
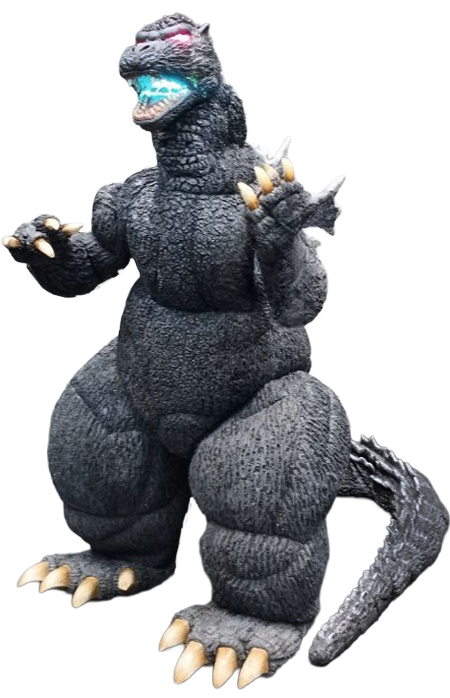
King of the Monsters
Matteo Simoni's Godzilla
 Prato Tuscany, Italy
 Active (as of 2026)
Creating a Godzilla suit is something I’ve dreamed of ever since I was a child, captivated by the films of the saga.
My first encounter with Godzilla happened when I was six years old. It was a rainy day, and my father brought home a VHS of the original 1954 masterpiece. From that moment on, I never let go of the saga; Godzilla and the other Kaiju have stayed with me ever since. If I had to categorize these characters, I wouldn’t just call them icons—I’d describe them as family: uncles, grandparents, and cousins.
I grew up during the Showa and Heisei eras. The latter, in particular, left the deepest mark on me. Although very little of the Heisei era actually reached Italy, I managed to watch some of the films in their original language. A fundamental role was played by the 90s toy line that, luckily, was available here; that was my gateway to the entire Heisei Kaiju roster.
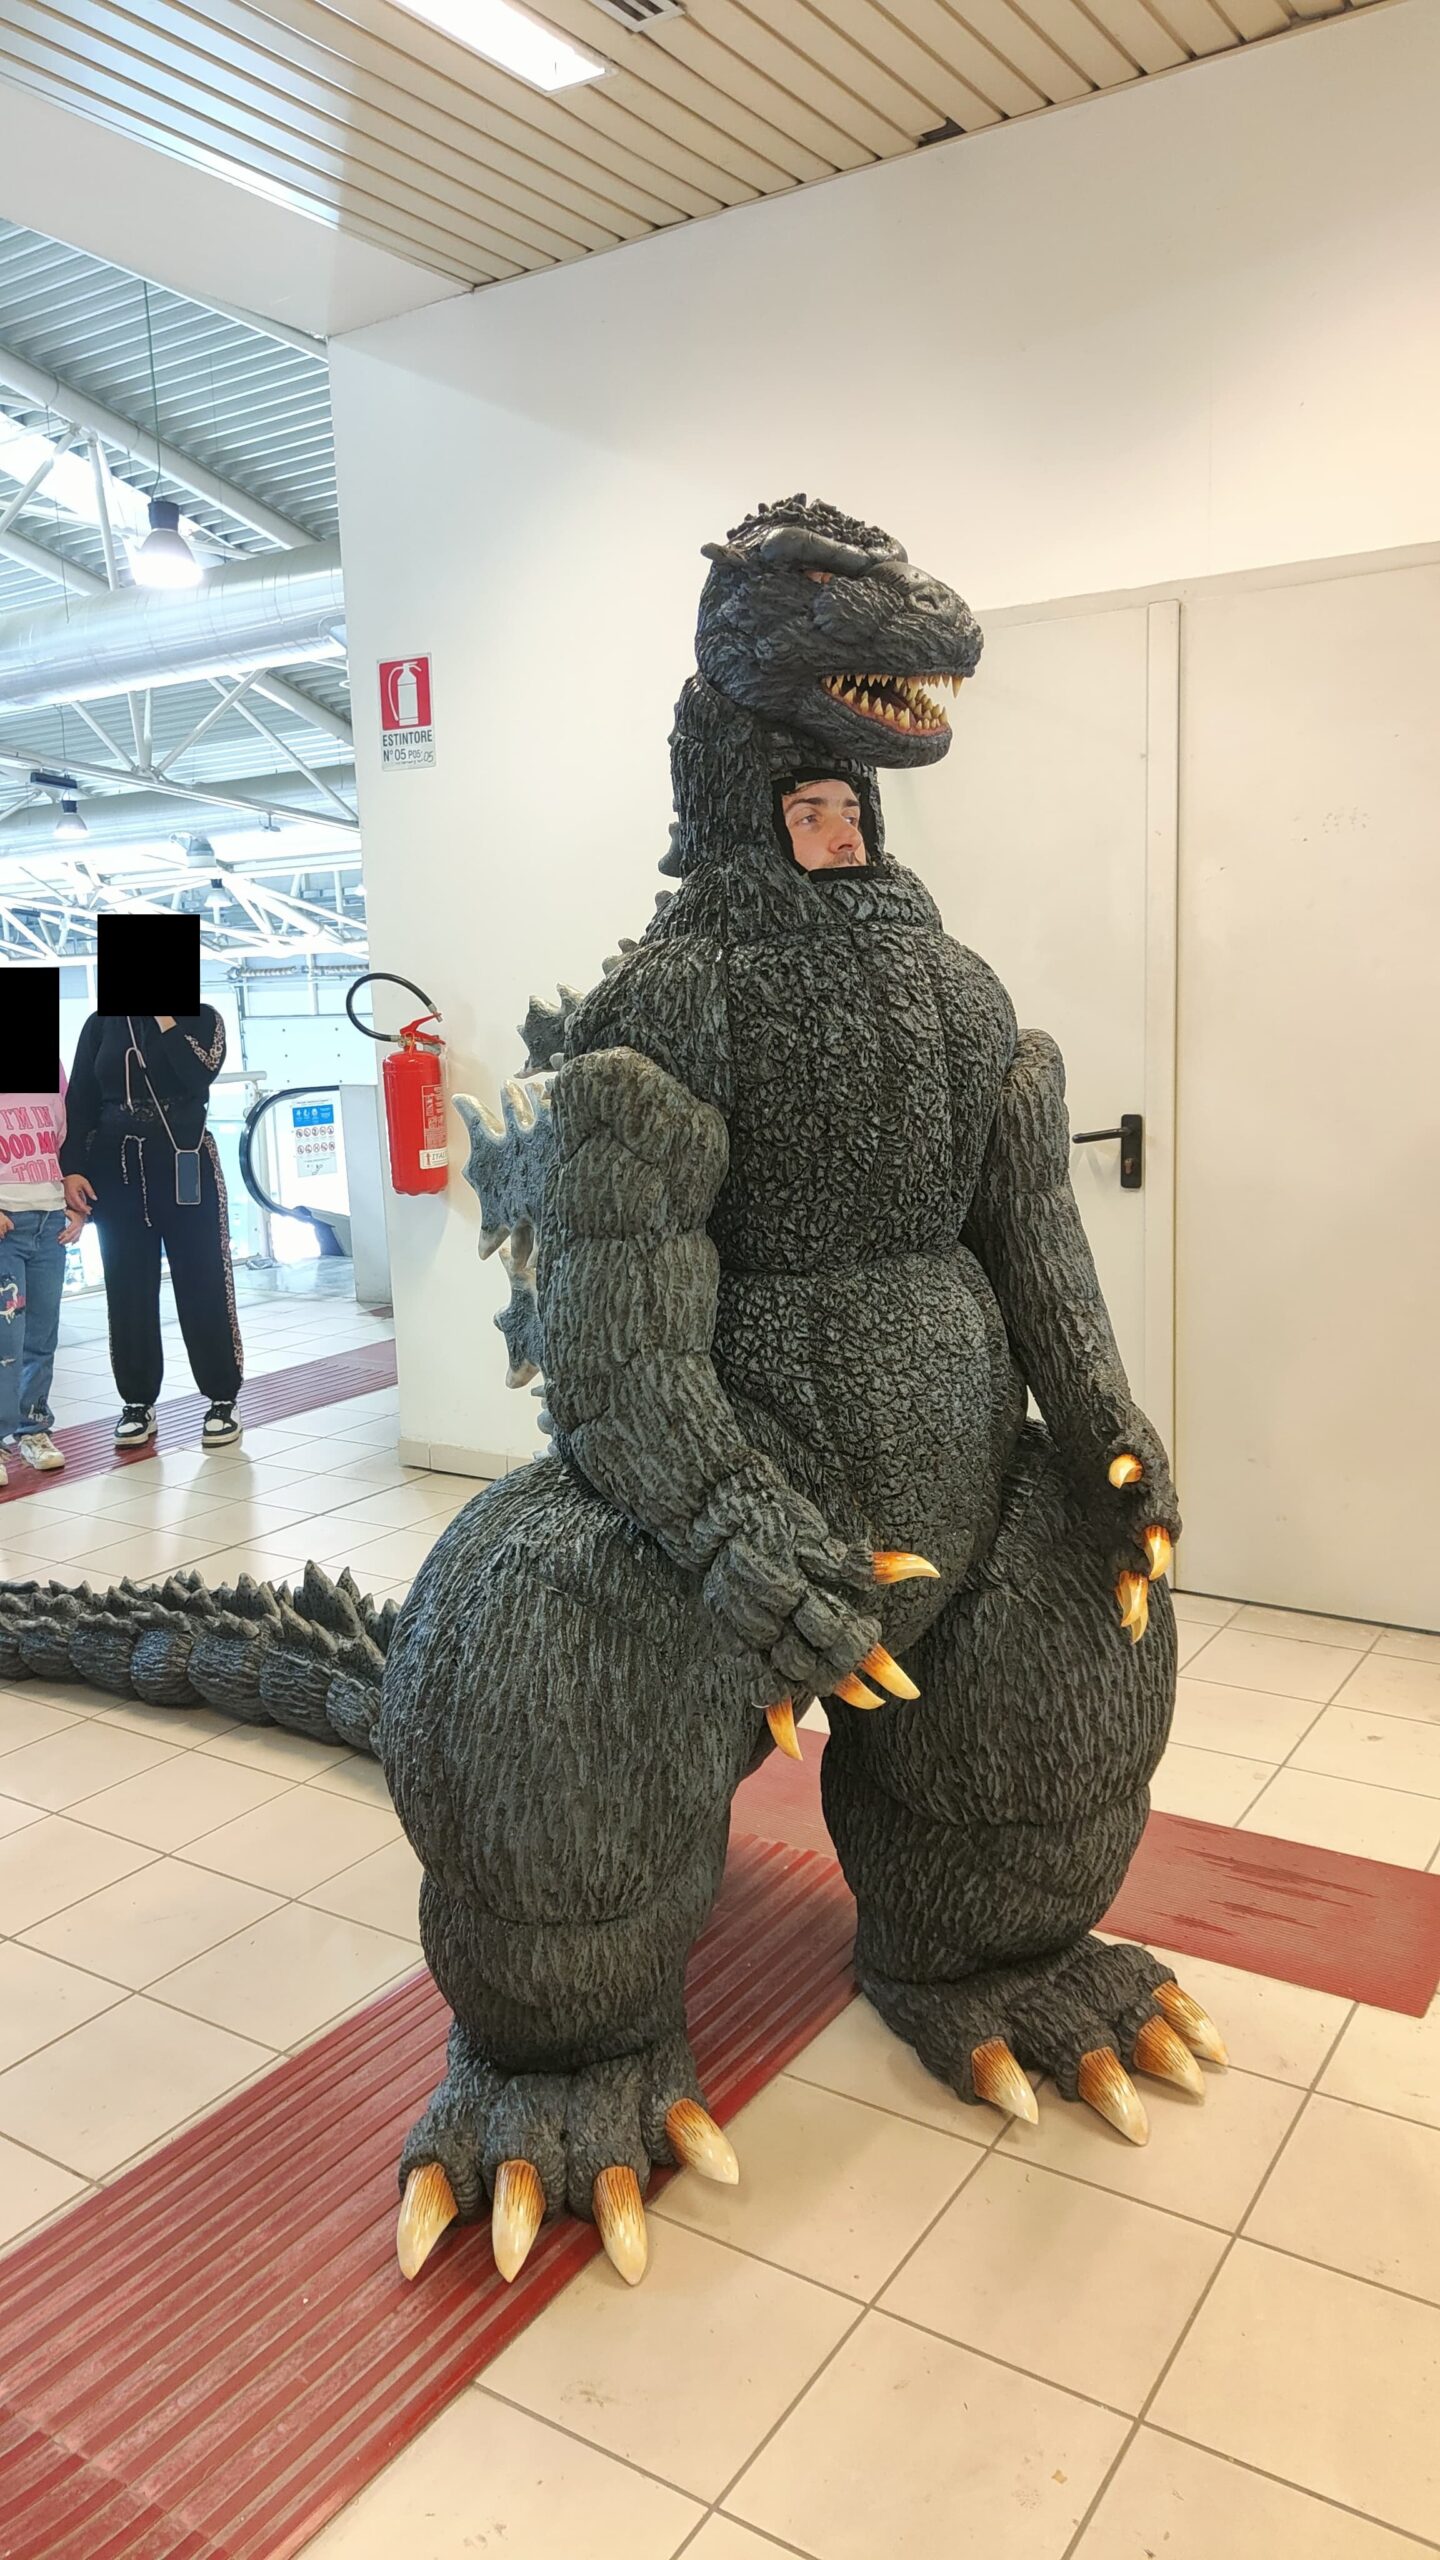
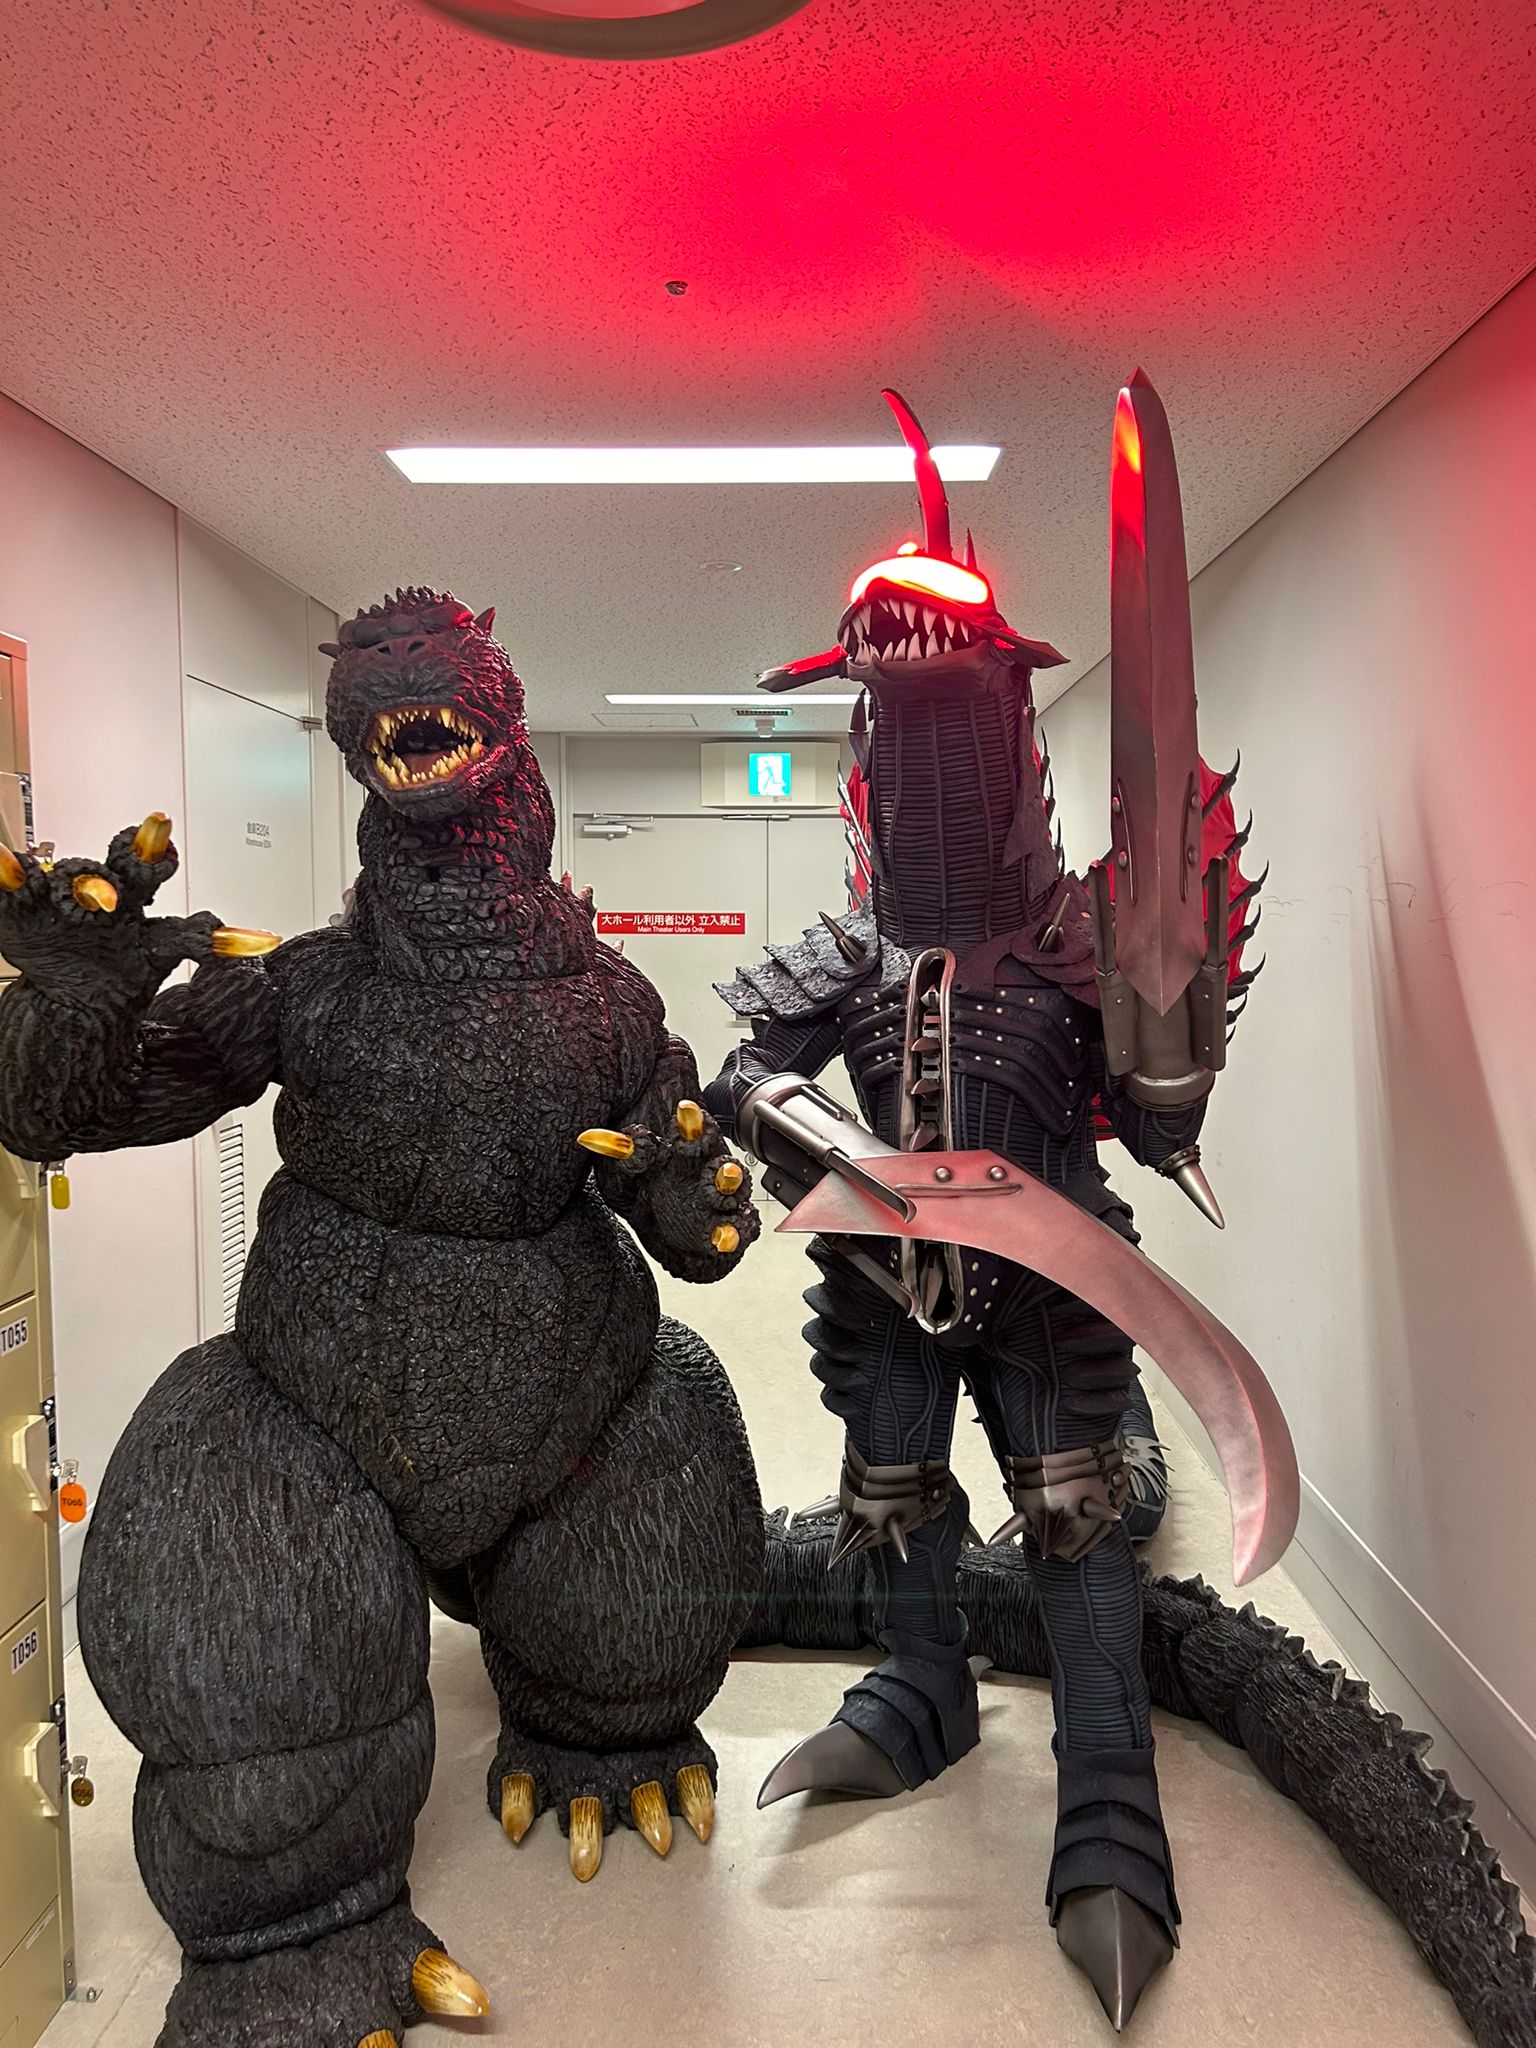
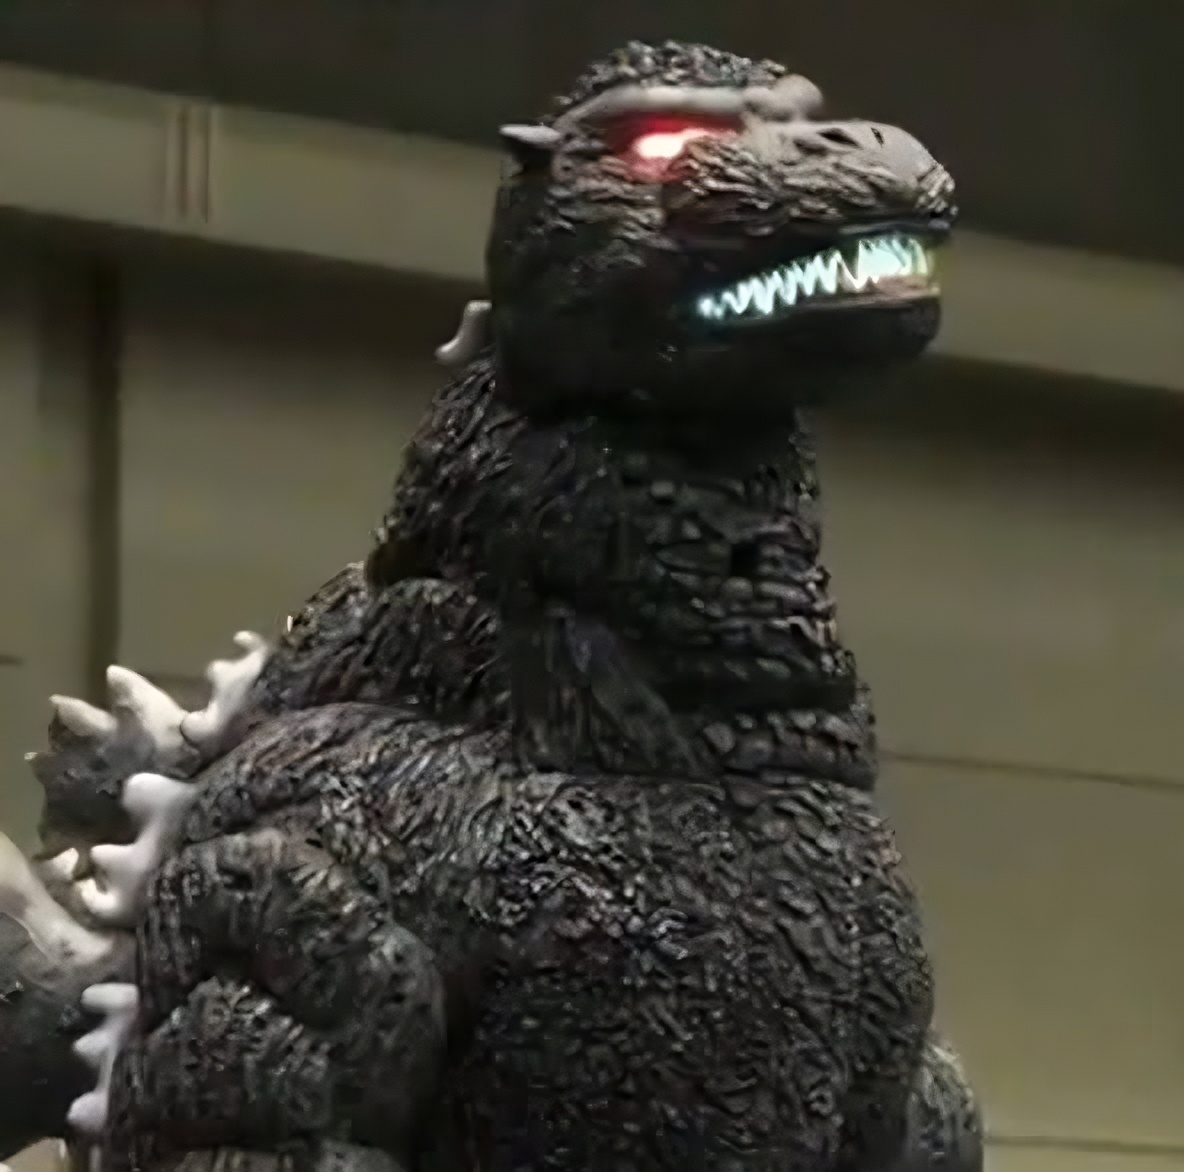
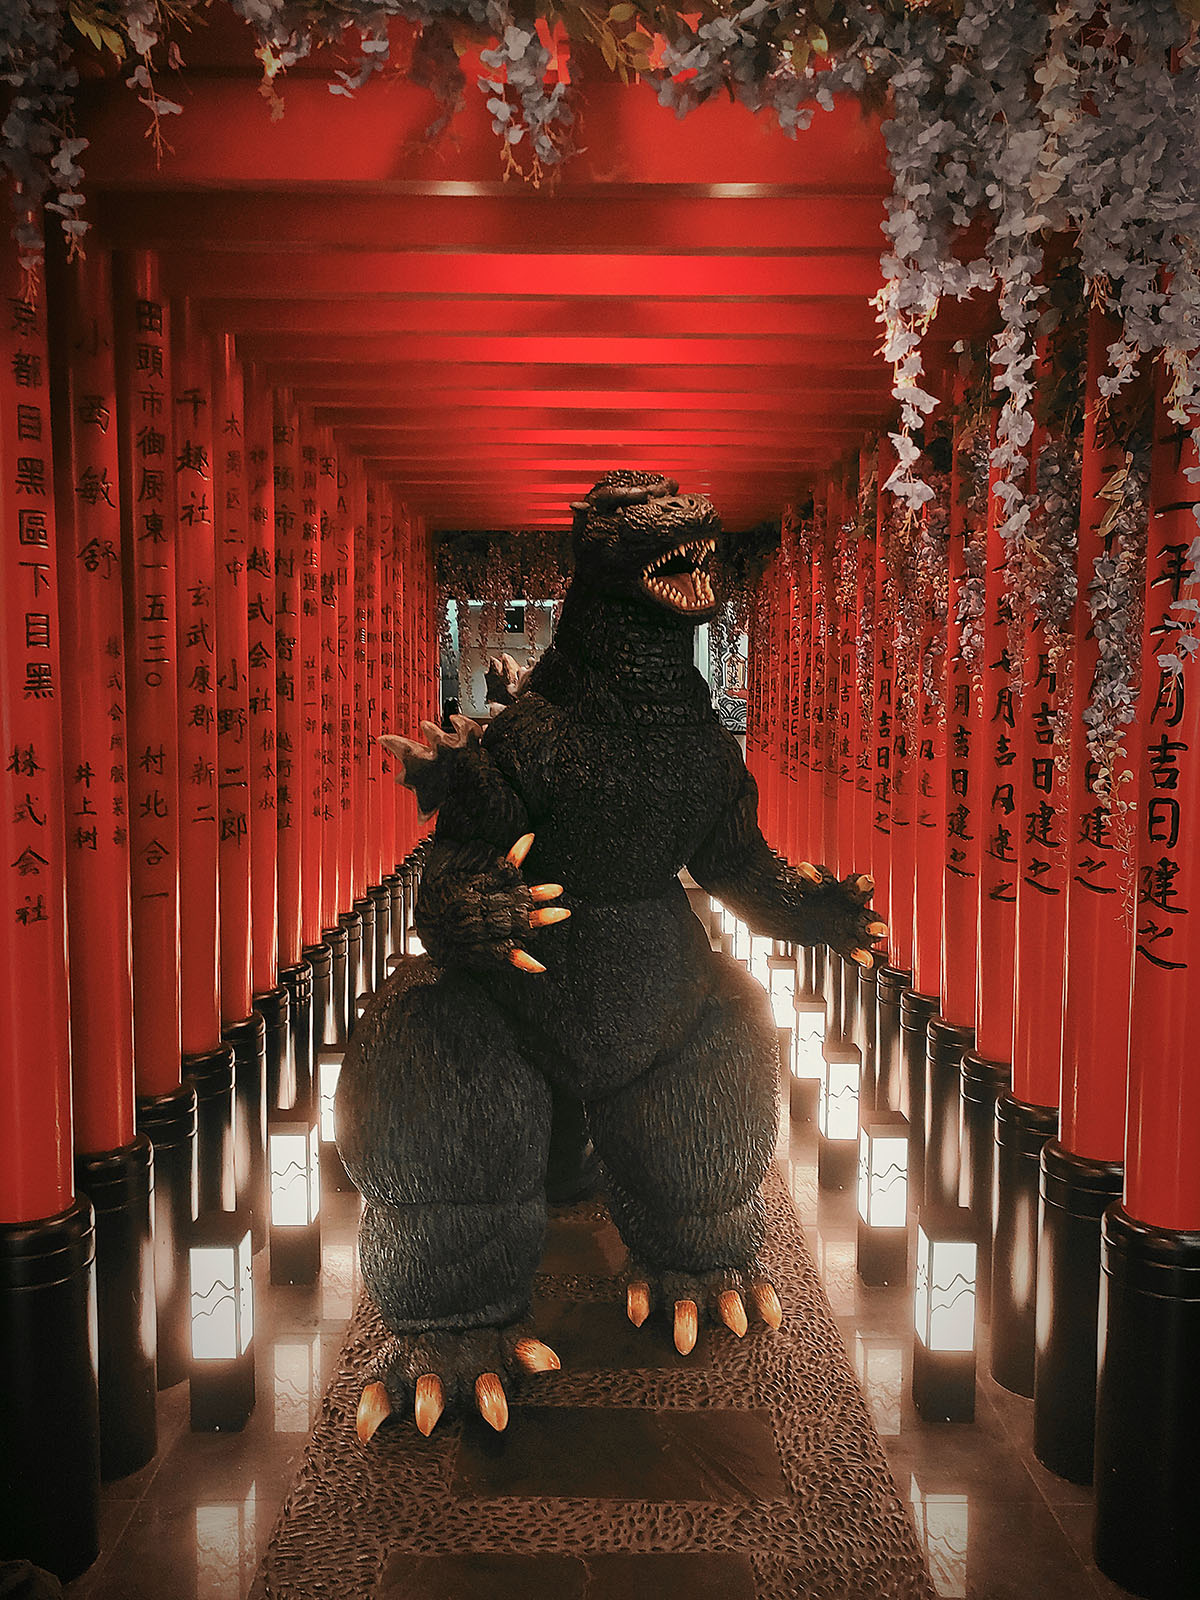
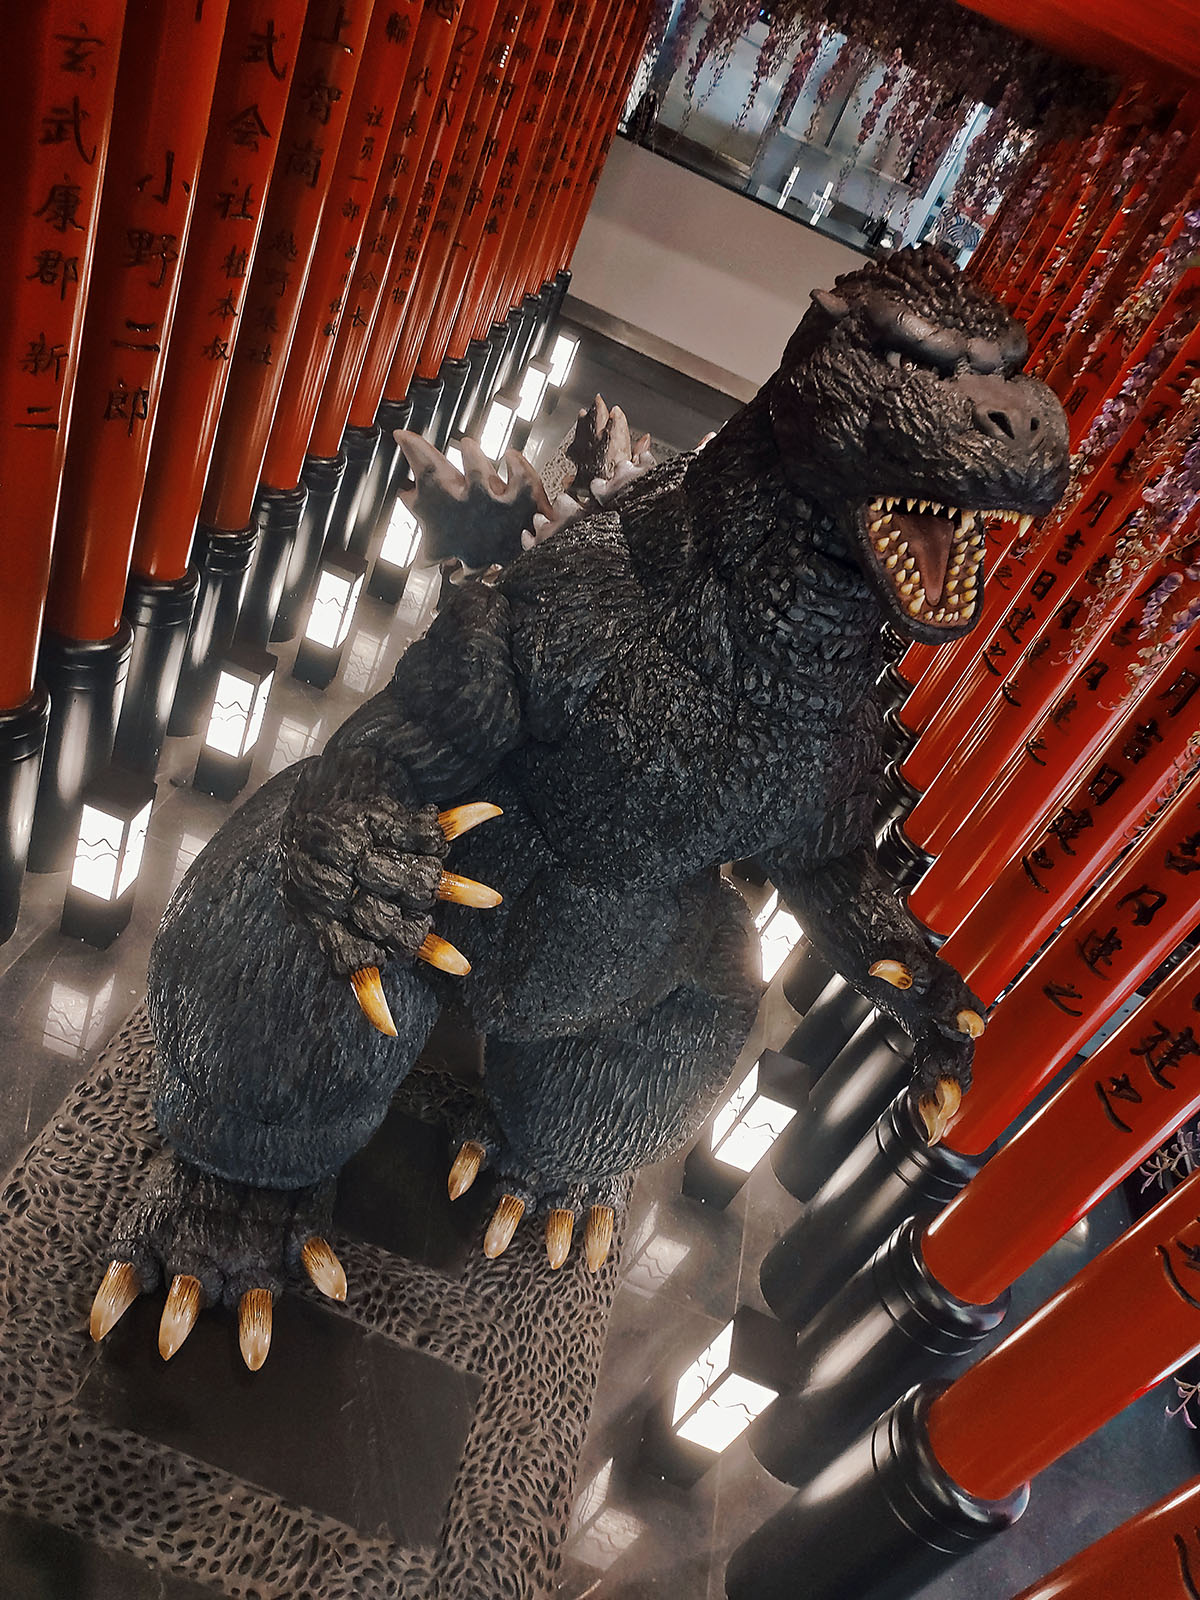
Because of this, the Heisei design represents the pinnacle of my passion—specifically "MogeGoji" from the 1994 film Godzilla vs. SpaceGodzilla.
As a dedicated cosplayer and president of a cosplay association, I realized that the World Cosplay Summit in Nagoya was my one true shot at showing Japan my love for Godzilla and the Kaiju Eiga genre. However, the competition was exclusively for duos.
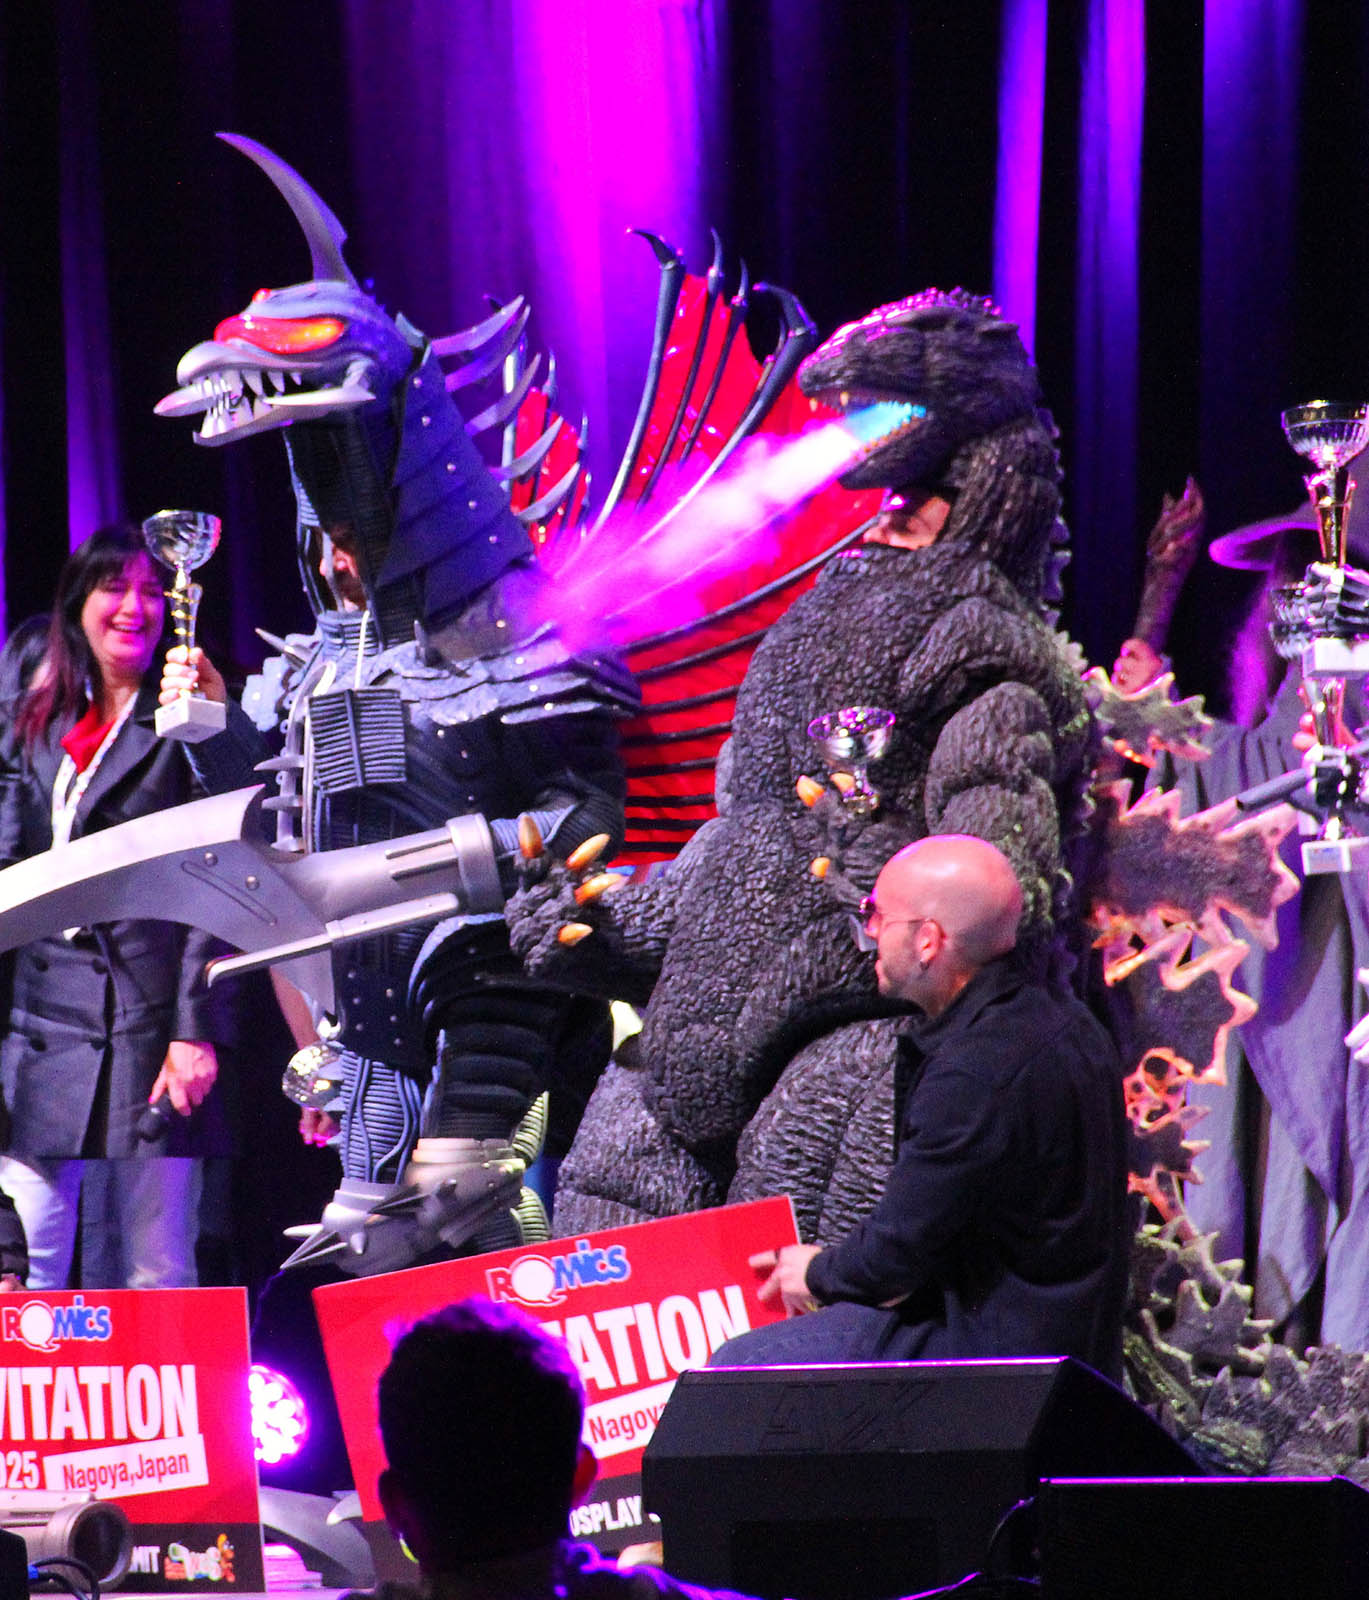
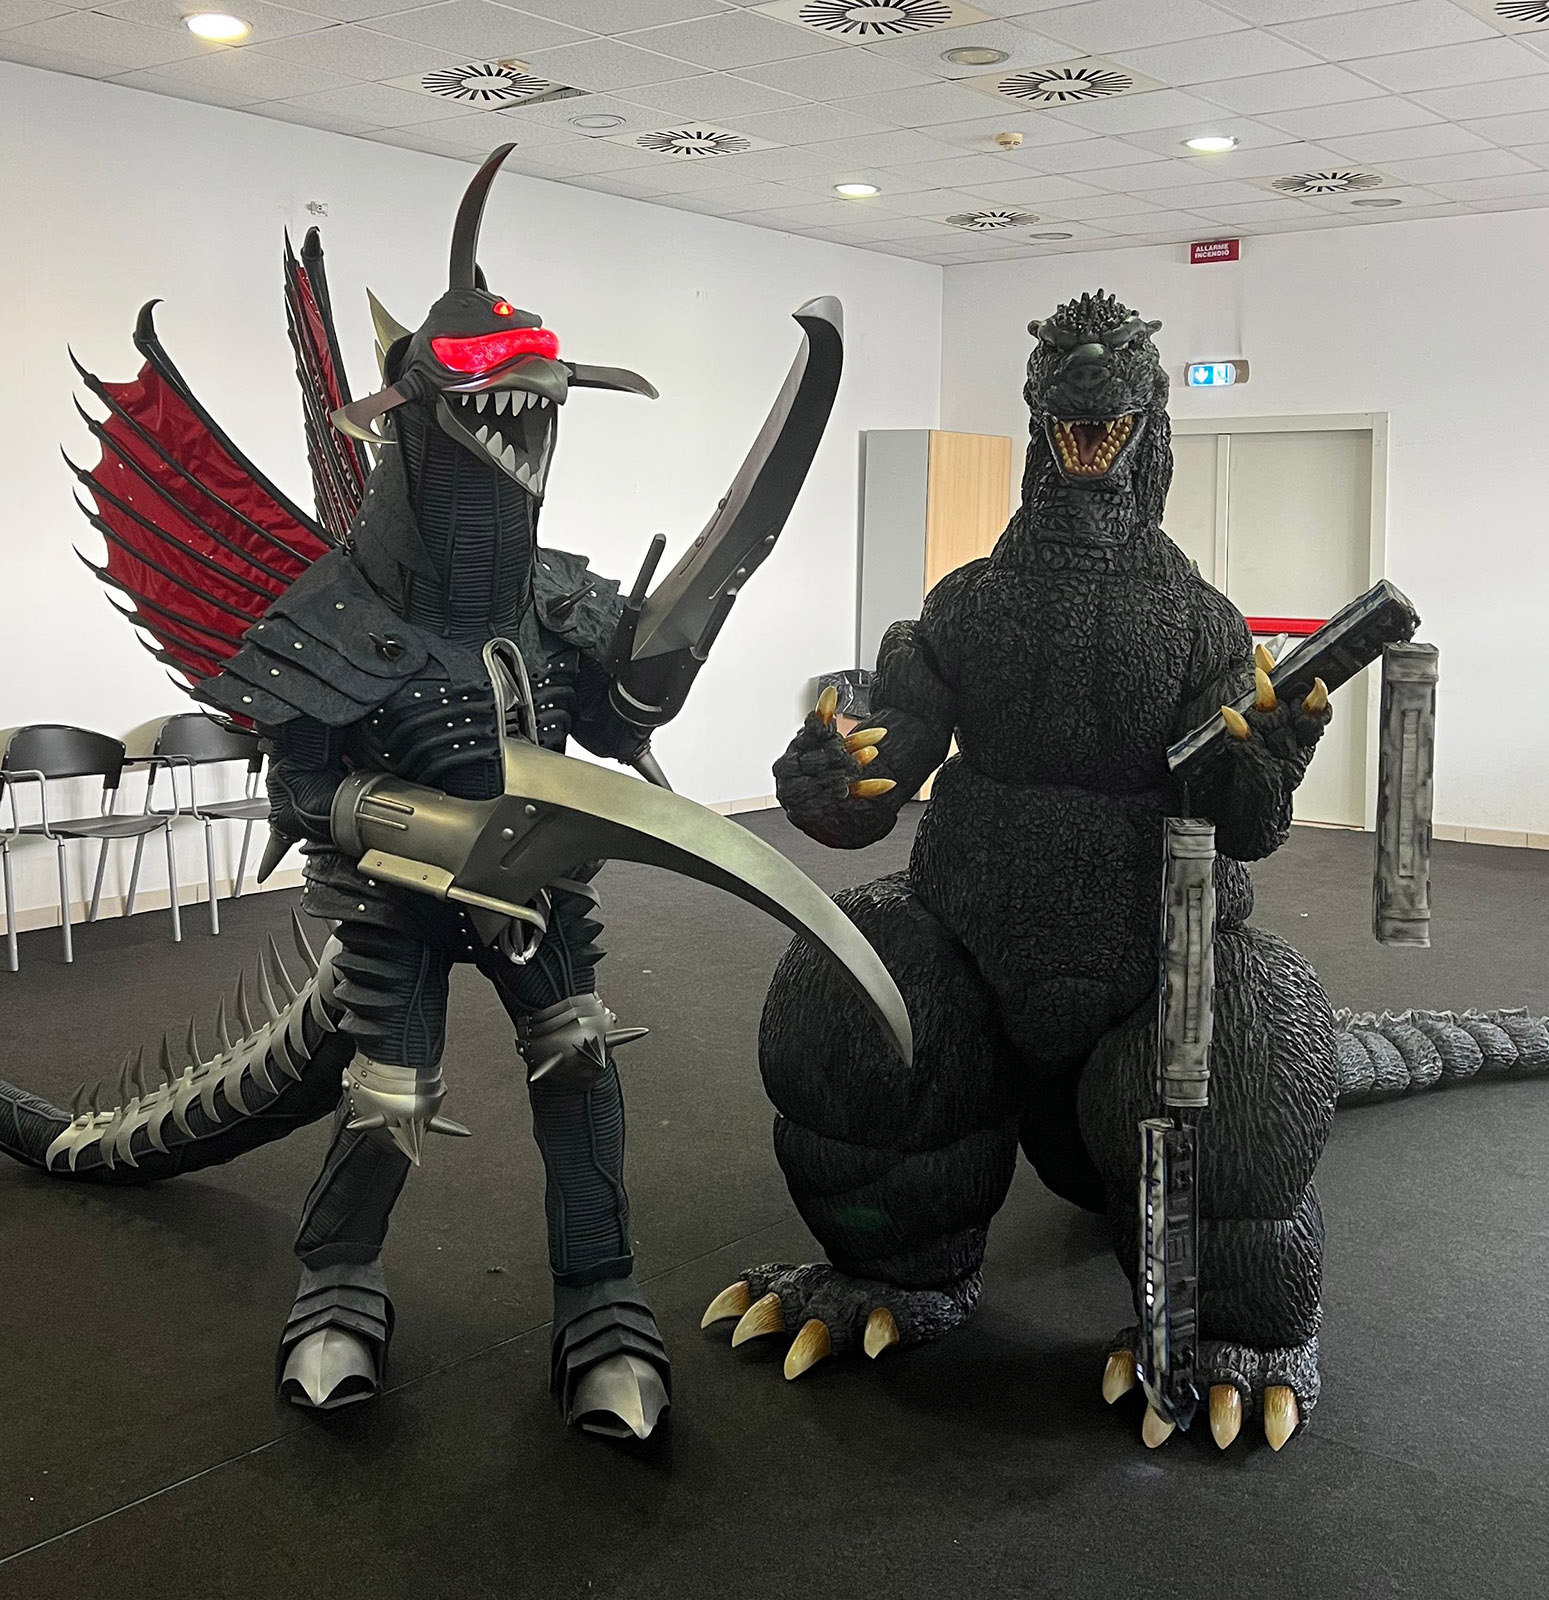
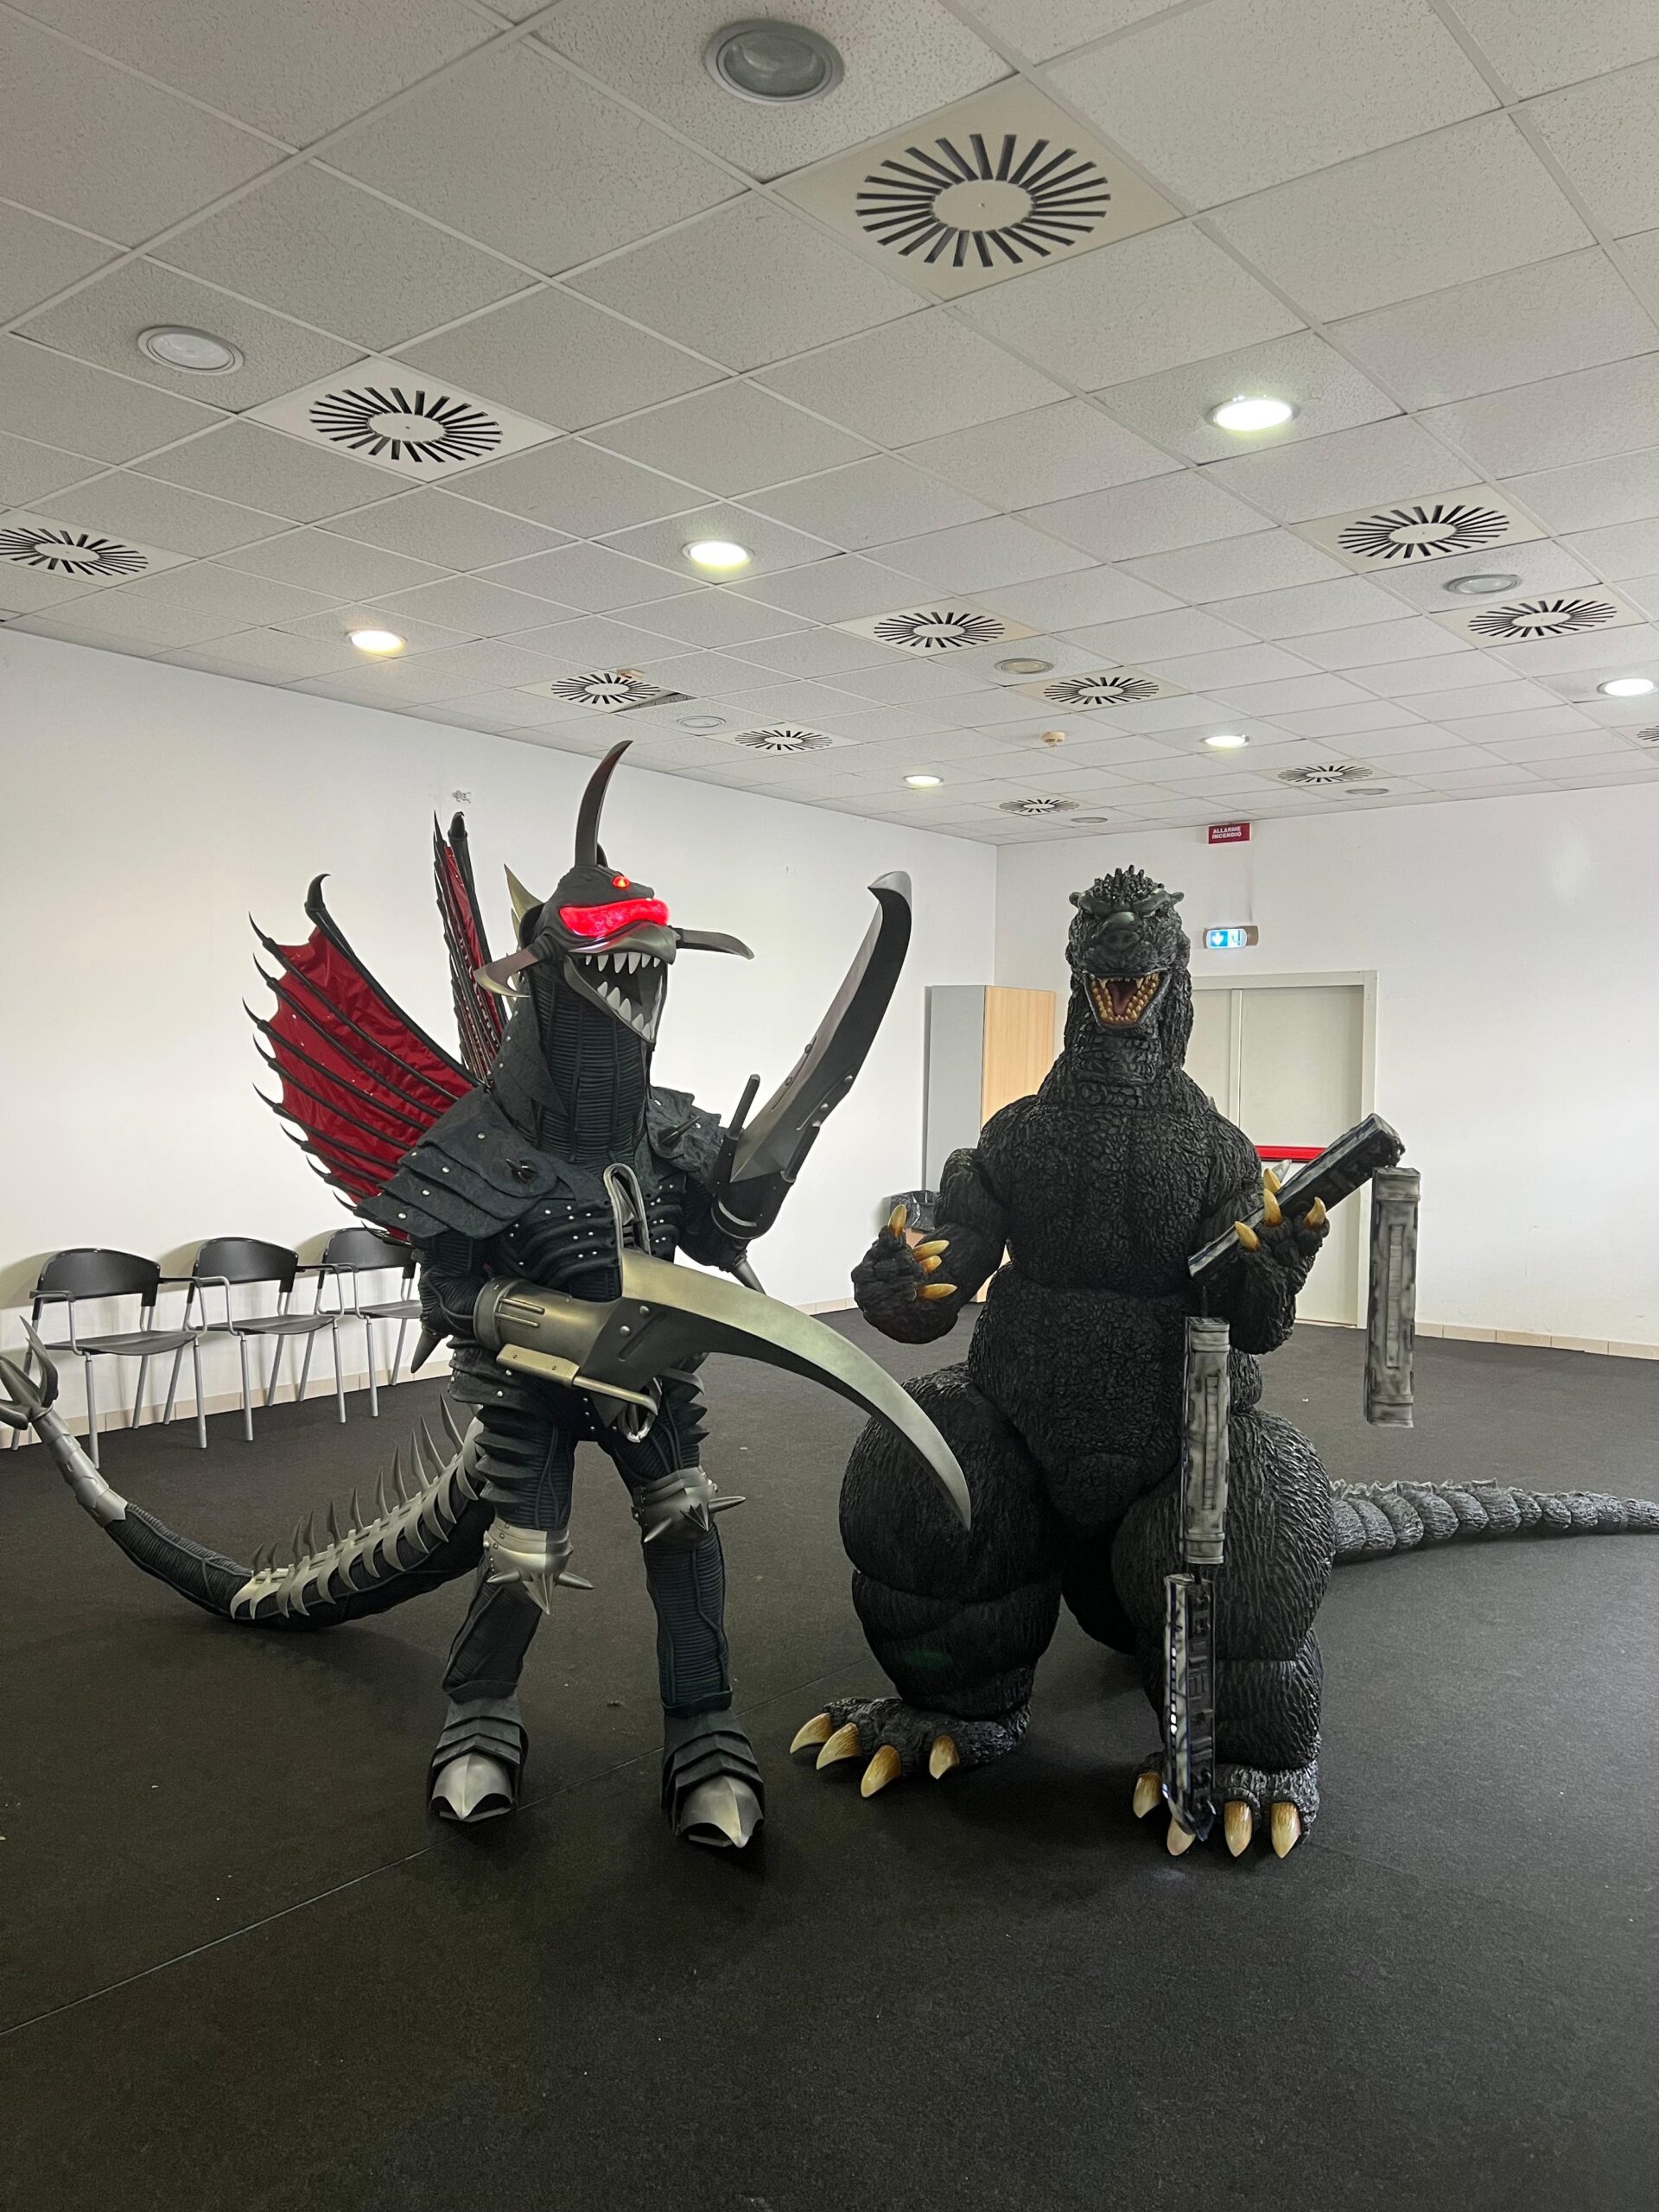
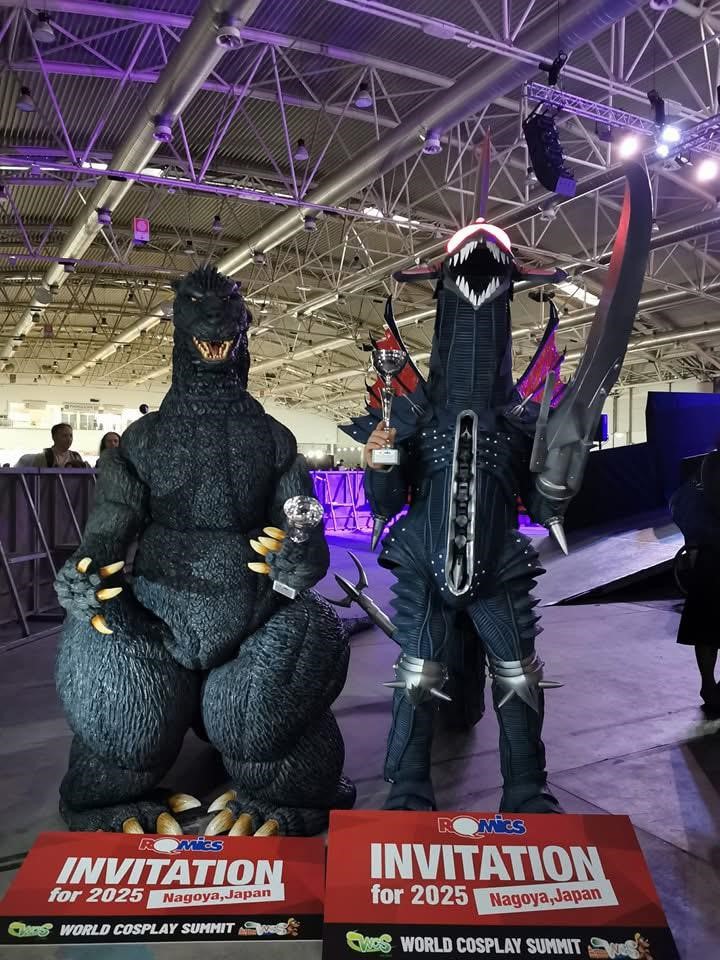
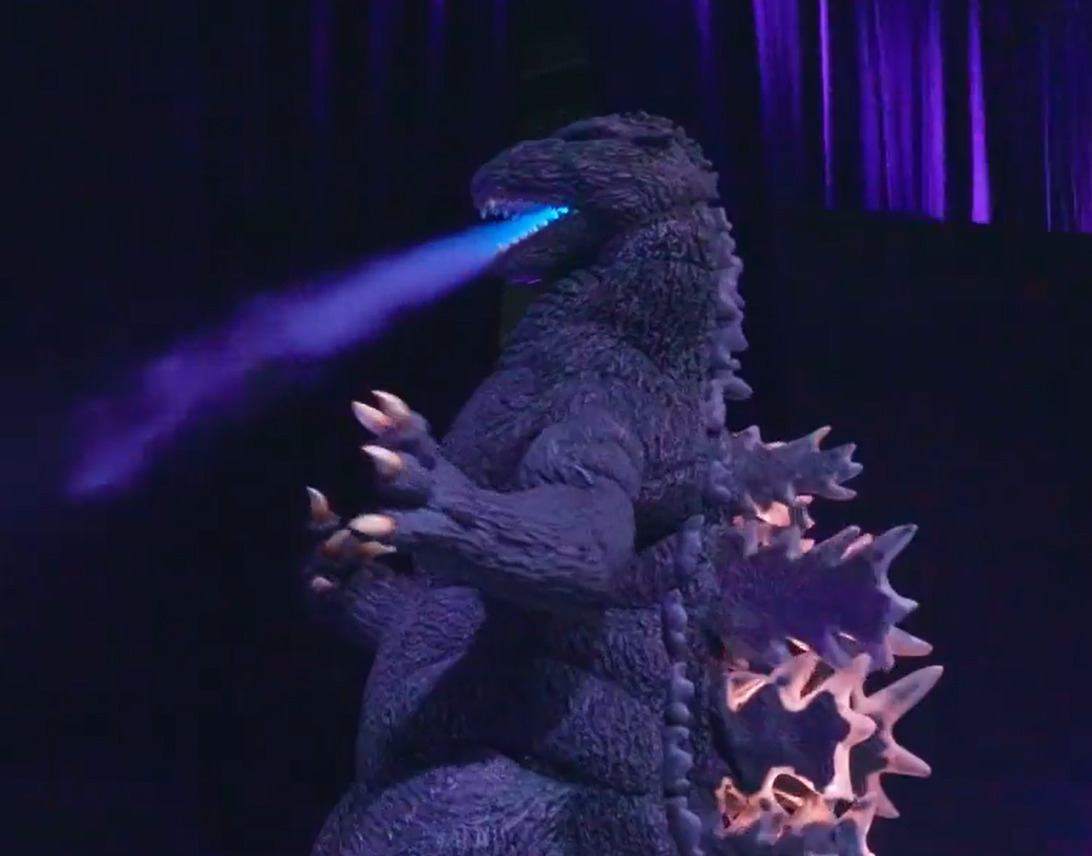
That was when I met Andrea Vesnaver, an electronics wizard and WCS veteran. After sharing my vision with him, he decided to join forces and tackle the national selections with me. Andrea built a stunning Gigan (Final Wars version) and engineered all the special effects for my Godzilla, including the fin illumination and the atomic breath system.
After winning the selections in Rome, we traveled to Nagoya to represent Italy at the World Cosplay Summit. It was the realization of a lifelong dream—a celebration of monsters and destruction, and our ultimate tribute to the Kaiju Eiga genre.
My first encounter with Godzilla happened when I was six years old. It was a rainy day, and my father brought home a VHS of the original 1954 masterpiece. From that moment on, I never let go of the saga; Godzilla and the other Kaiju have stayed with me ever since. If I had to categorize these characters, I wouldn’t just call them icons—I’d describe them as family: uncles, grandparents, and cousins.
I grew up during the Showa and Heisei eras. The latter, in particular, left the deepest mark on me. Although very little of the Heisei era actually reached Italy, I managed to watch some of the films in their original language. A fundamental role was played by the 90s toy line that, luckily, was available here; that was my gateway to the entire Heisei Kaiju roster.
Because of this, the Heisei design represents the pinnacle of my passion—specifically "MogeGoji" from the 1994 film Godzilla vs. SpaceGodzilla.
As a dedicated cosplayer and president of a cosplay association, I realized that the World Cosplay Summit in Nagoya was my one true shot at showing Japan my love for Godzilla and the Kaiju Eiga genre. However, the competition was exclusively for duos.
That was when I met Andrea Vesnaver, an electronics wizard and WCS veteran. After sharing my vision with him, he decided to join forces and tackle the national selections with me. Andrea built a stunning Gigan (Final Wars version) and engineered all the special effects for my Godzilla, including the fin illumination and the atomic breath system.
After winning the selections in Rome, we traveled to Nagoya to represent Italy at the World Cosplay Summit. It was the realization of a lifelong dream—a celebration of monsters and destruction, and our ultimate tribute to the Kaiju Eiga genre.
Inside Godzilla
An Italian artisan at the Cosplay World Championships in Japan
Inside Godzilla is a short documentary by Lorenzo Tempestini that tells the story of Matteo Simoni (a craftsman from Prato) and his partner in crime Andrea Vesnaver, who represented Italy at the World Cosplay Summit in Japan – the most important global event dedicated to cosplay.
As a child, Matteo was fascinated by Godzilla while watching a VHS tape of the 1954 film. That passion never left him: over the years, he studied artisanal special effects, experimented with materials like foam rubber and latex, and worked for almost eight years to build a Godzilla costume inspired by the original Japanese films.
Preparation
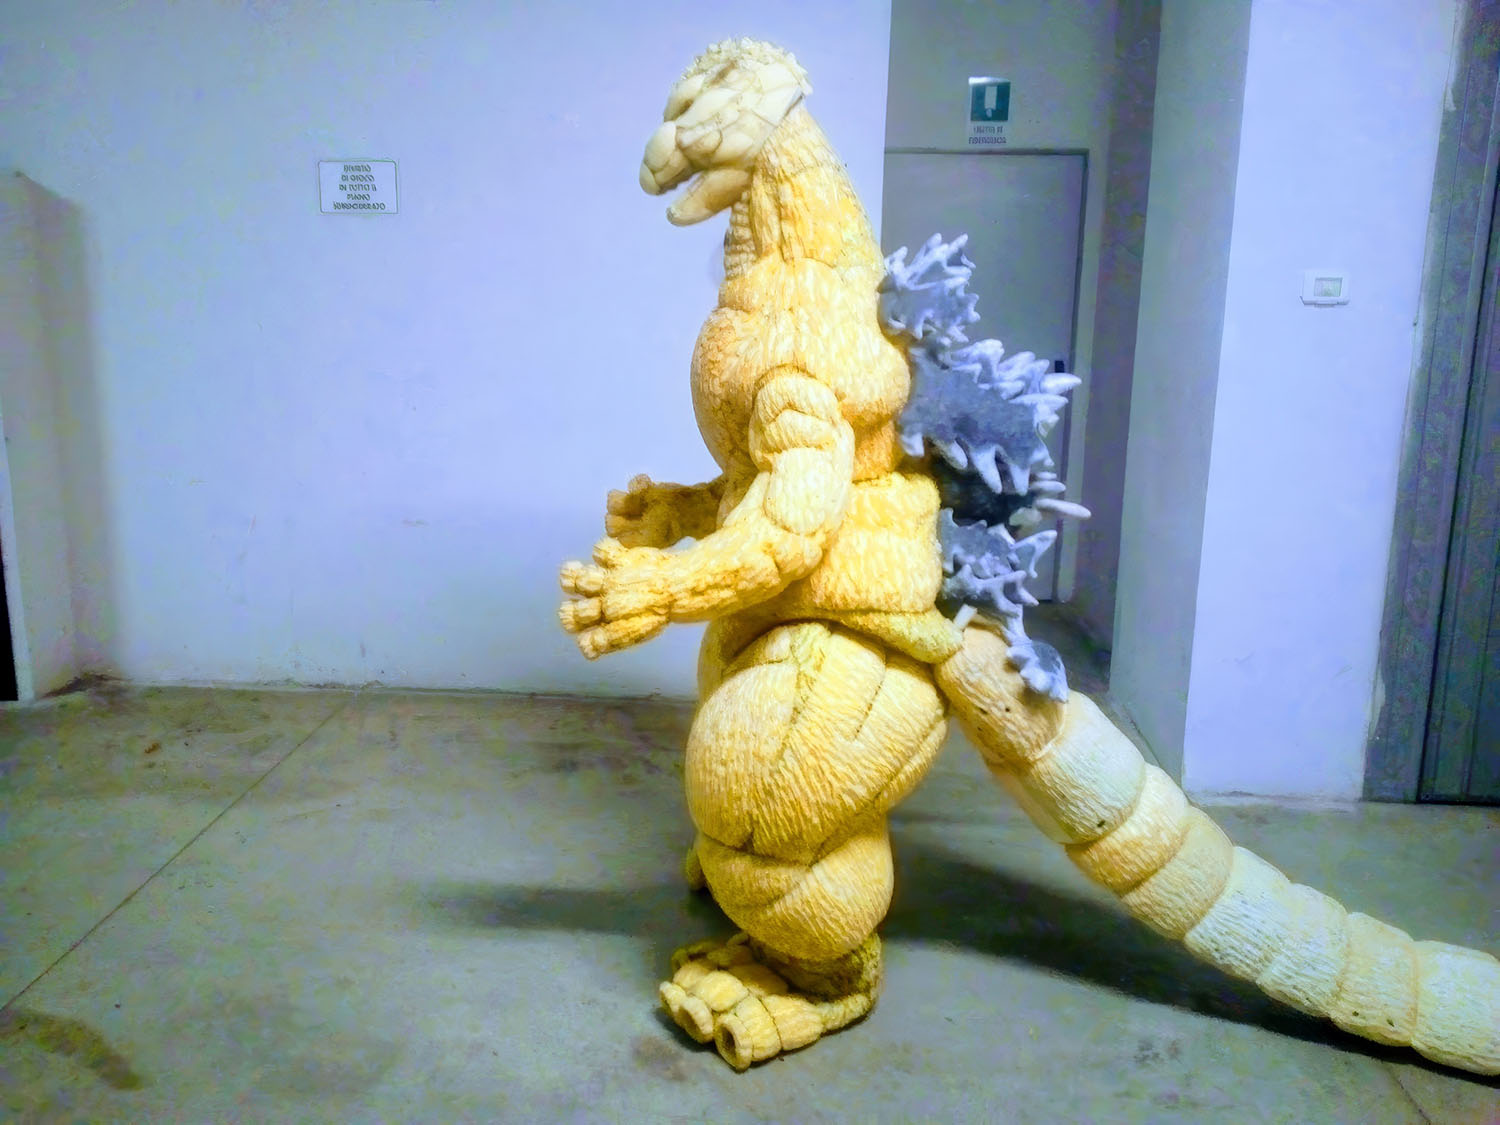
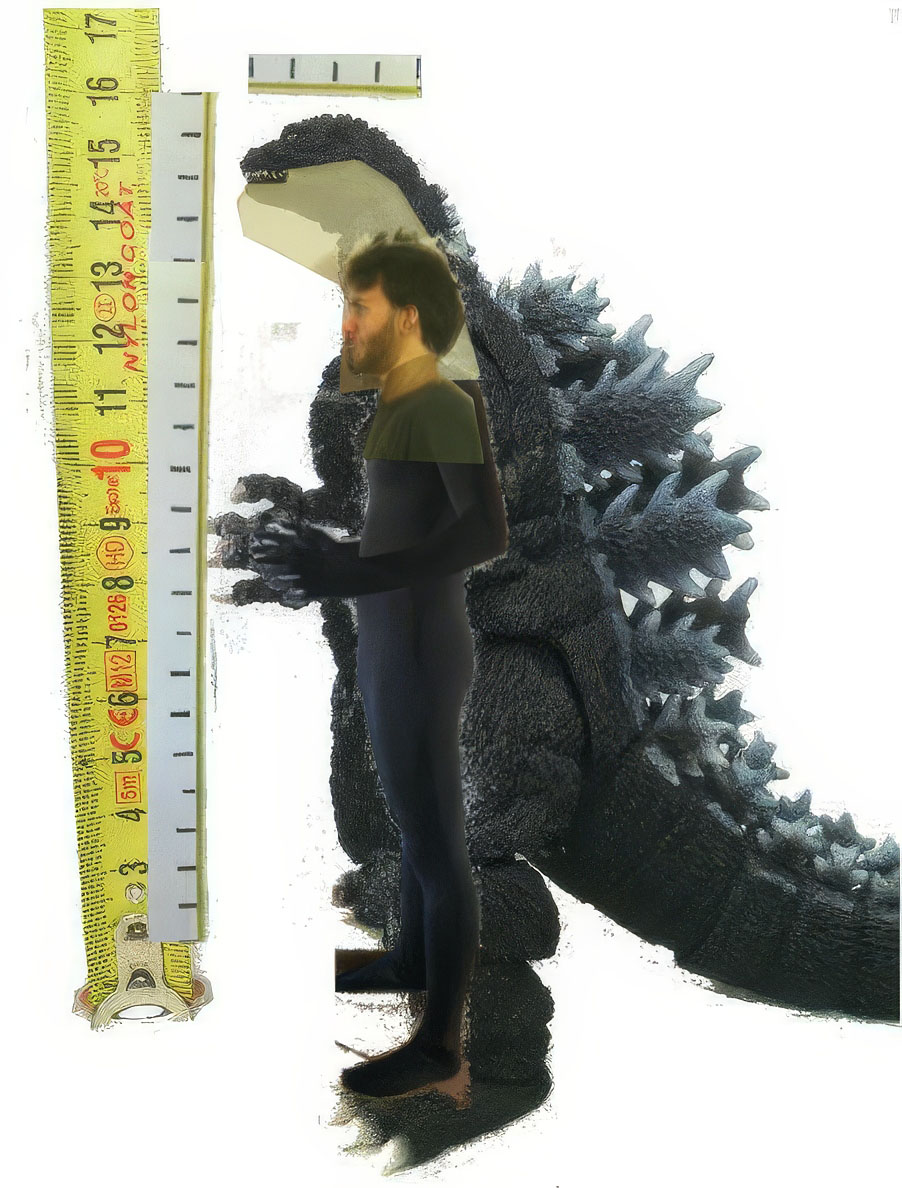
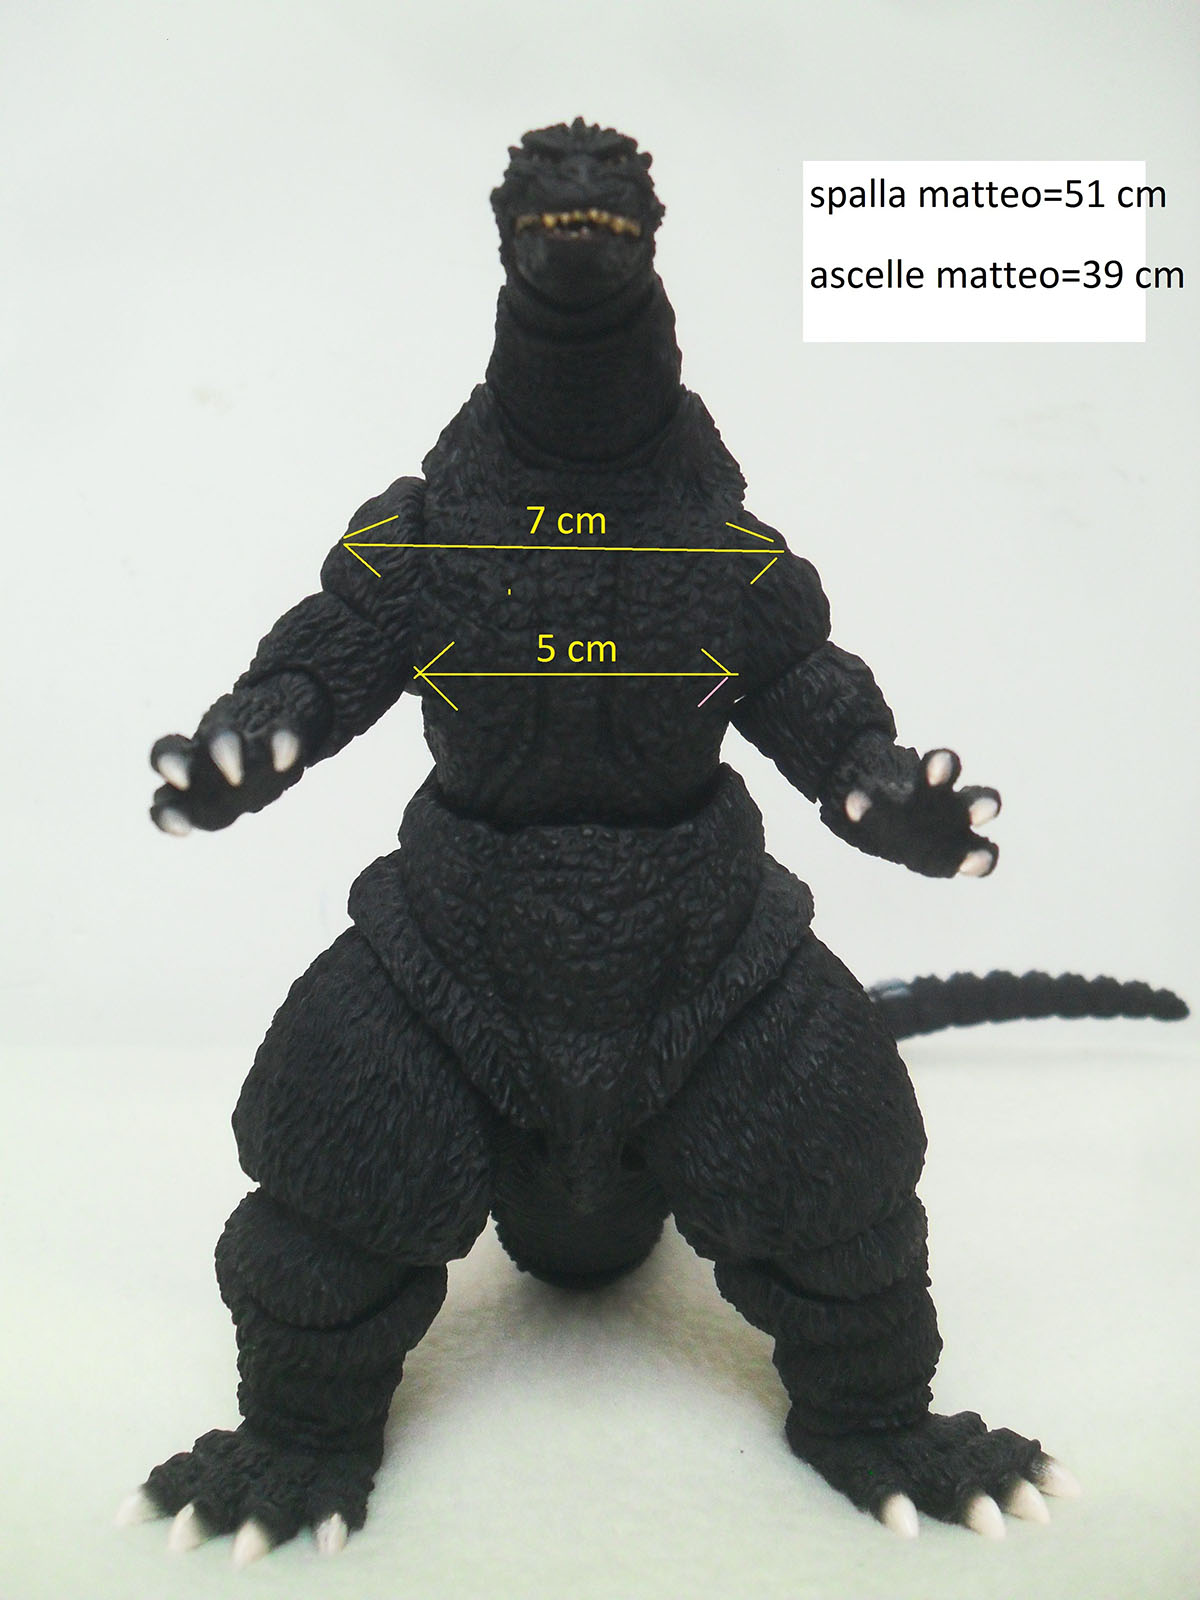
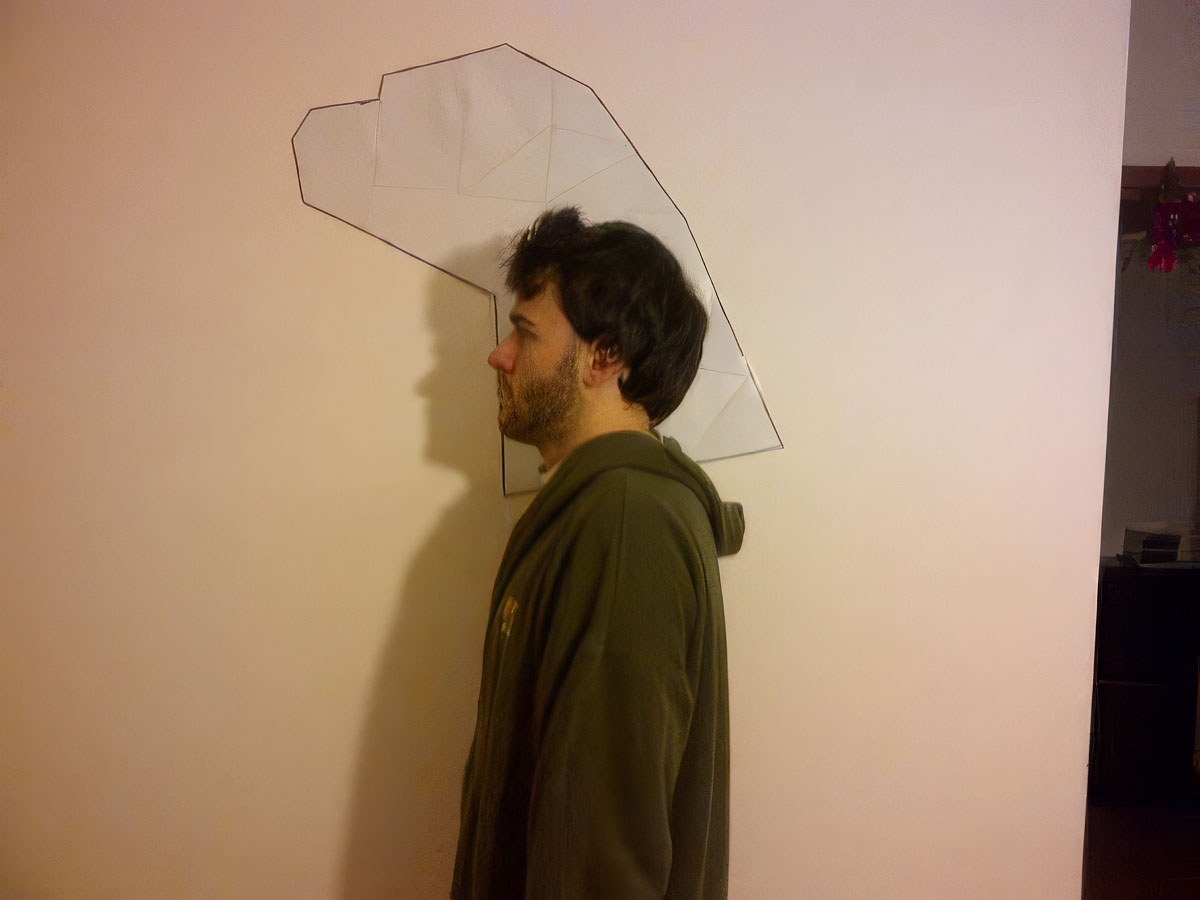
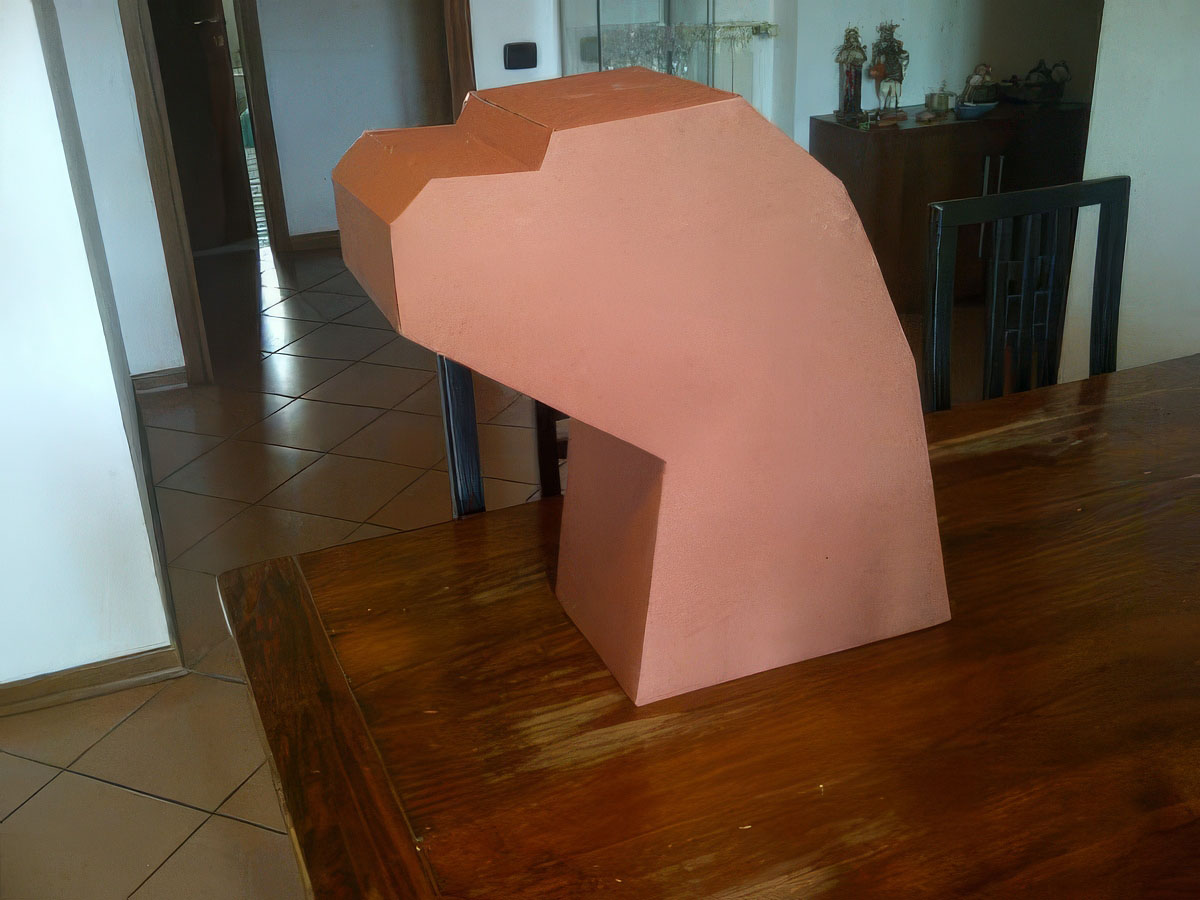
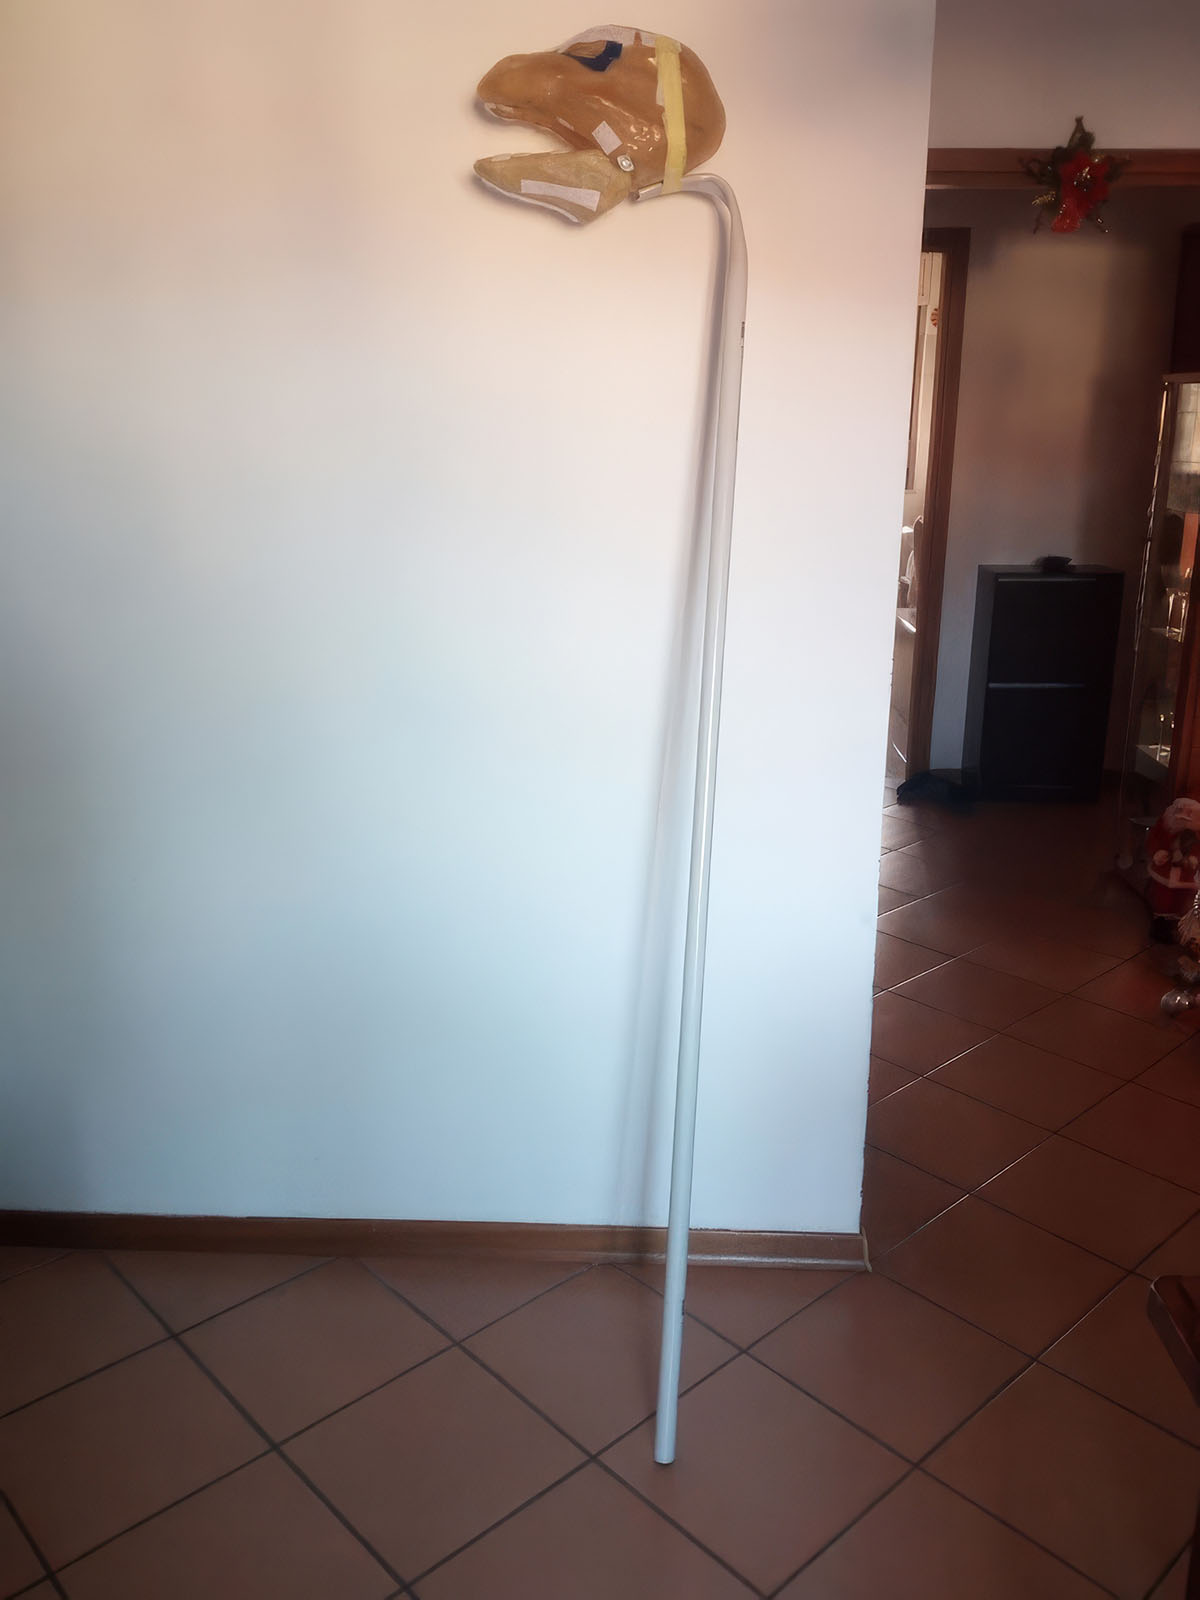
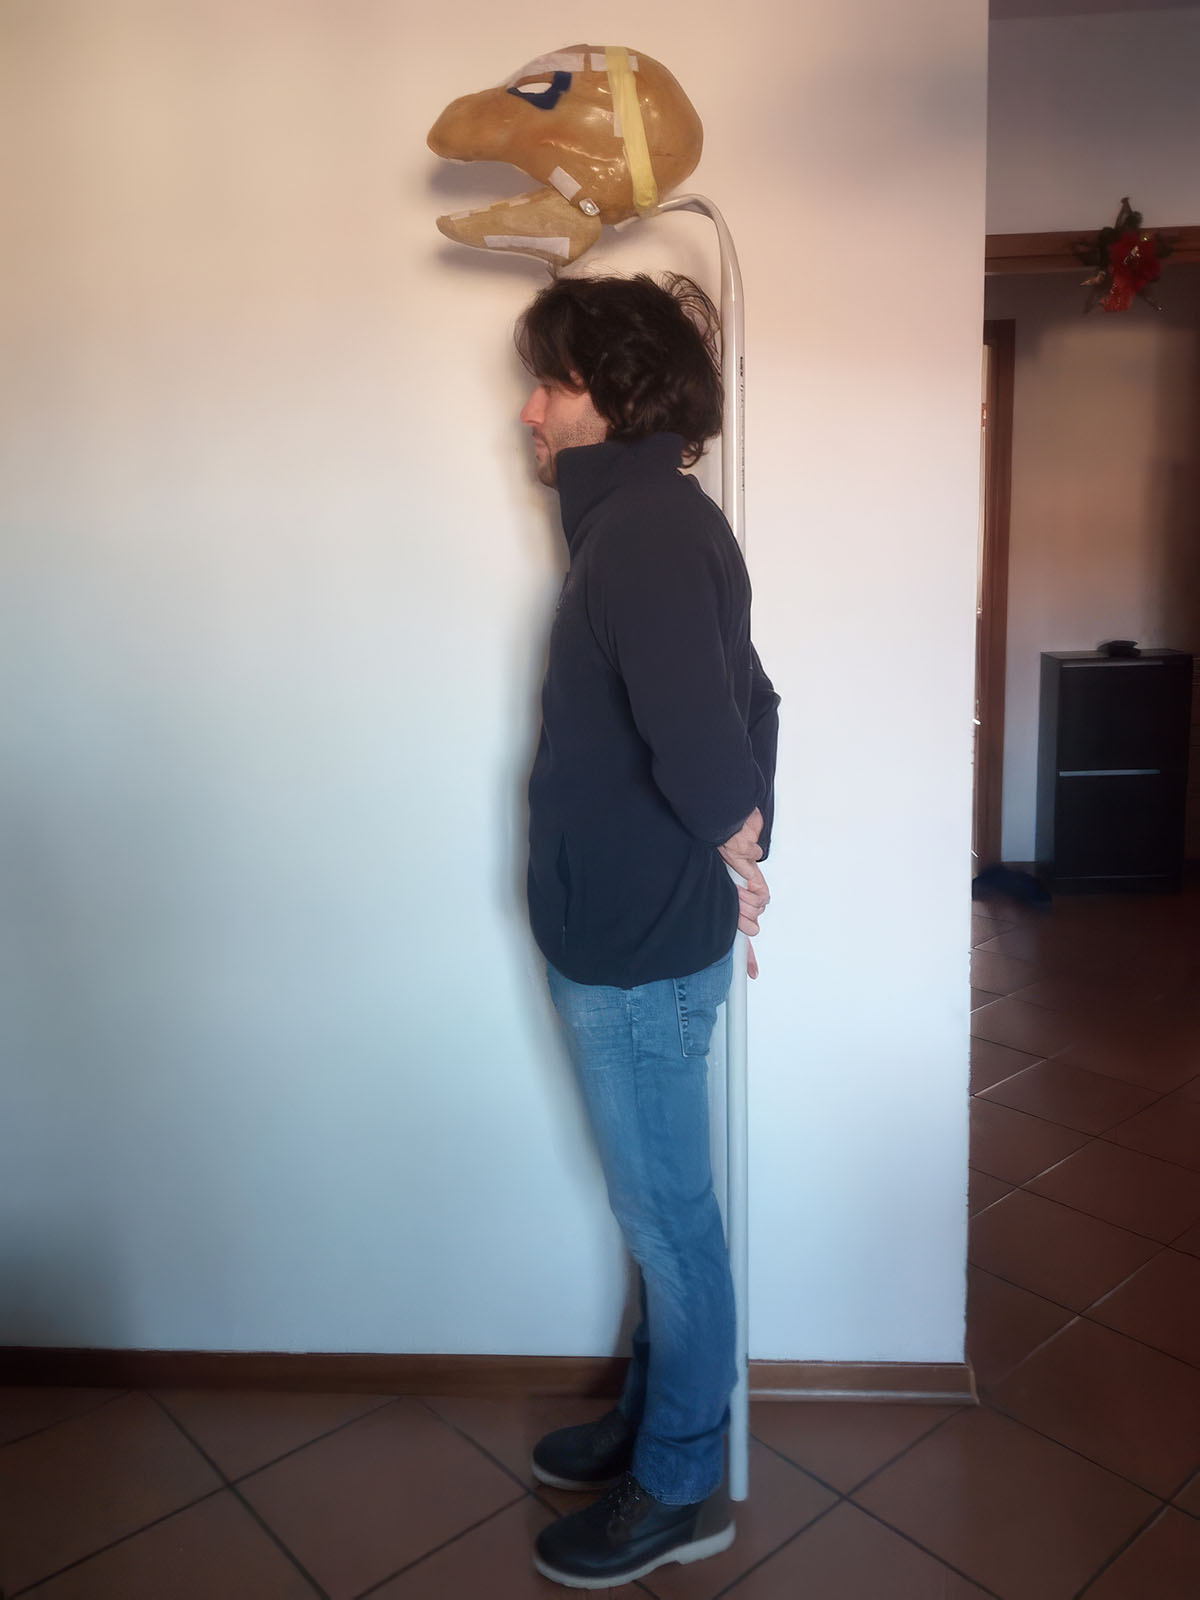
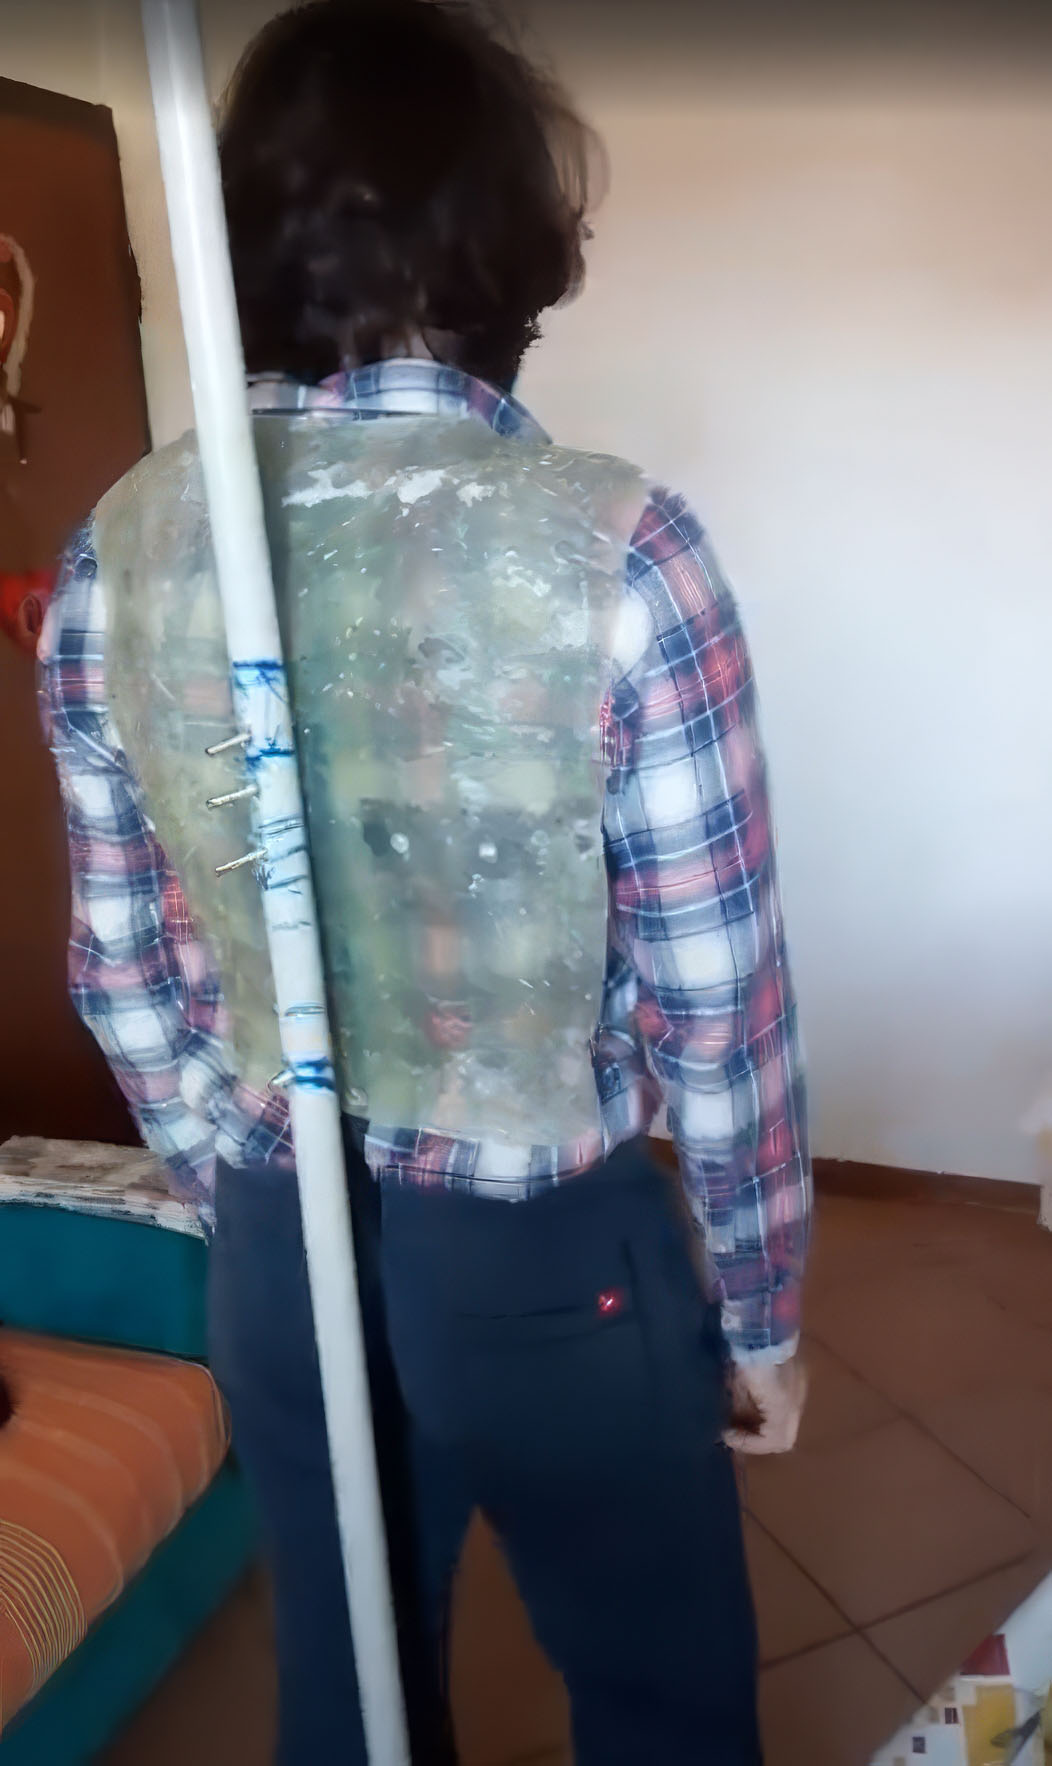
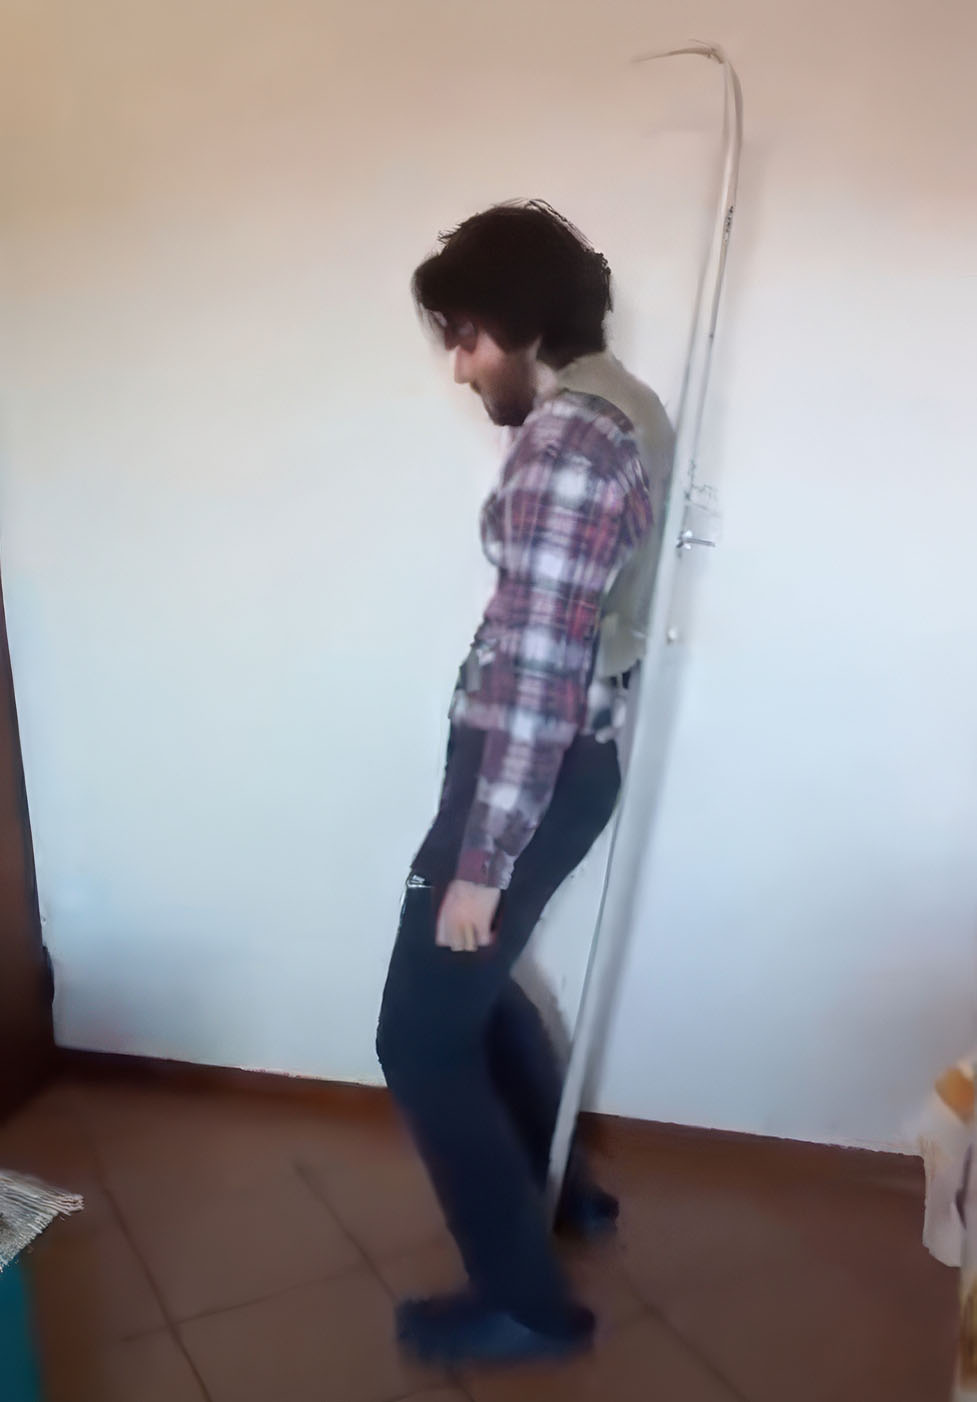
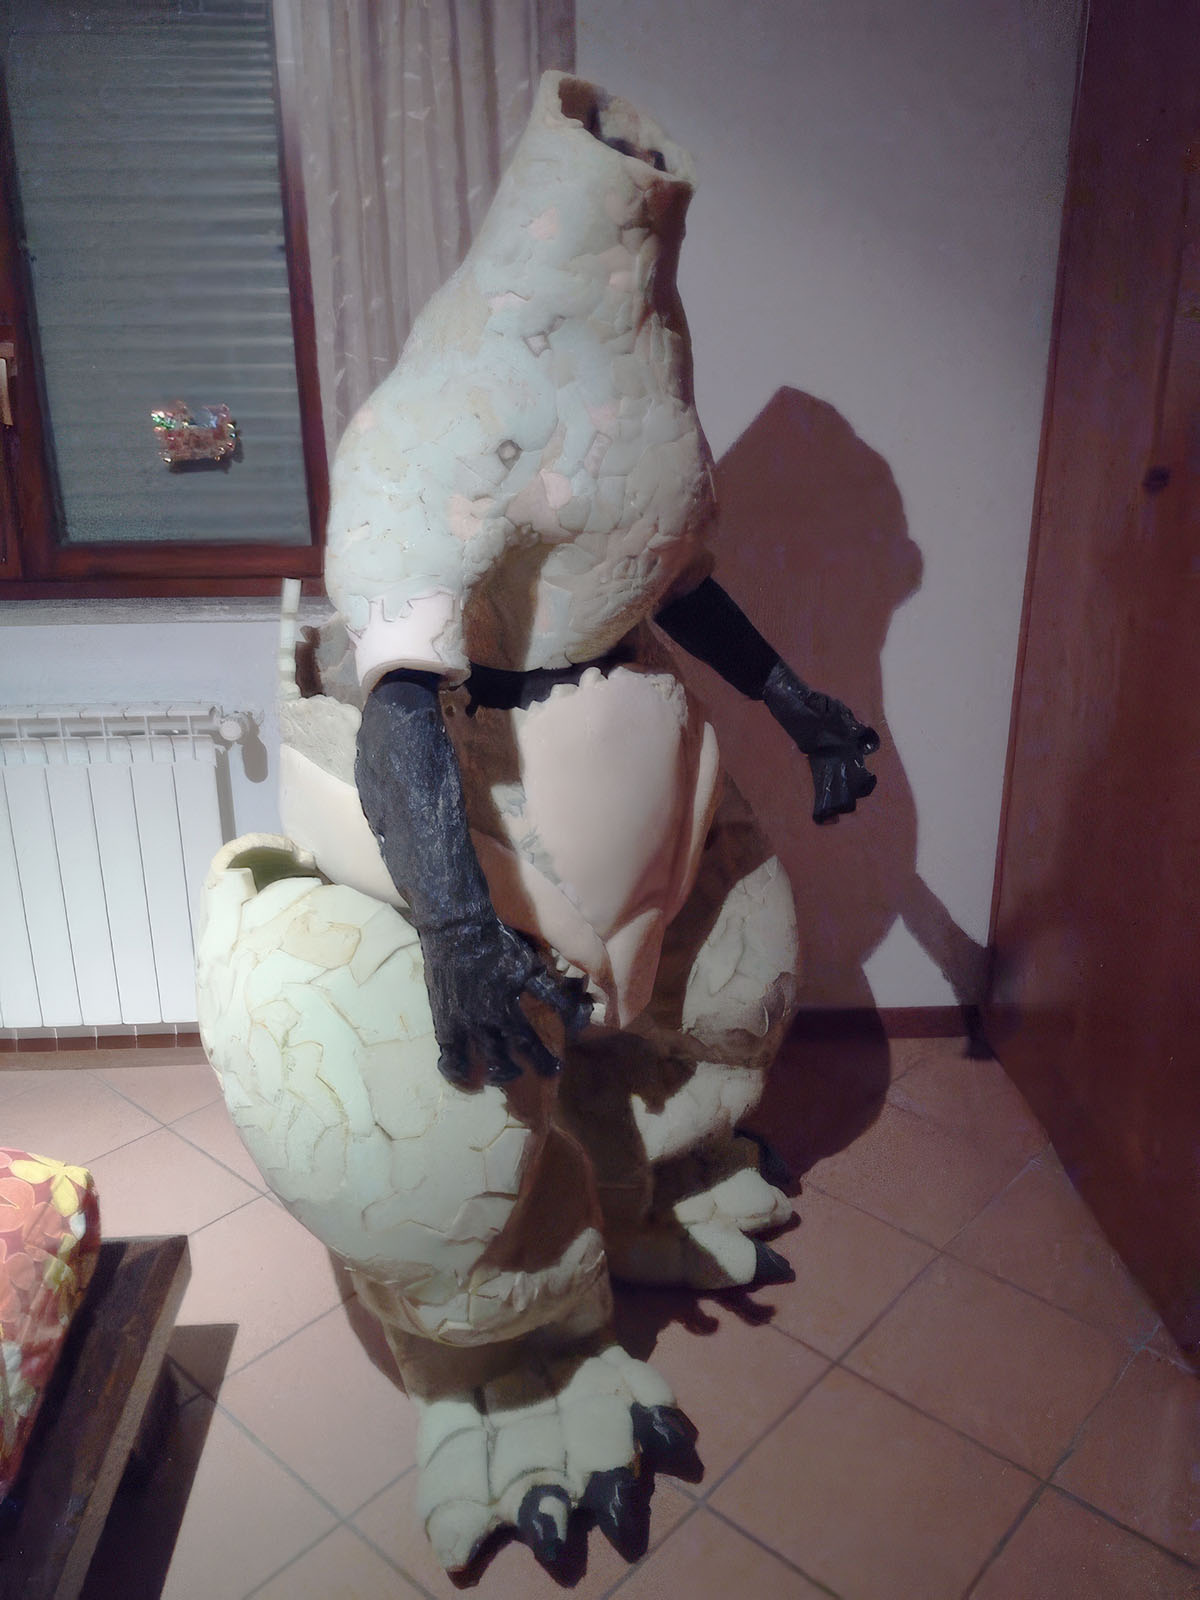
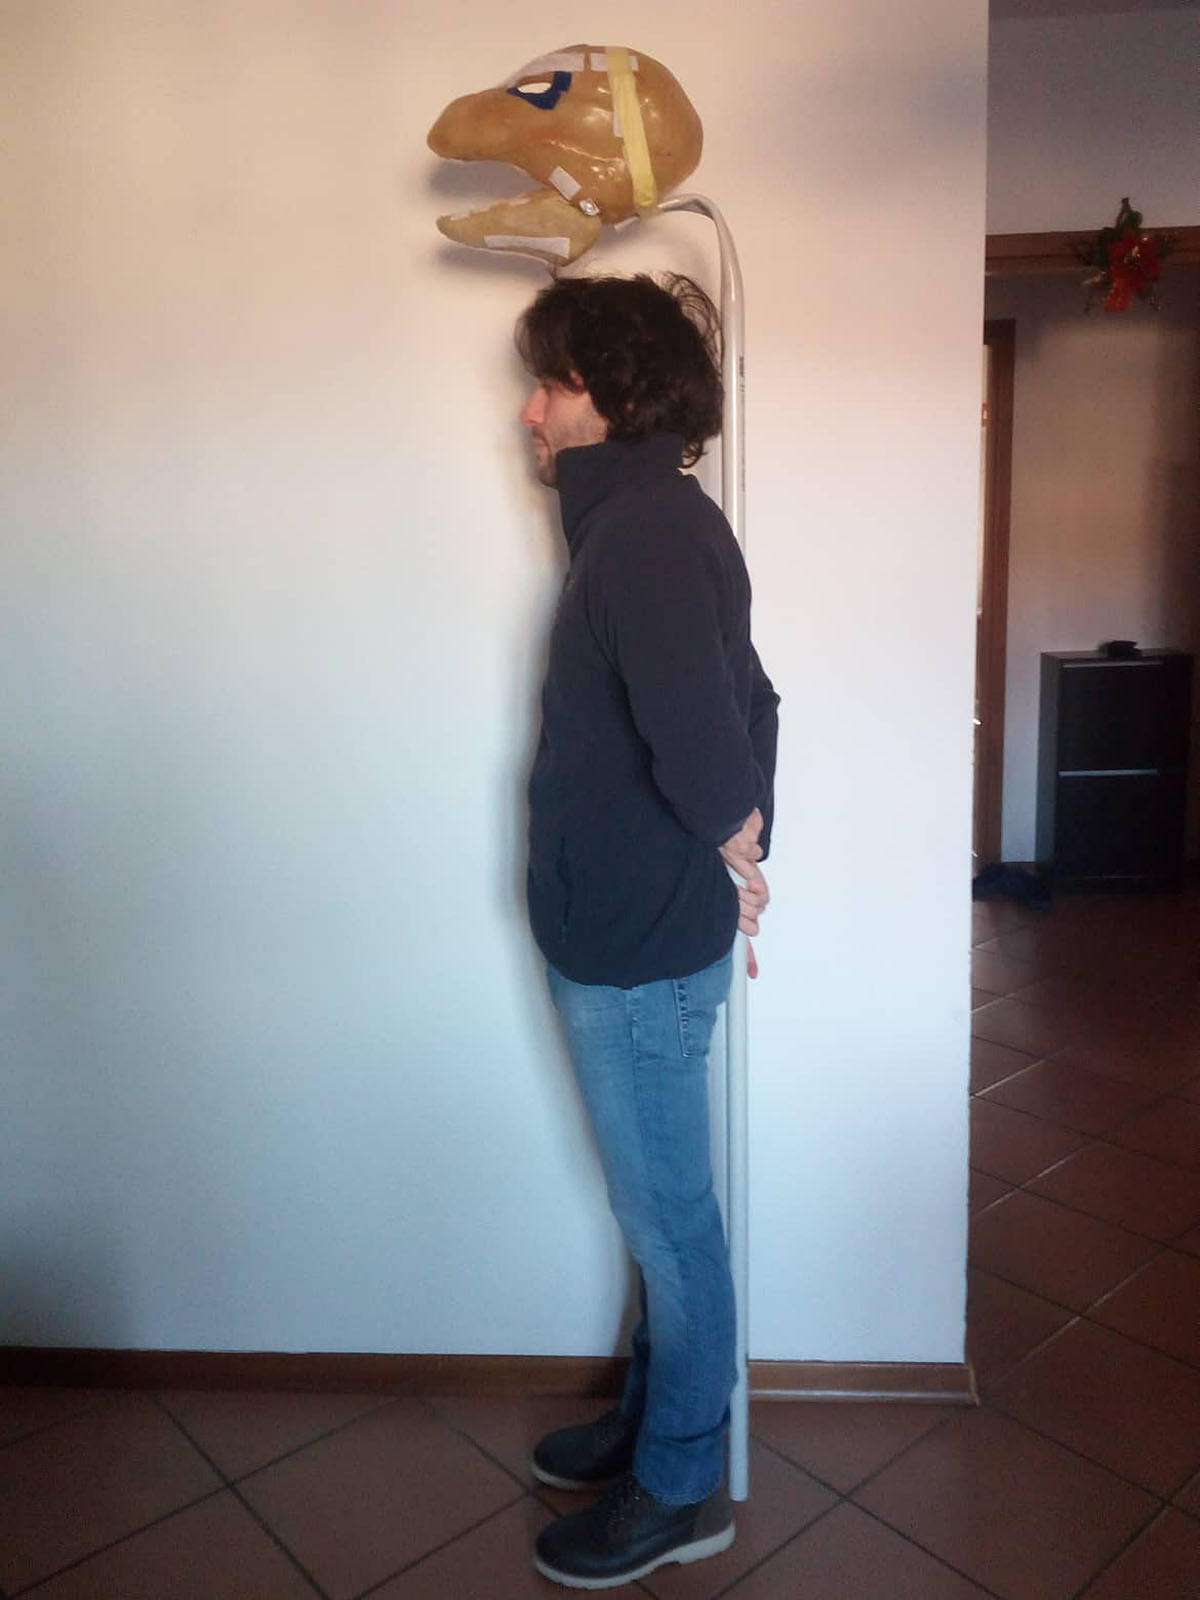
The preparation of the costume focused on two fundamental factors: maintaining the proportions between myself and the action figure, and creating a load-bearing structure using a fiberglass bodice and a heavy-duty corrugated pipe.
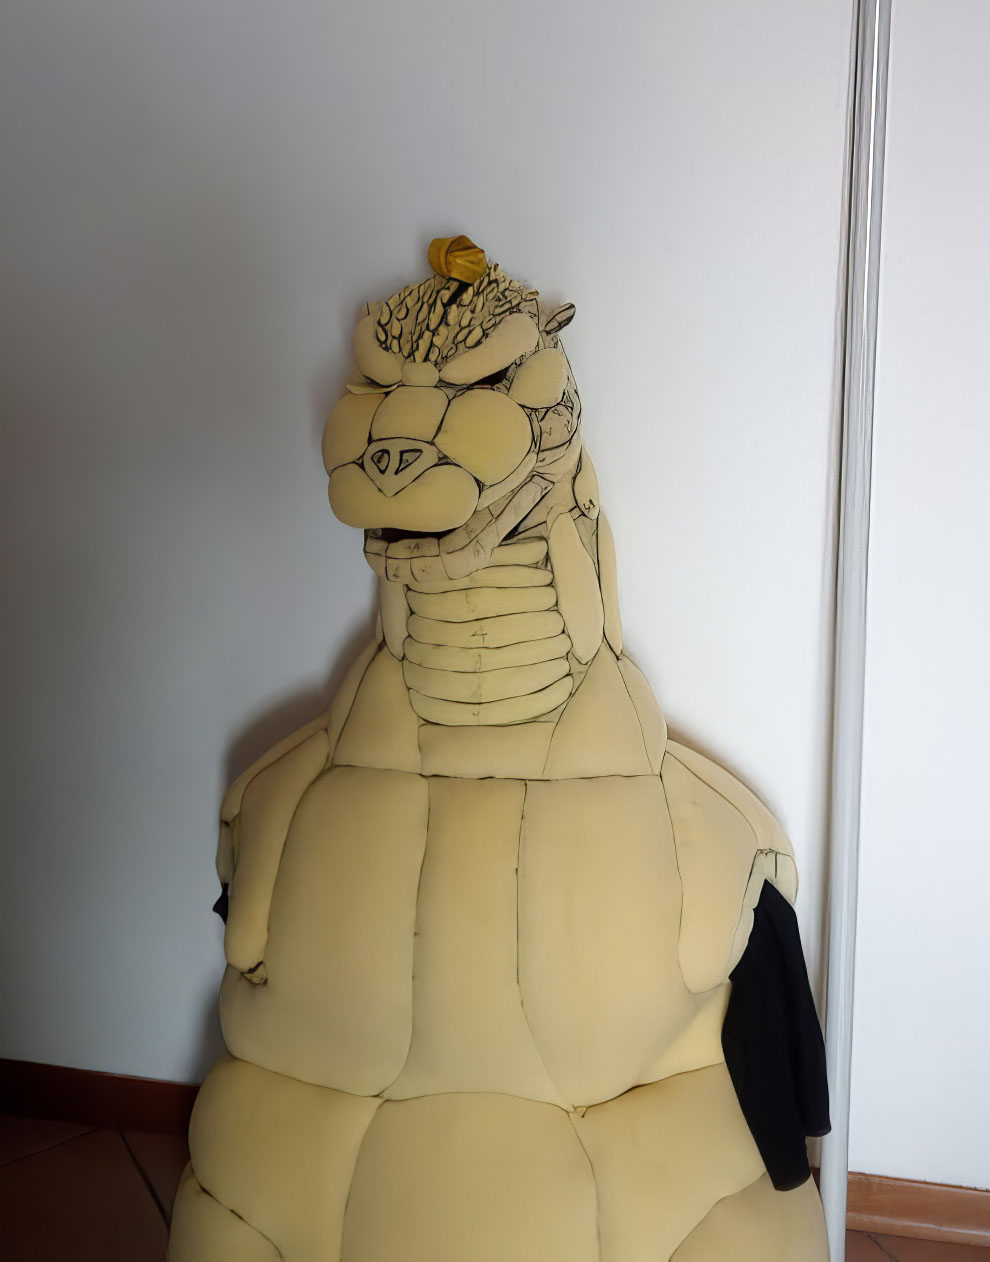
The first step involved measuring the action figure and scaling those dimensions to my own body to determine the correct ratio. I then built a geometric cardboard mockup of the head and neck to visually assess the overall scale and volume I would be dealing with.
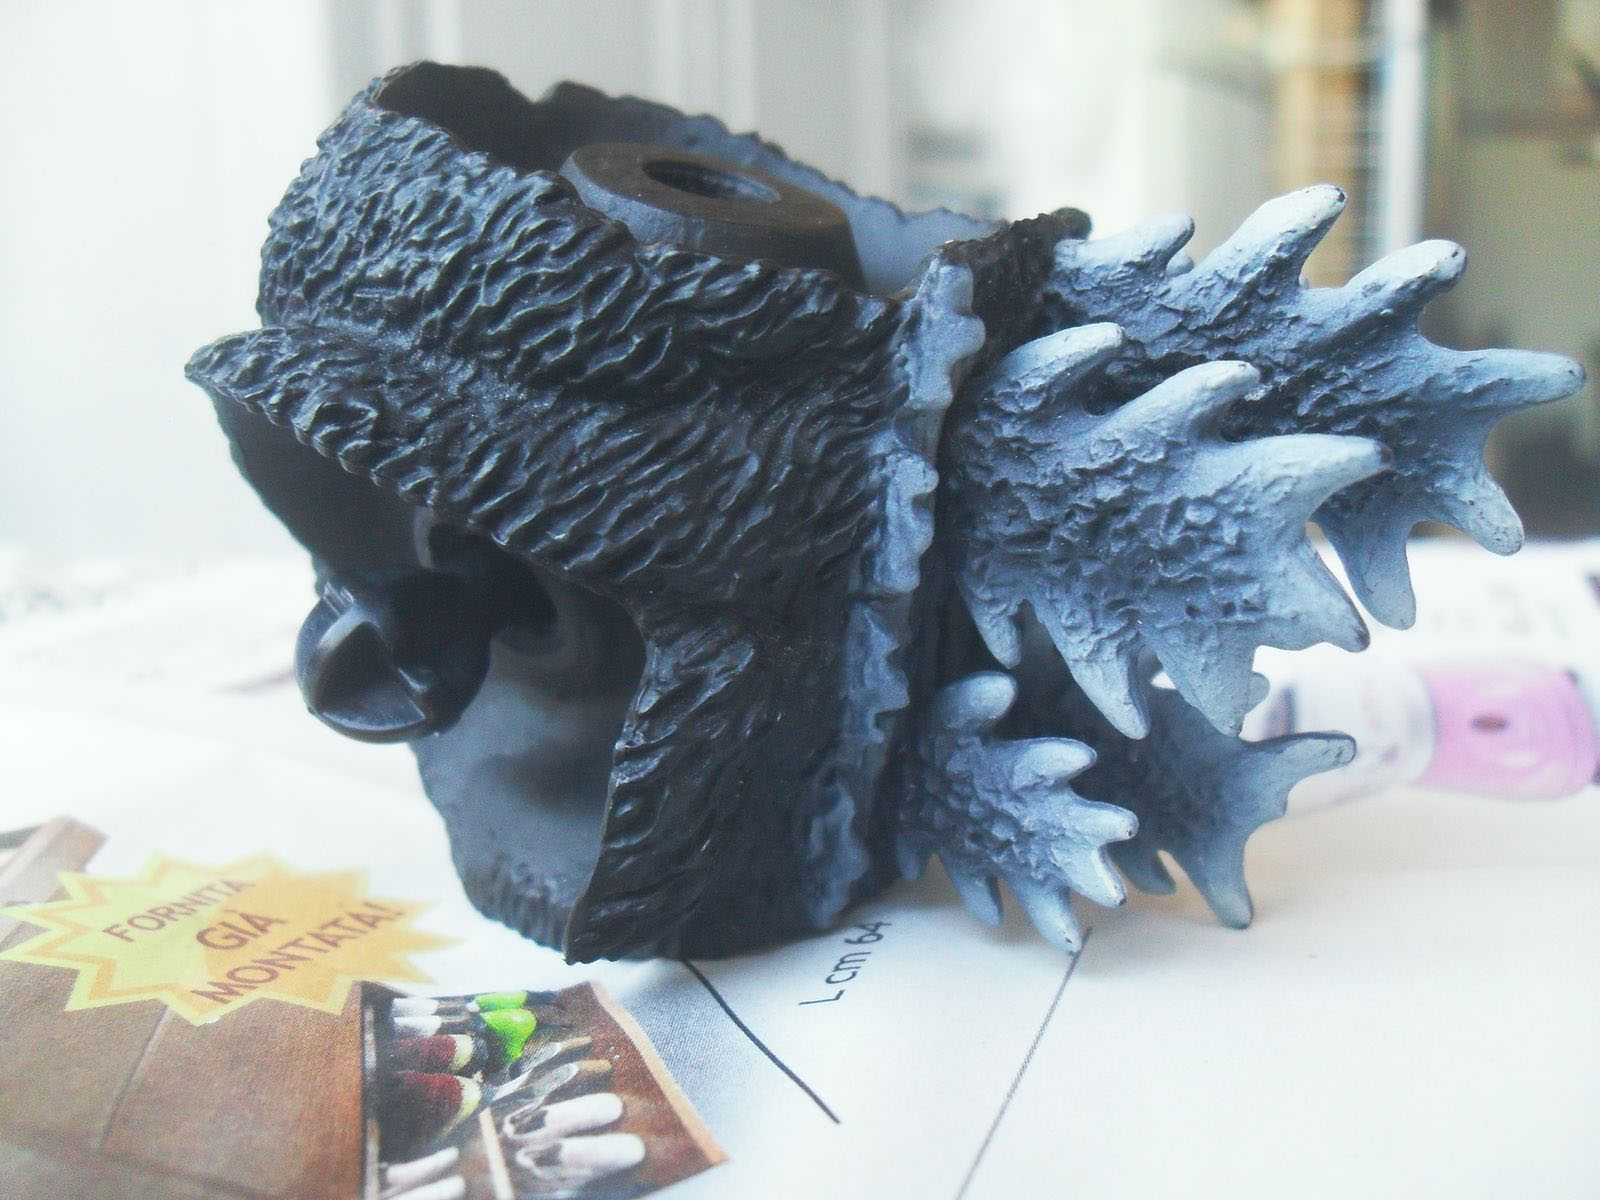
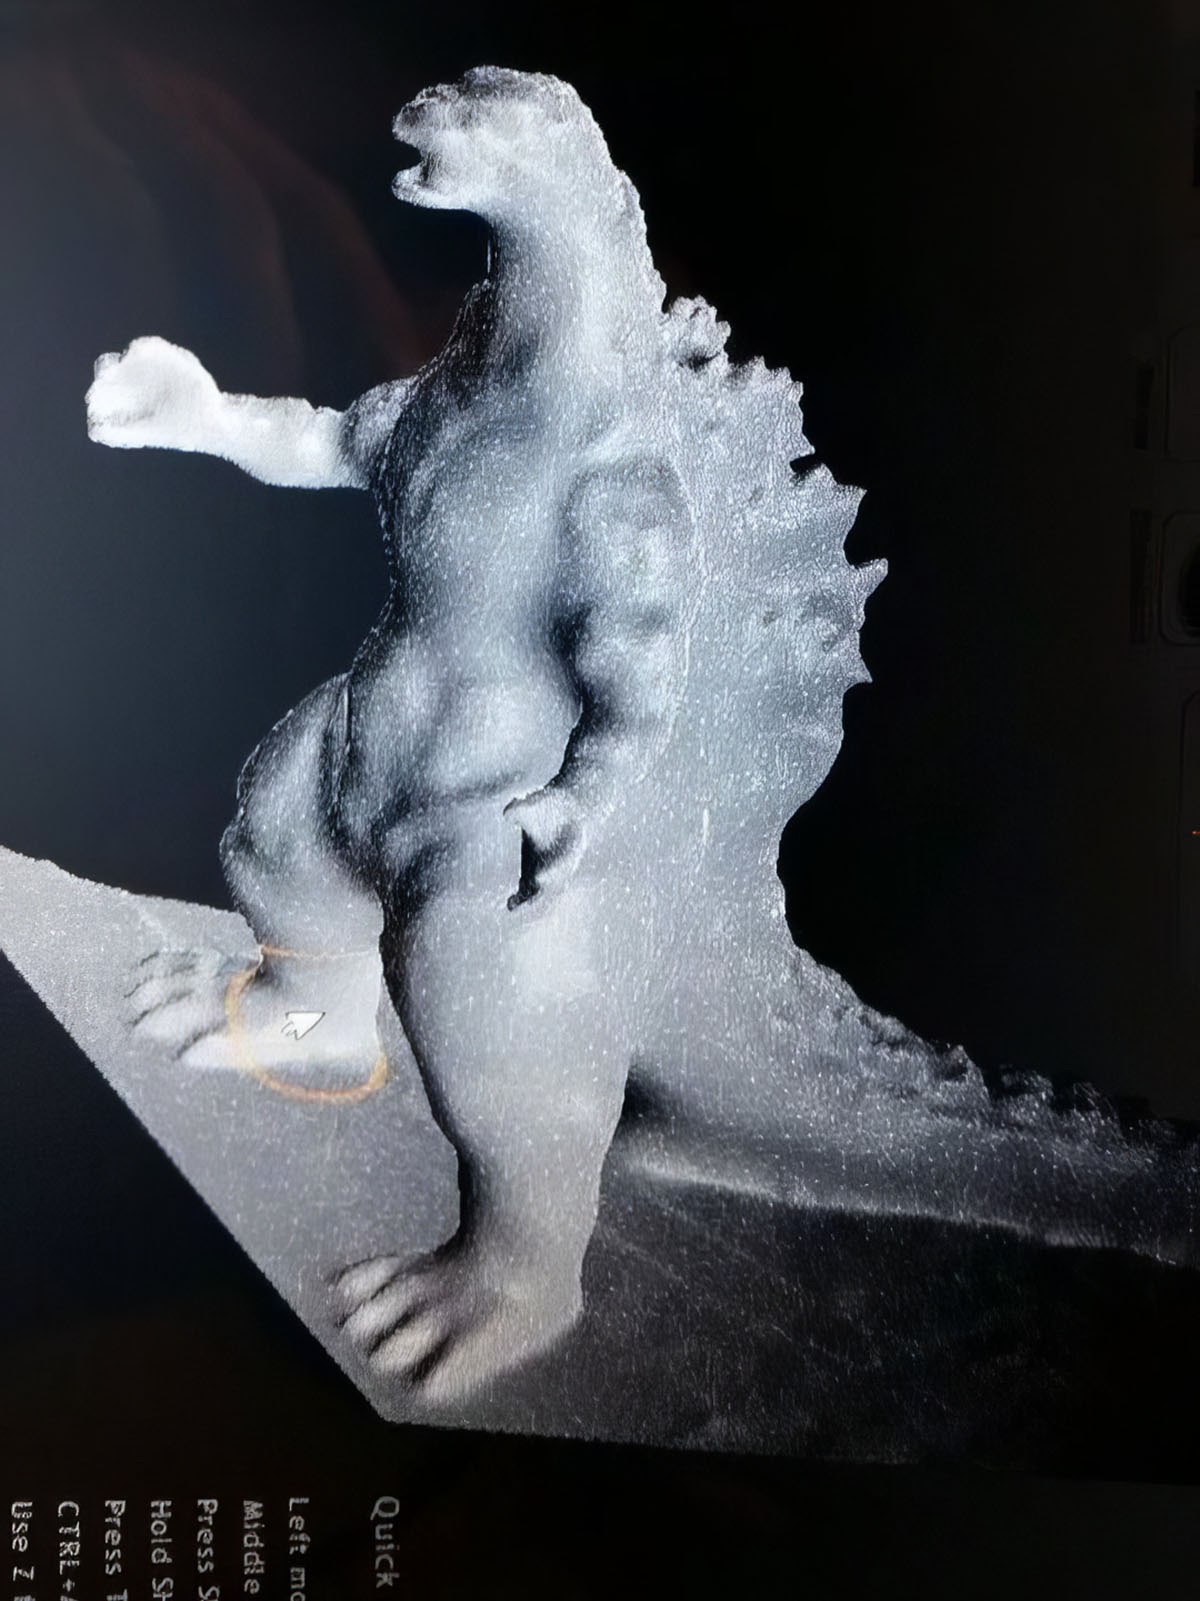
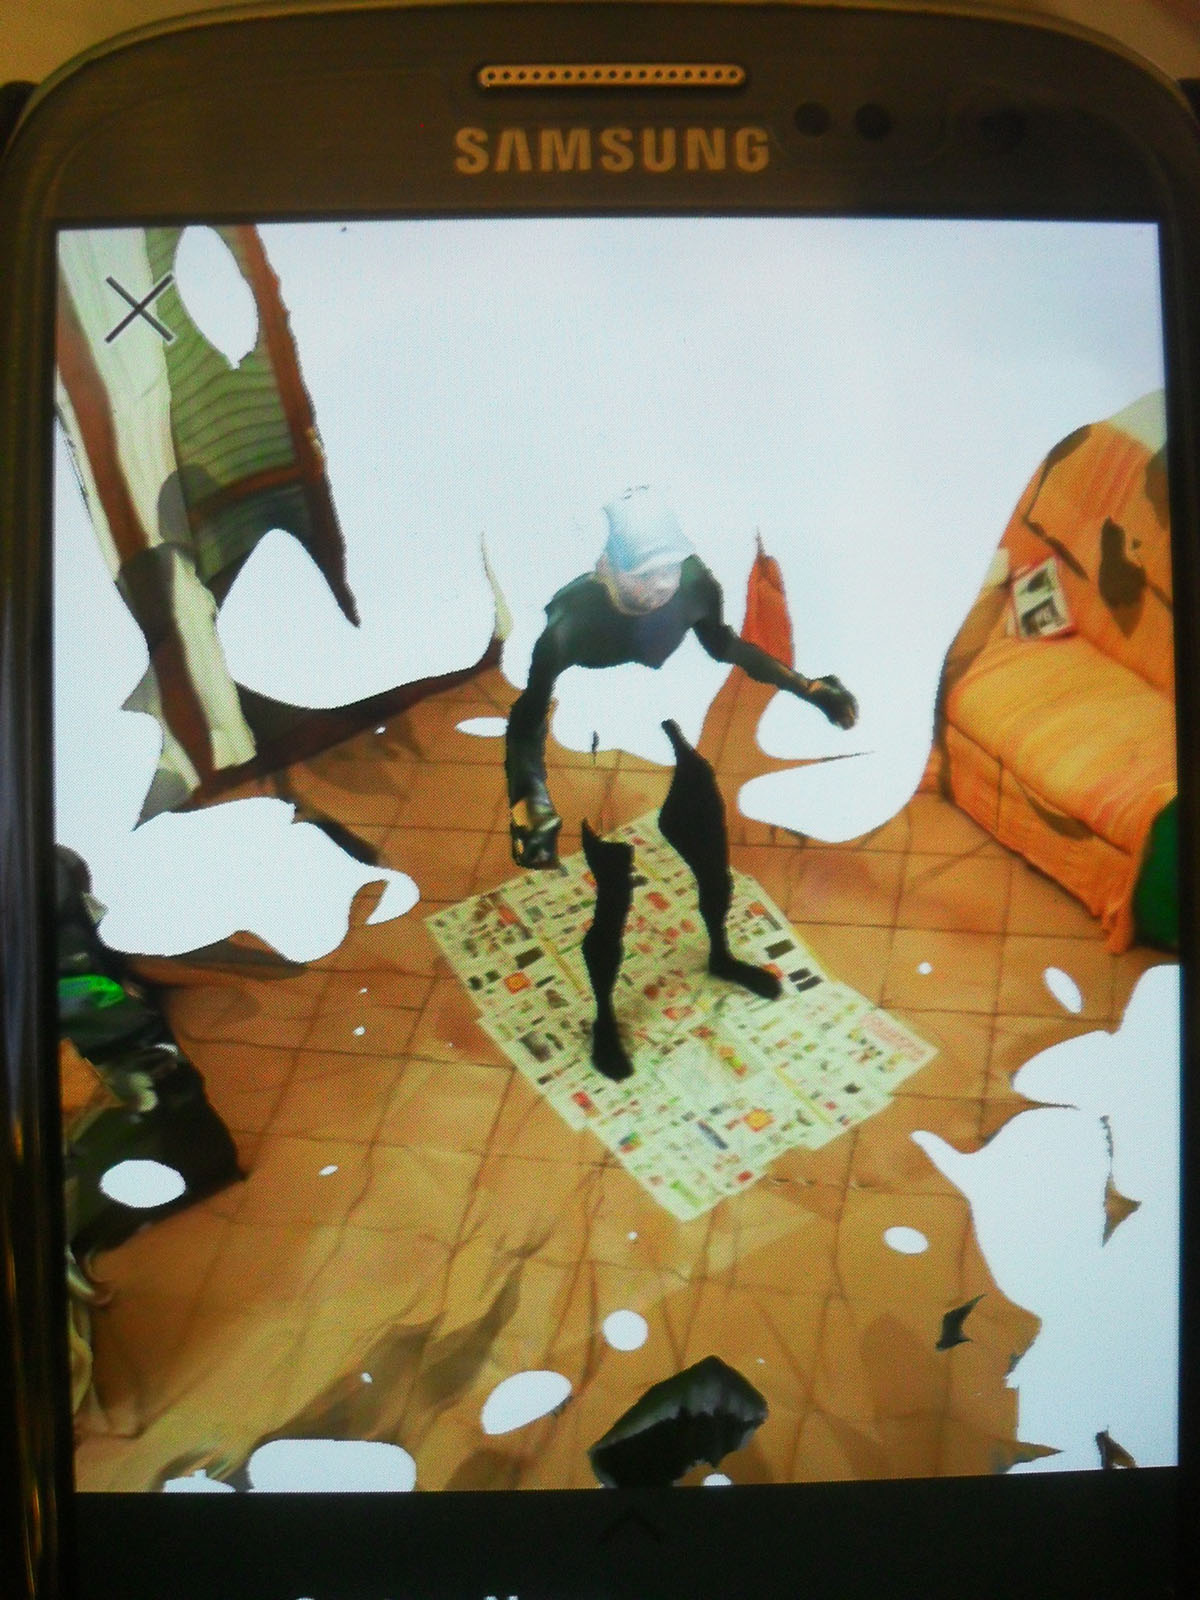
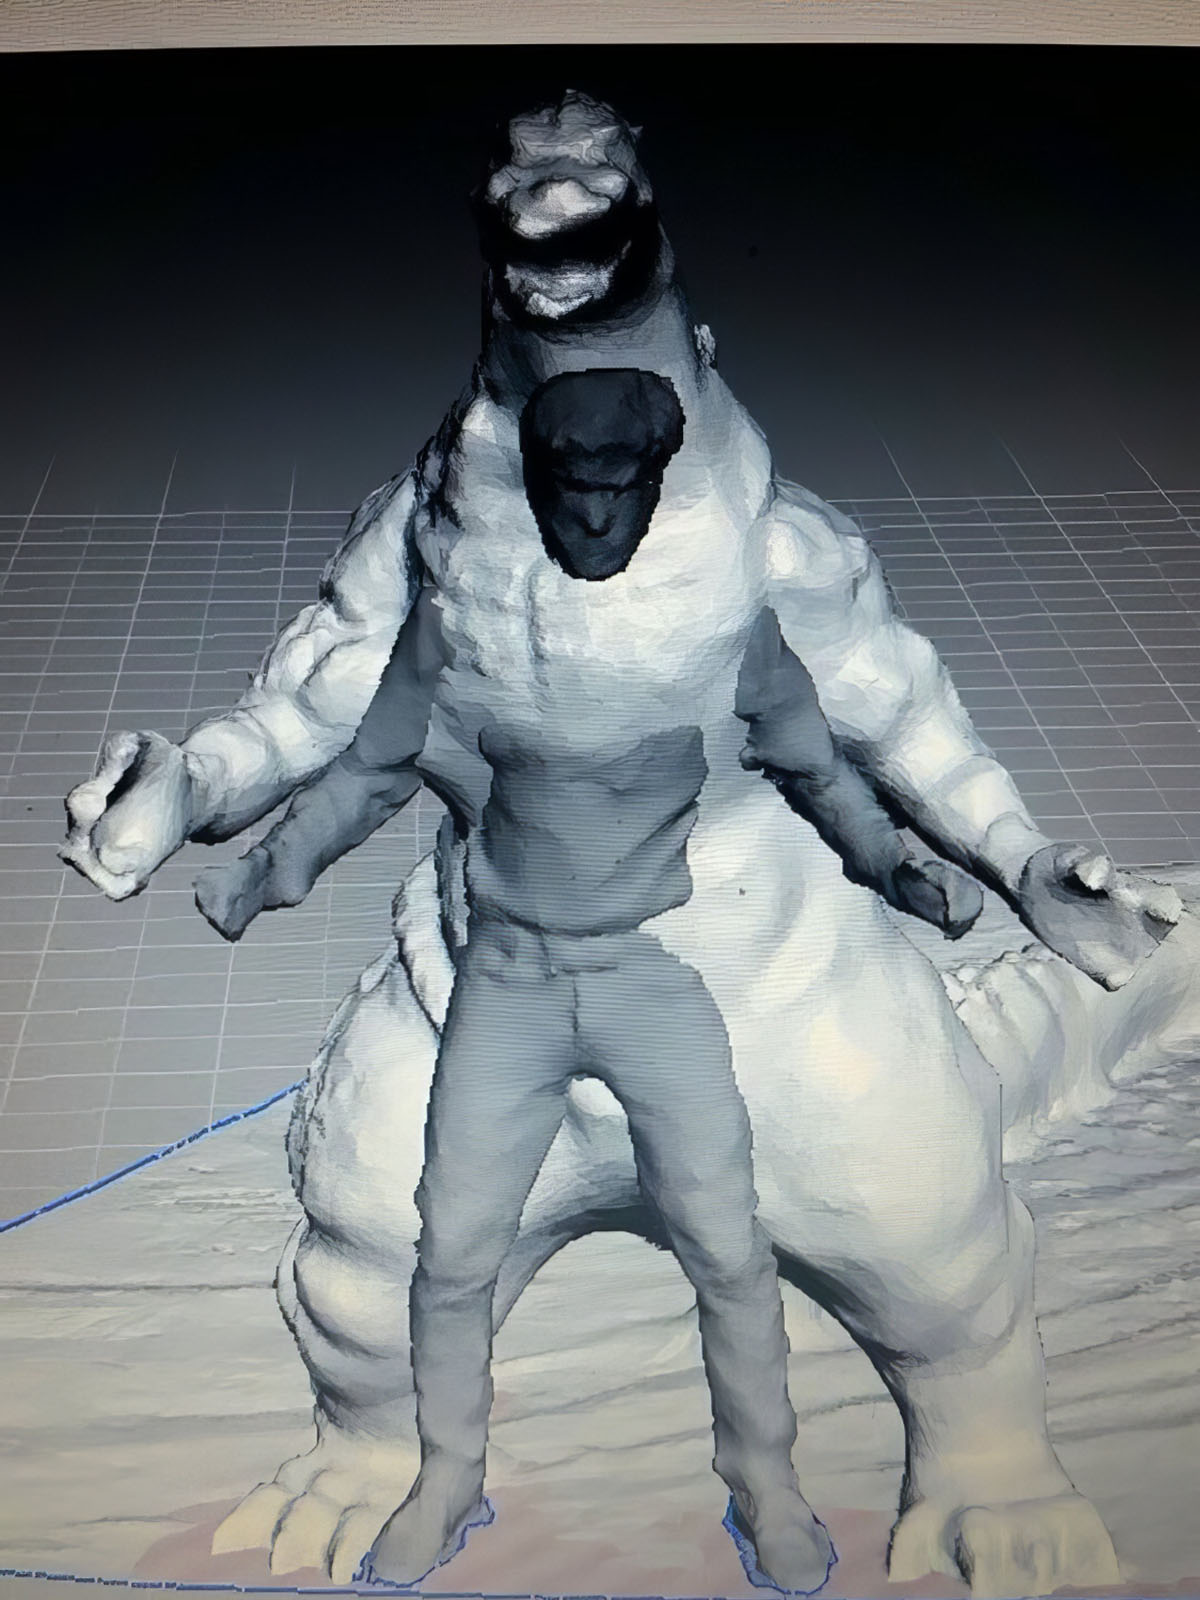
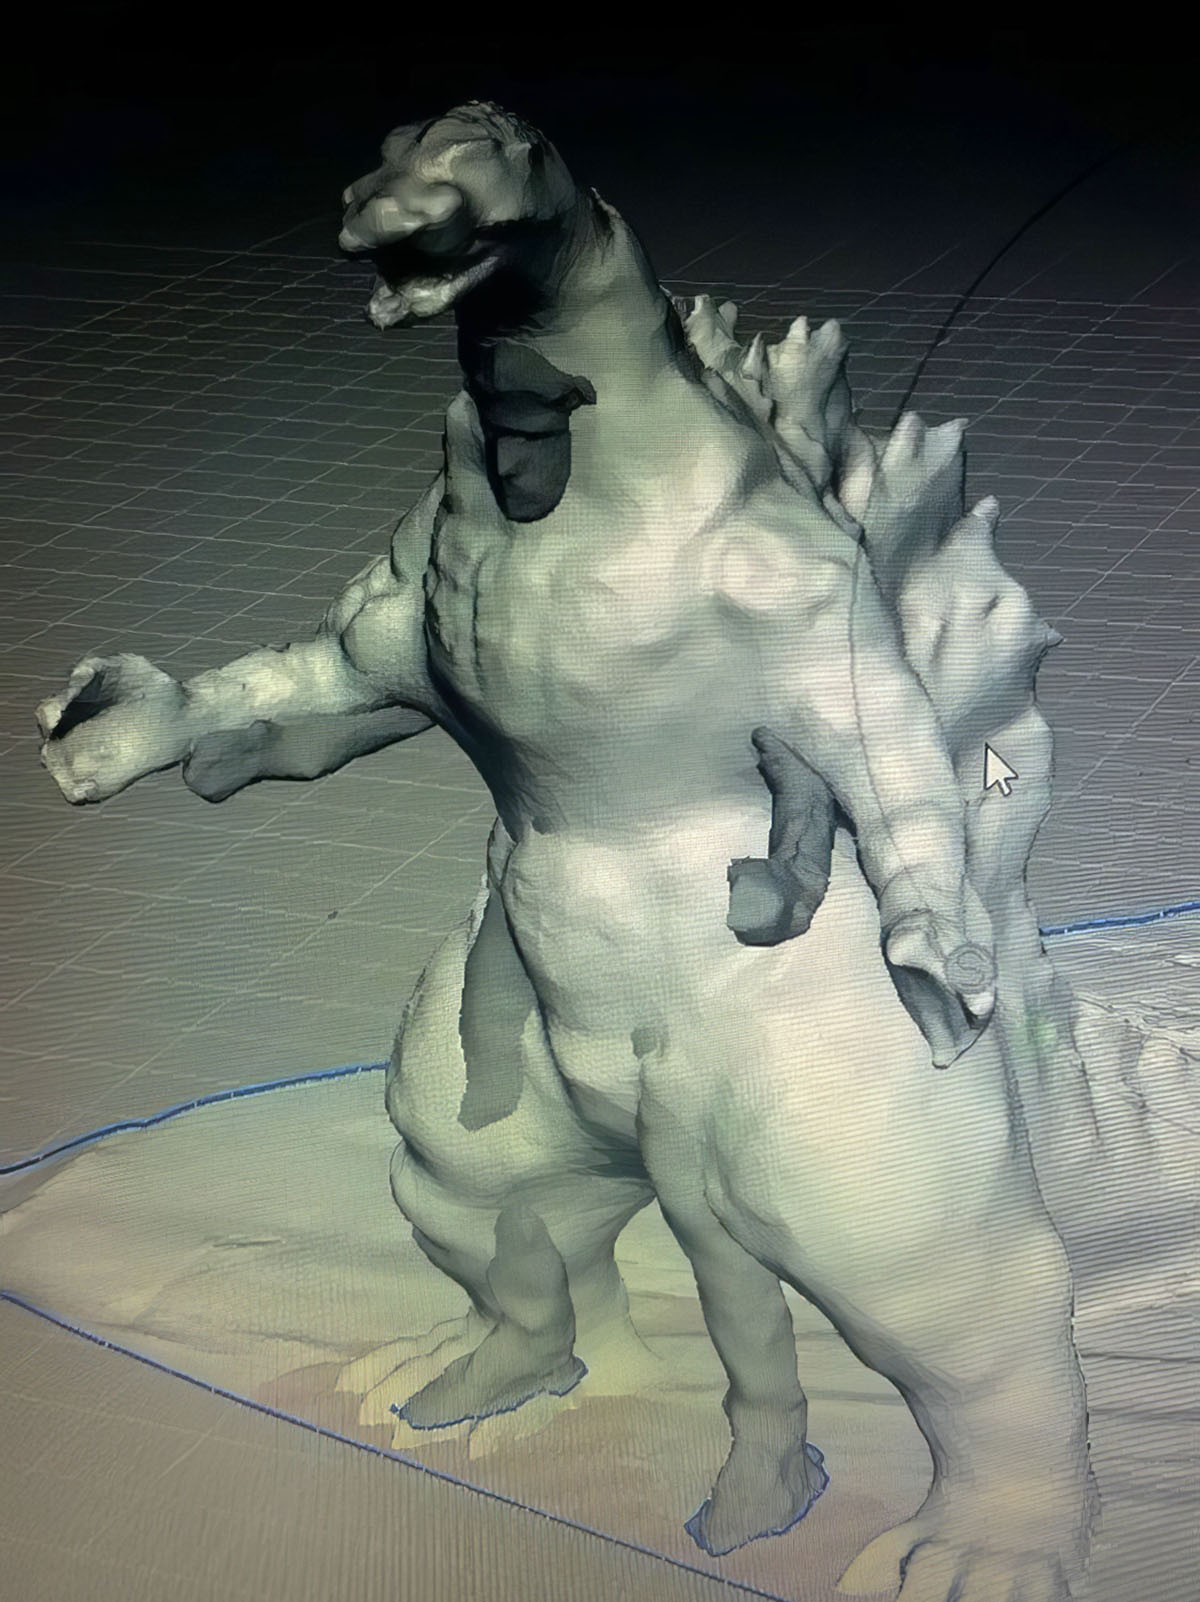
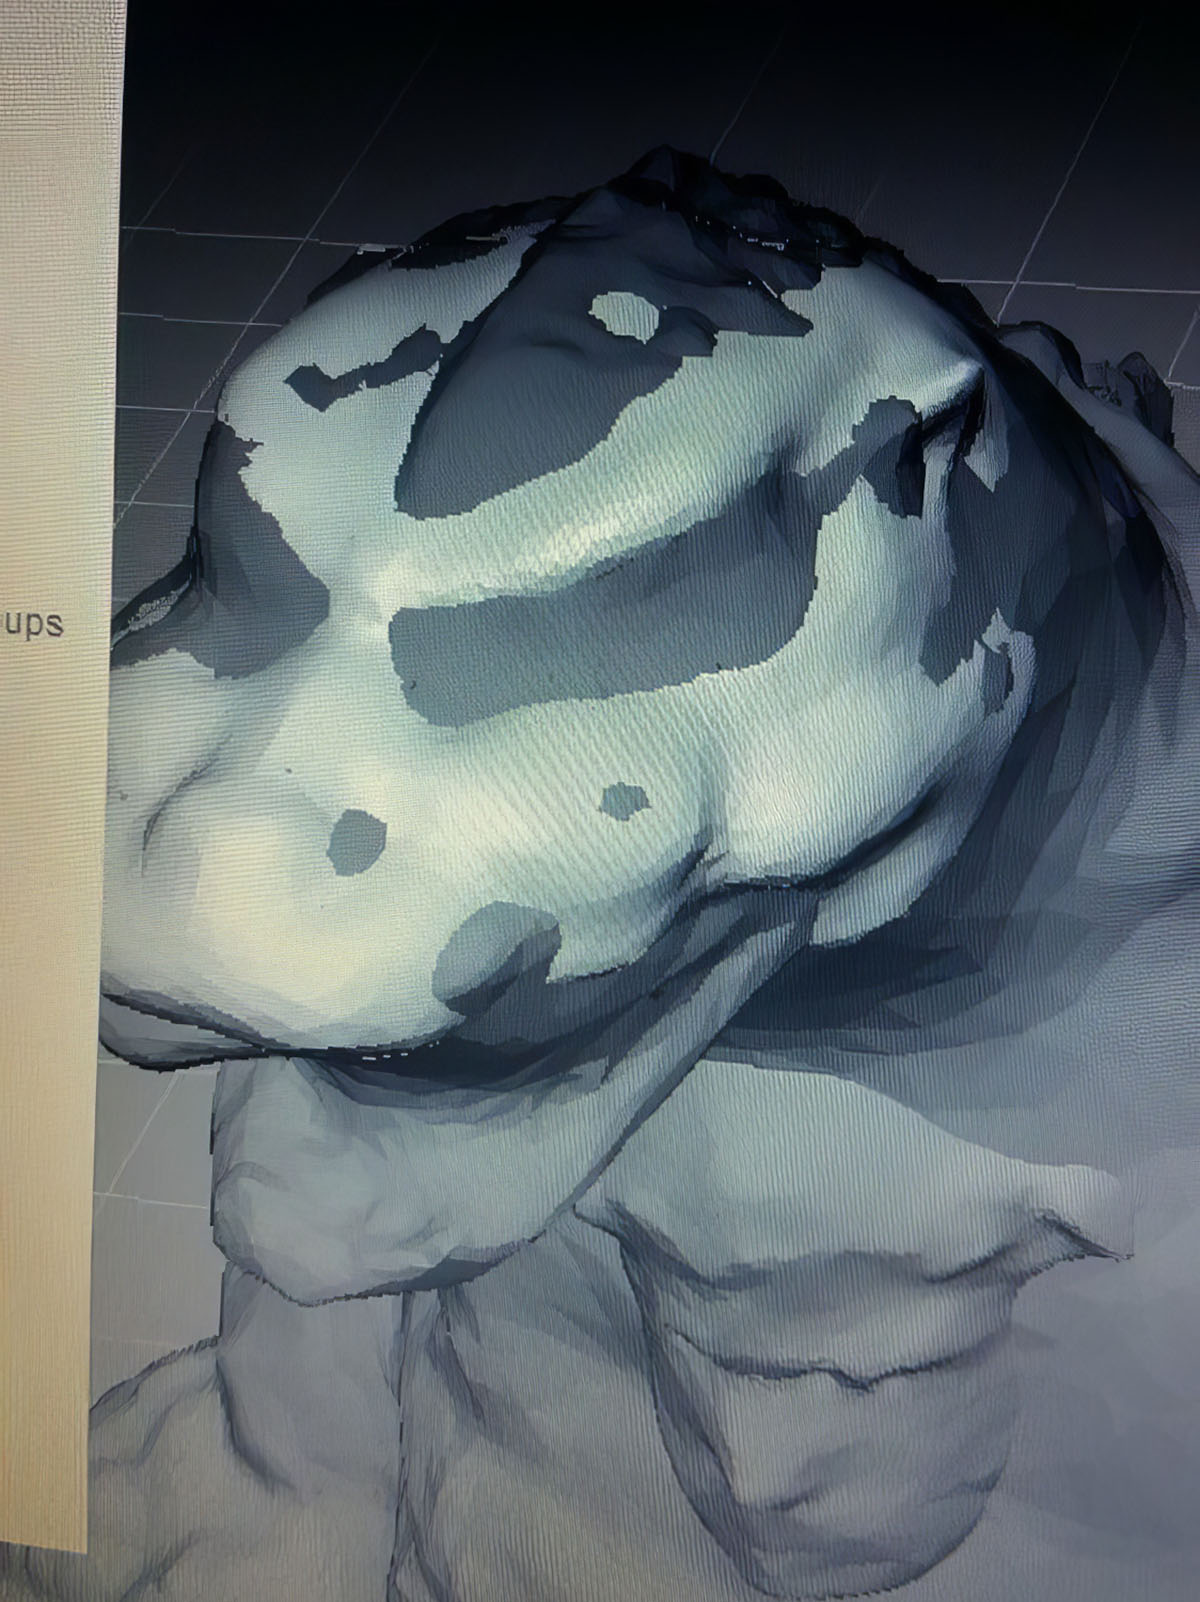
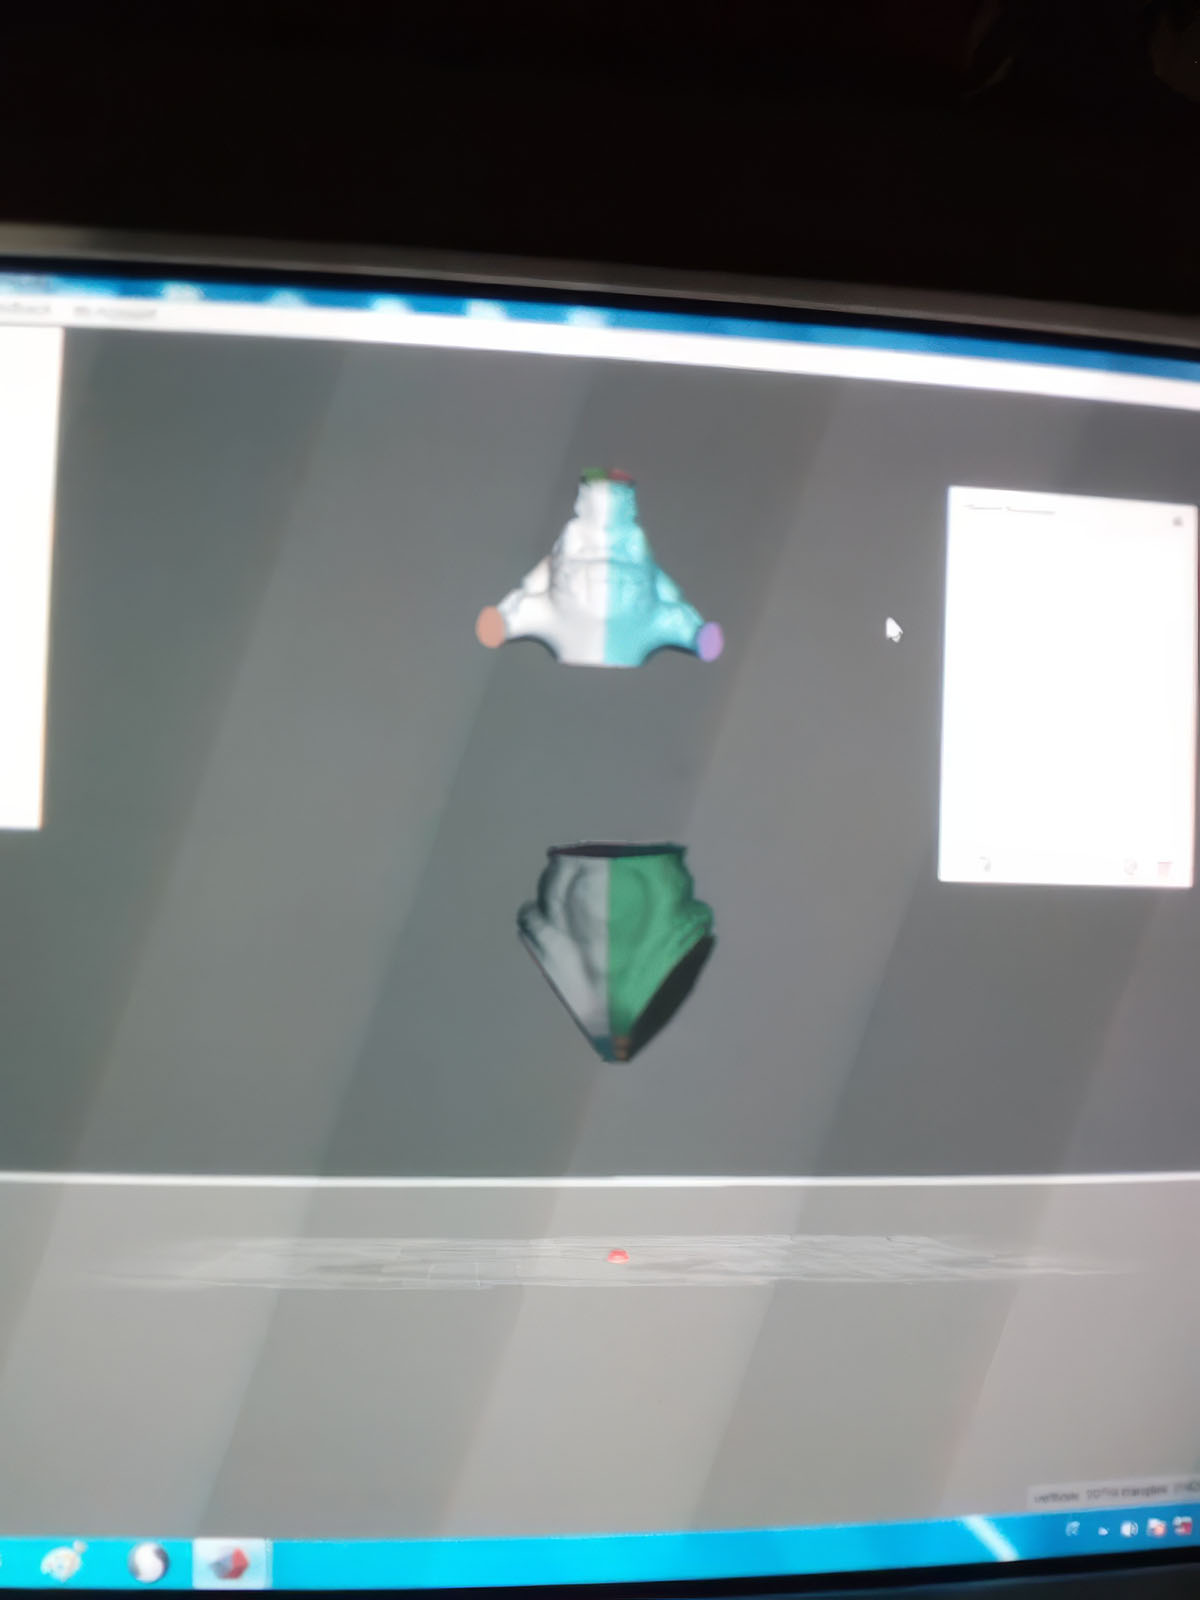
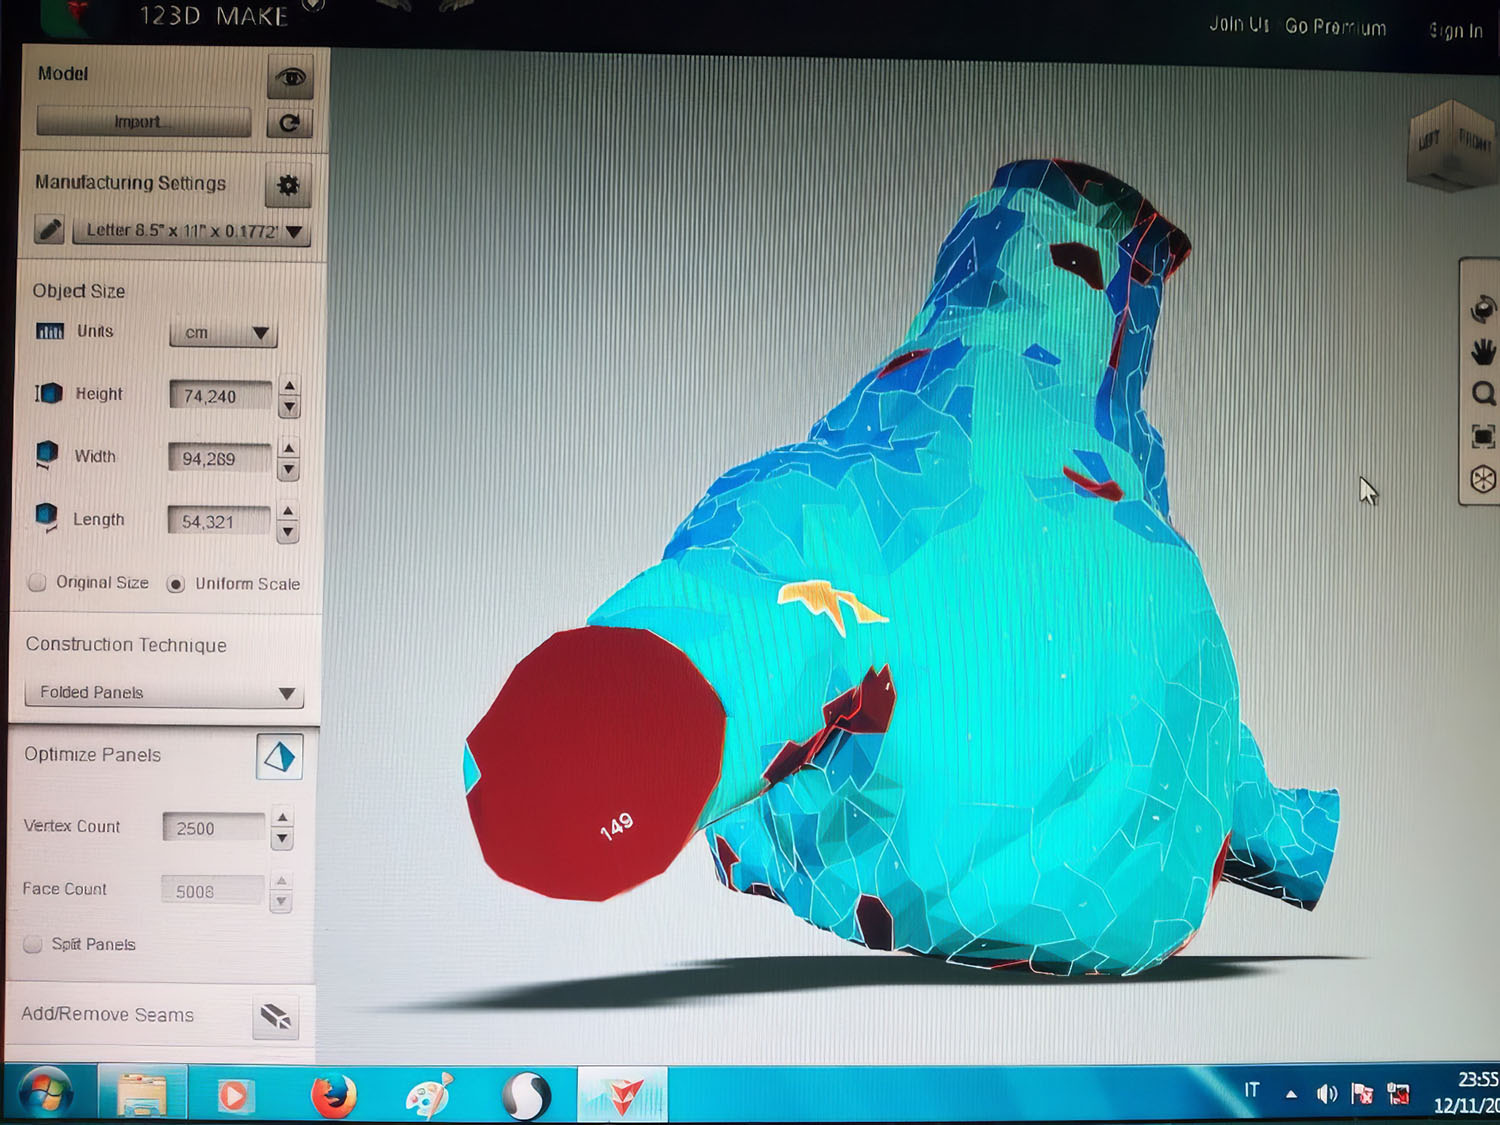
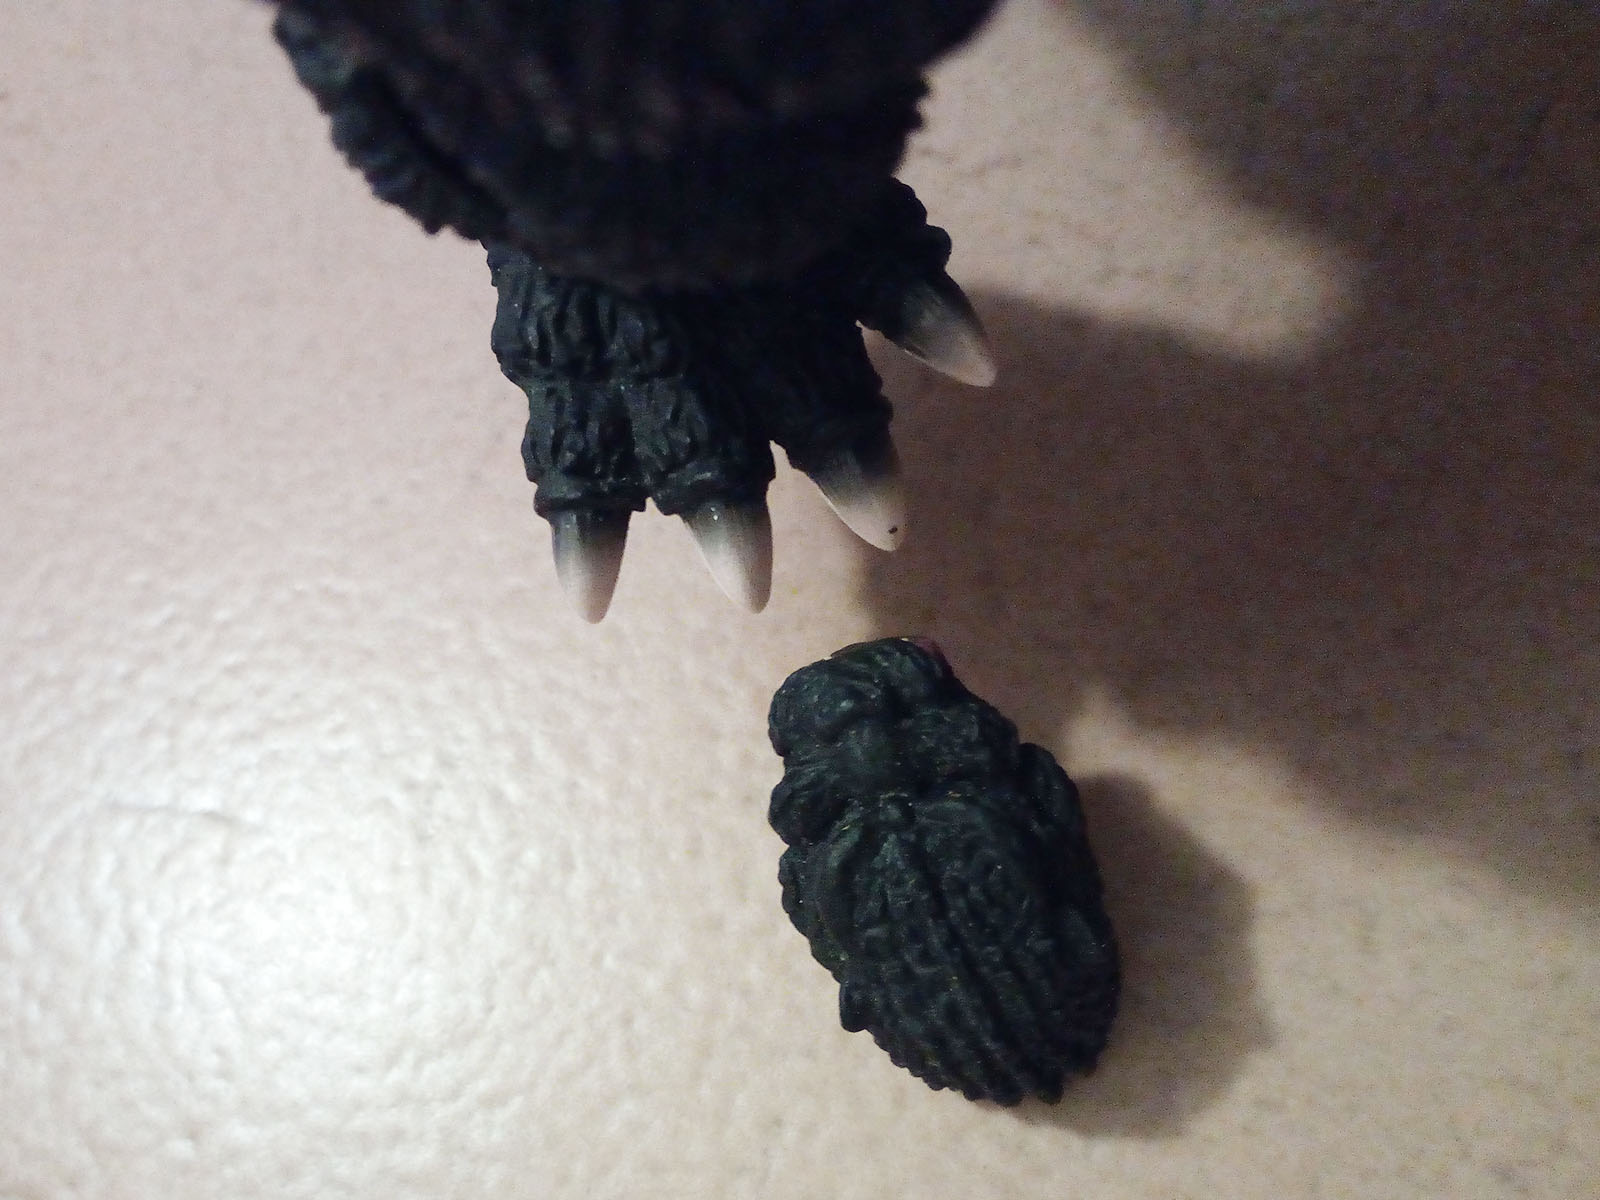
The action figure was disassembled, and each part was 3D scanned; later, the entire figure was scanned as a single unit. However, the crucial step was 3D scanning myself. By placing my digital double alongside the full-body scan of the figure, I could perform a direct comparison to define the actual scale of the suit. This process was also essential for determining the exact placement of my head and shoulders within the costume.
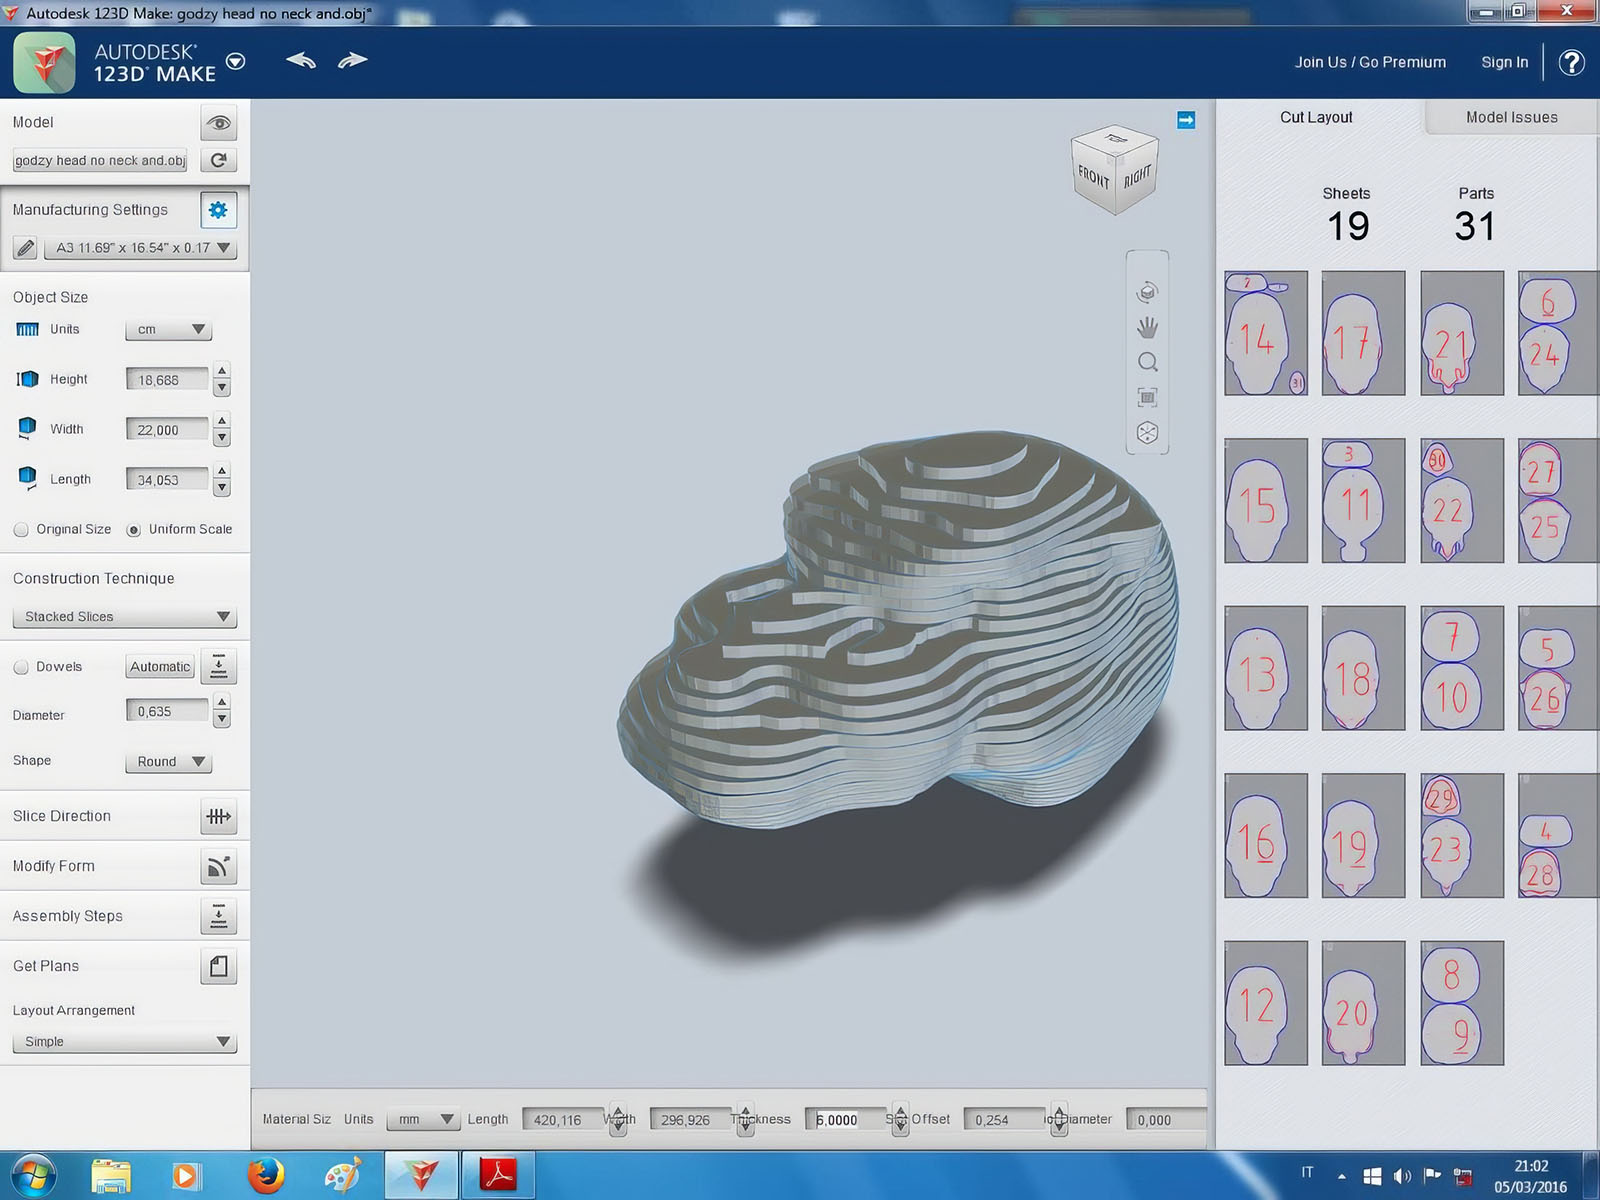
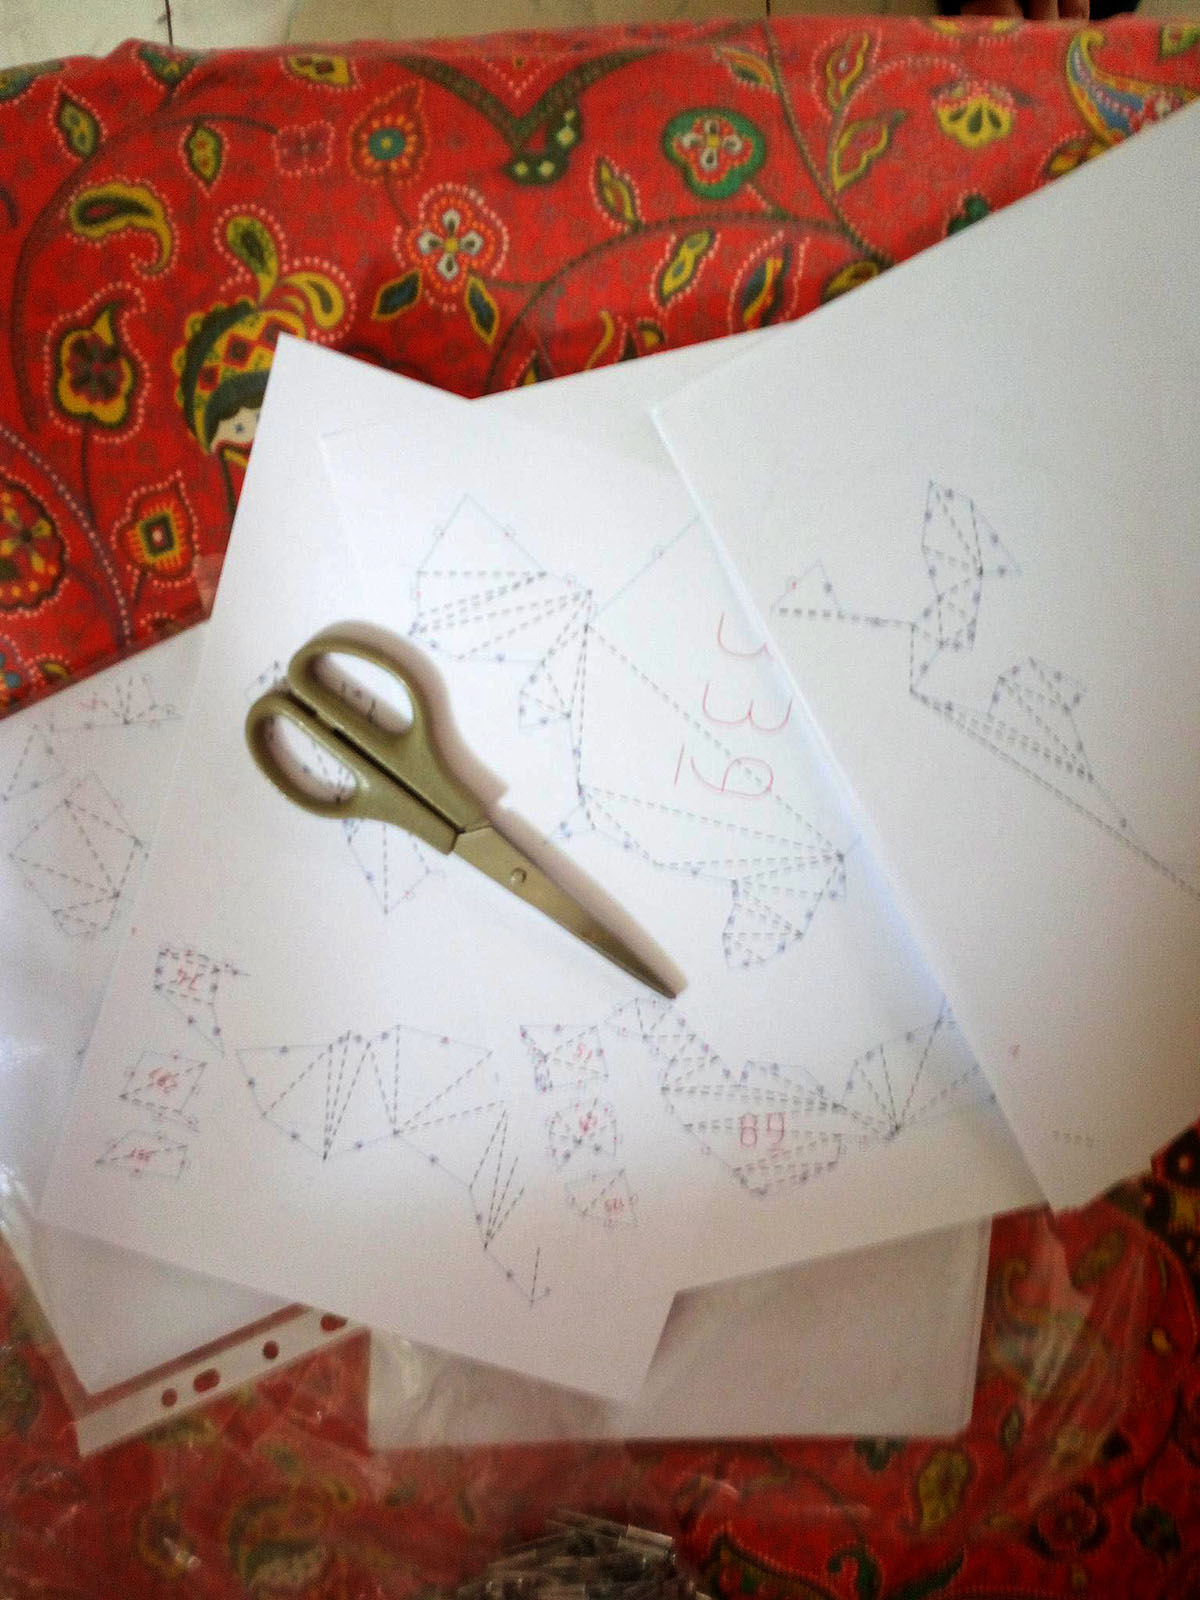
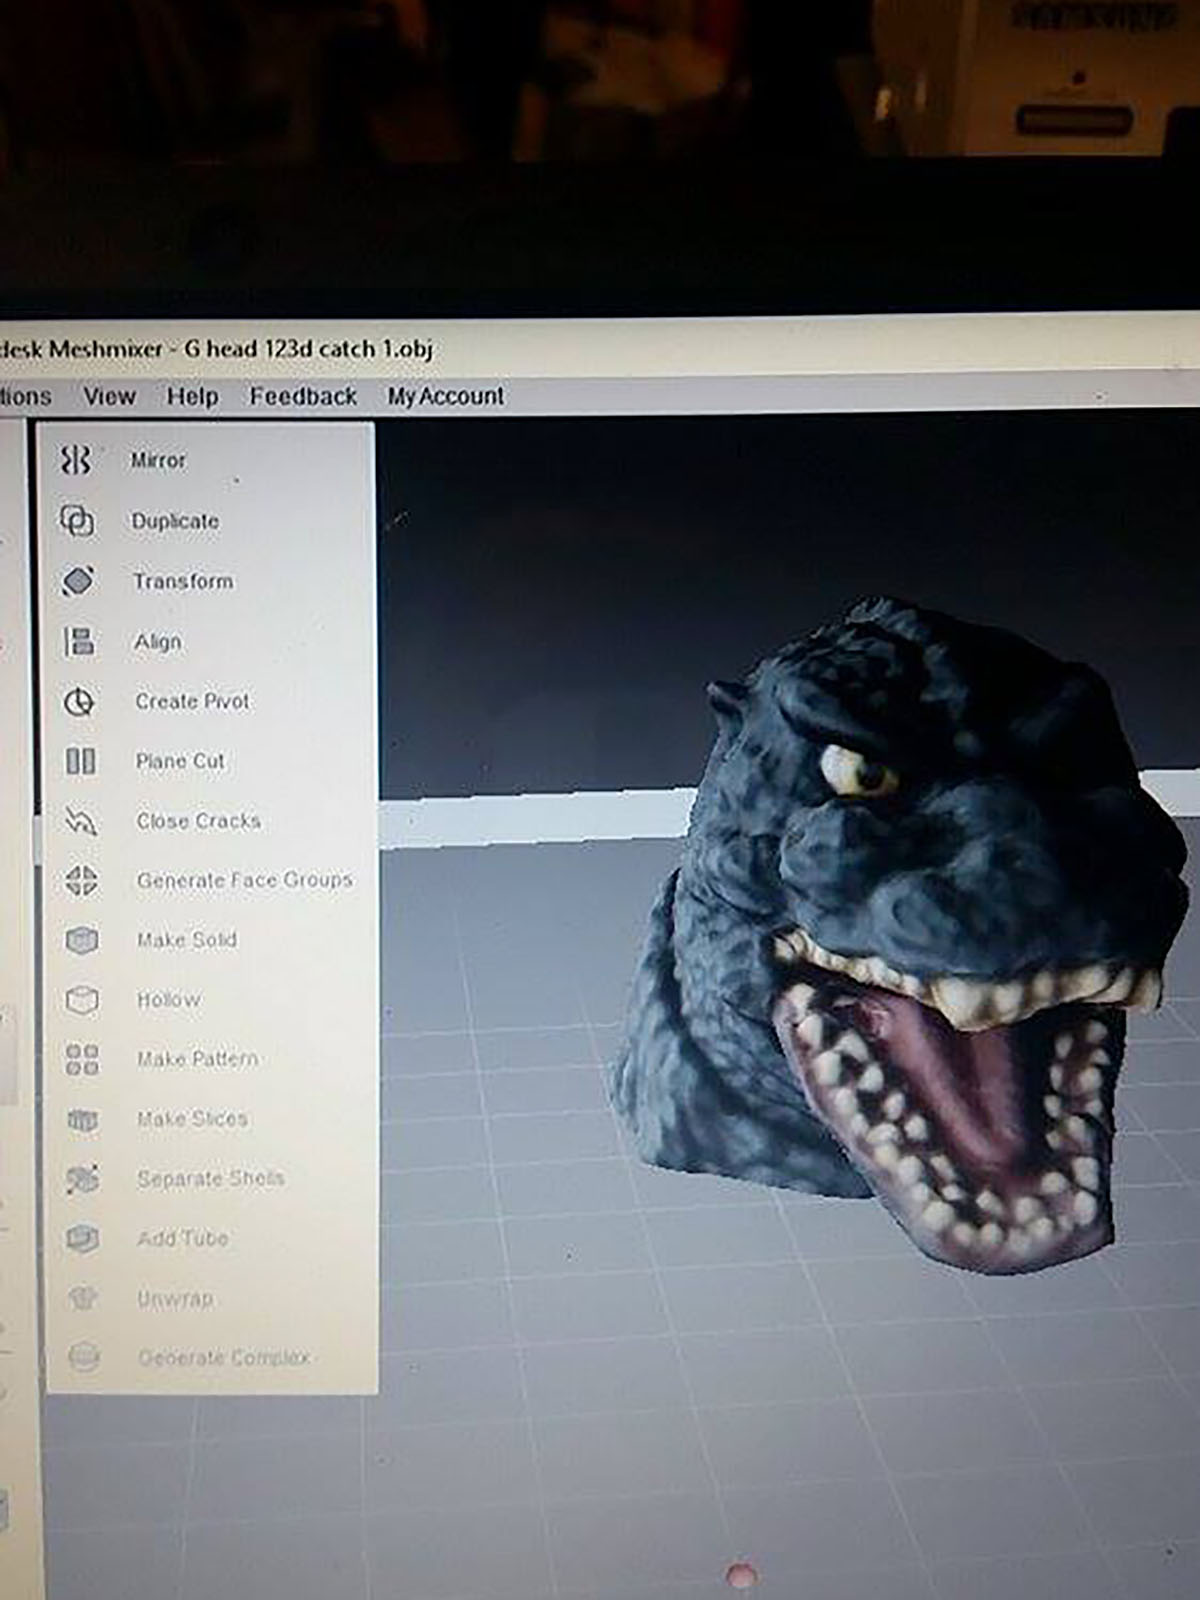
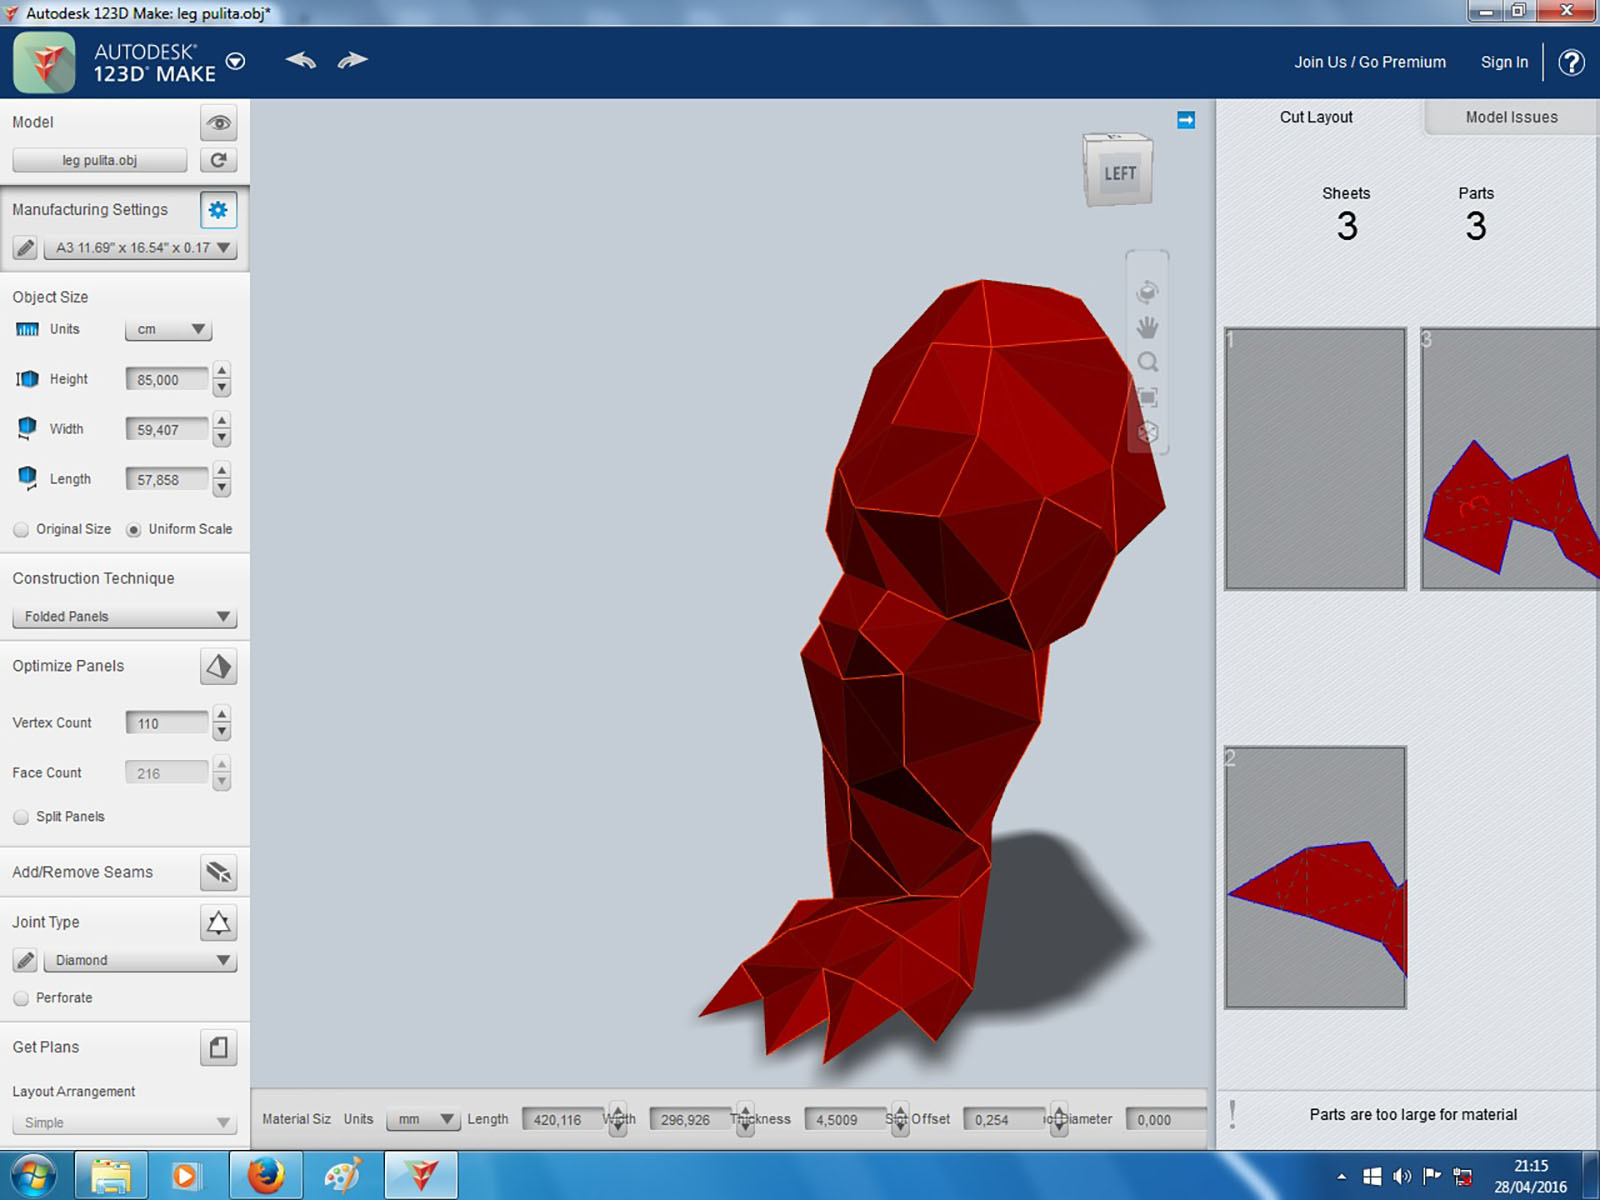
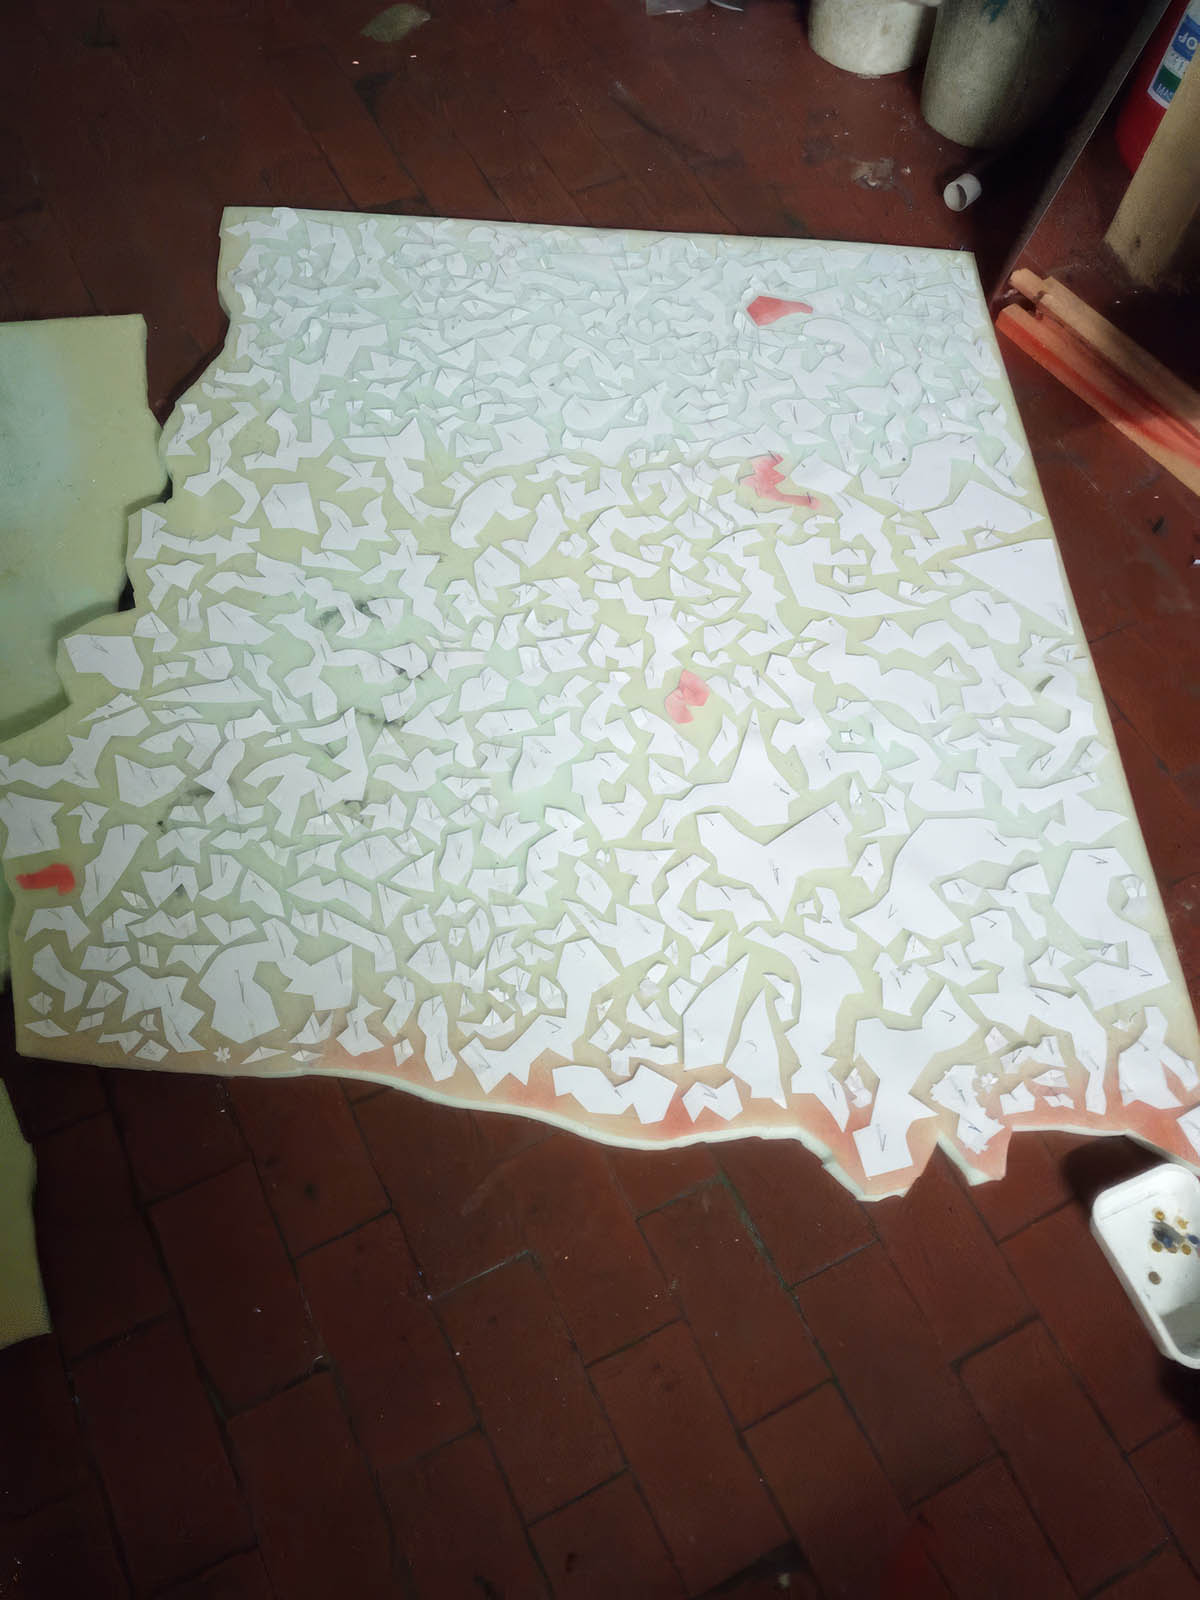
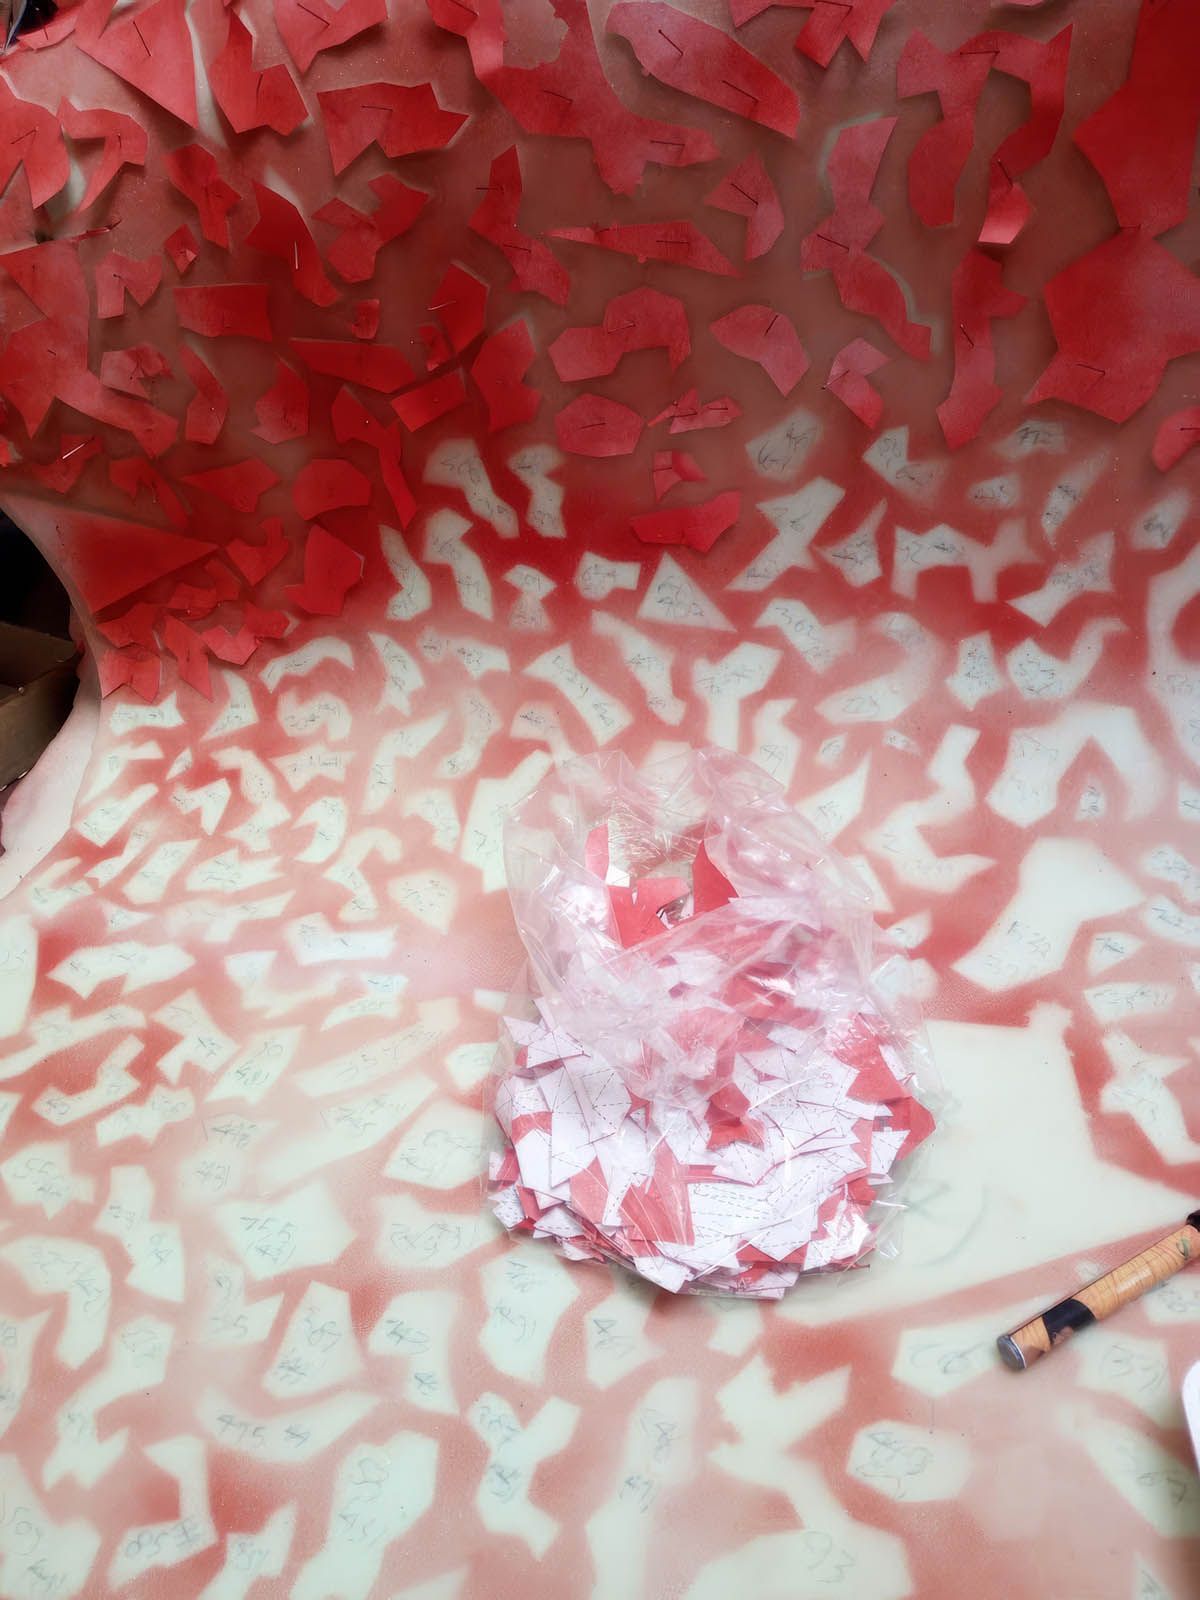
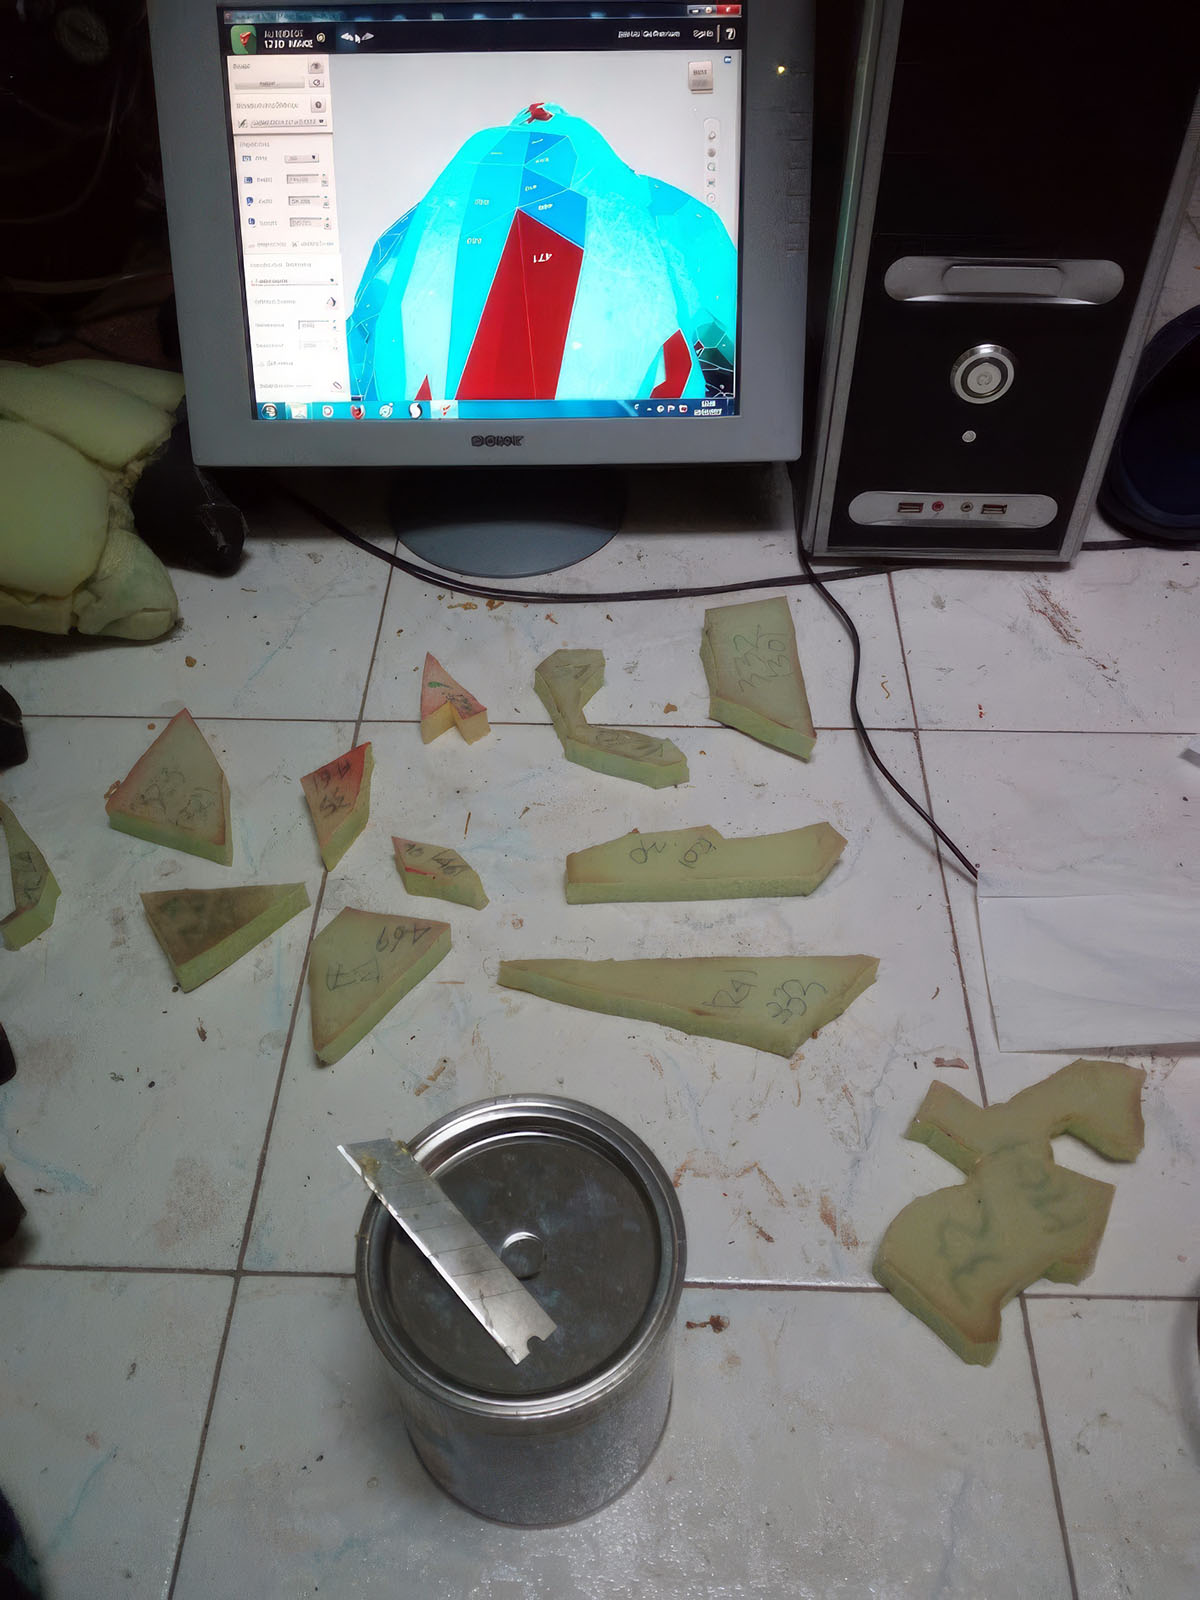
The 3D scan files for the head, body, and legs were imported into Autodesk and processed into puzzle-like paper patterns, which were then traced onto upholstery foam. In contrast, the arms, tail, and fins were handcrafted based on the calculated proportions.
The head, in particular, went through several prototypes before the final design was achieved.
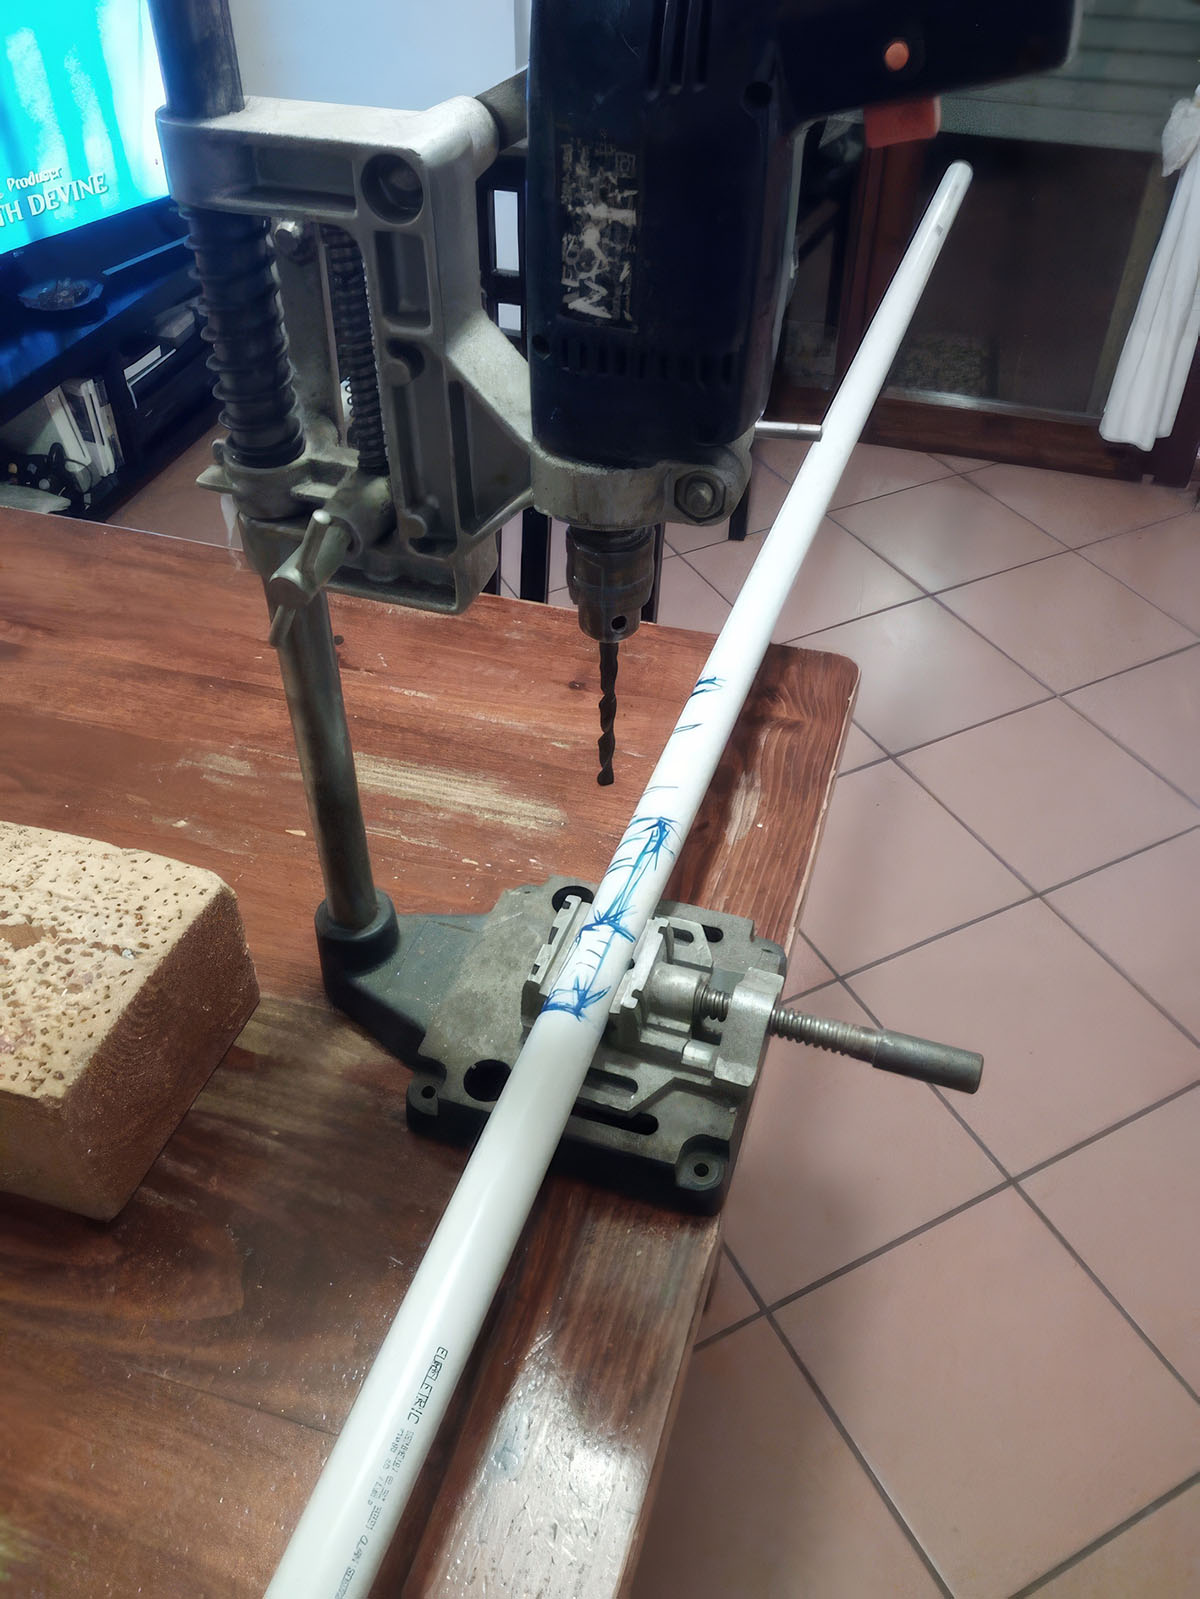
Once the total height of the suit was established, I prepared a large-diameter corrugated pipe with pre-drilled holes. This pipe served as the initial mounting point for the head. I then bolted a fiberglass bodice, molded to my back, onto the pipe. This combination of pipe and bodice created a robust load-bearing structure that supports the entire costume reliably and practically. Additionally, this frame allowed the suit to rest on the ground, offloading the total weight during breaks.
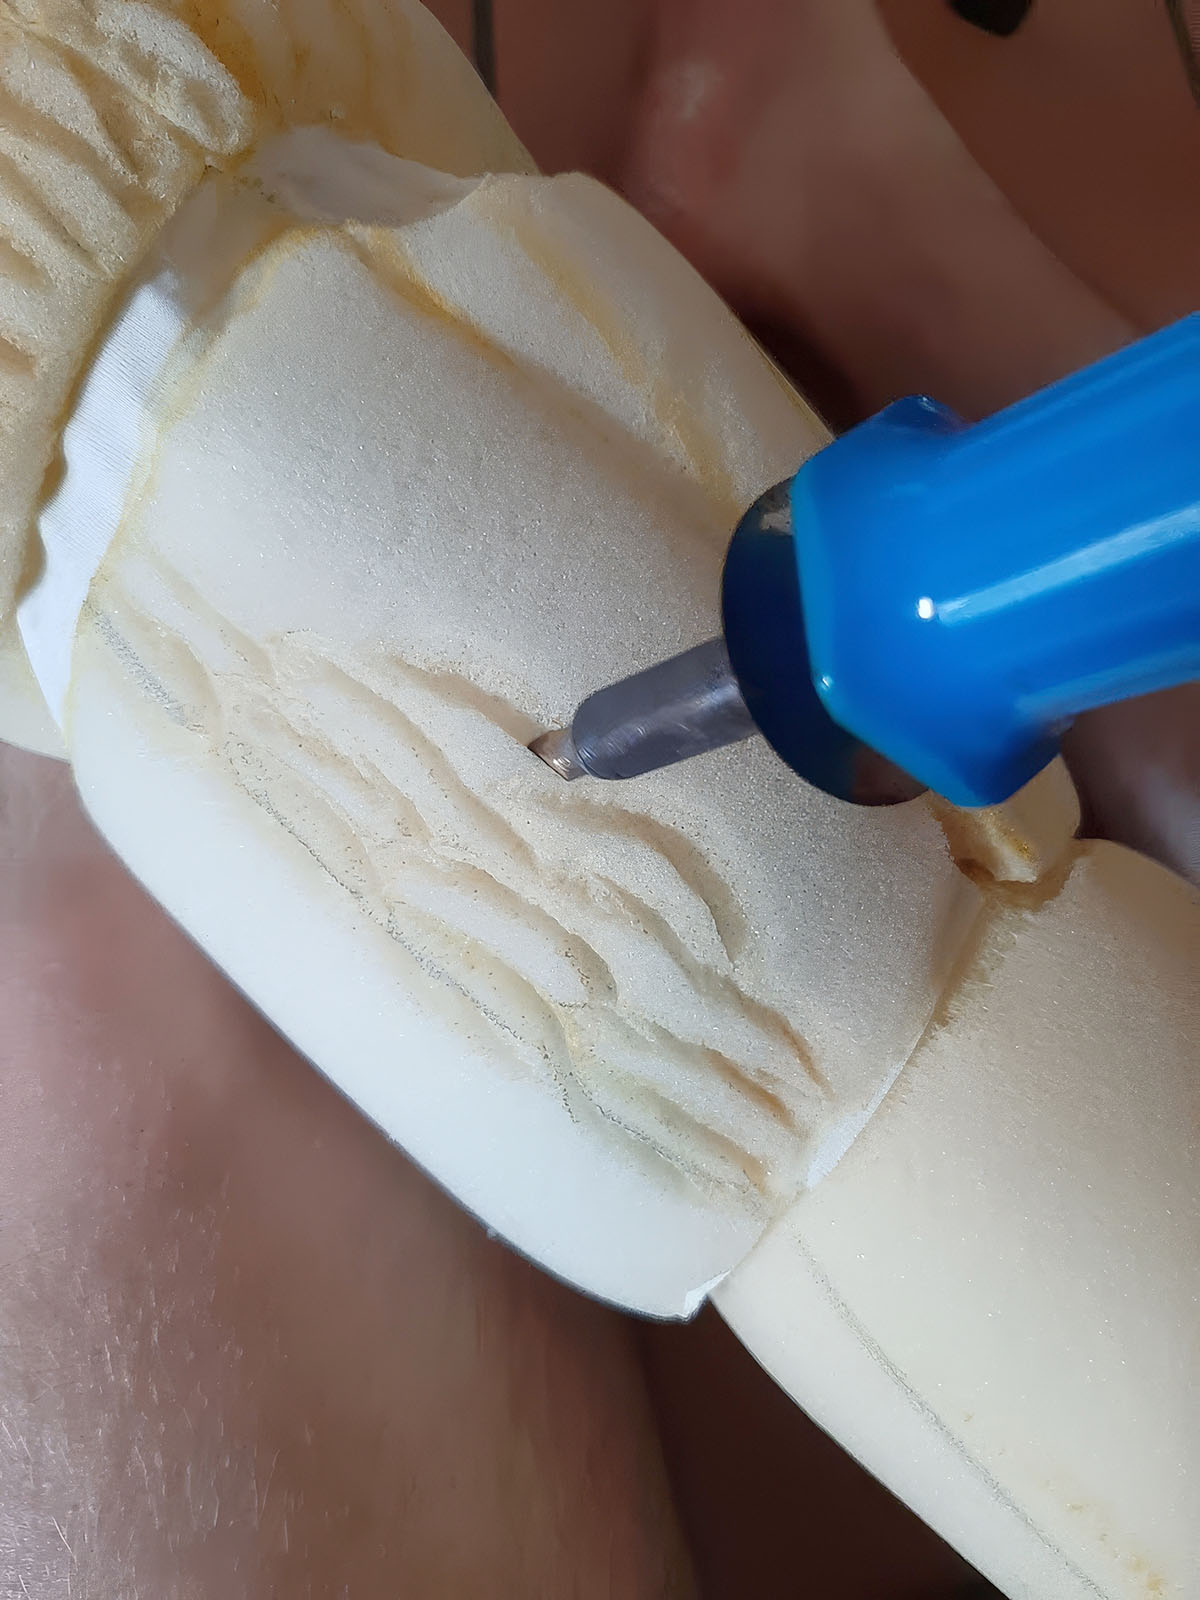
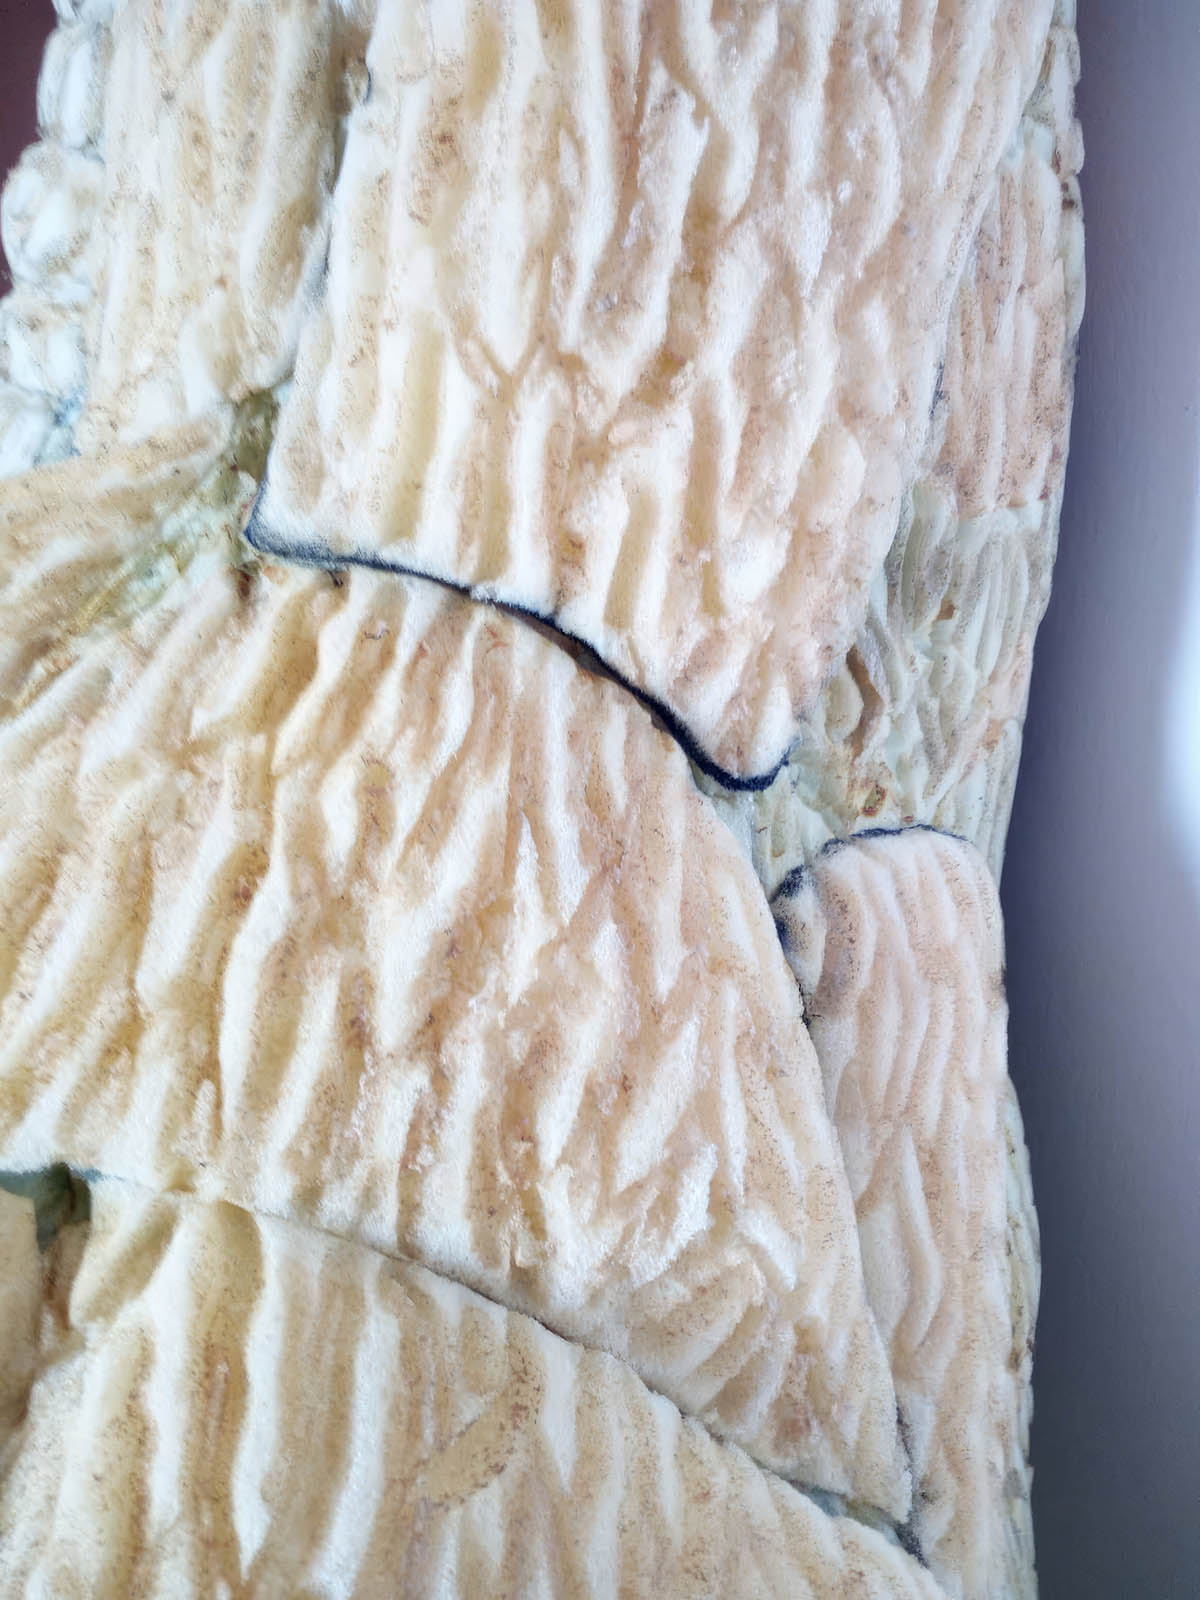
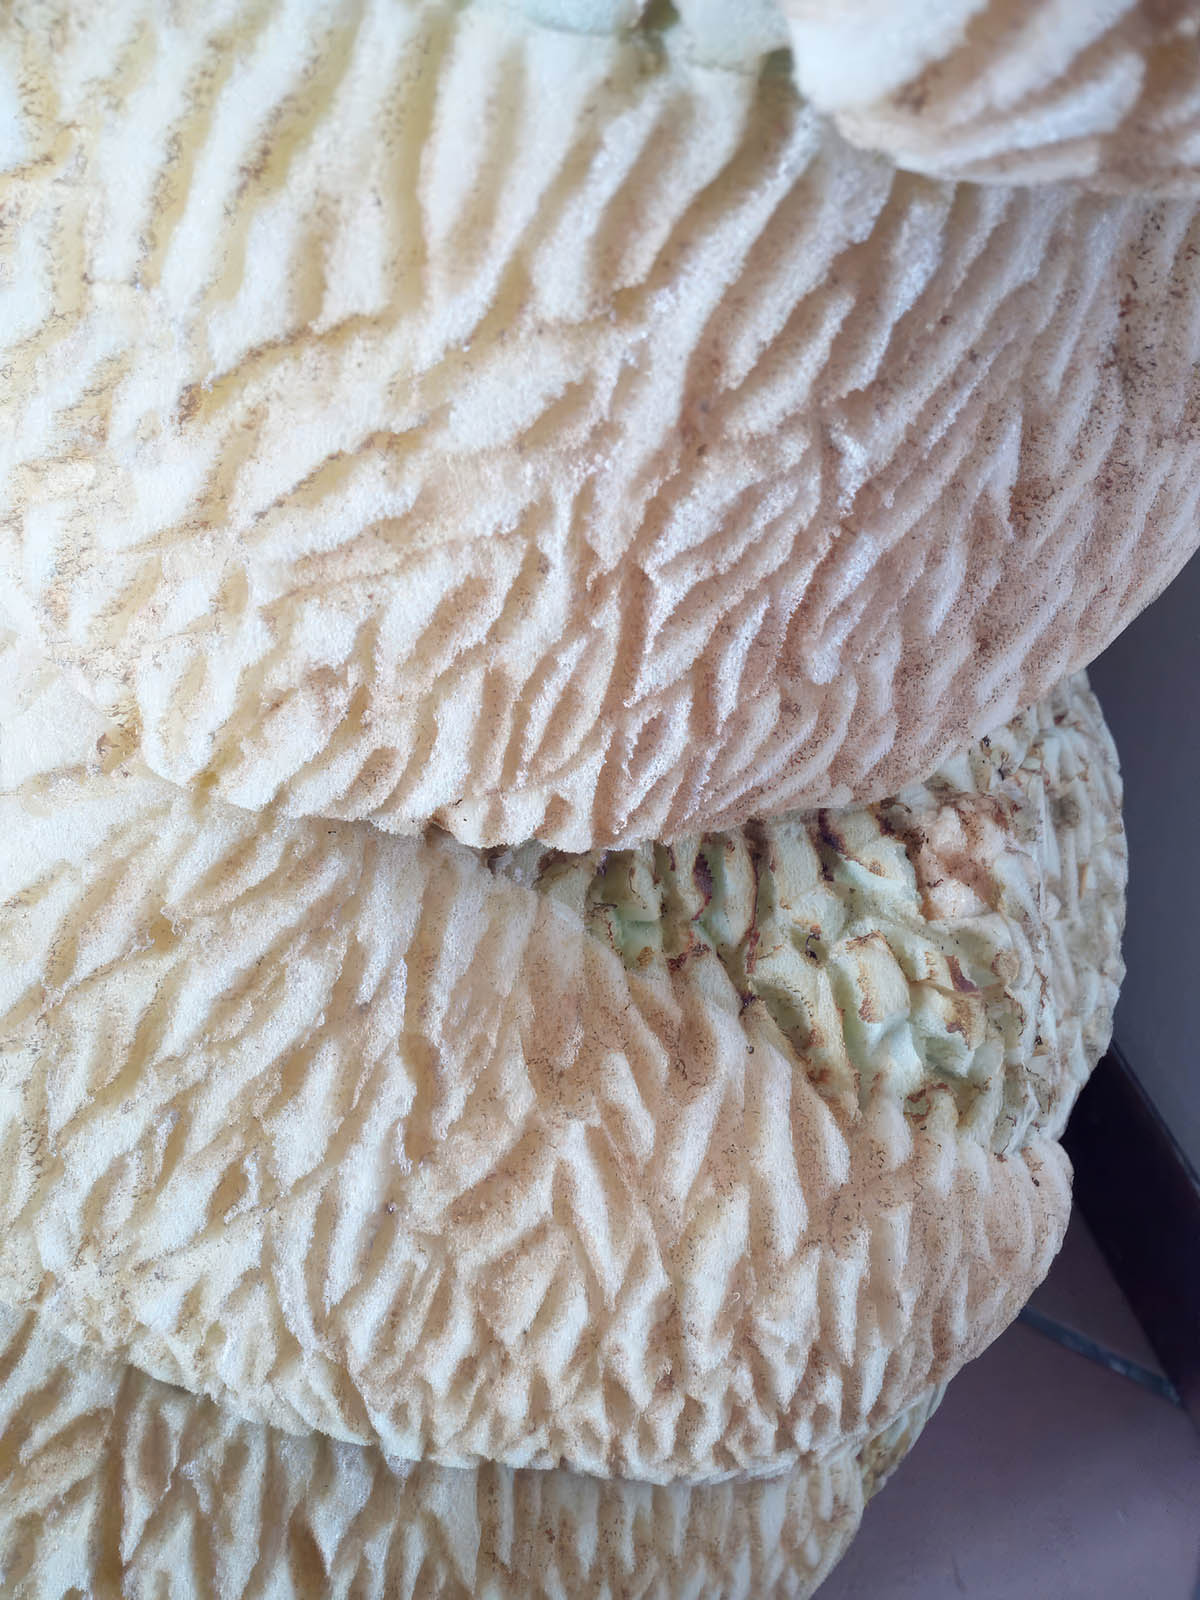
The initial body components were test-fitted and worn multiple times to evaluate mobility, clearance, and gait. Finally, the various skin textures were etched into the foam using a wood-burning tool (pyrograph).
The Head
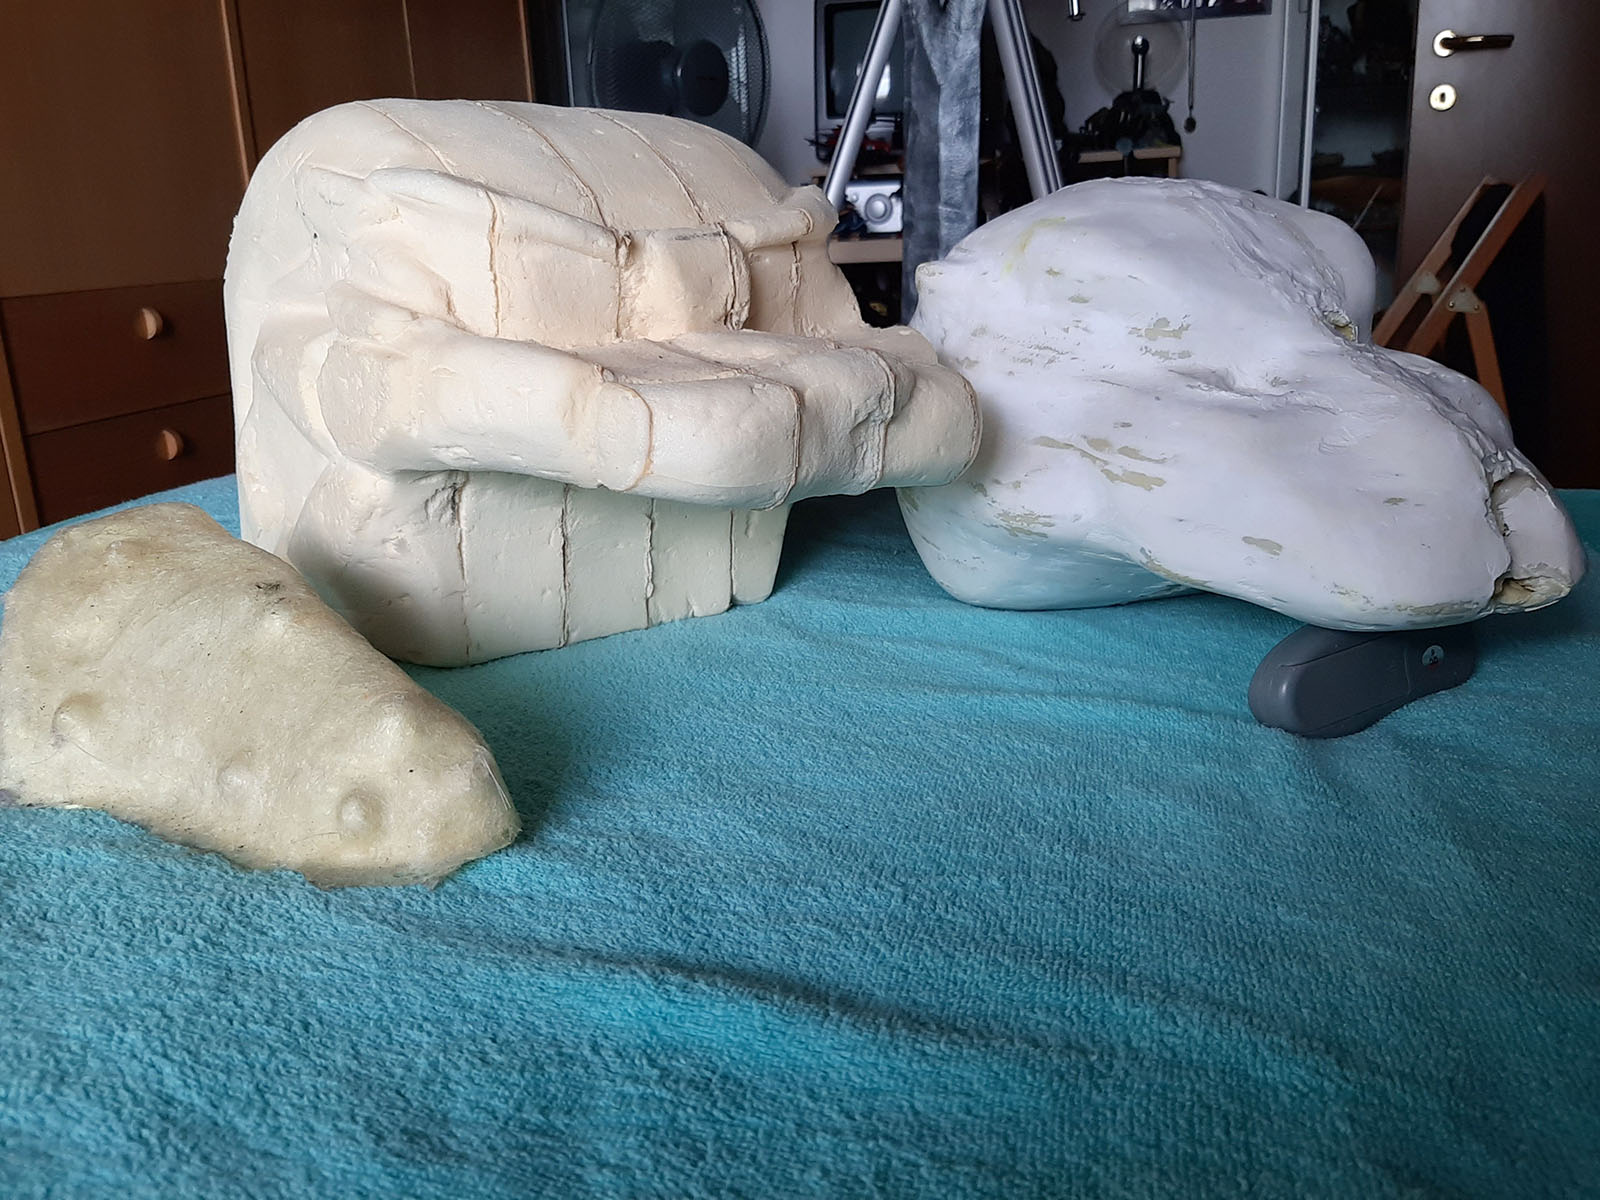
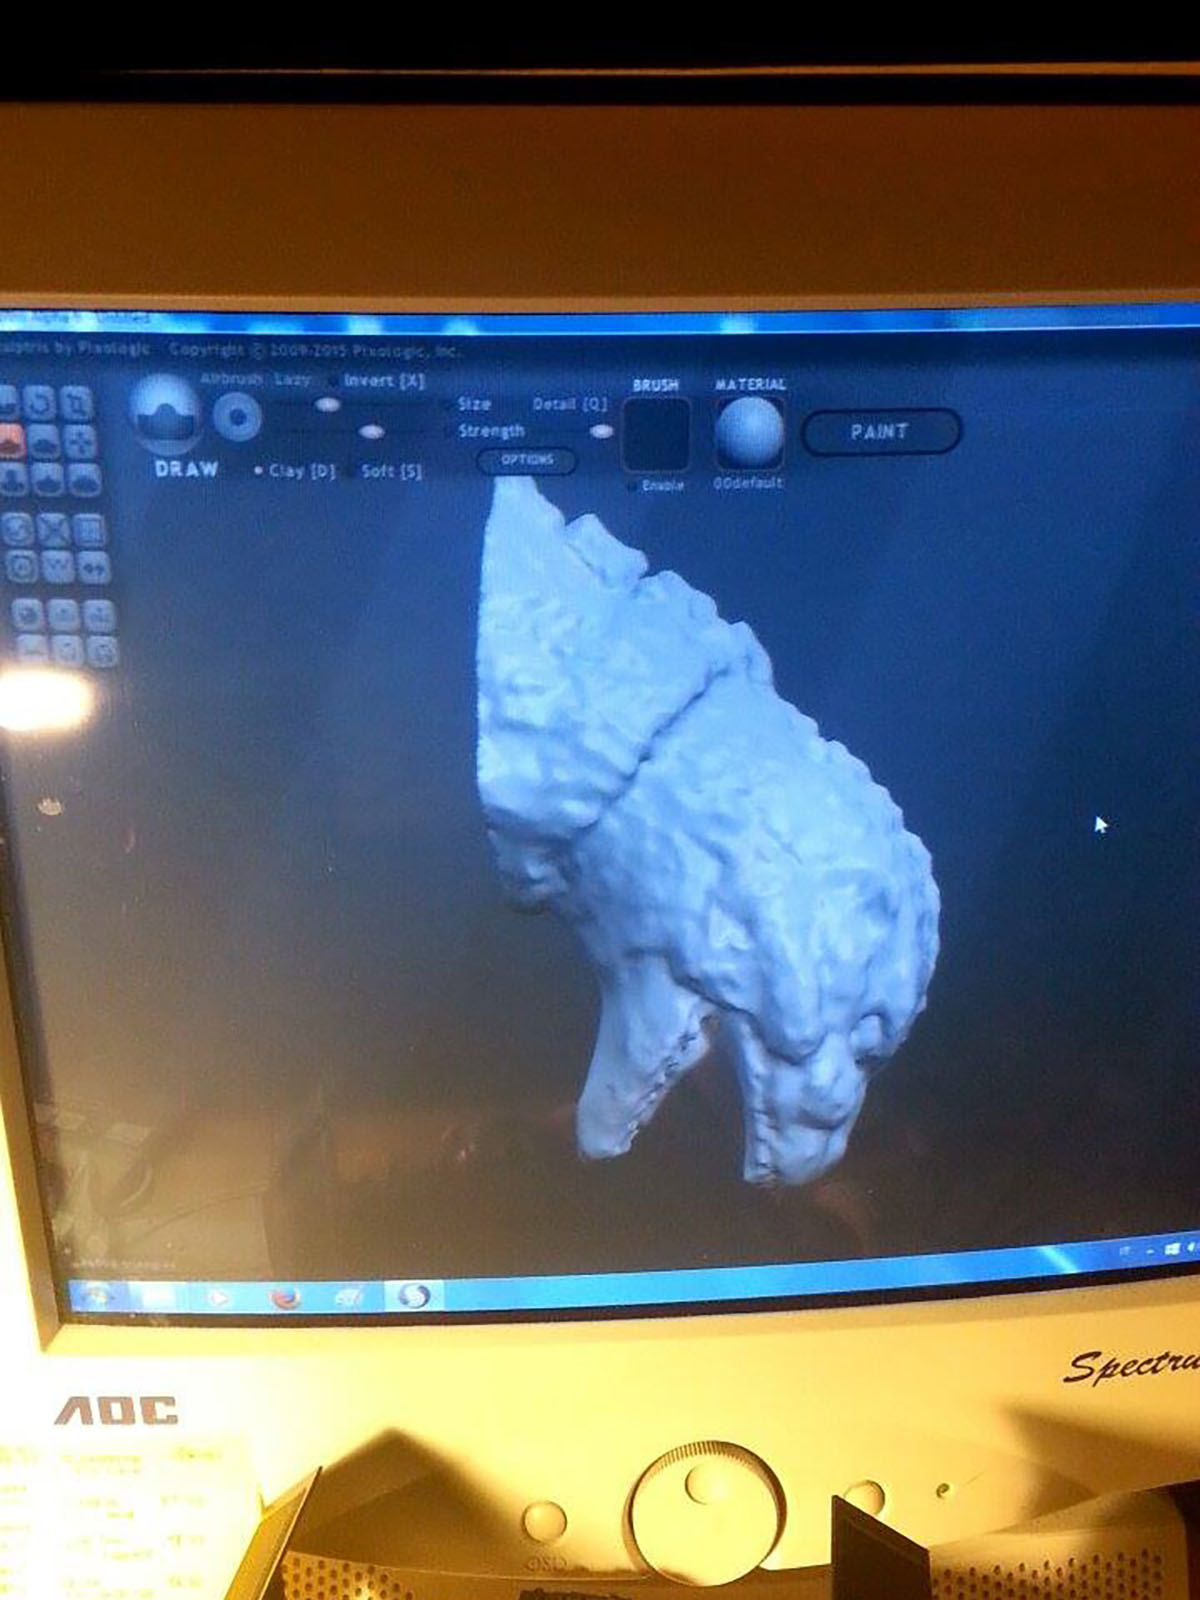
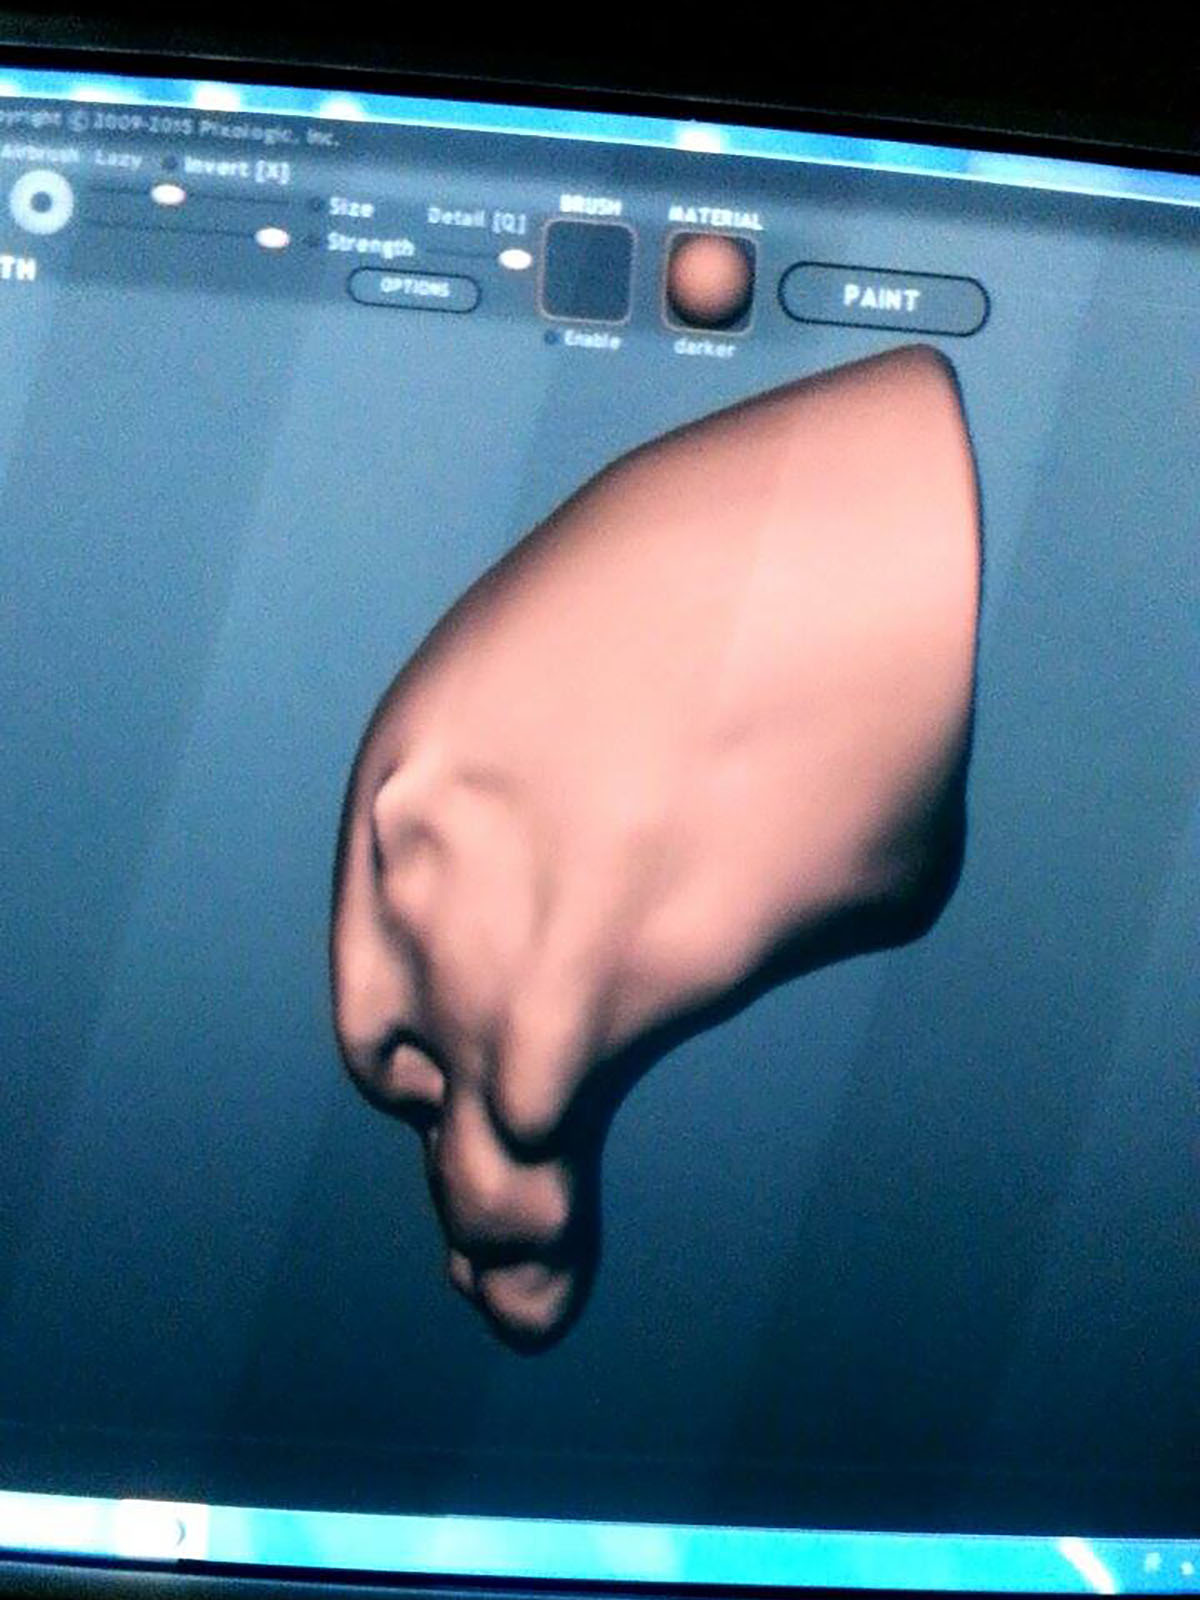
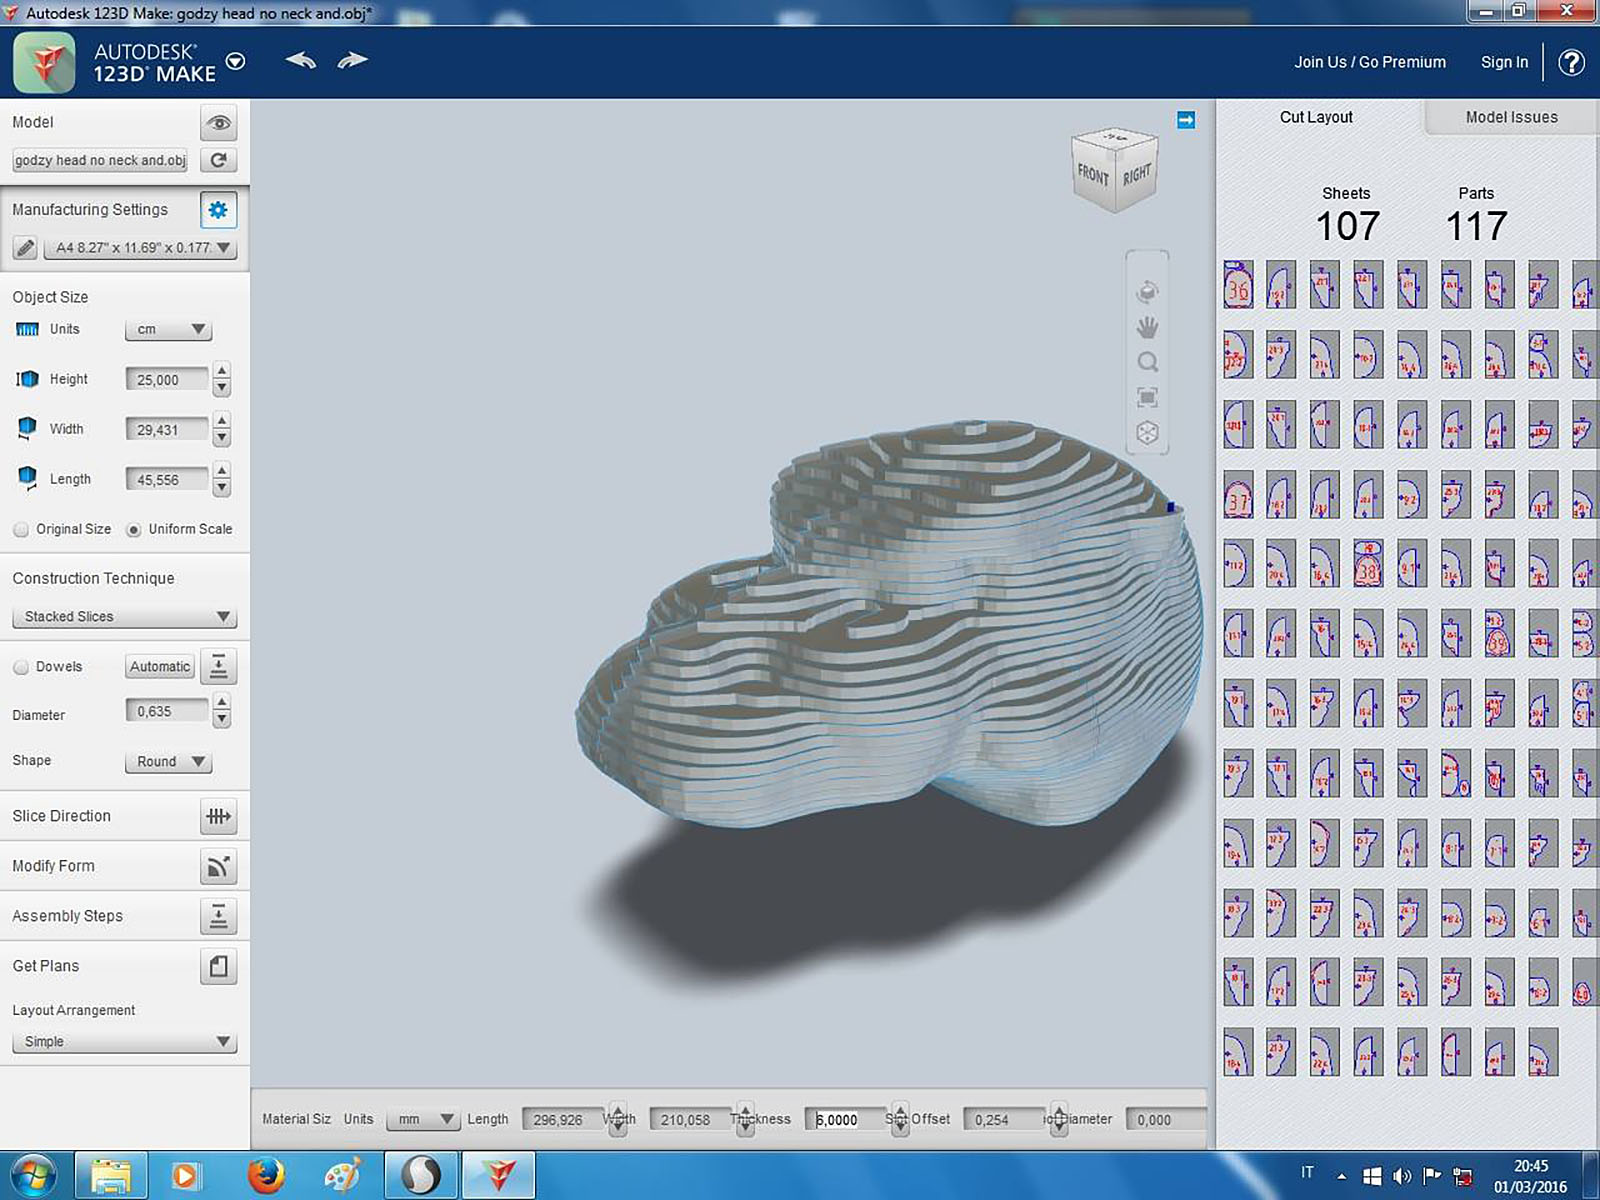
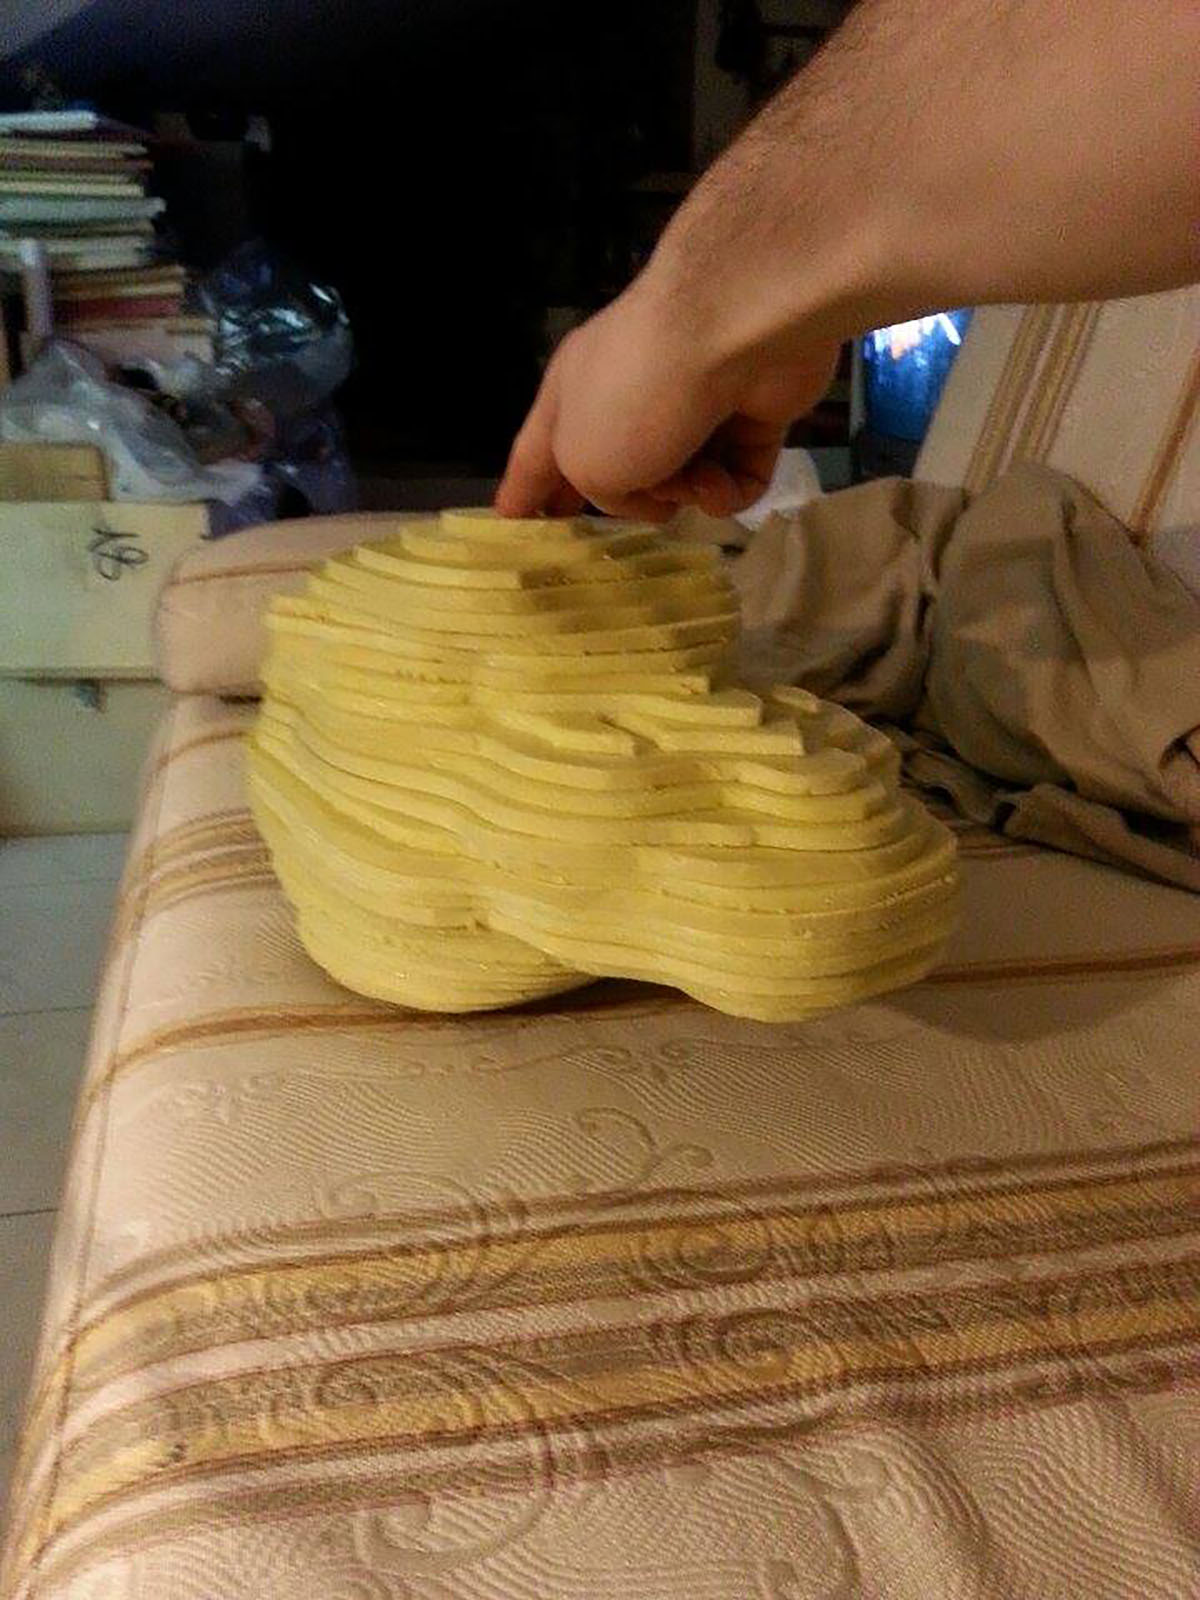
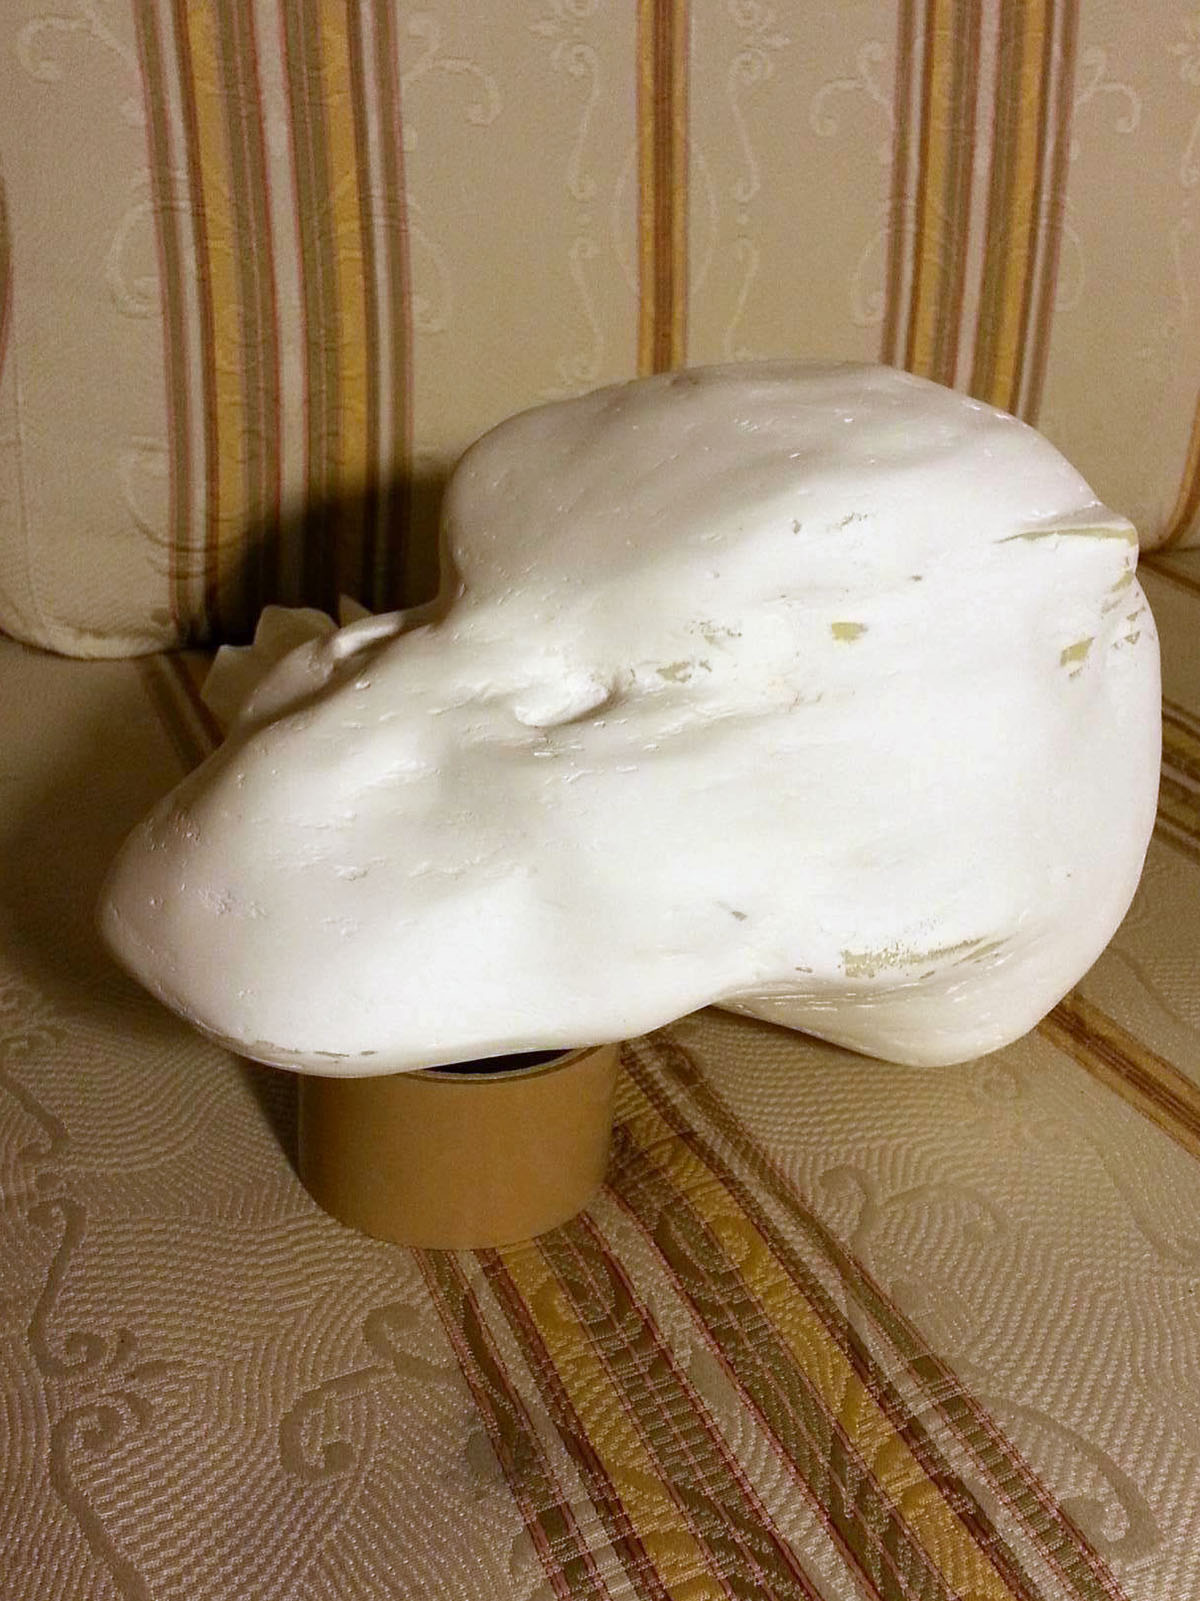
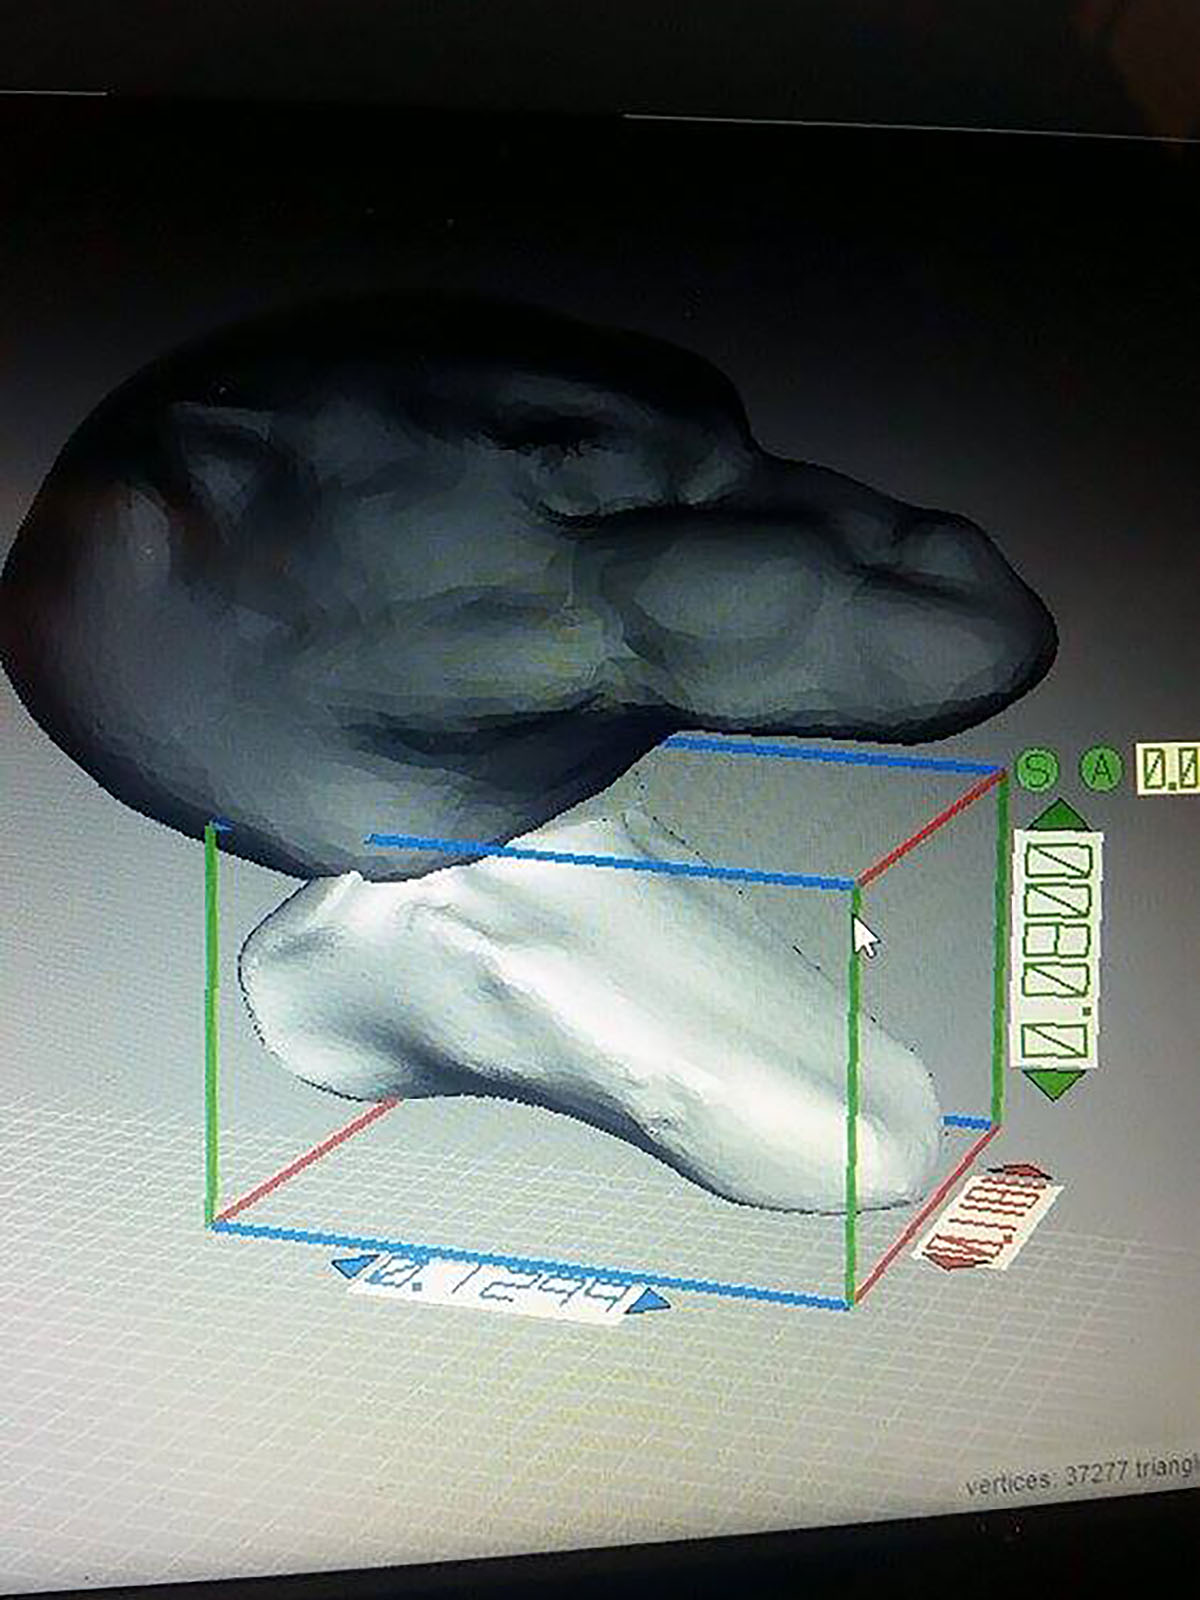
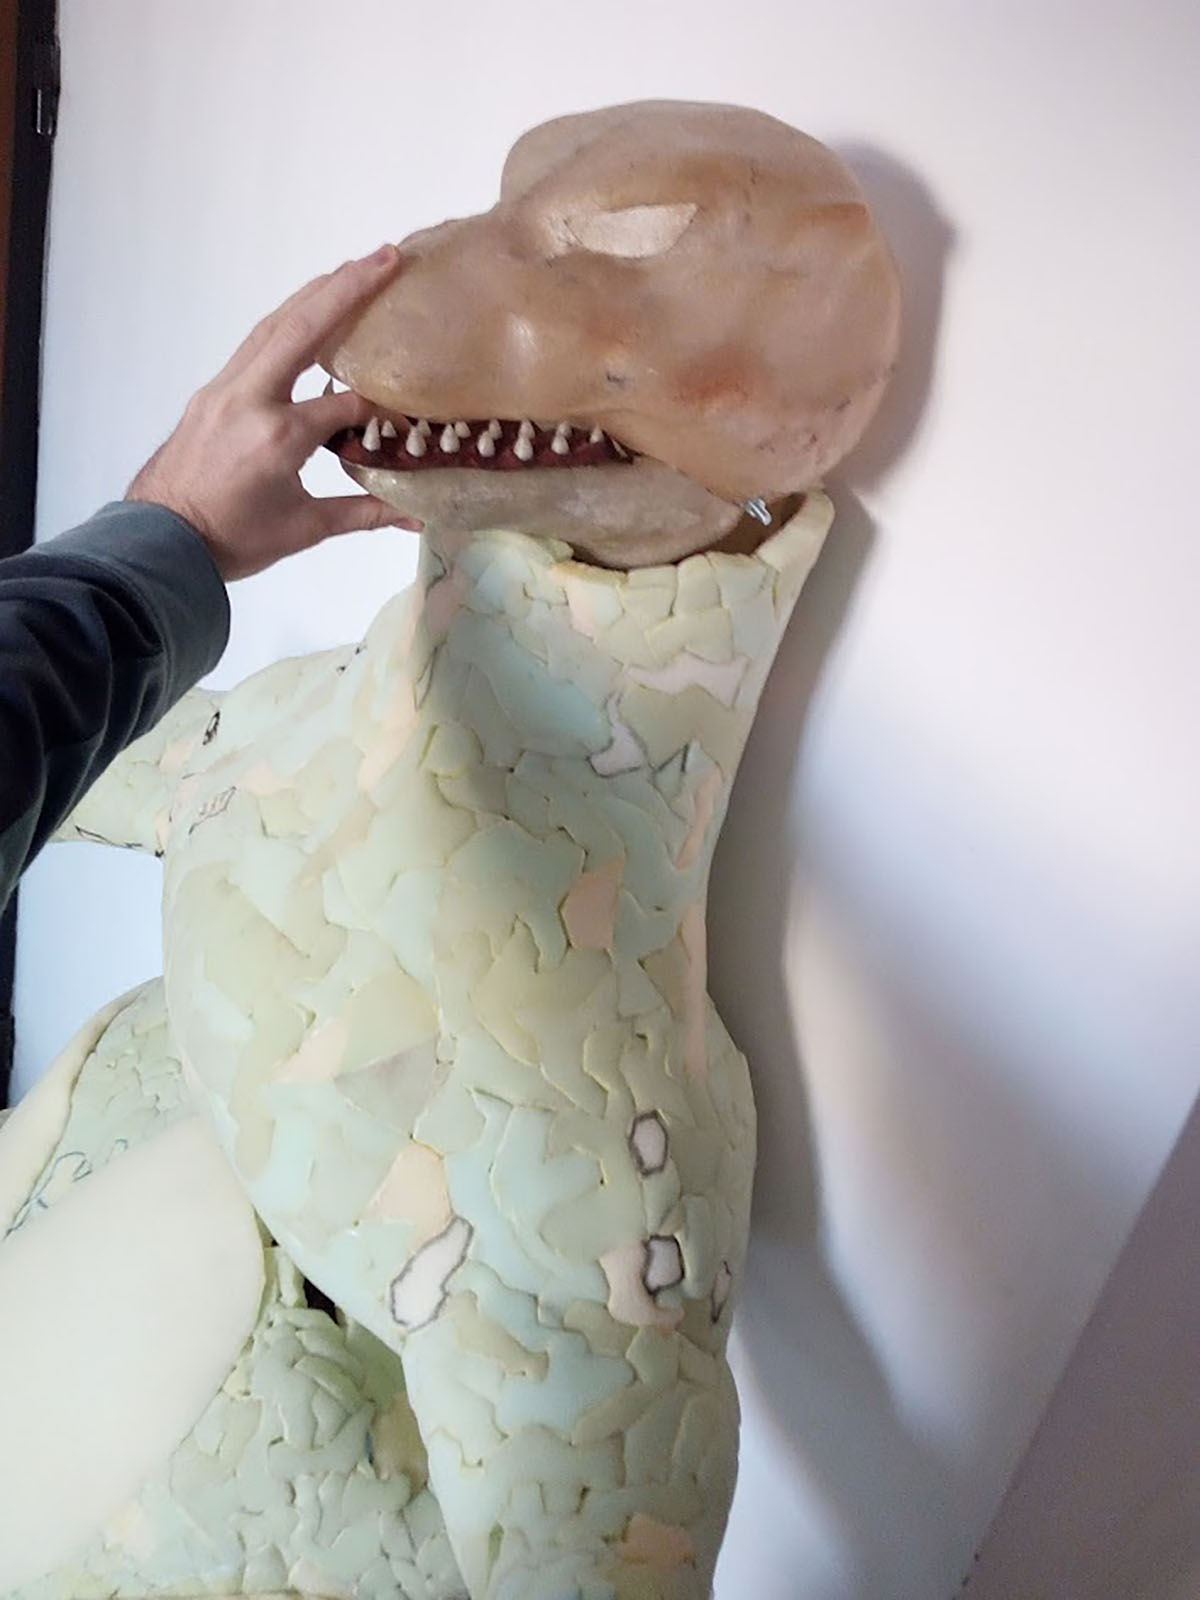
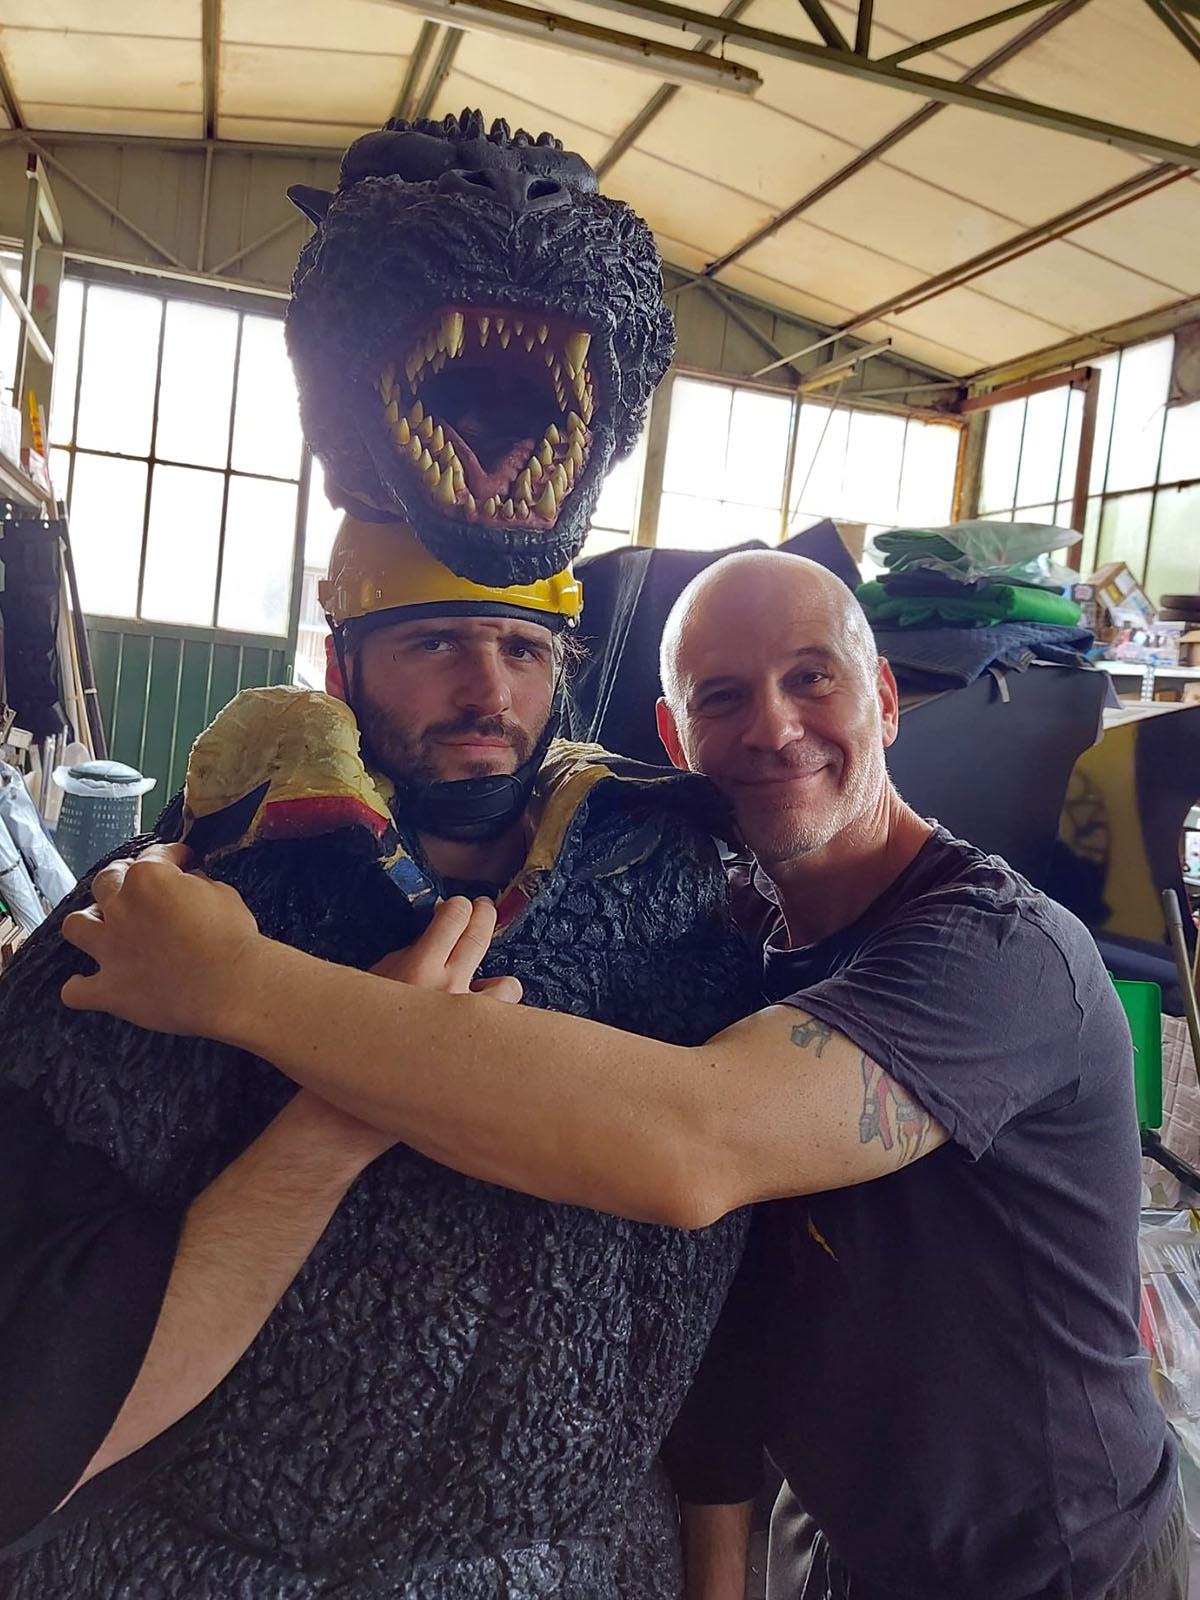
Starting from a 3D scan of an action figure, Andrea isolated the head section. I then imported this data into Autodesk, which generated the slices (cross-sections) to be transferred onto expanded polystyrene. Once these layers were glued together, I obtained the base form, which was then carved and sanded down.
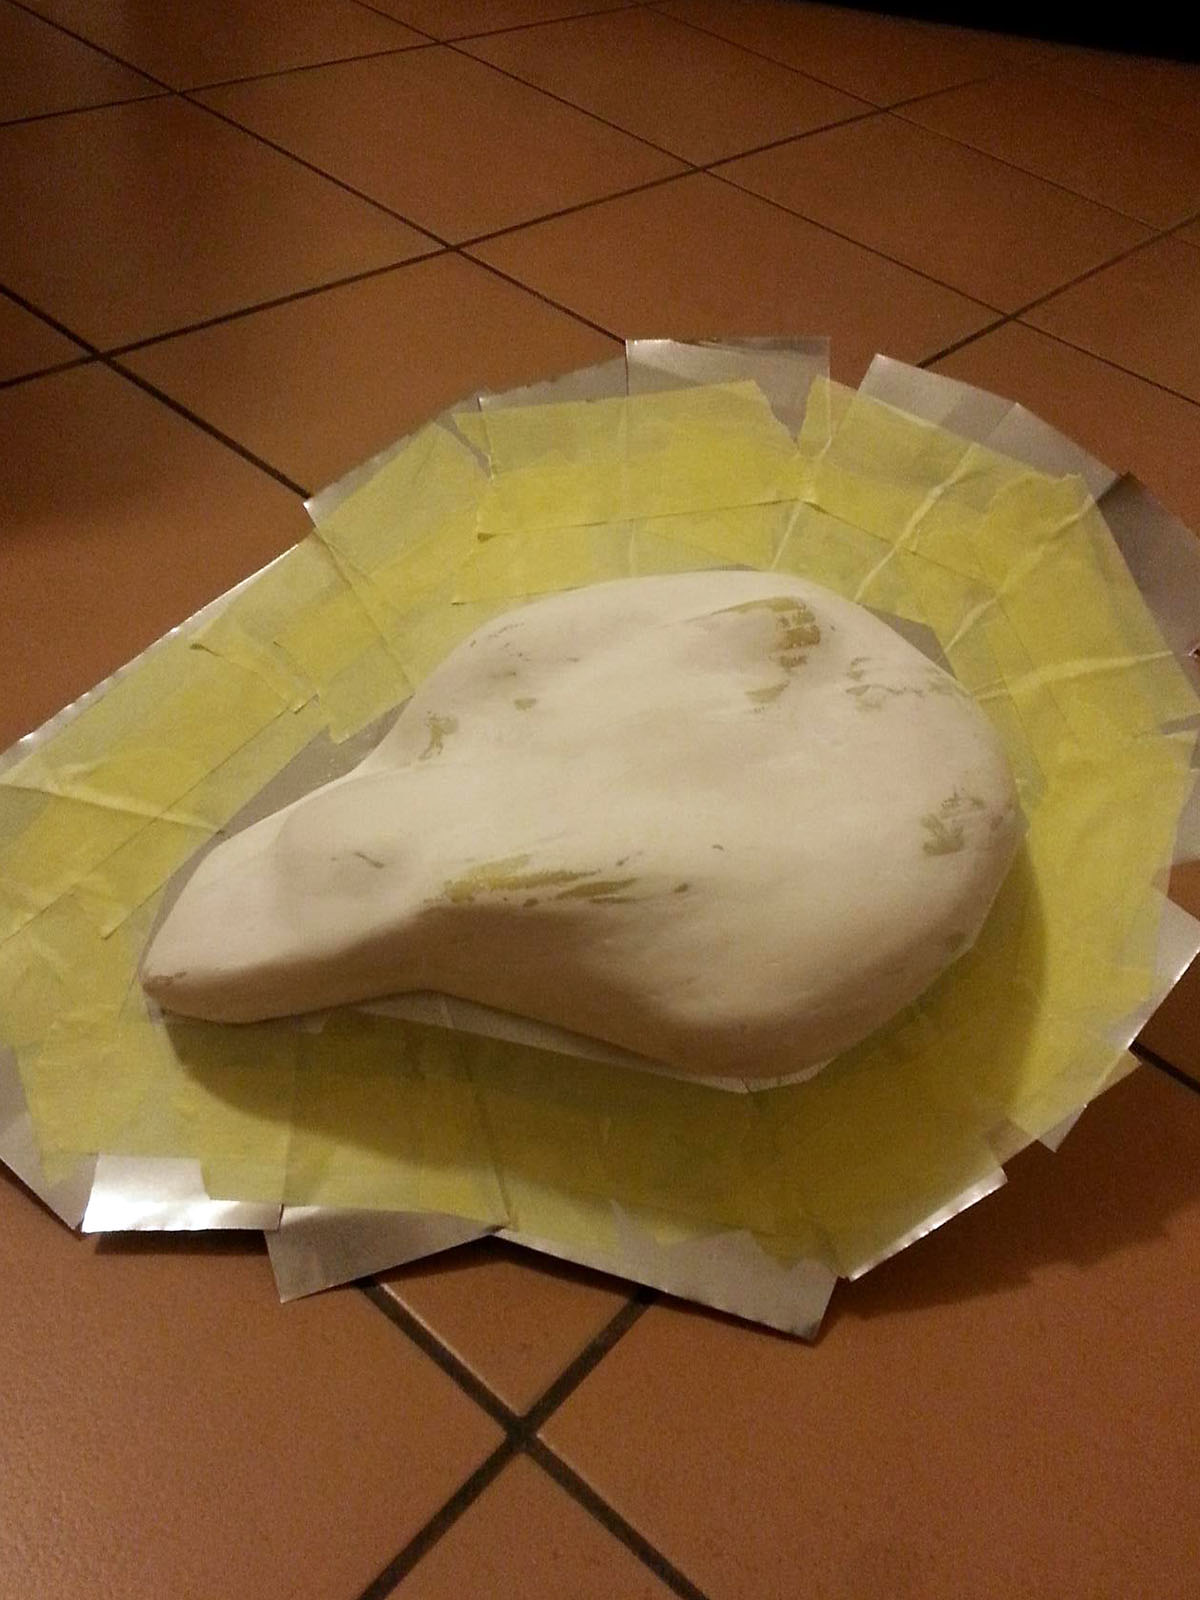
Once the object was smooth and uniform, I made a central cut to allow for the insertion of shims (divider plates).
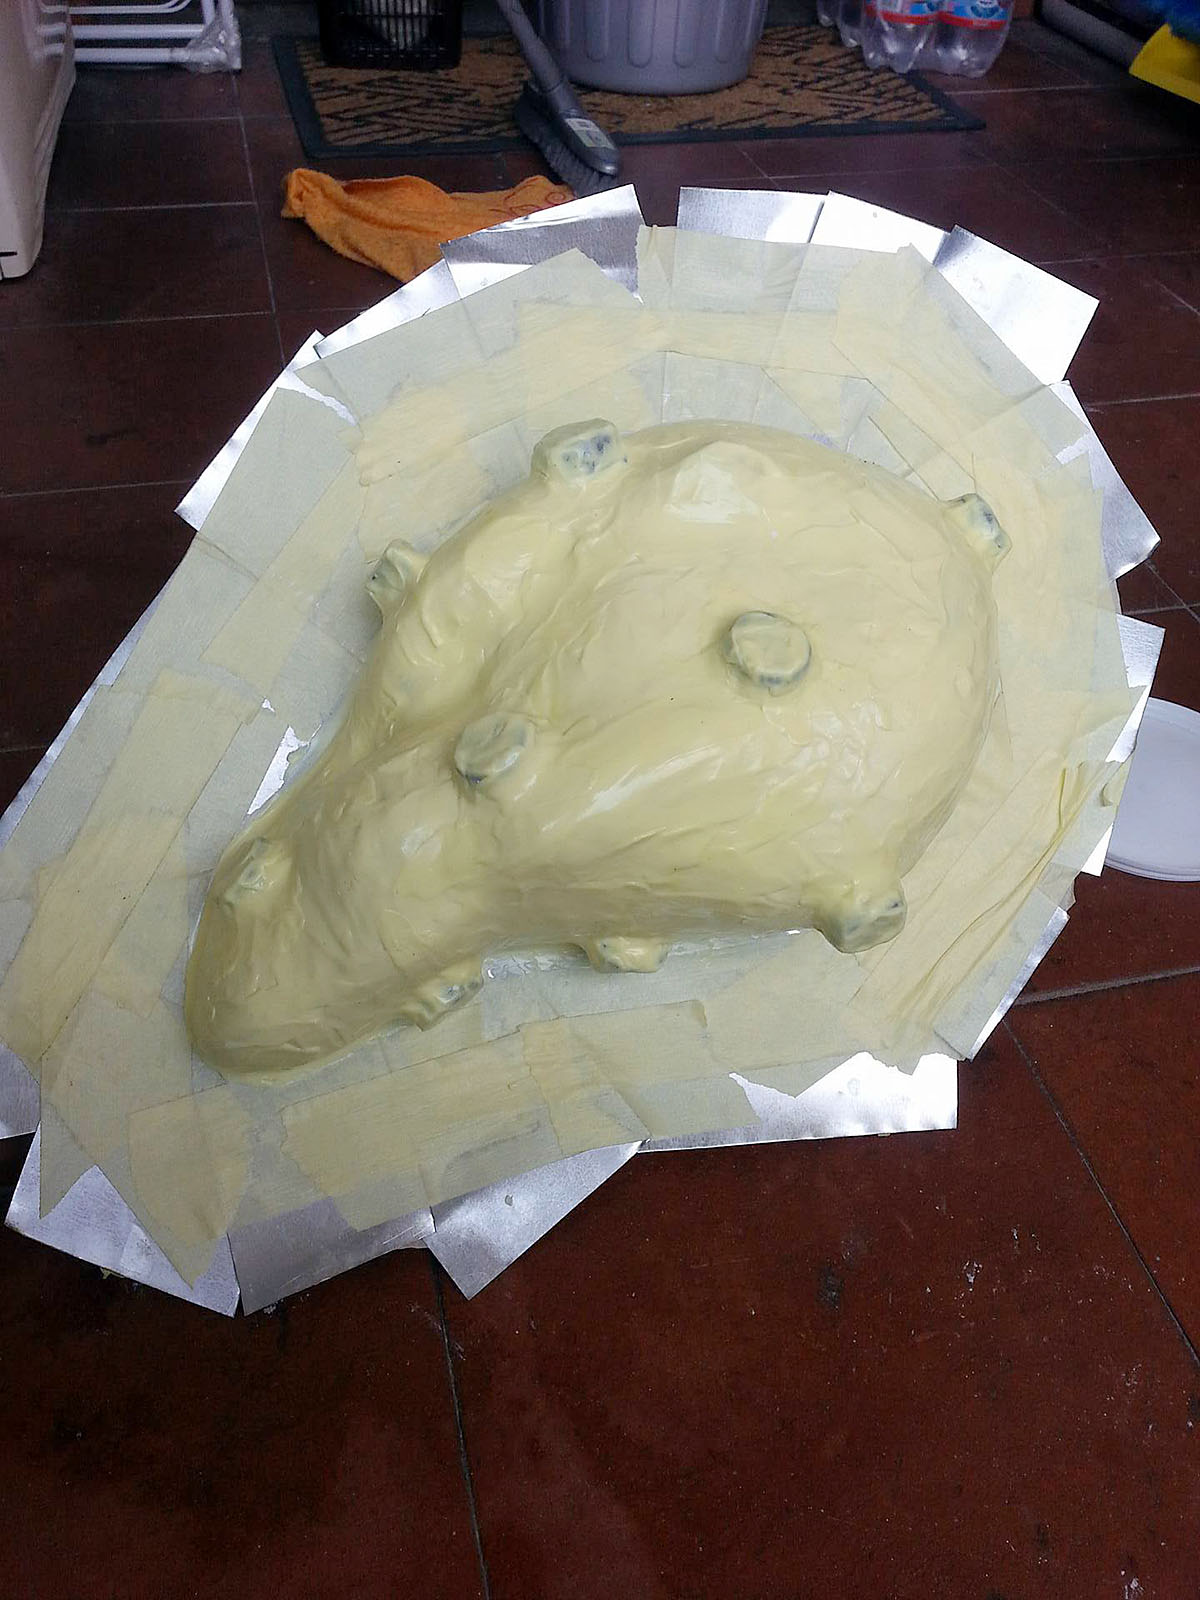
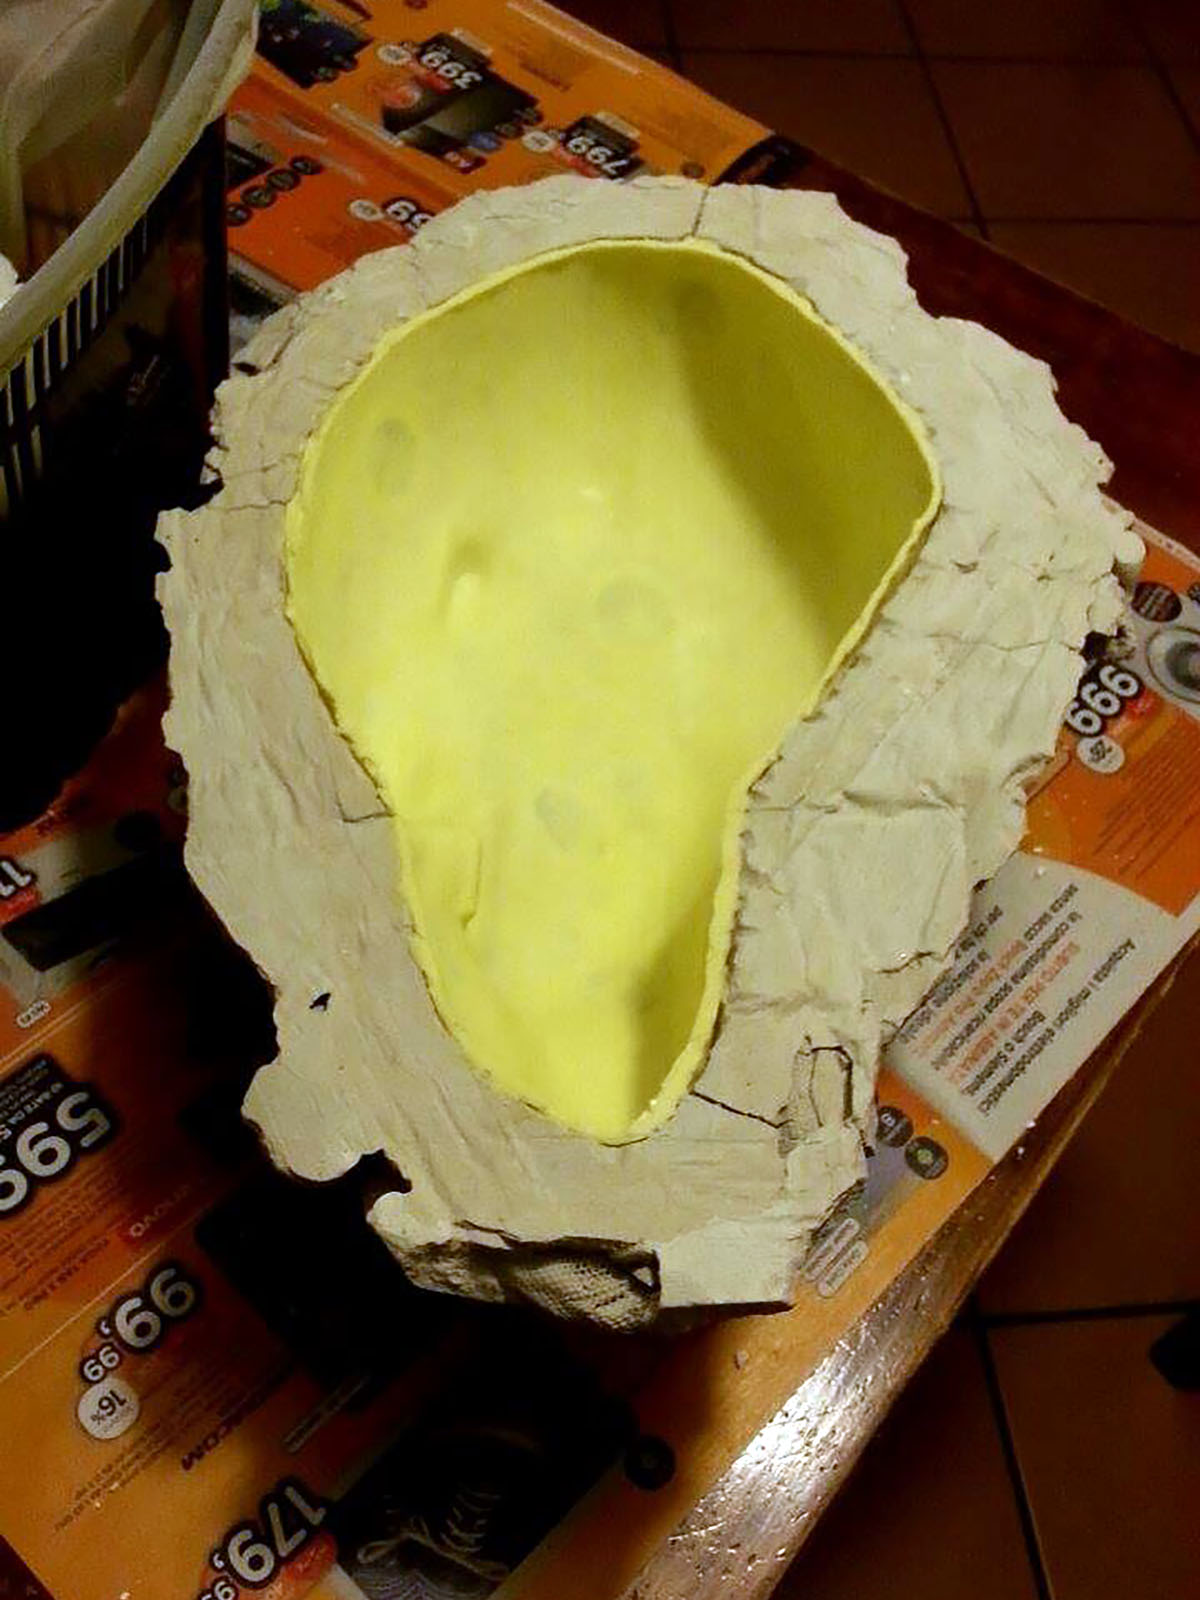
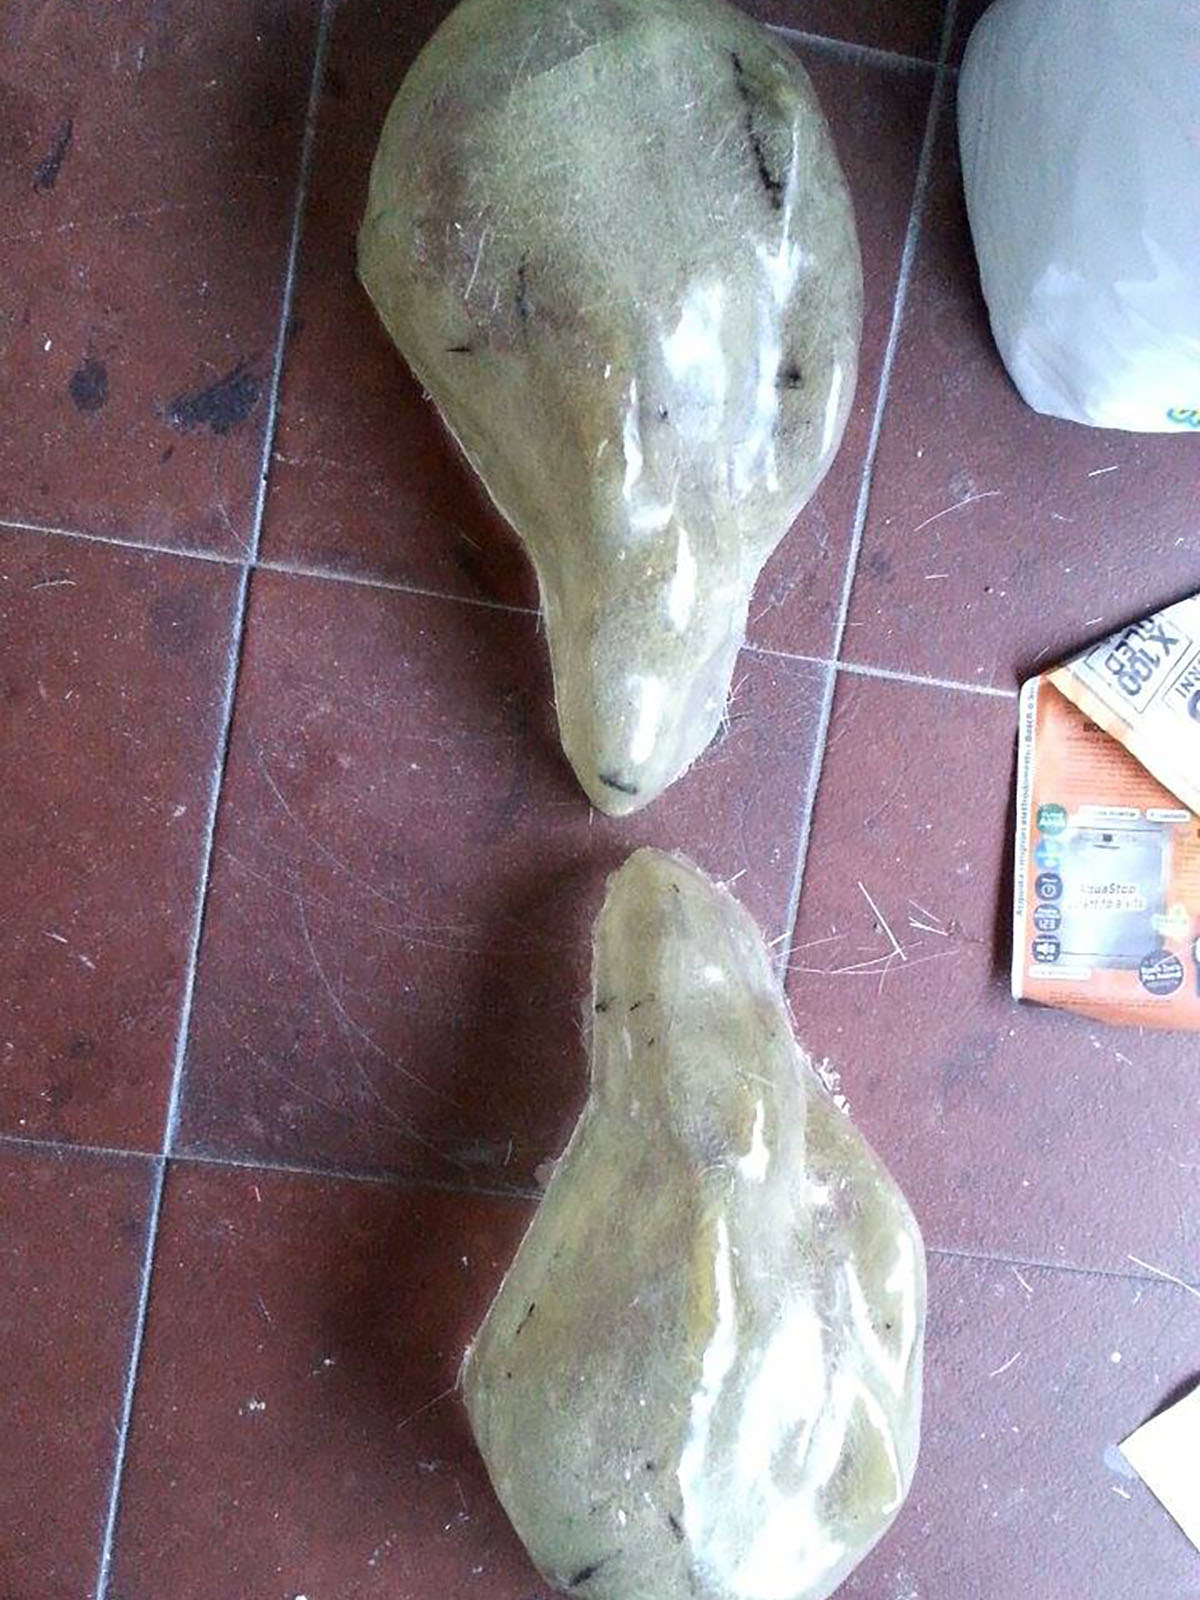
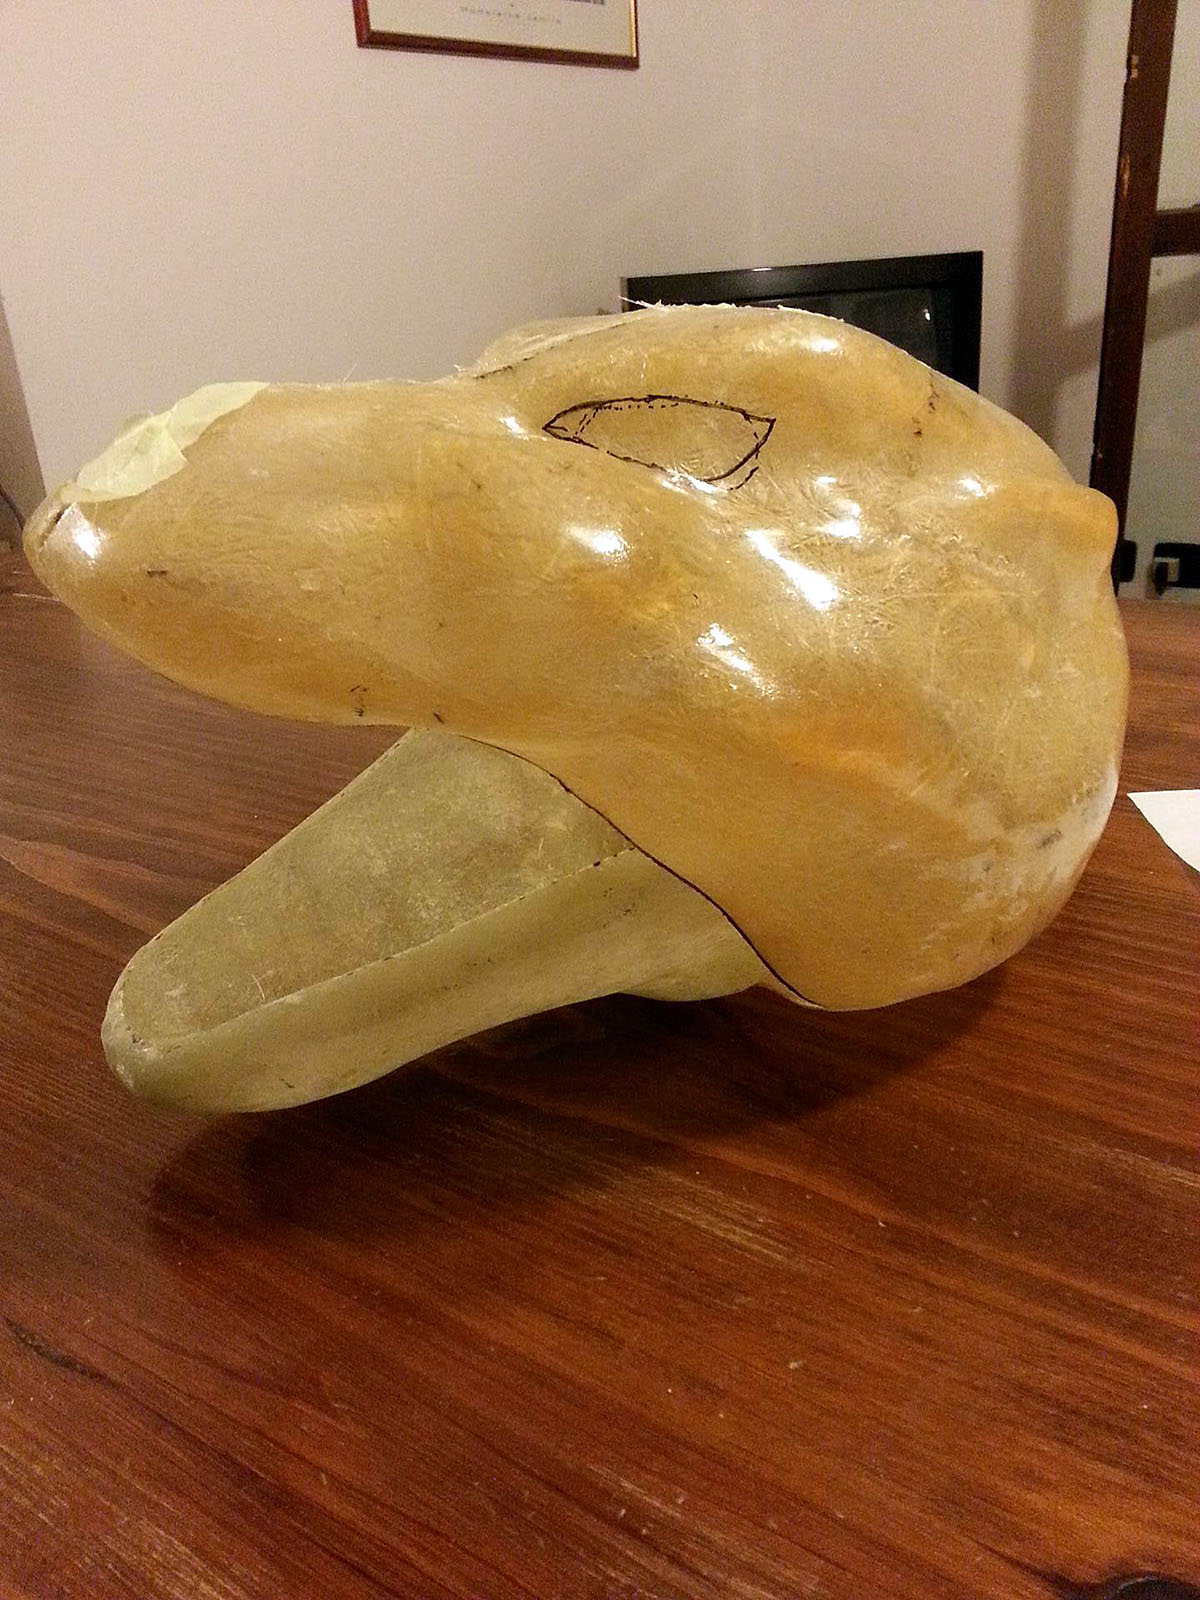
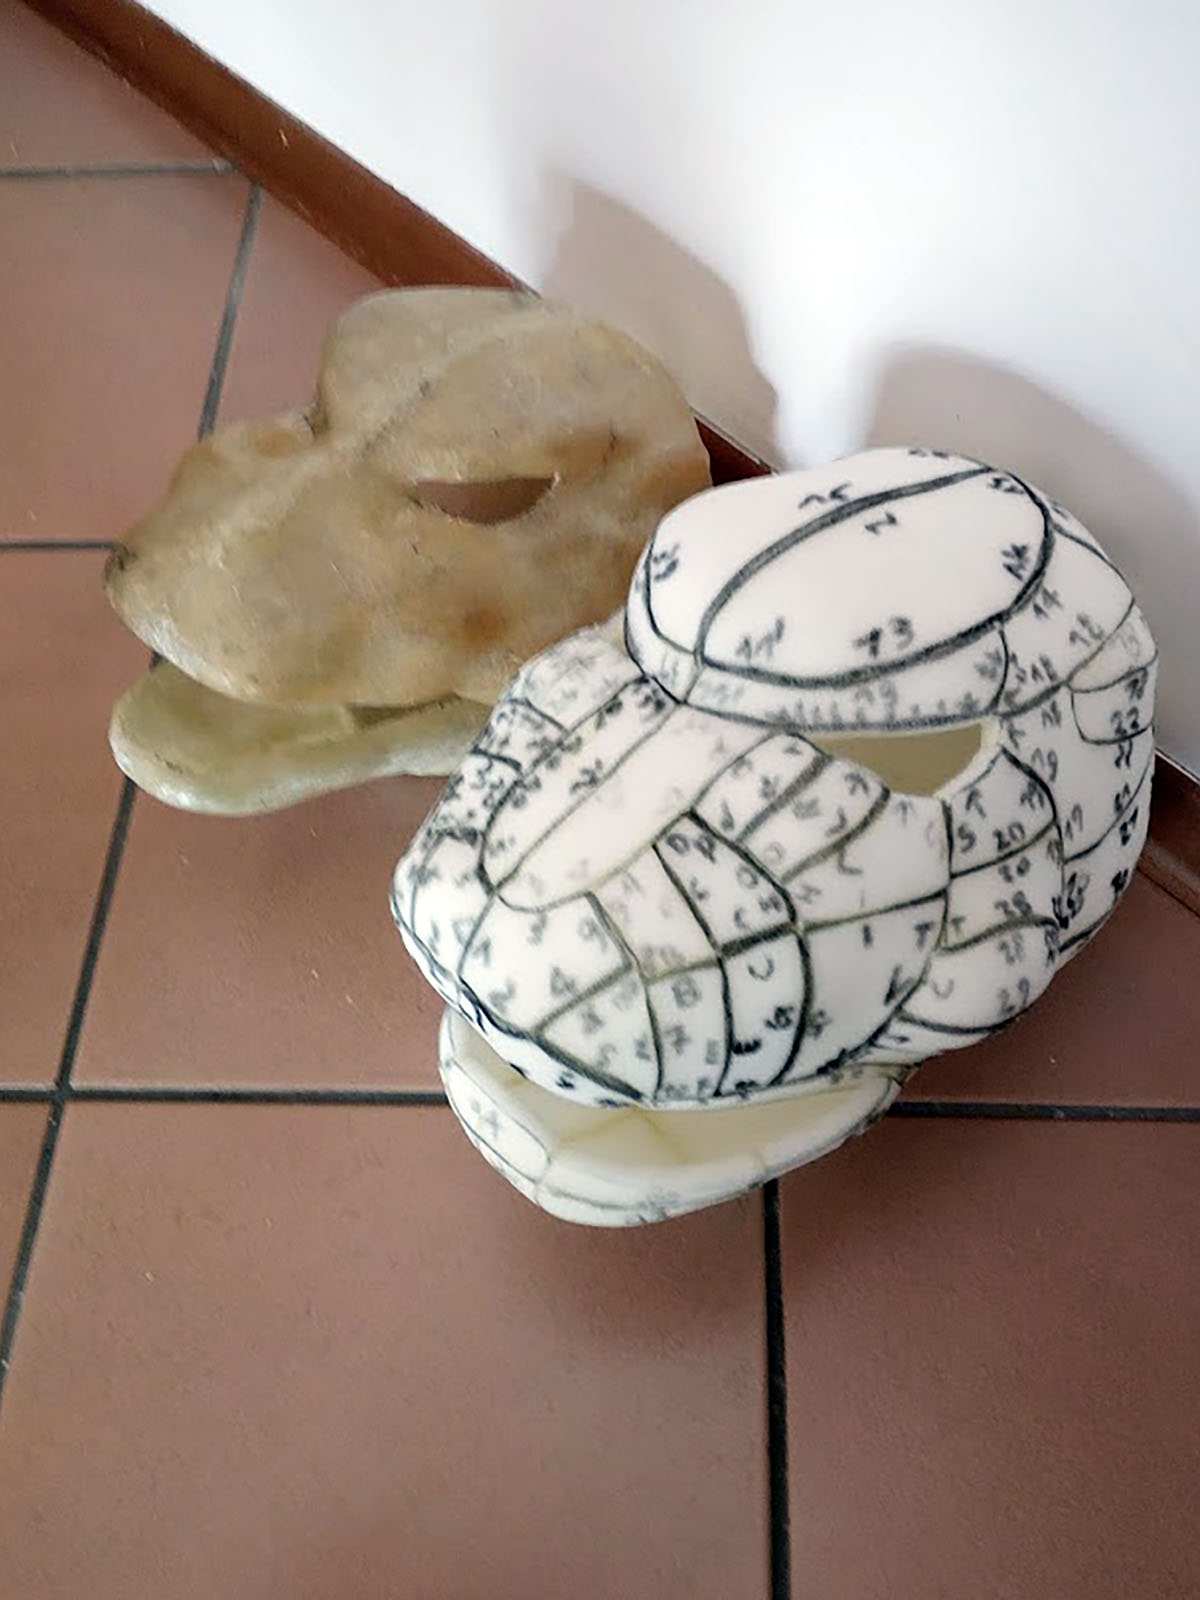
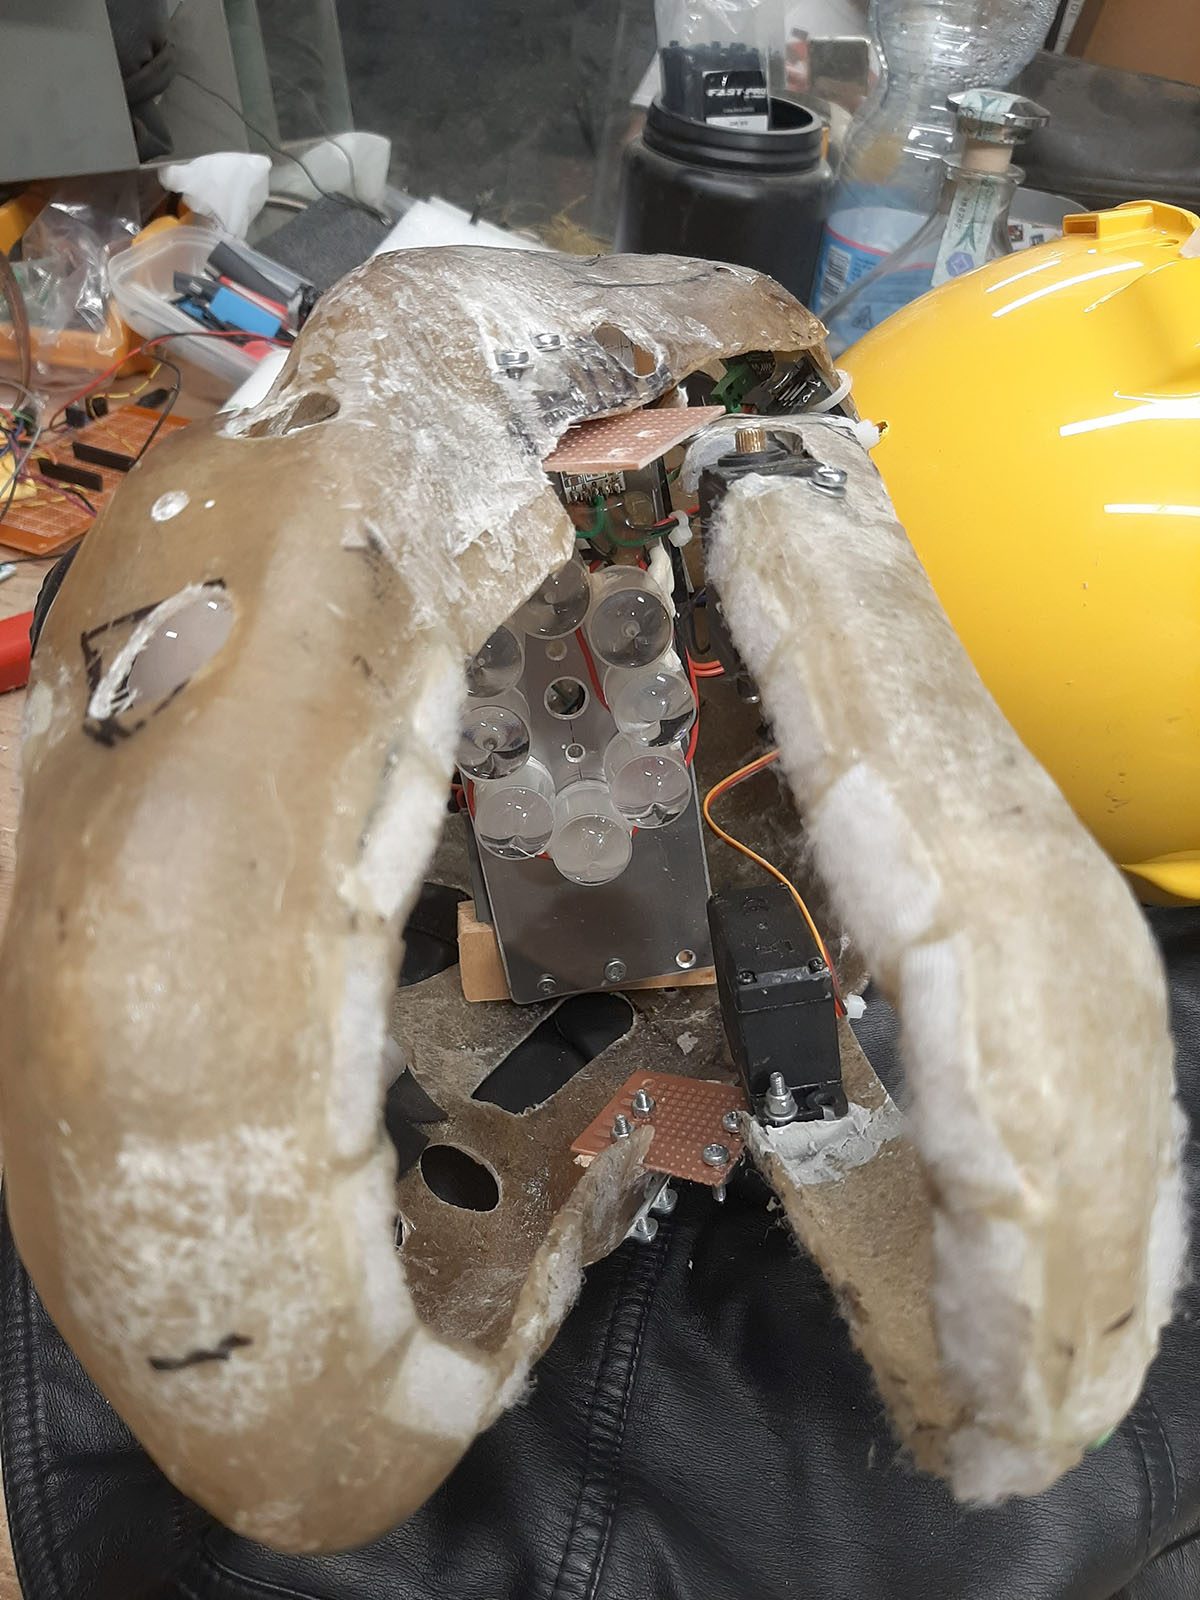
I applied silicone putty to both sections of the head master; once cured, I added a plaster mother mold to provide rigid support. After removing the master, the two silicone molds were ready for the fiberglass layup. By joining the two halves, I obtained the Godzilla skull. Following the same process for the jaw, the piece was ready for the installation of servo motors, lights, and the conduit for the “atomic breath,” as well as the initial eye-fitting tests.
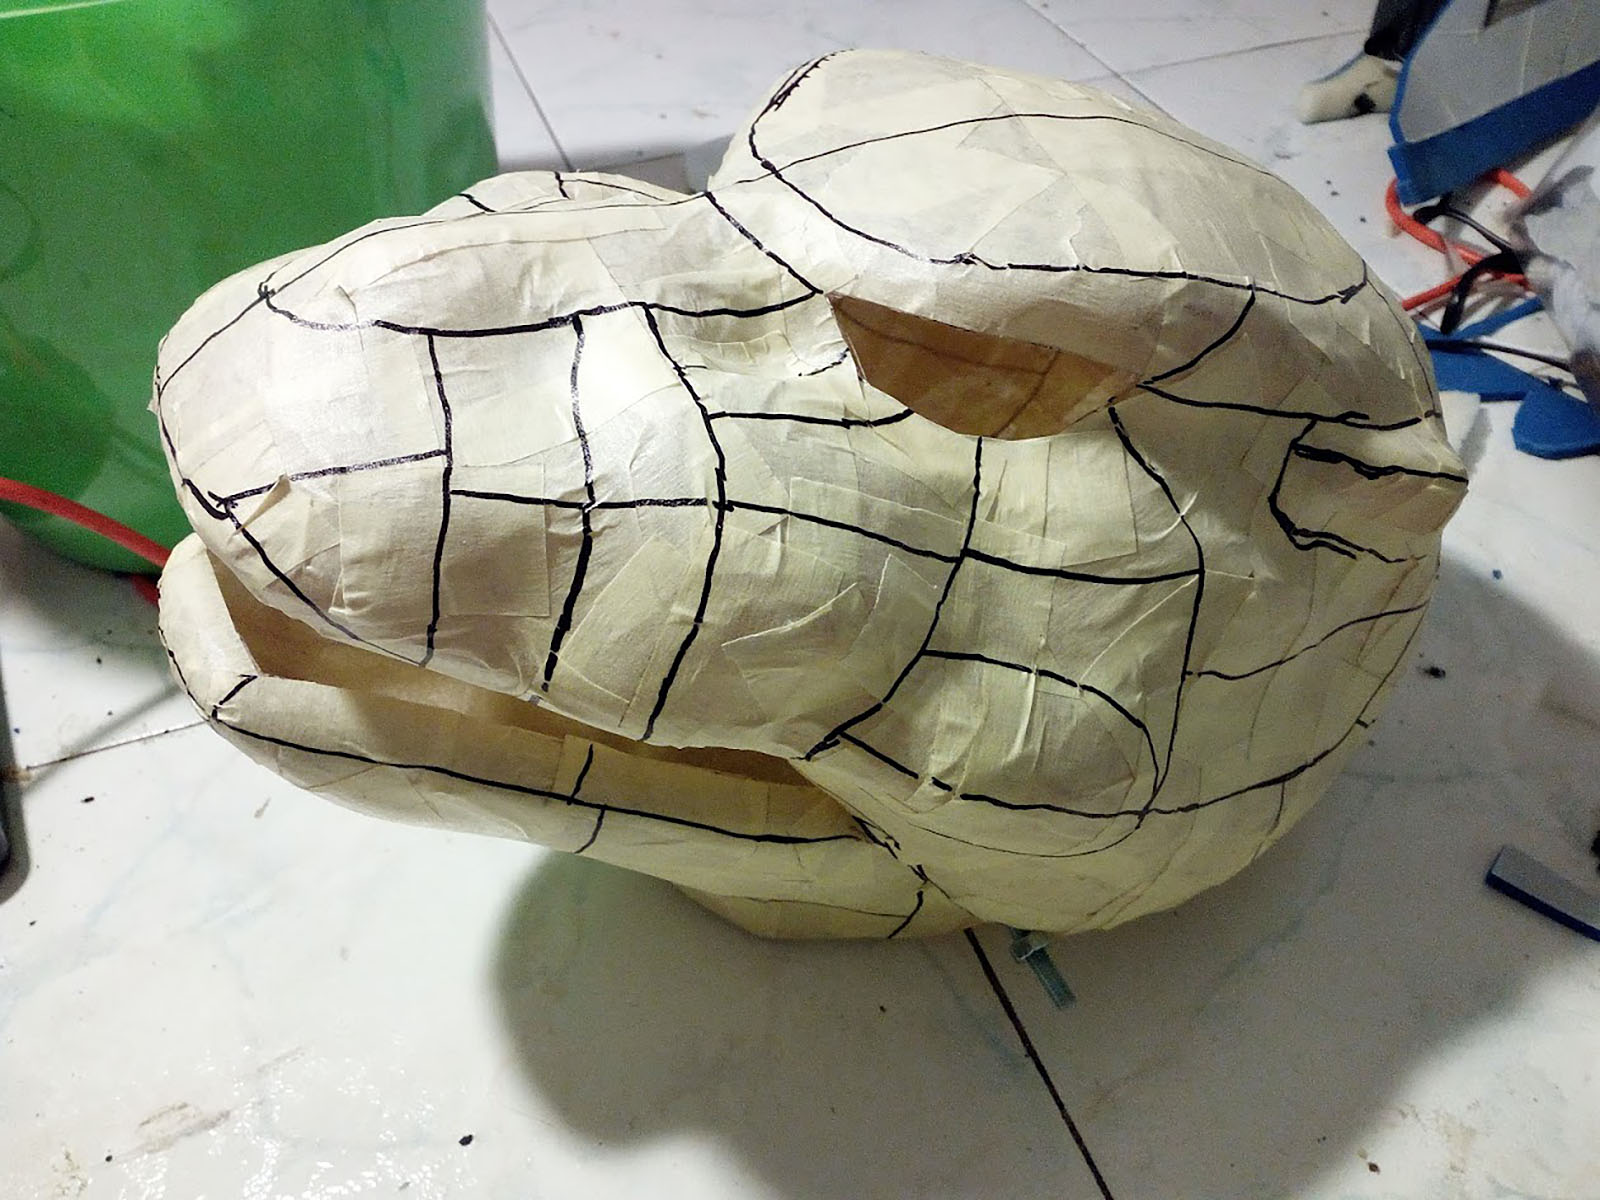
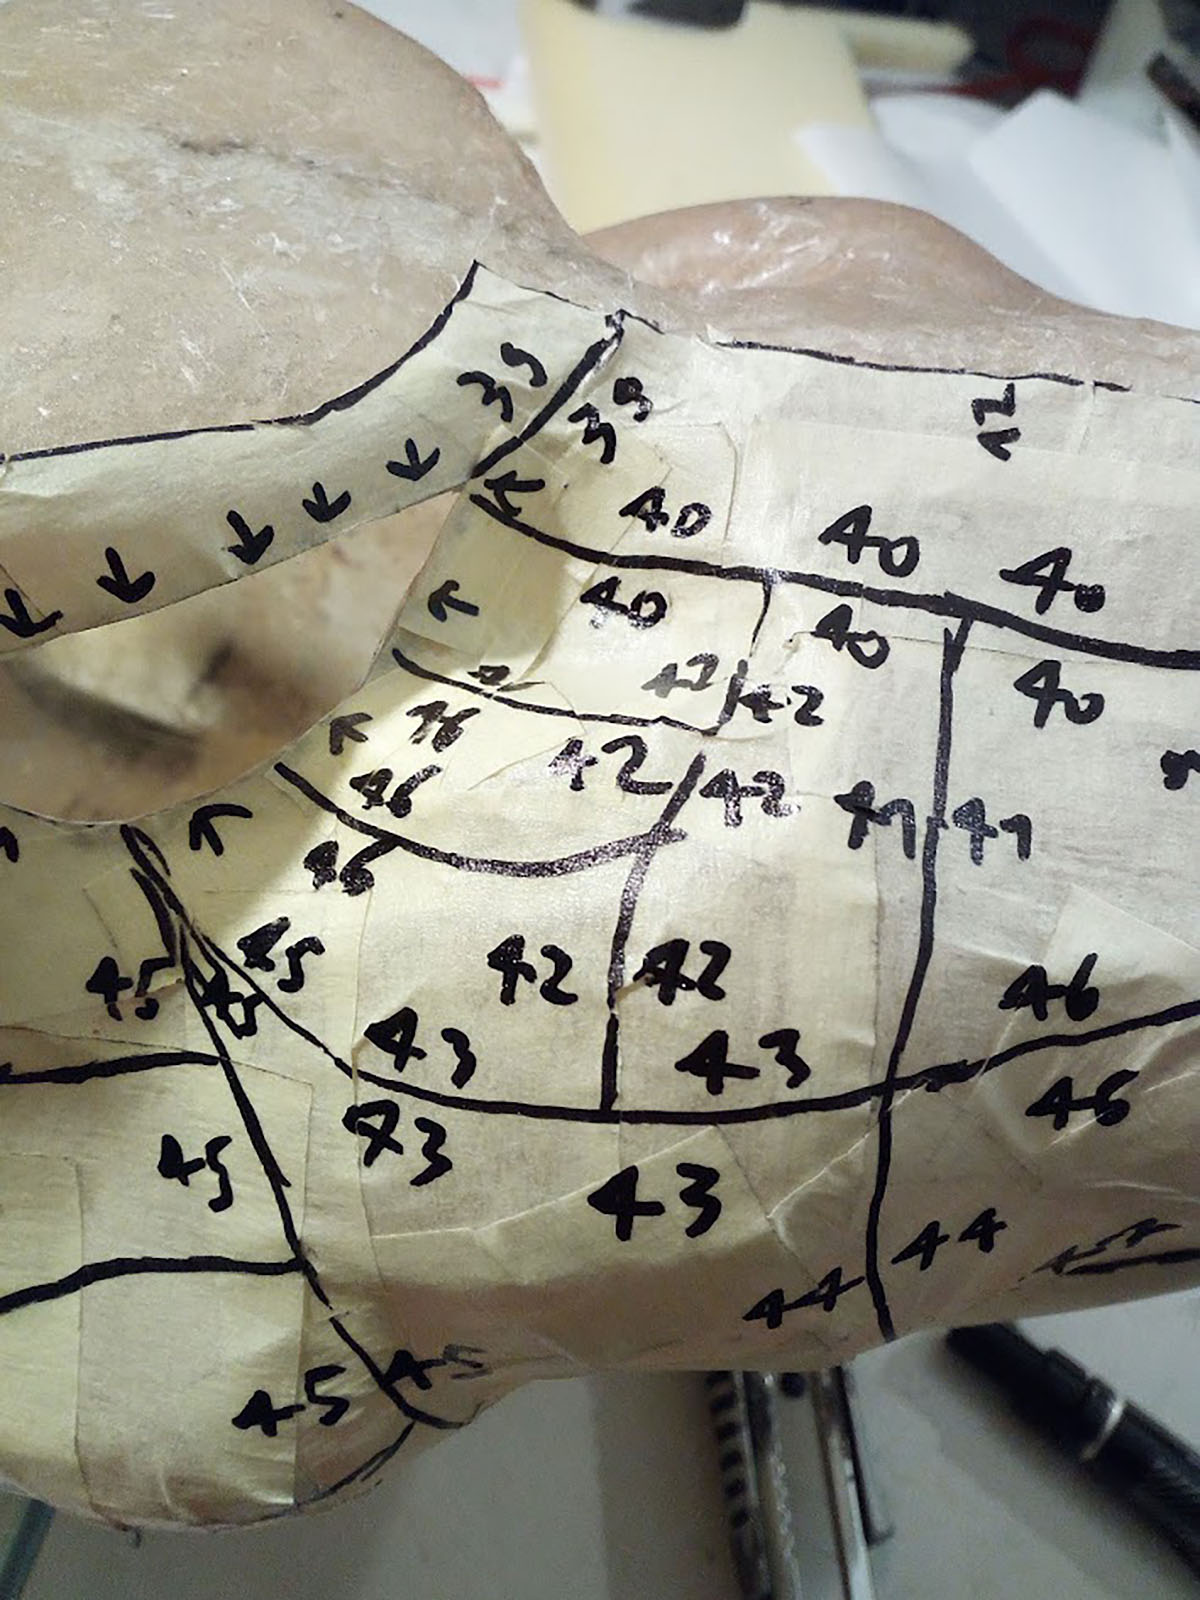
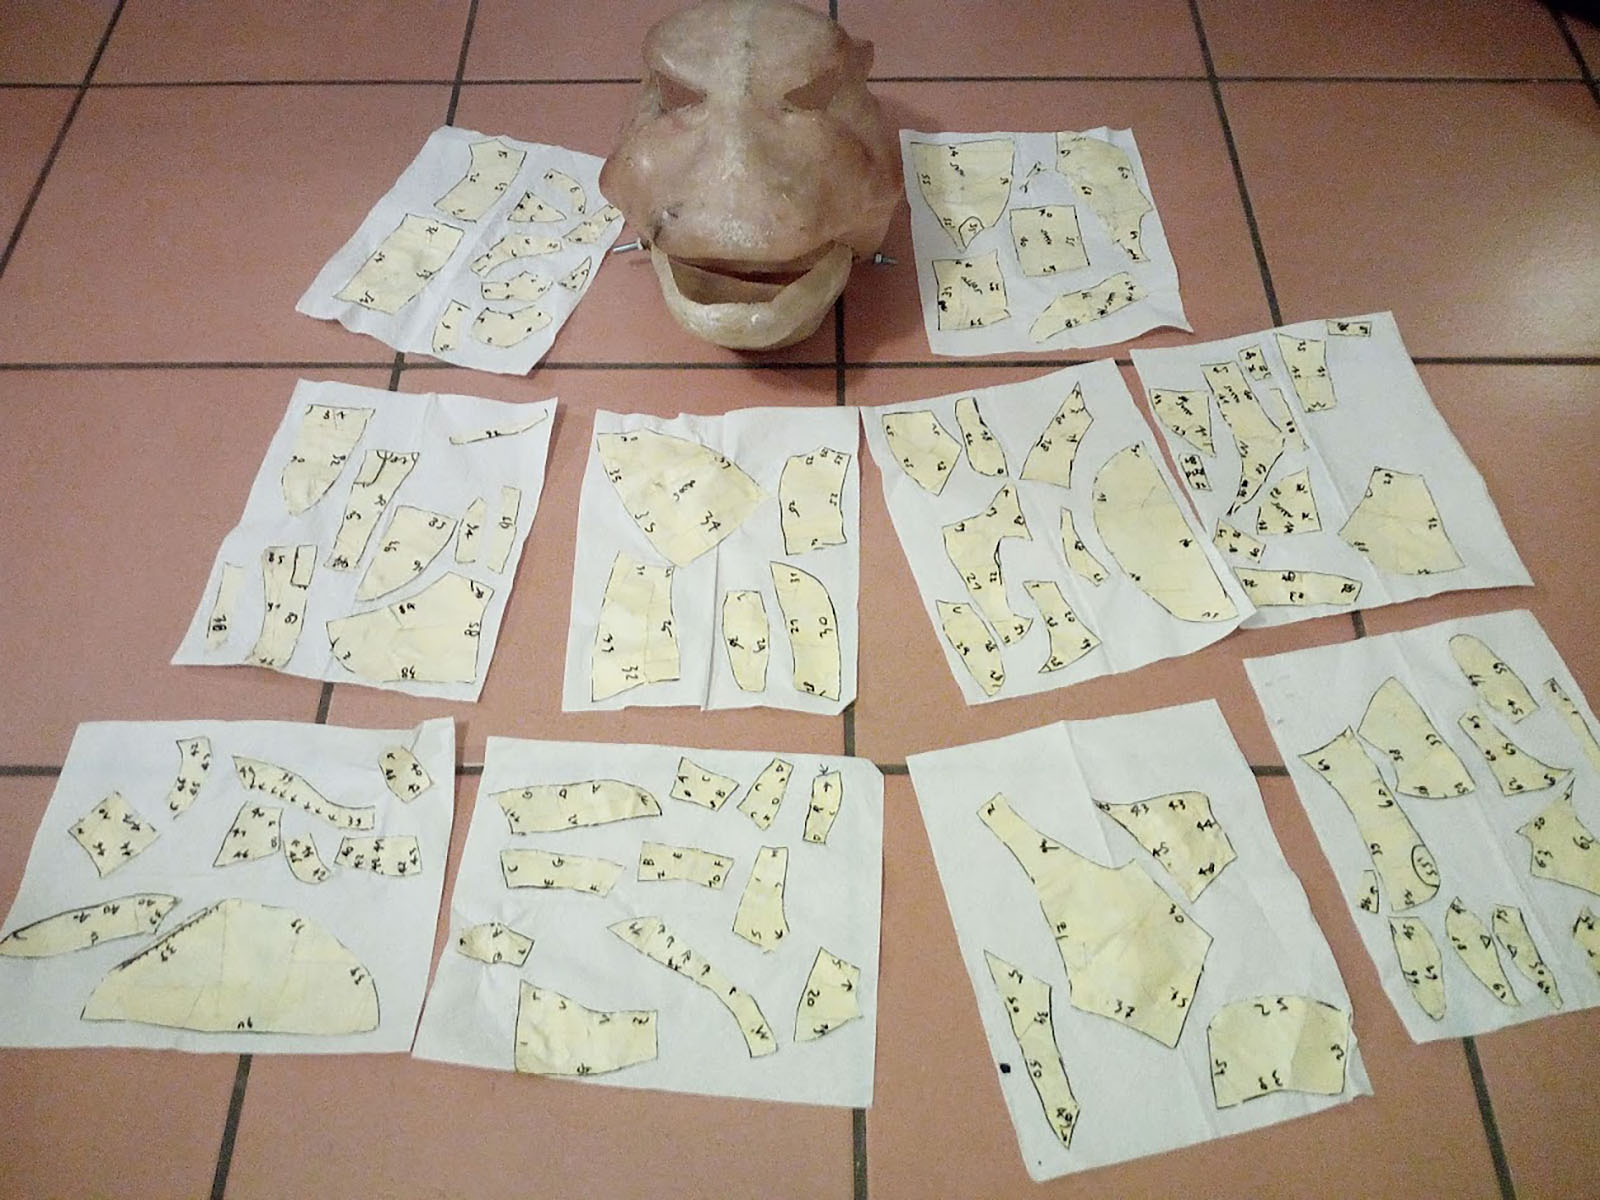
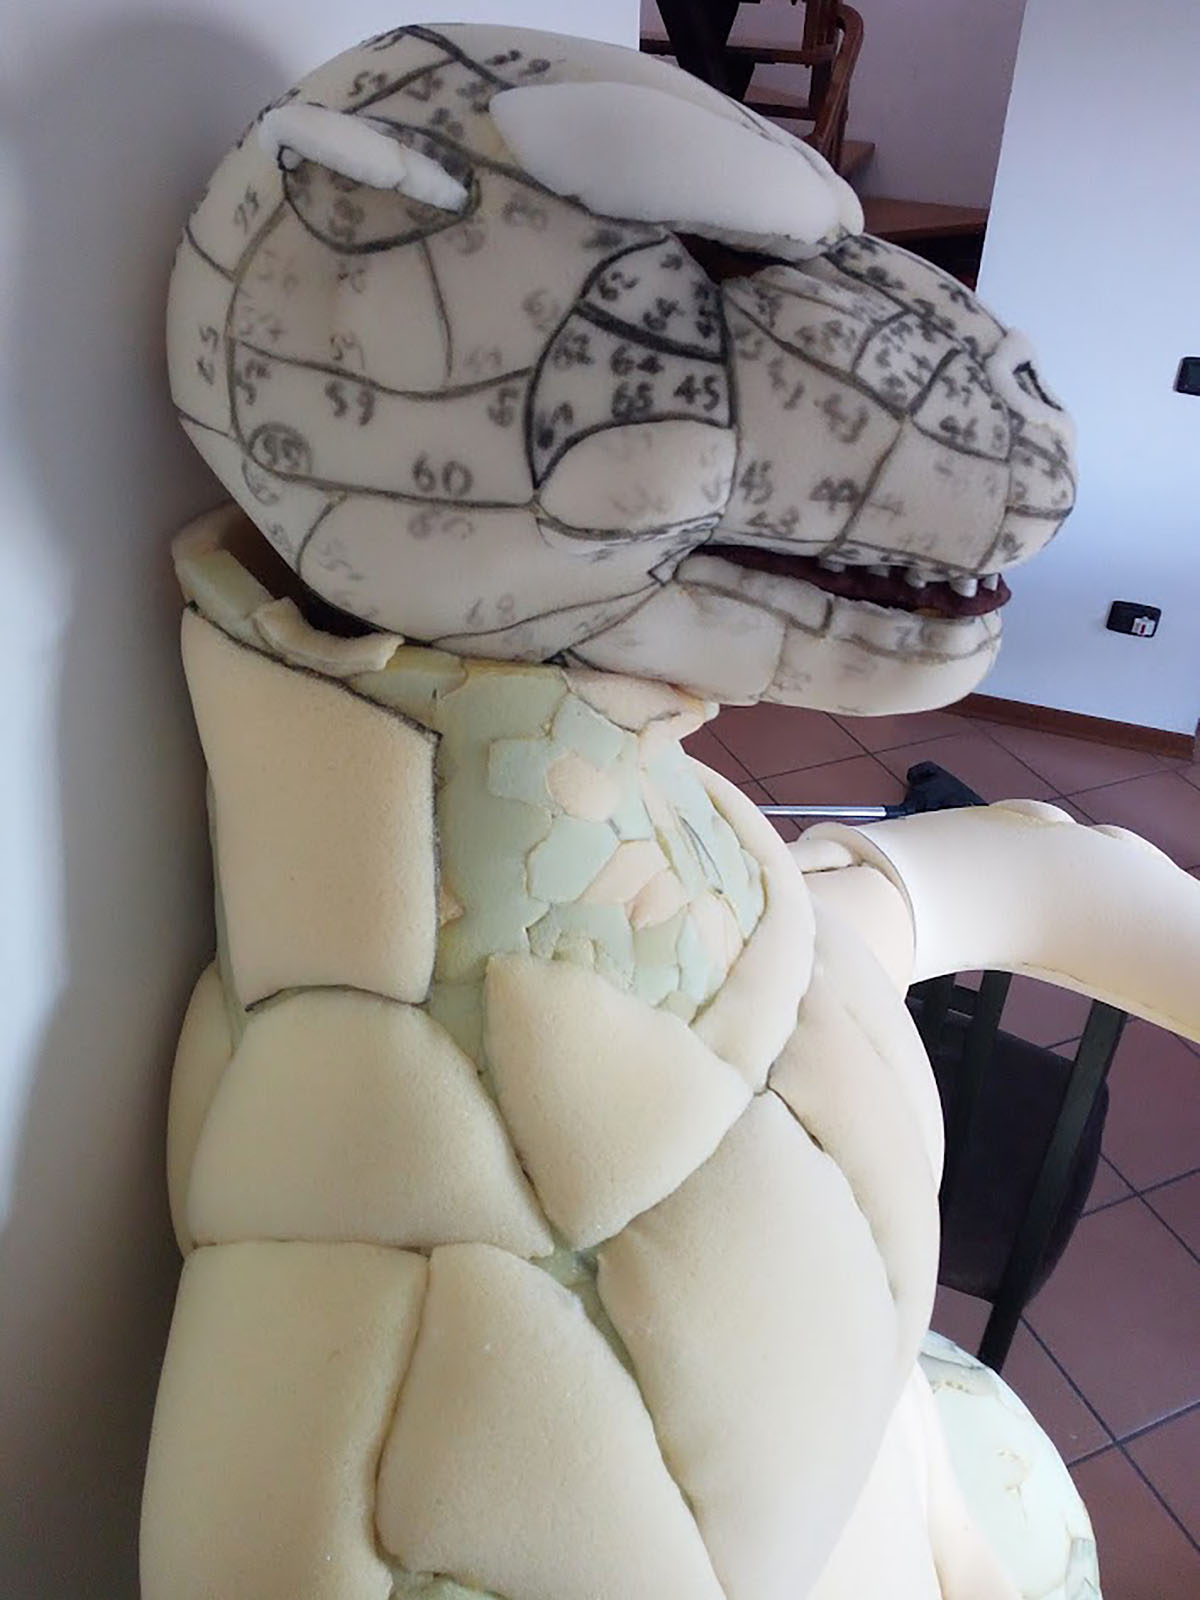
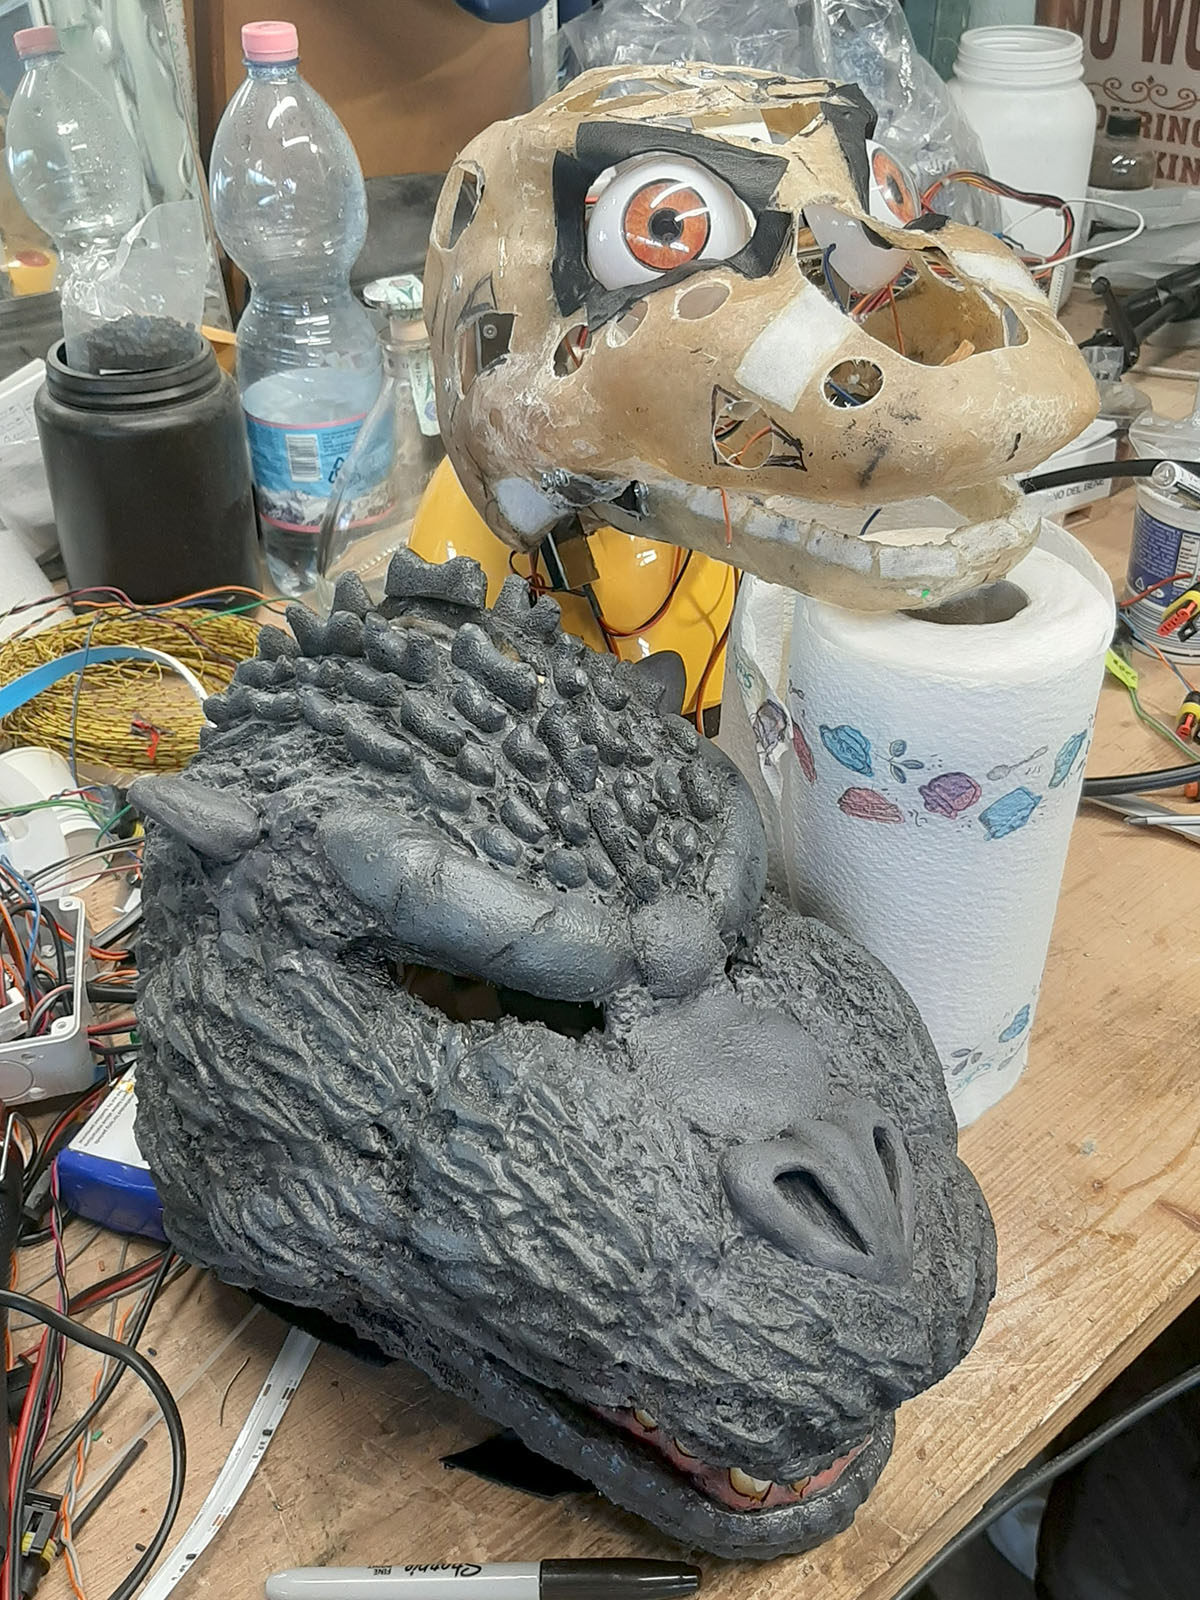
The entire skull was then covered in masking tape, onto which I drew a “puzzle” of patterns to be transferred to foam rubber These pieces form the foam skin that covers the mechanical skull.
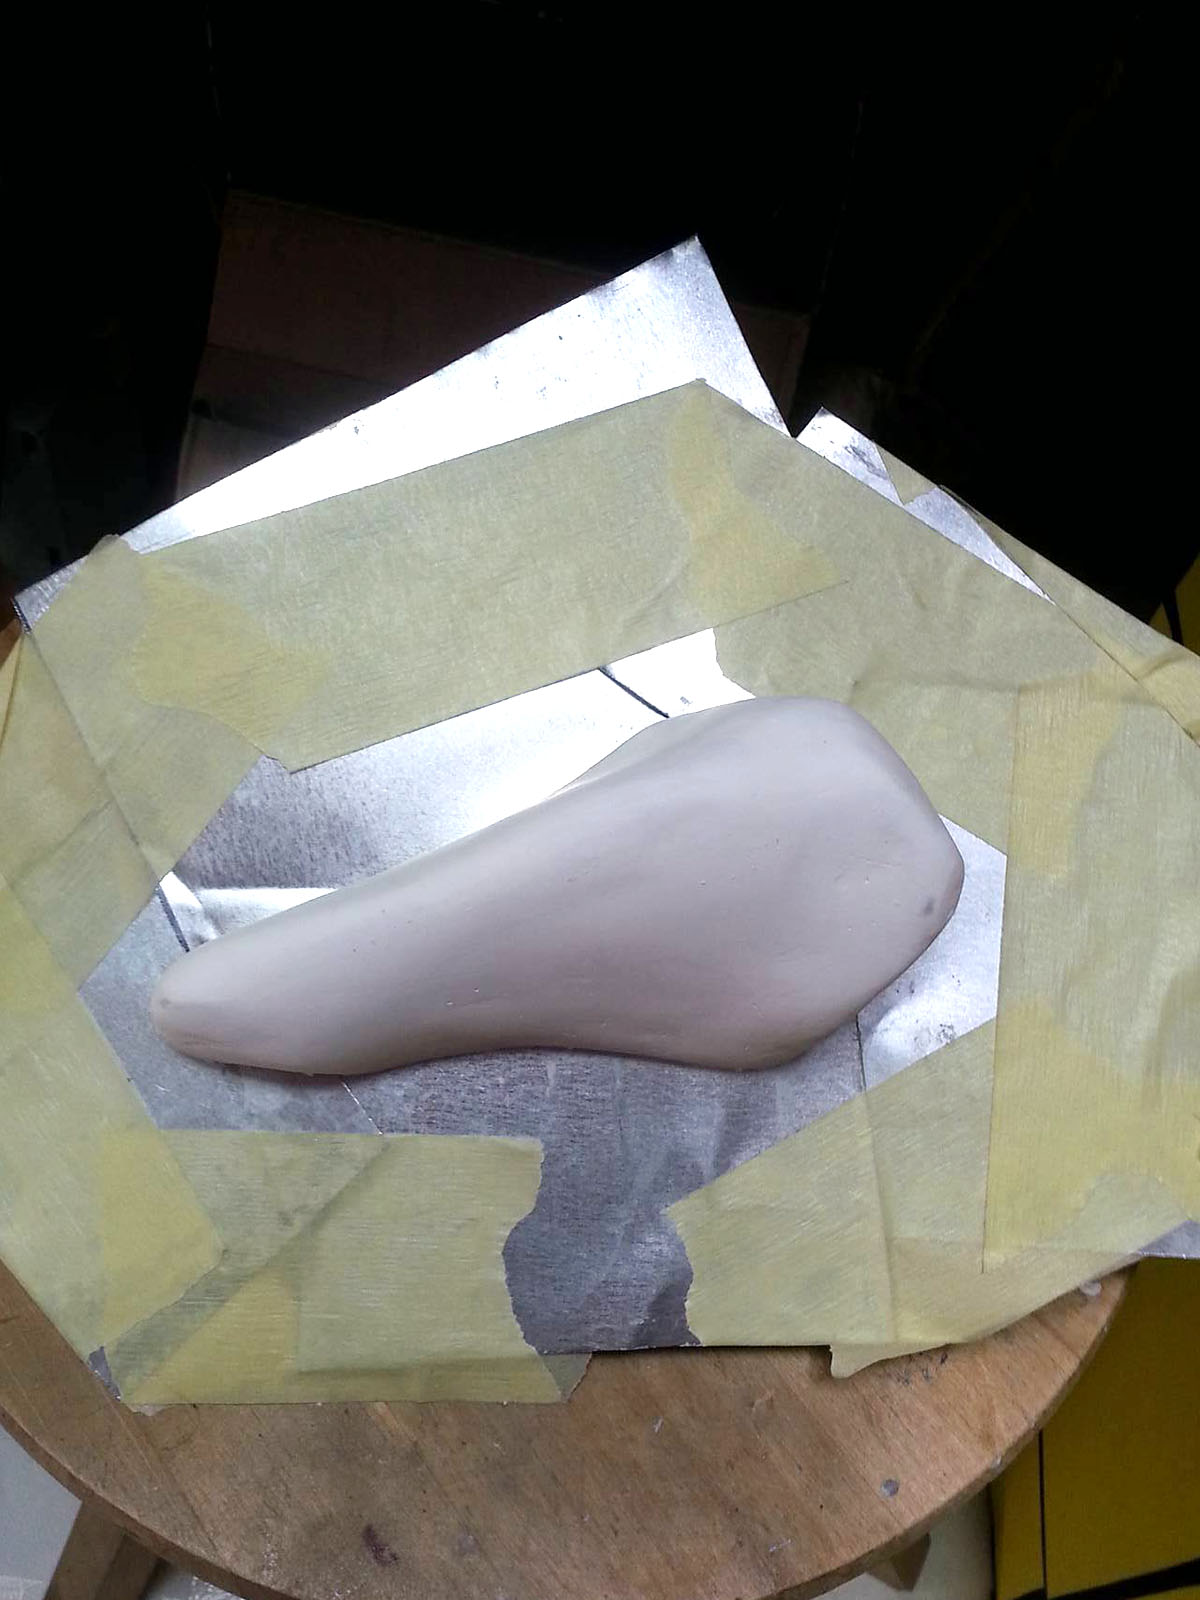
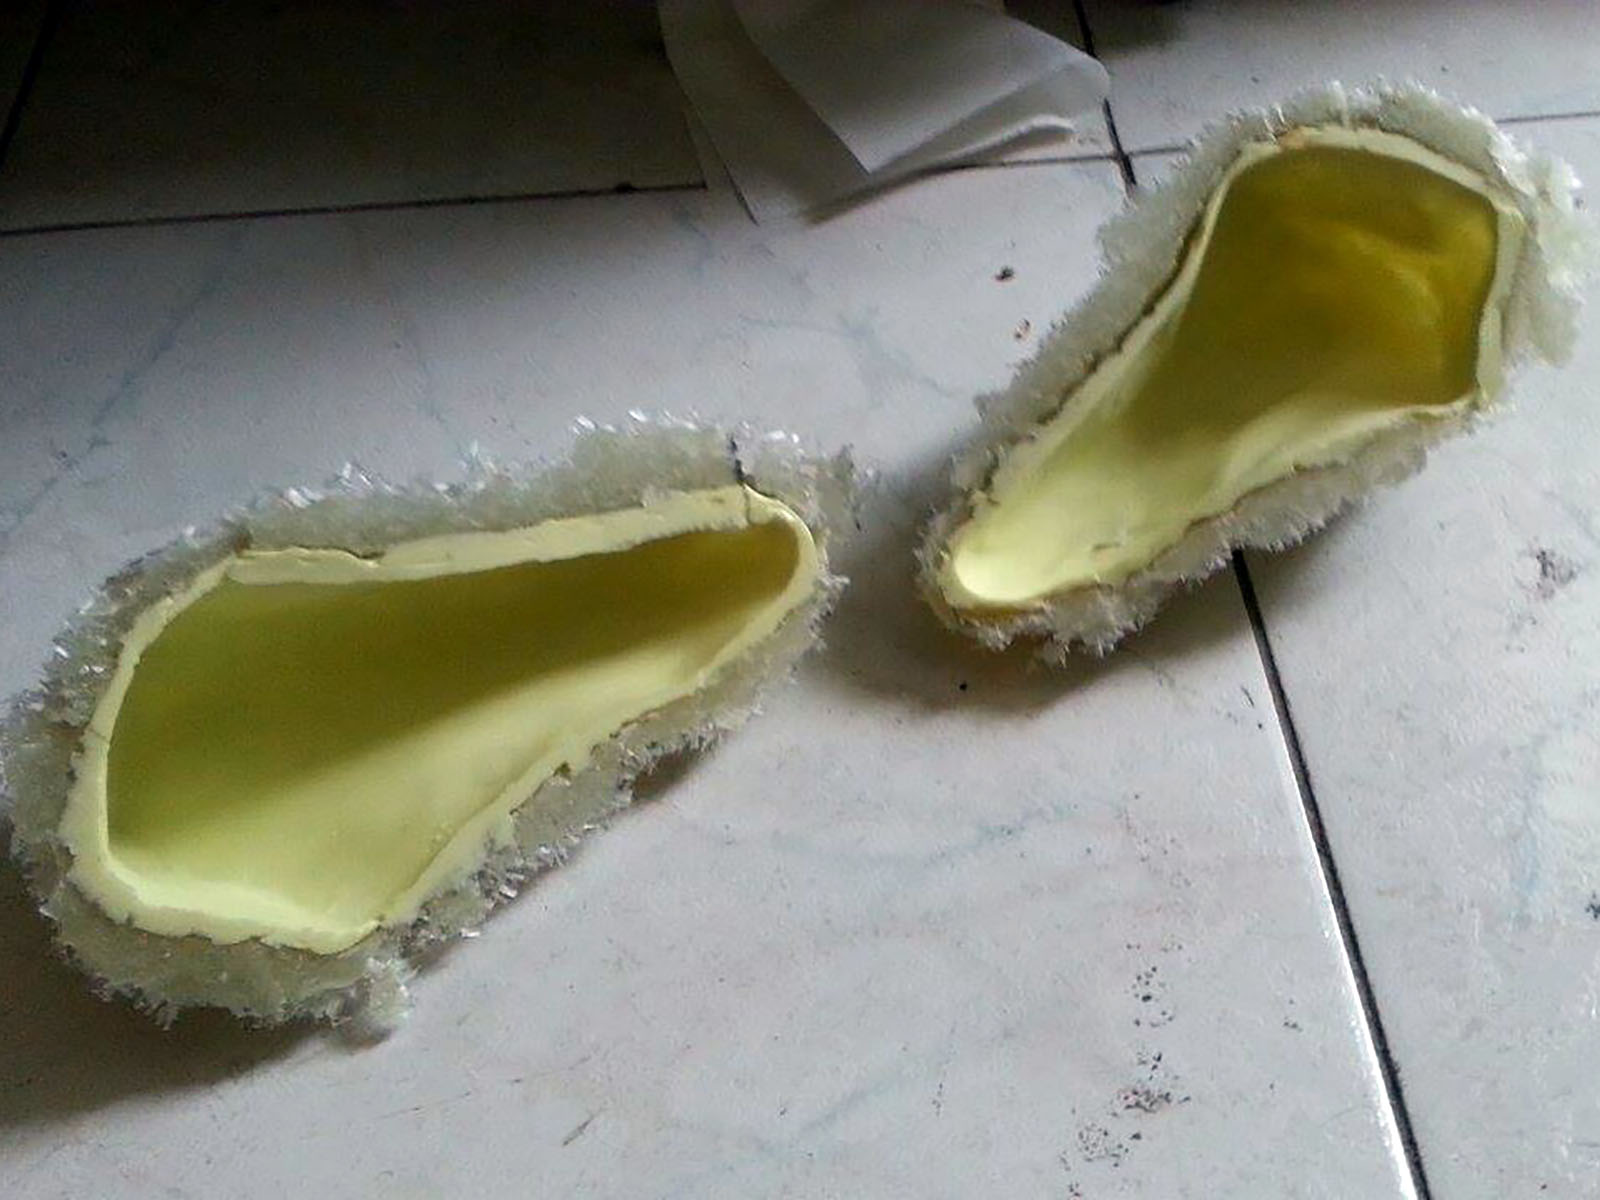
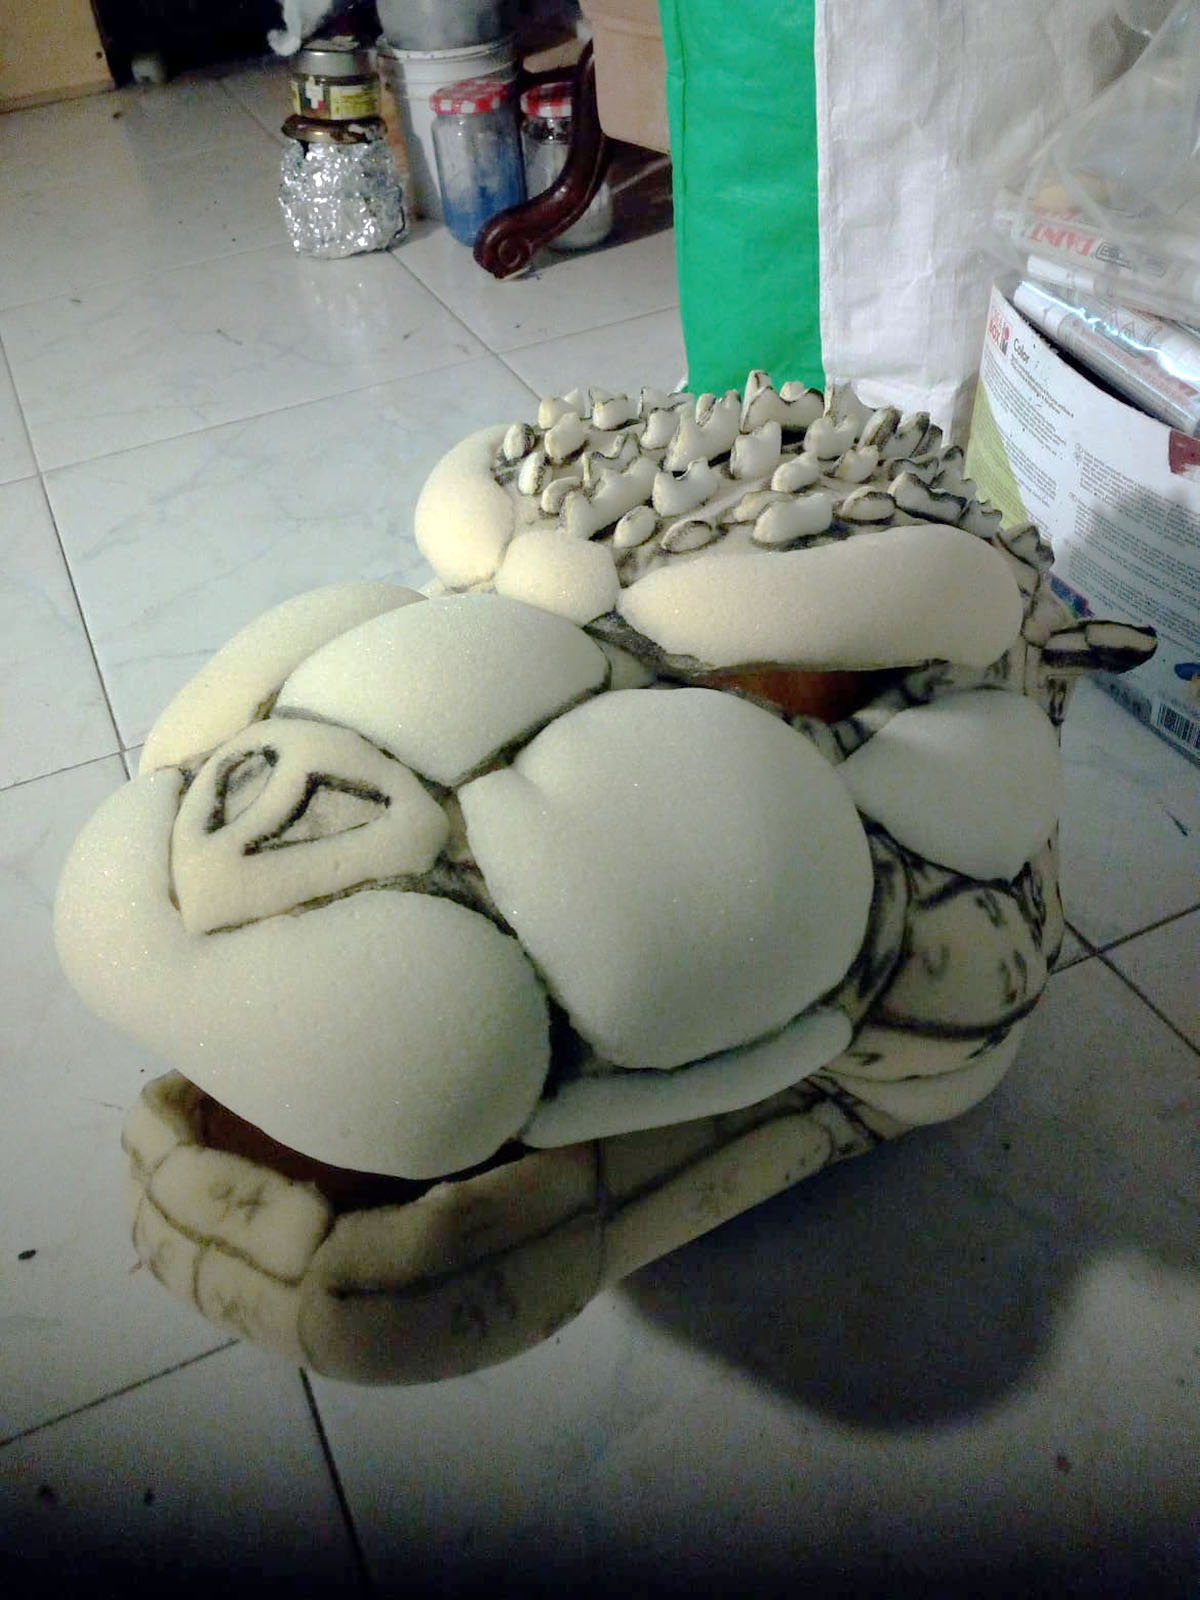
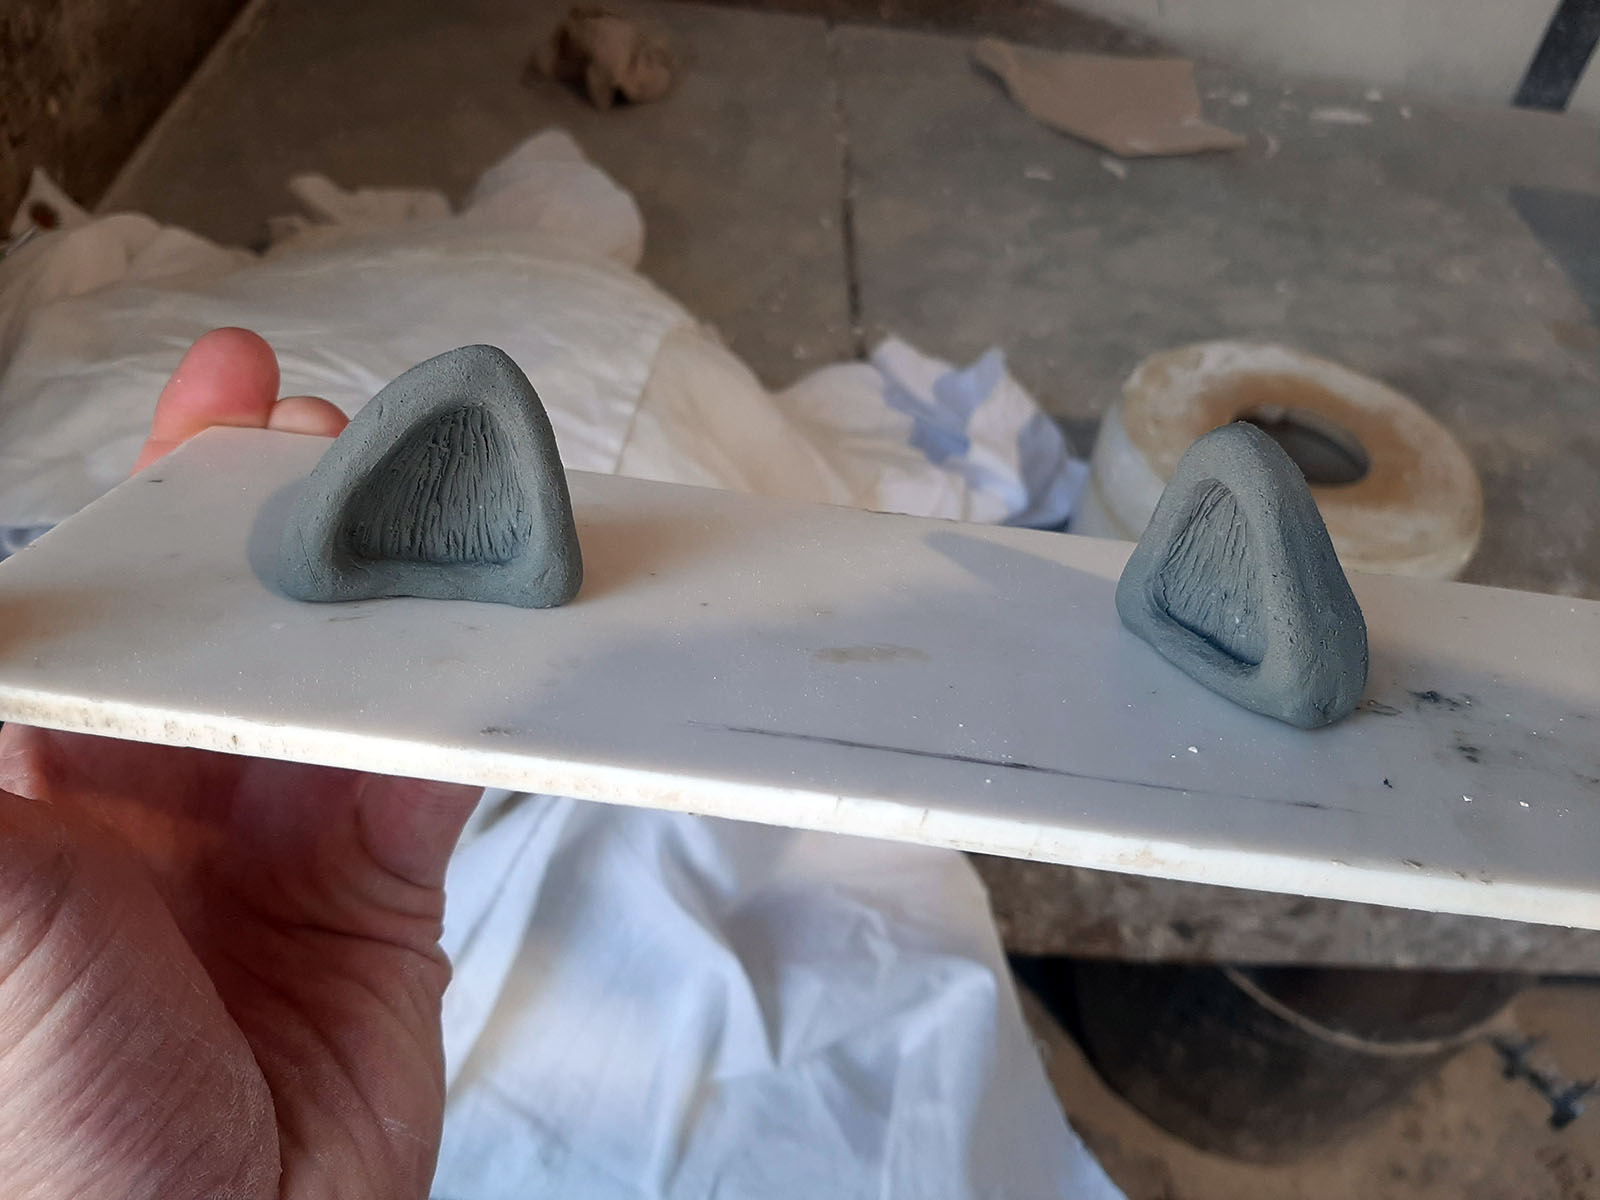
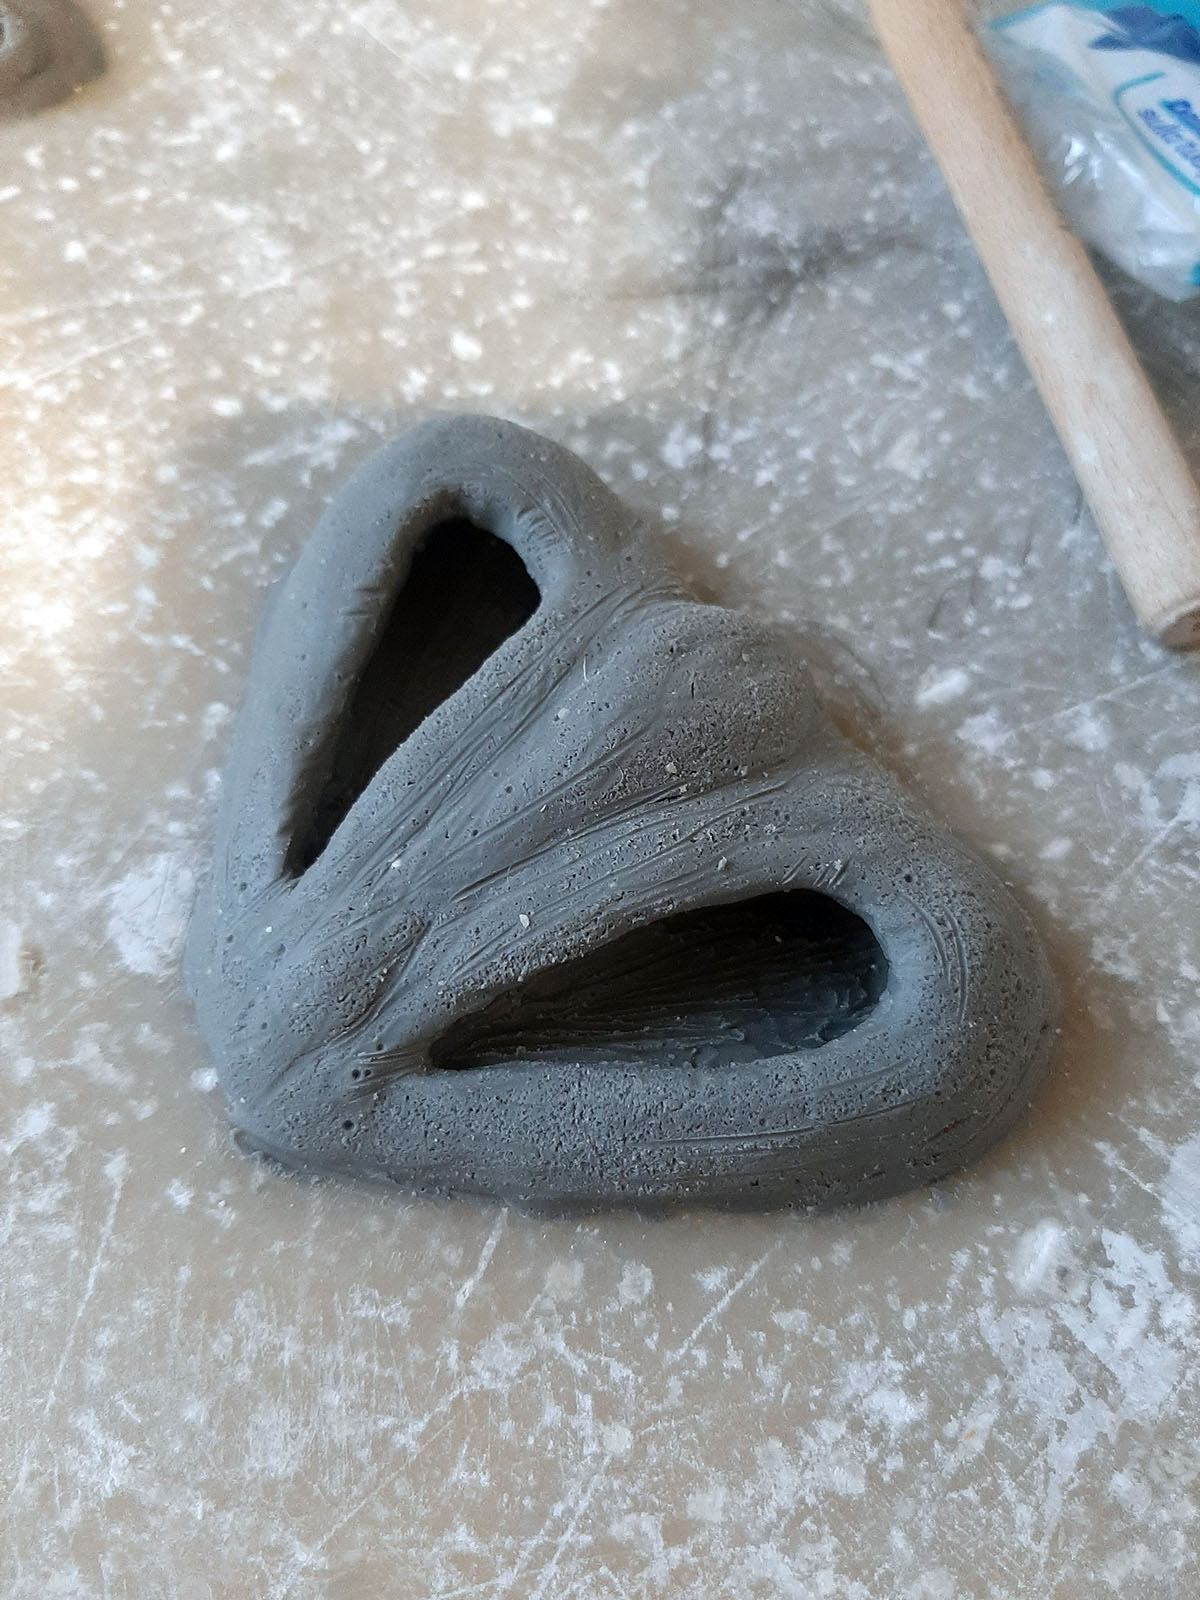
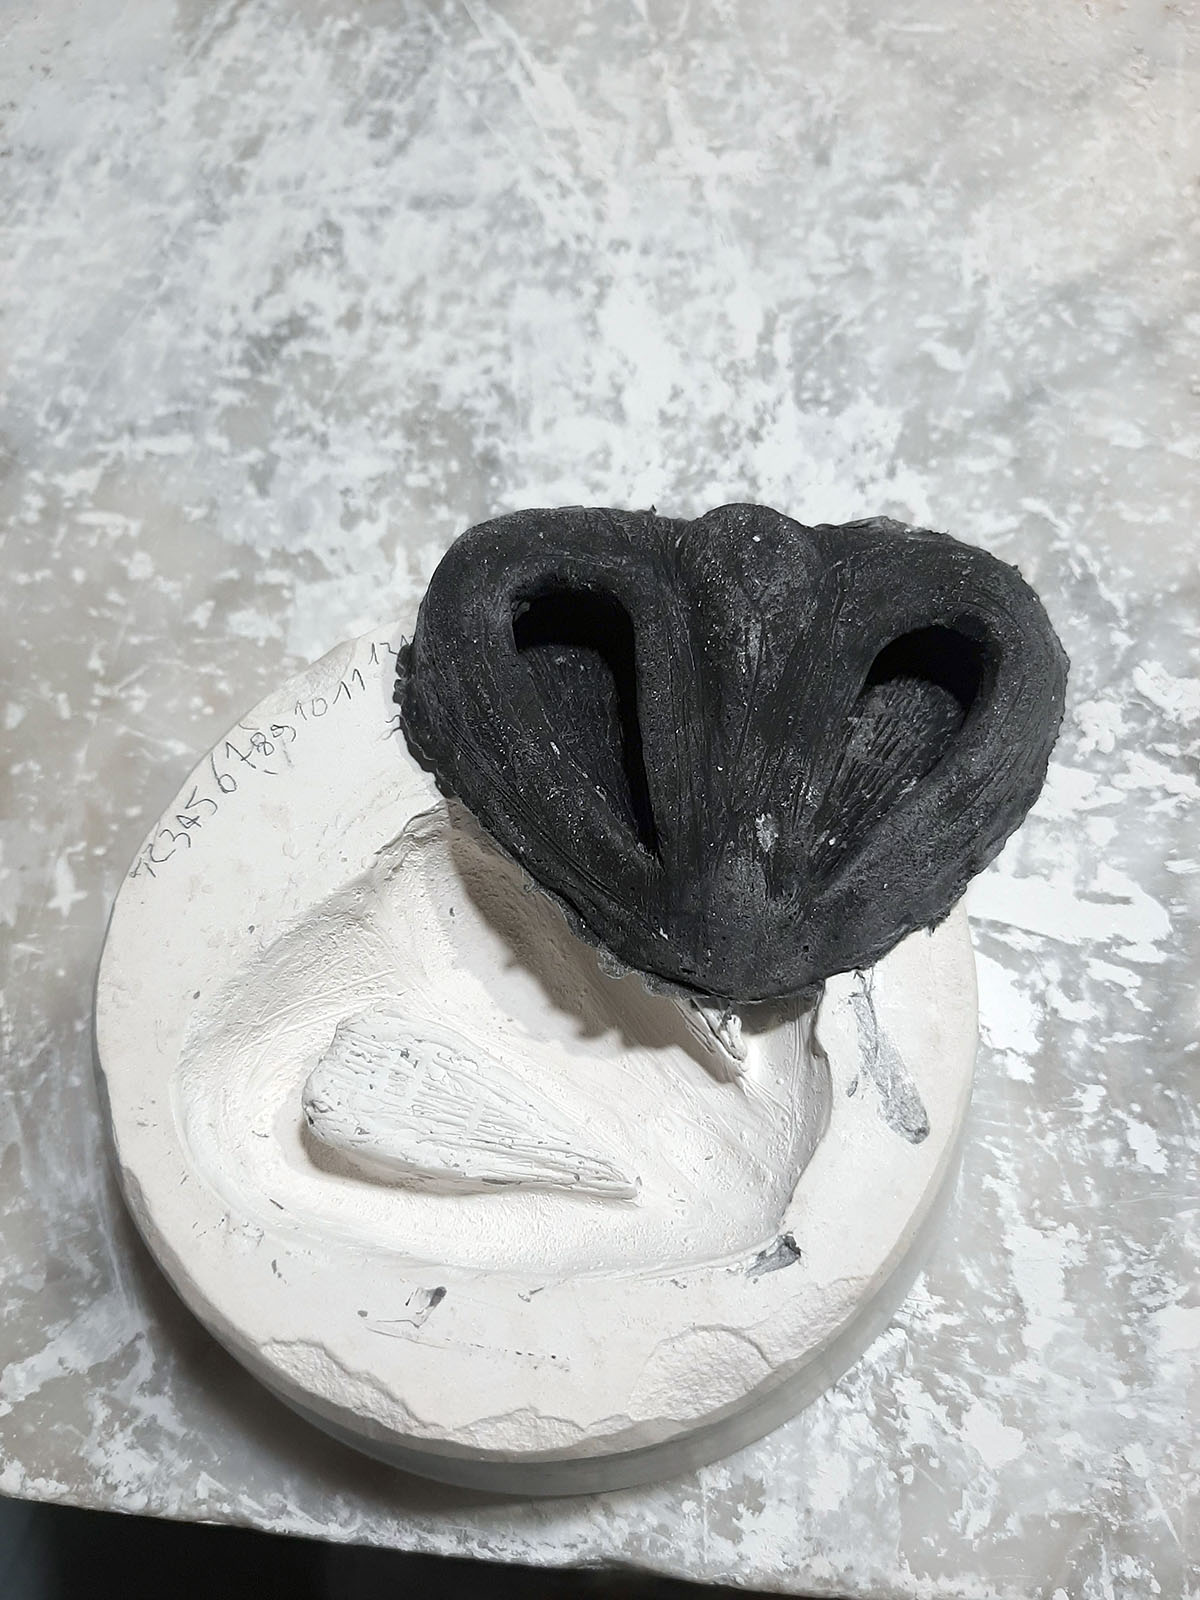
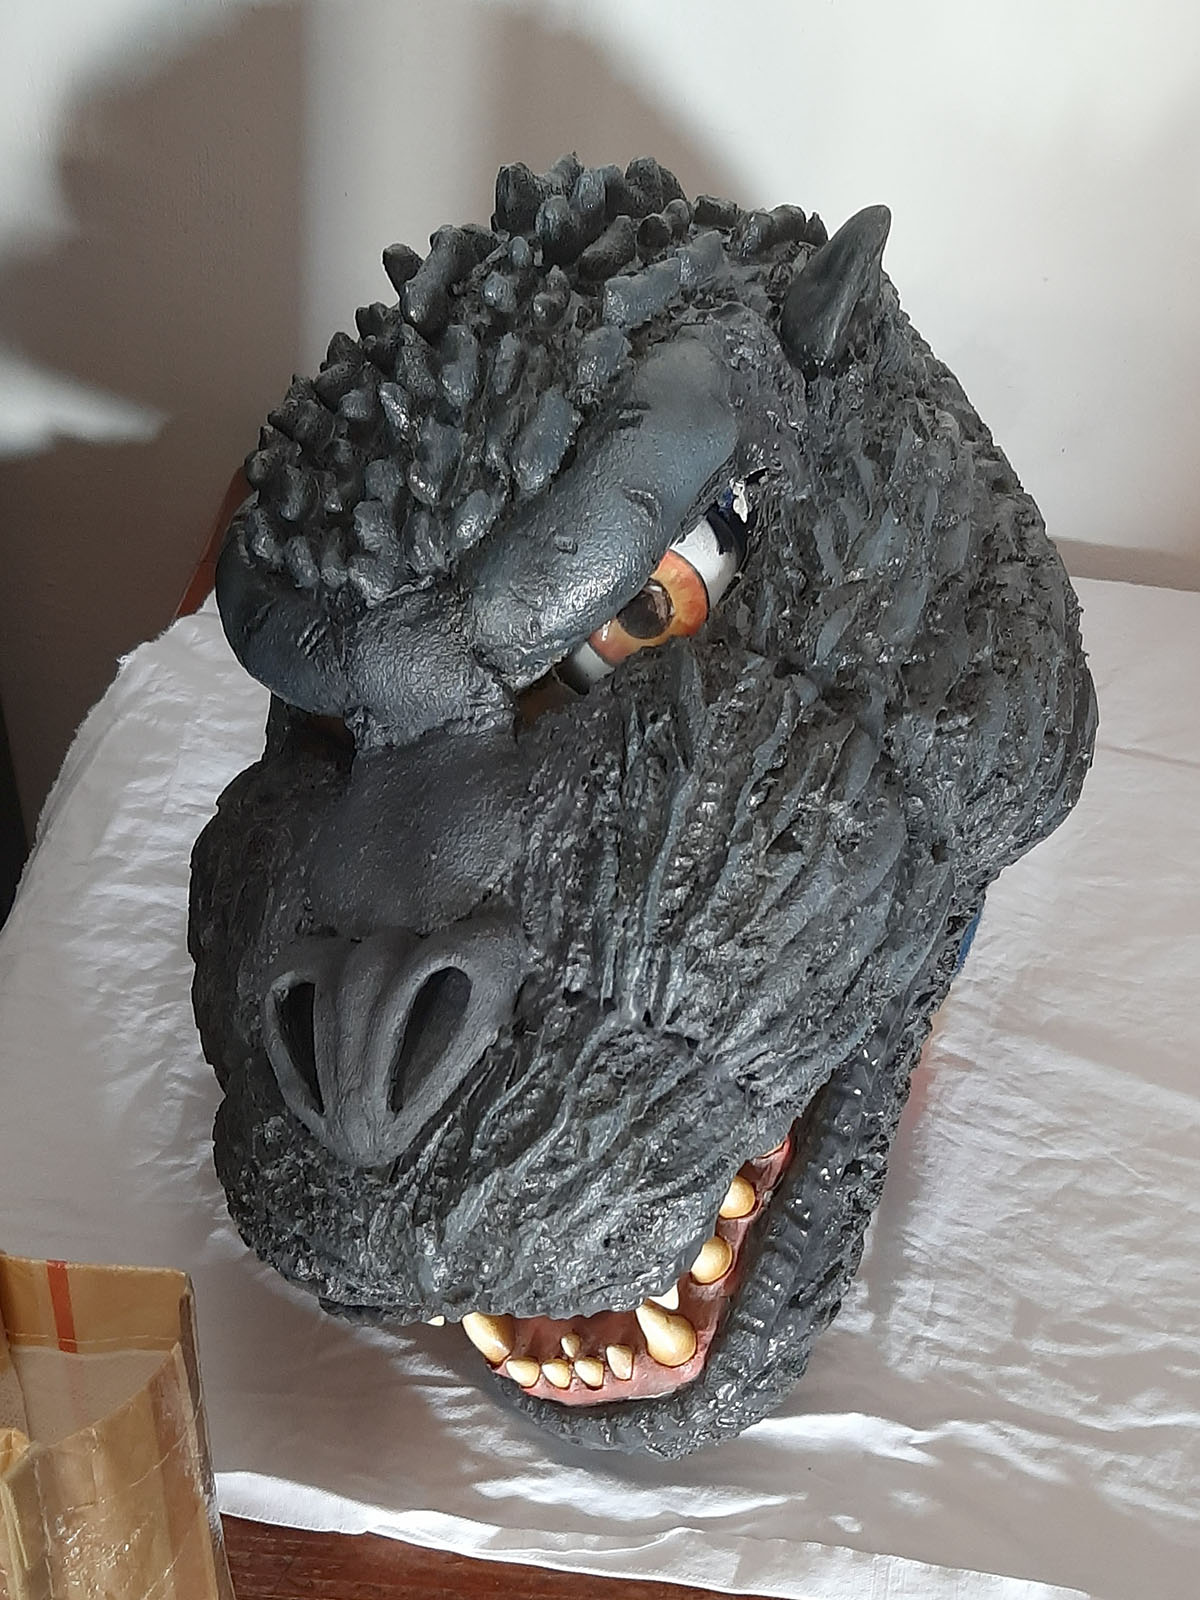
After ensuring the skin fit perfectly, I applied the skin texture, eyebrows, and the small dorsal fins on the nape. Specific details like the nose and ears were sculpted in plasticine, molded in plaster, and cast in multiple layers of latex before being permanently attached to the face.
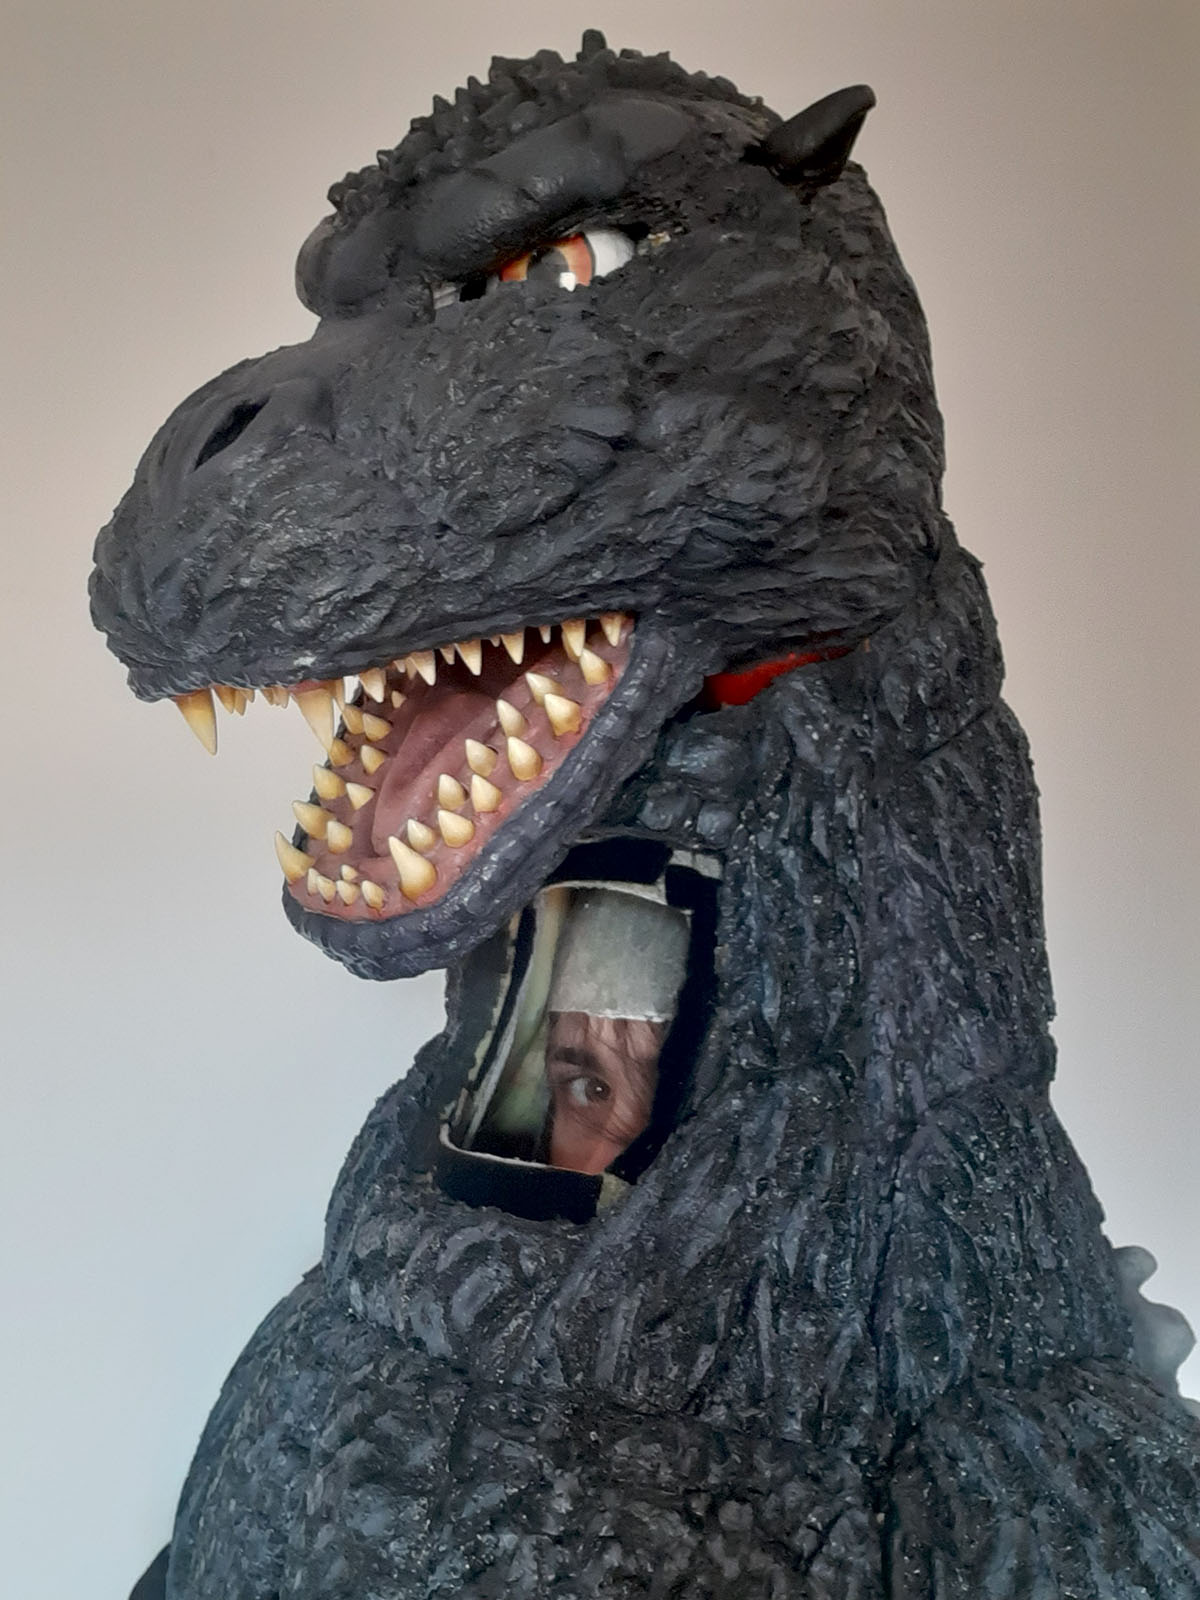
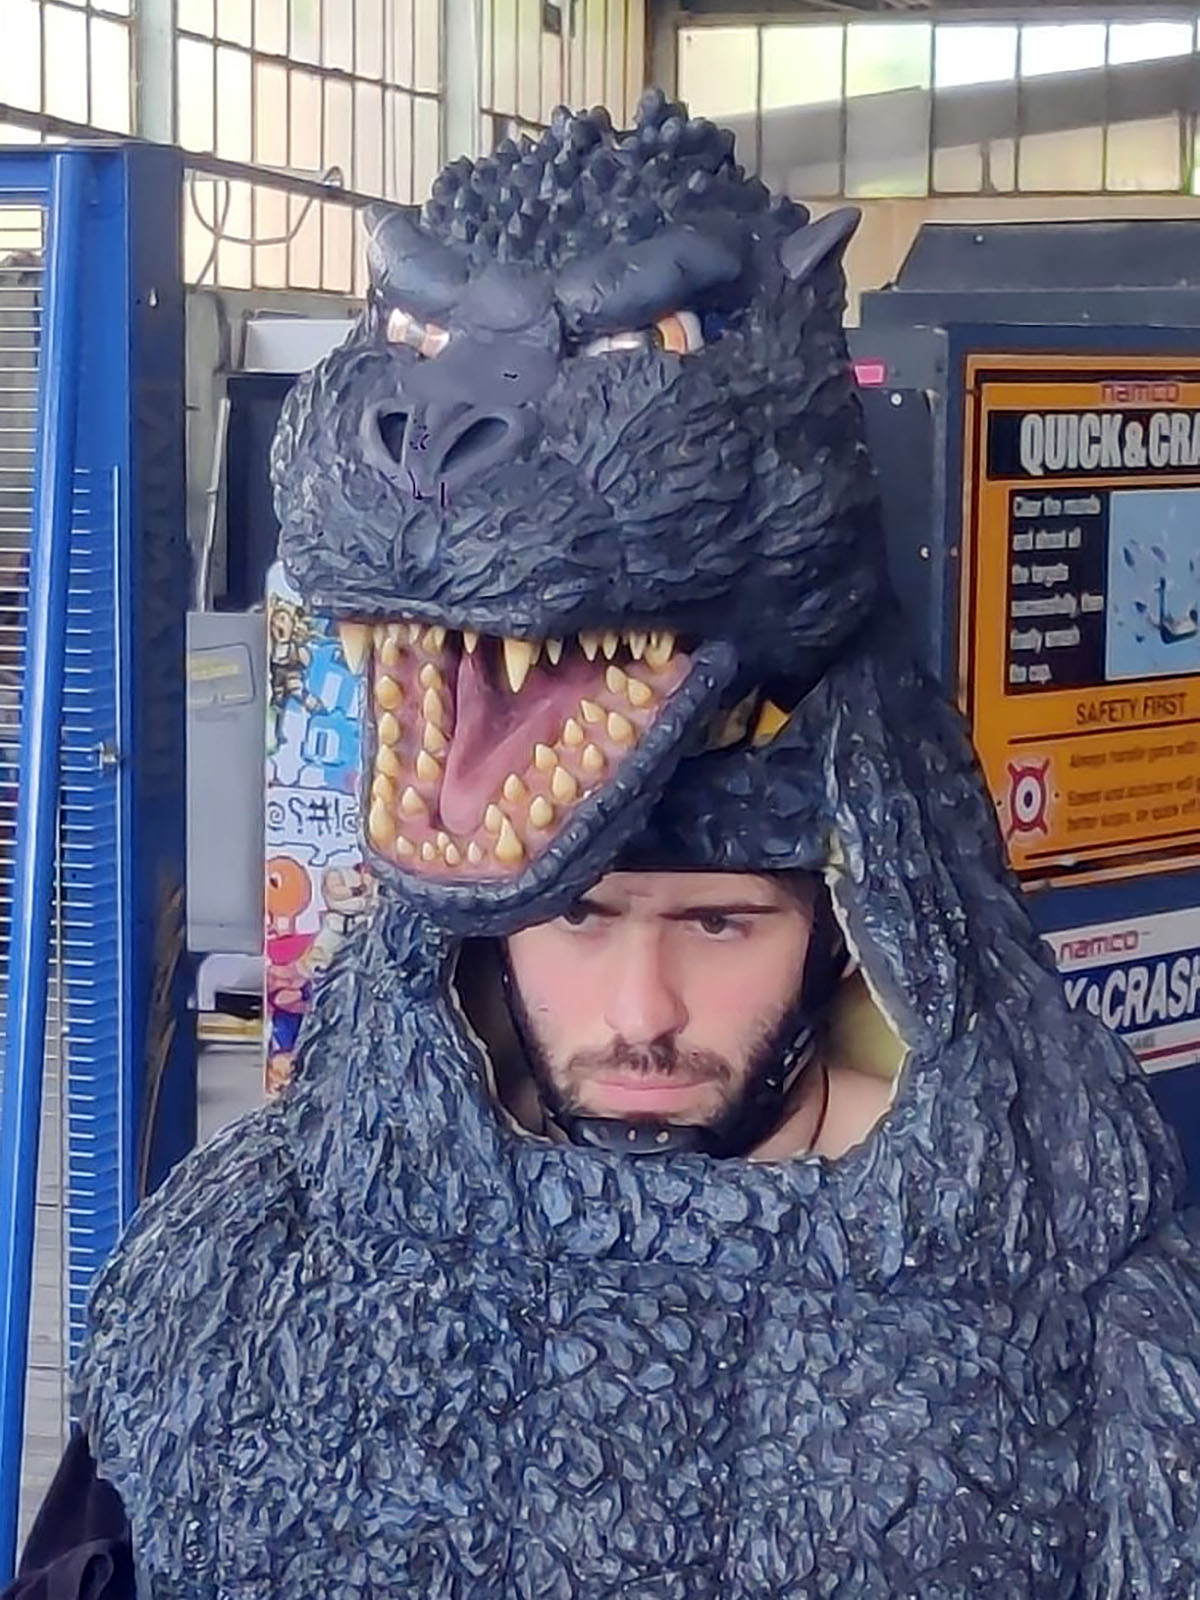
Following extensive testing, the completed head was mounted onto a modified safety helmet to ensure not only a stable fit but also a perfectly centered and upright position.
Eyes
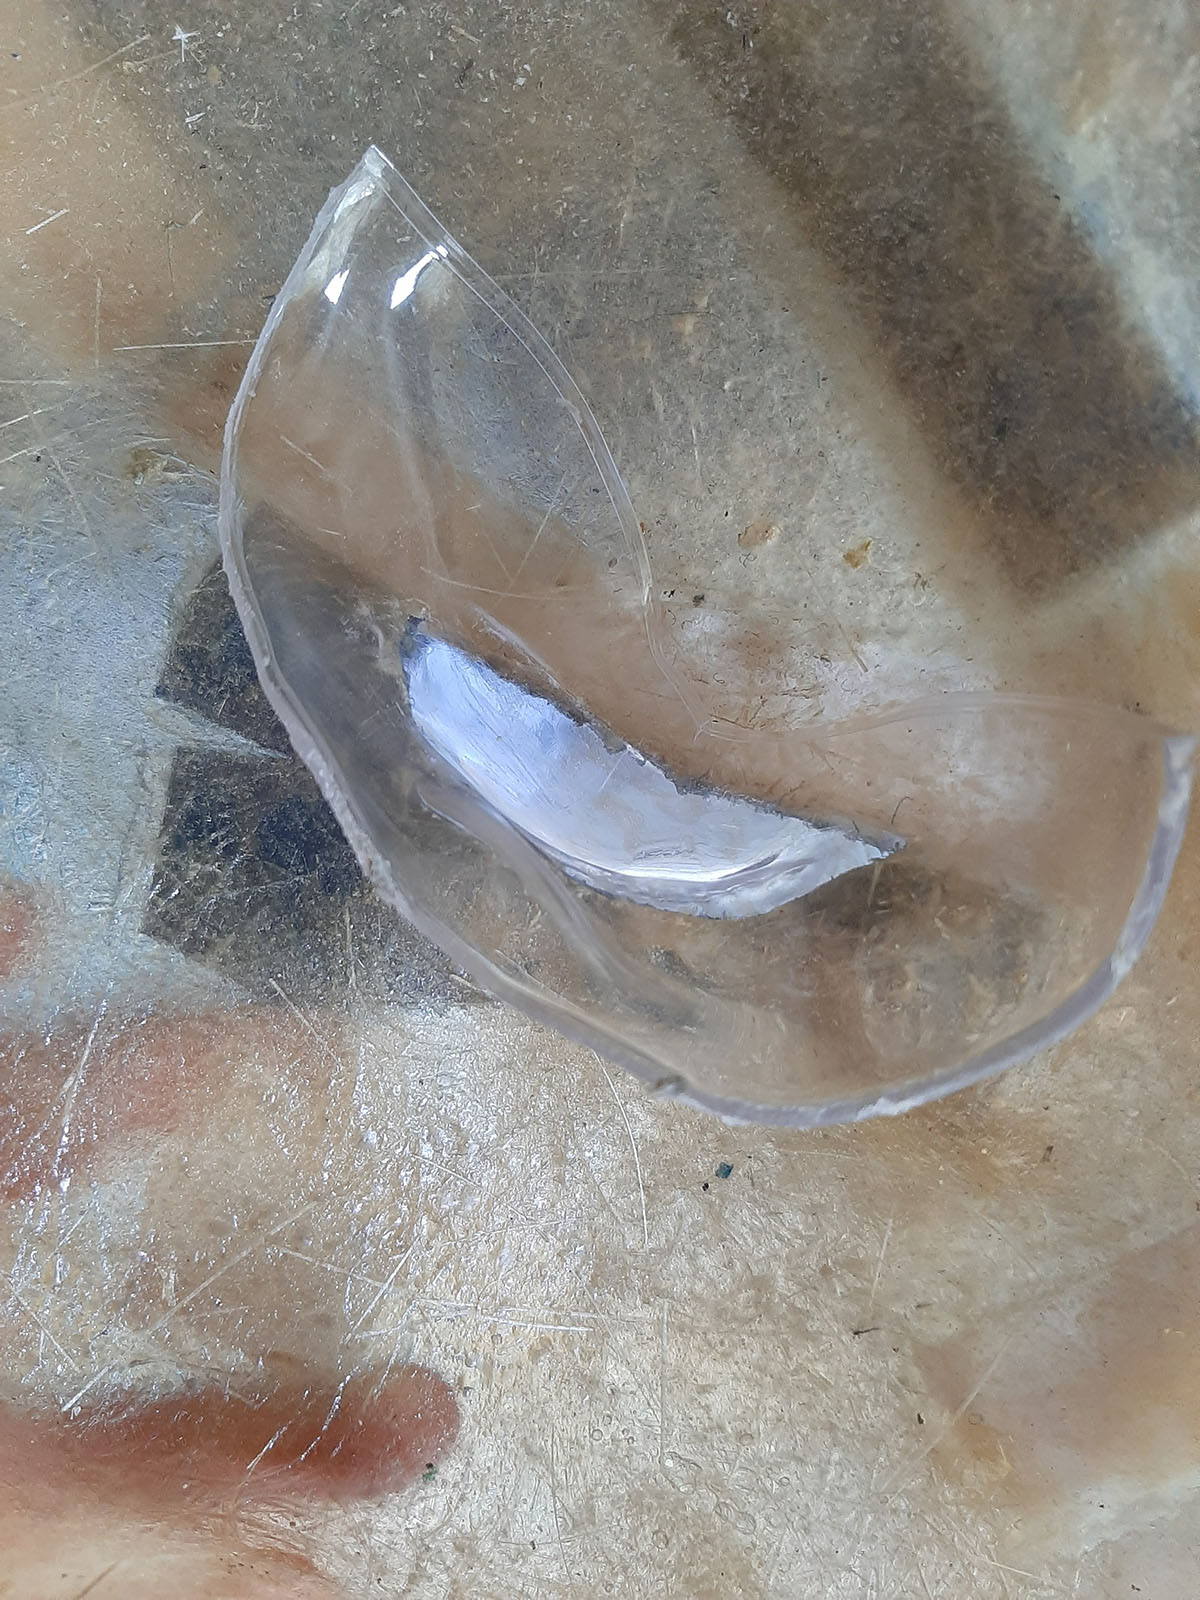
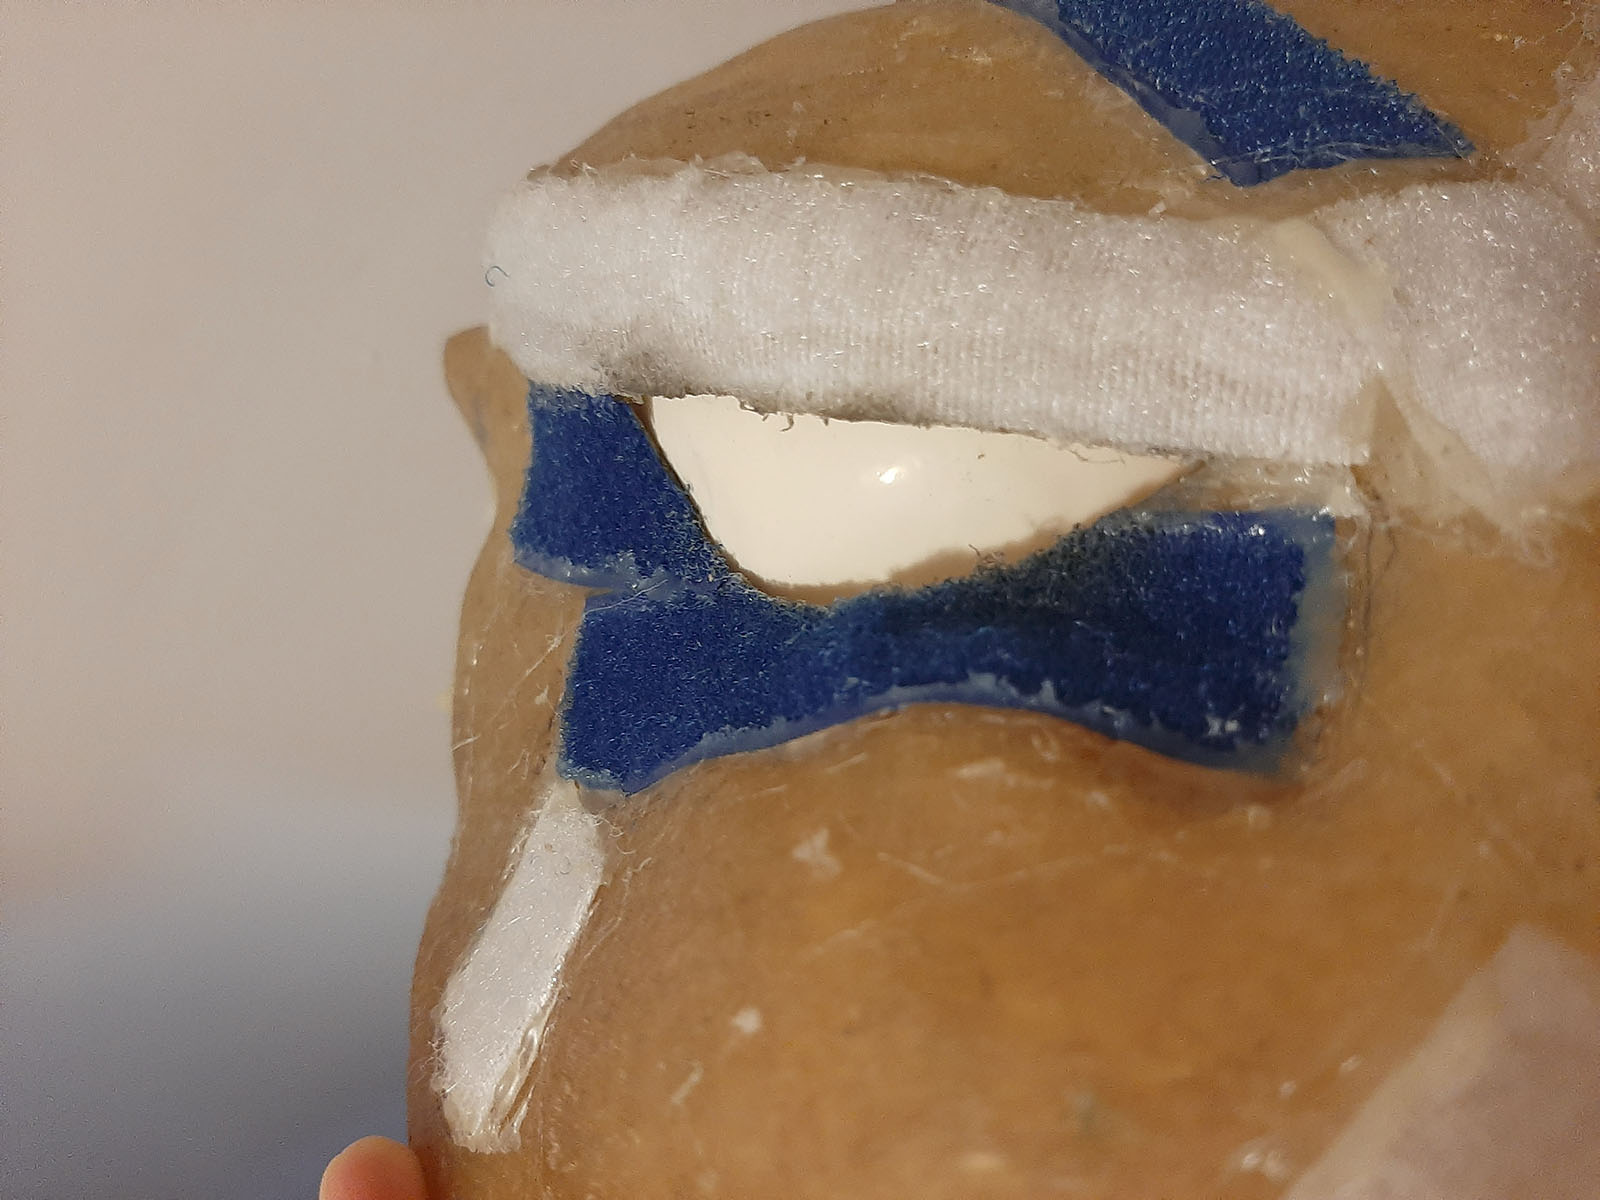
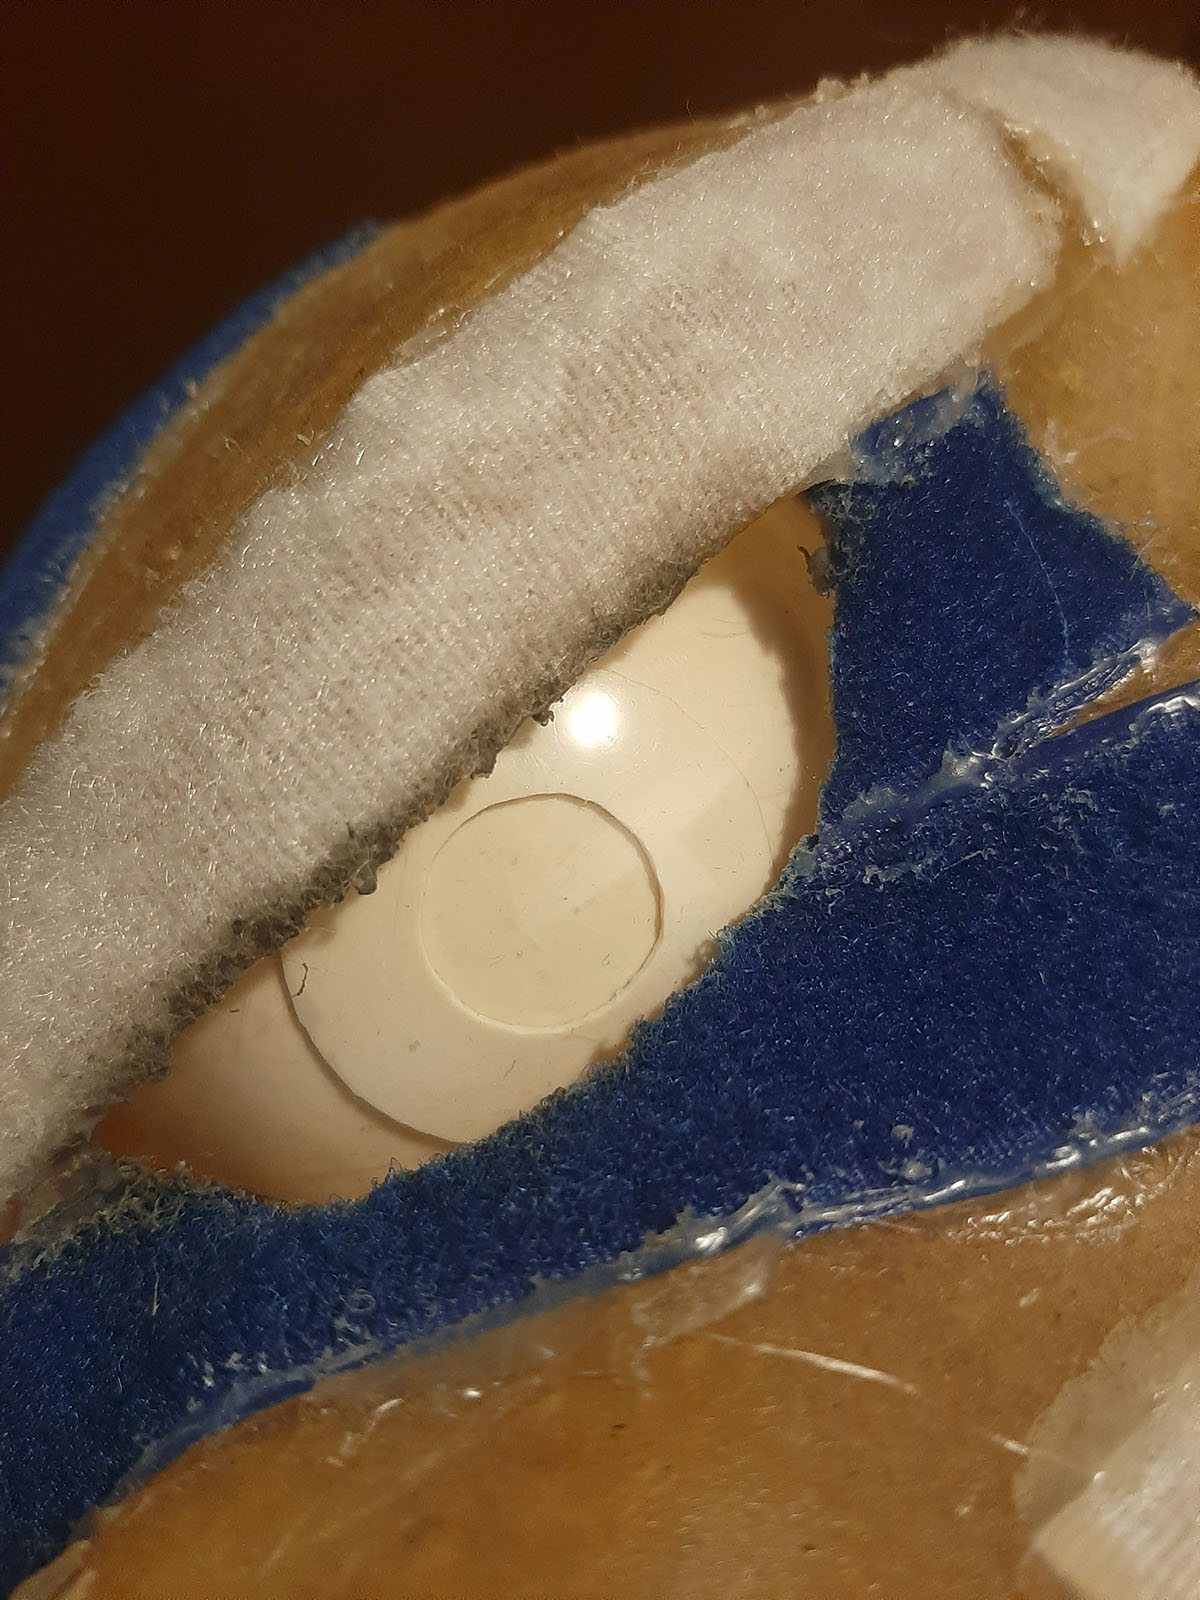
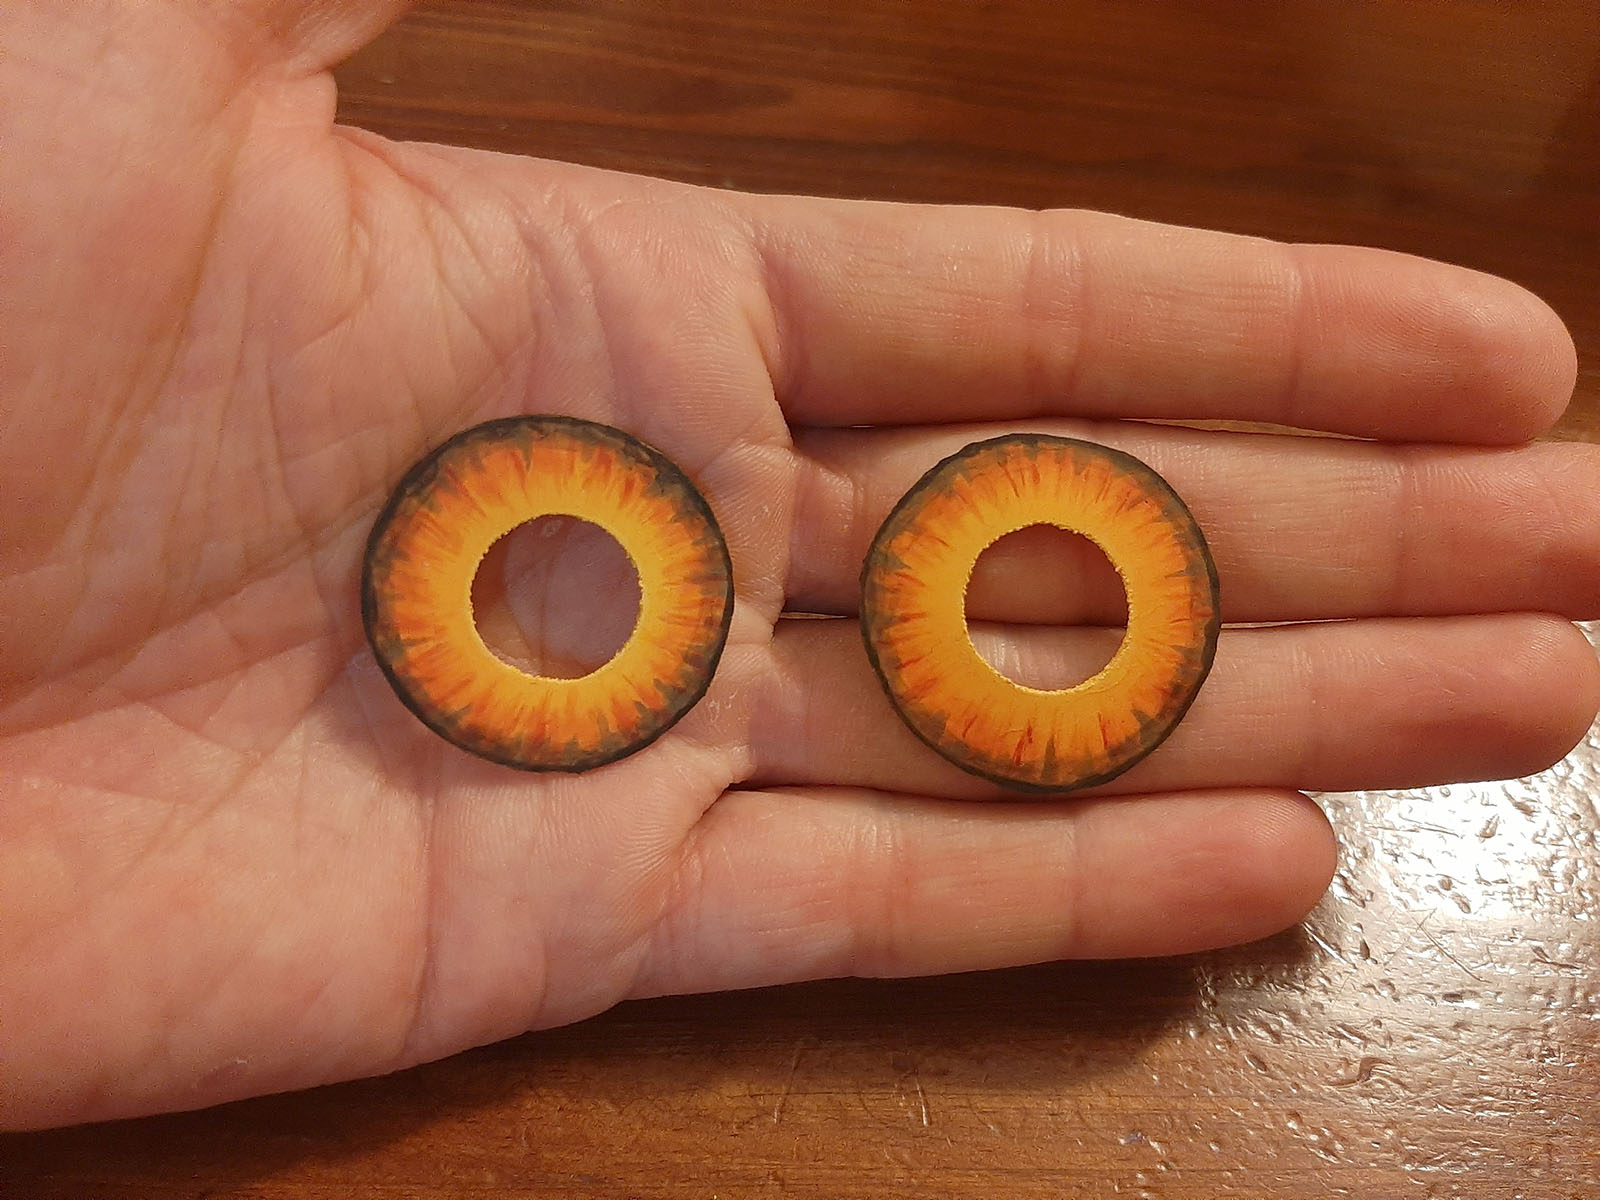
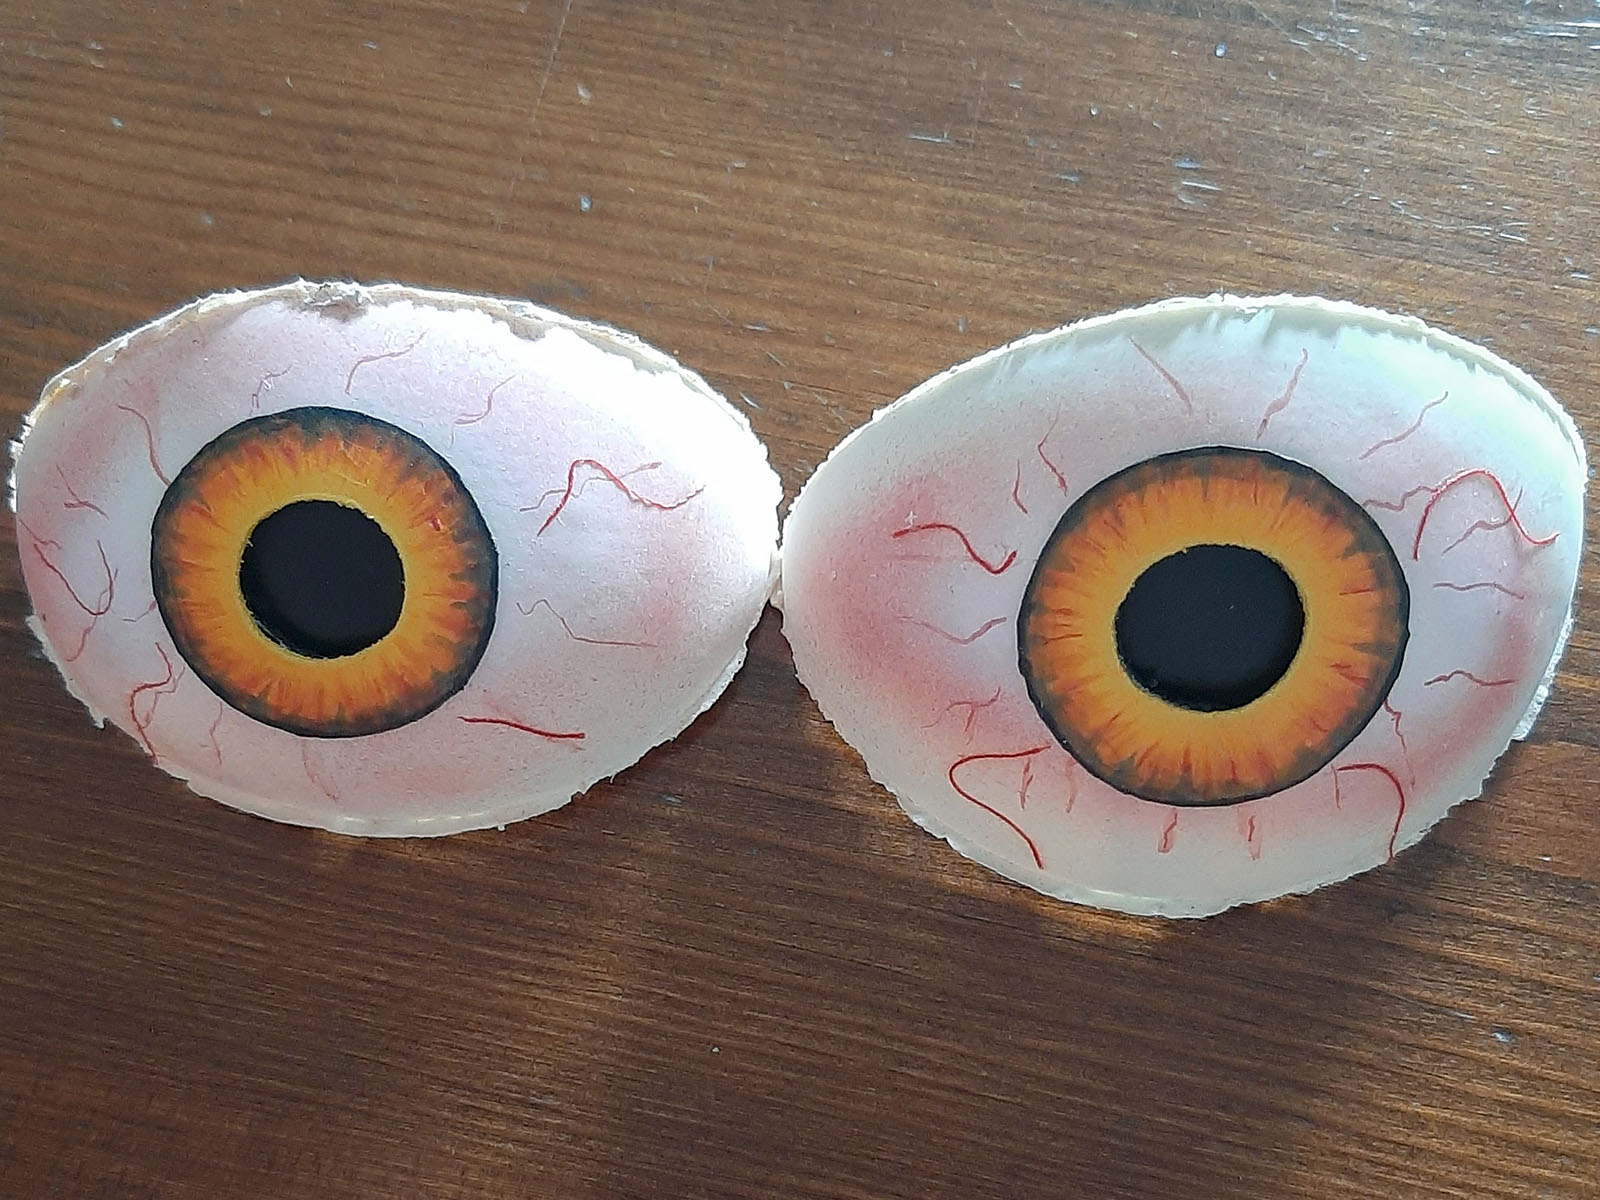
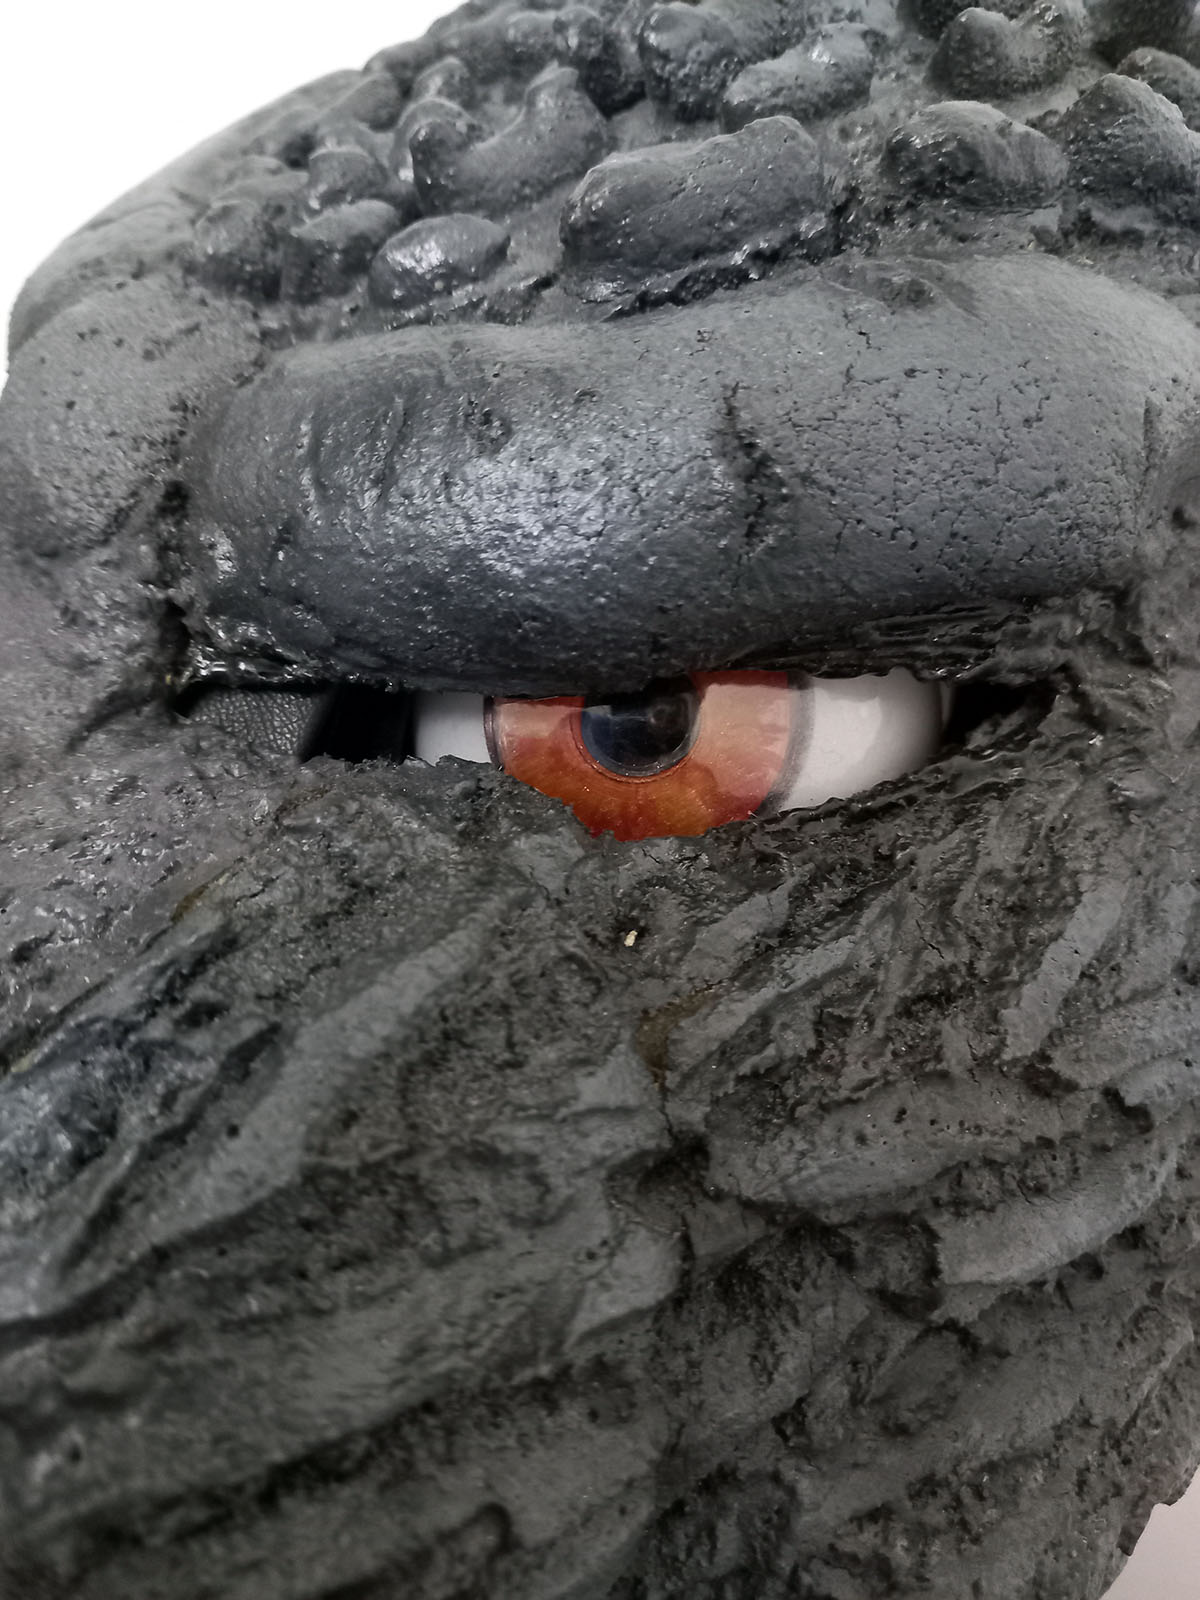
The fabrication of the eyes began by coating transparent plastic hemispheres with white-pigmented latex, layering it until the desired thickness was achieved.
The two latex halves were then slit at the center to insert a specific black plastic underneath the white surface level. The iris—crafted from two additional white latex hemispheres and detailed by hand and airbrush—was applied on top. This layered technique was essential to creating a sense of depth.
To enhance the realism and achieve a “terror-stricken” look, I added red shading and veins to the sclera, using a mix of hand-painting and thin red threads.
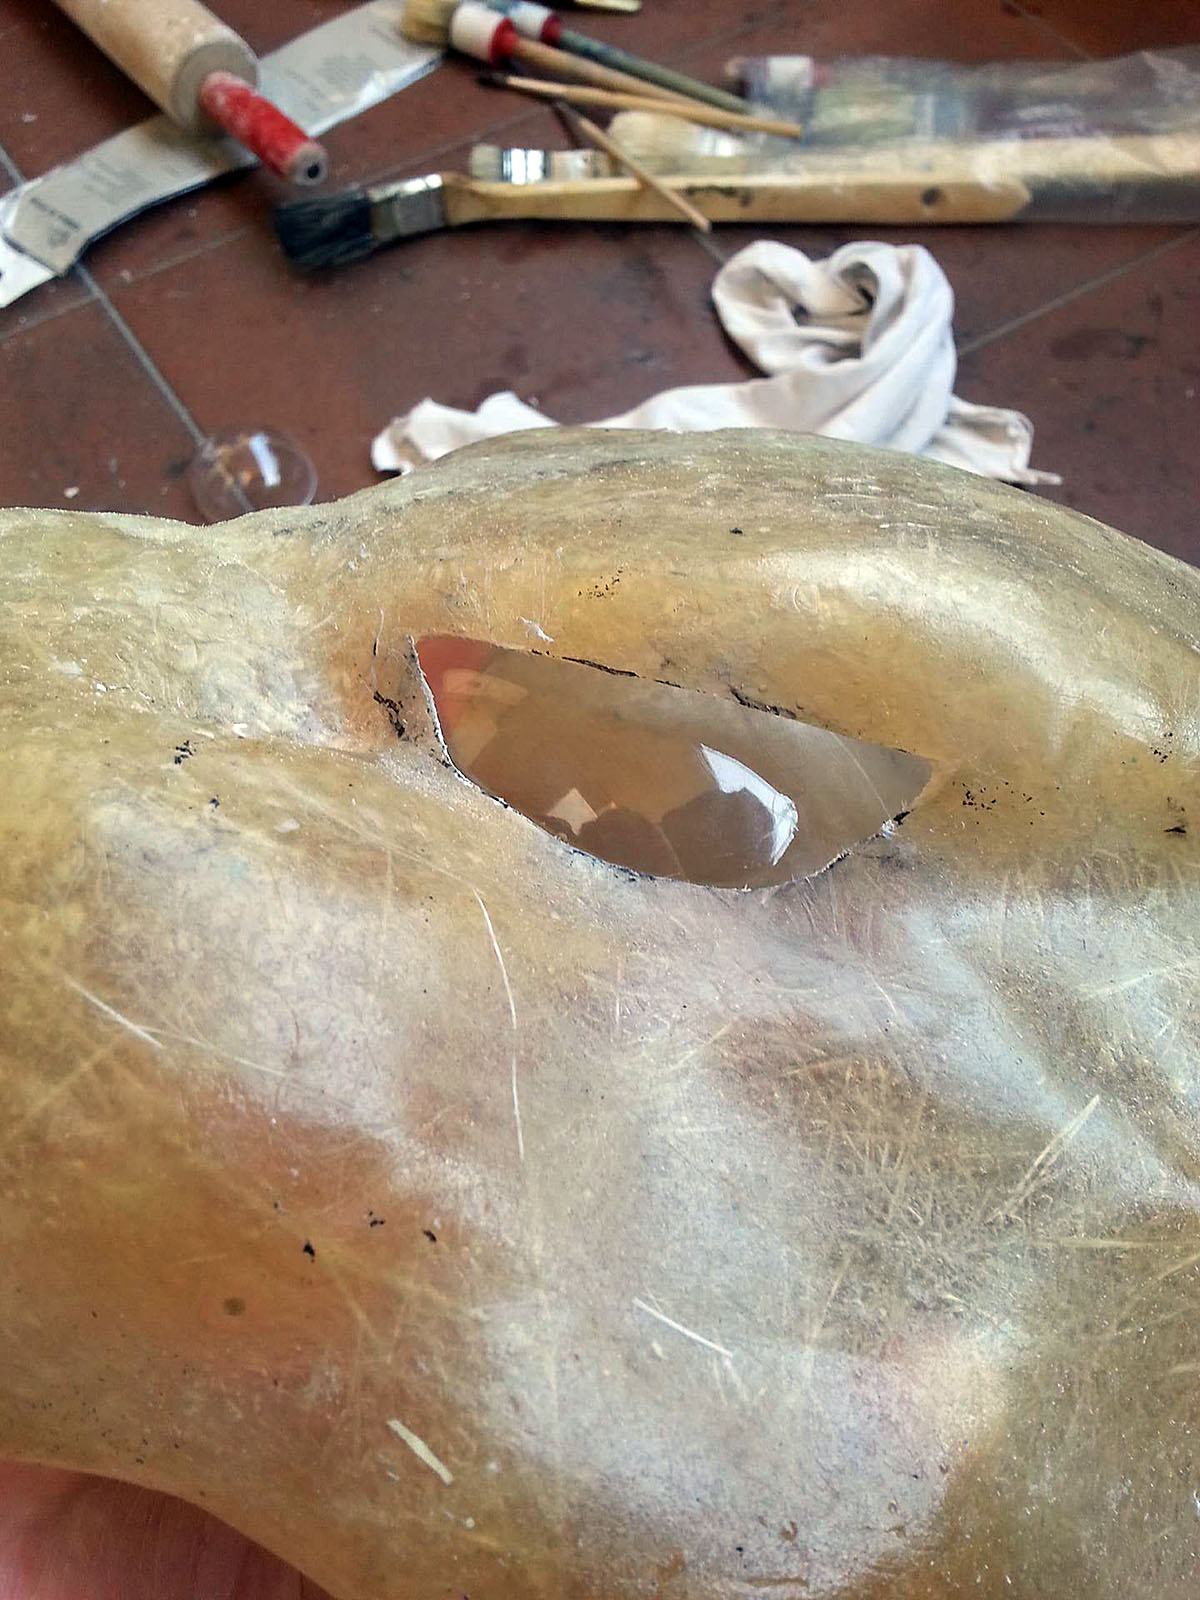
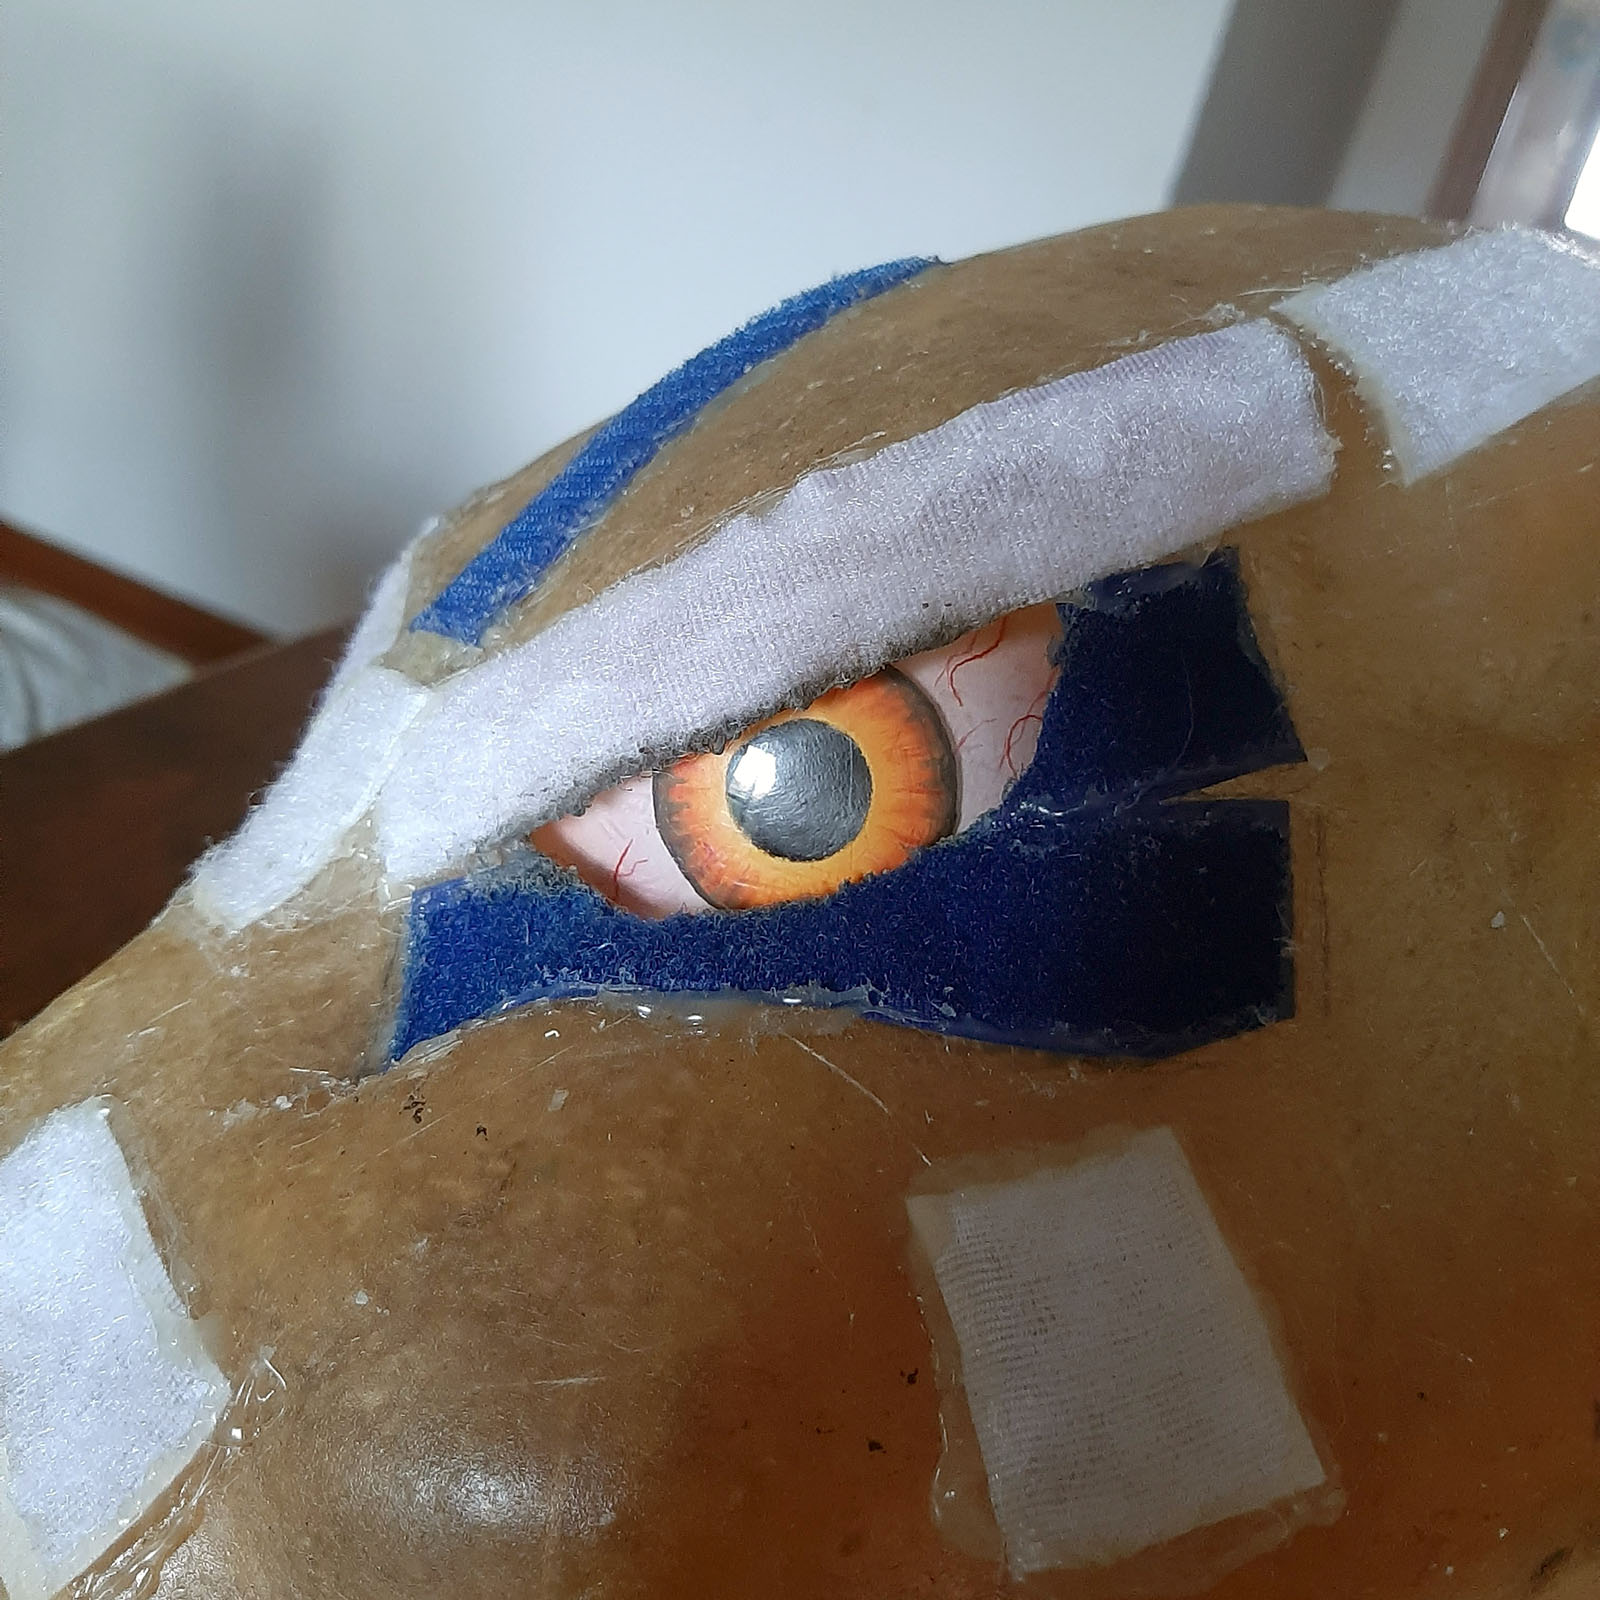
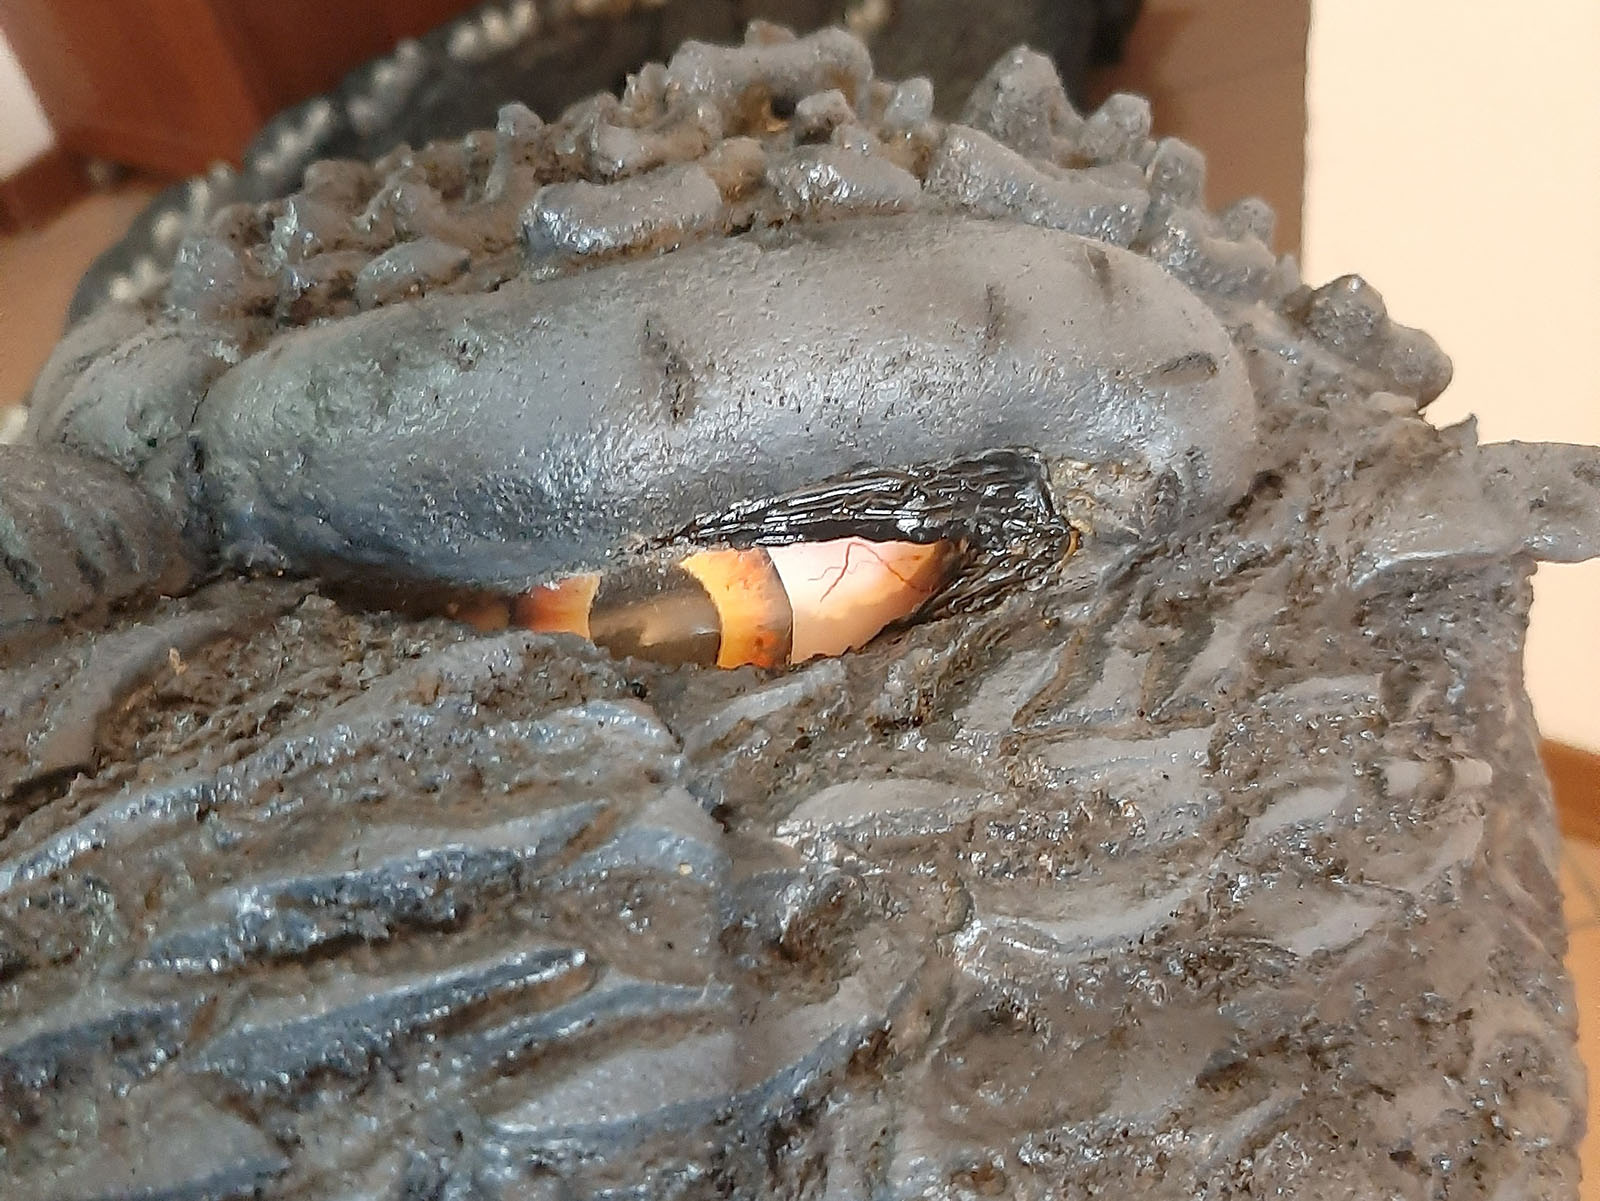
The finished eye was then mounted into the head, protected by a layer of transparent plastic that had been thermoformed to match the skull’s internal shape.
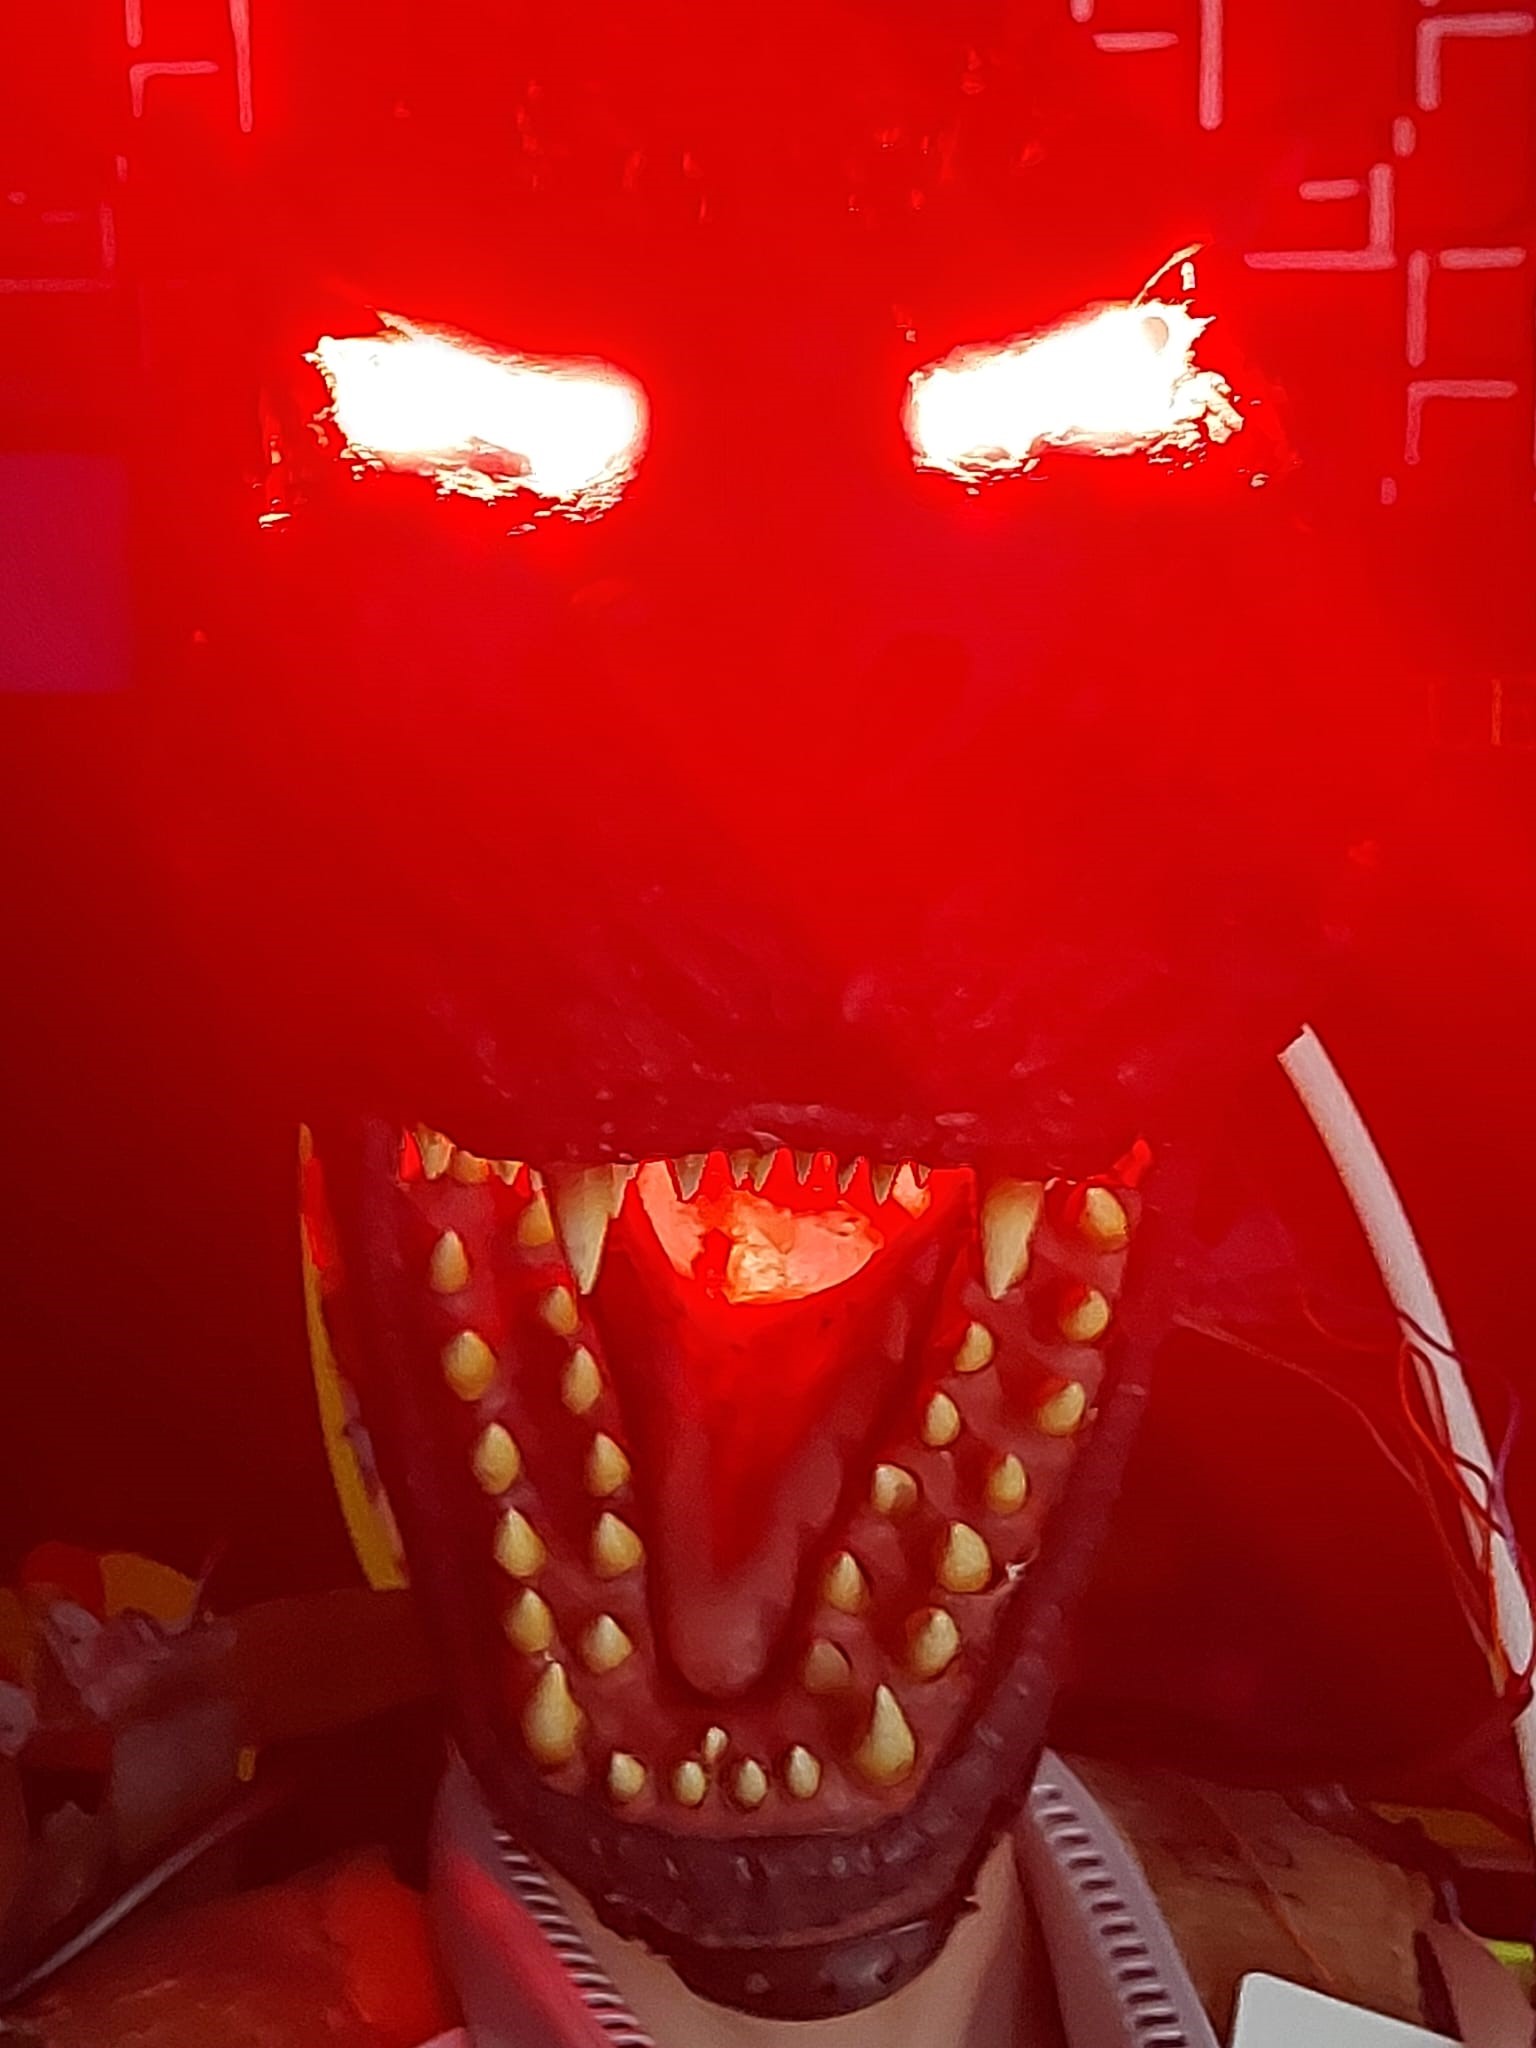
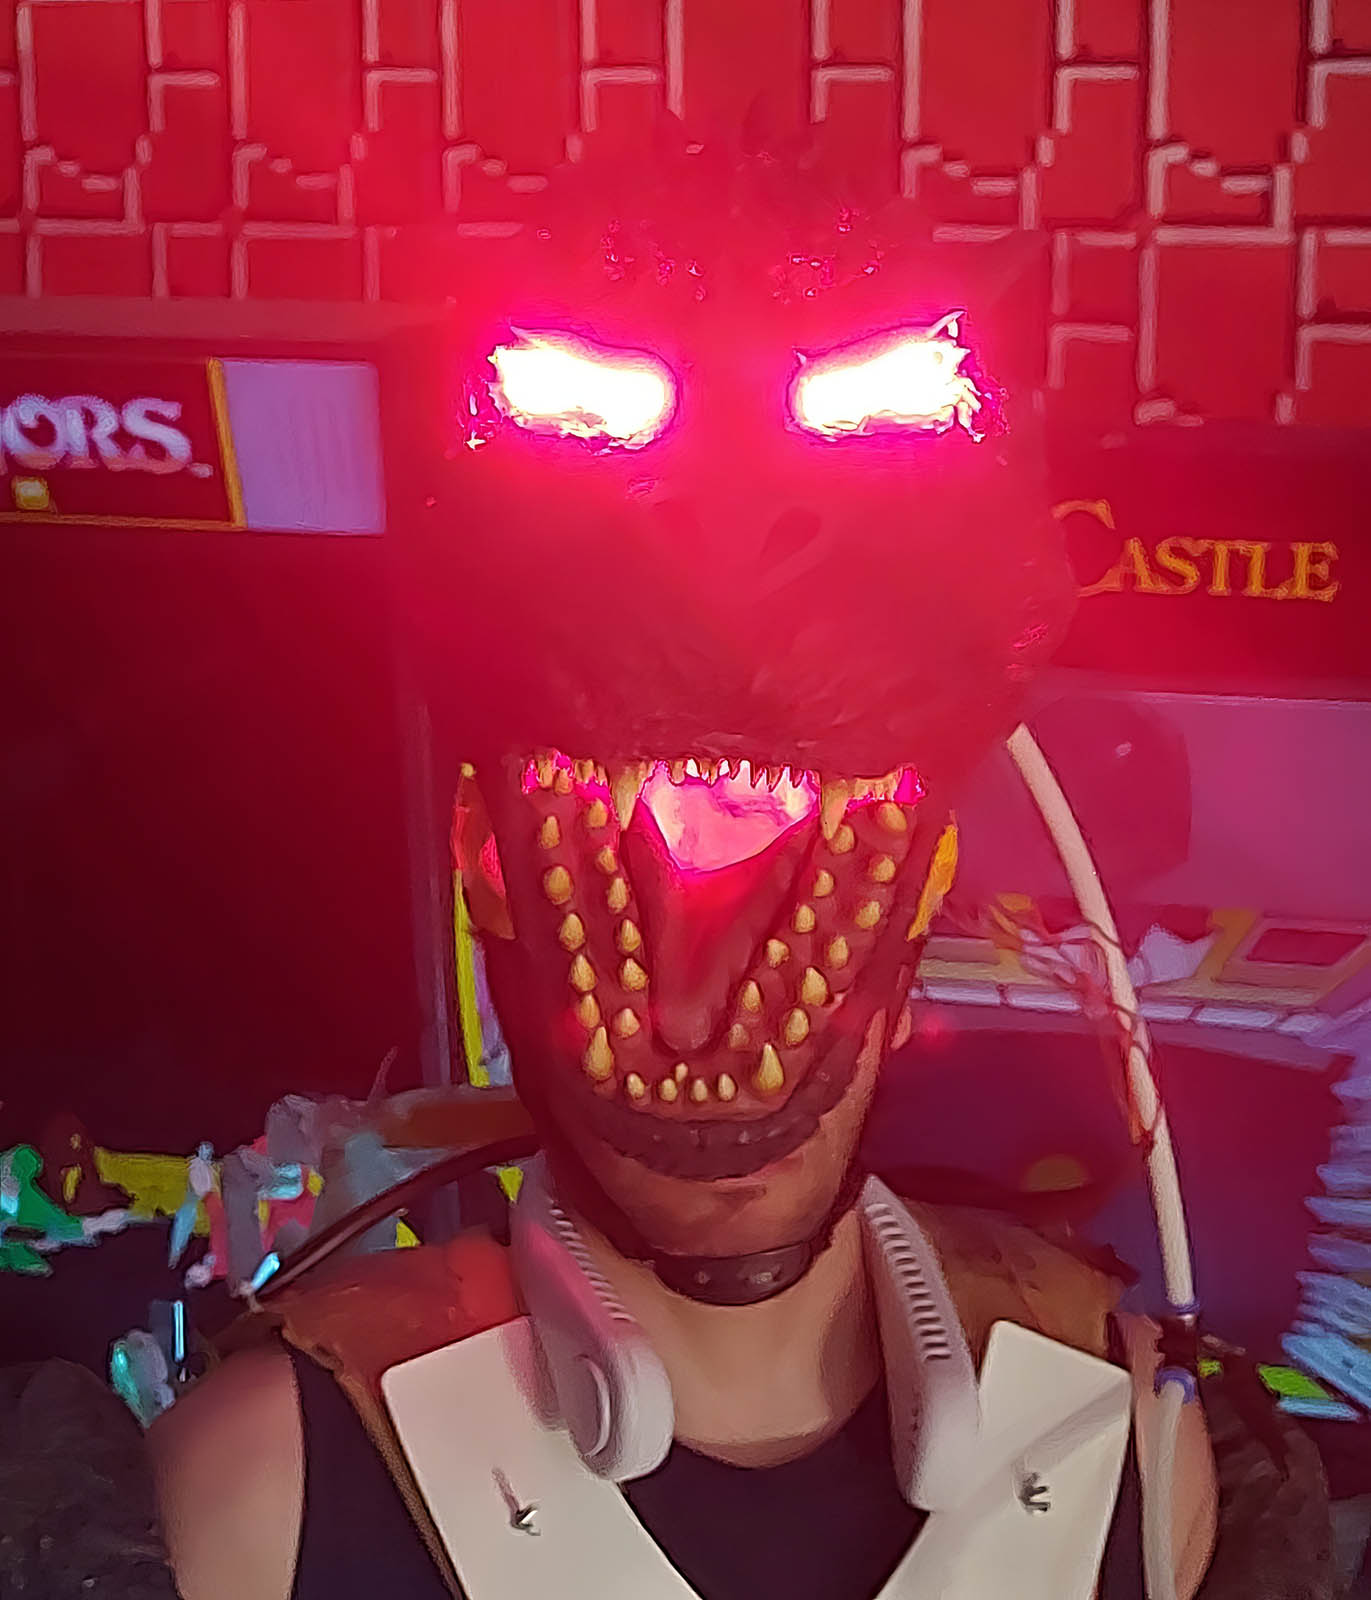
For the World Cosplay Summit finals in Japan, Andrea 3D-printed a new set of eyes to replace my original ones. We made these new bulbs thinner to accommodate the red LEDs we decided to install, which activate whenever the “atomic breath” is triggered.
Arms and Hands
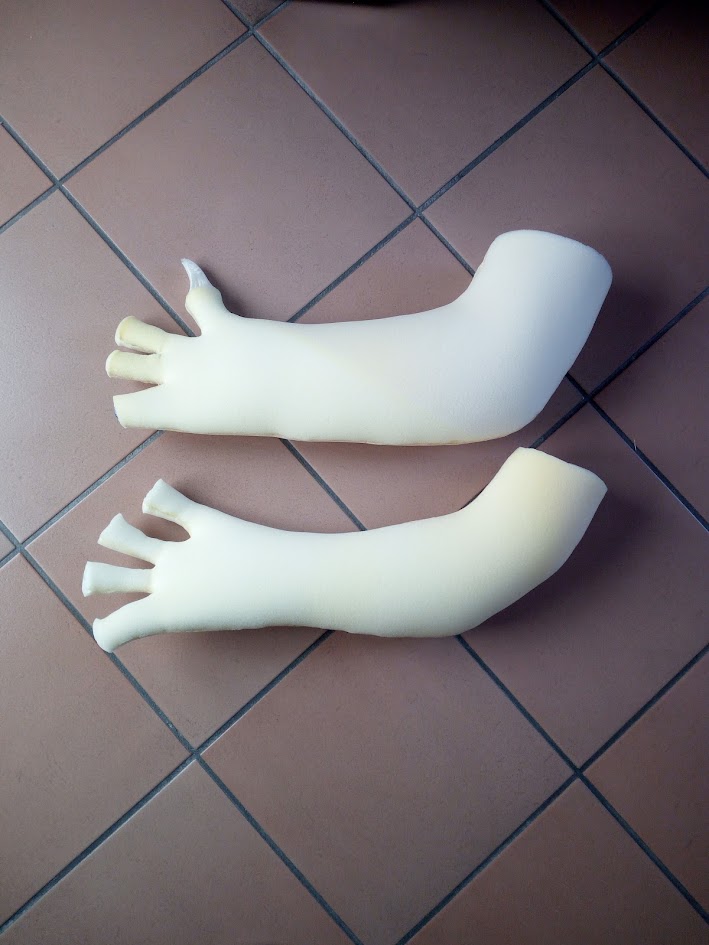
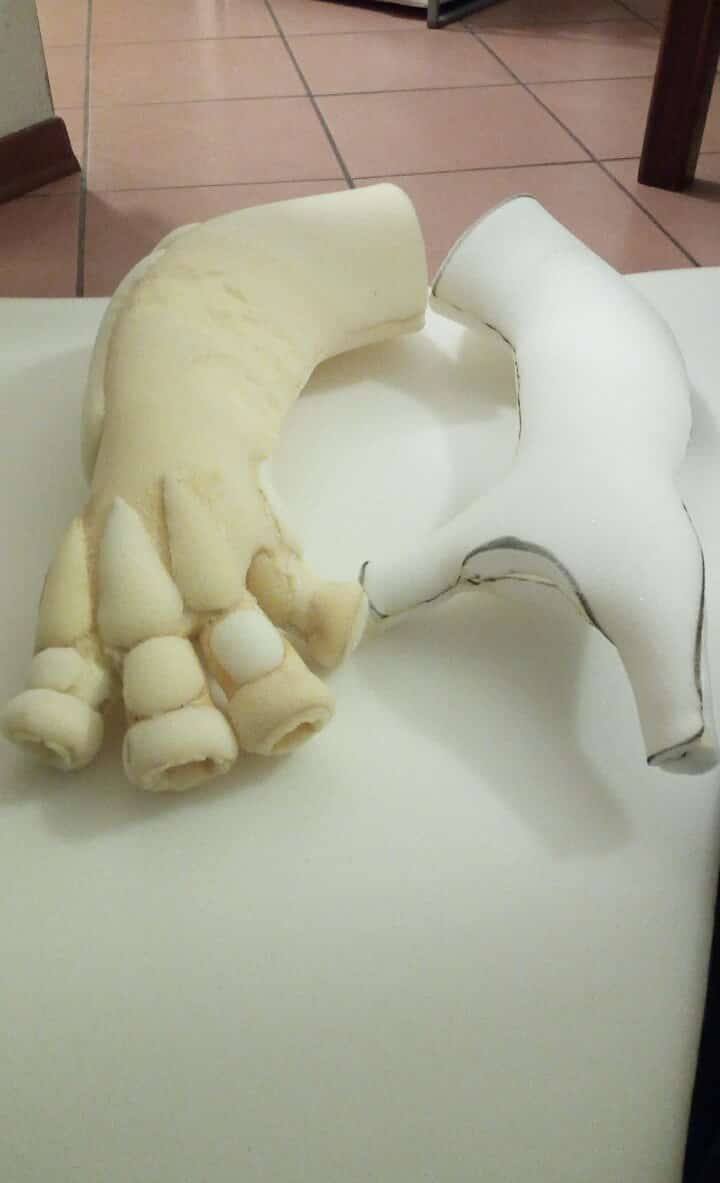
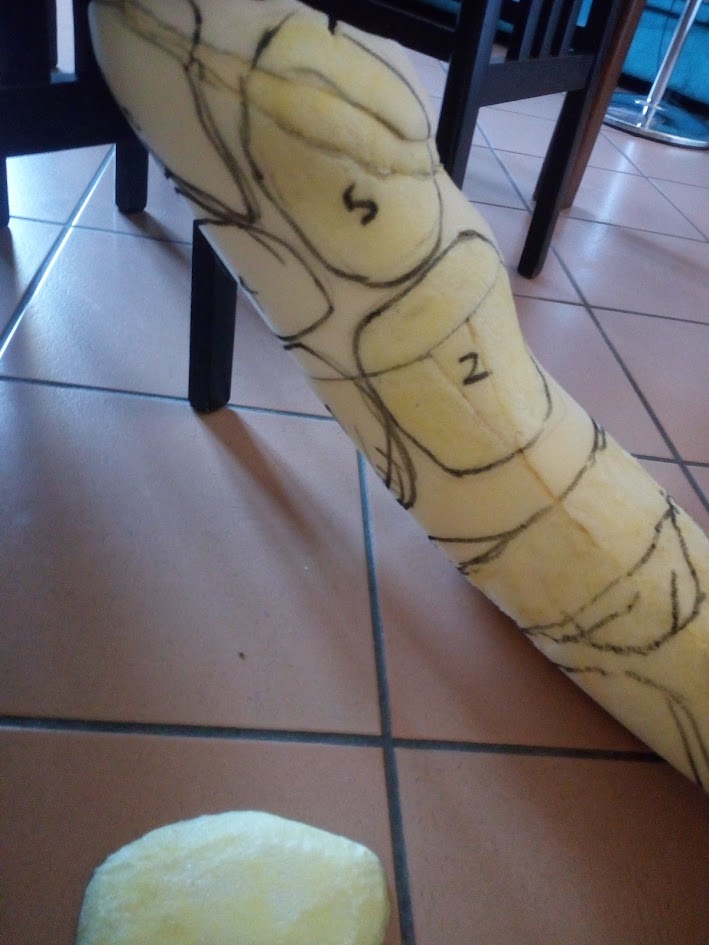
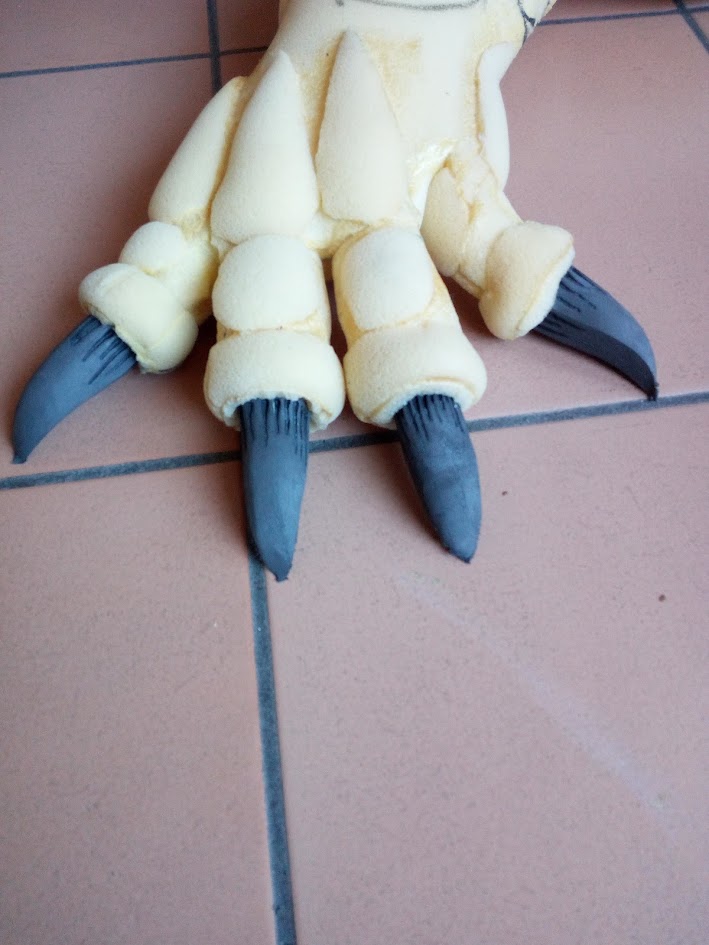
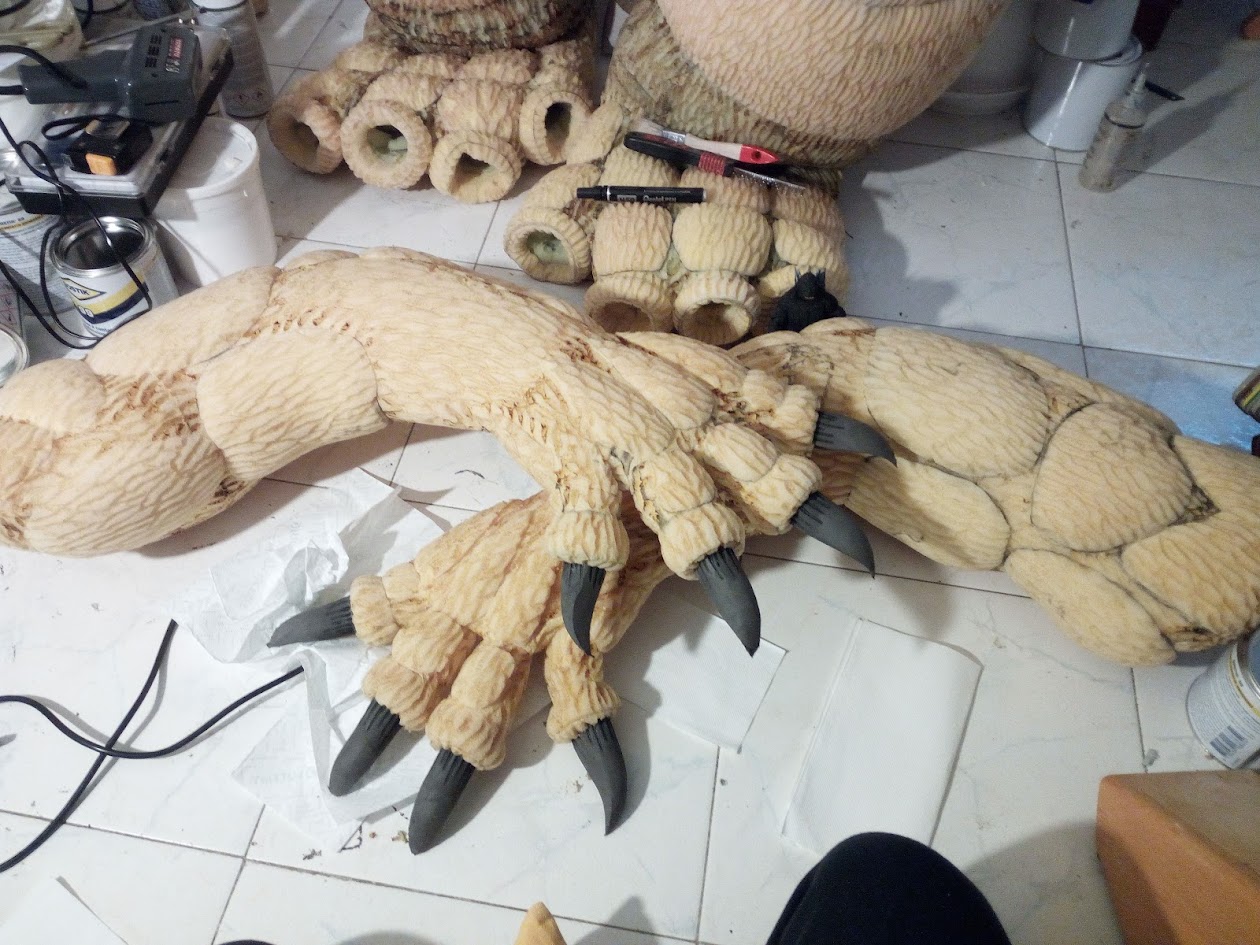
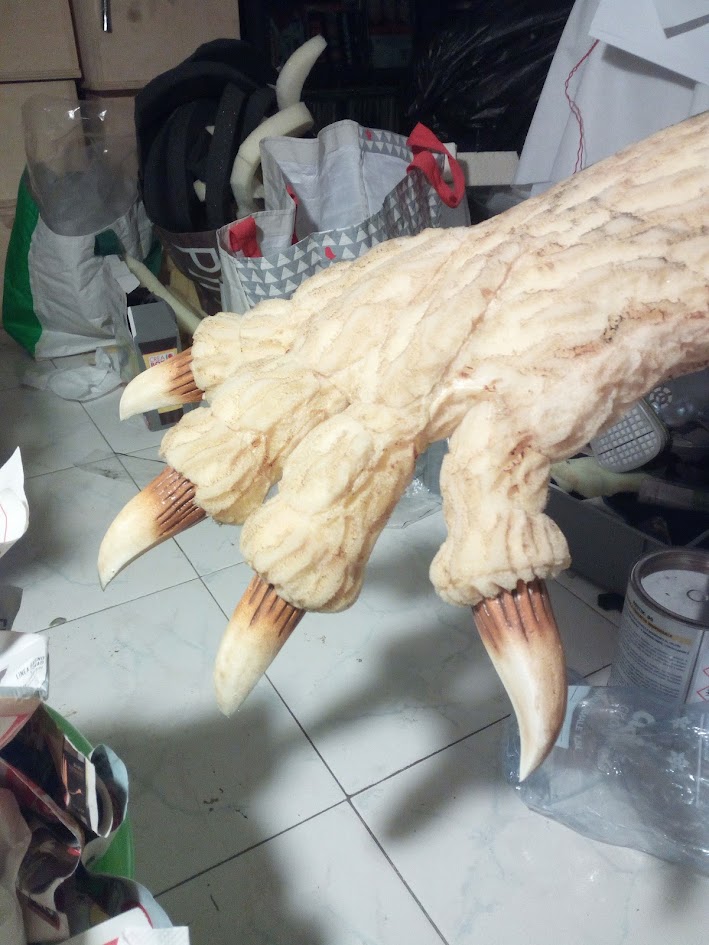
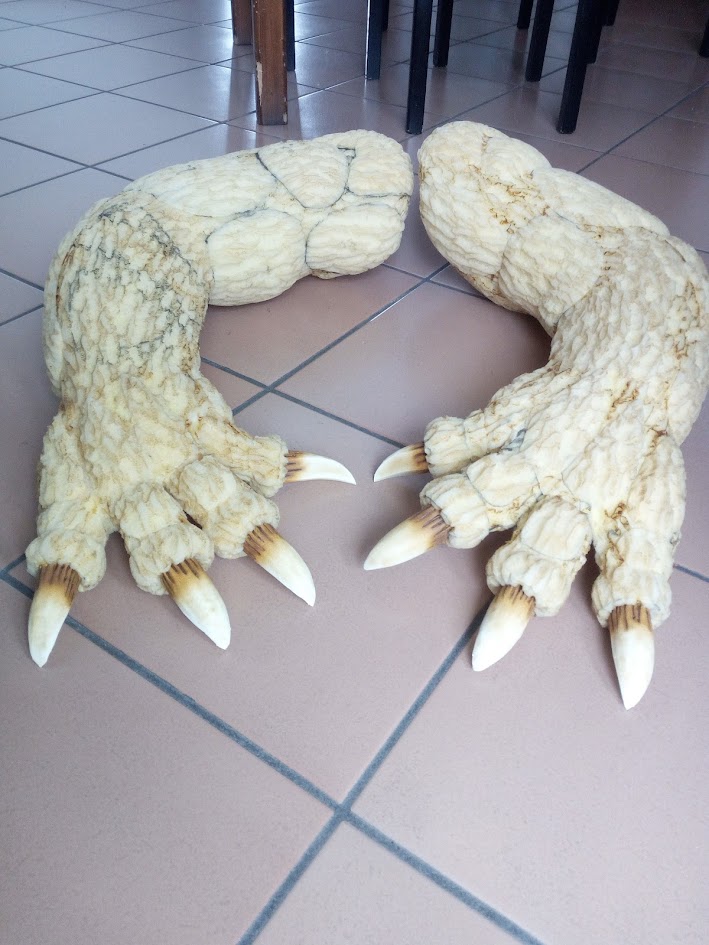
Unlike the rest of the suit, the arms were not created via 3D scanning. Instead, they were drawn freehand directly onto the foam, ensuring they remained perfectly in scale with the rest of the body.
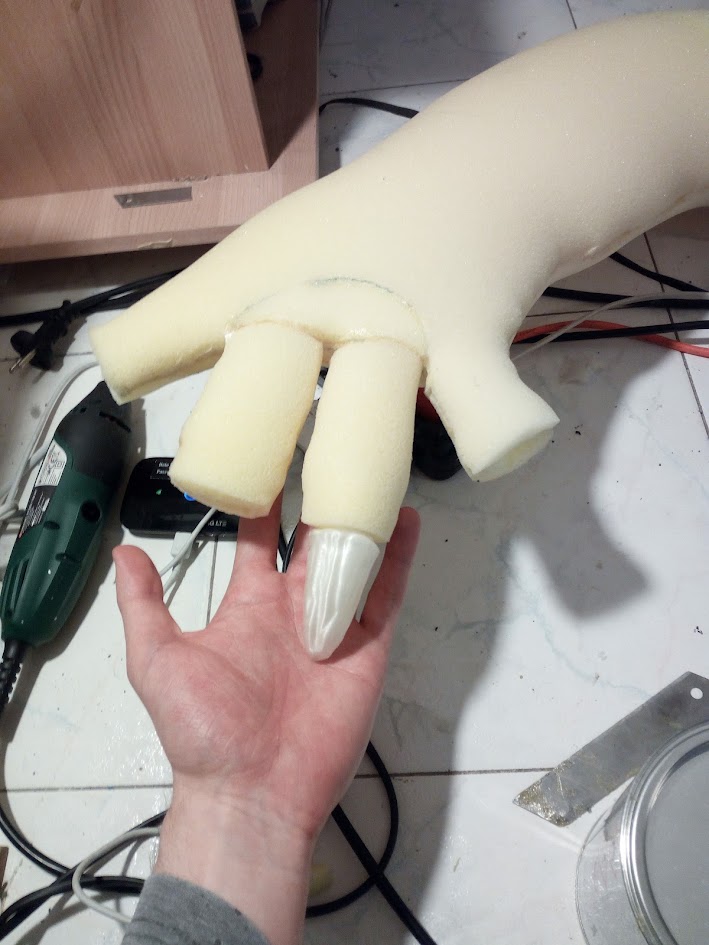
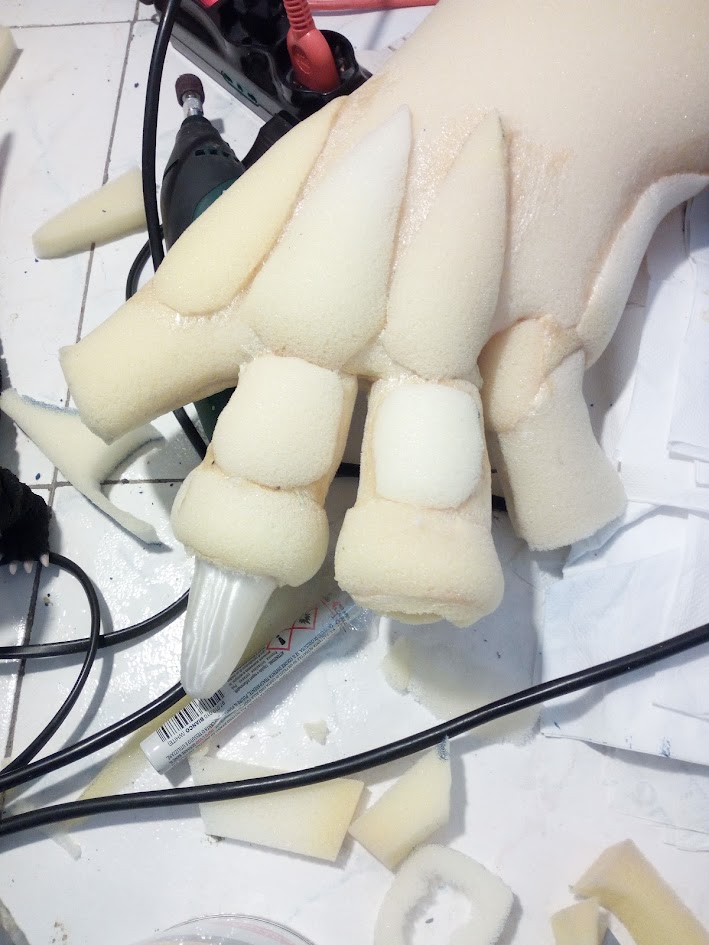
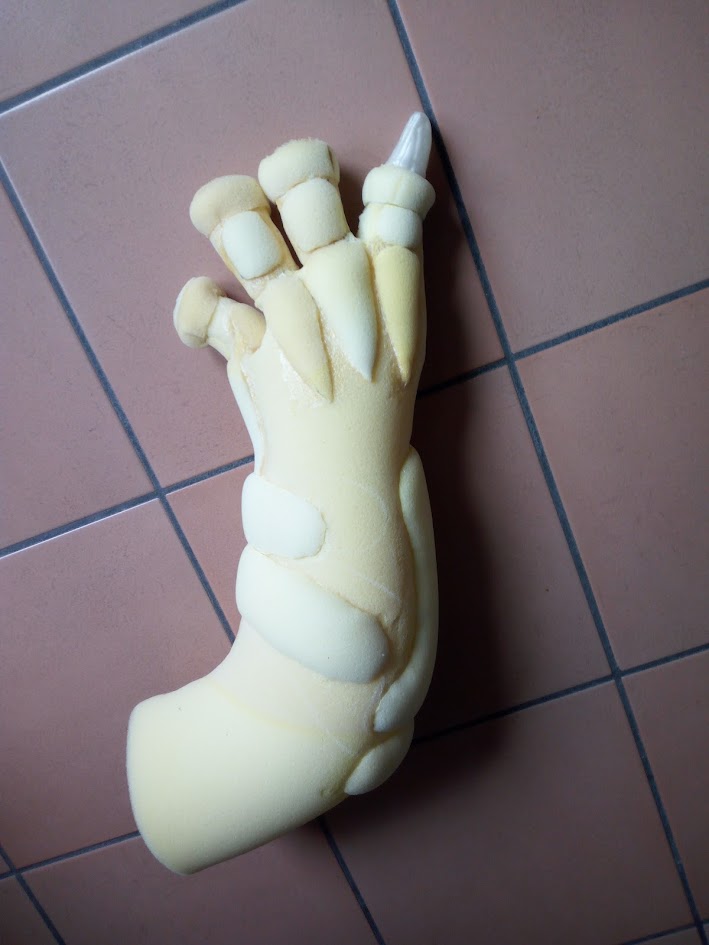
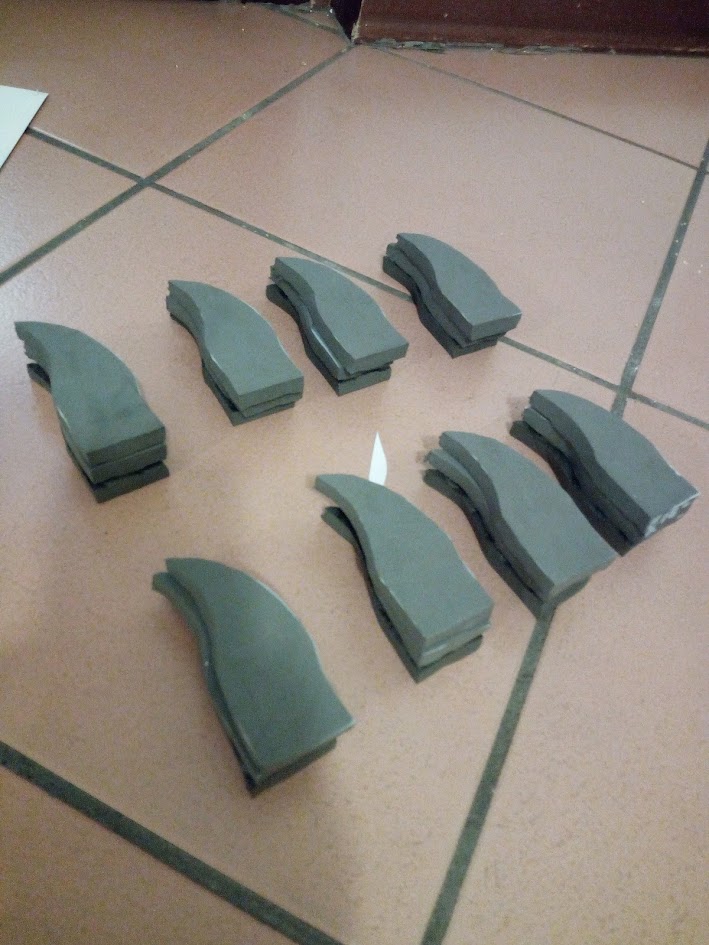
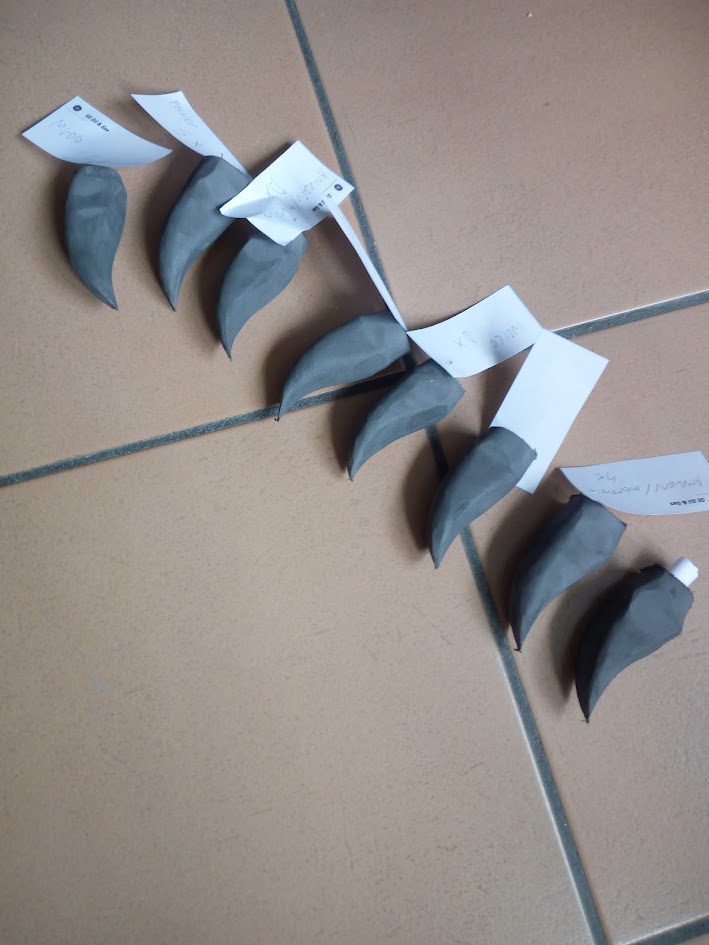
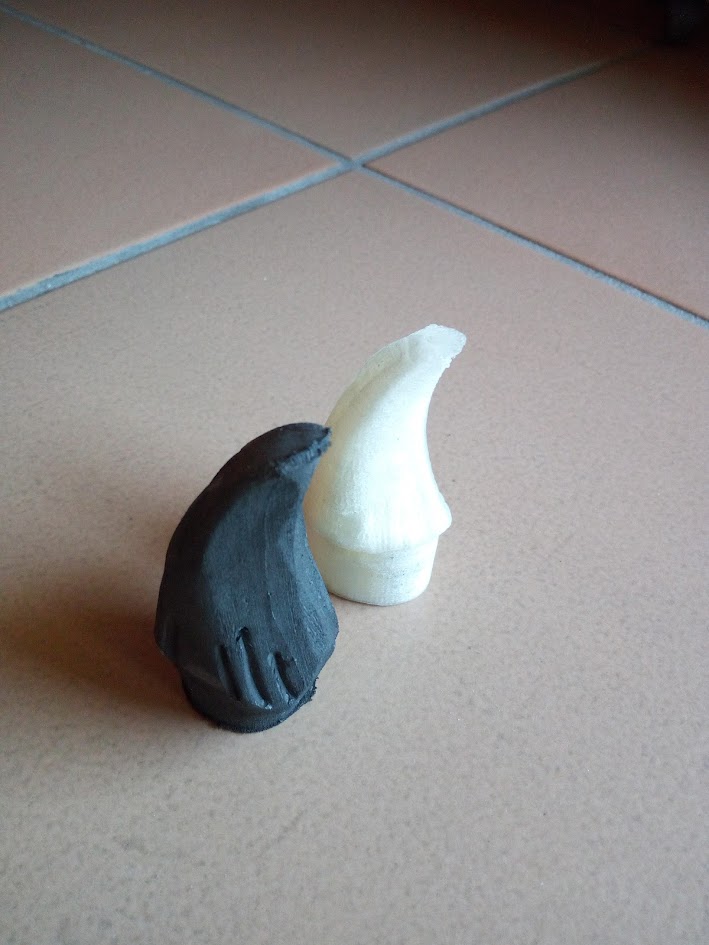
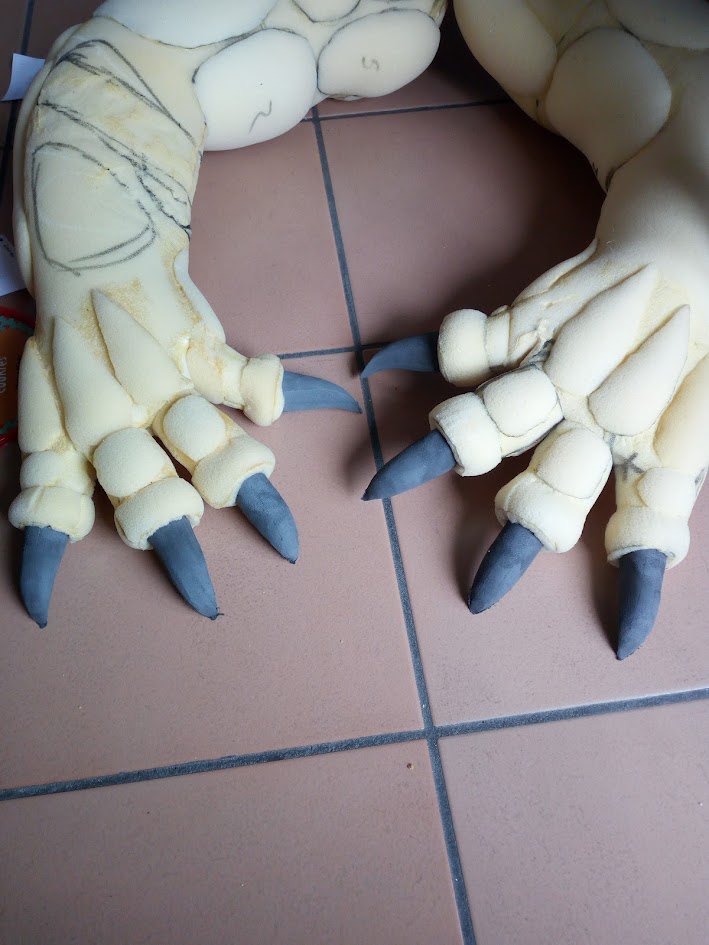
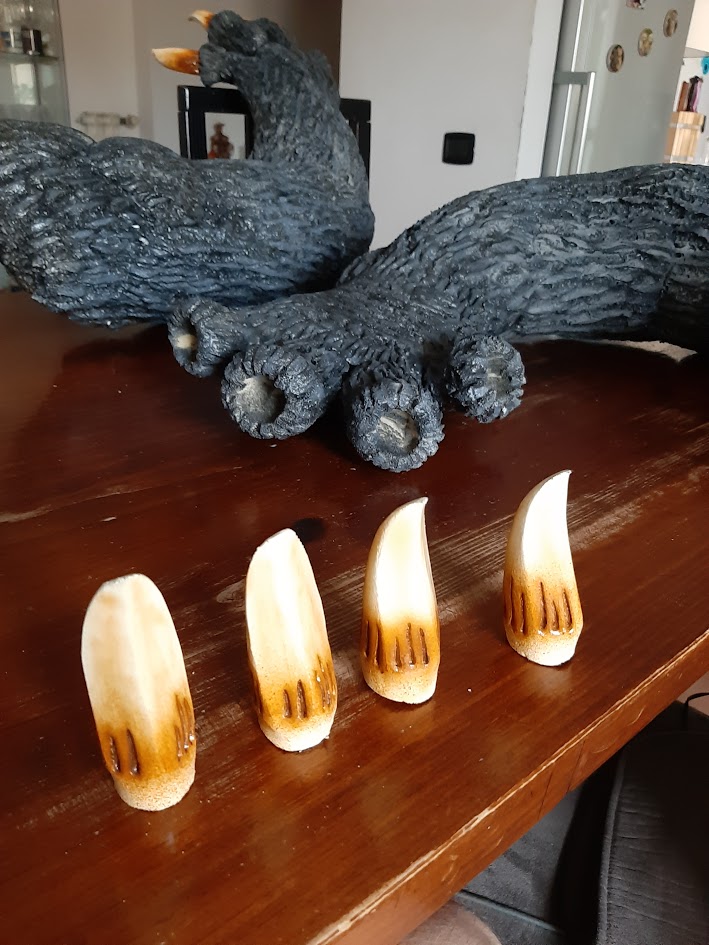
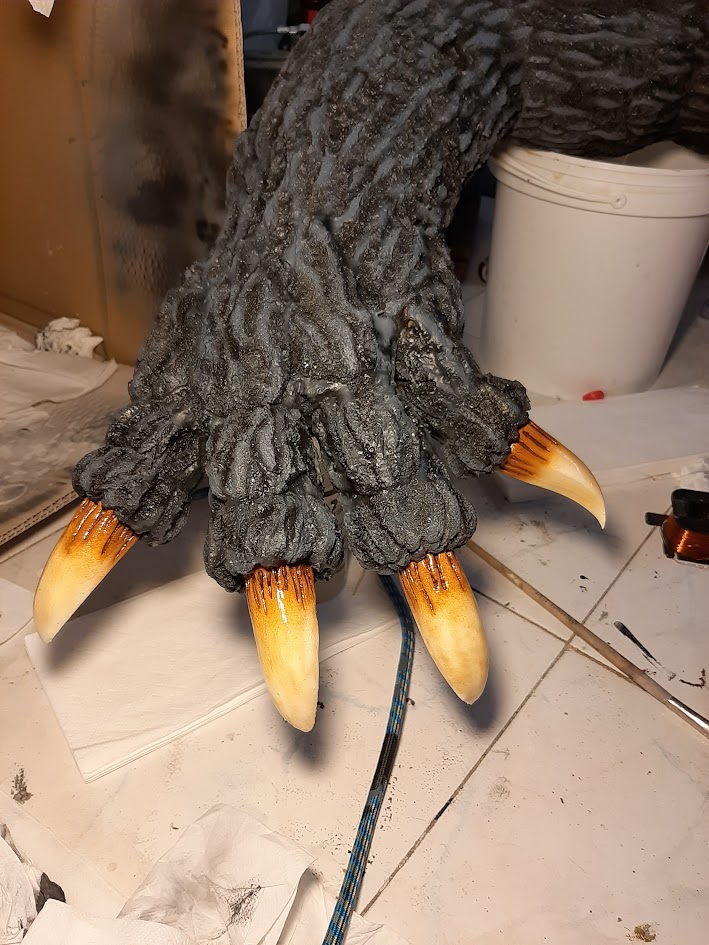
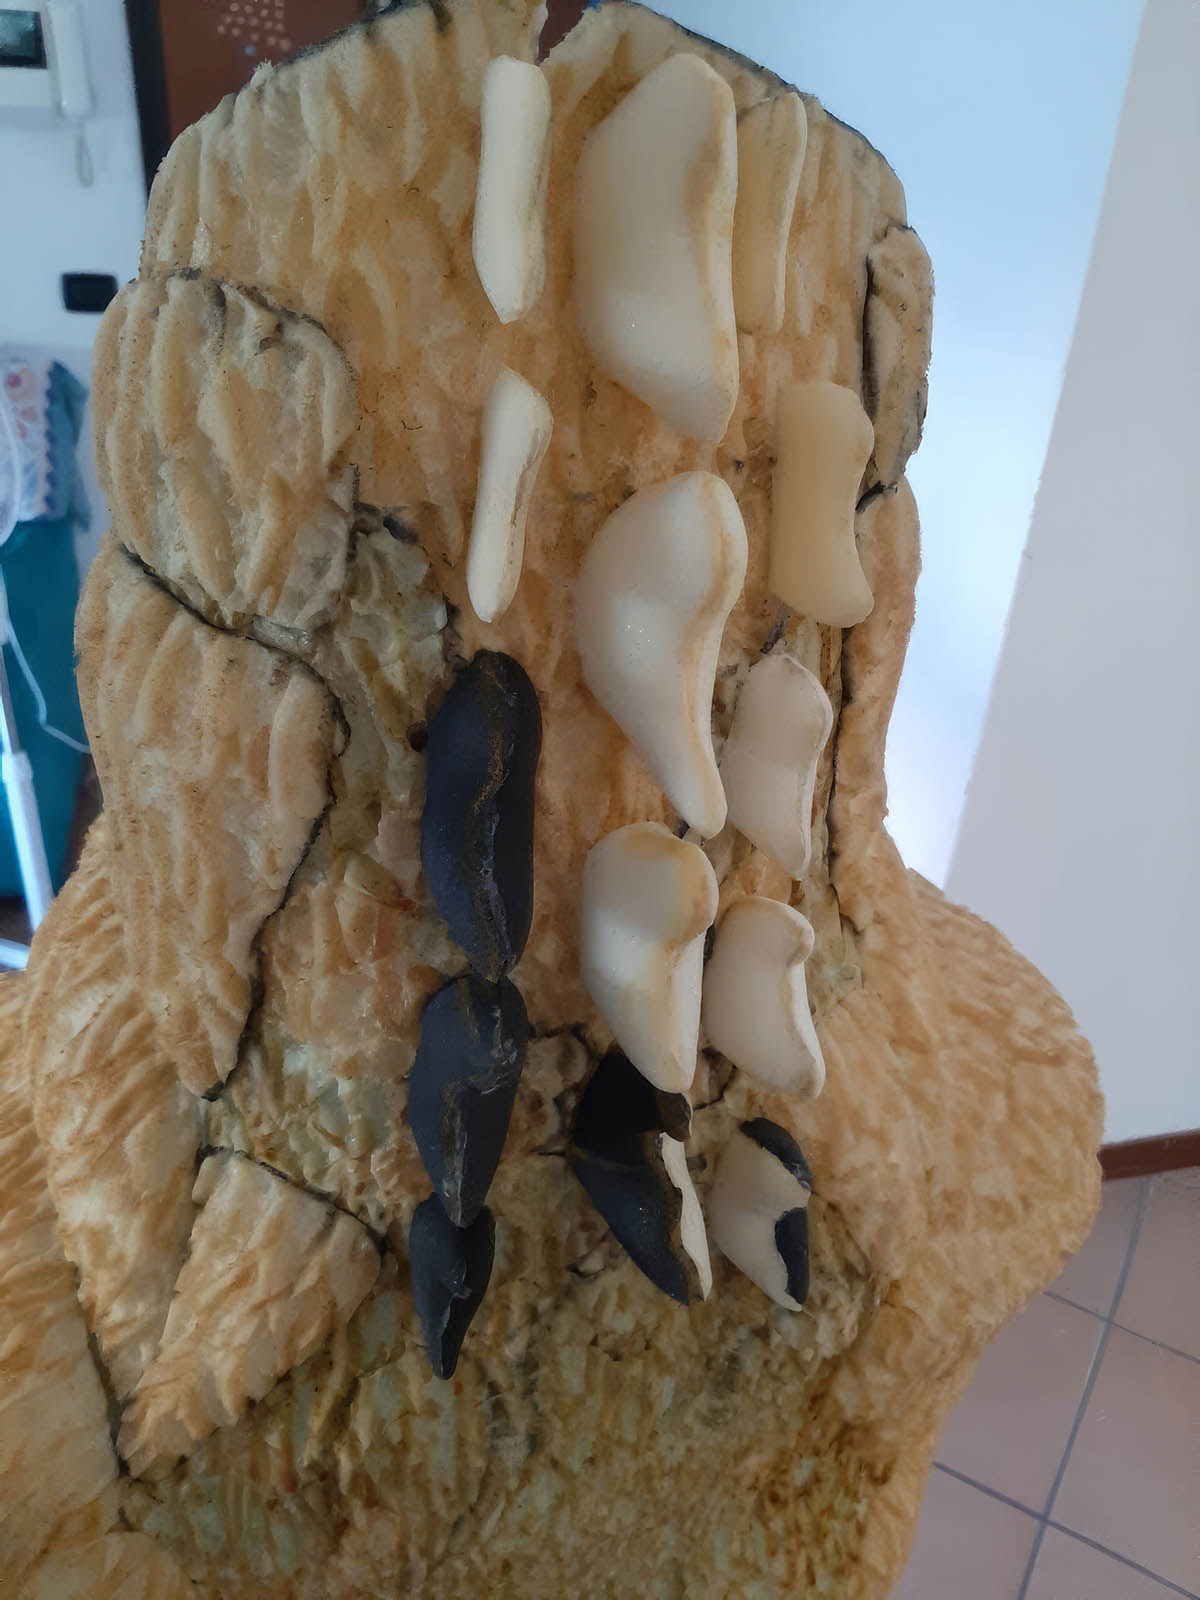
The design consisted of two halves, including the hands and fingers; once joined, they formed smooth, muscle-less arm bases. To assist with the claws, Andrea 3D-printed a master claw to serve as a template for the EVA foam versions. After carving all the claws following this guide, I refined them to look more organic by adding veins, custom coloring, and a coat of spray plasticizer. The goal was to create a finish that visually contrasted with the skin, achieving a realistic, natural look.
After sculpting the musculature with additional foam and adding fine details to the fingers, I applied the same skin texture to the arms to match the rest of the body.
Finally, I applied the black latex, treated the surface, and finished it with airbrushing before permanently bonding the claws to the fingertips.
The button in the right hand controls the mouth, while the left one activates the sequence for the atomic breath and lights.
Legs and Feet
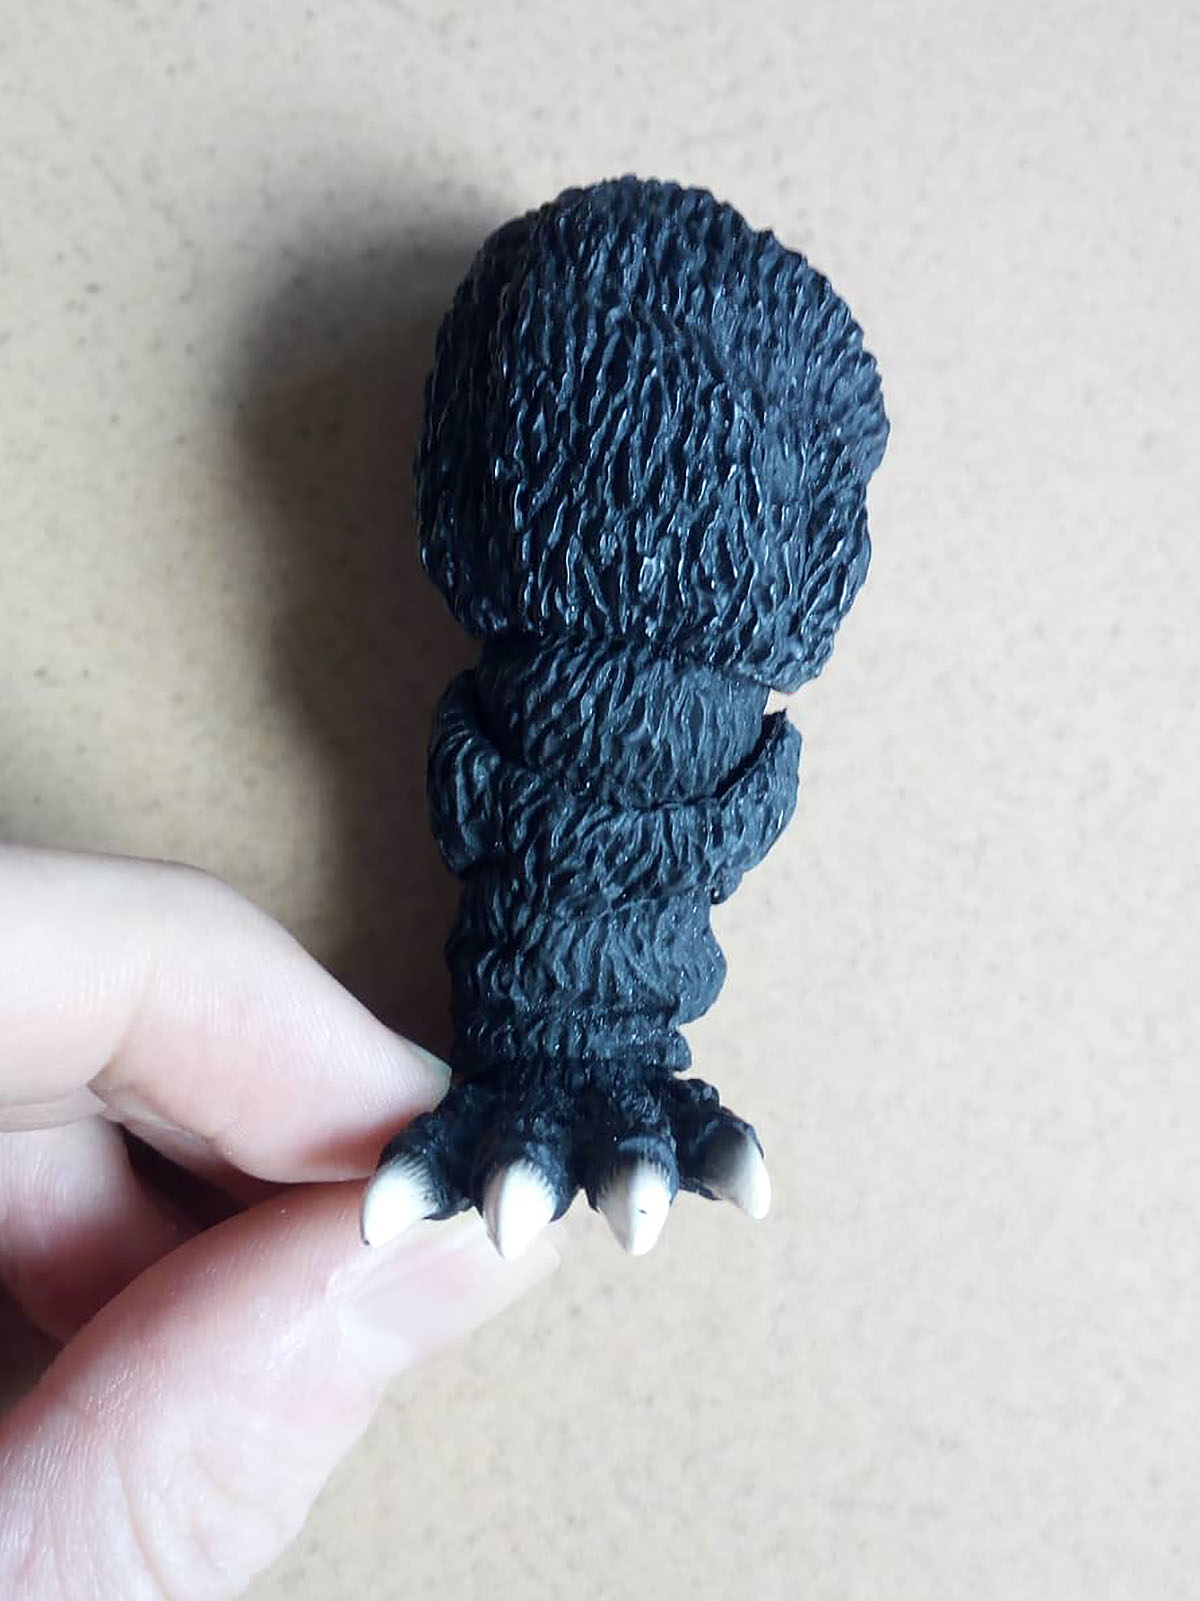
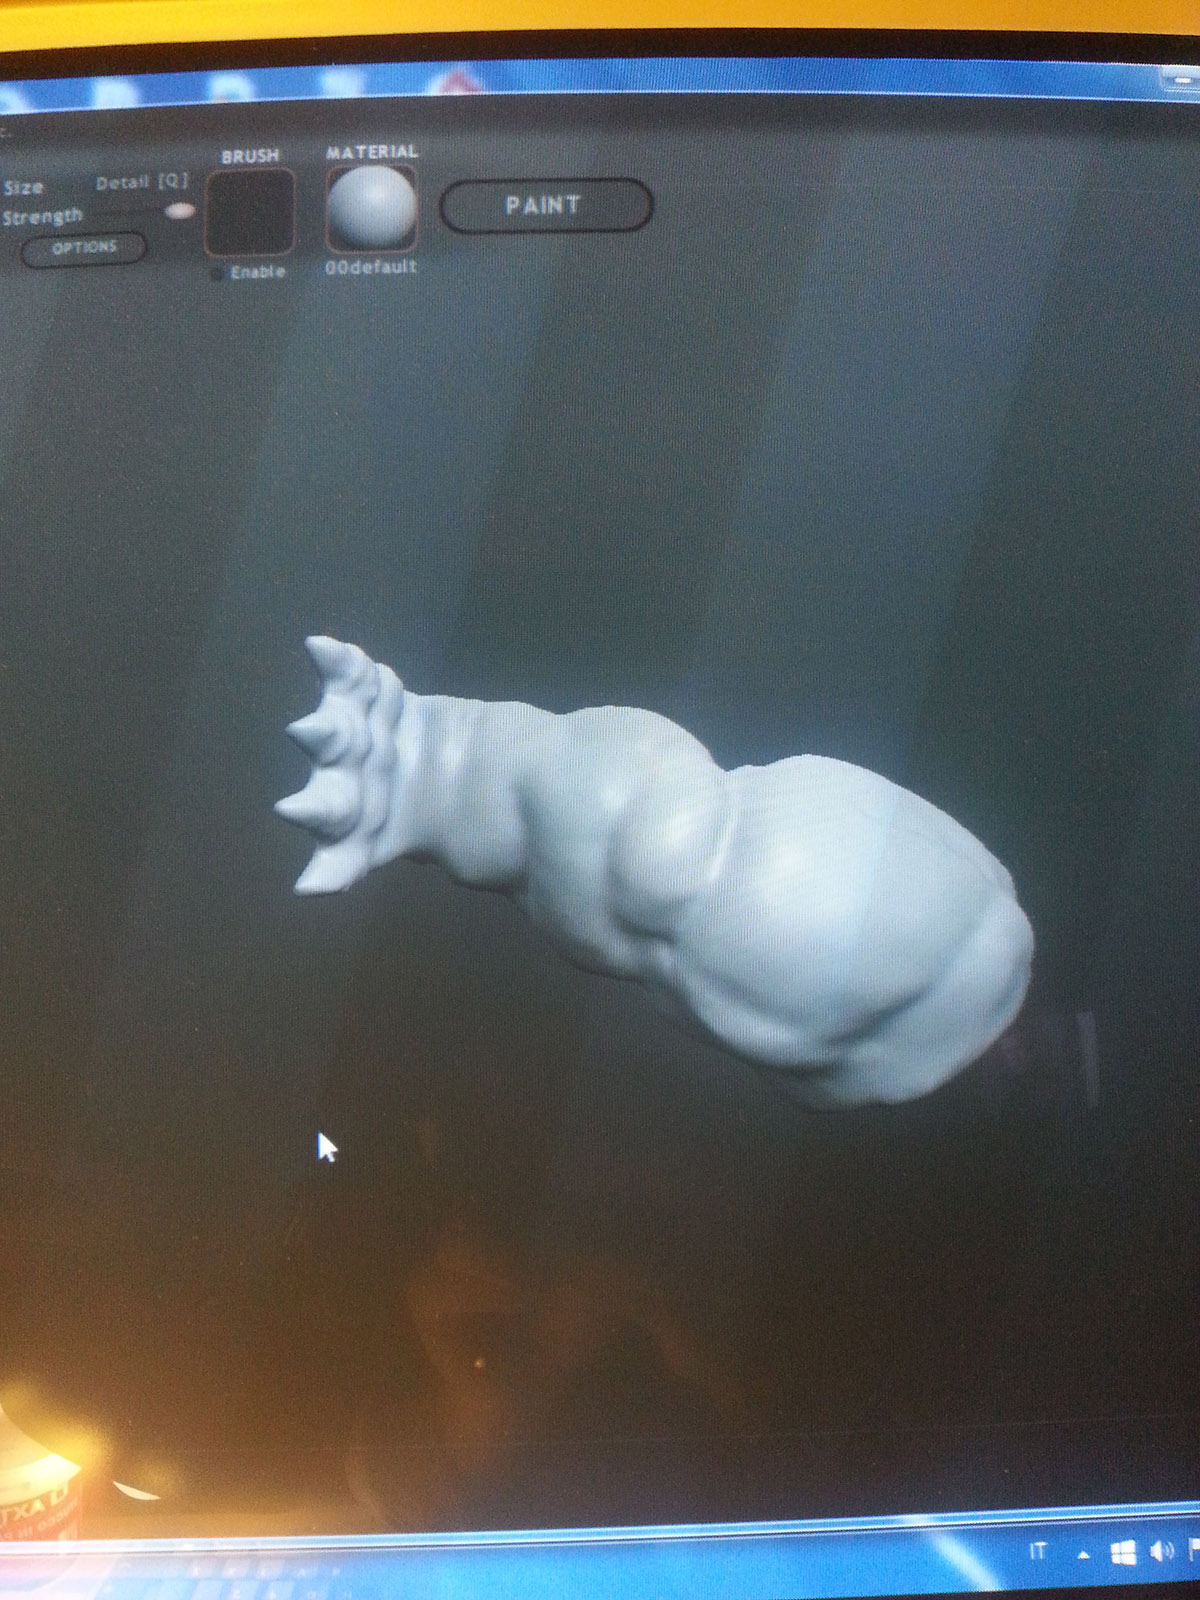
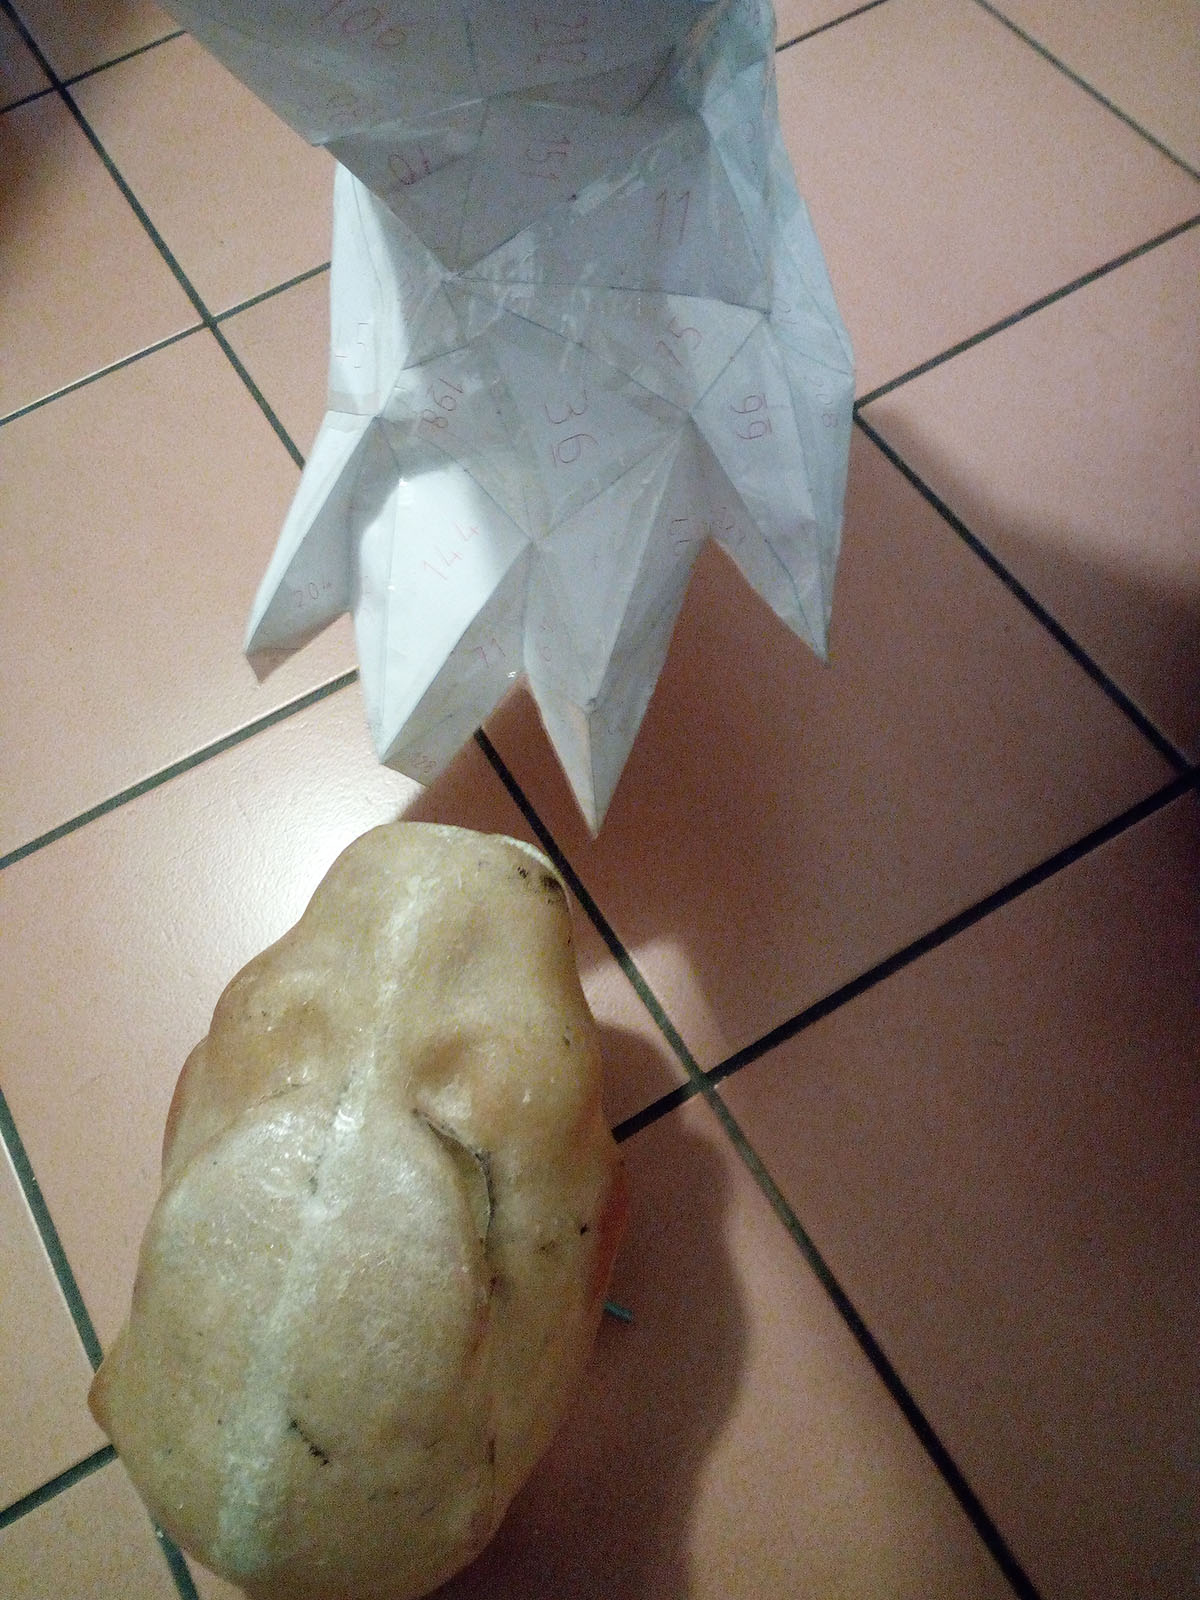
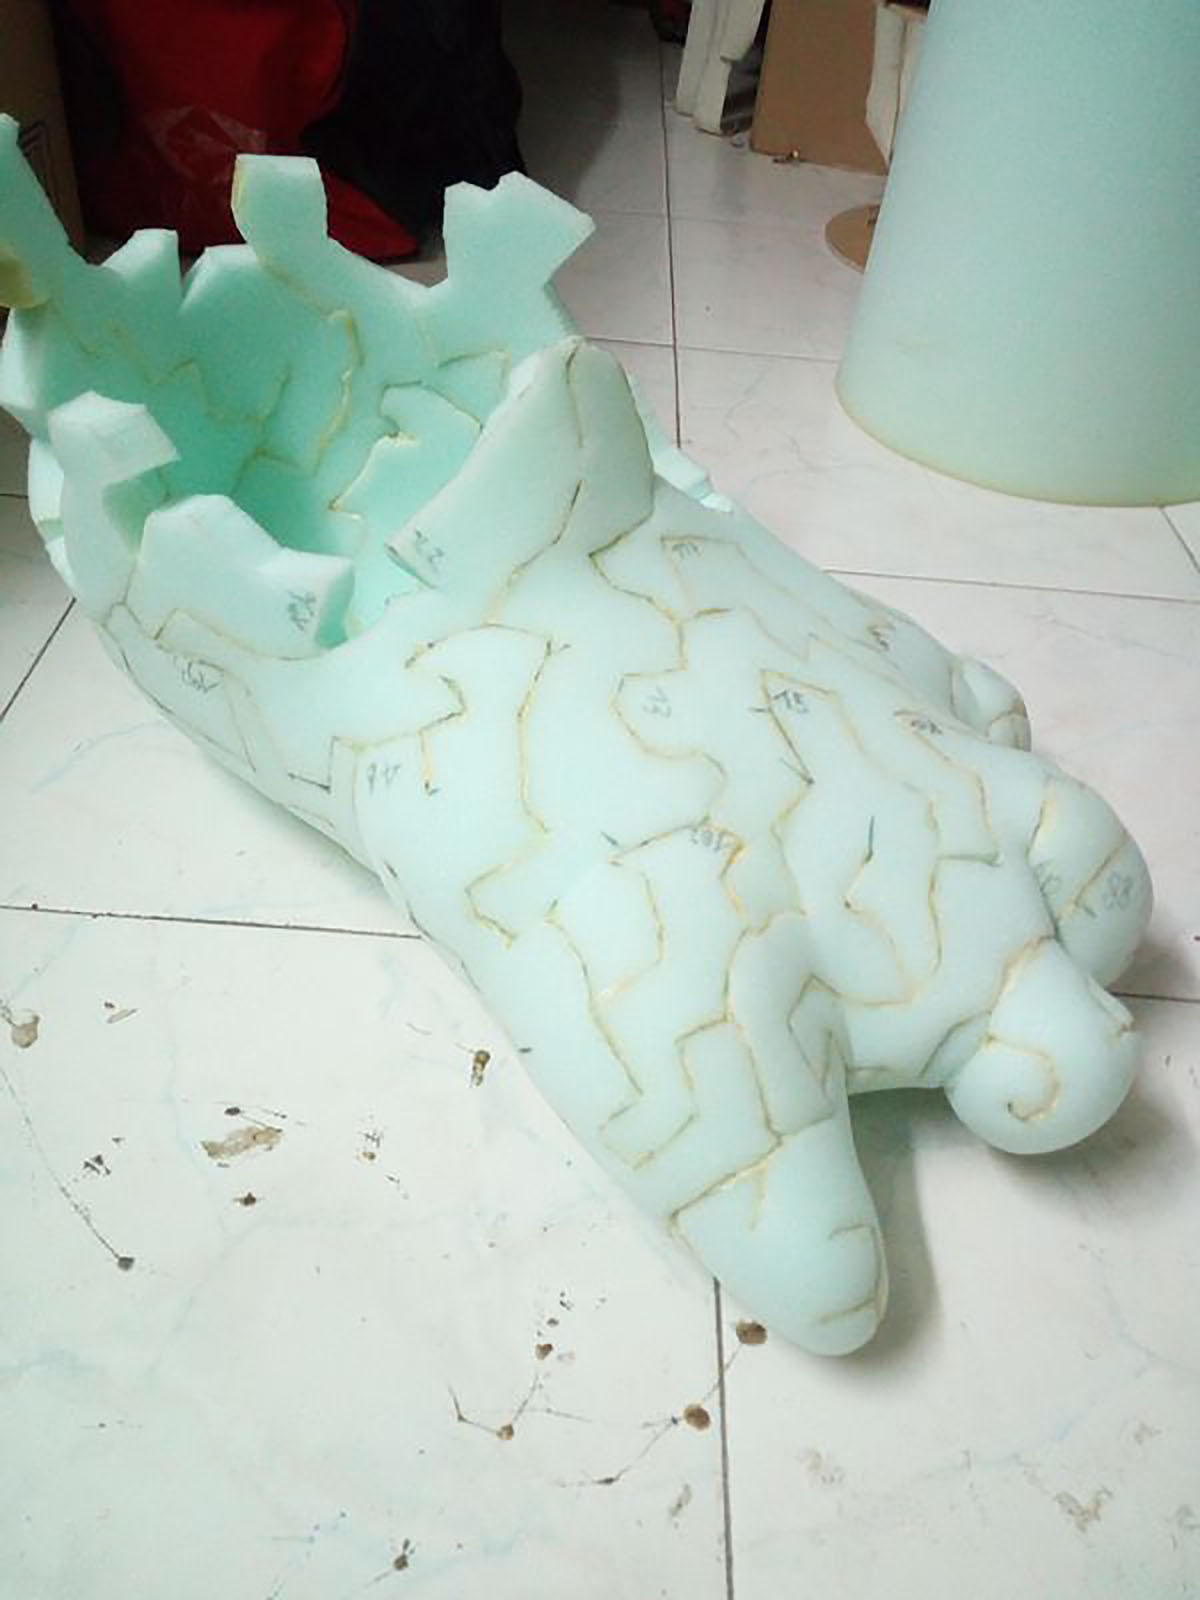
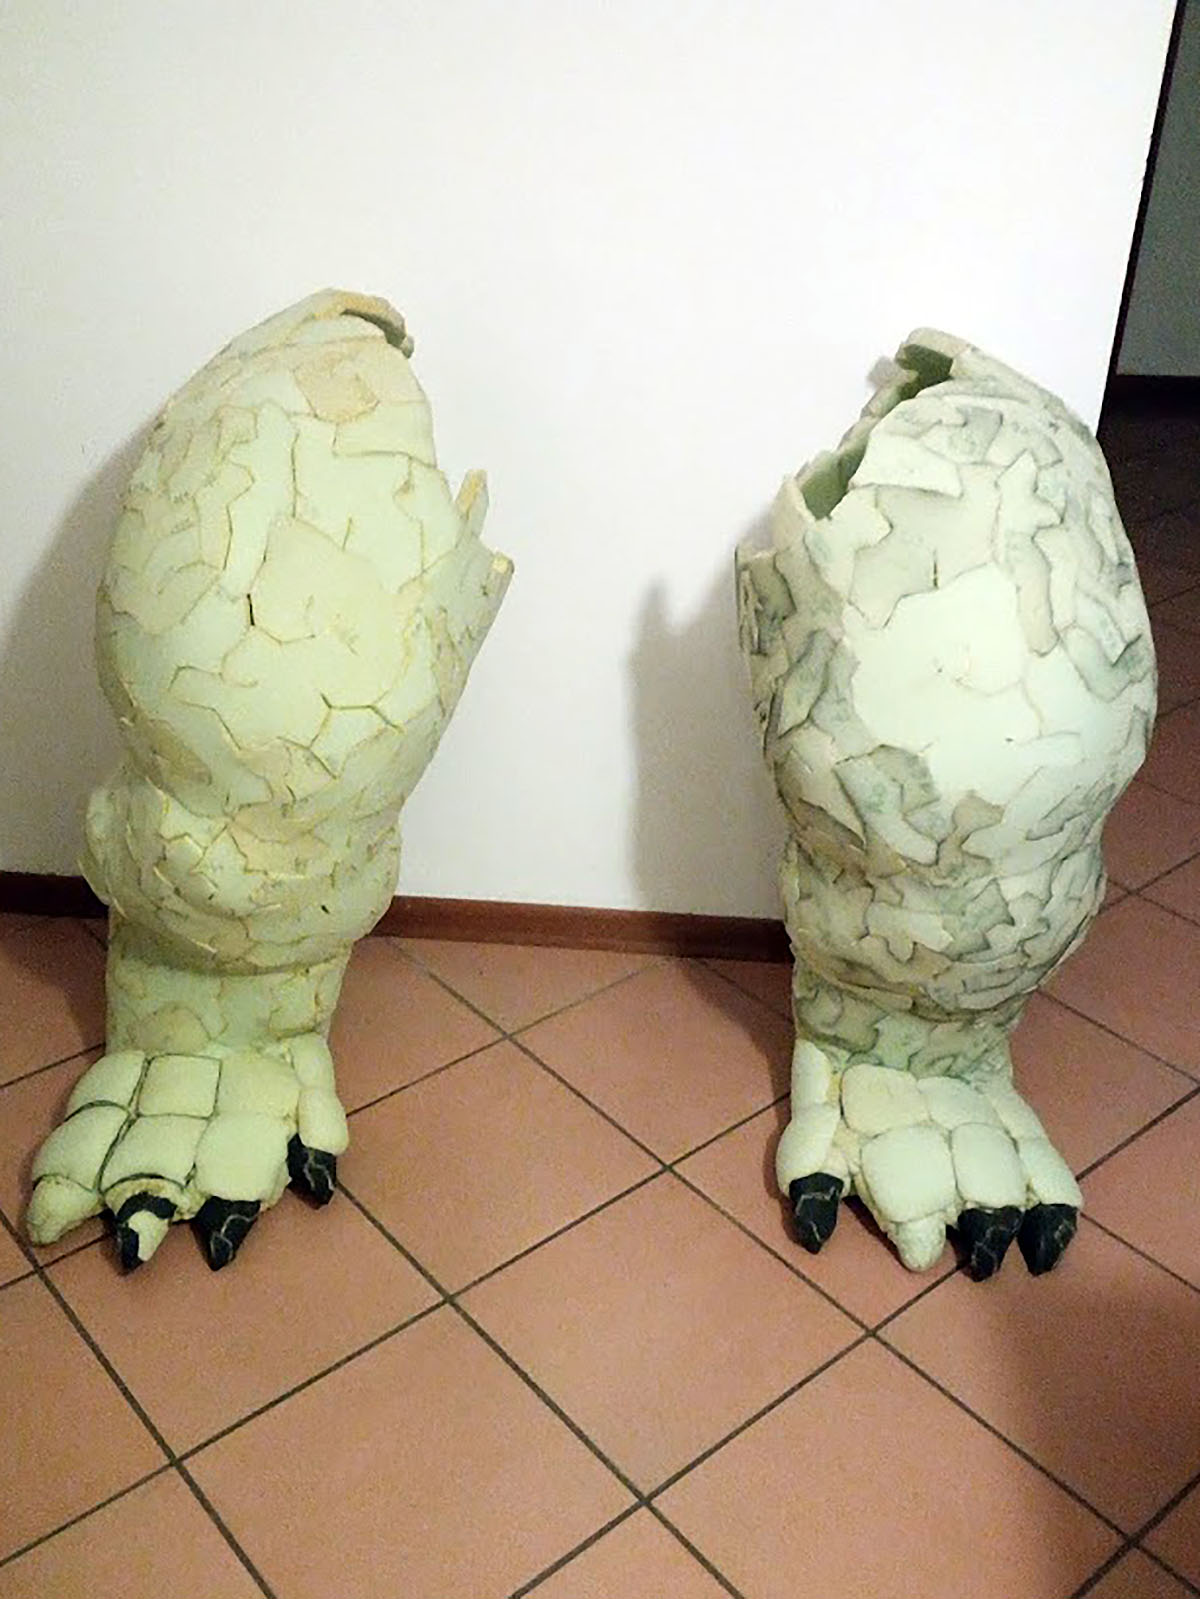
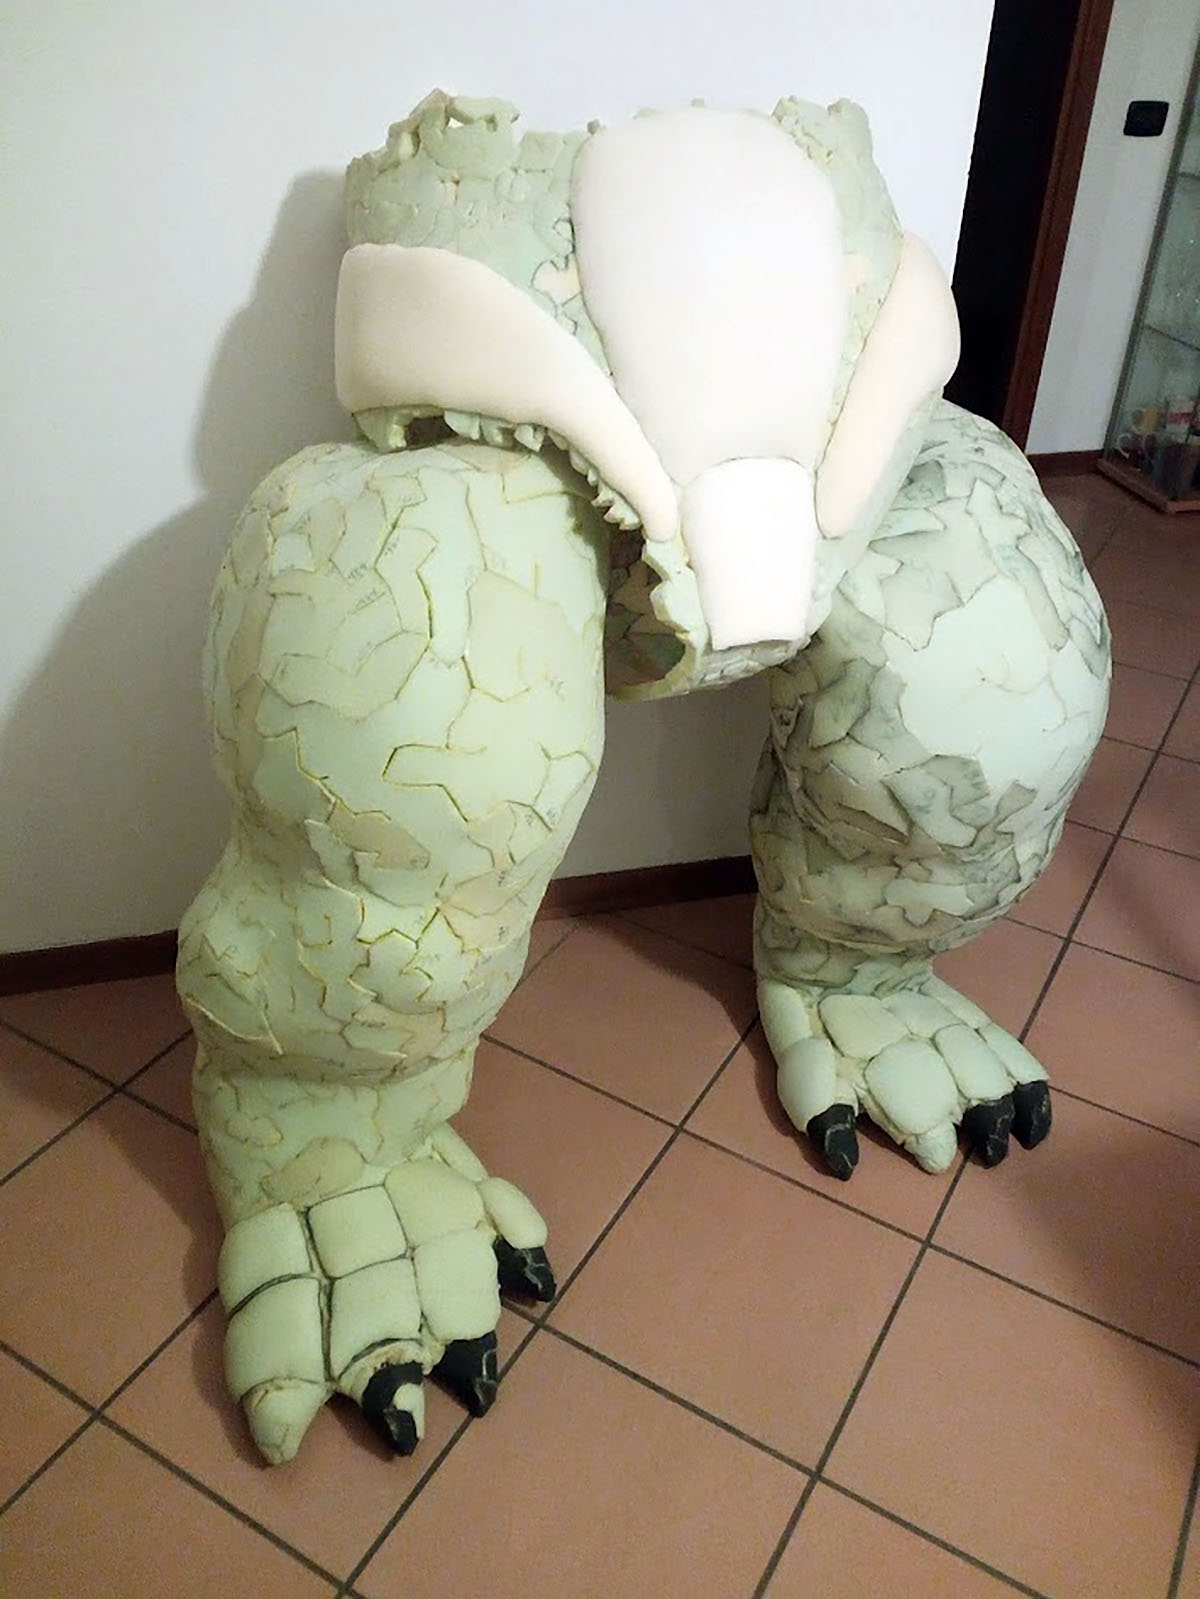
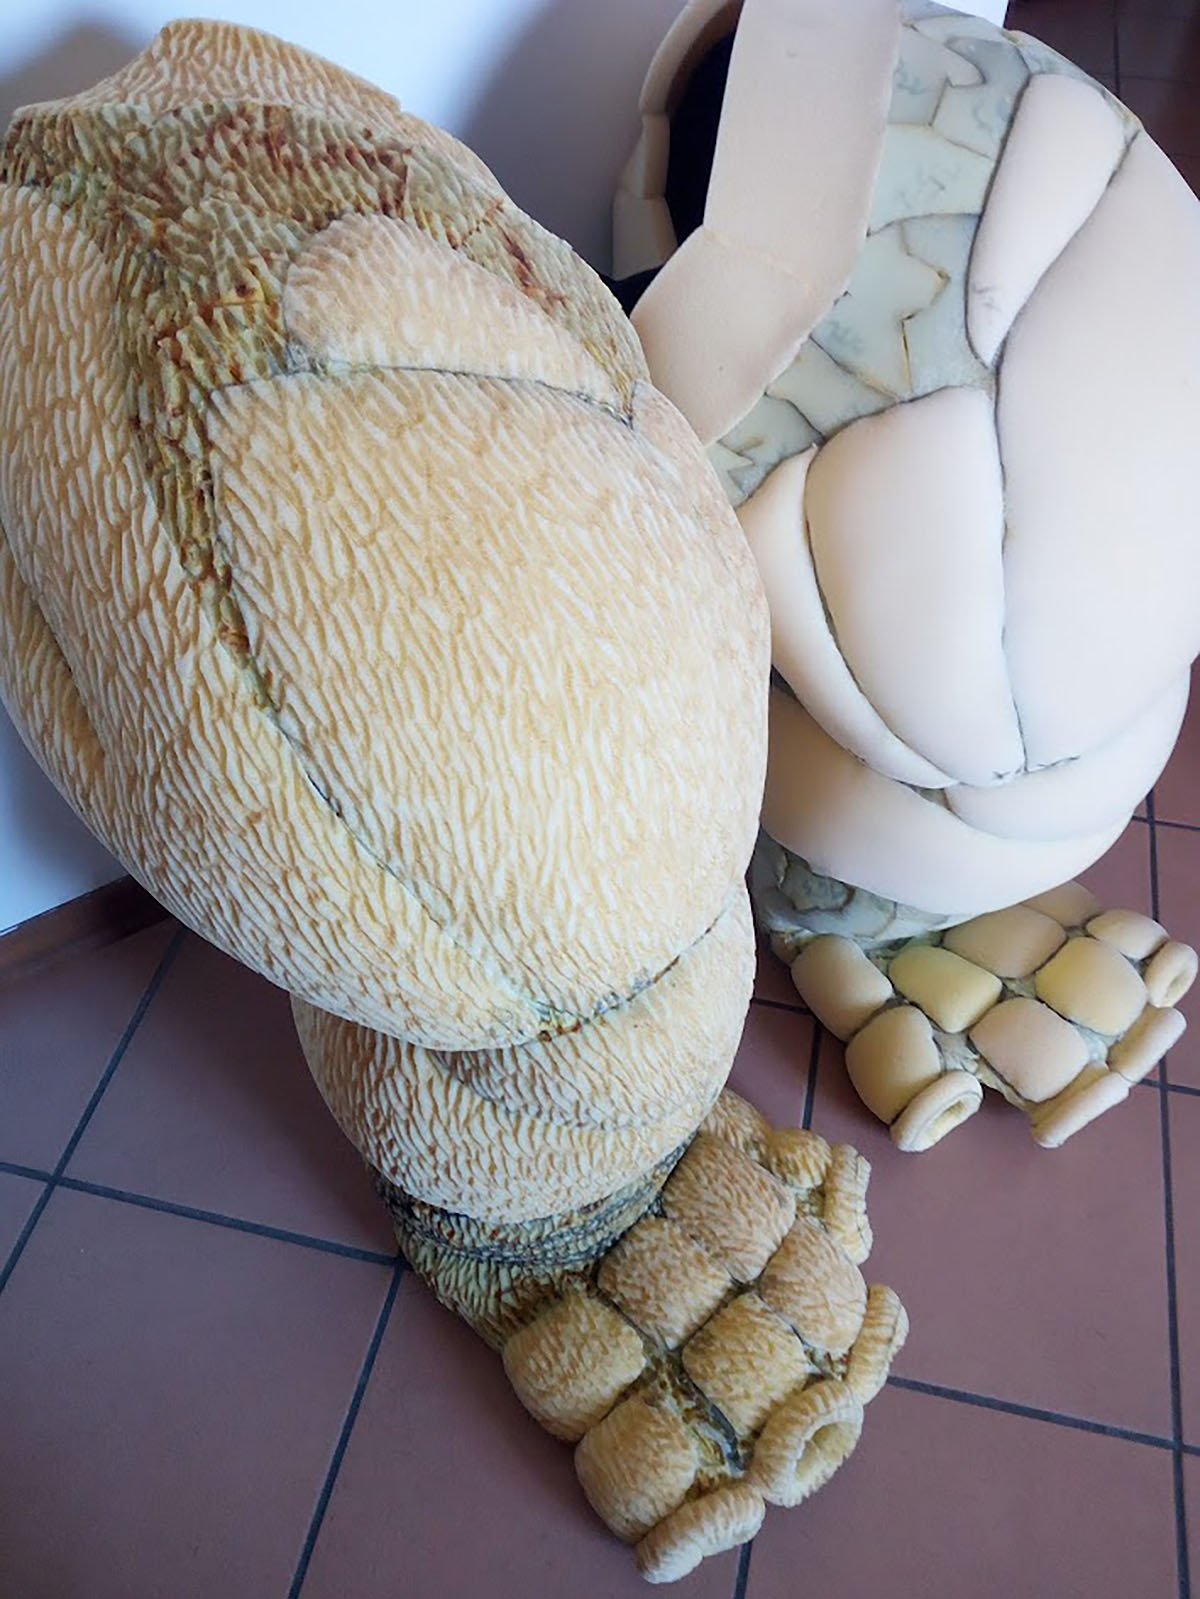
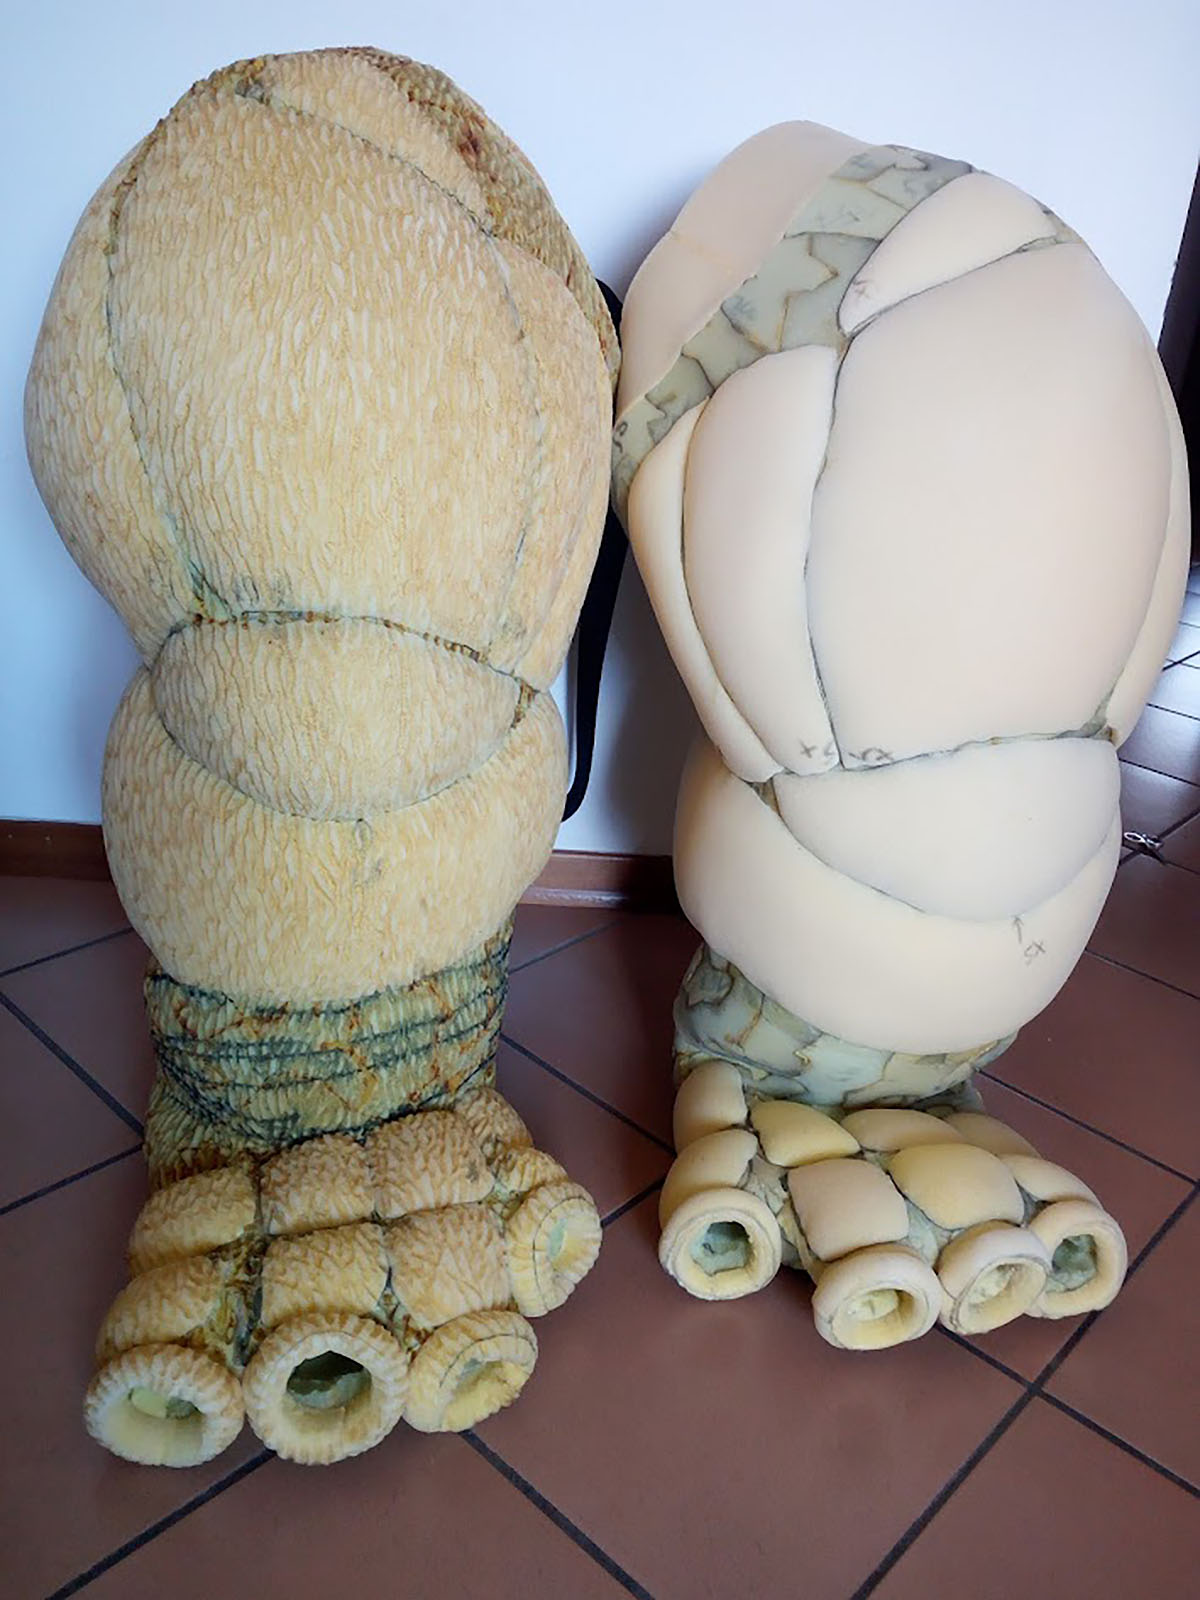
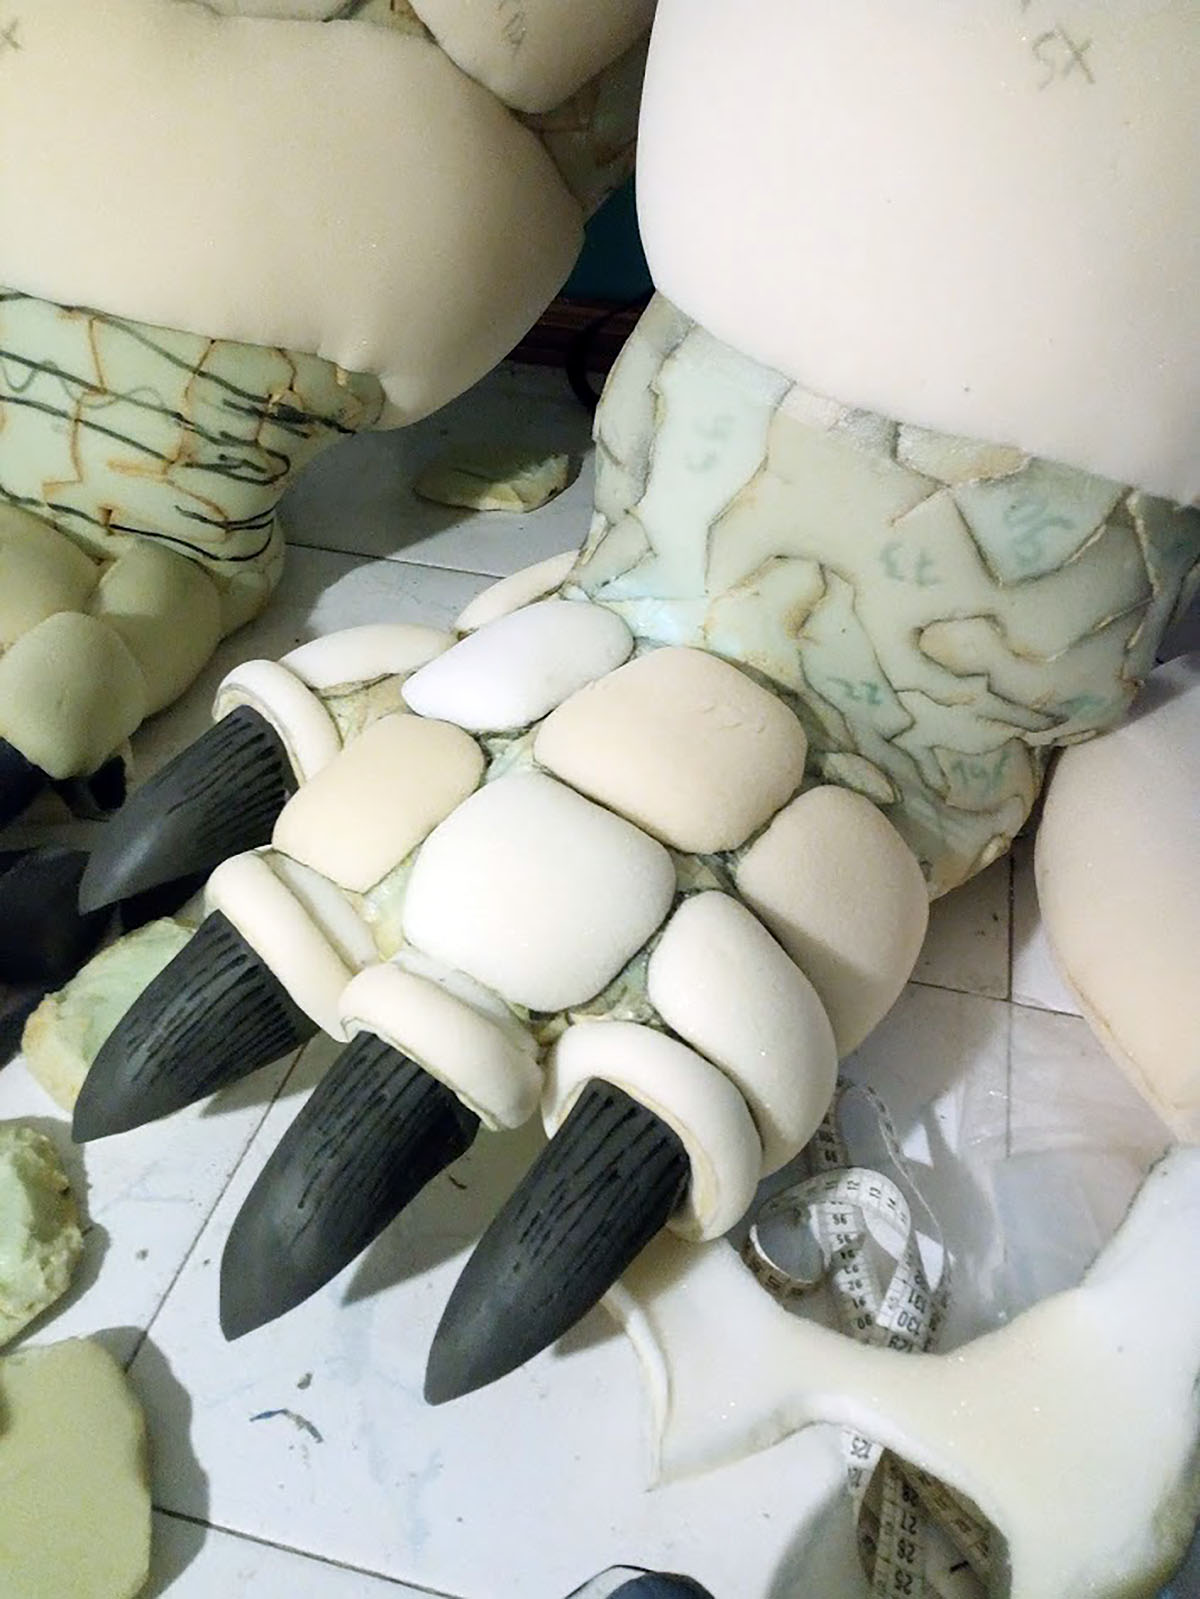
Just like the main body, the legs were created by 3D scanning the action figure’s limbs and assembling them using the Autodesk “puzzle” process.
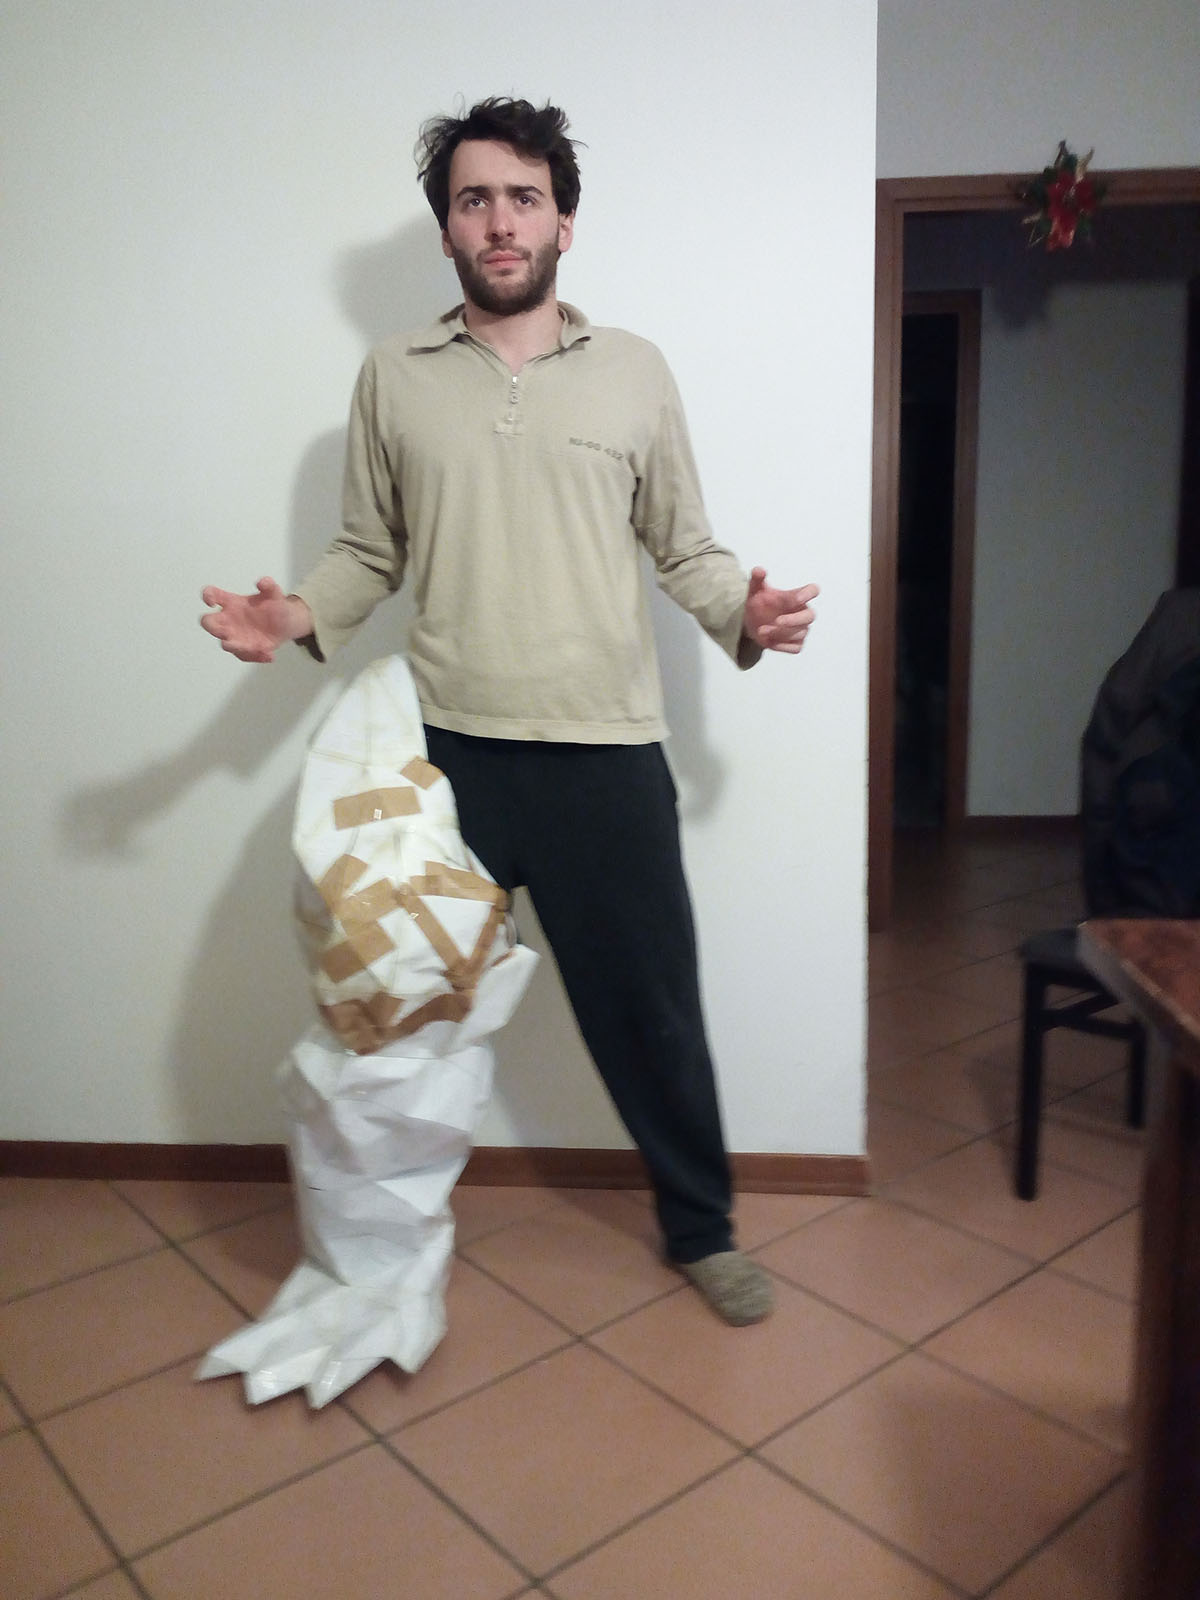
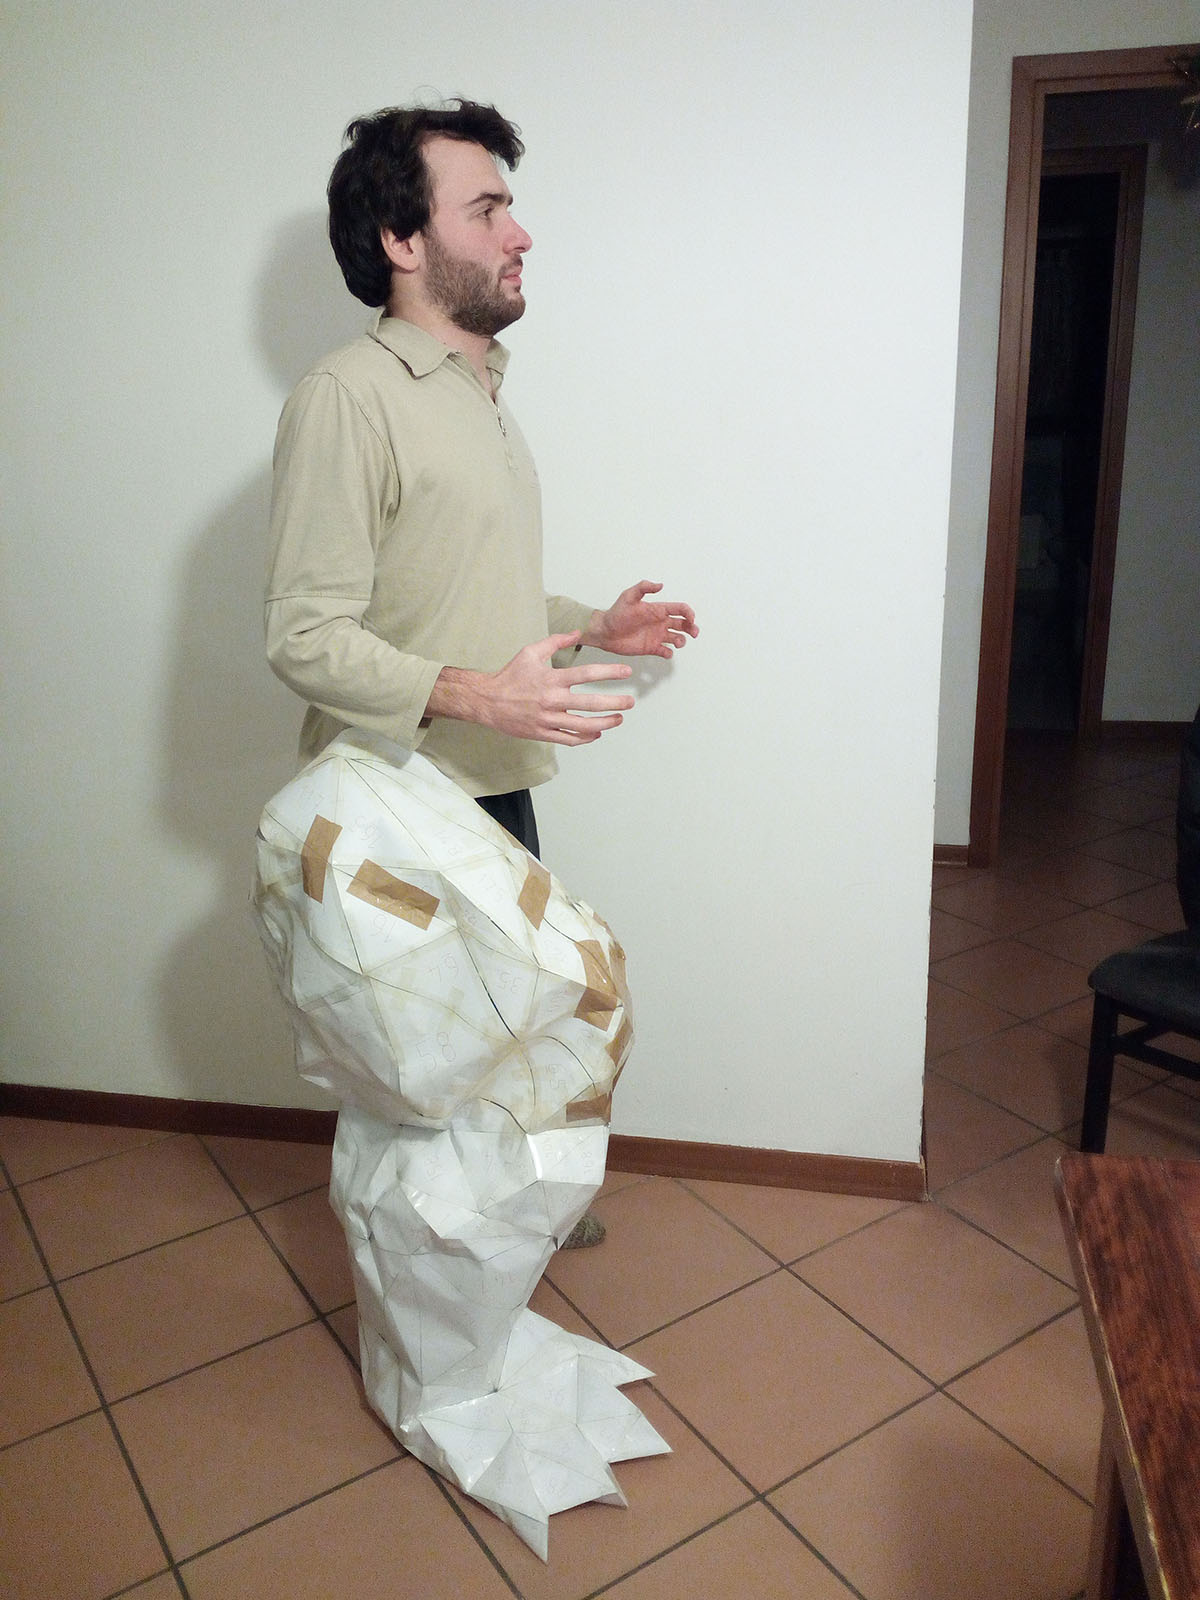
I initially created a paper mock-up to verify the scale. To ensure perfect proportions, I used the ratio between the foot and the head as a reference point, comparing the original action figure to the physical dimensions of the suit’s skull and the paper patterns.
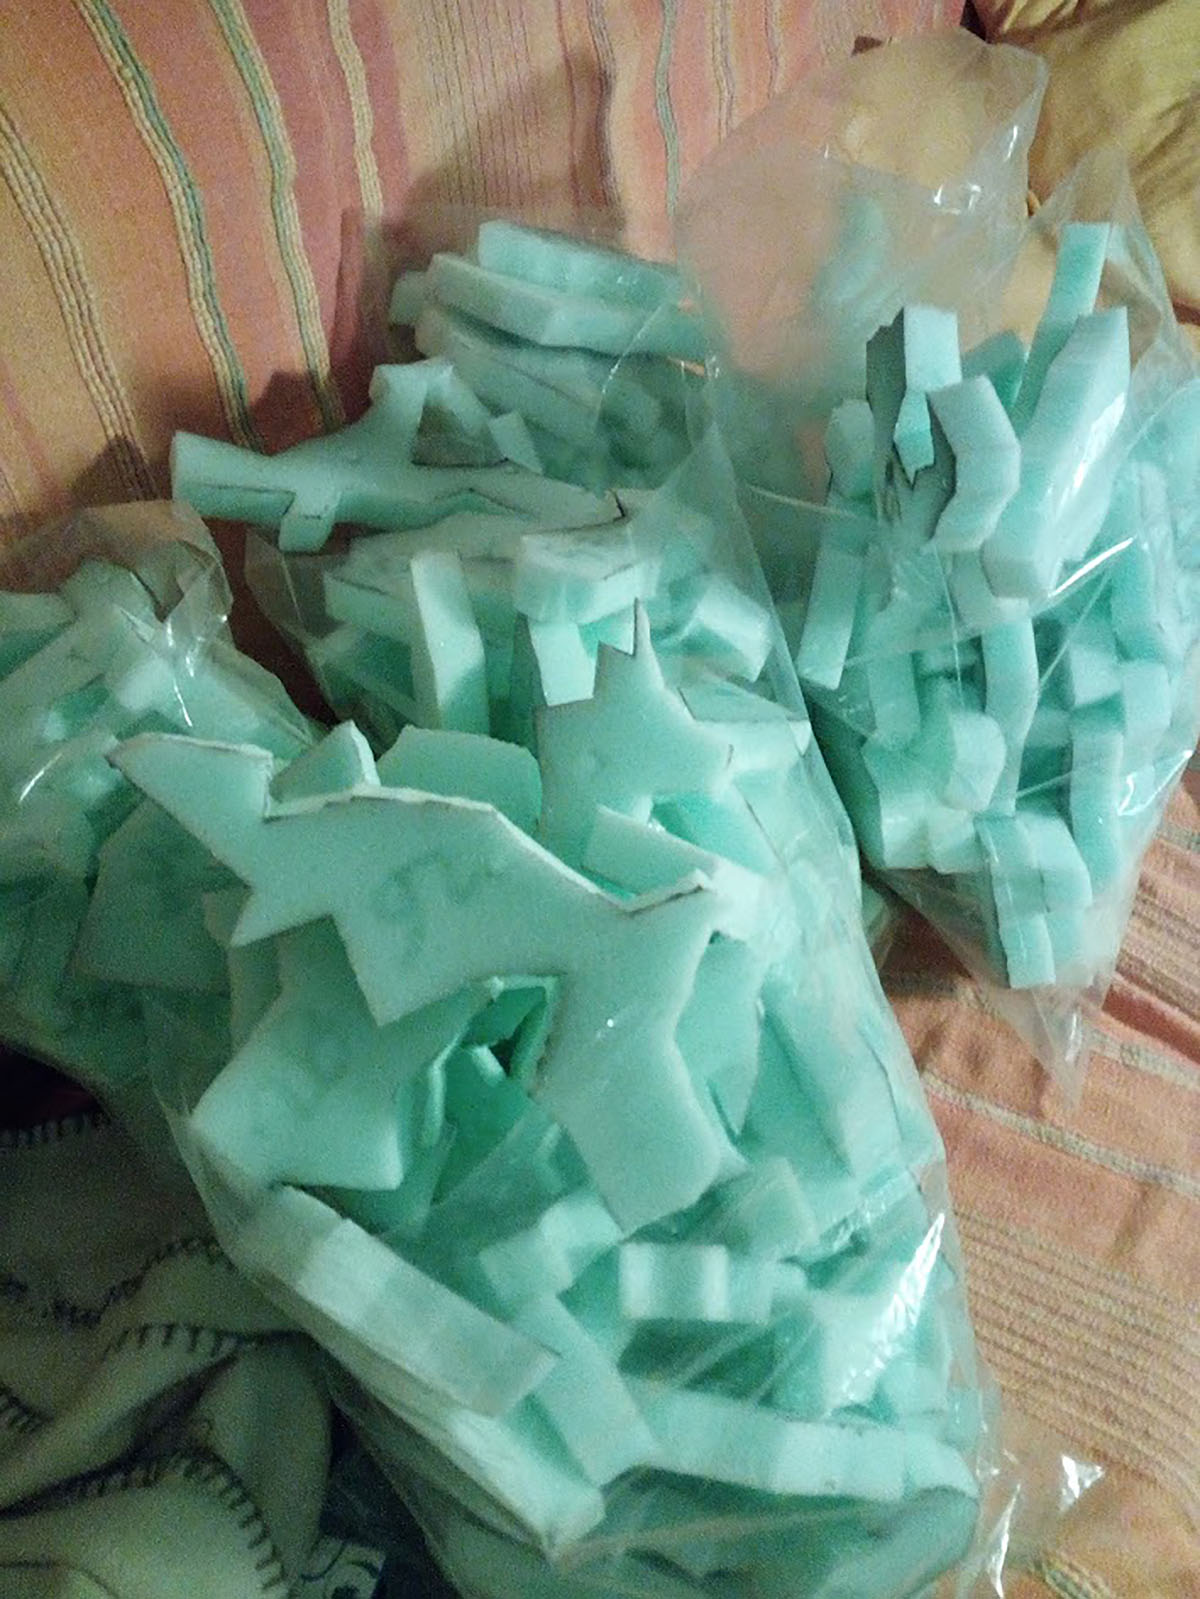
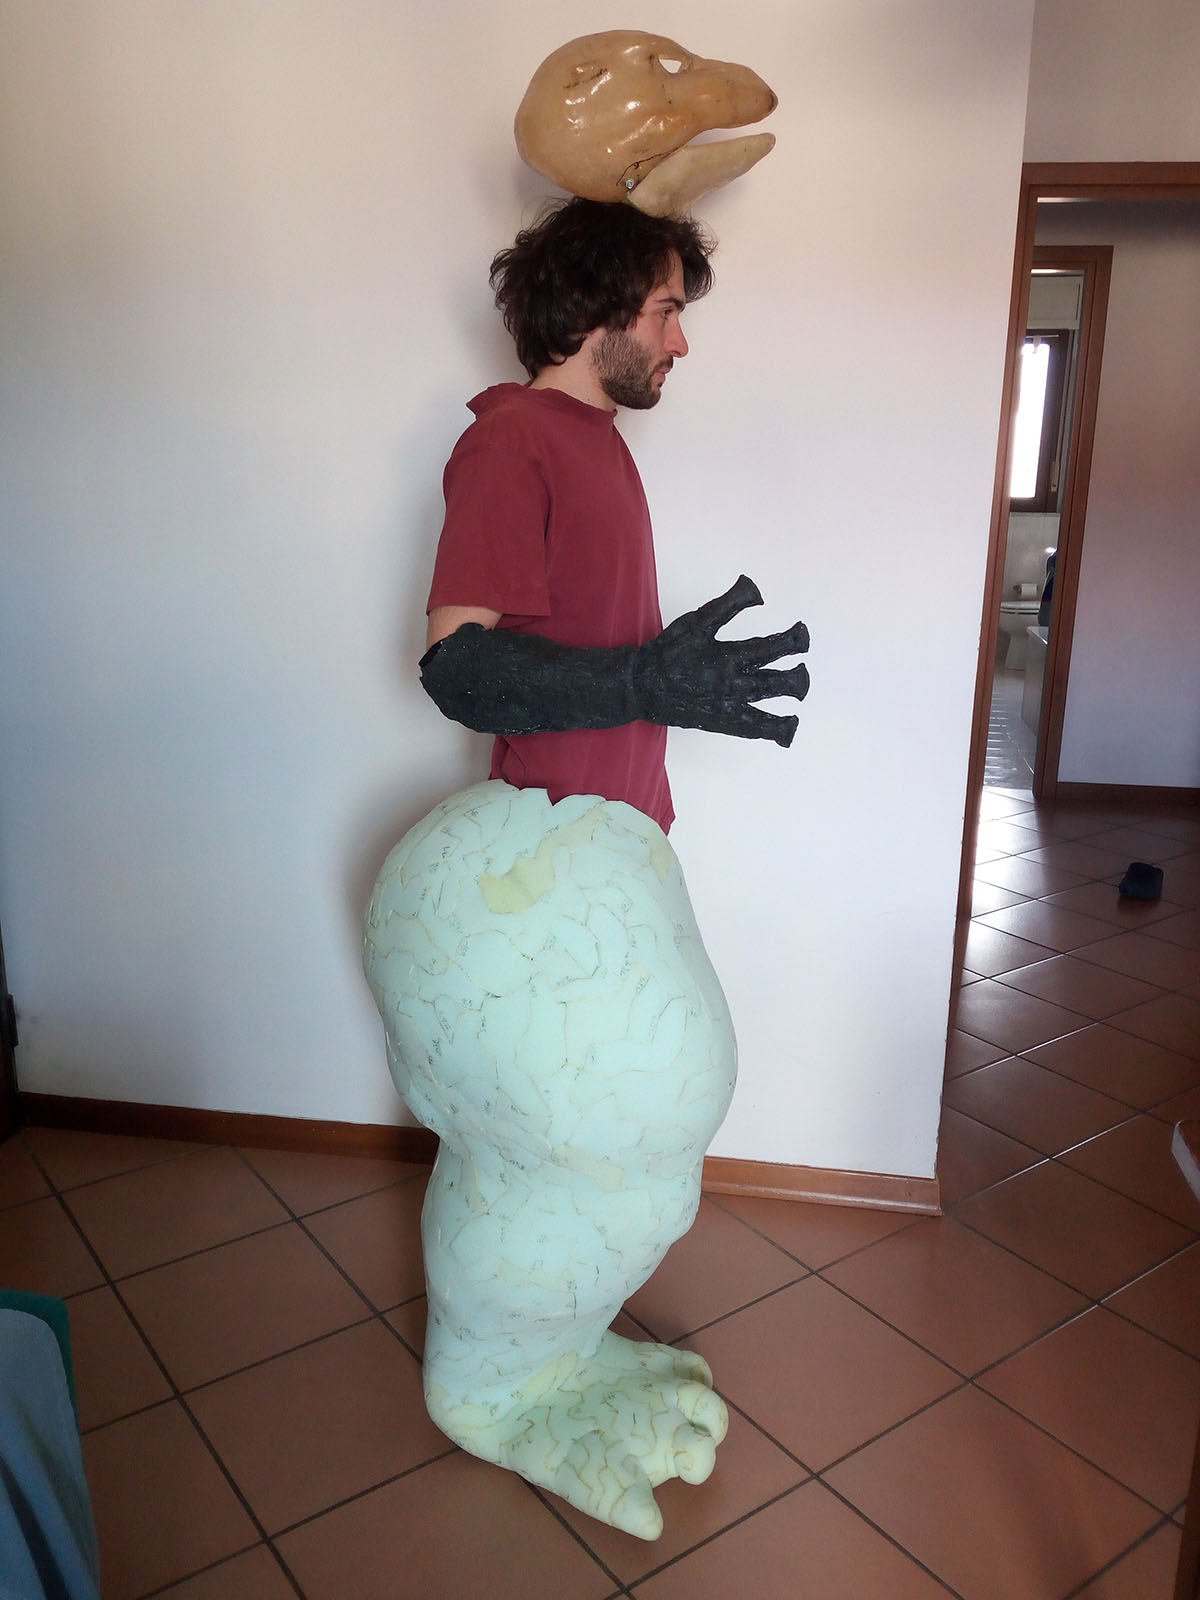
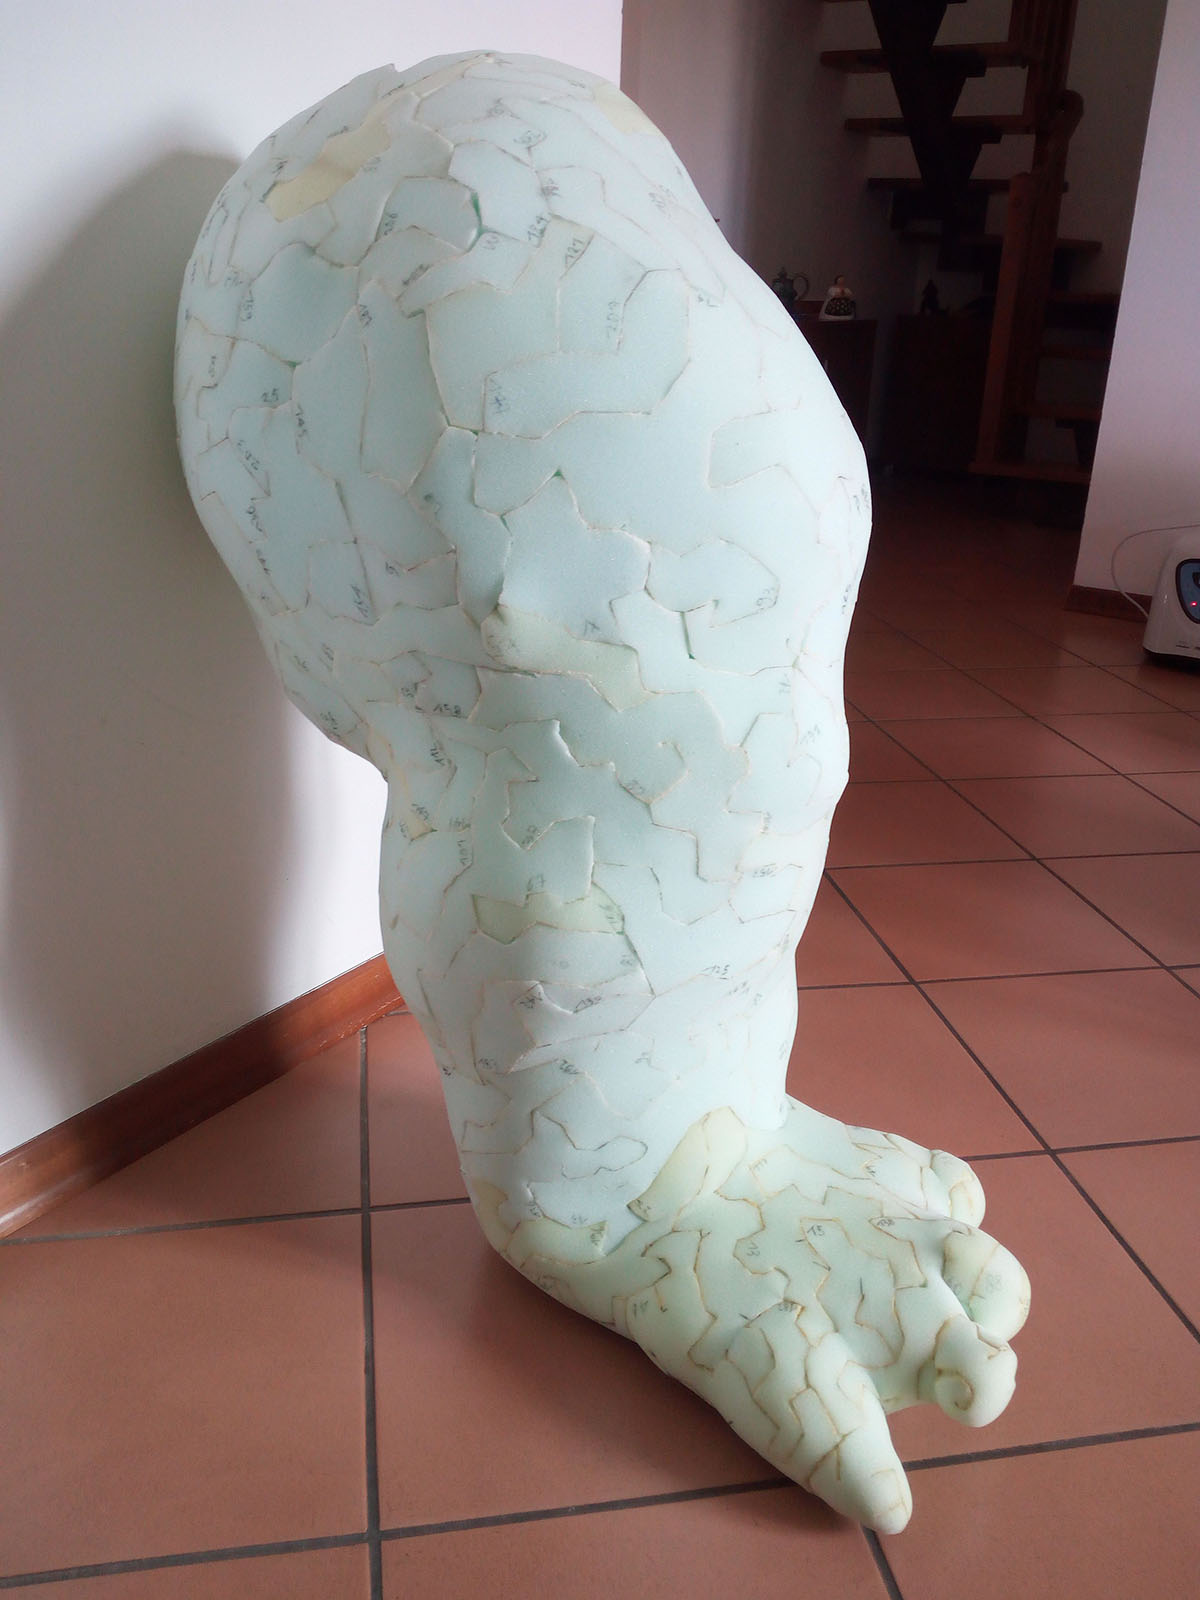
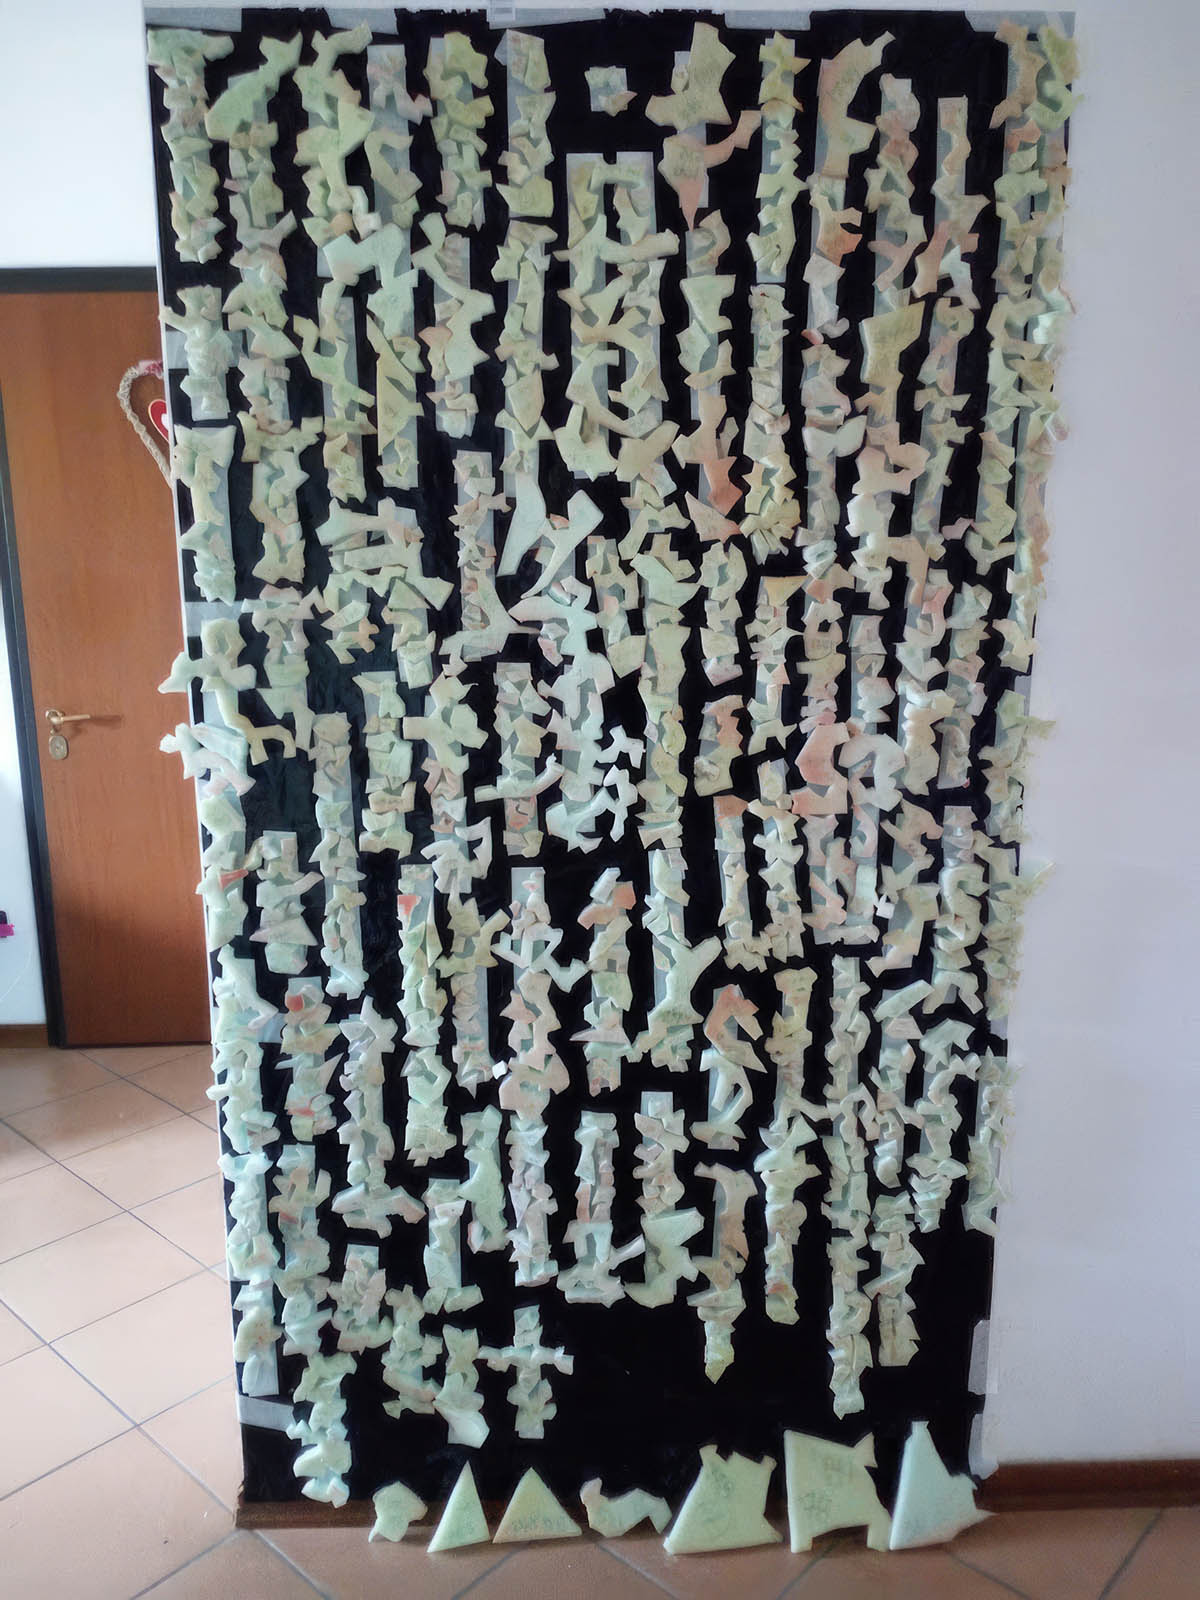
After several test fittings with the paper mock-up, I transferred the patterns onto the foam. The legs consist of approximately 400 pieces, which were glued together to form two smooth base silhouettes.
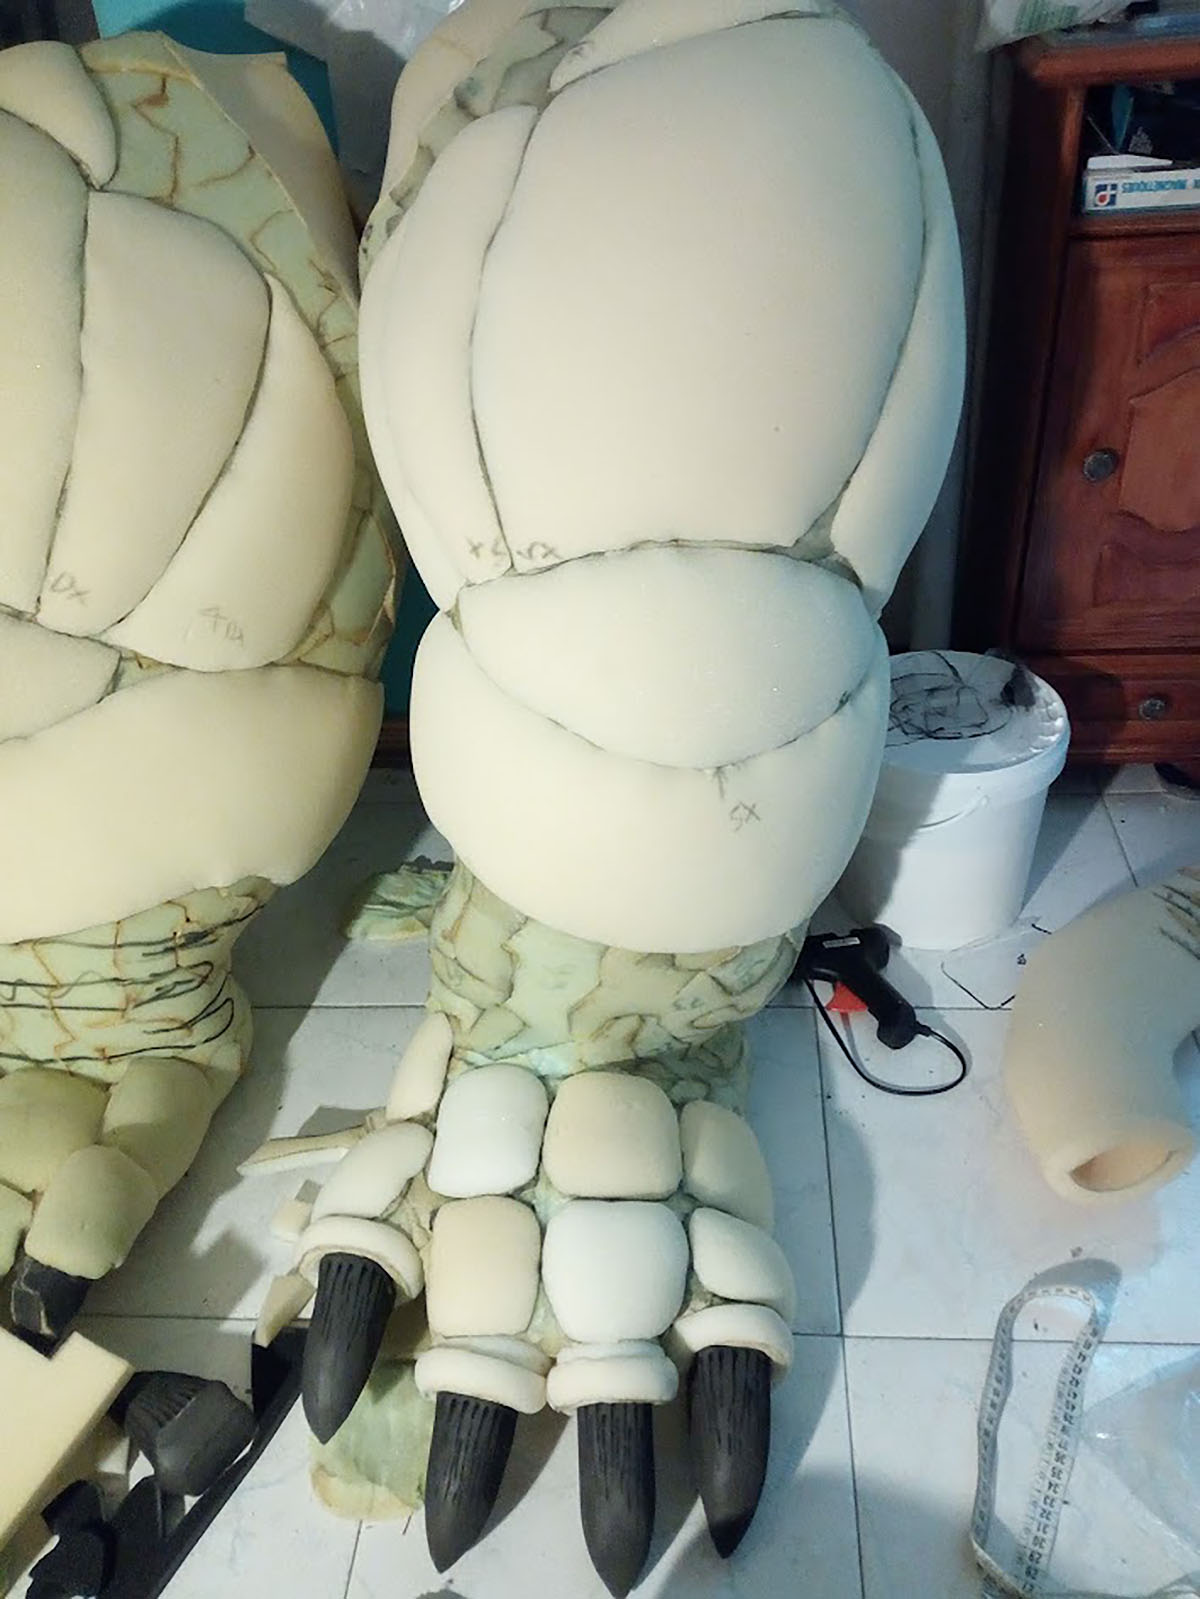
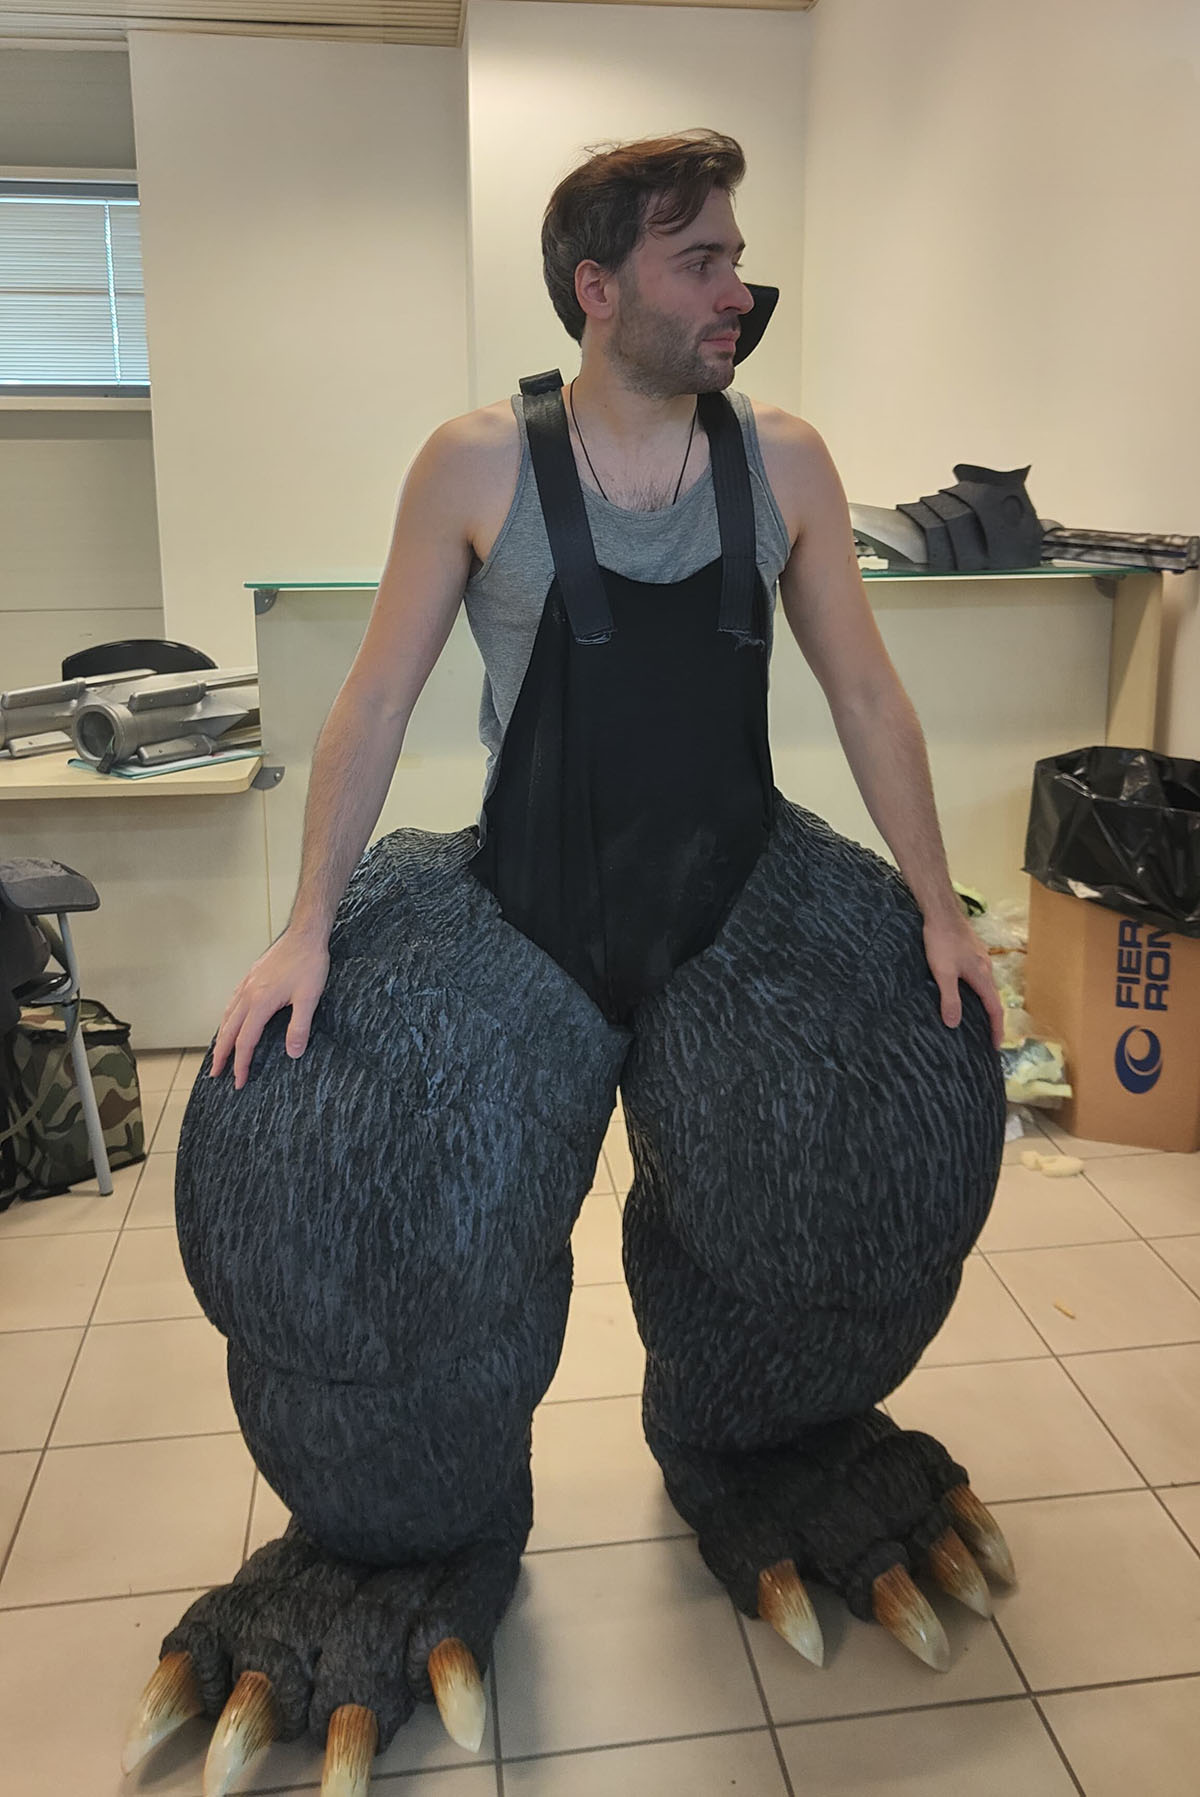
Once the musculature and skin texture were sculpted, I sewed a custom harness (salopette style). This allows me to wear the legs securely while ensuring they maintain their proper alignment and axis during movement.
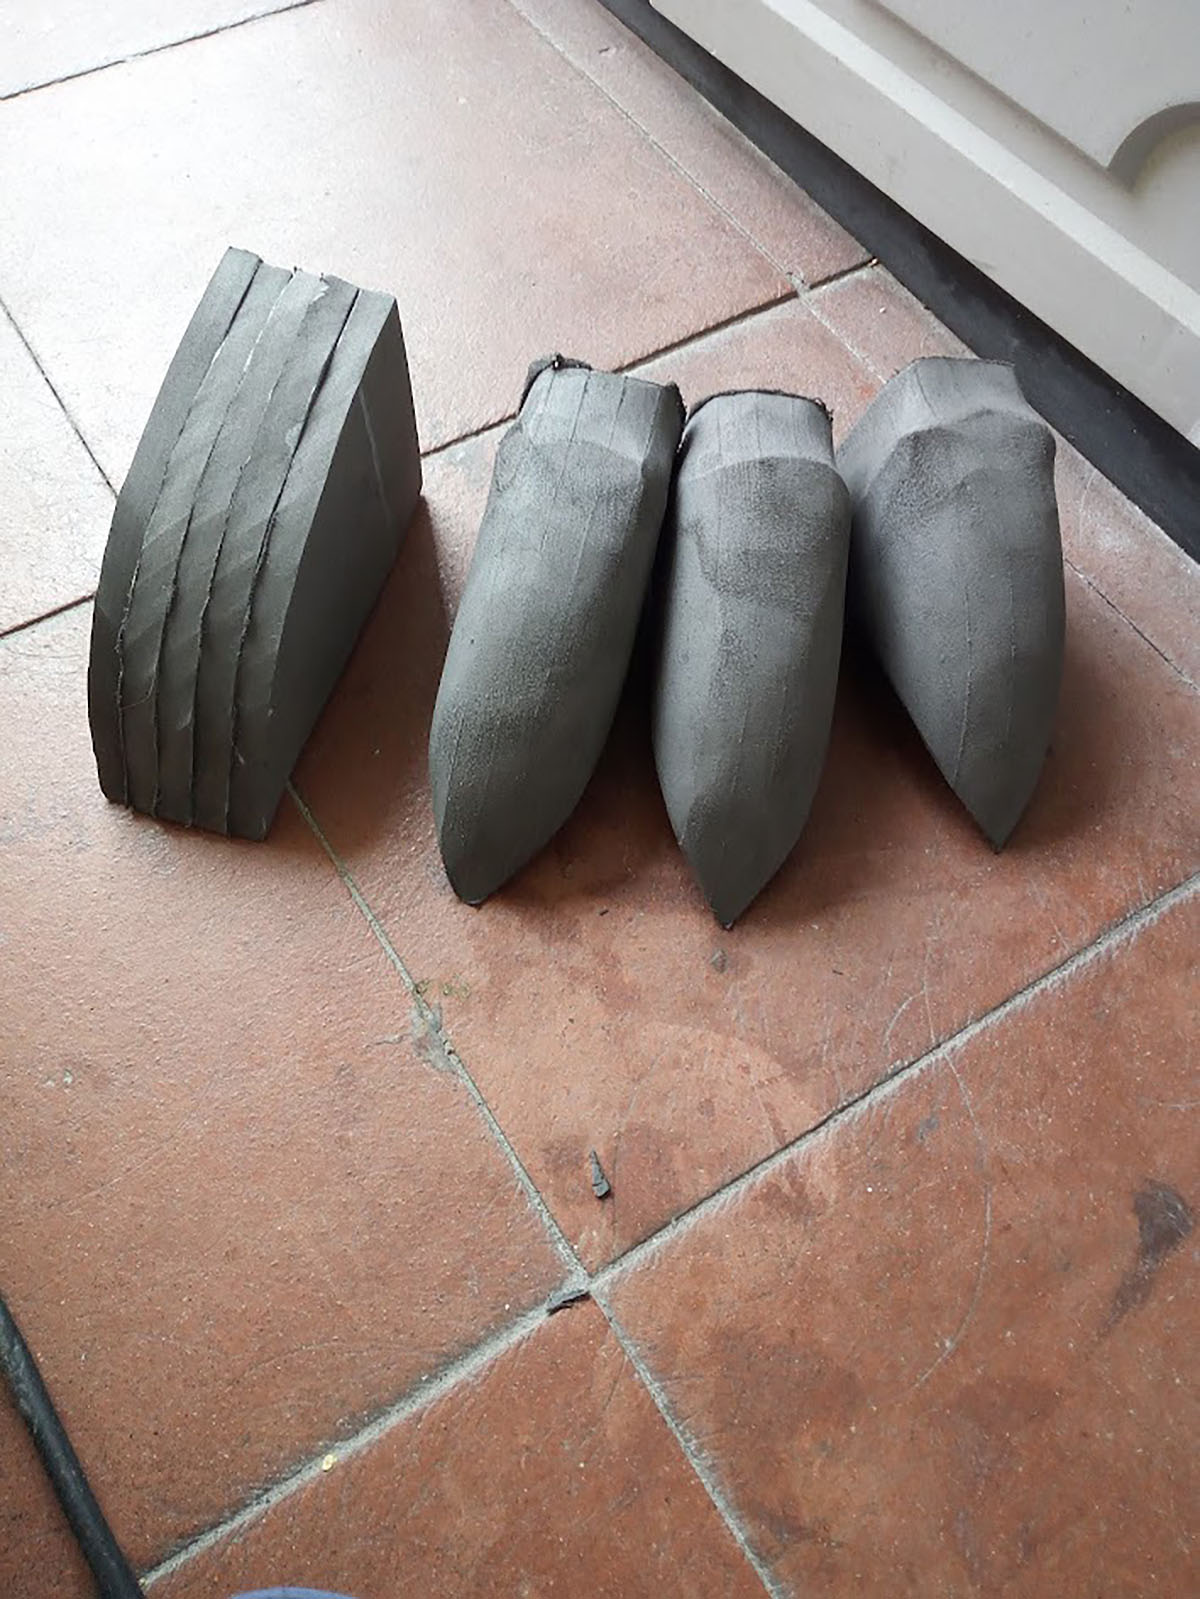
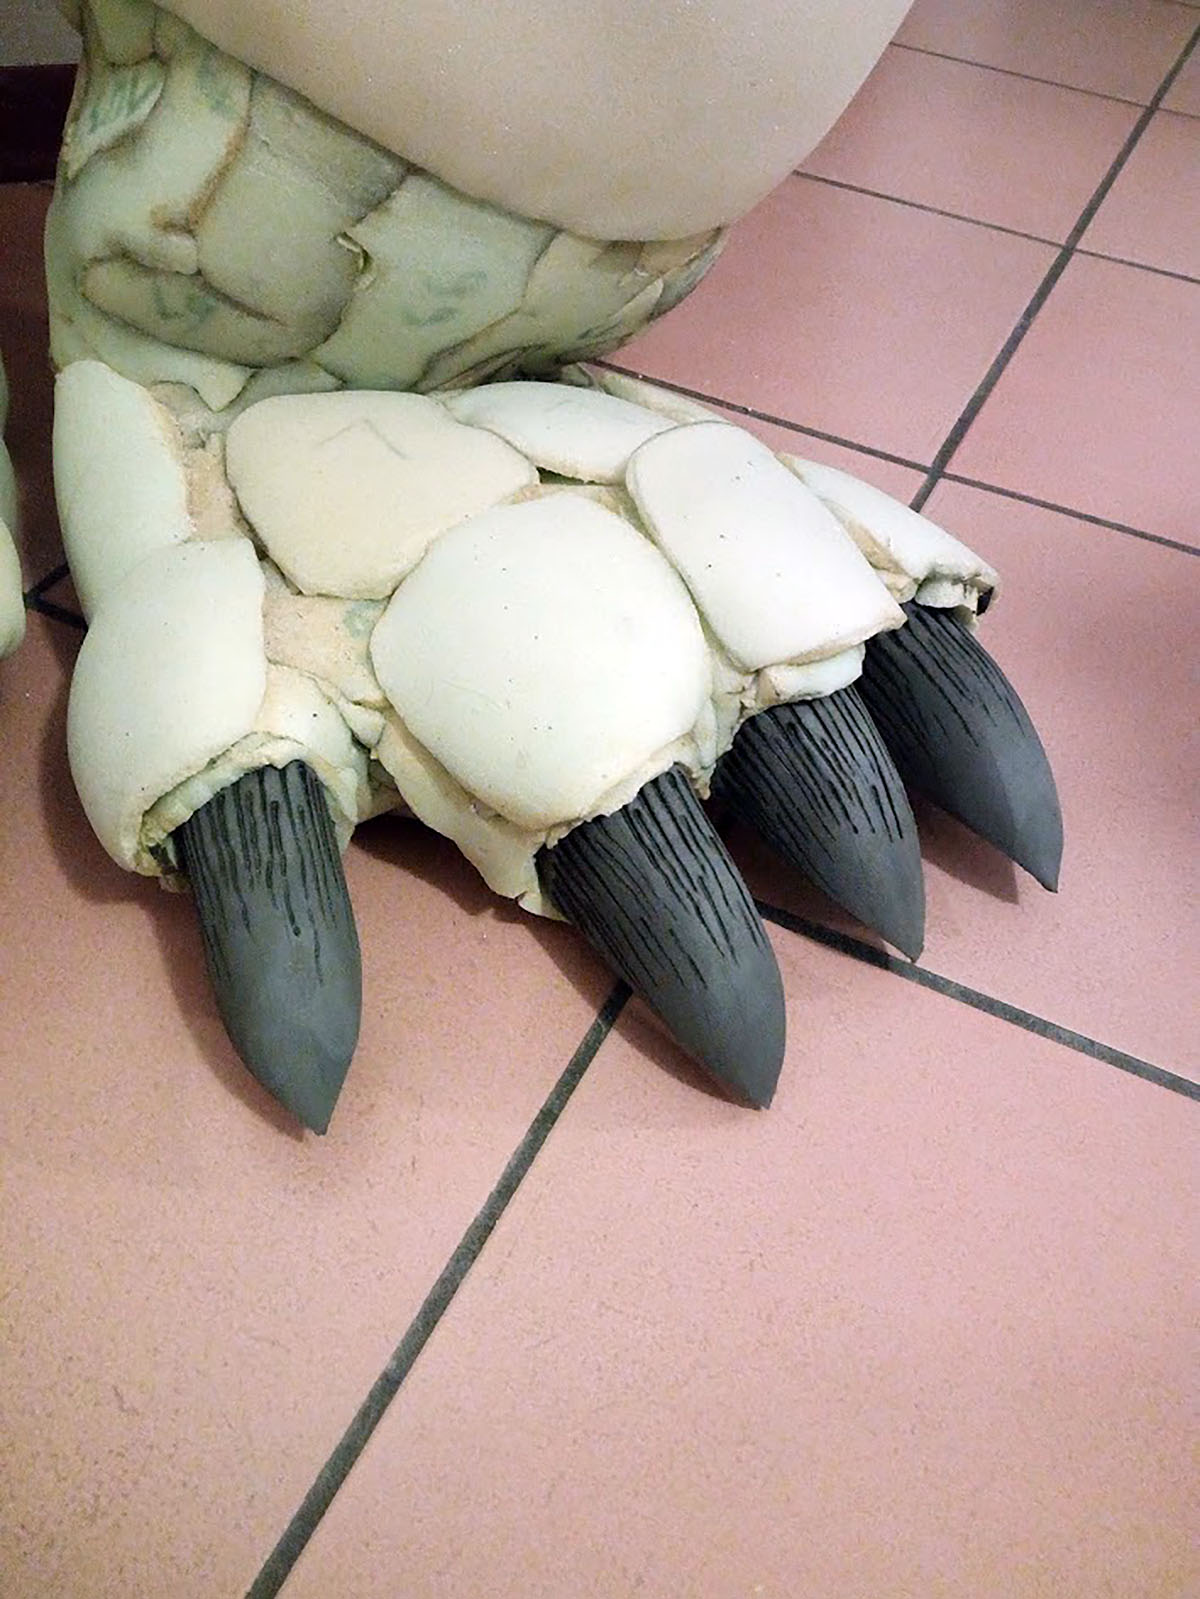
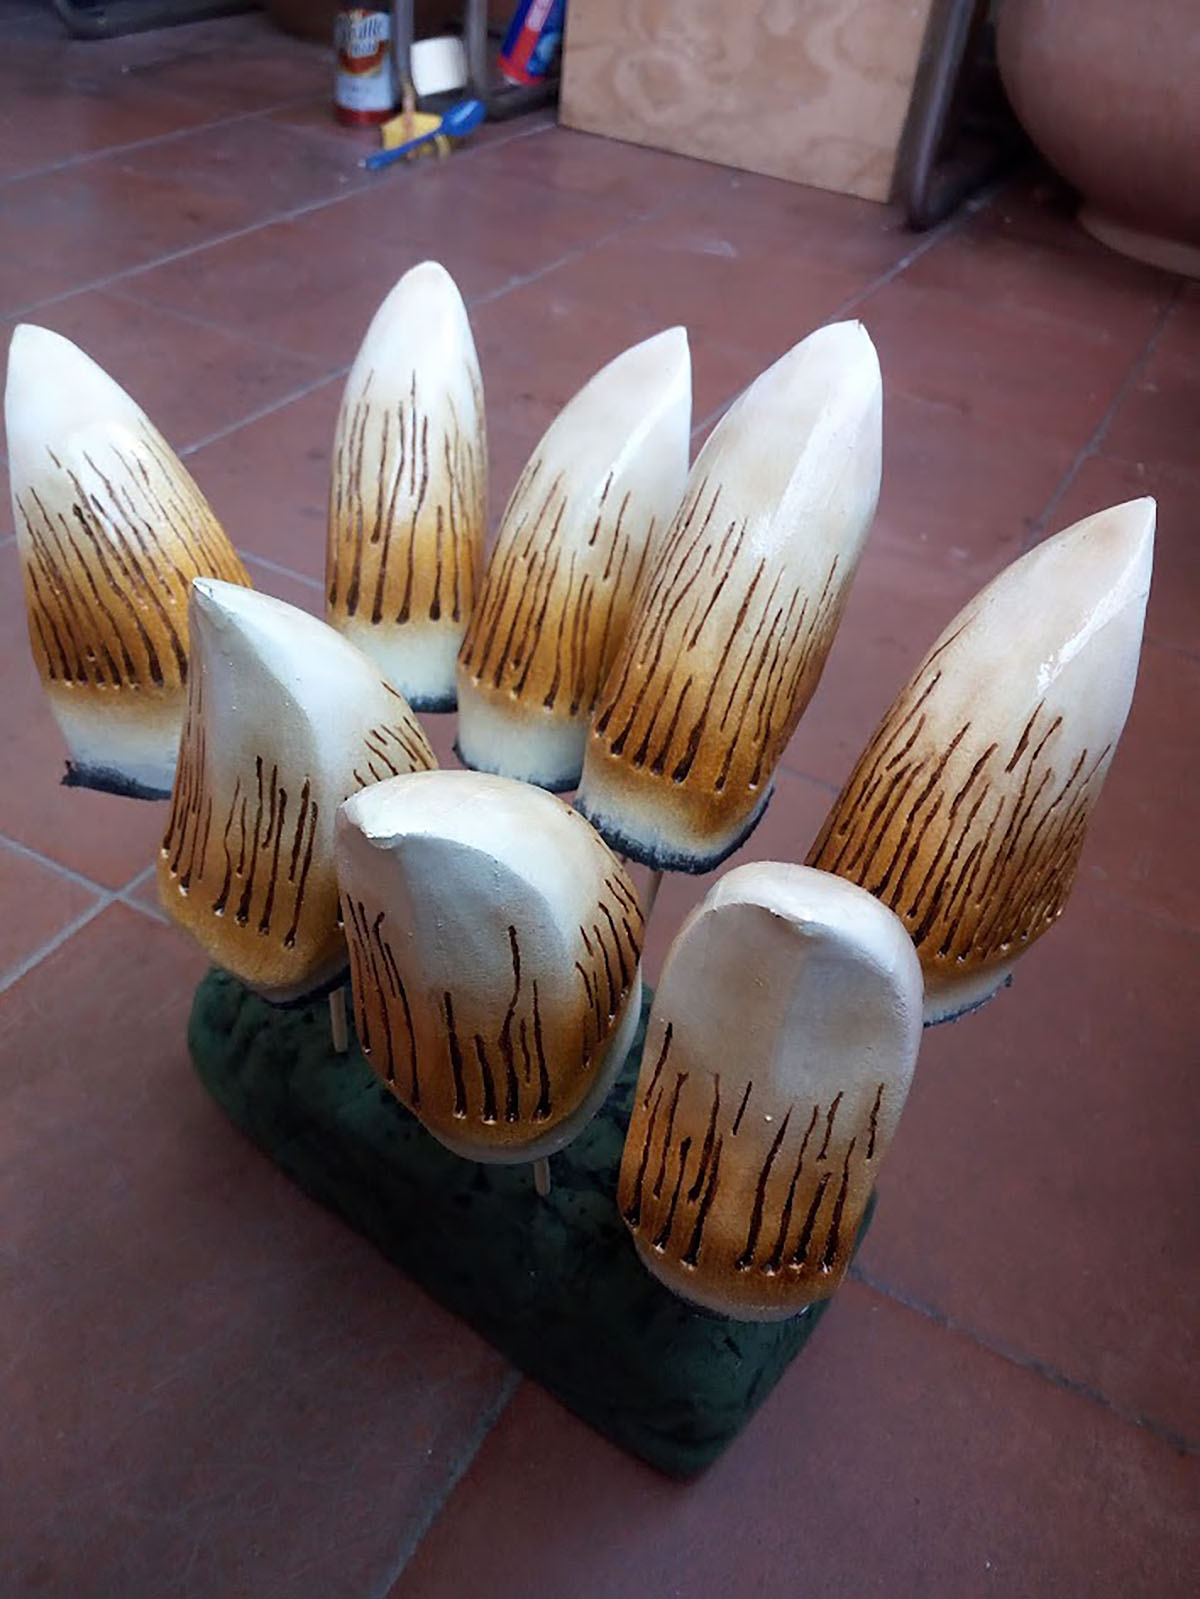
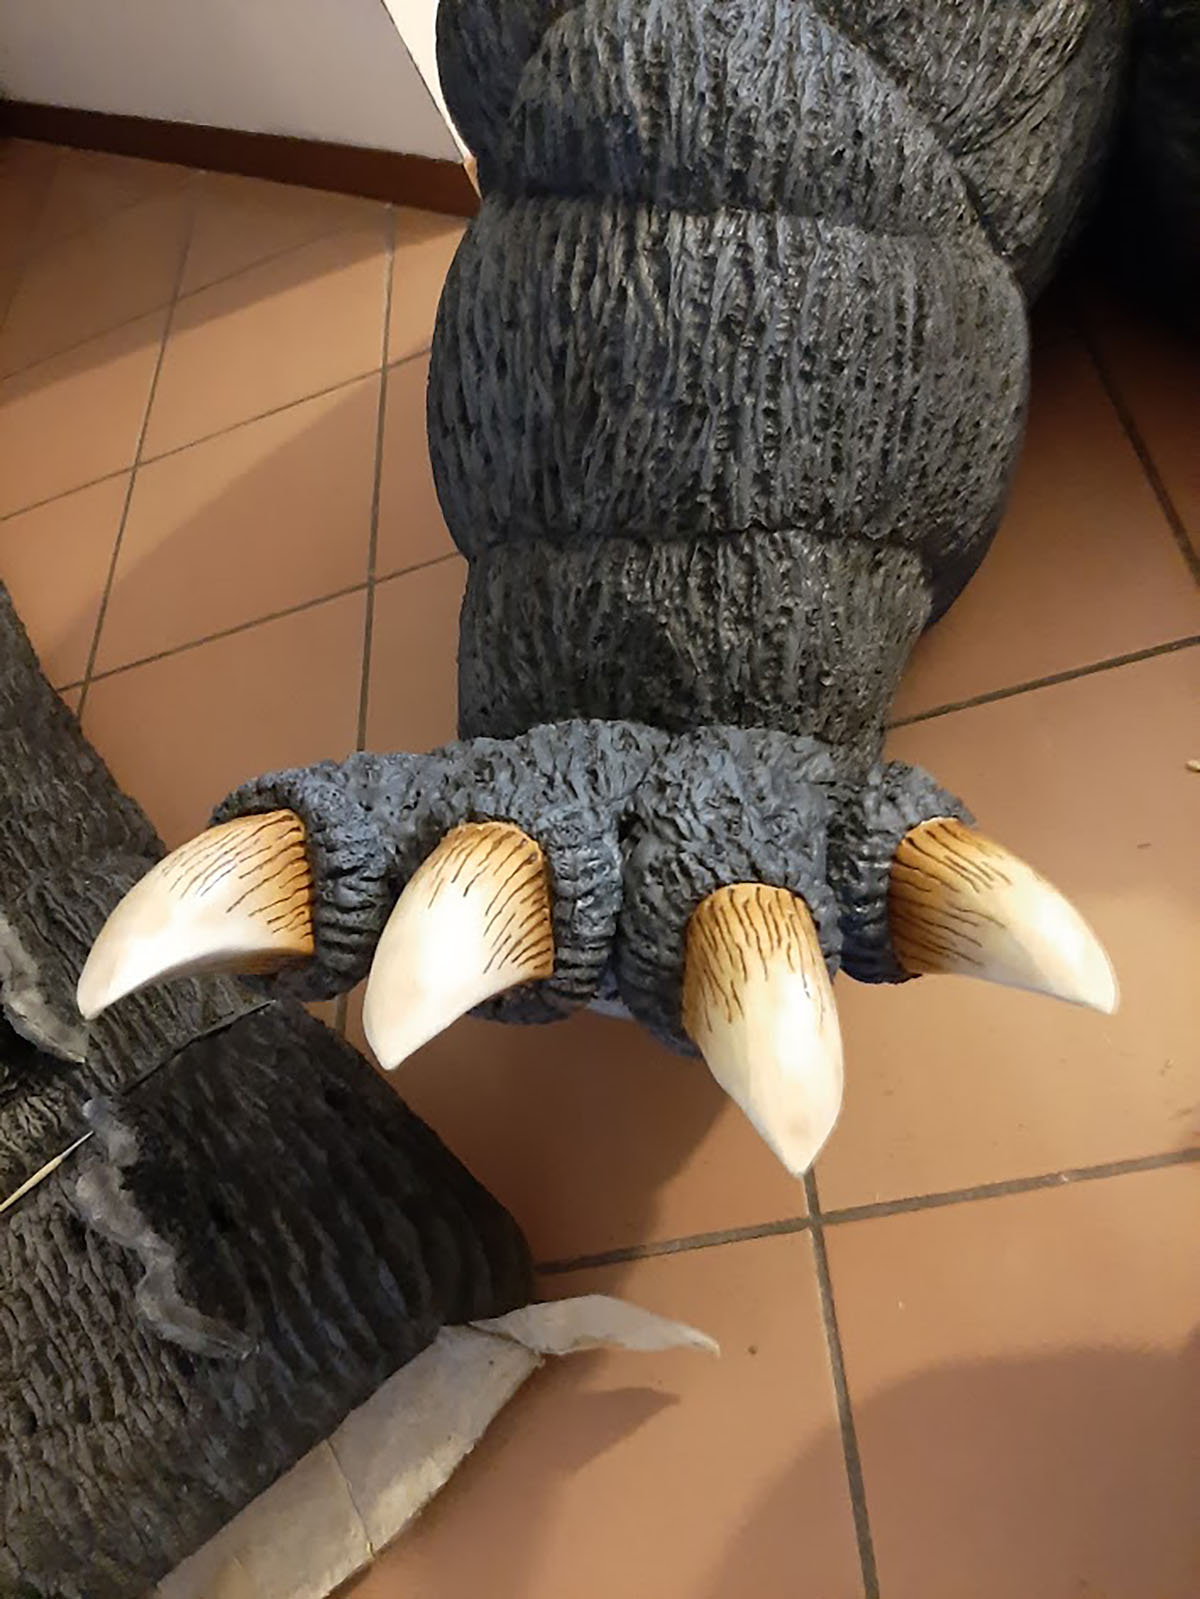
The claws for the feet were constructed using the same process as the hand claws, once again creating a sharp visual contrast between the skin and the nails through the use of spray plasticizer.
Several coats of spray-applied black latex completed the organic finish of the skin. After treating the surface, just as I did with the rest of the suit, I used an airbrush to define the highlights and shadows of the hide. The final step was permanently bonding the claws into place.
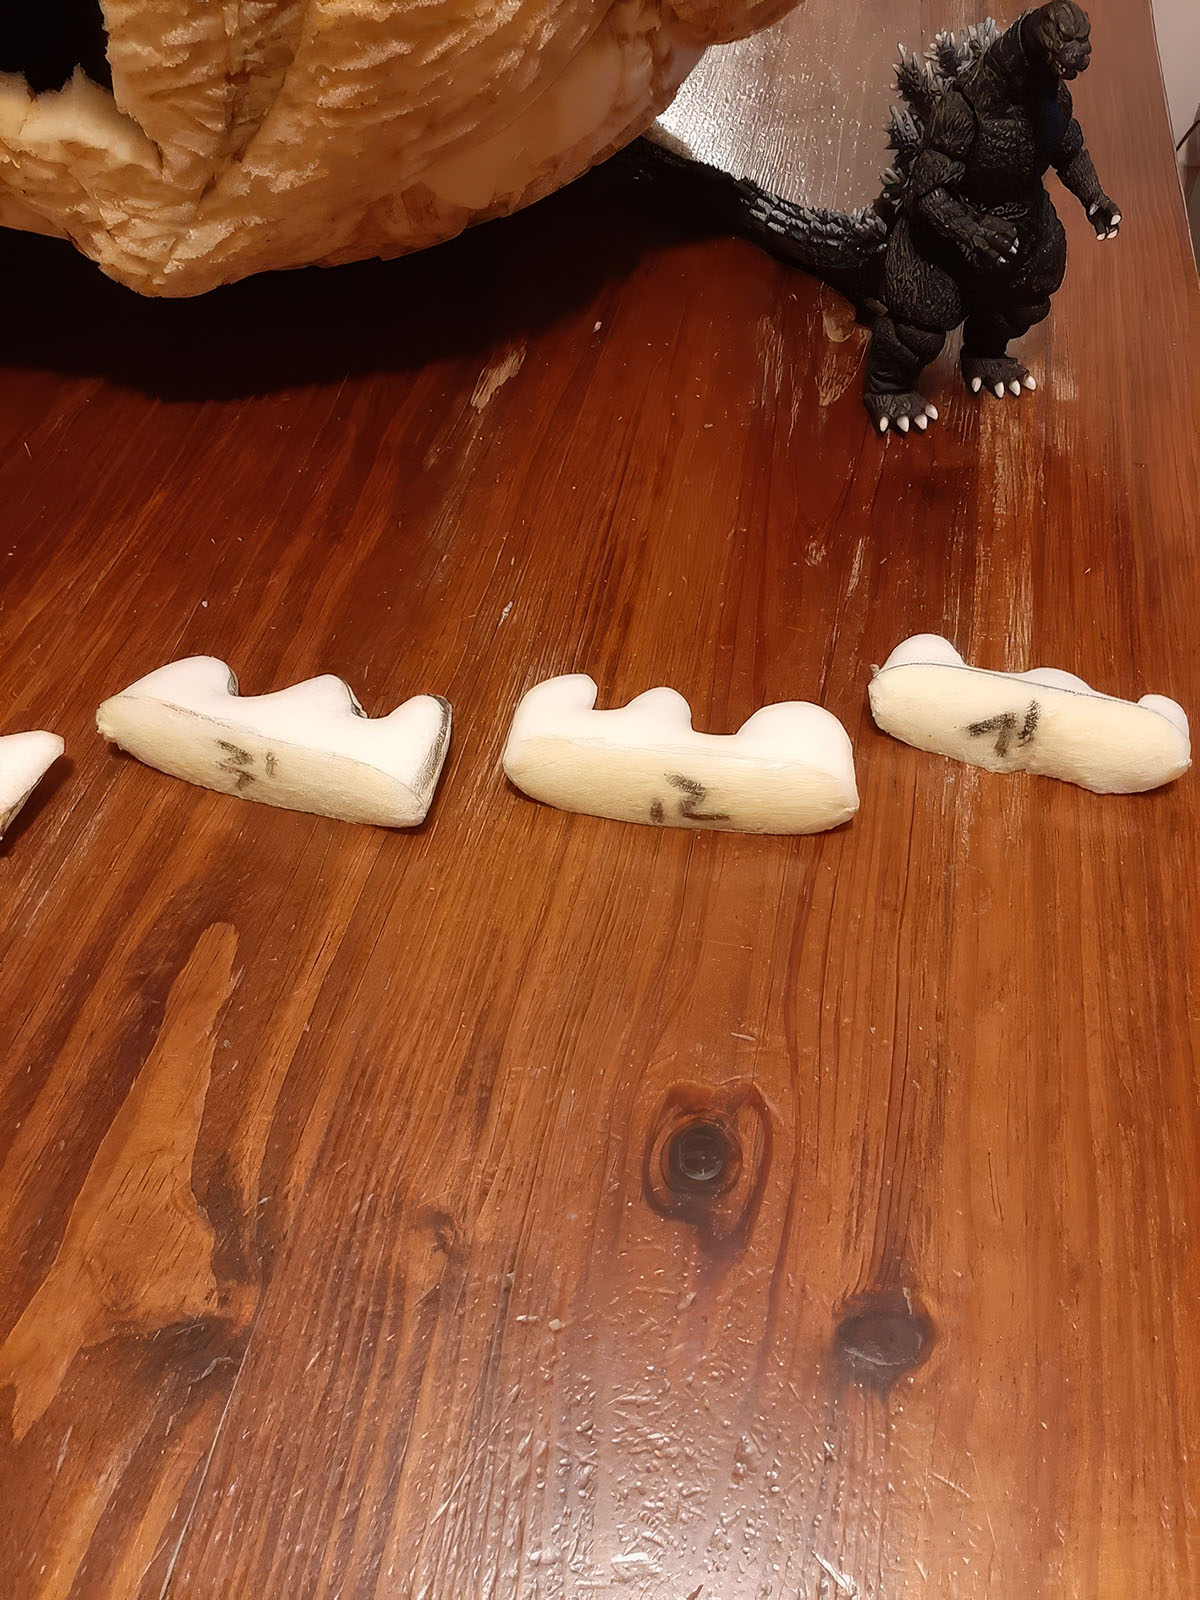
Dorsal Fins
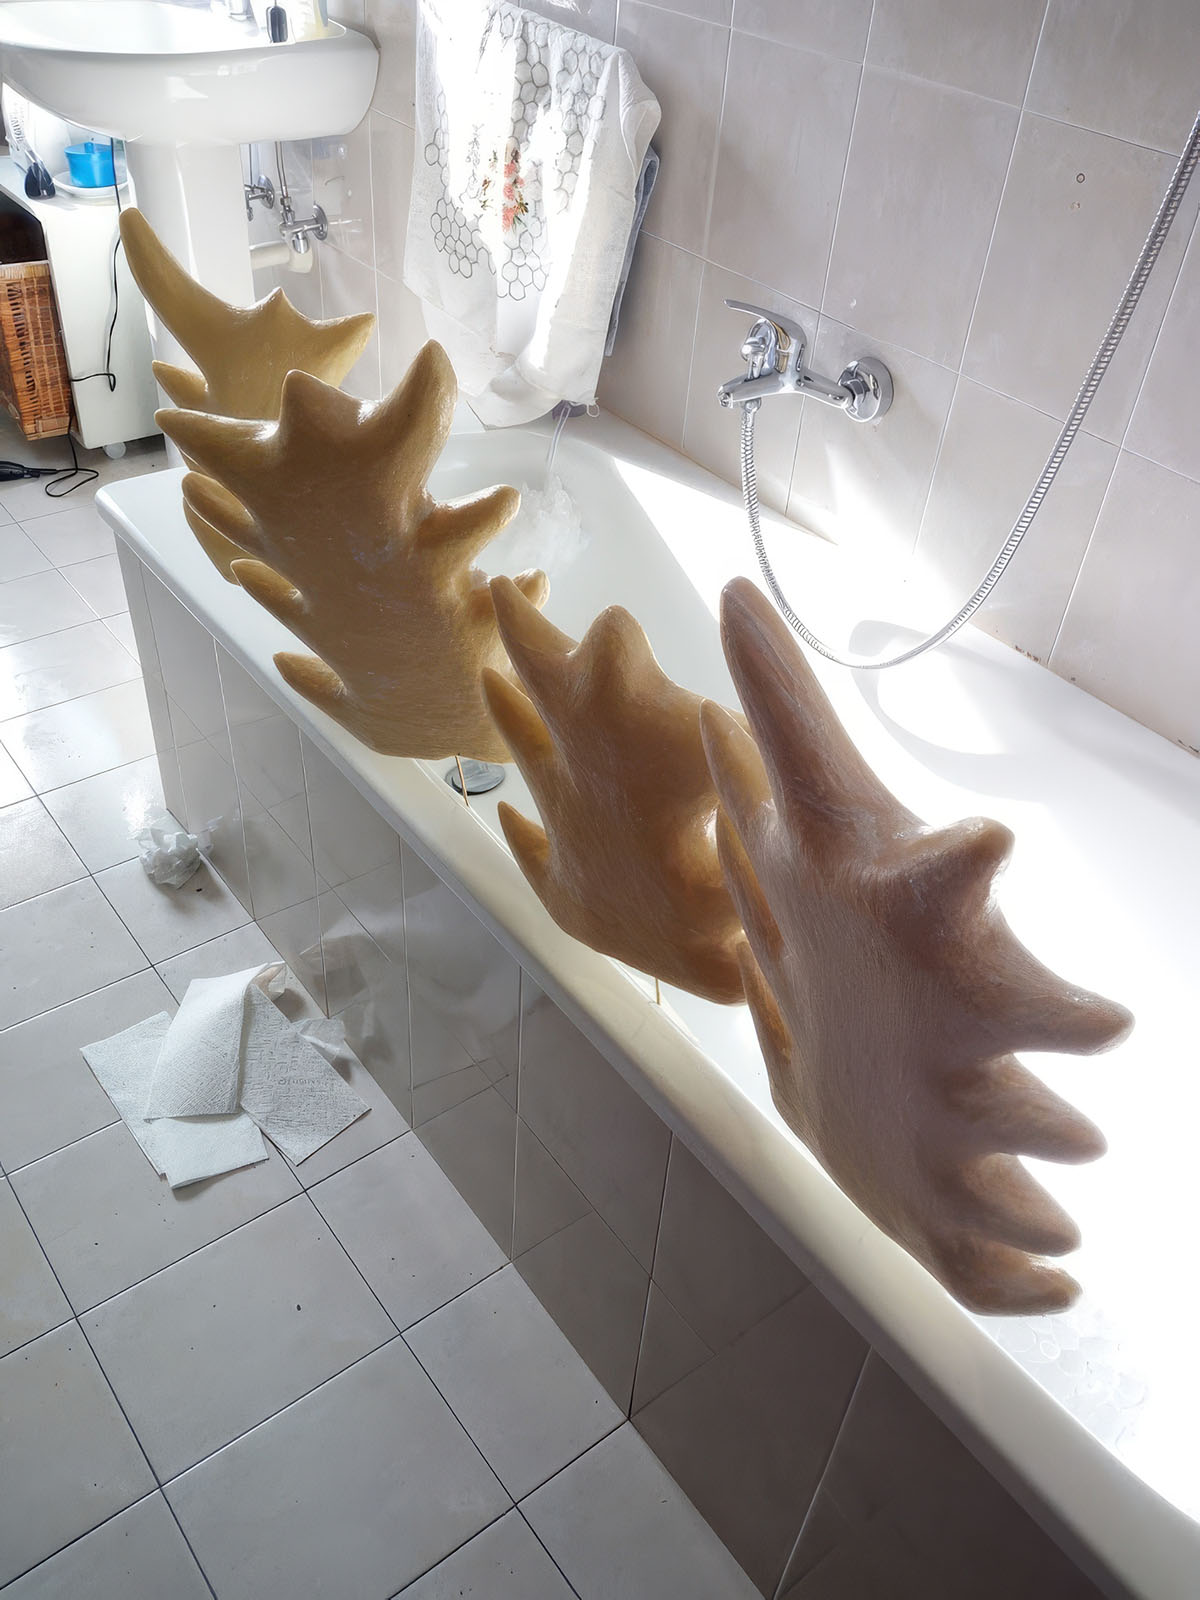
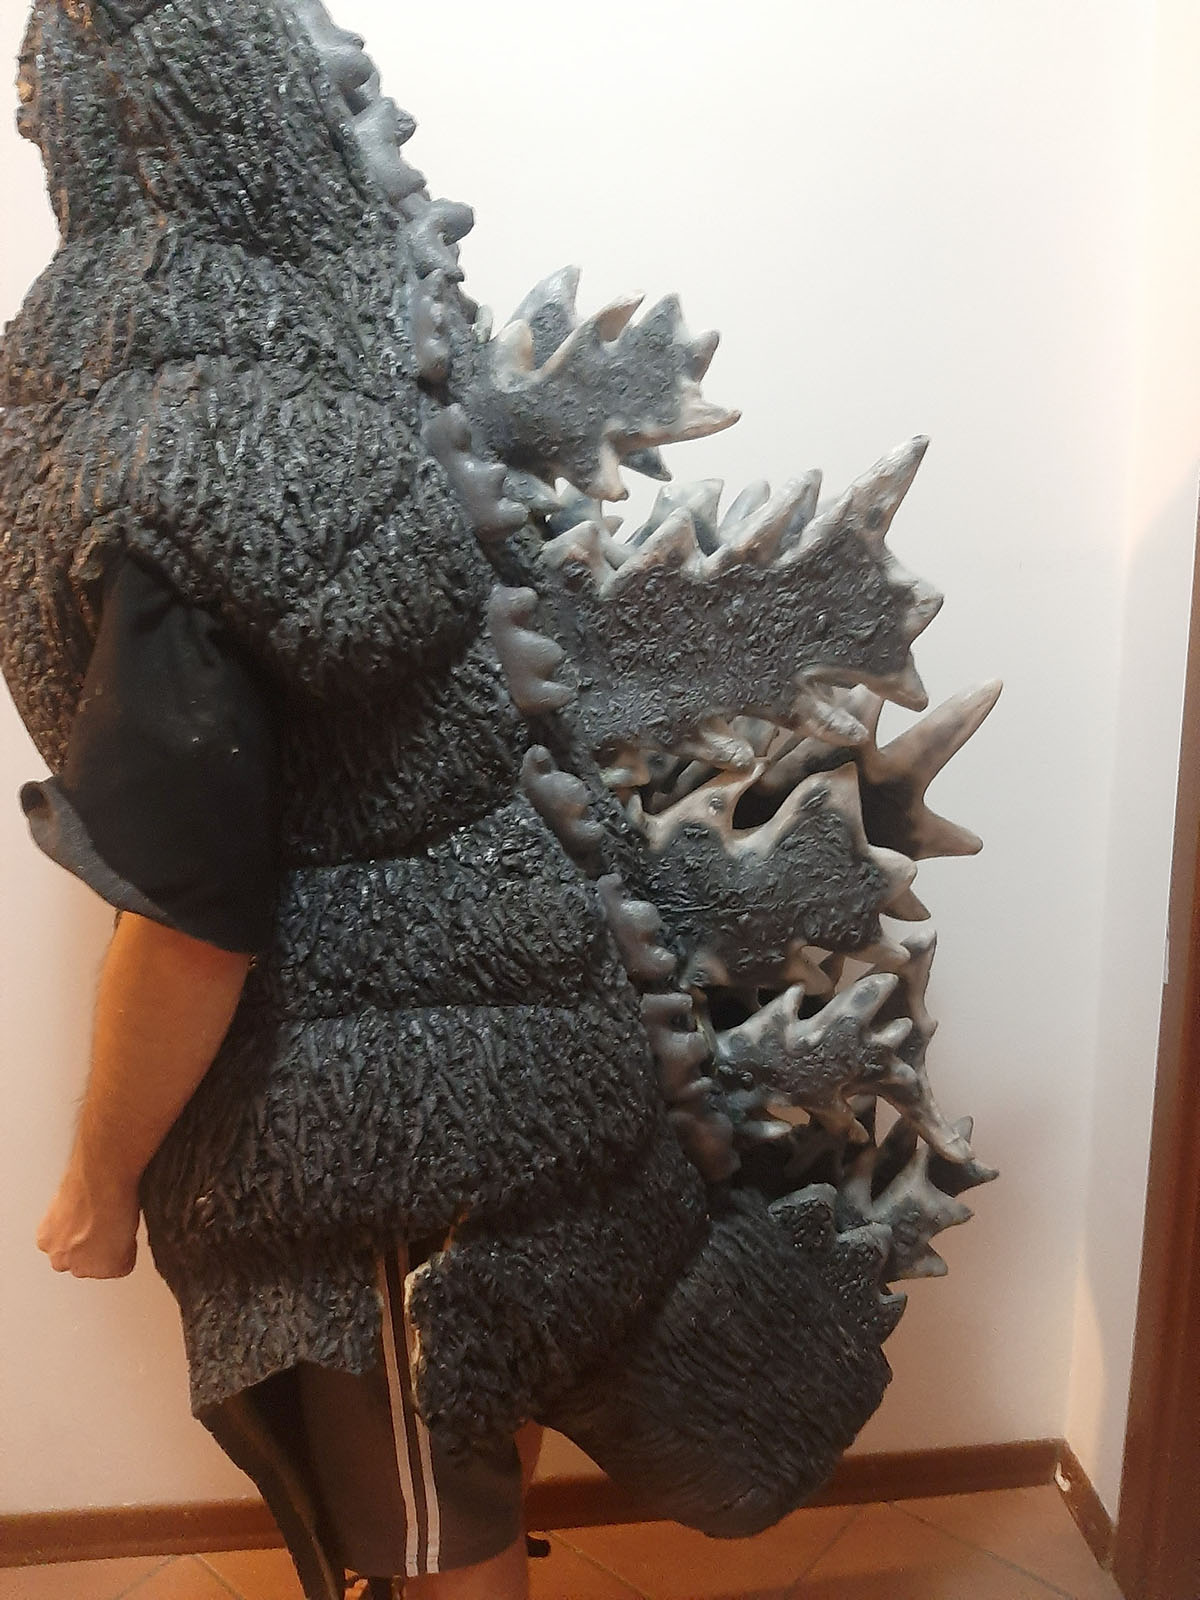
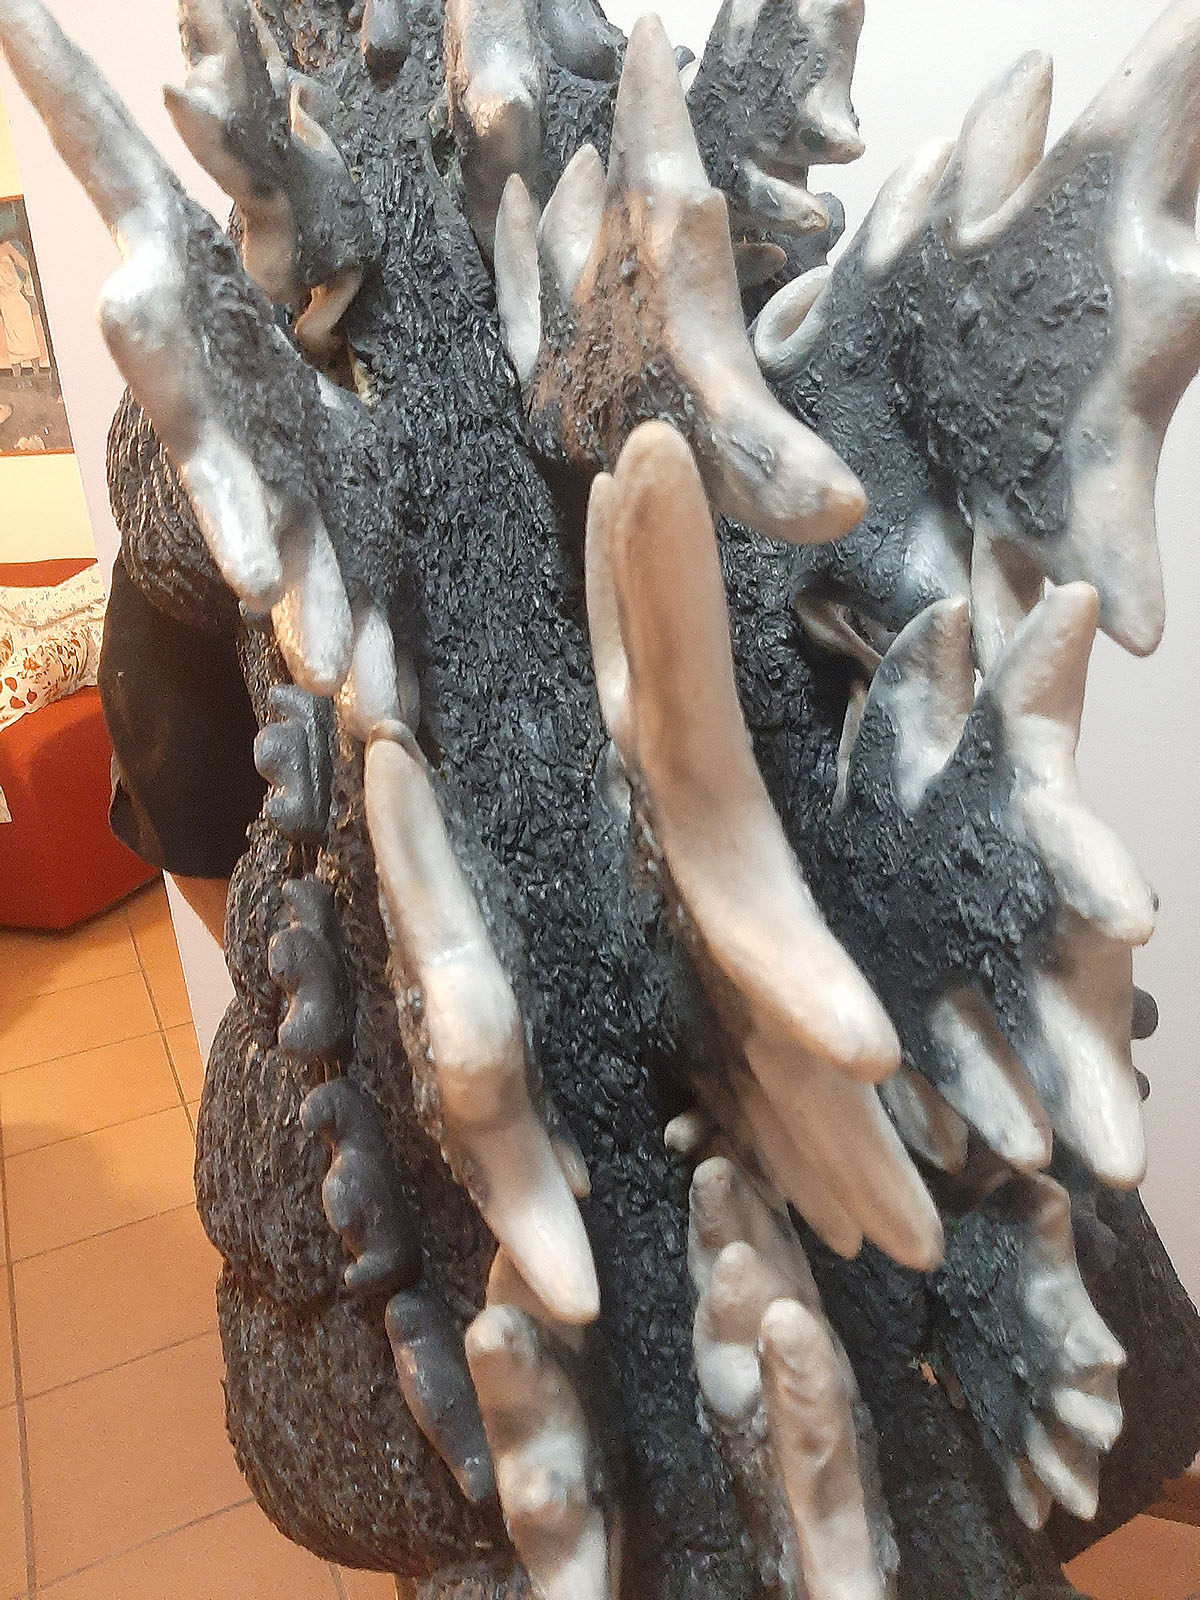
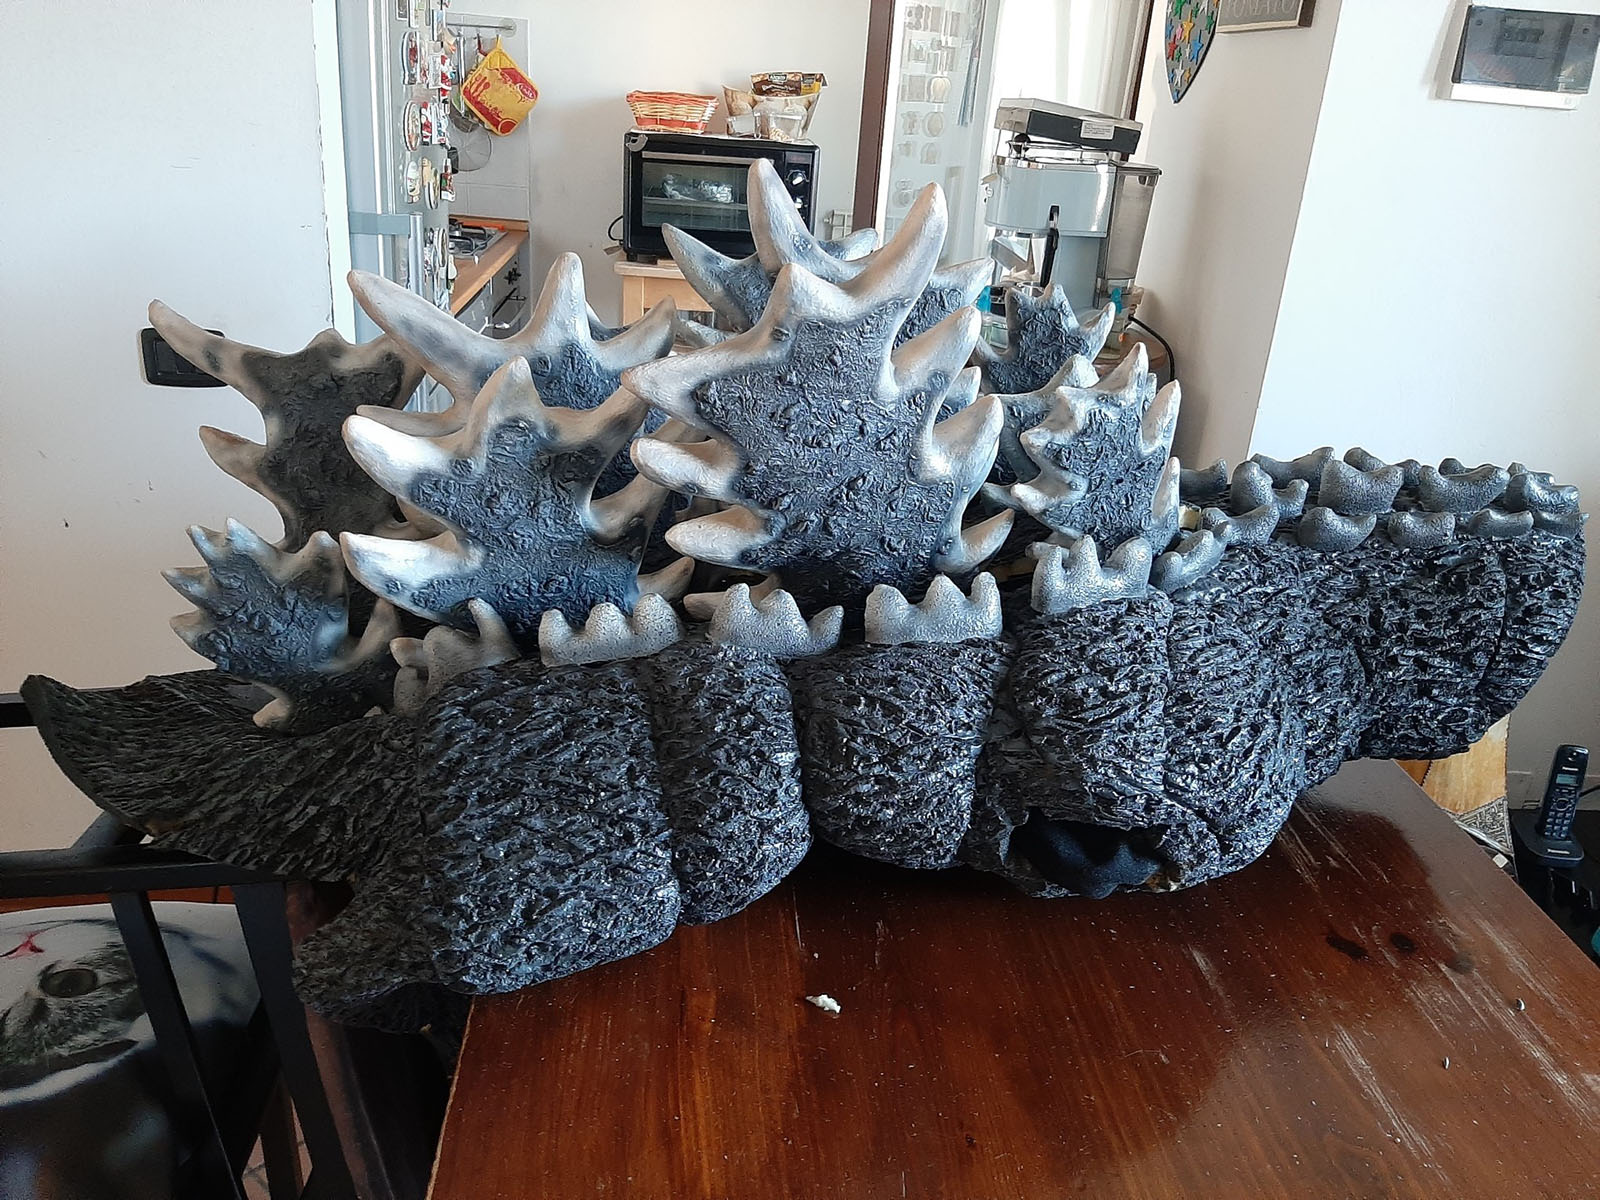
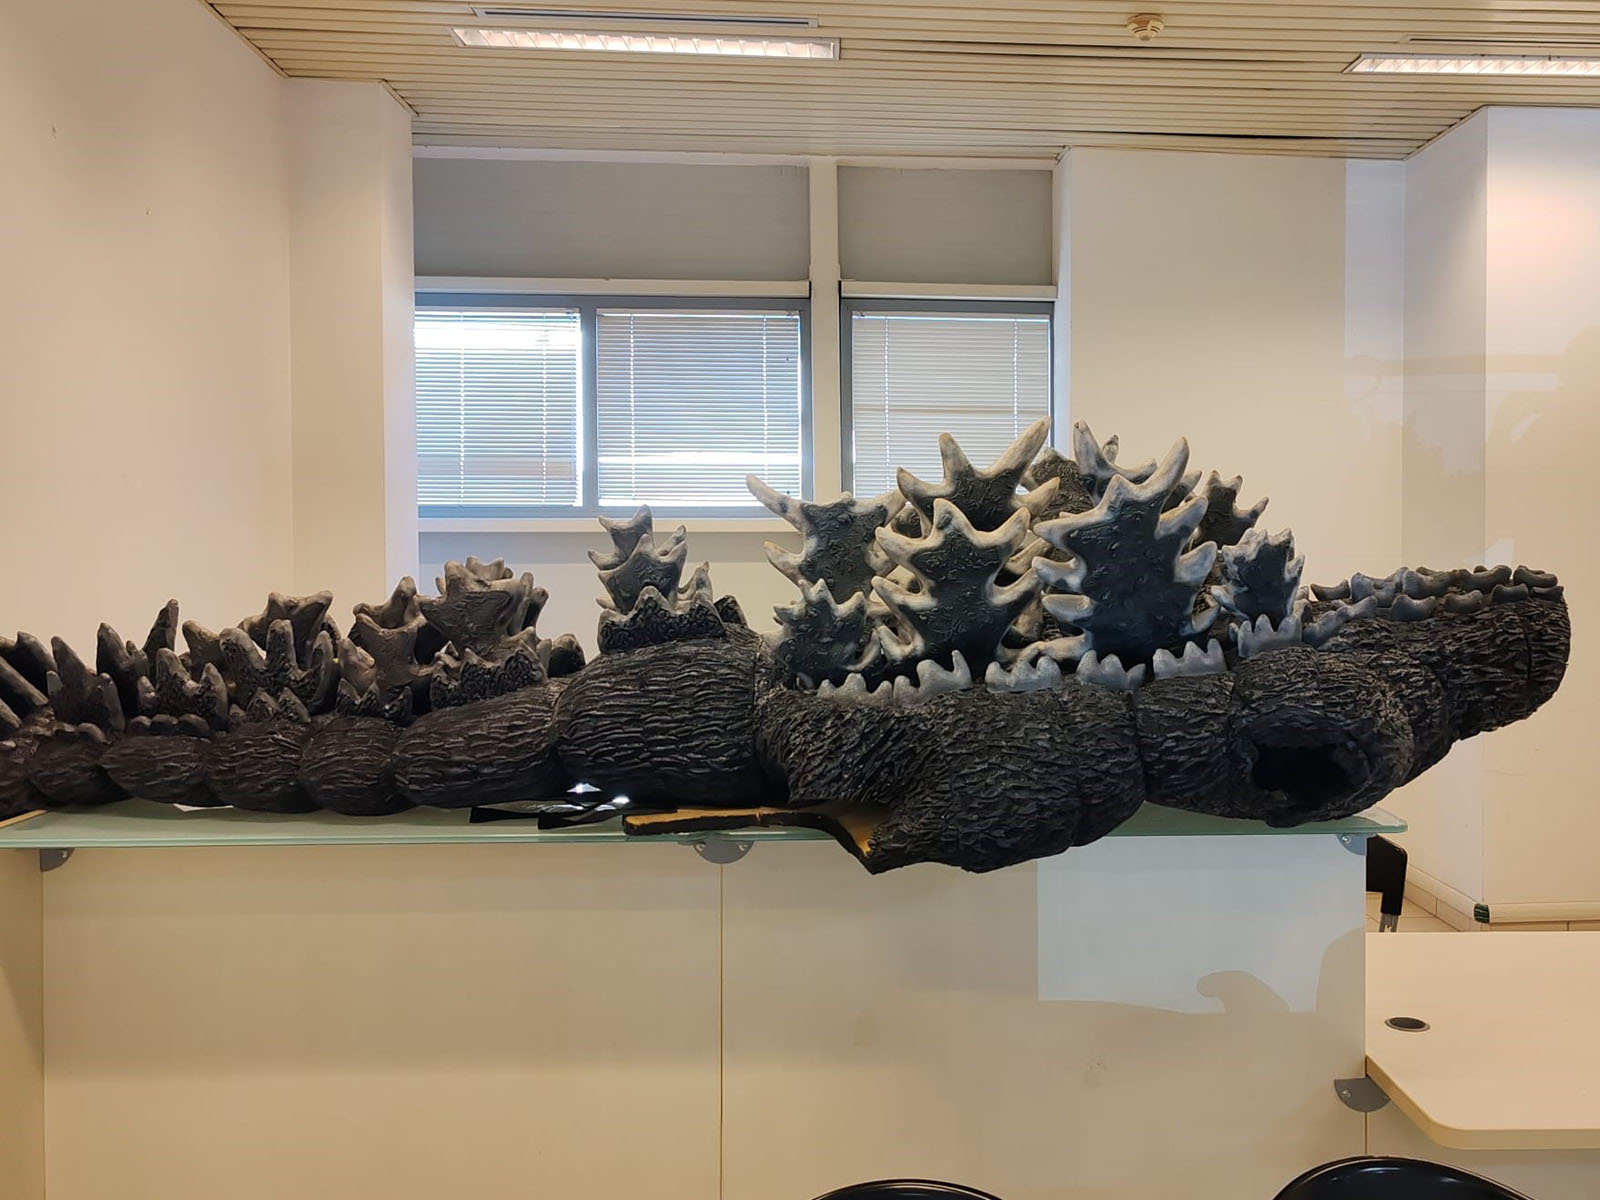
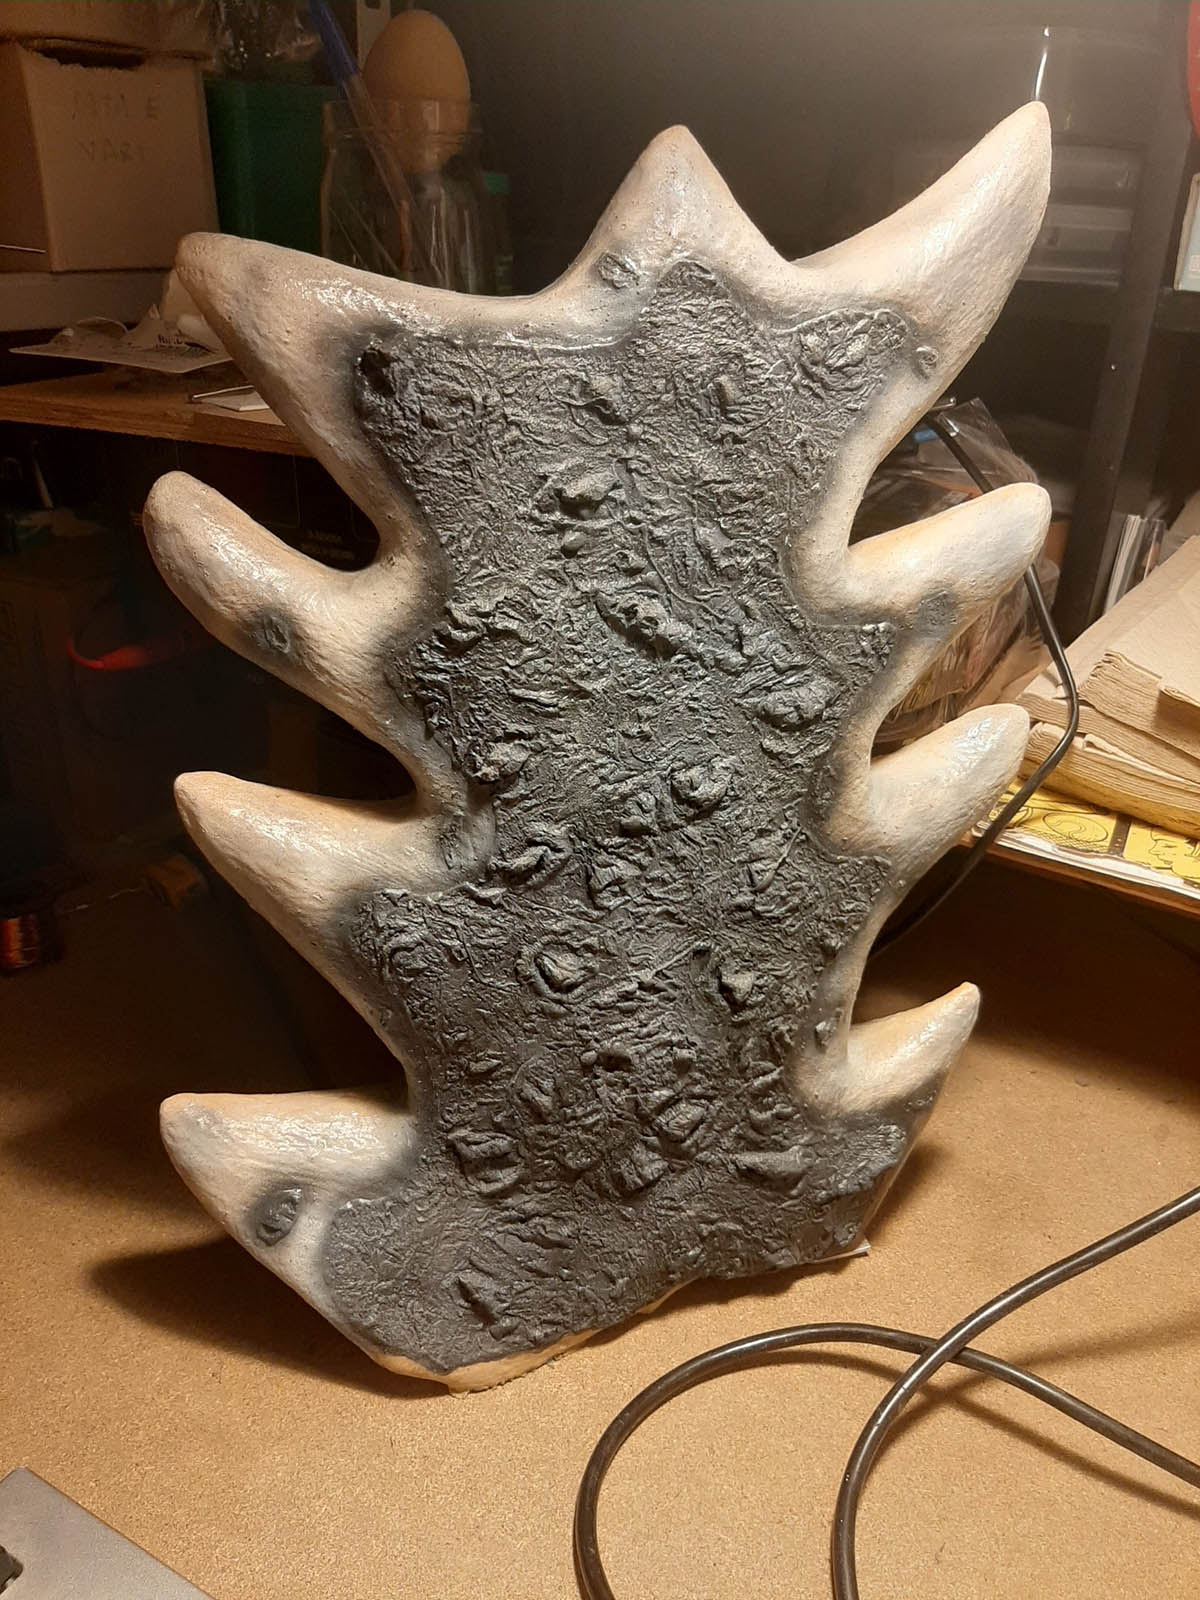
The dorsal fins were crafted using a specialized process, as we decided to make them glow—just like in the film—during the activation of the atomic breath.
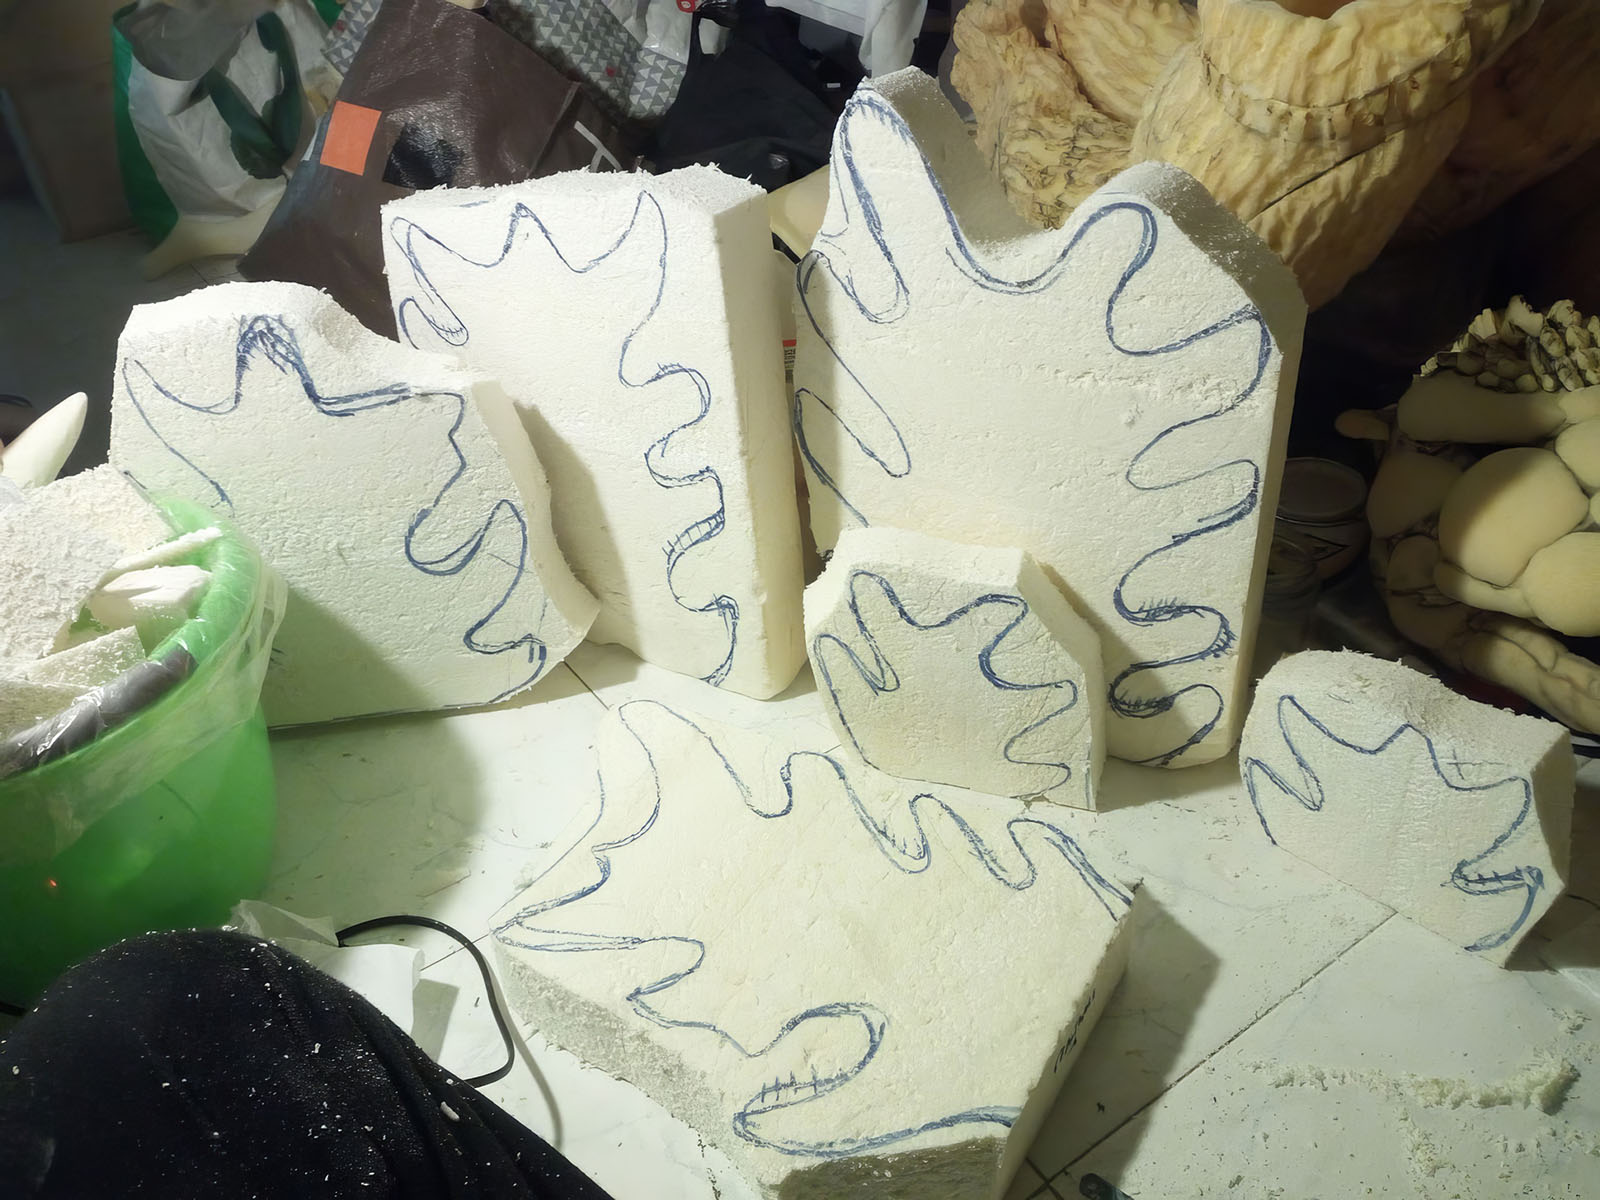
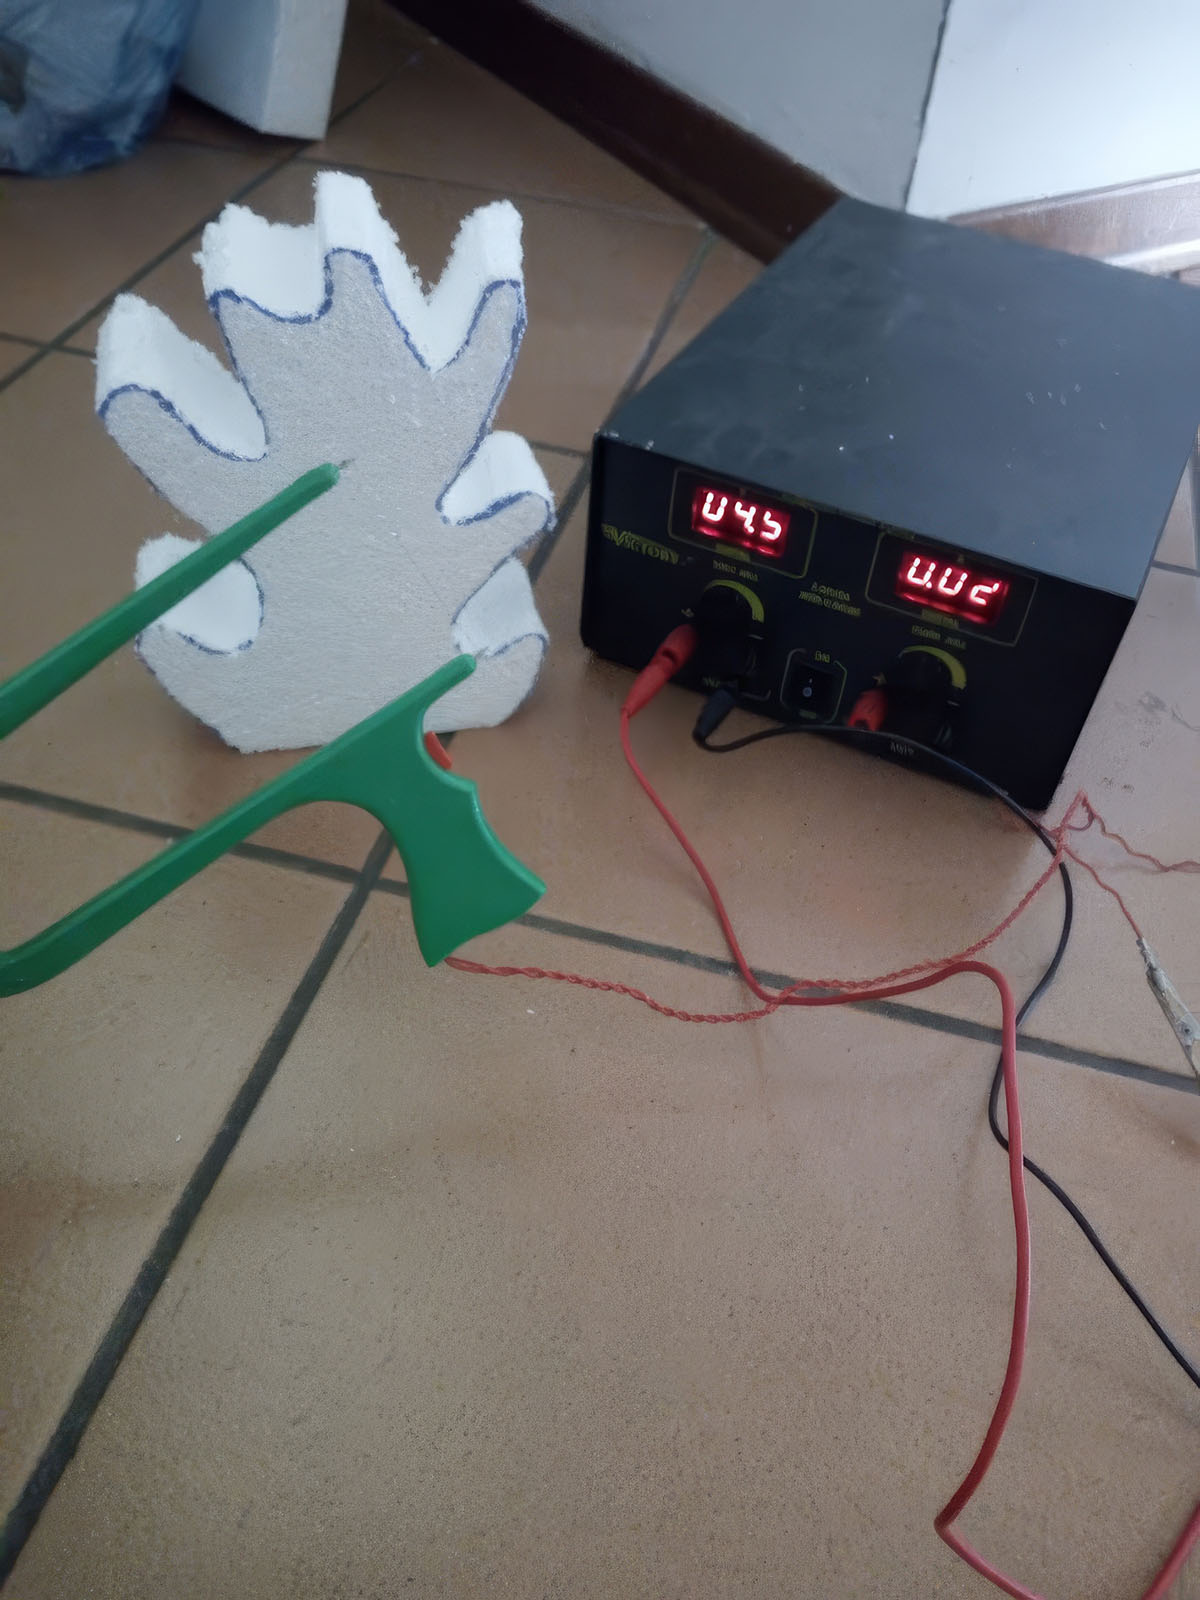
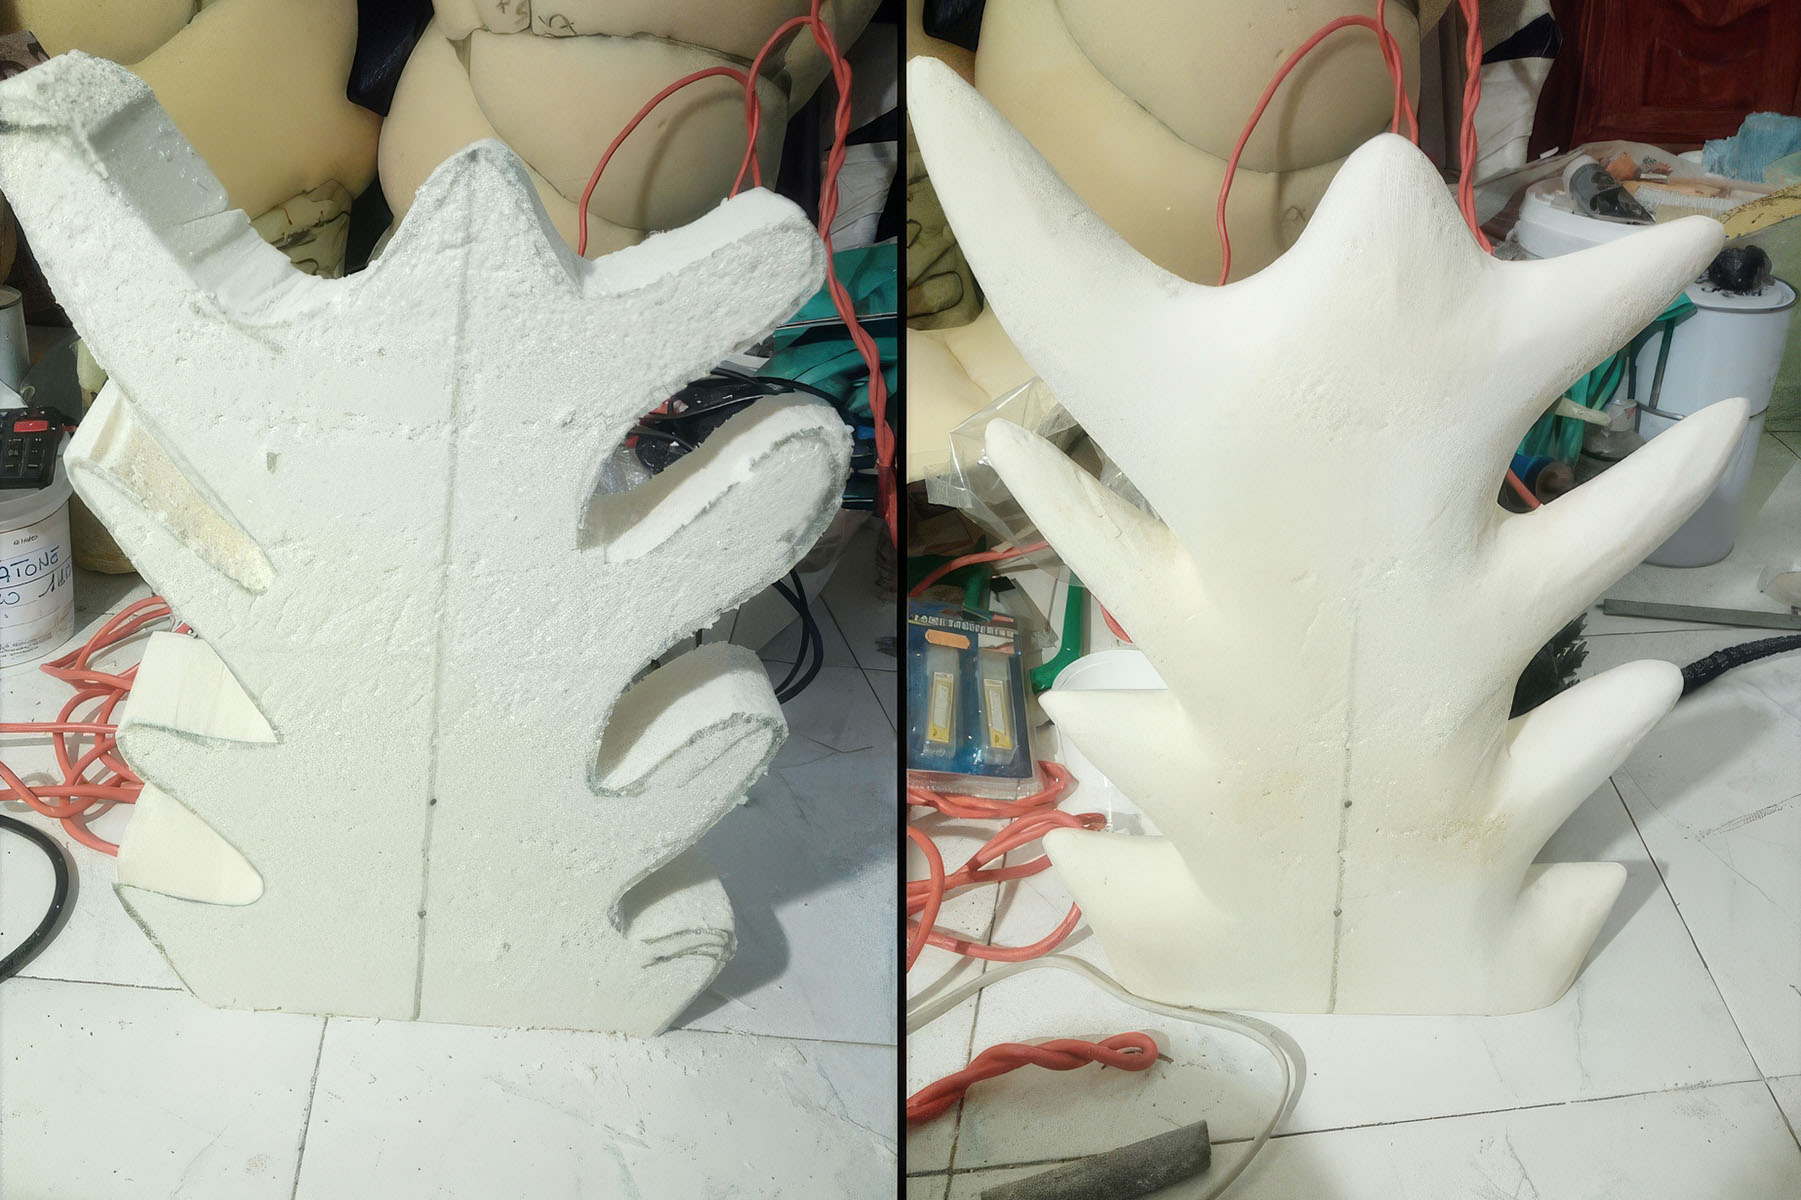
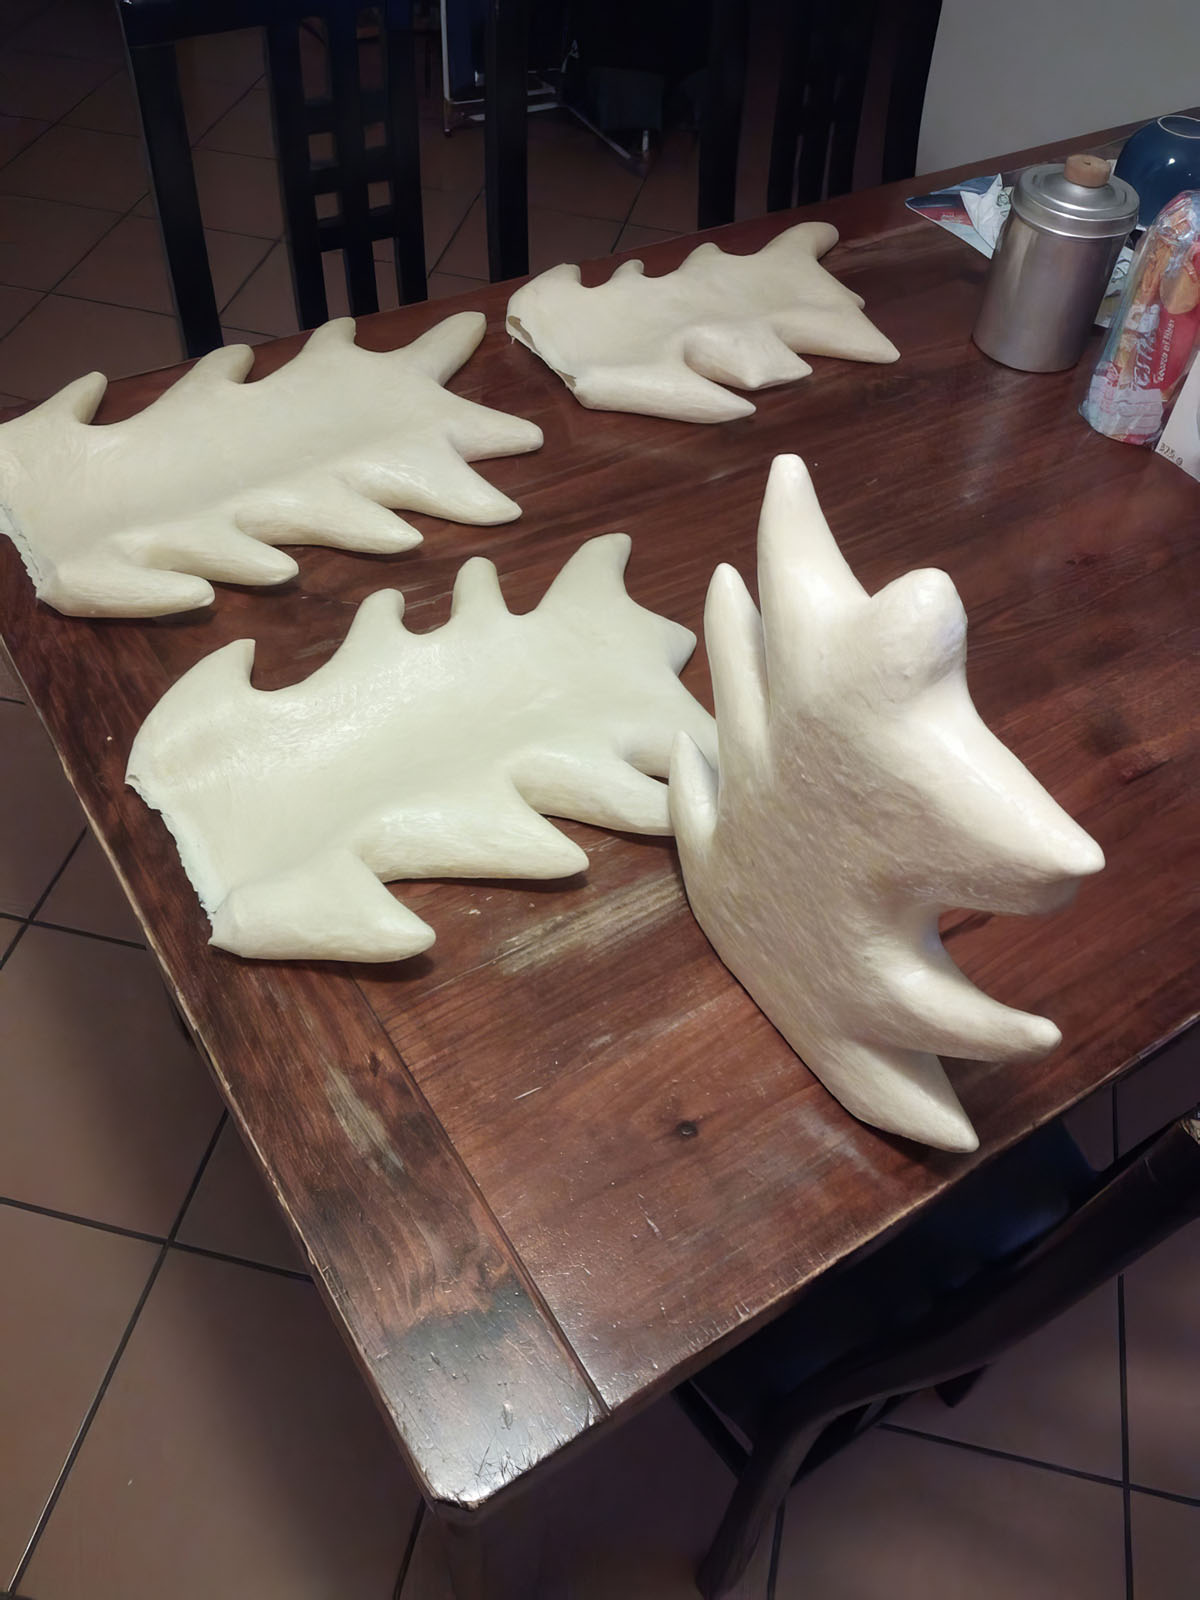
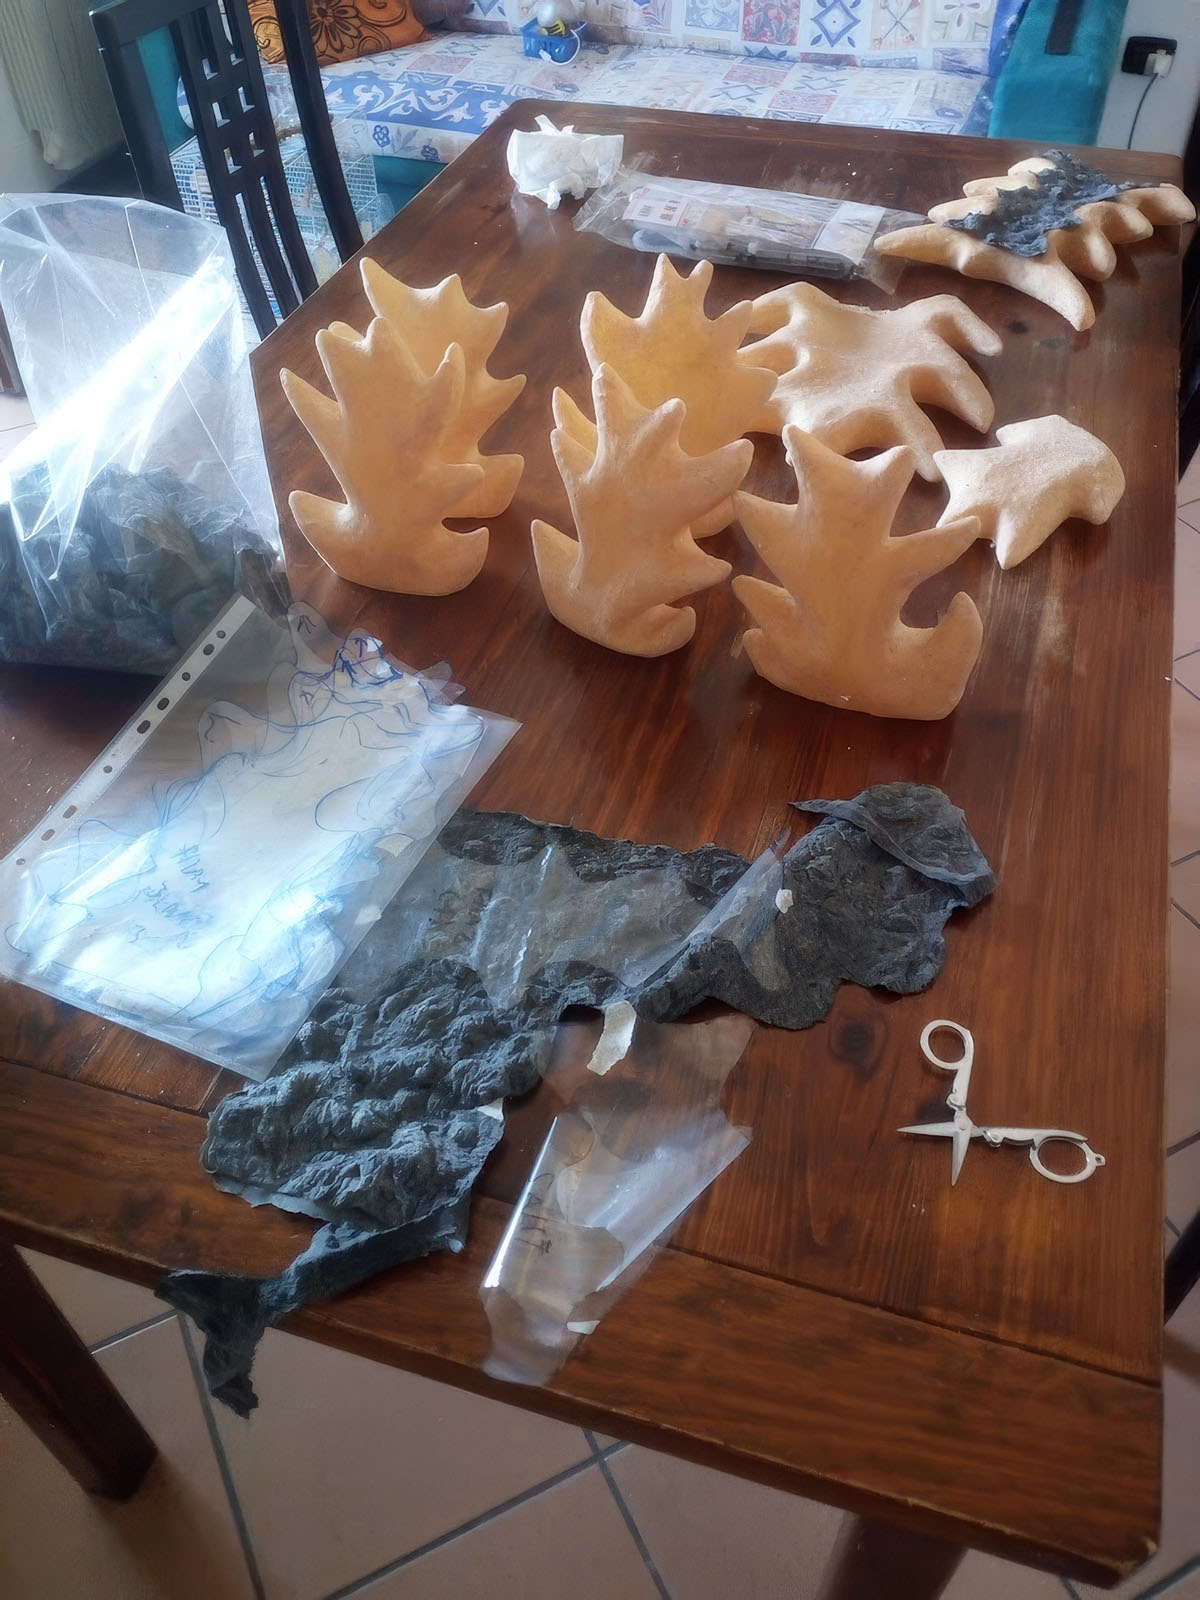
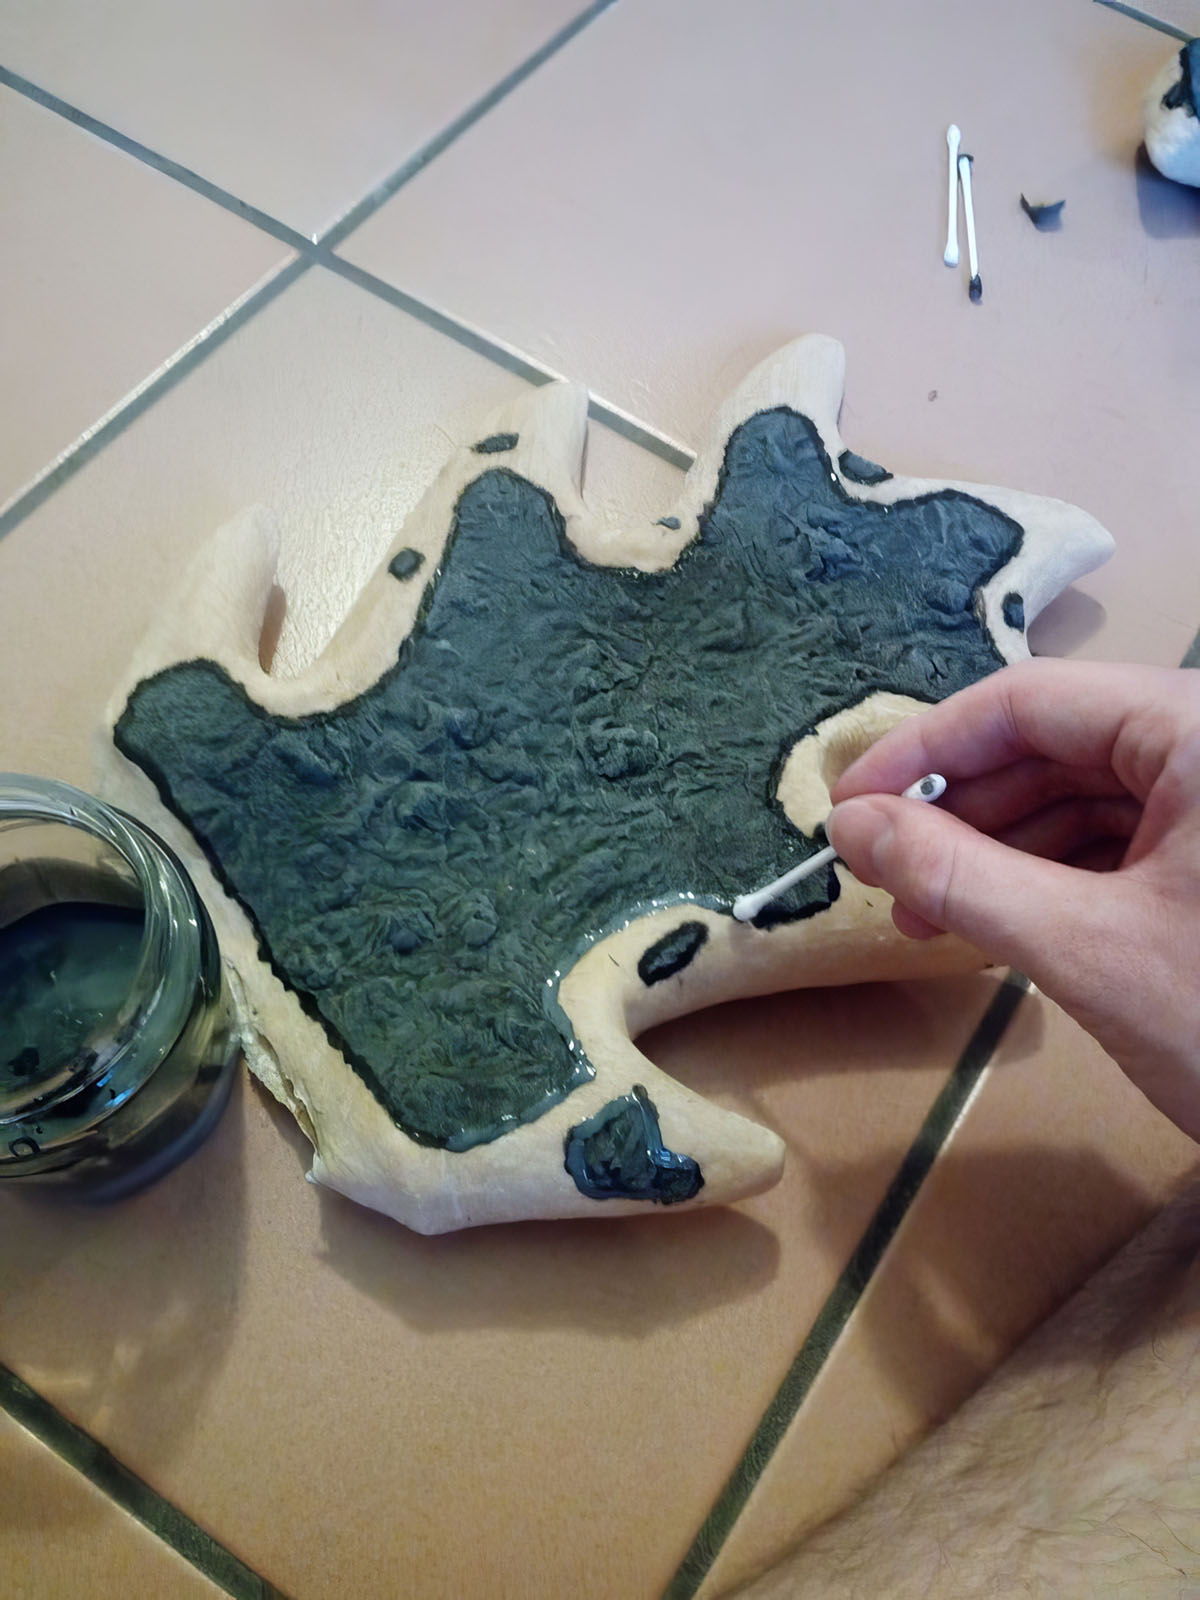
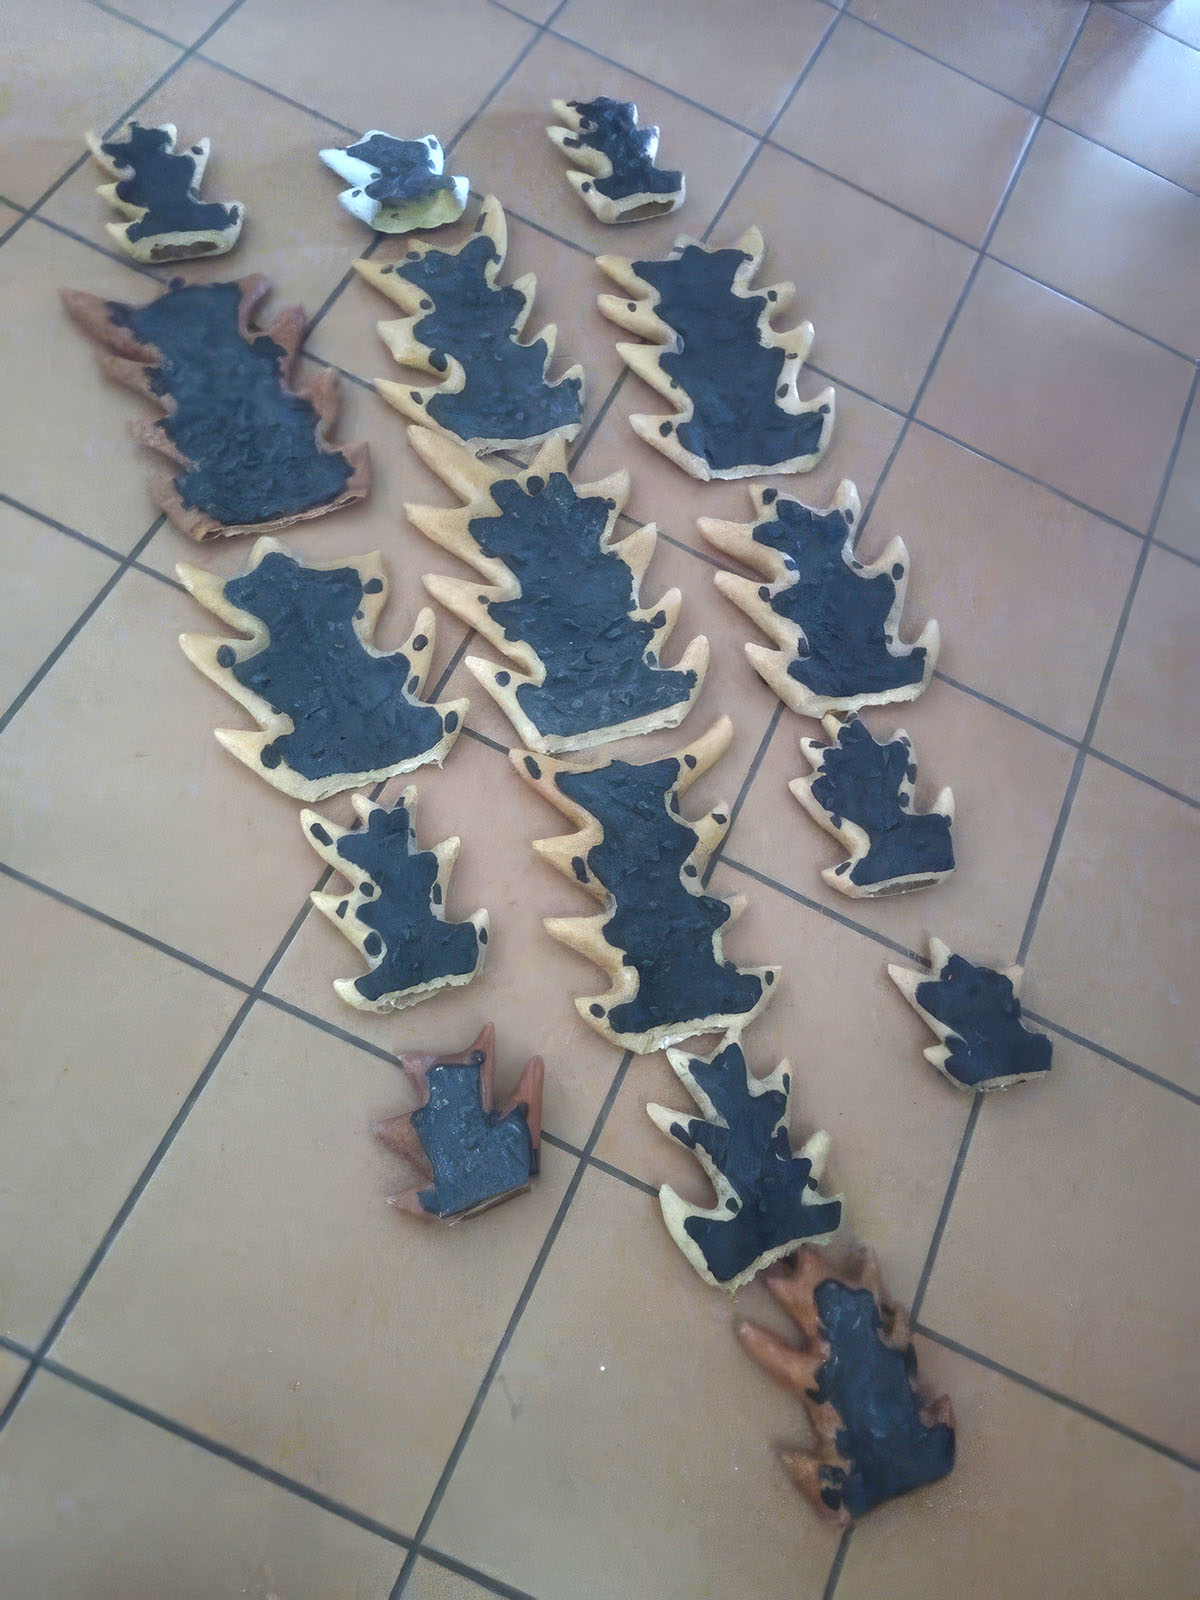
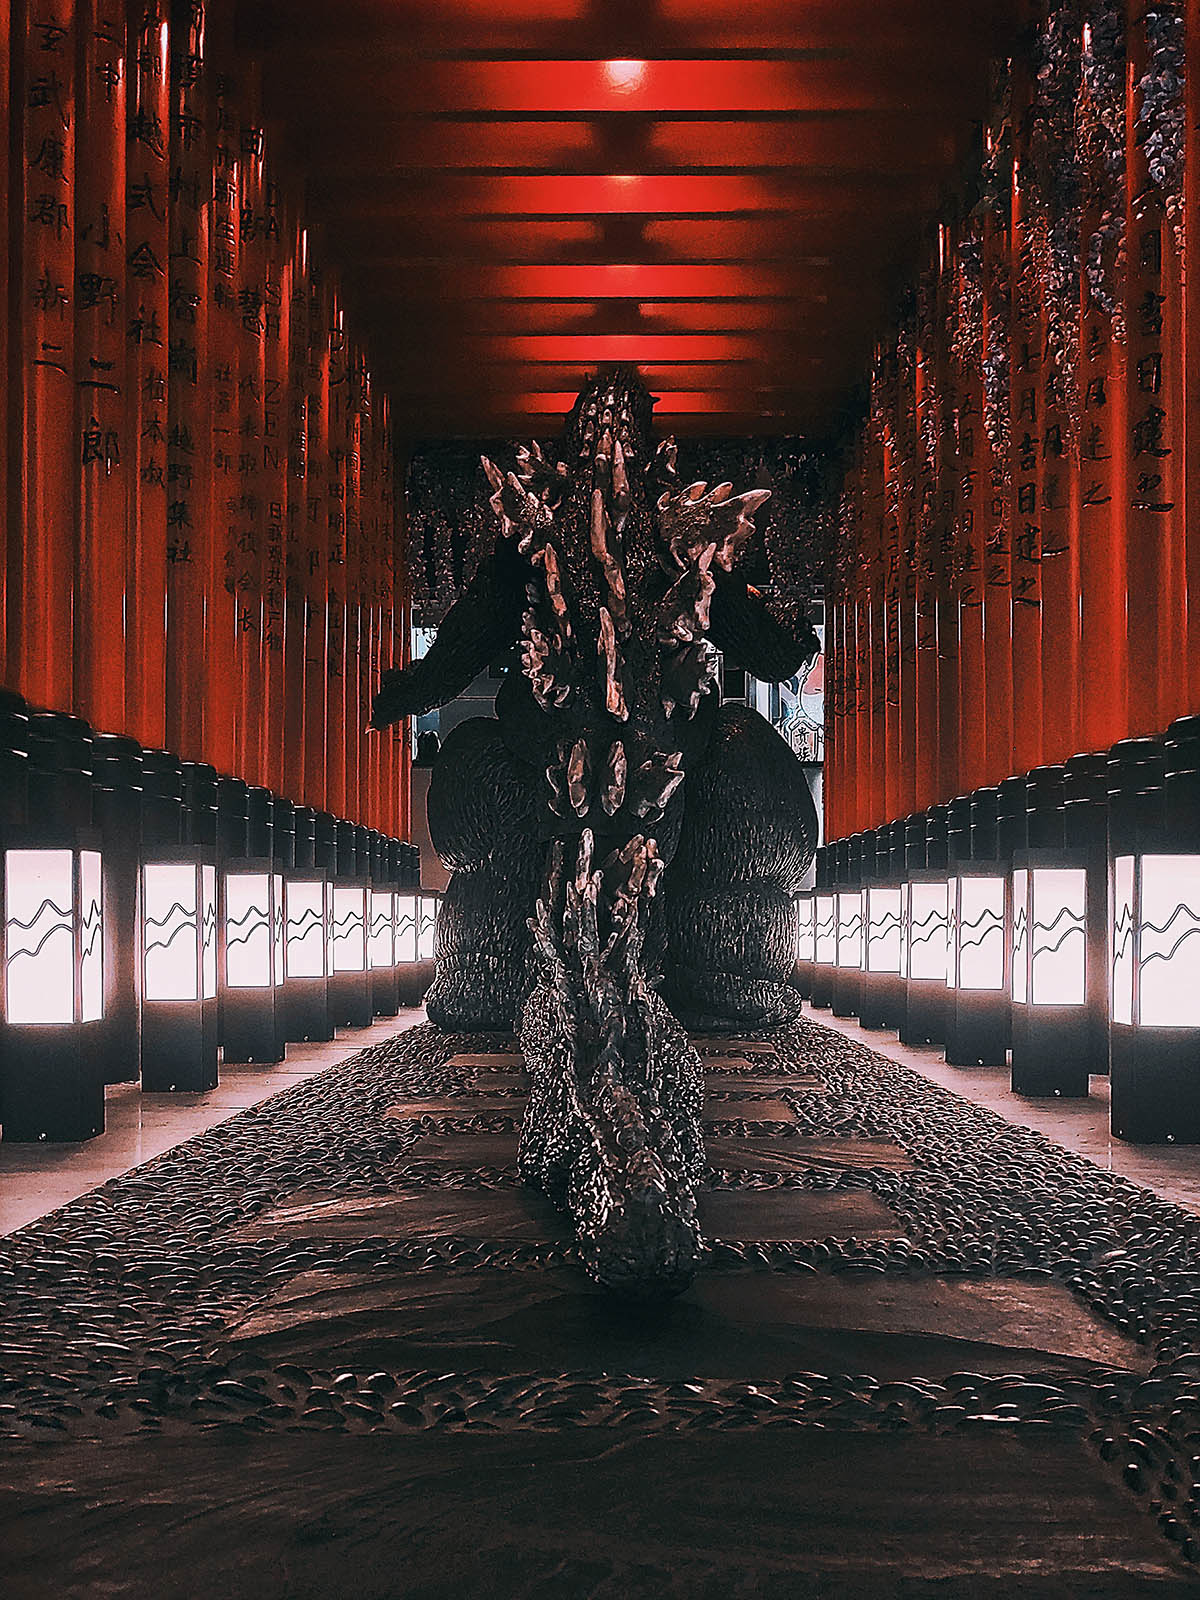
All the masters for the fins were hand-drawn onto expanded and high-density polystyrene, using film stills and the action figure as references. After being cut with a hot-wire foam cutter, each piece was sanded and rounded off.
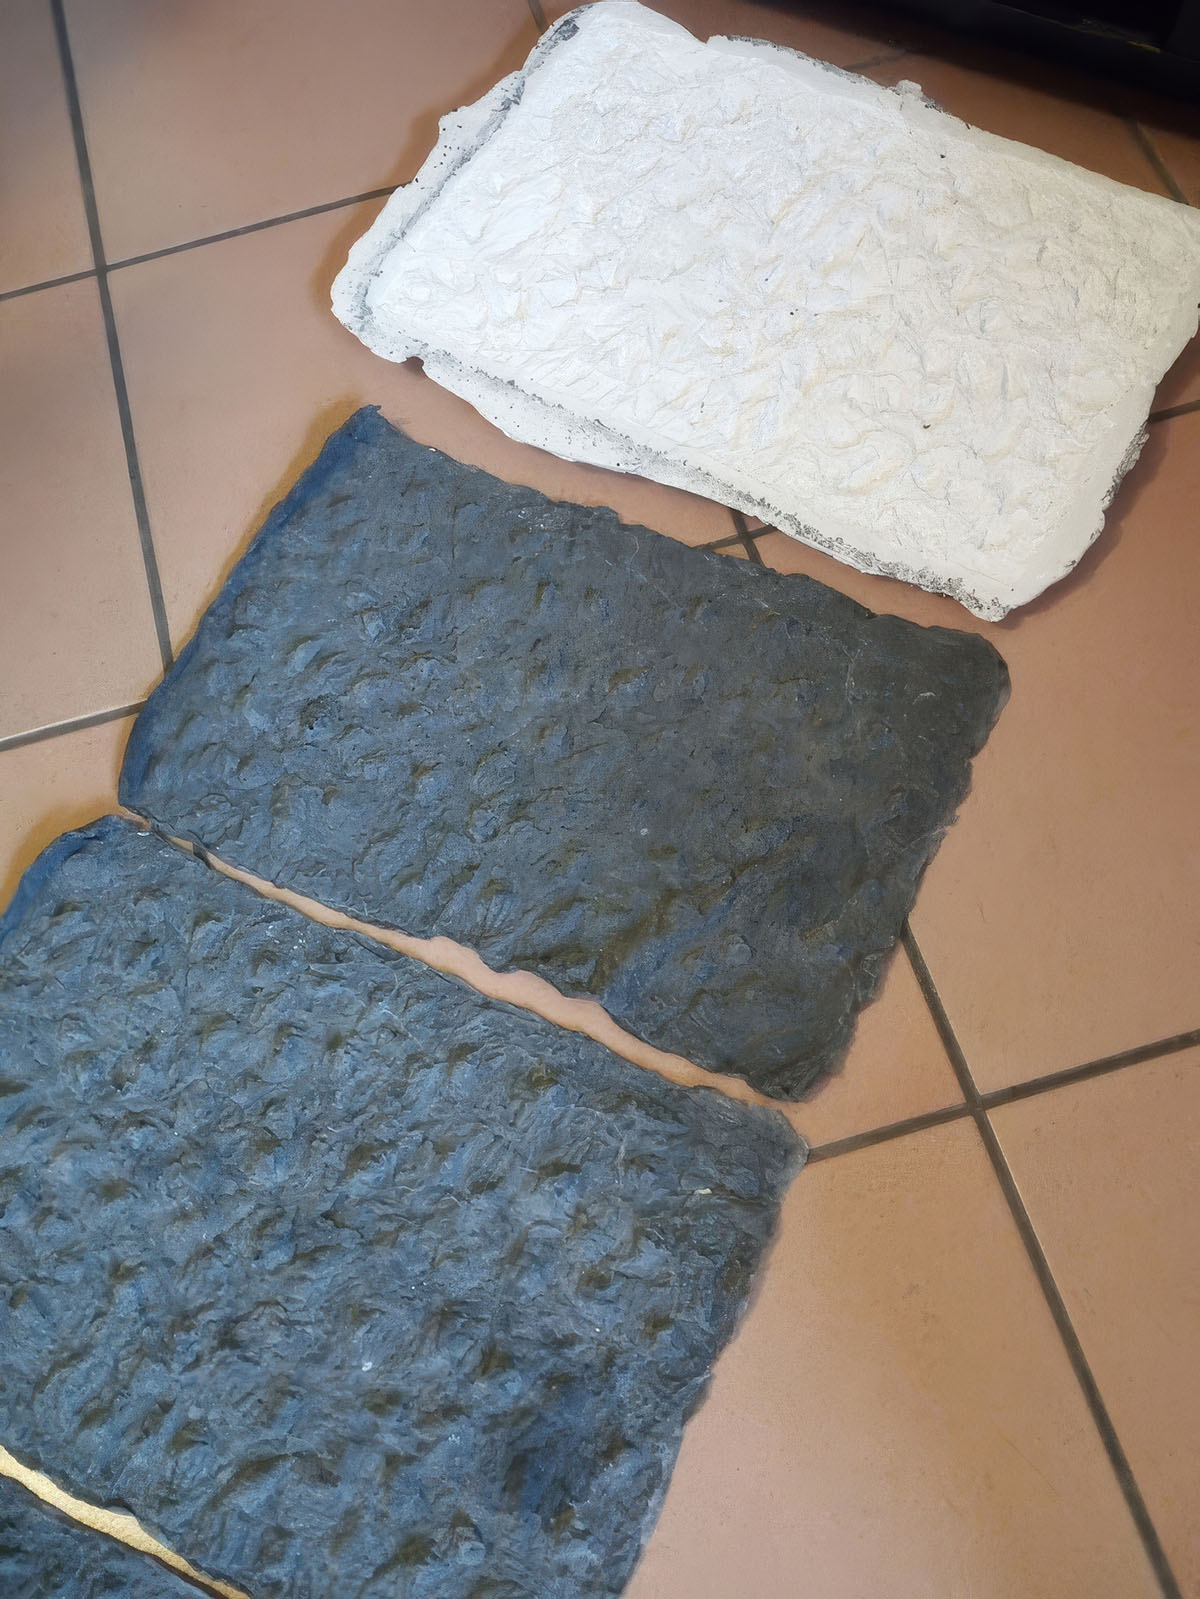
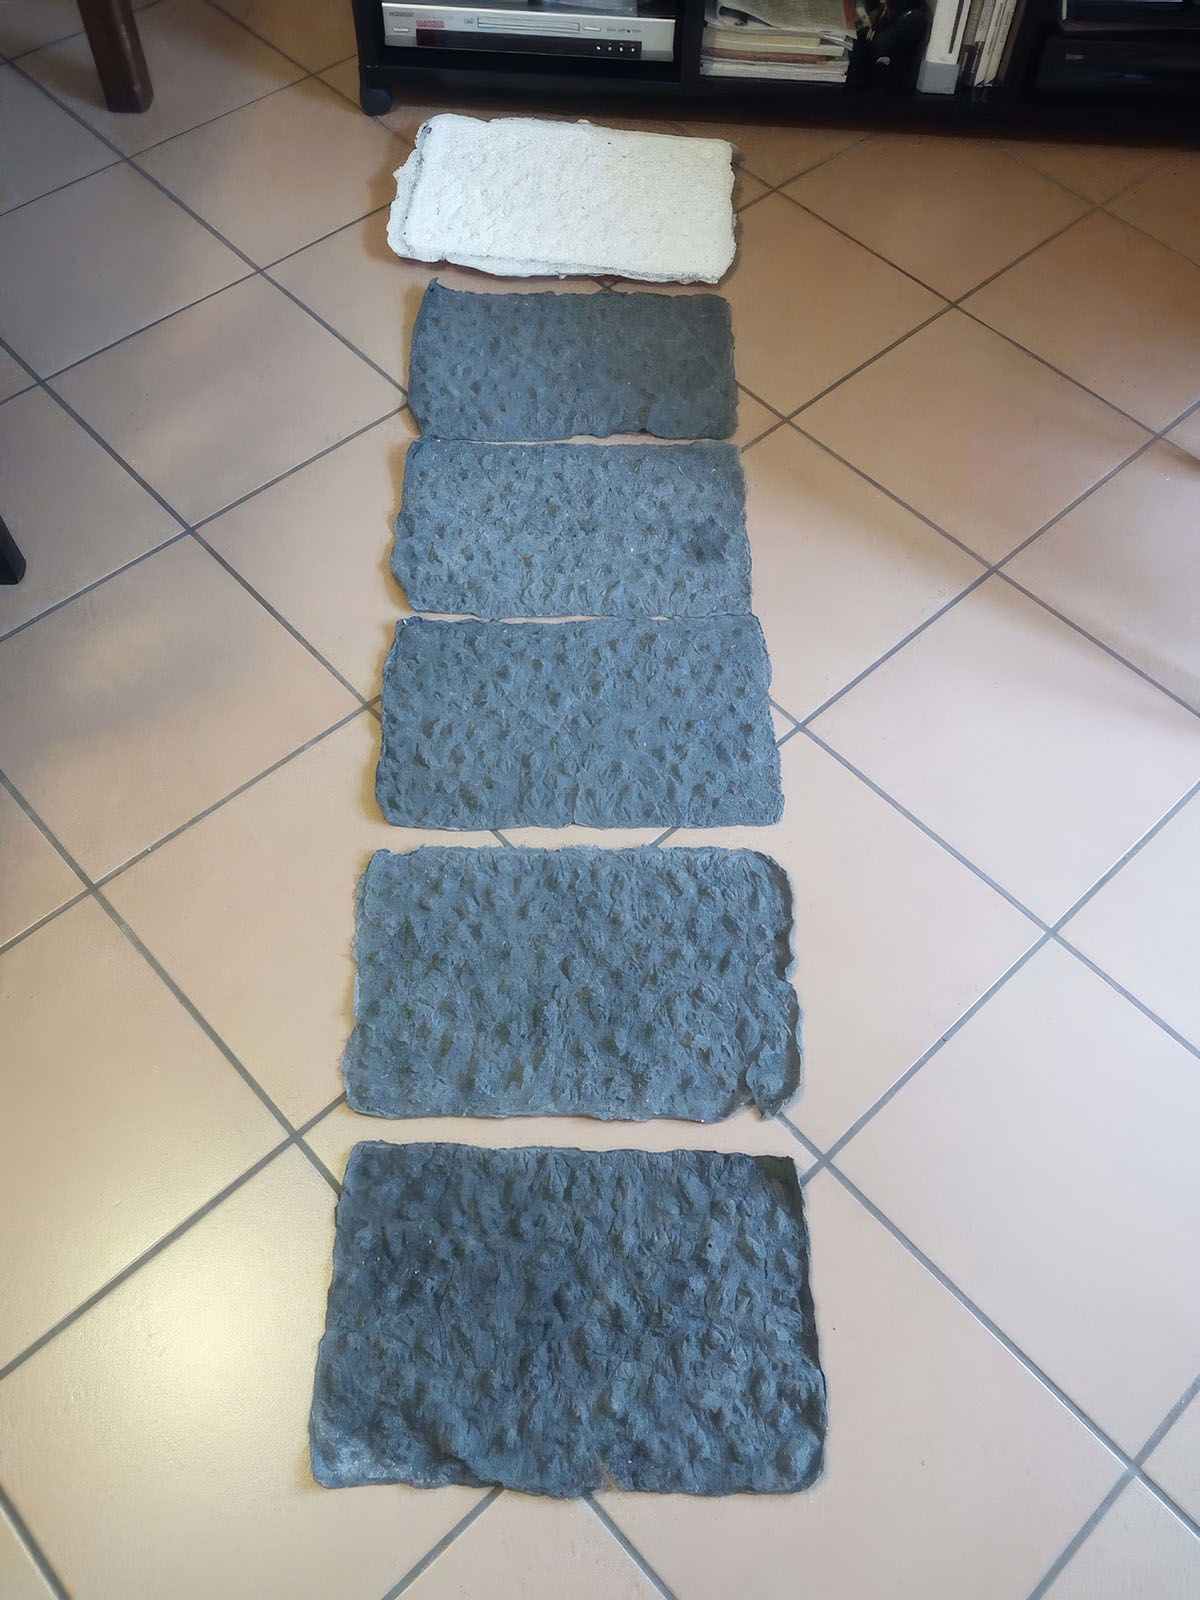
Each master received 15 coats of pure, unpigmented pre-vulcanized latex. Once the latex was fully cured, the masters were extracted from the ‘skin’ (a process made possible because latex does not bond with polystyrene).
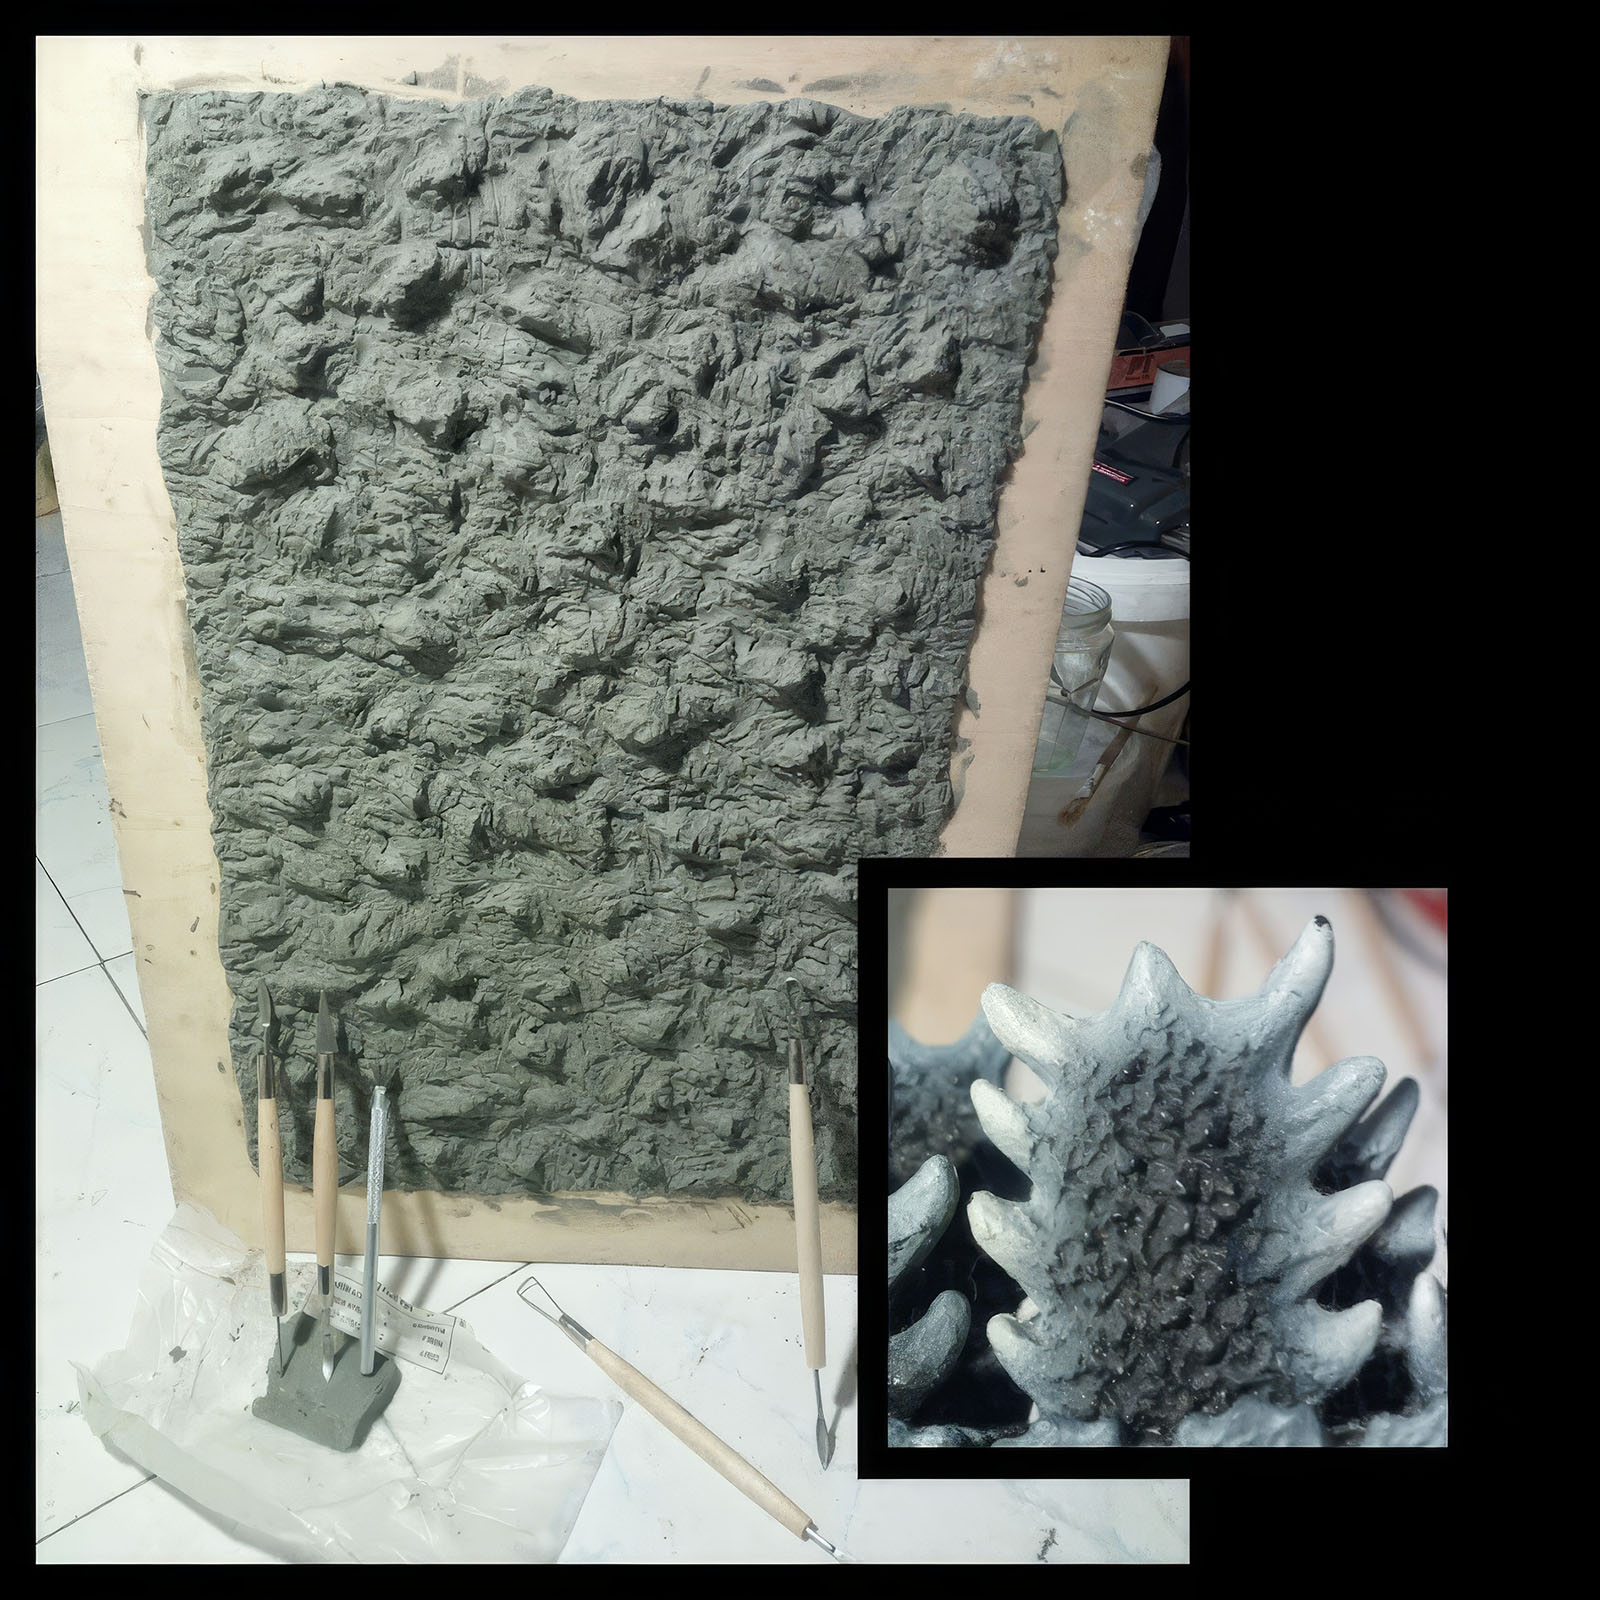
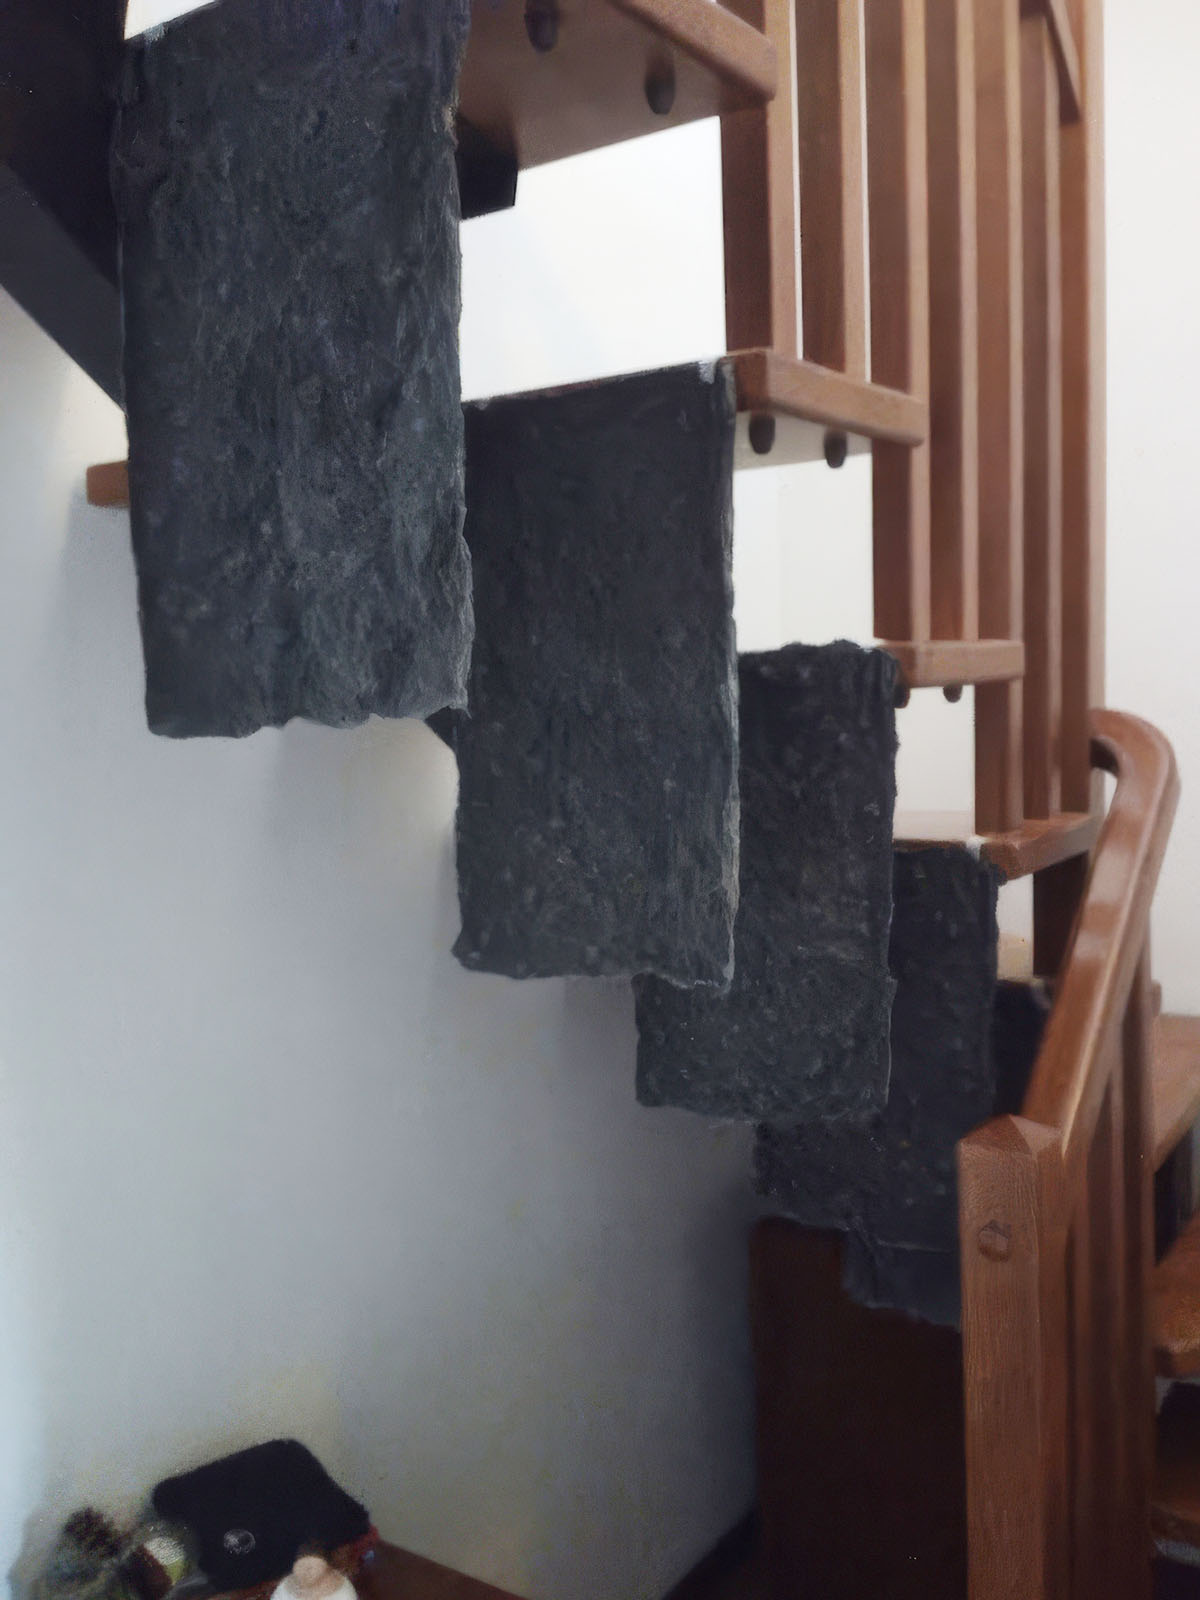
This left me with hollow latex fins that allowed light to pass through. However, they were still missing the central skin texture, which I created by sculpting a flat master in plasticine.
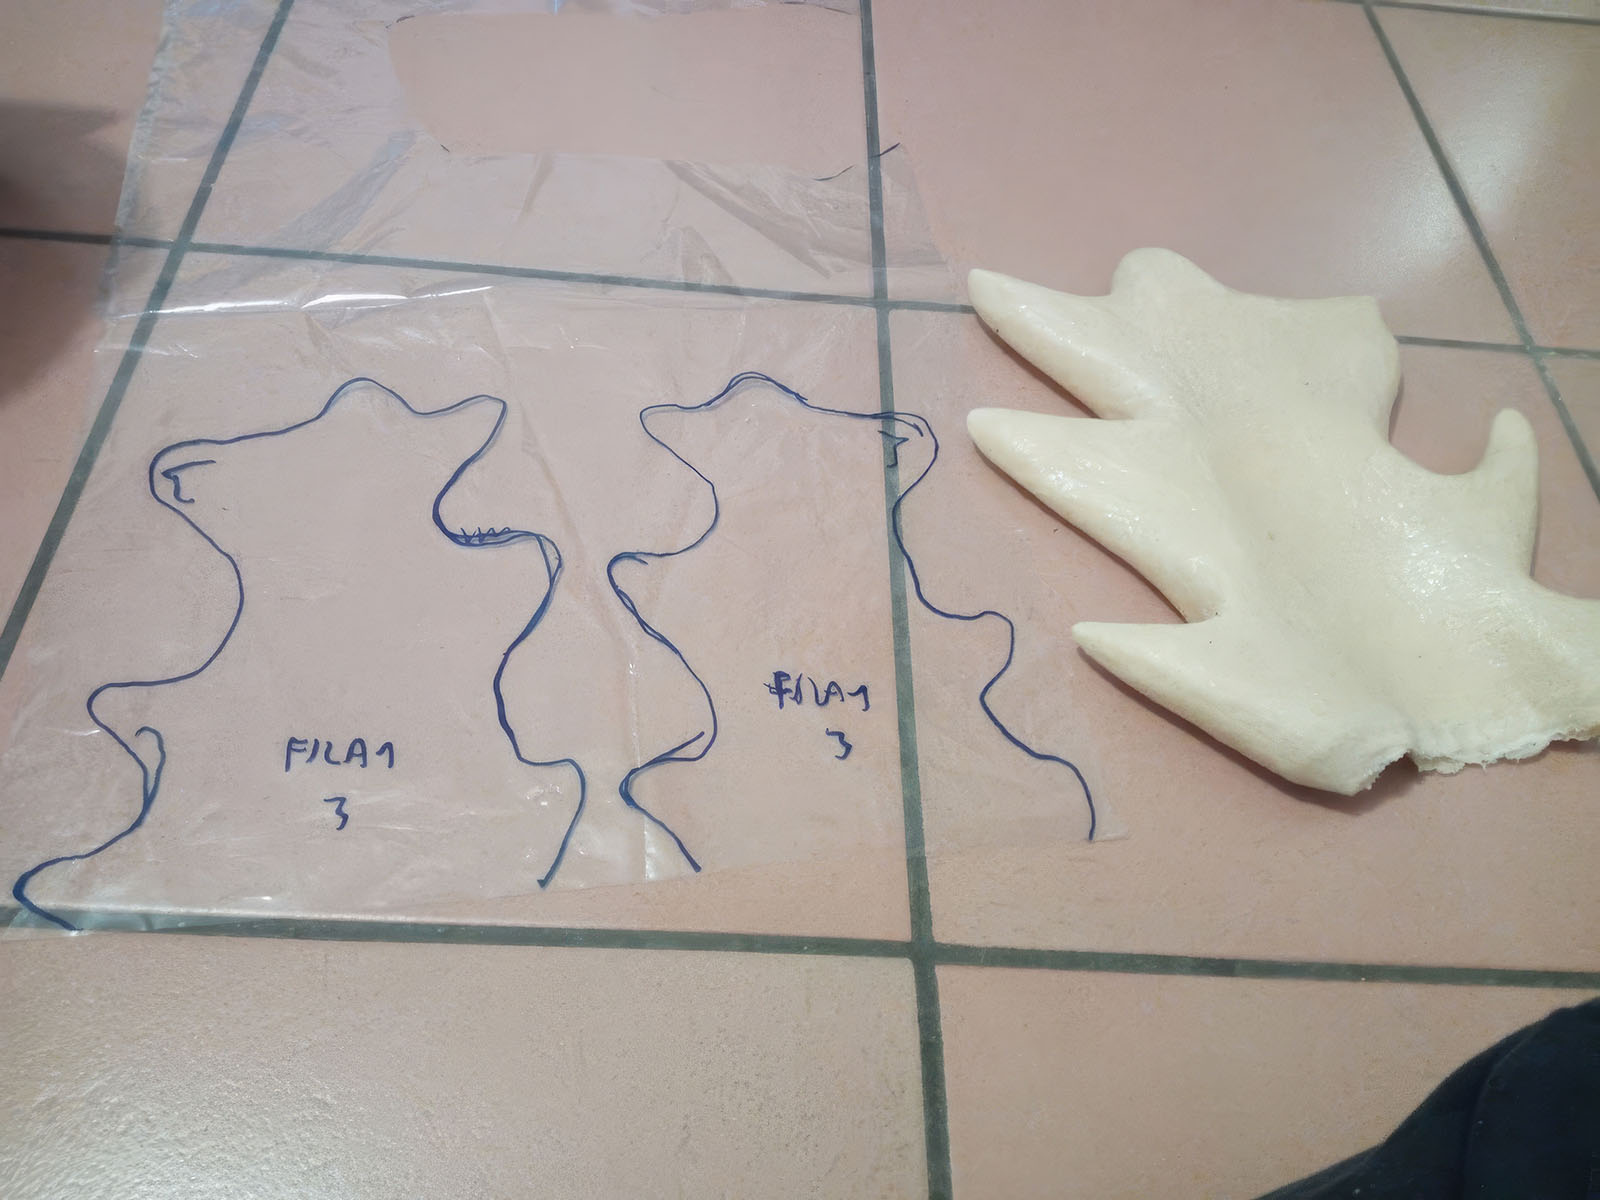
I then pulled a plaster mold from this flat sculpture, which allowed me to produce several ‘sheets’ of textured skin. I applied the paper patterns for each fin’s central section to these sheets, cut them to shape, and permanently fused them to the fins using additional latex.
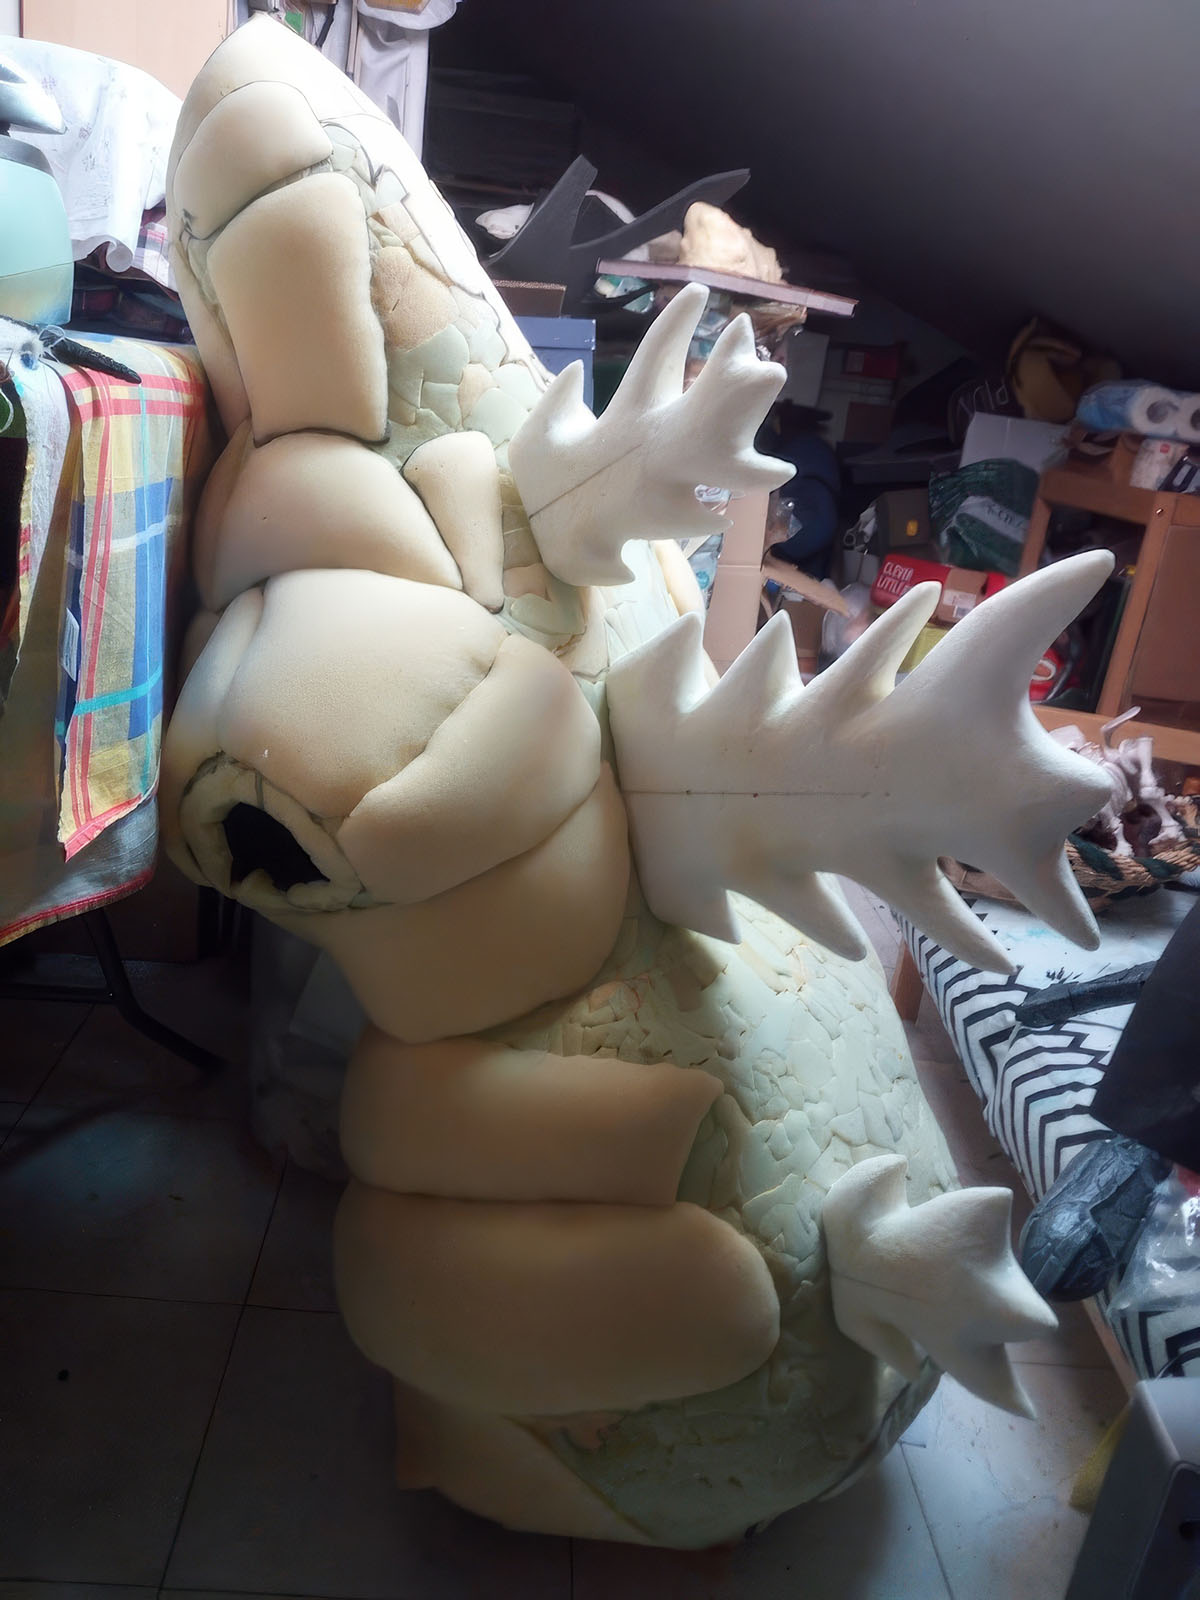
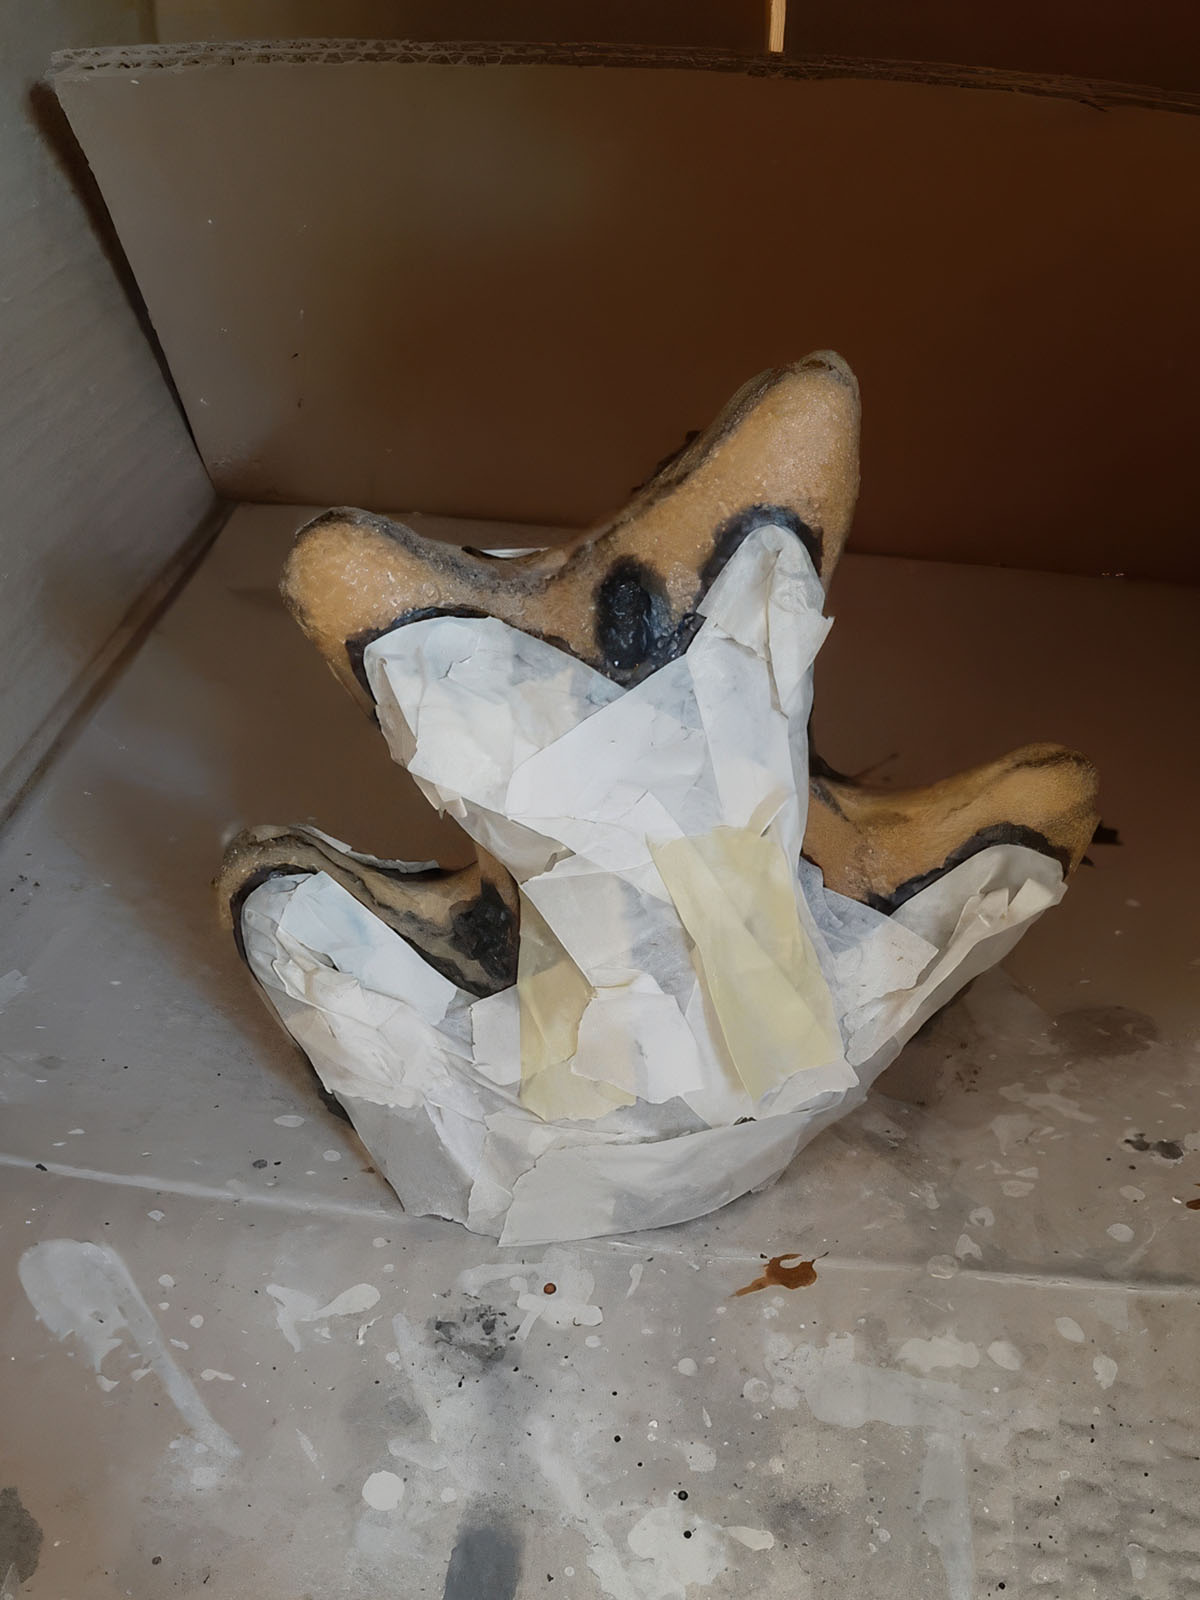
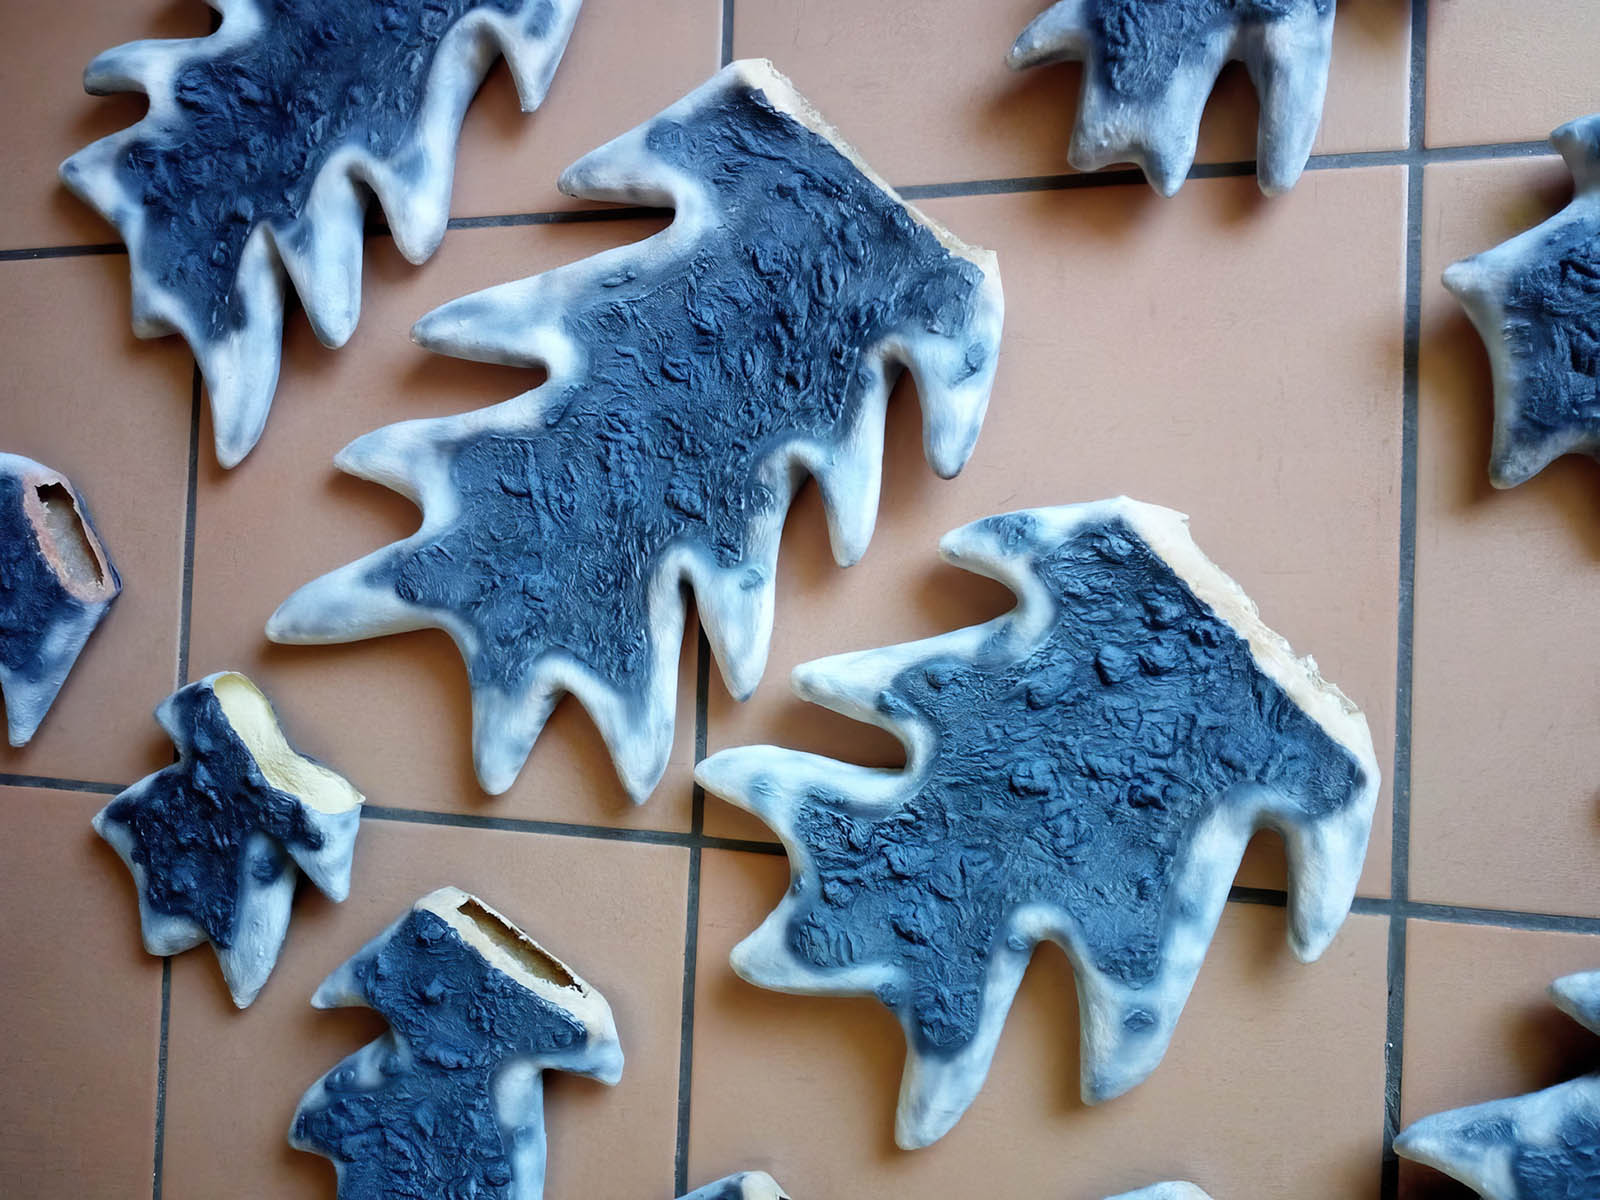
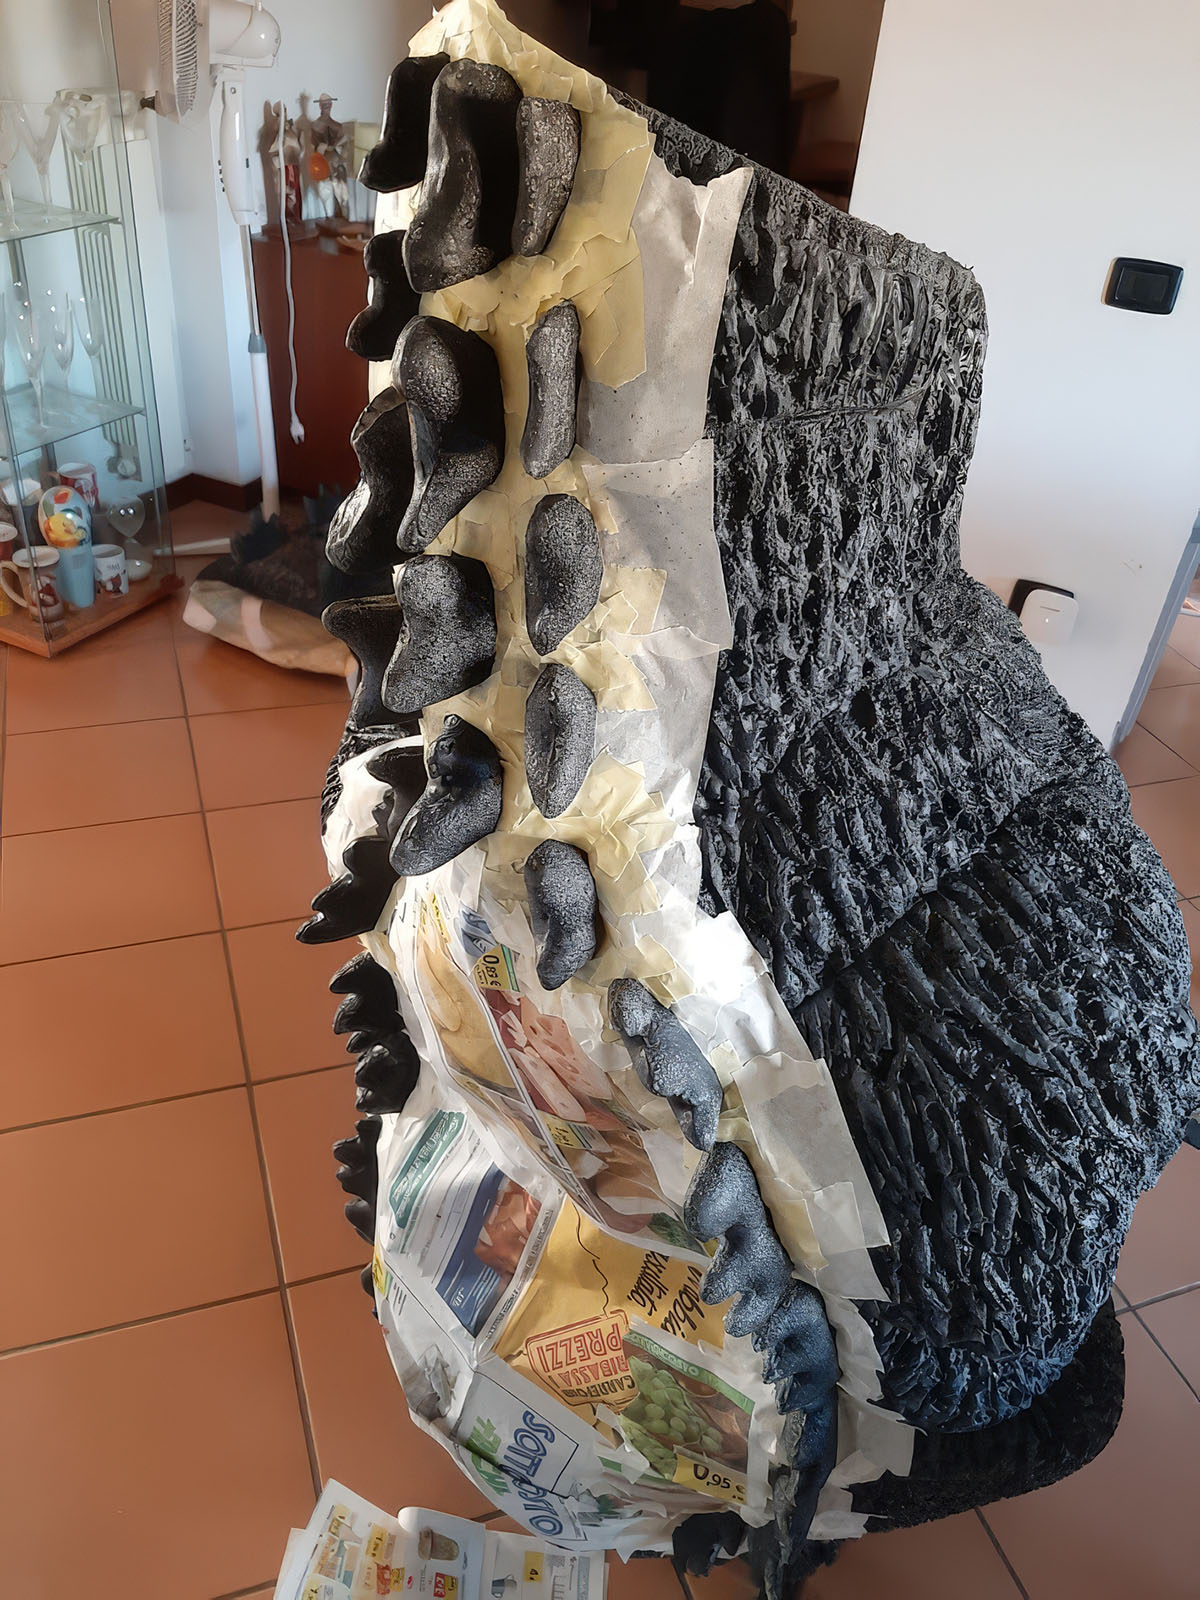
At this stage, each fin was treated, masked, and airbrushed: ivory white on the bony parts, and black and grey on the central textured area (matching the rest of the suit). The smaller fins on the neck and back were carved from upholstery foam, then treated and painted to match the others.
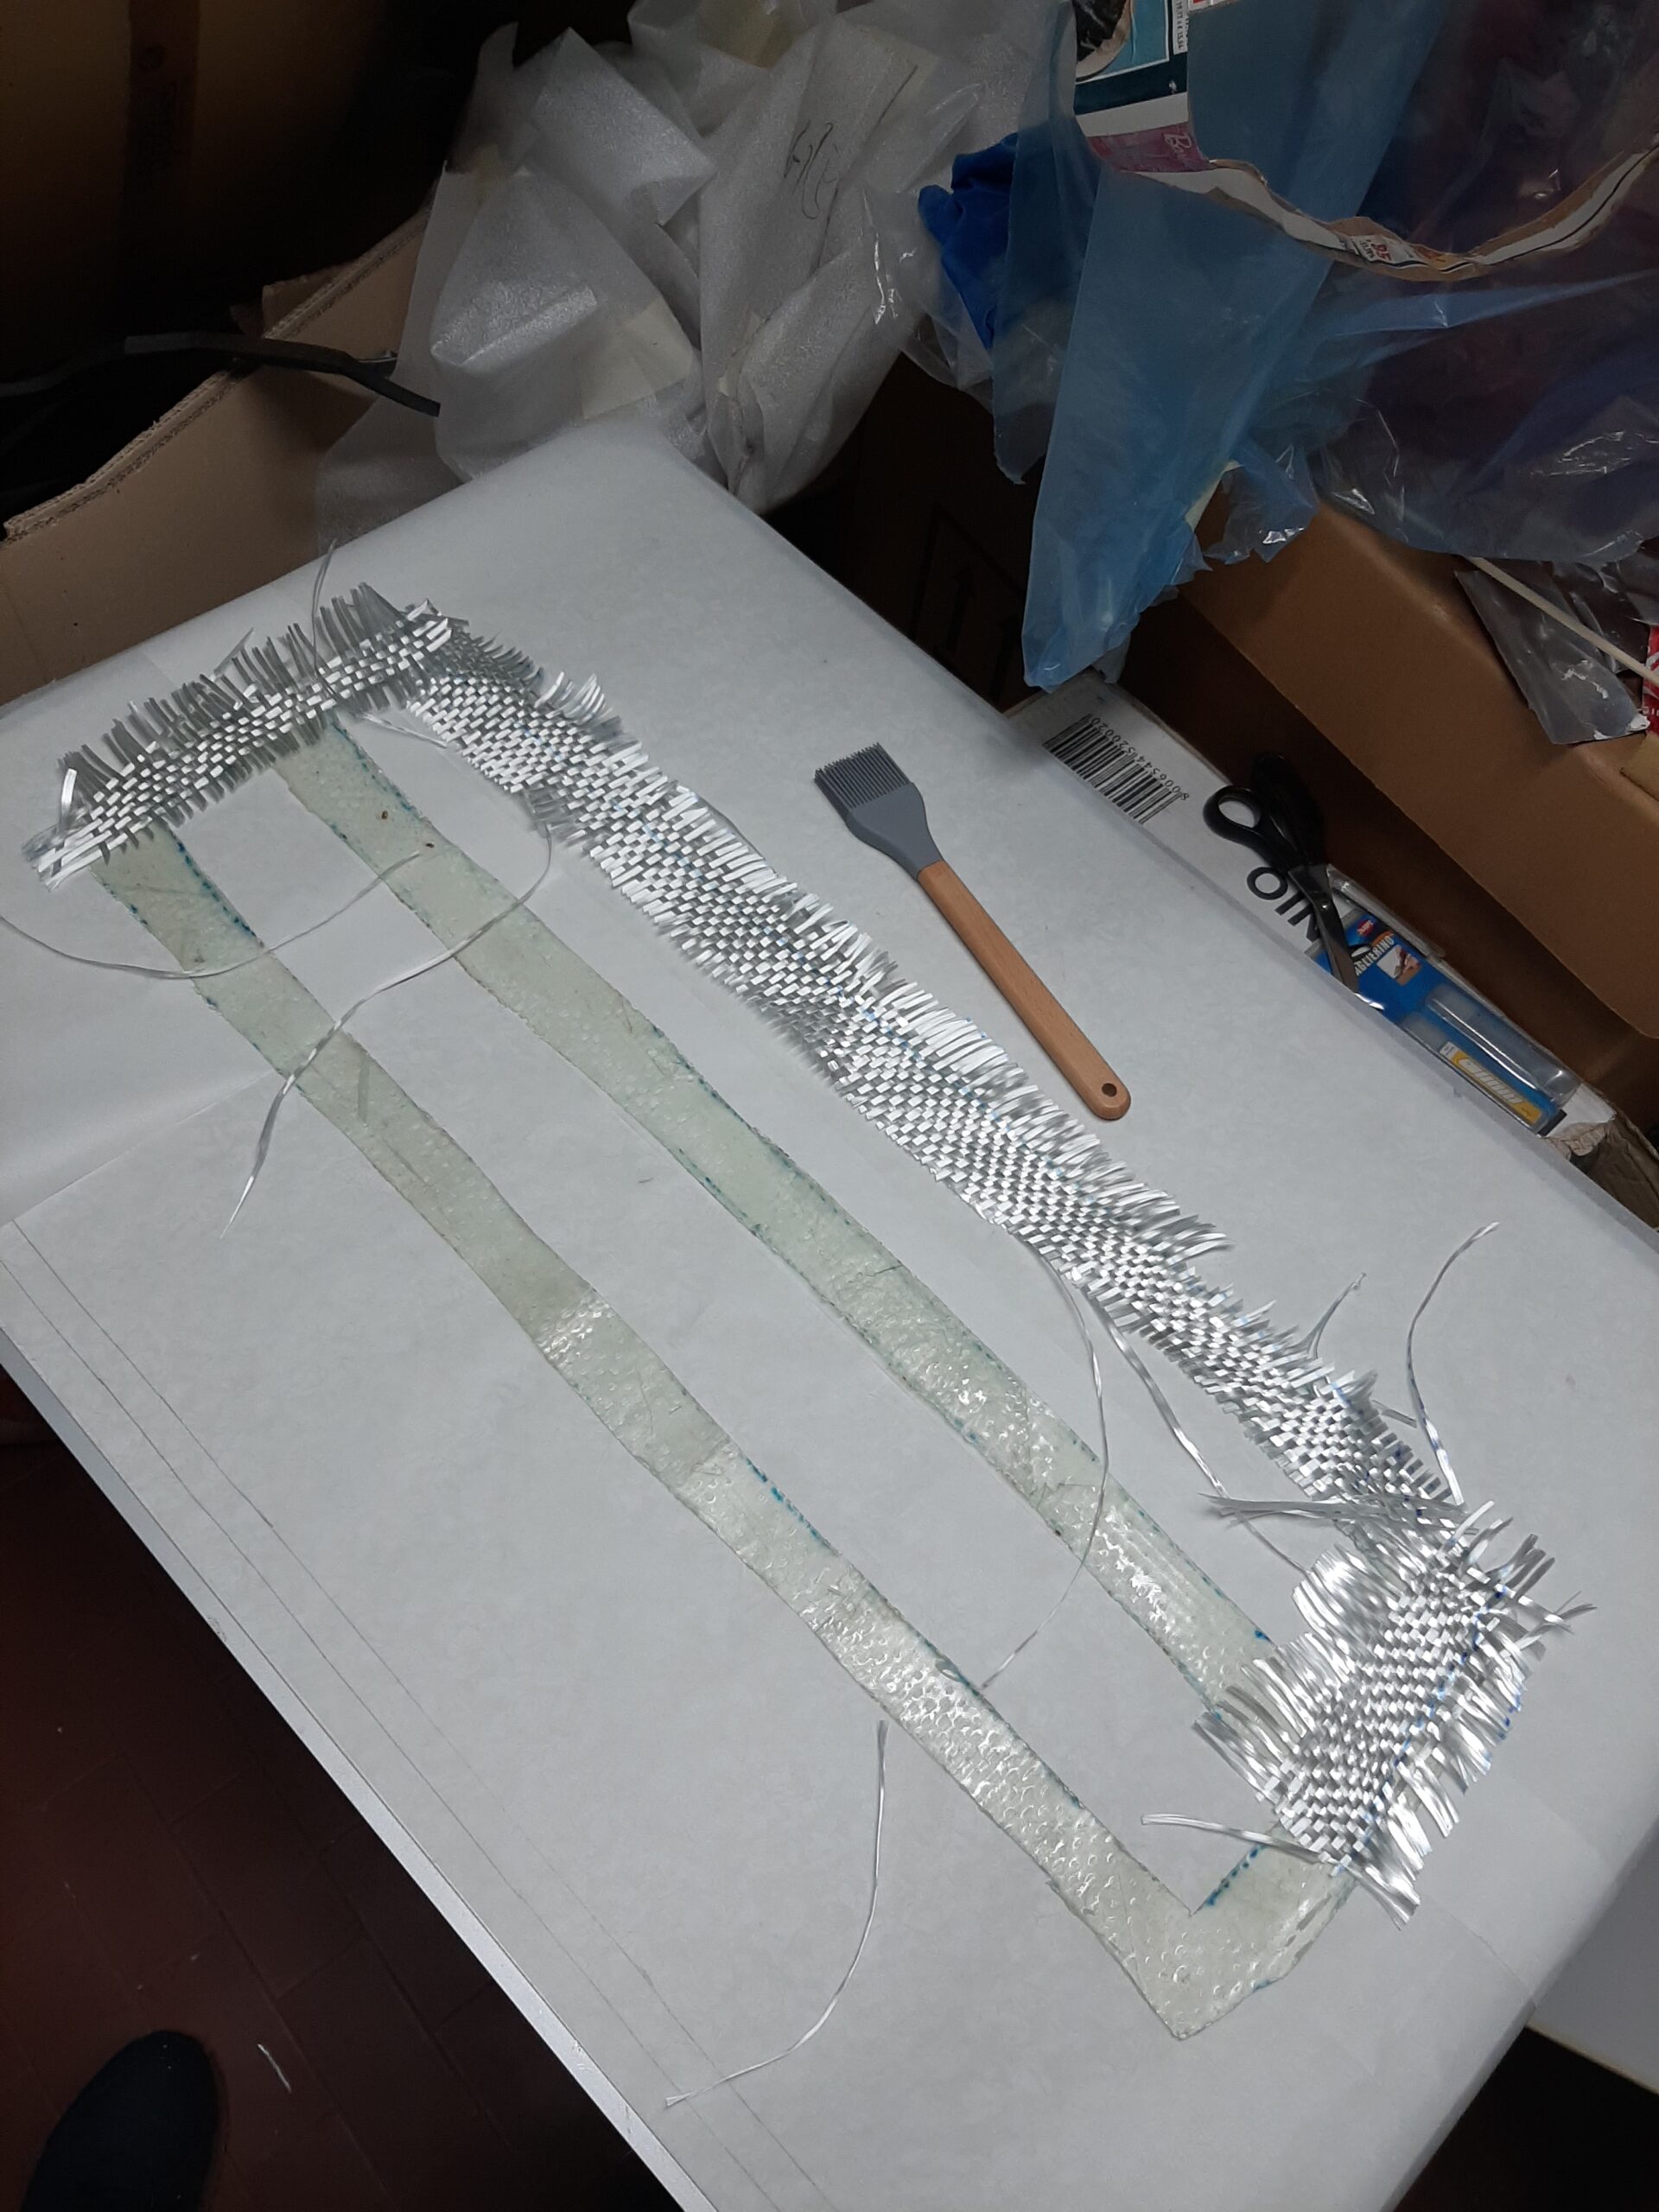
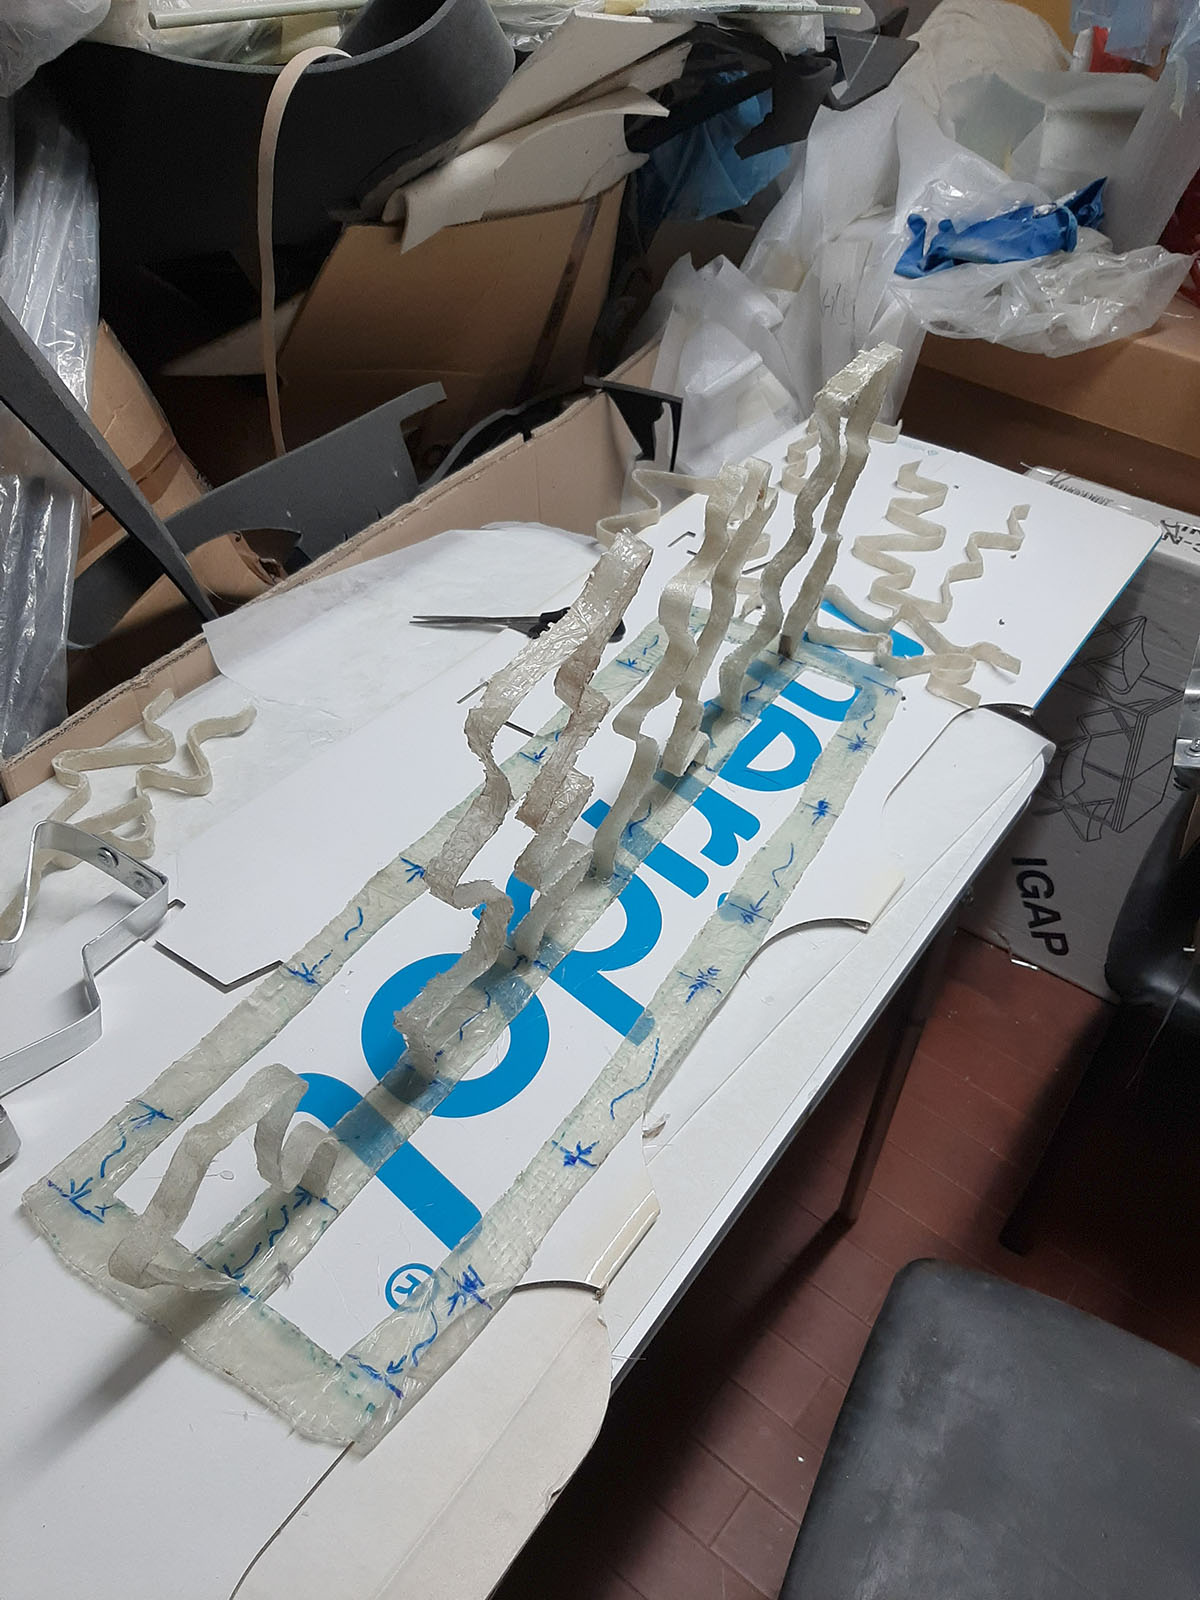
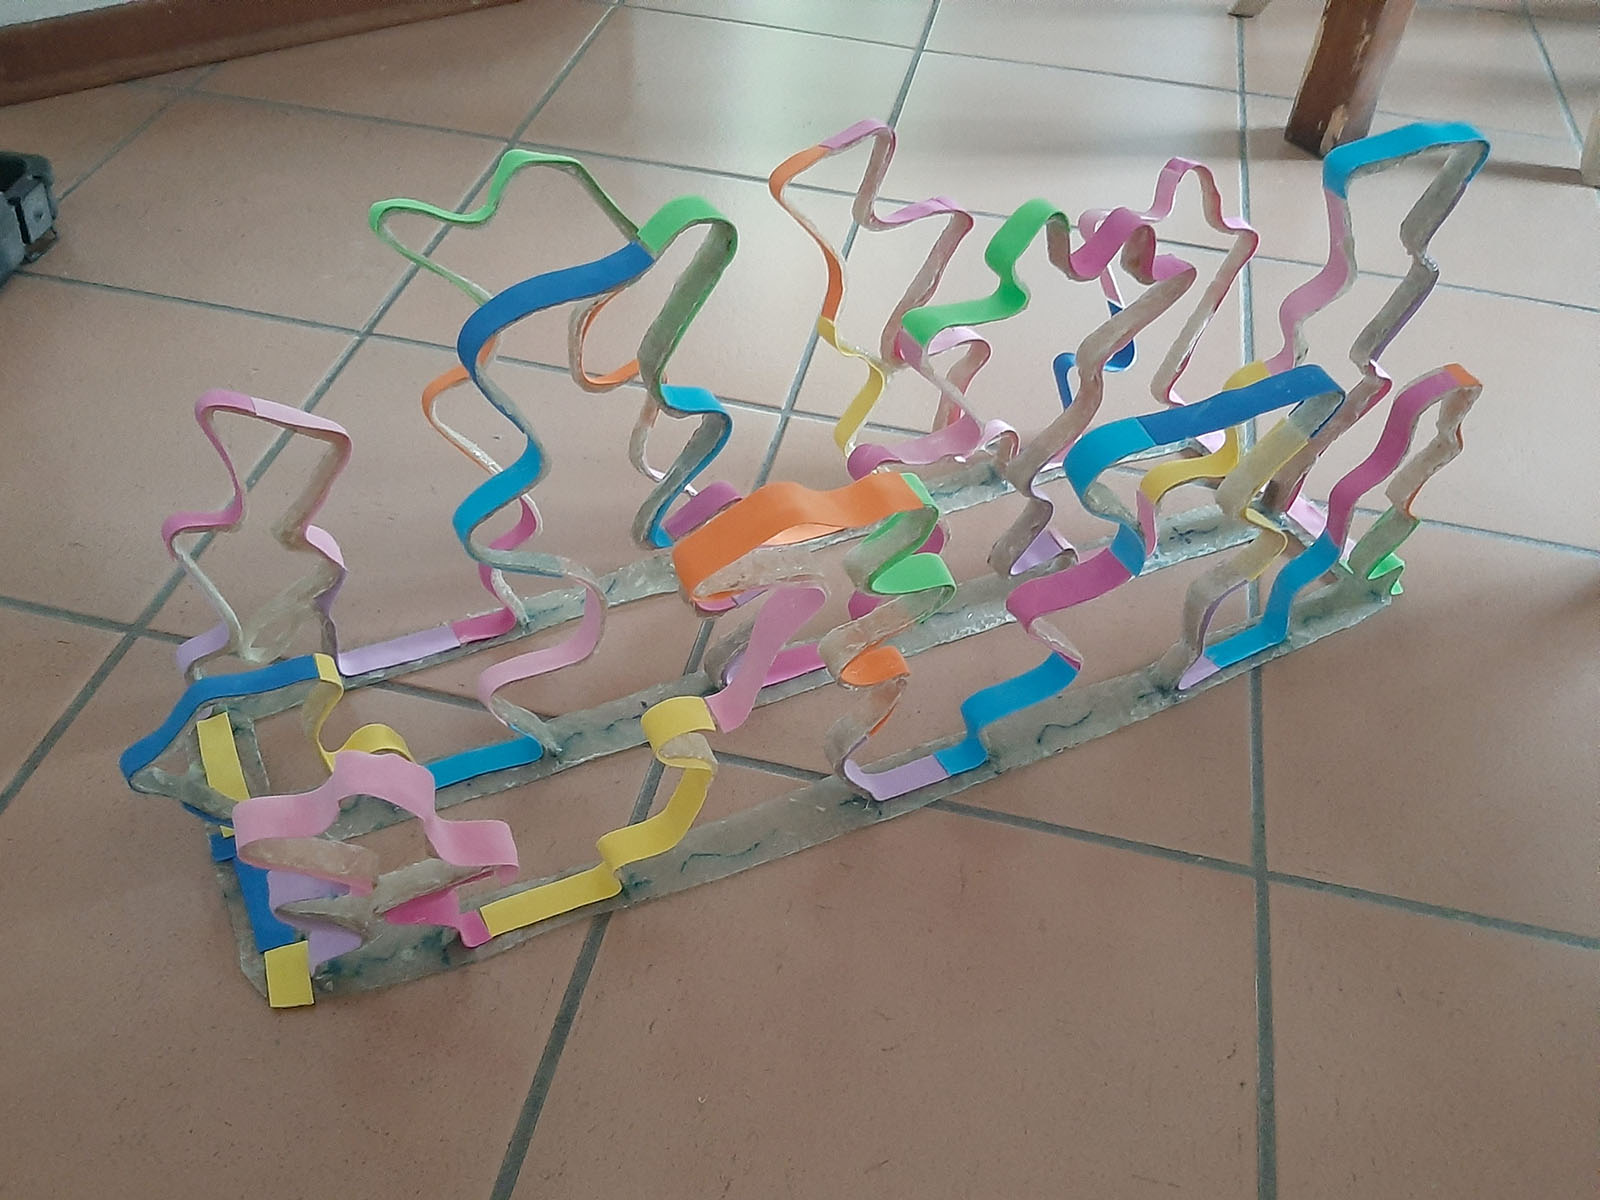
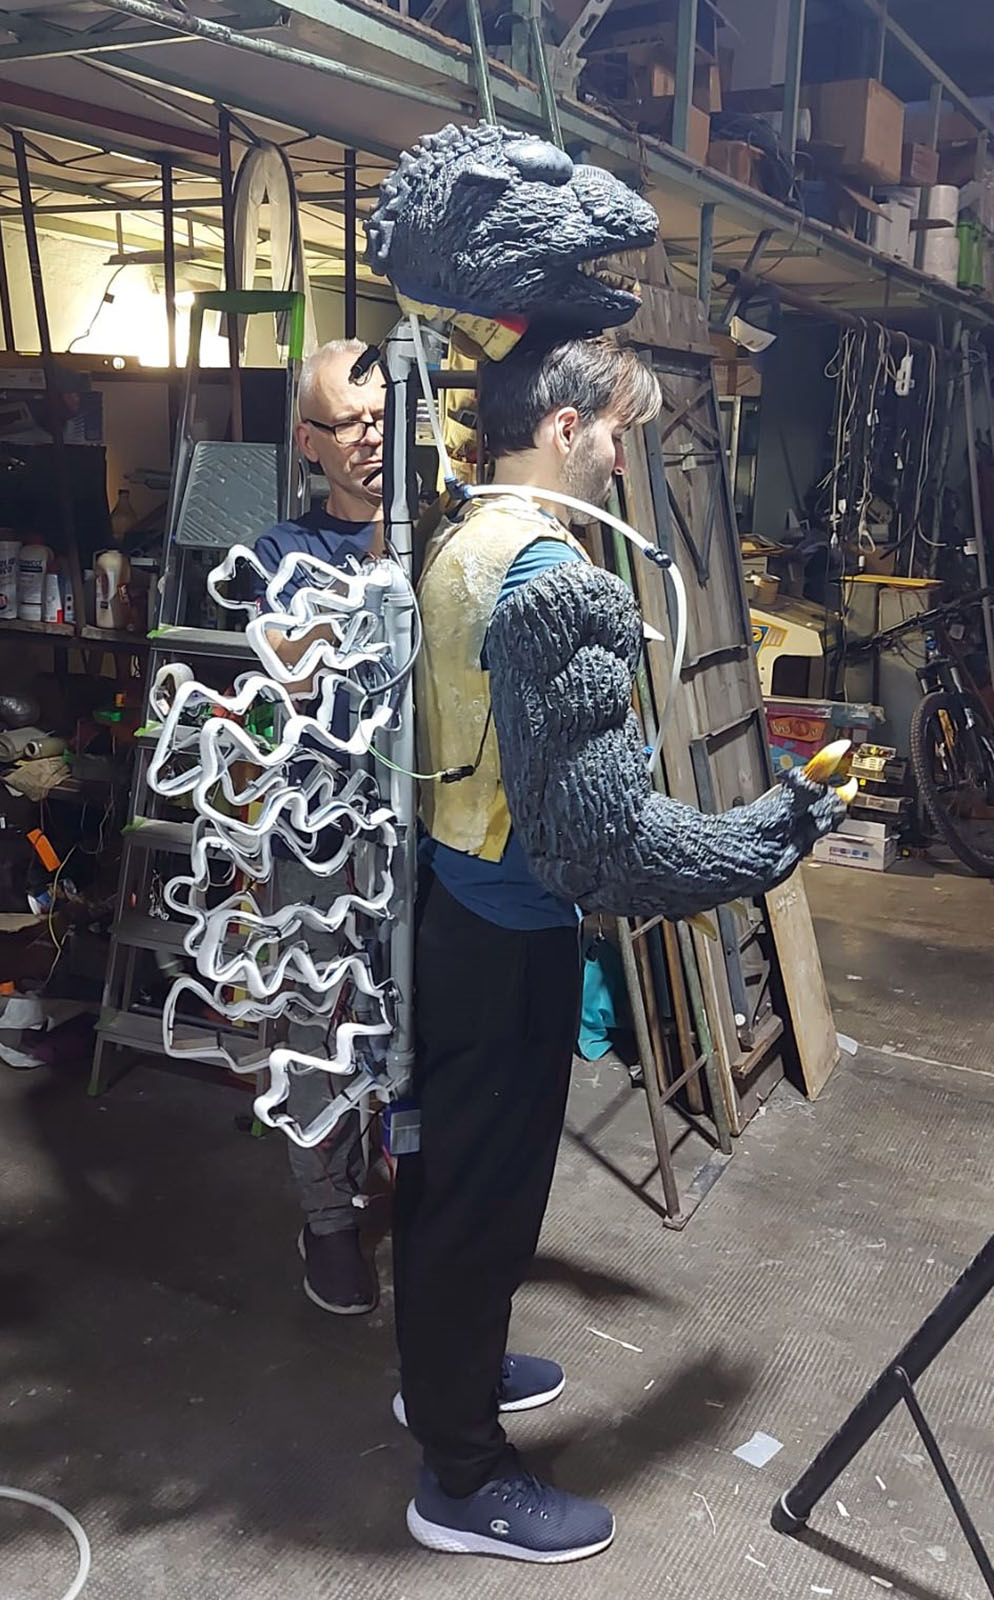
To install the fins and the lighting system onto the costume, a support frame was required. I built this frame out of fiberglass, primarily in two stages:
First, I constructed a flat, rectangular frame with a central axis. This allowed the outer supports to hold the two exterior rows of fins, while the central axis supported the main middle row.
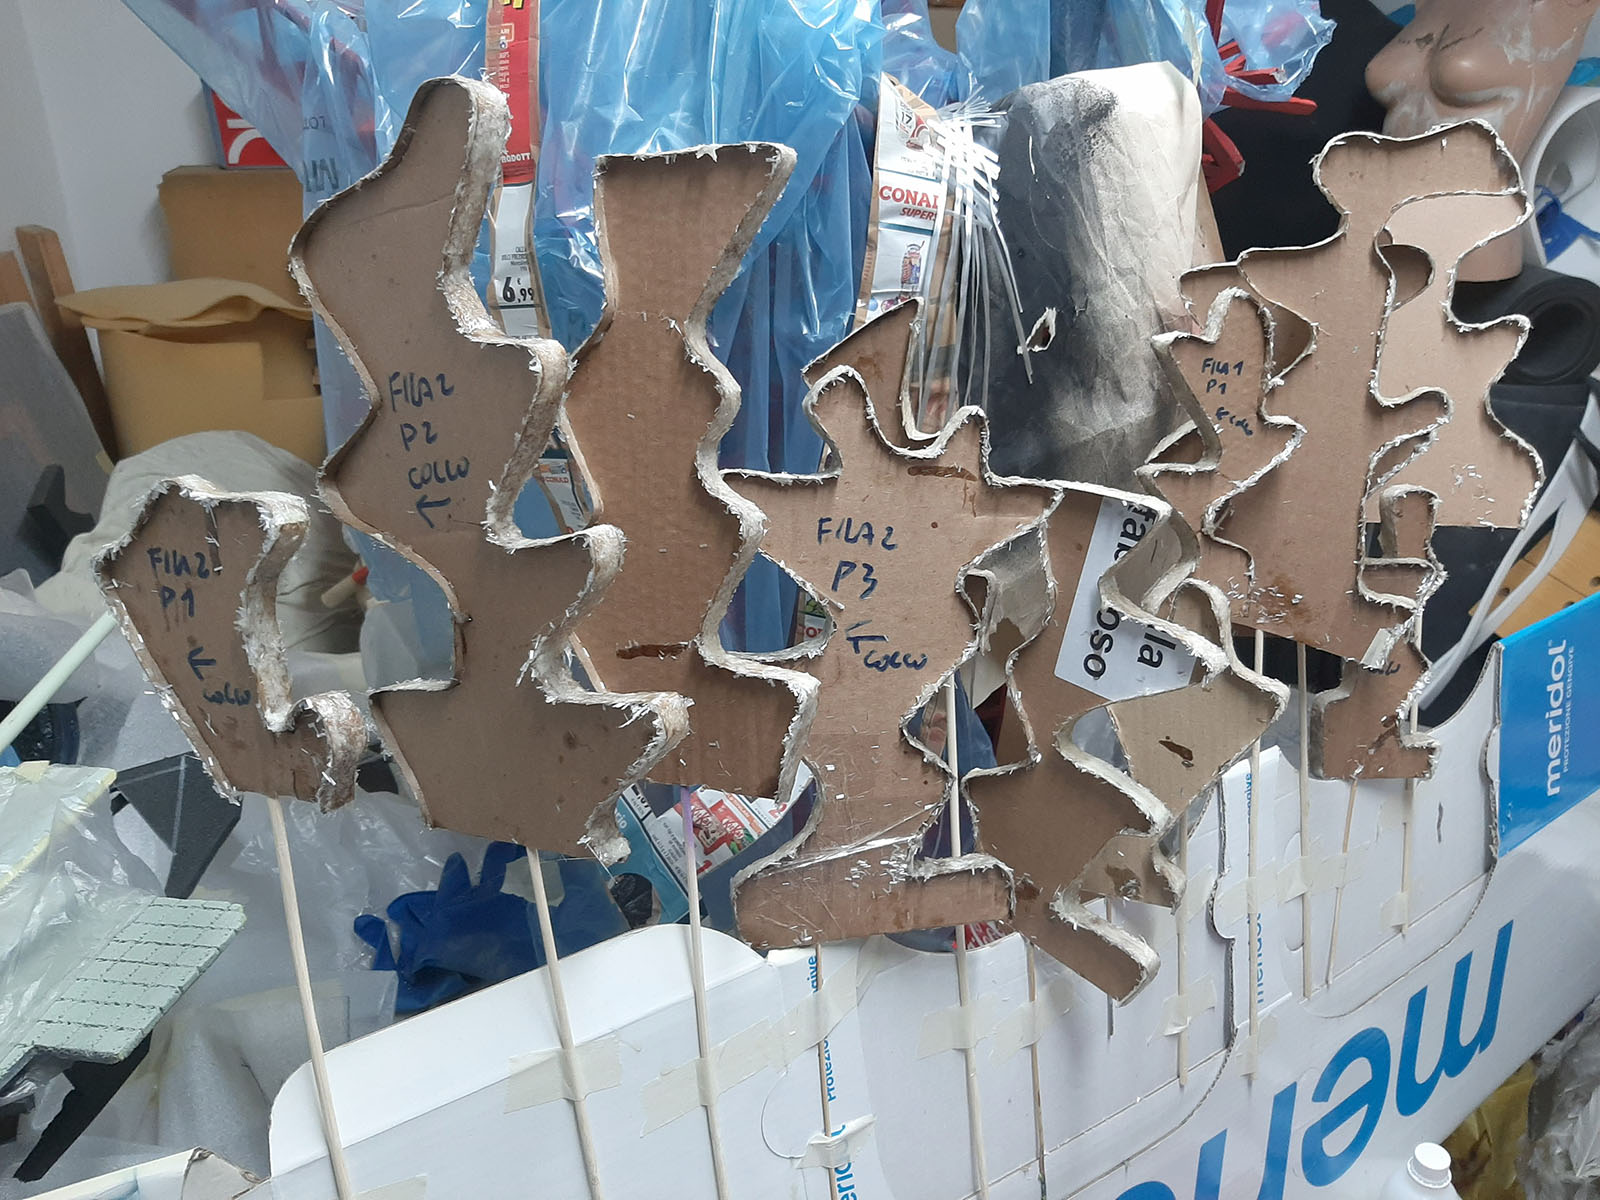
Second, I created cardboard mockups for every single fin, designing a silhouette slightly smaller than the finished piece. These mockups were coated with a release agent and then layered with fiberglass. This process gave me the rigid ‘skeleton’ for each fin.
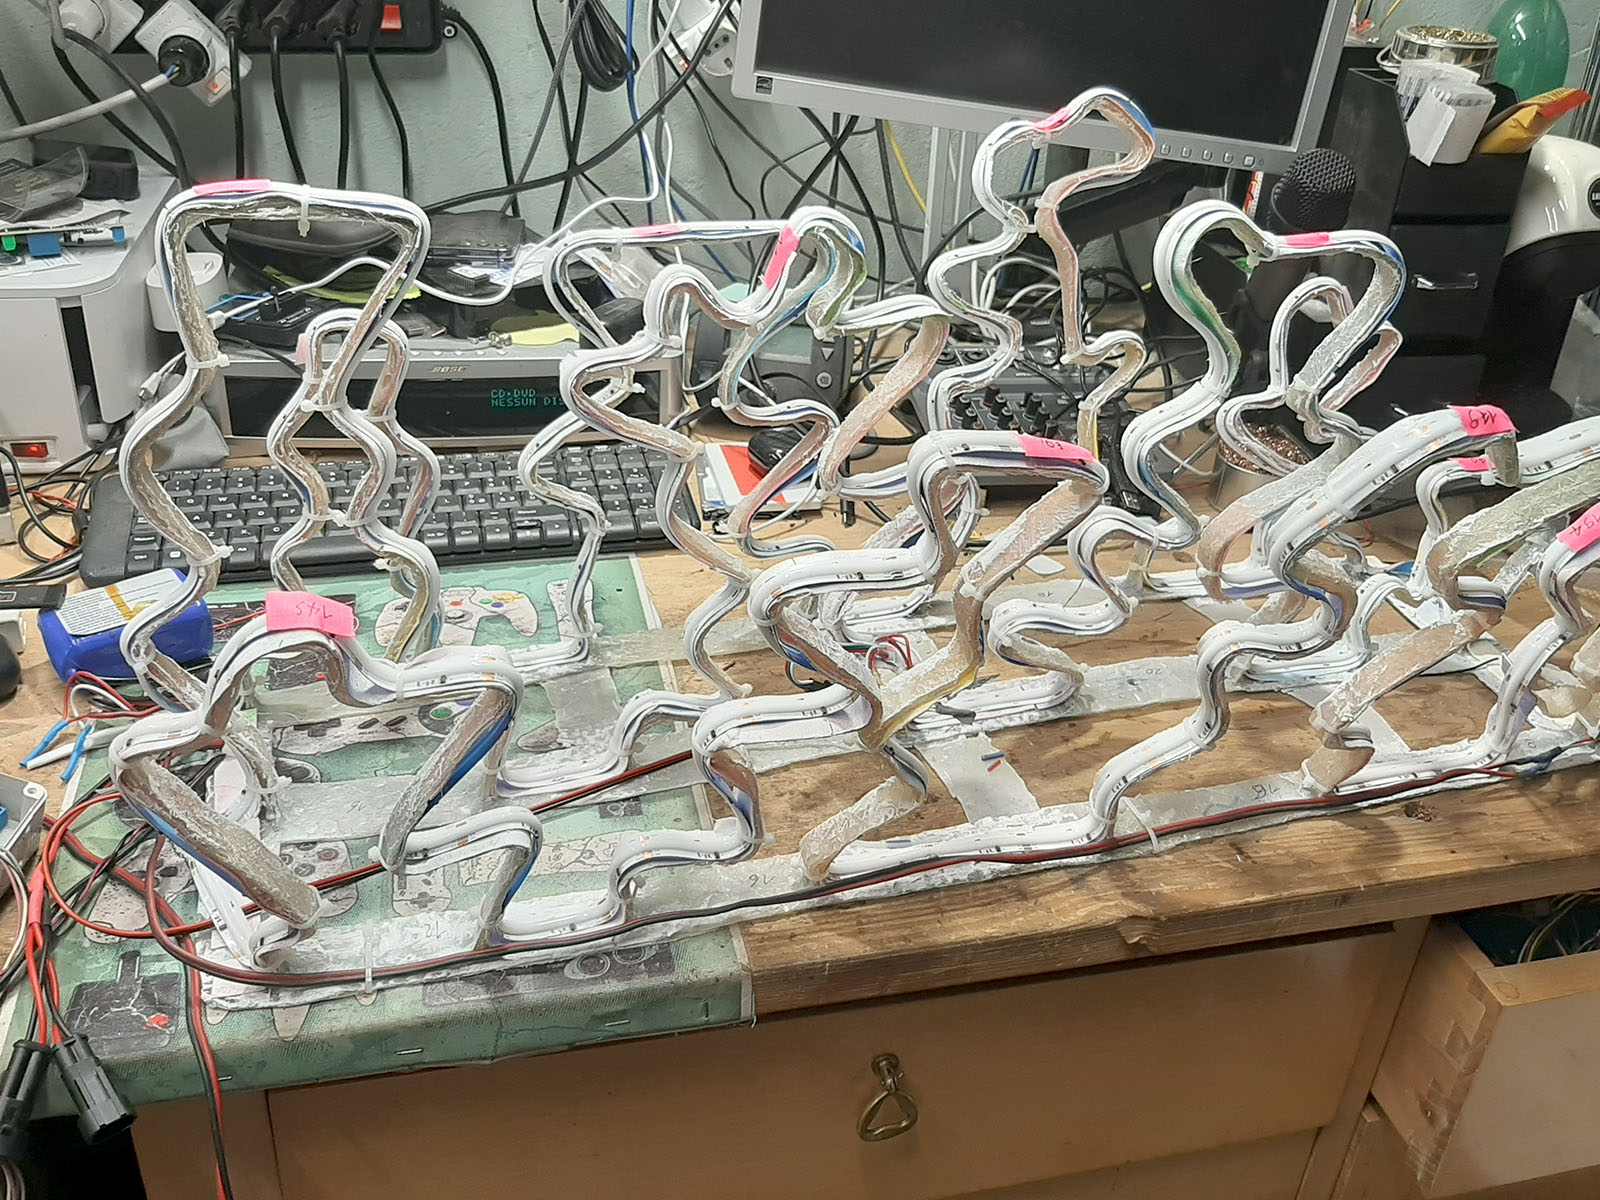
These skeletons were then fiberglassed onto the main frame. The entire structure was covered in thin EVA foam to provide a base for the programmable LED strips; this step was crucial to prevent the fiberglass from damaging the strips through direct contact.
The completed frame was bolted to the central tube mentioned in the preparation phase. The latex fins were then fitted over the skeletons—much like putting on a mask. Finally, the base of the fins was blended into the back skin using latex, completing this section of the build.
Mouth and Jaw
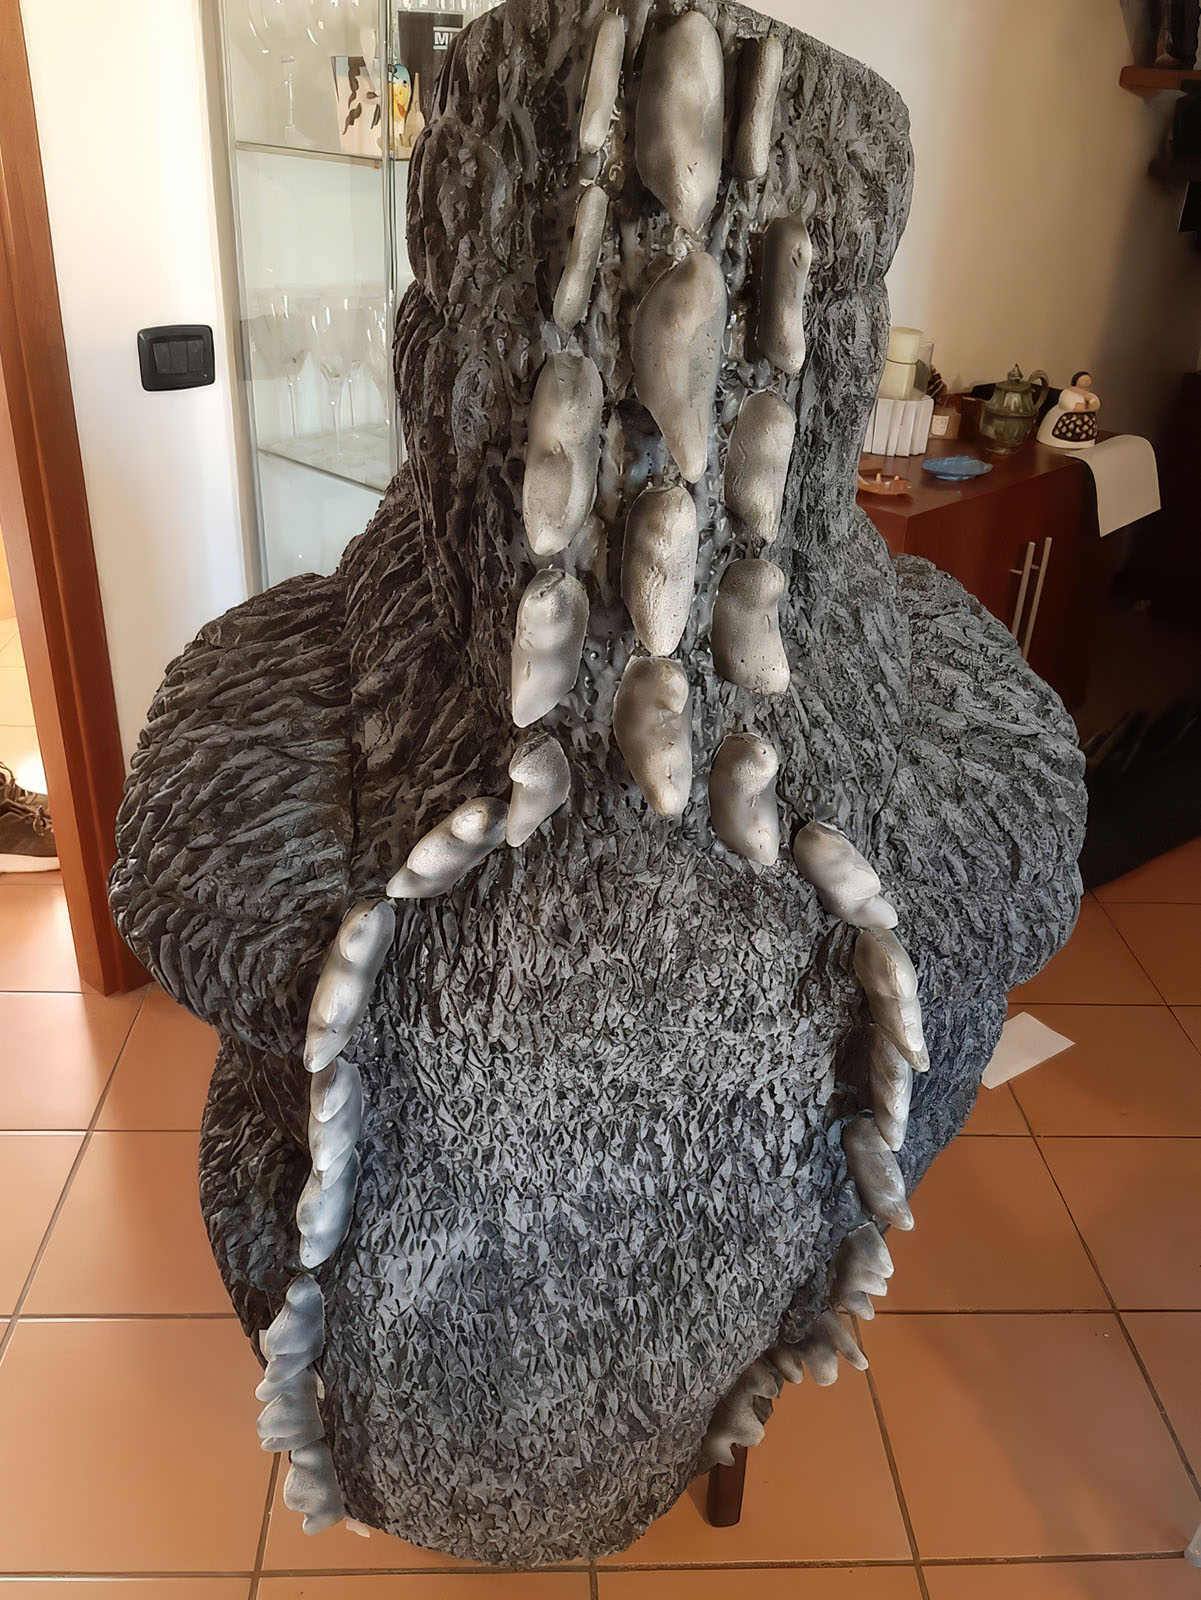
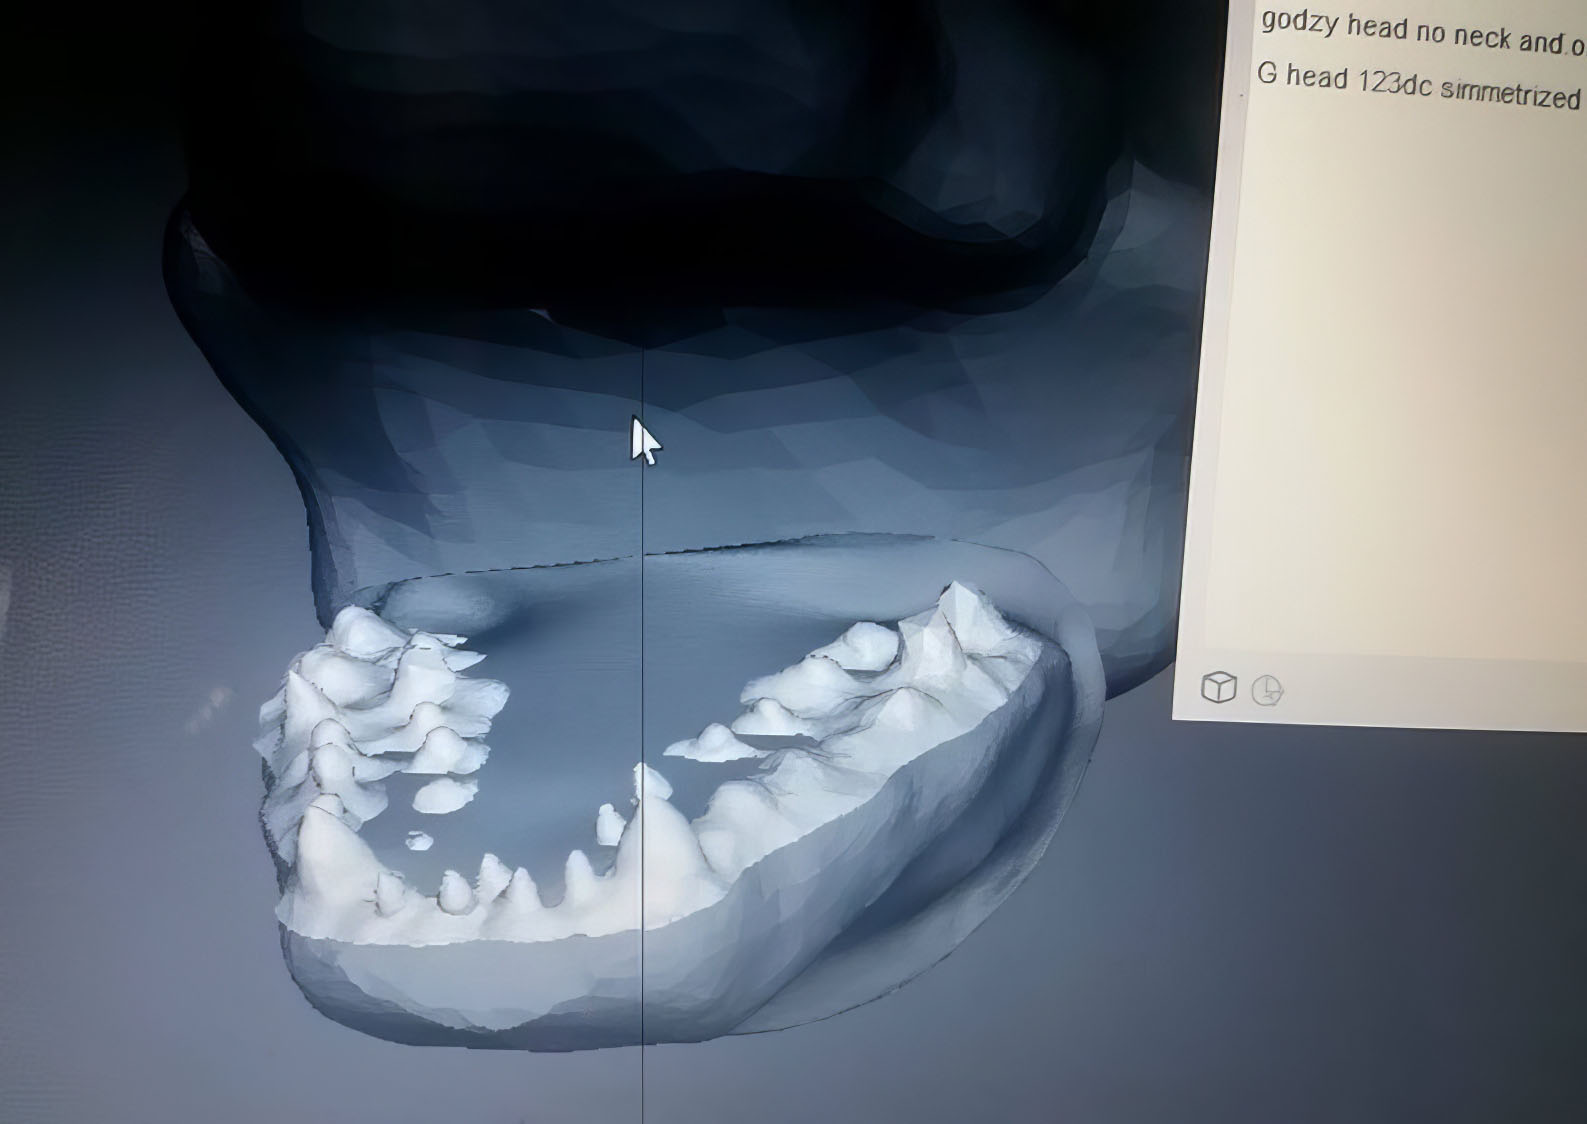
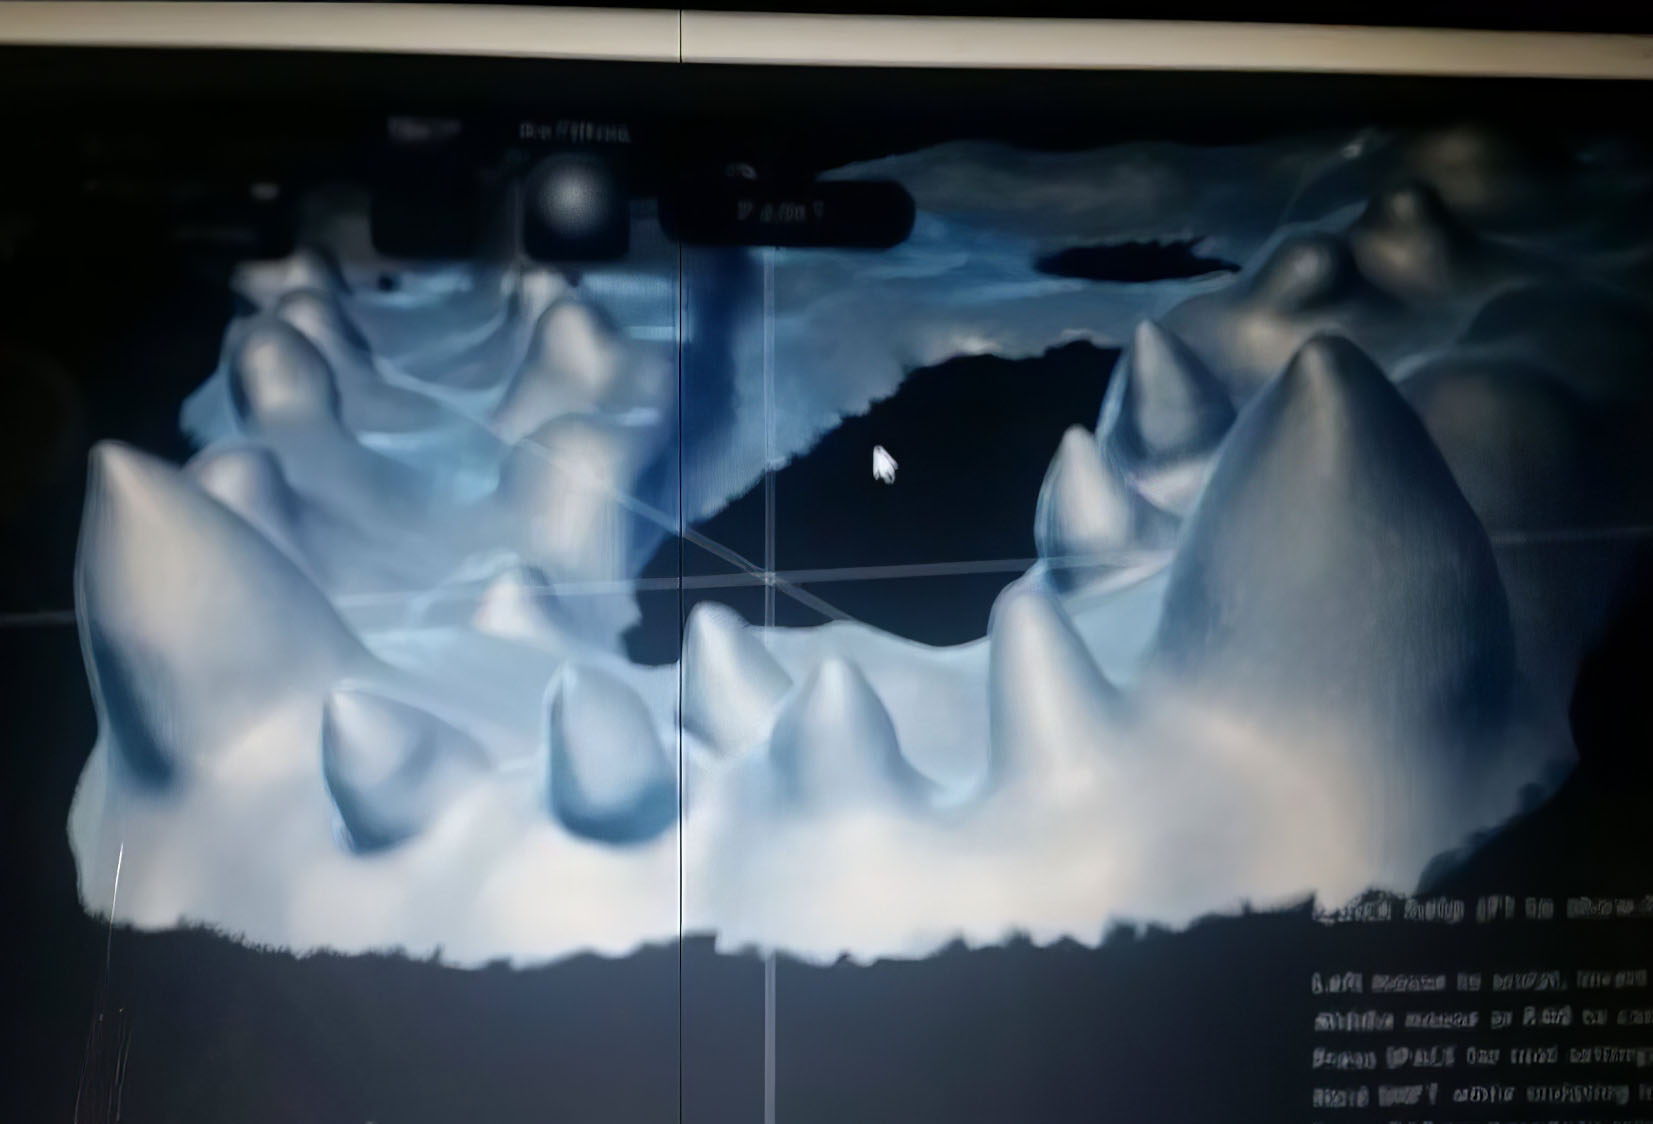
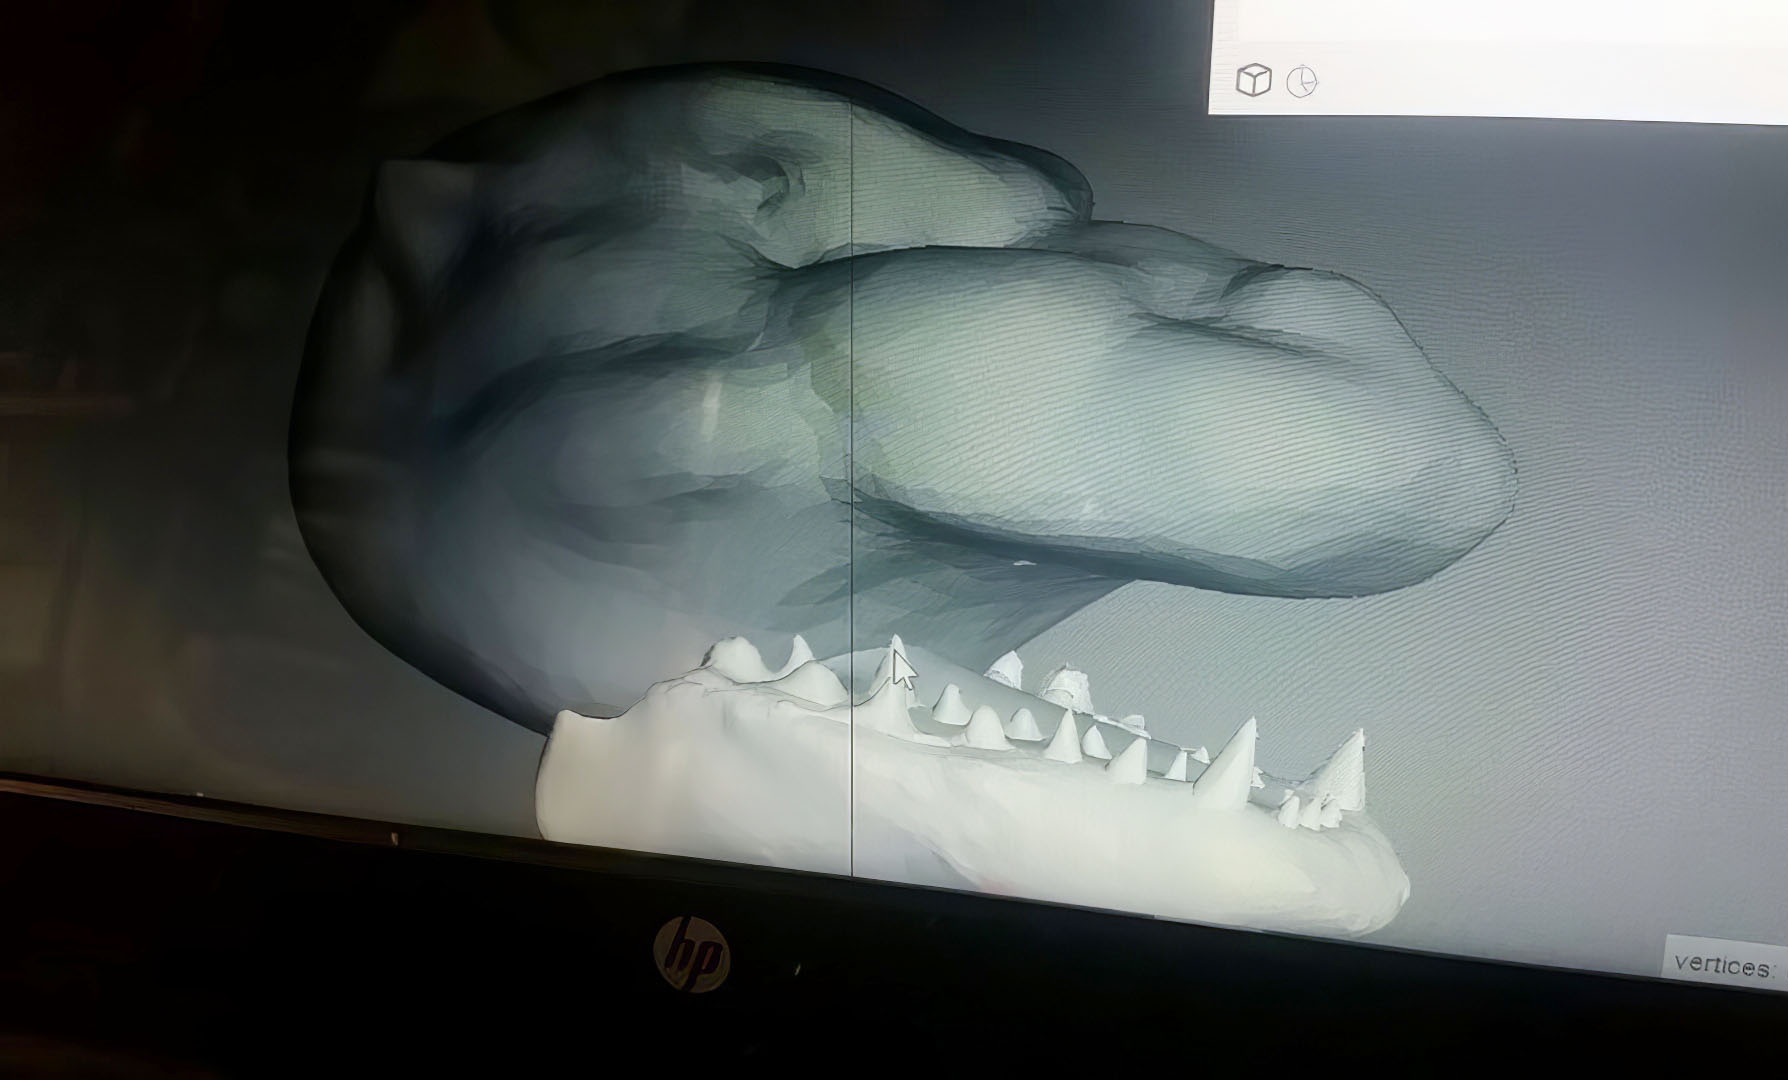
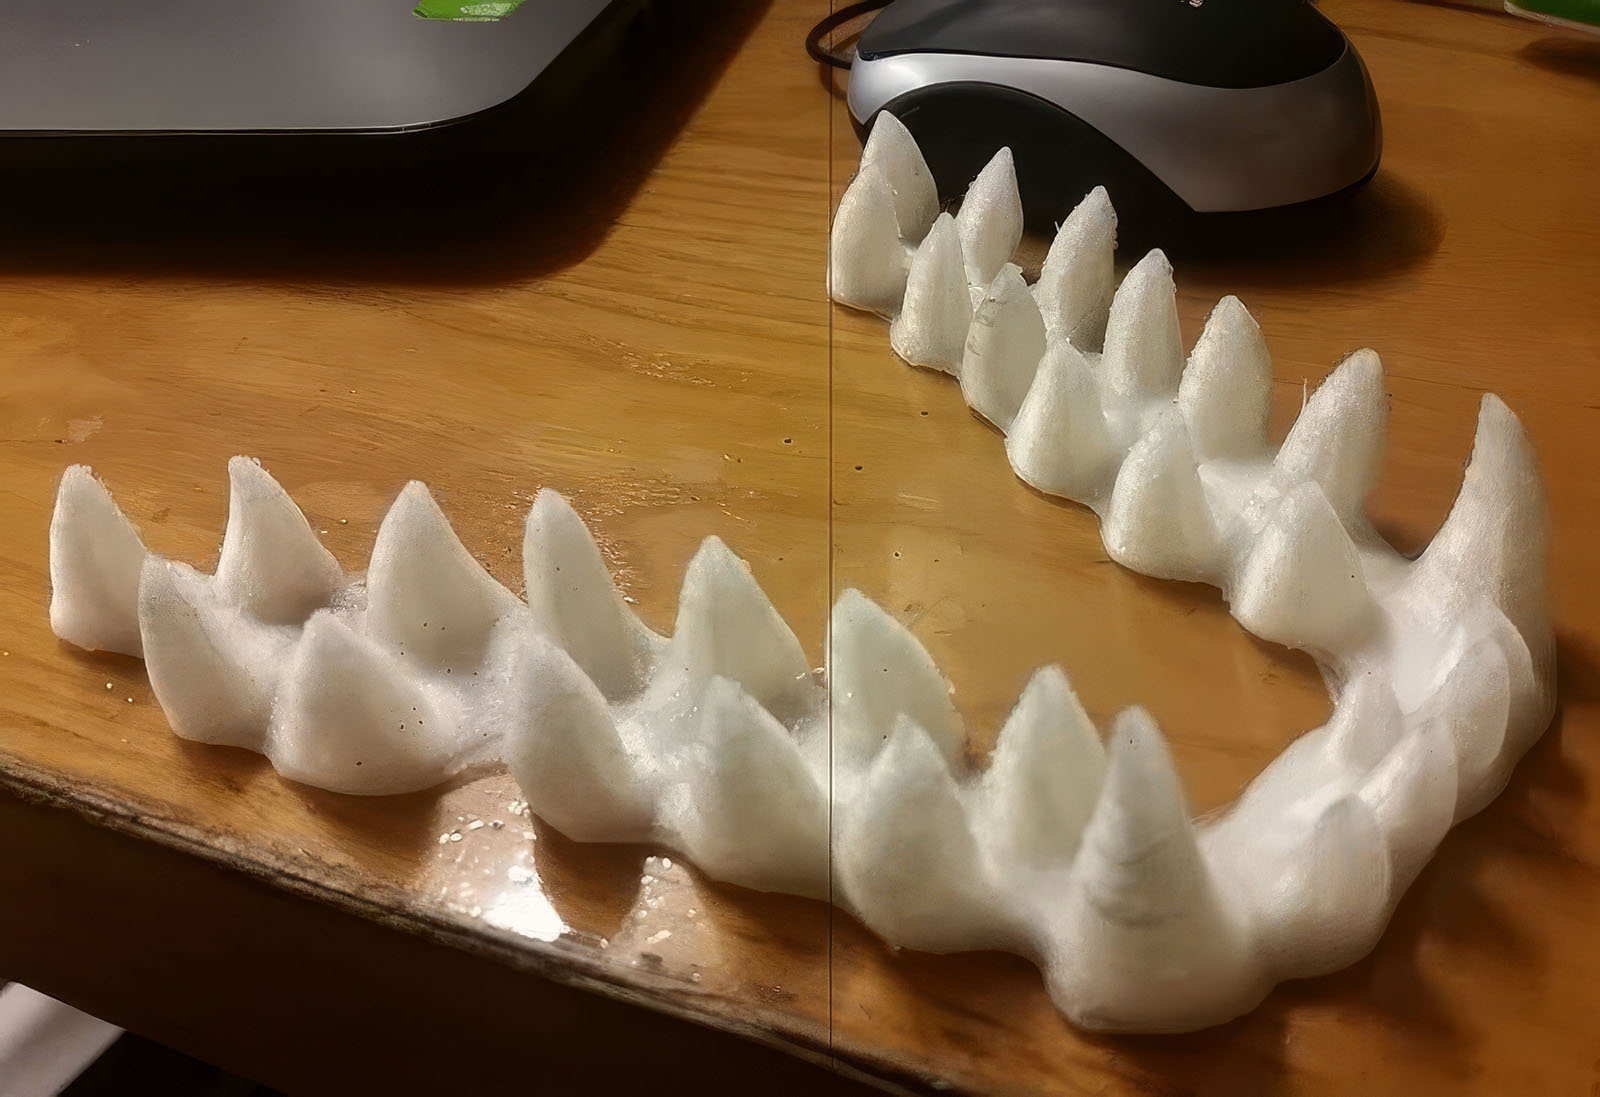
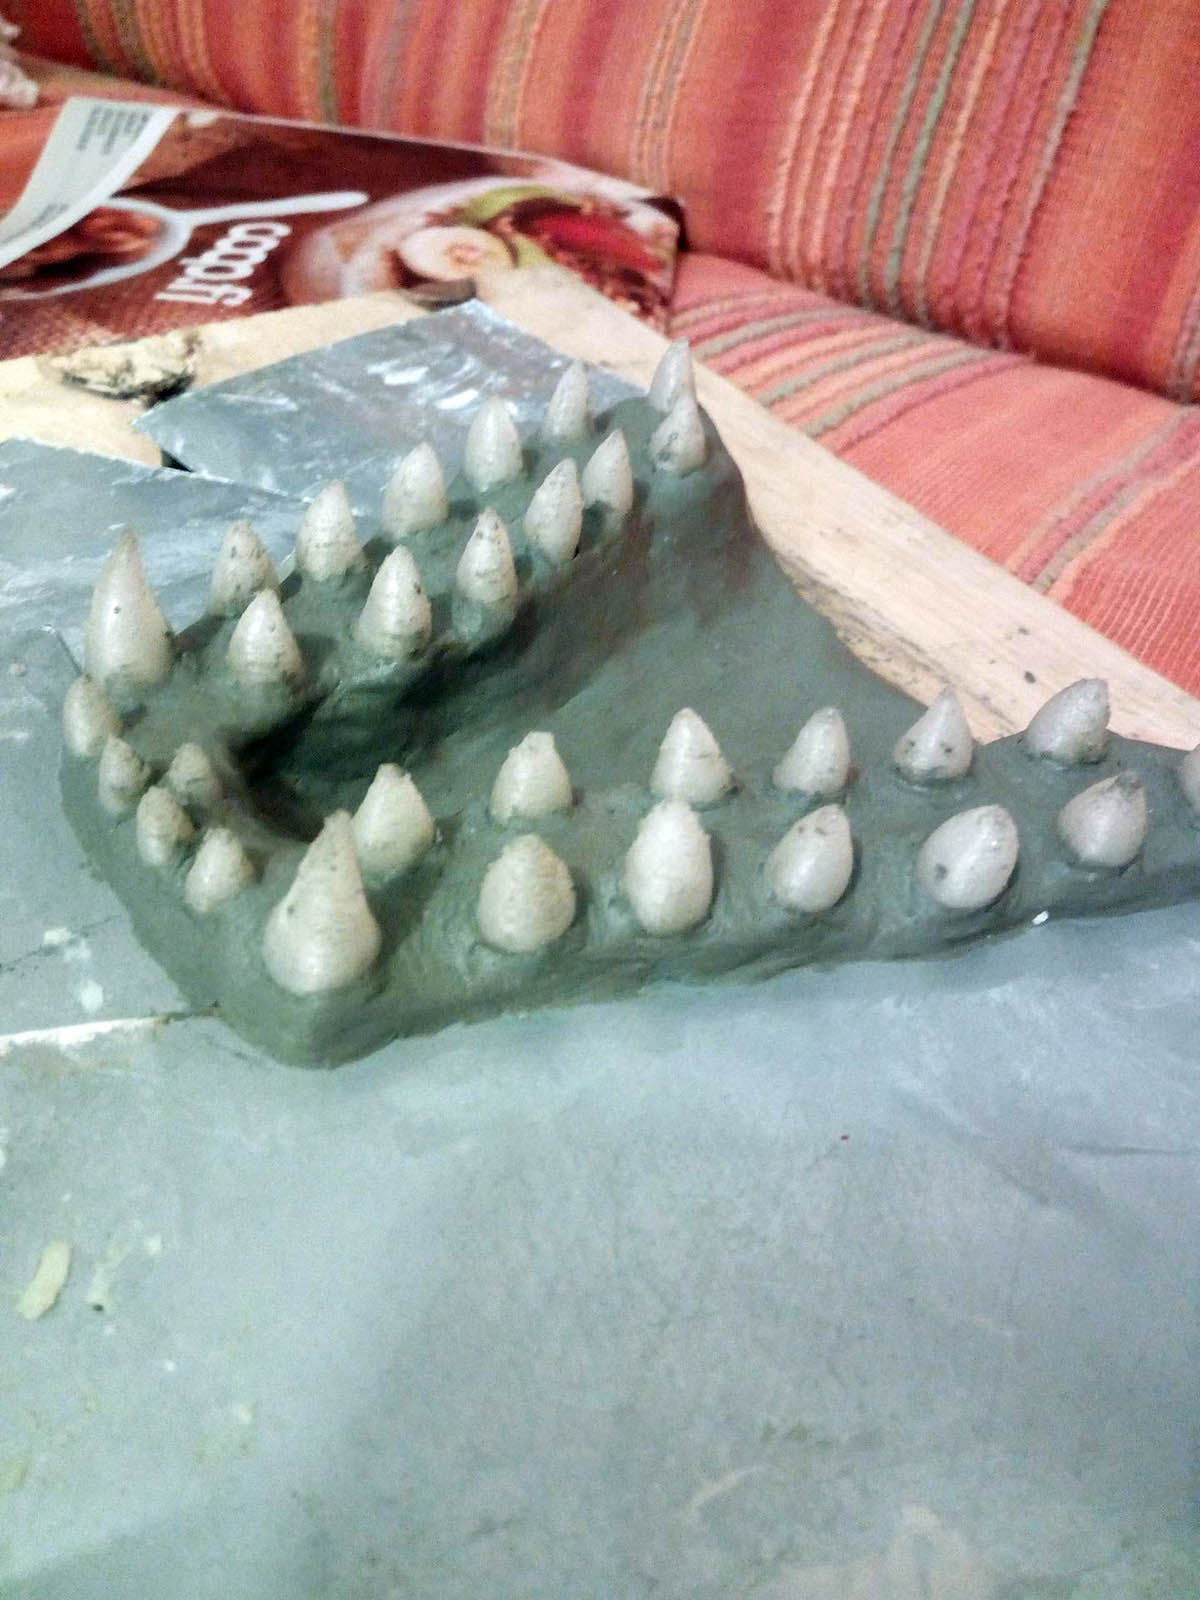
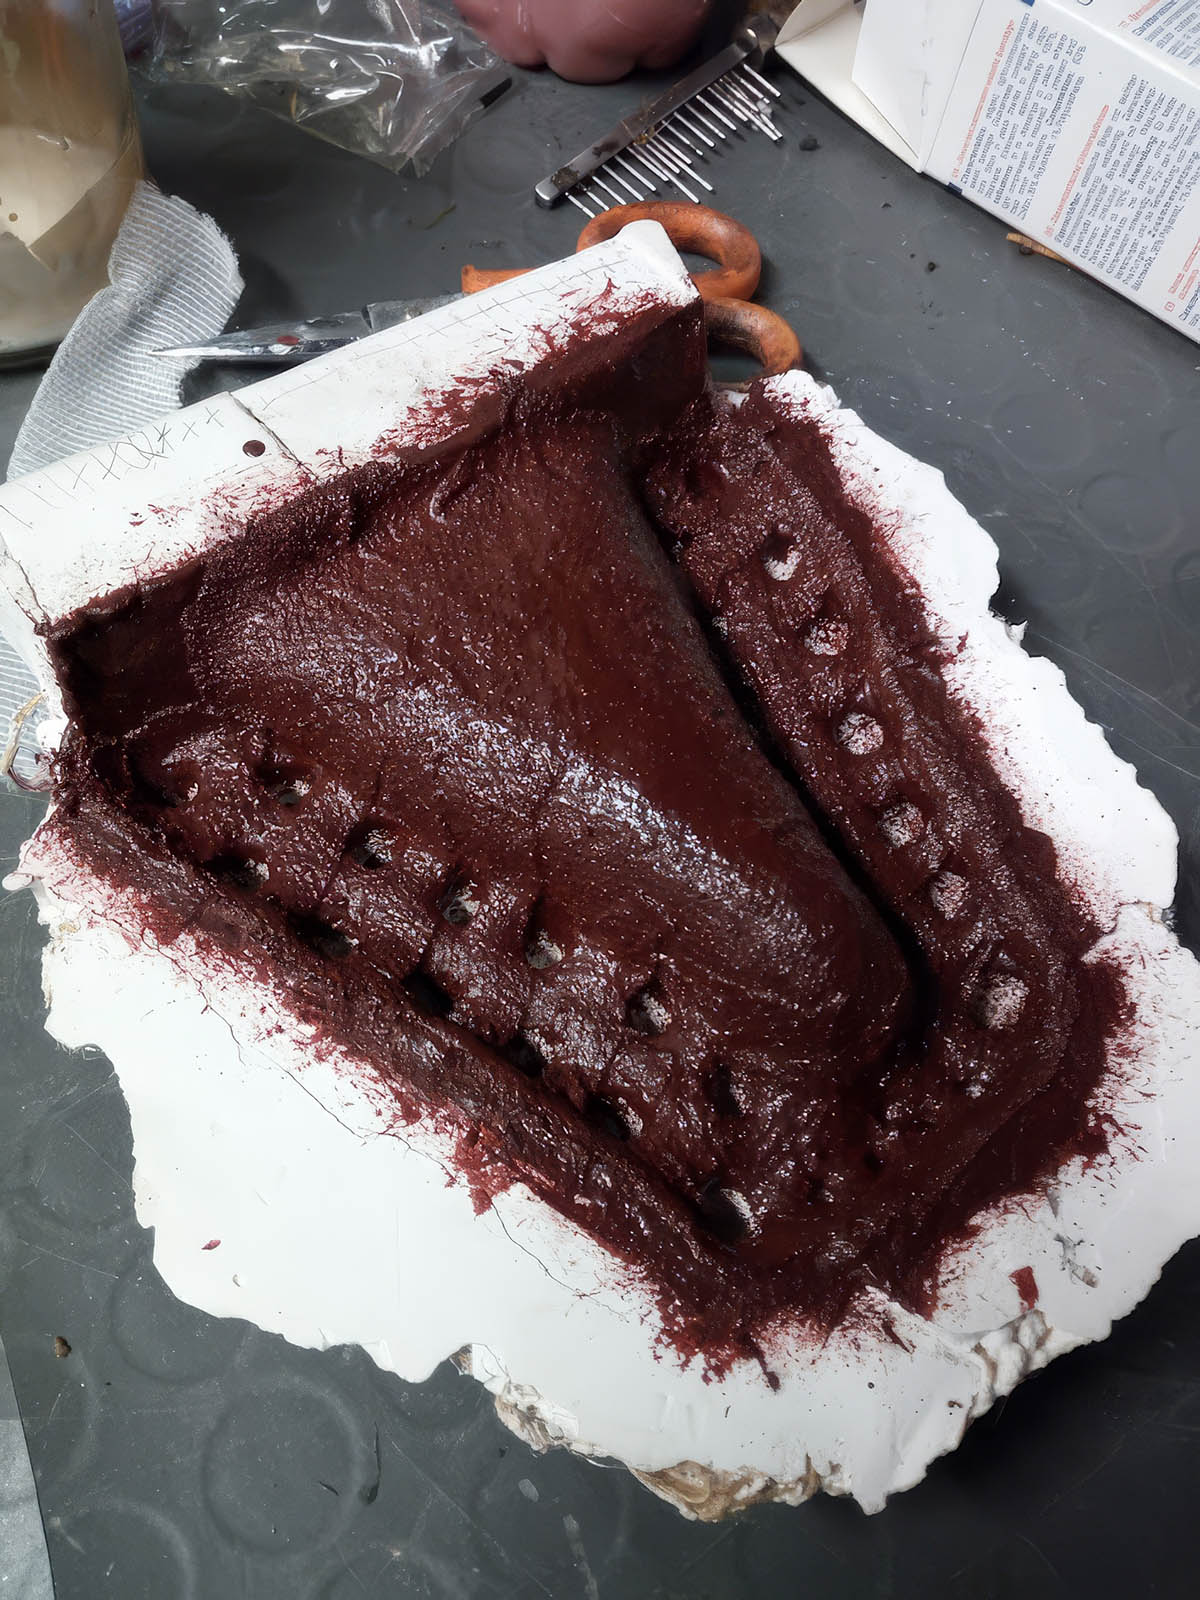
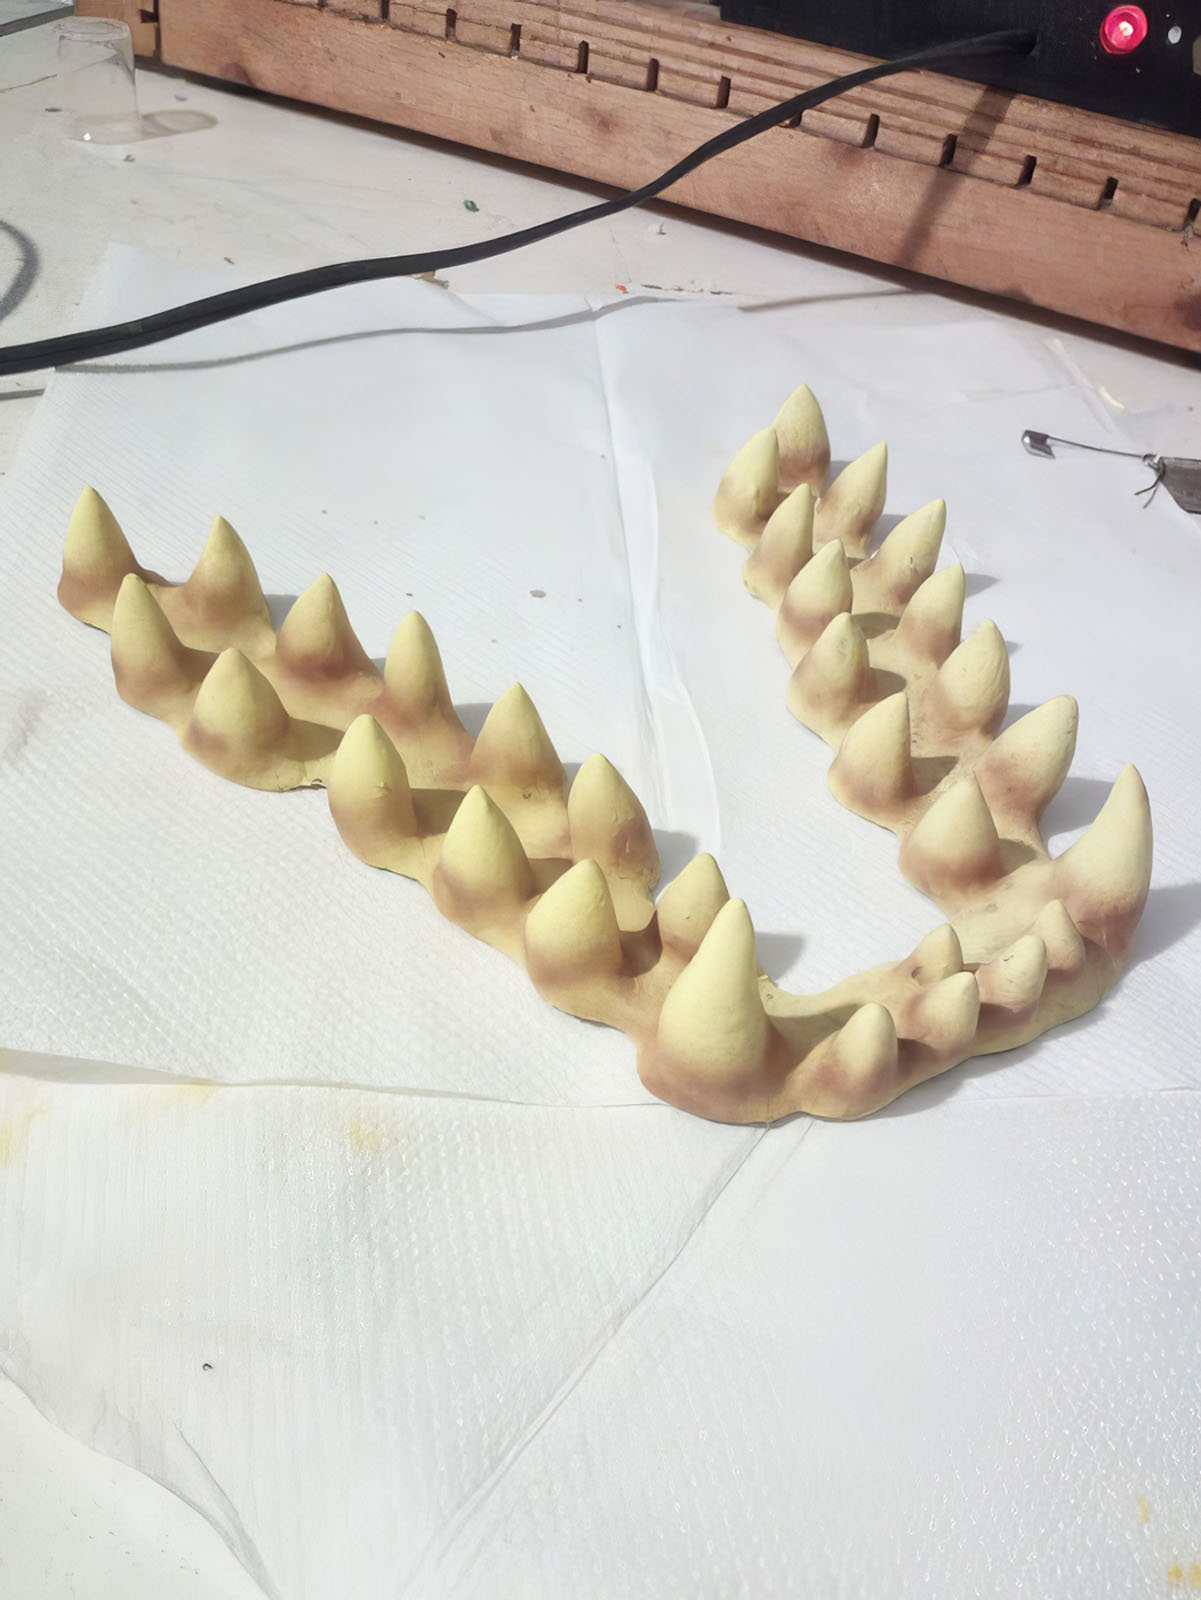
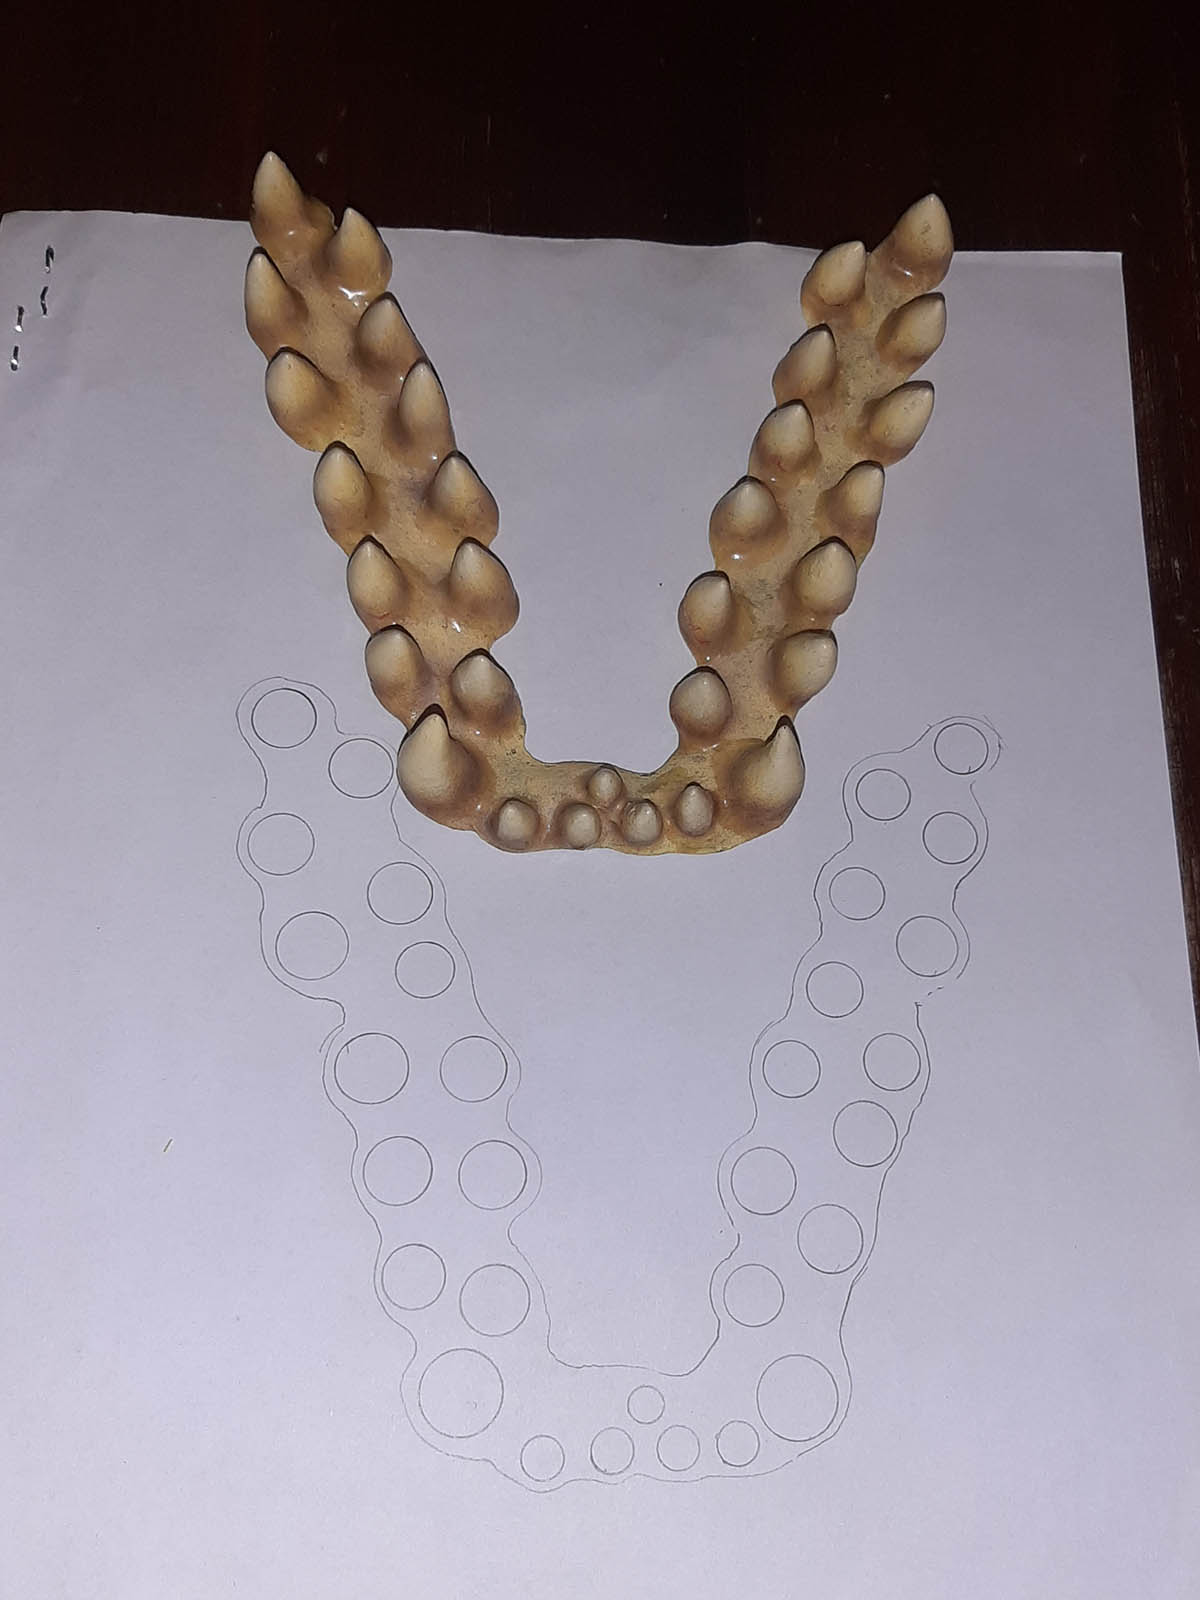
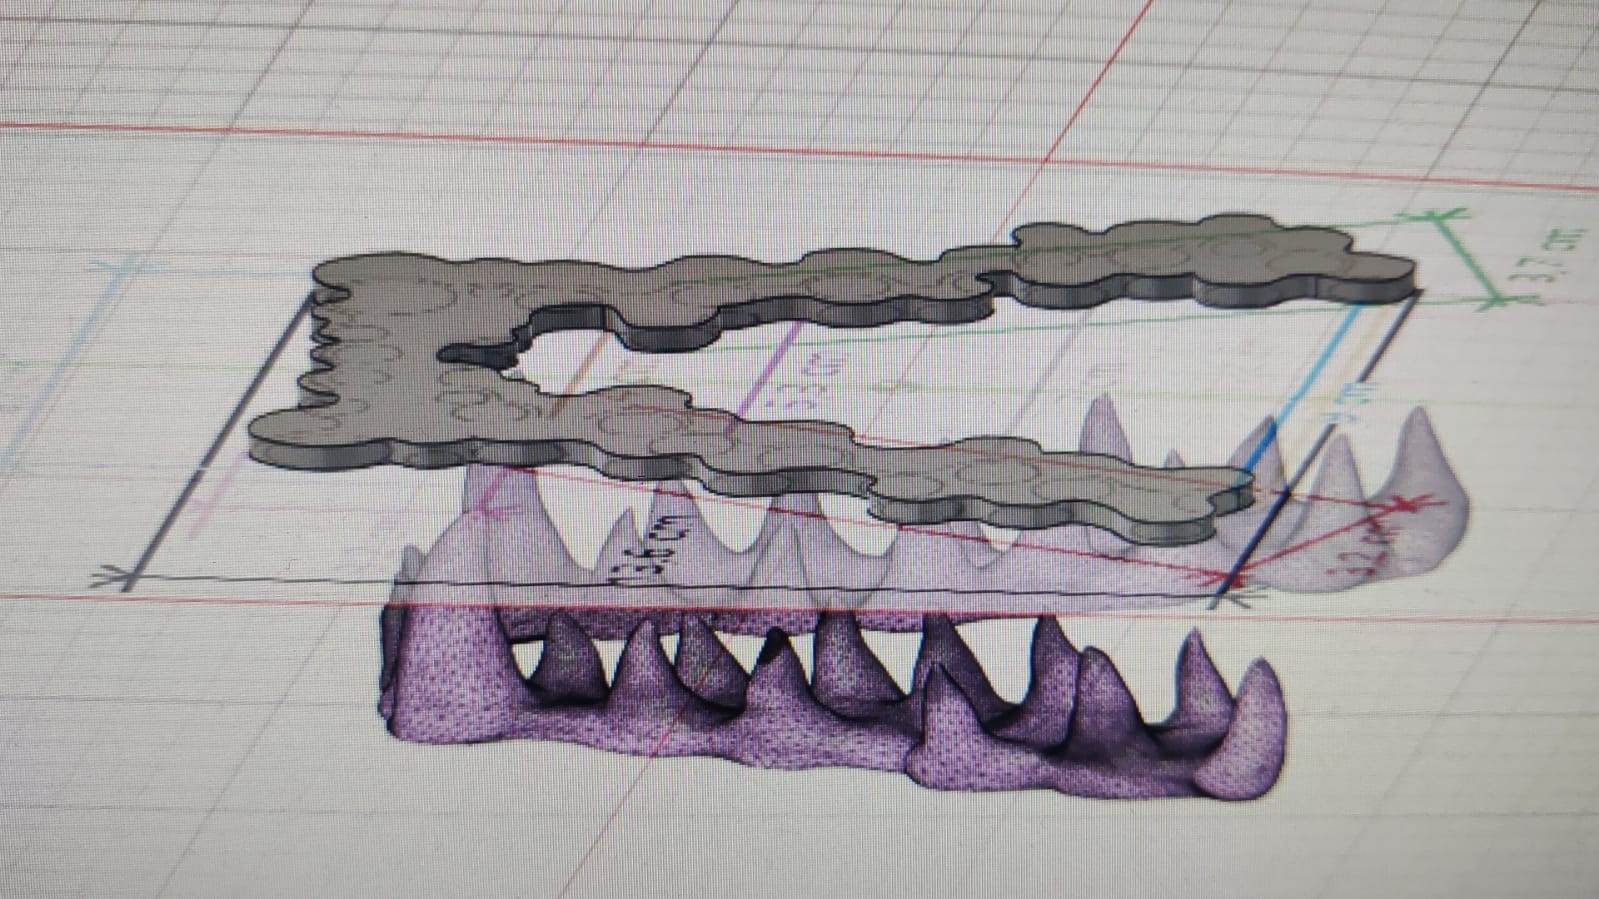
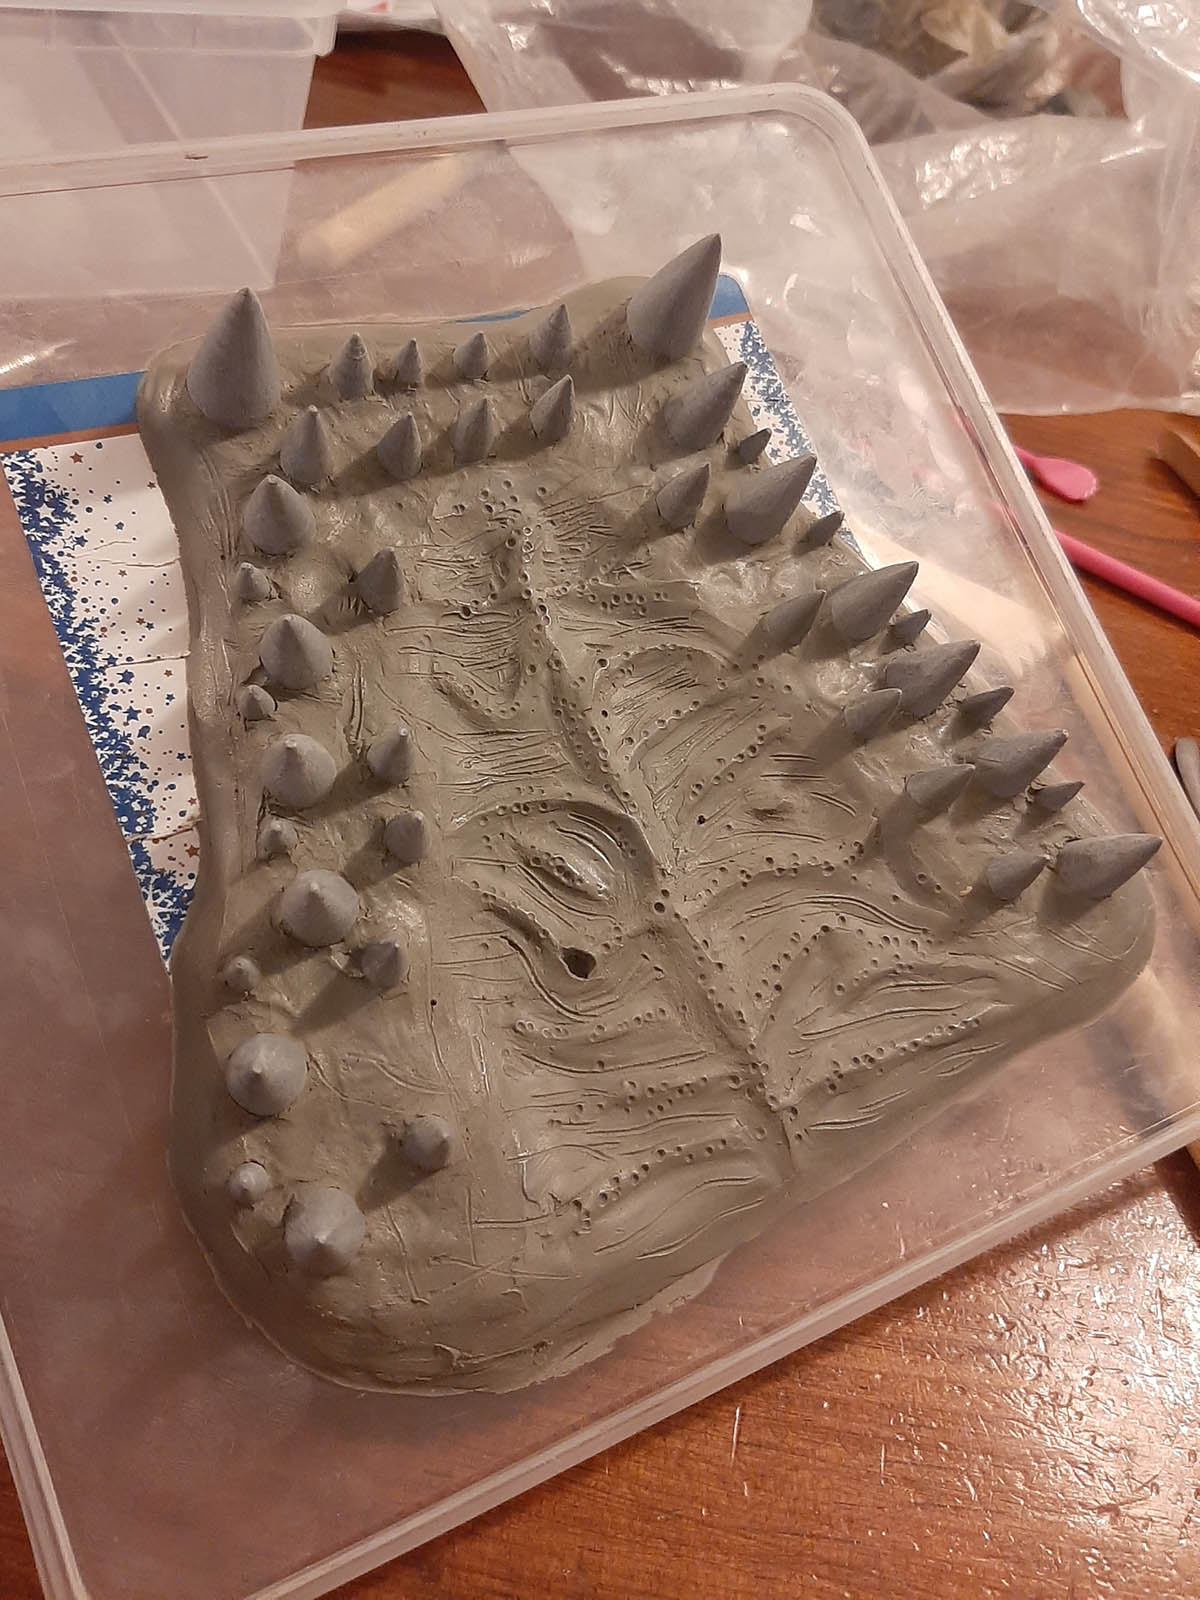
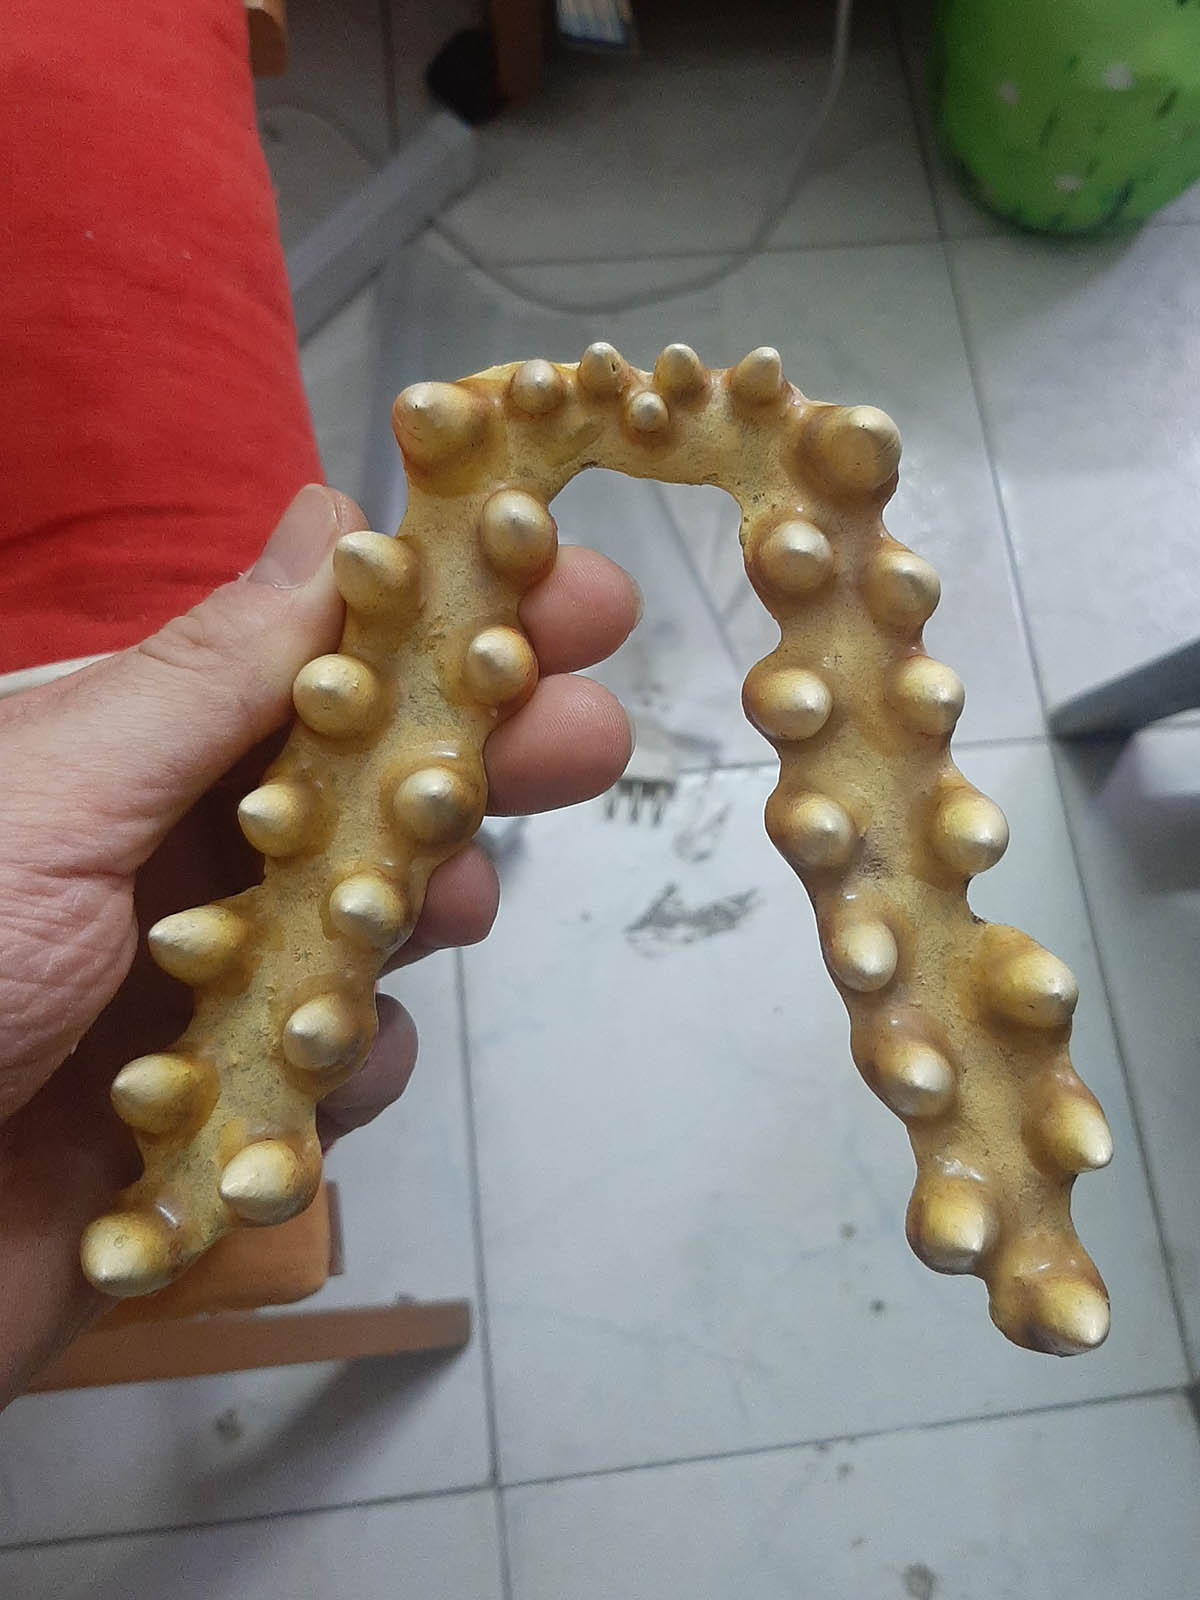
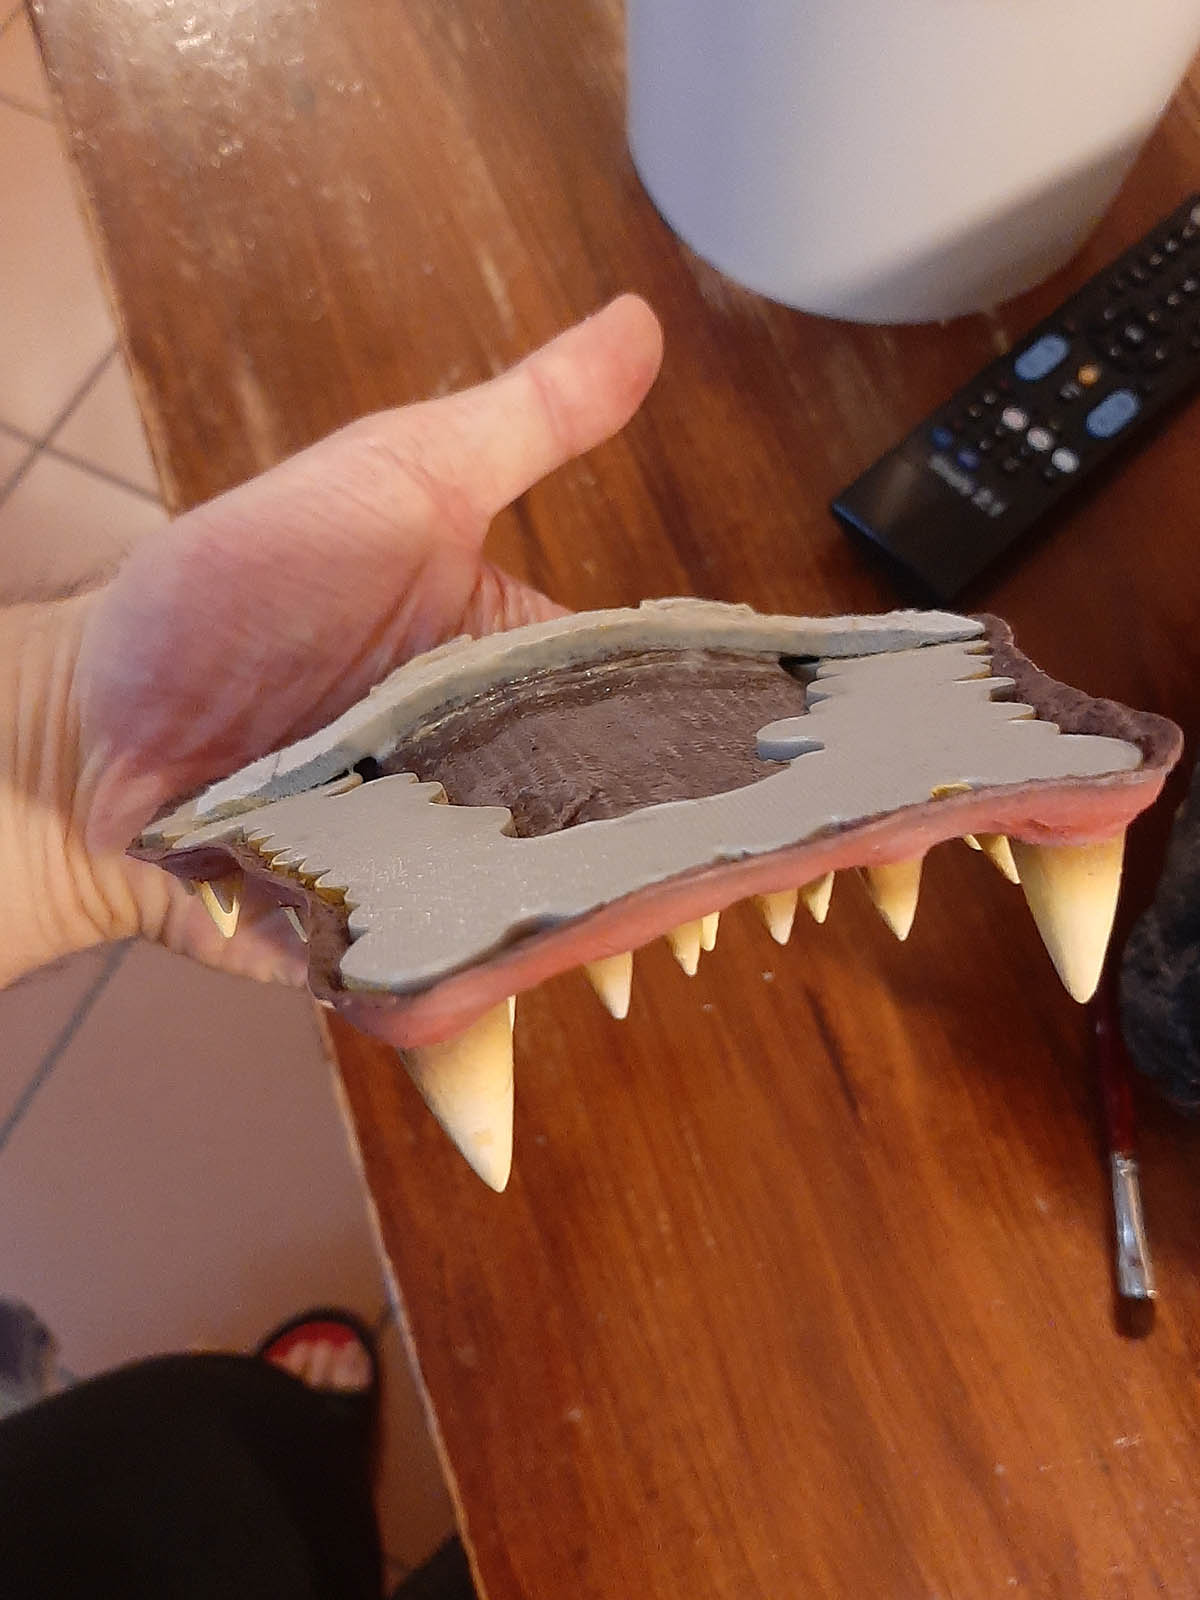
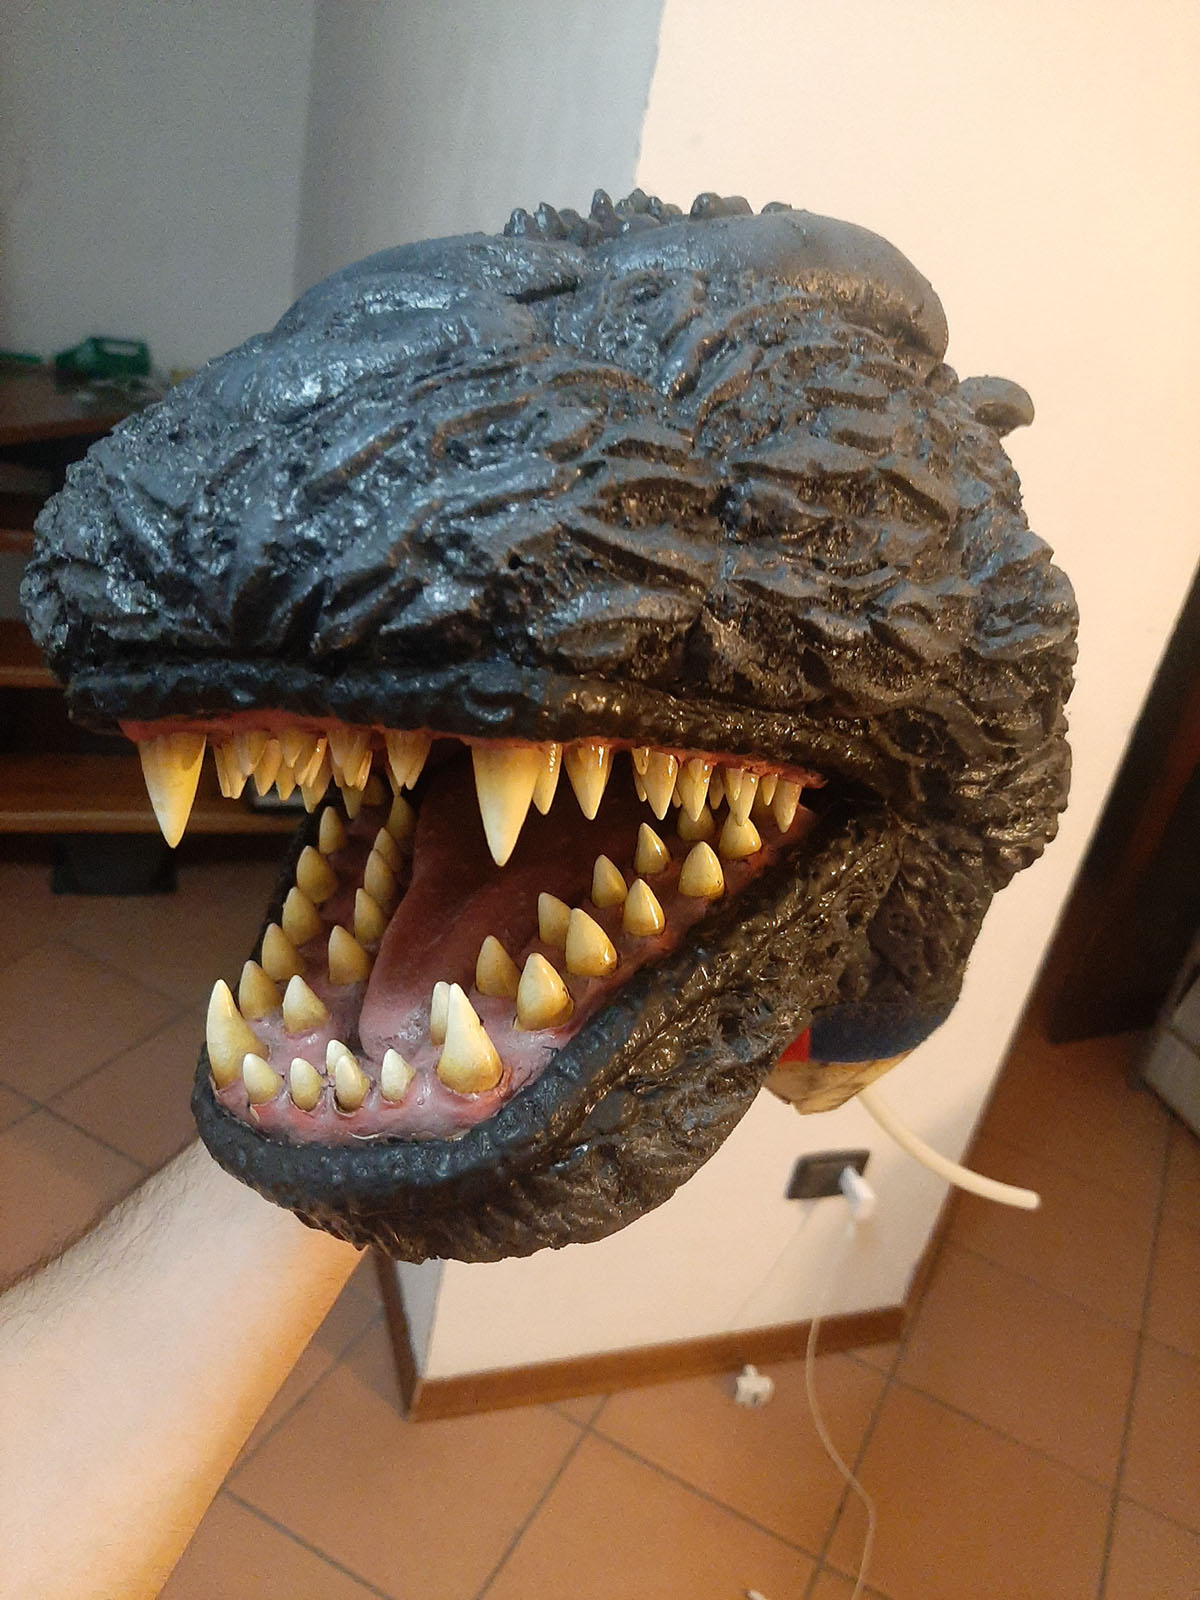
The 3D scan failed to capture the finer internal details, such as the teeth. To fix this, Andrea digitally sculpted the teeth directly onto the scan file, successfully extracting a 3D model of the lower jaw’s denture.
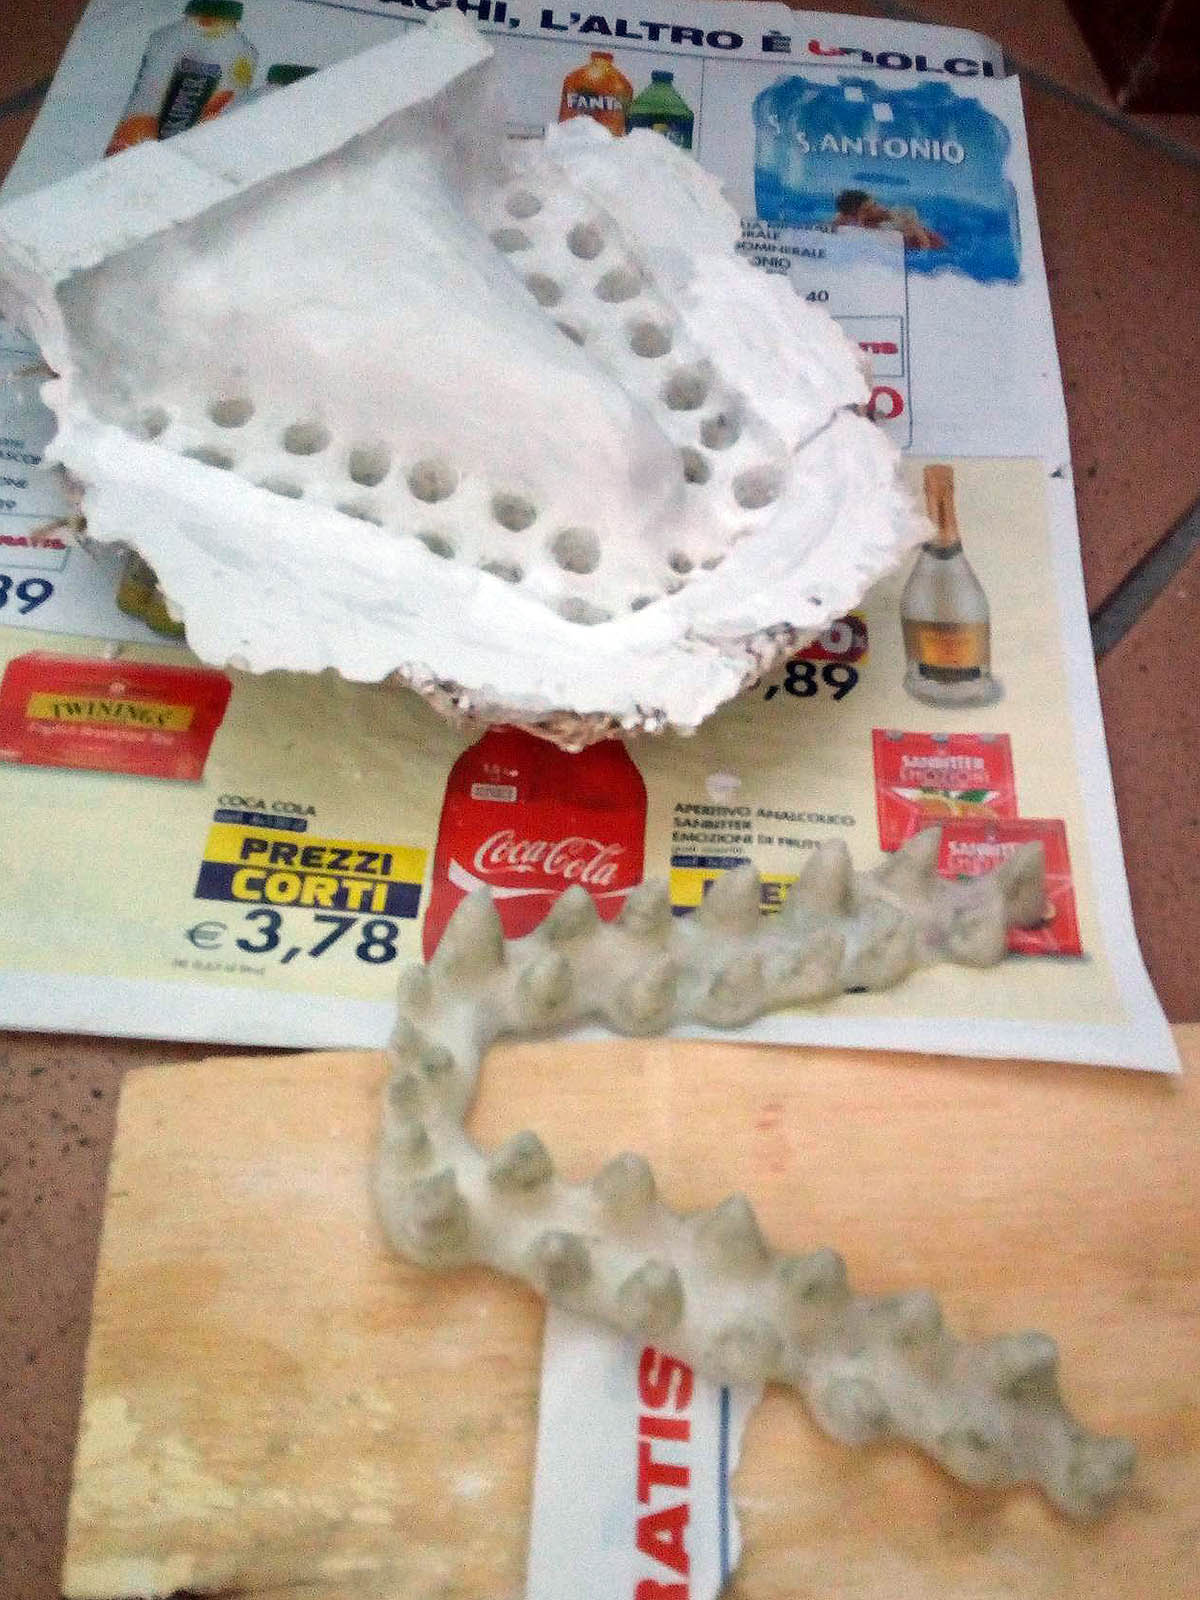
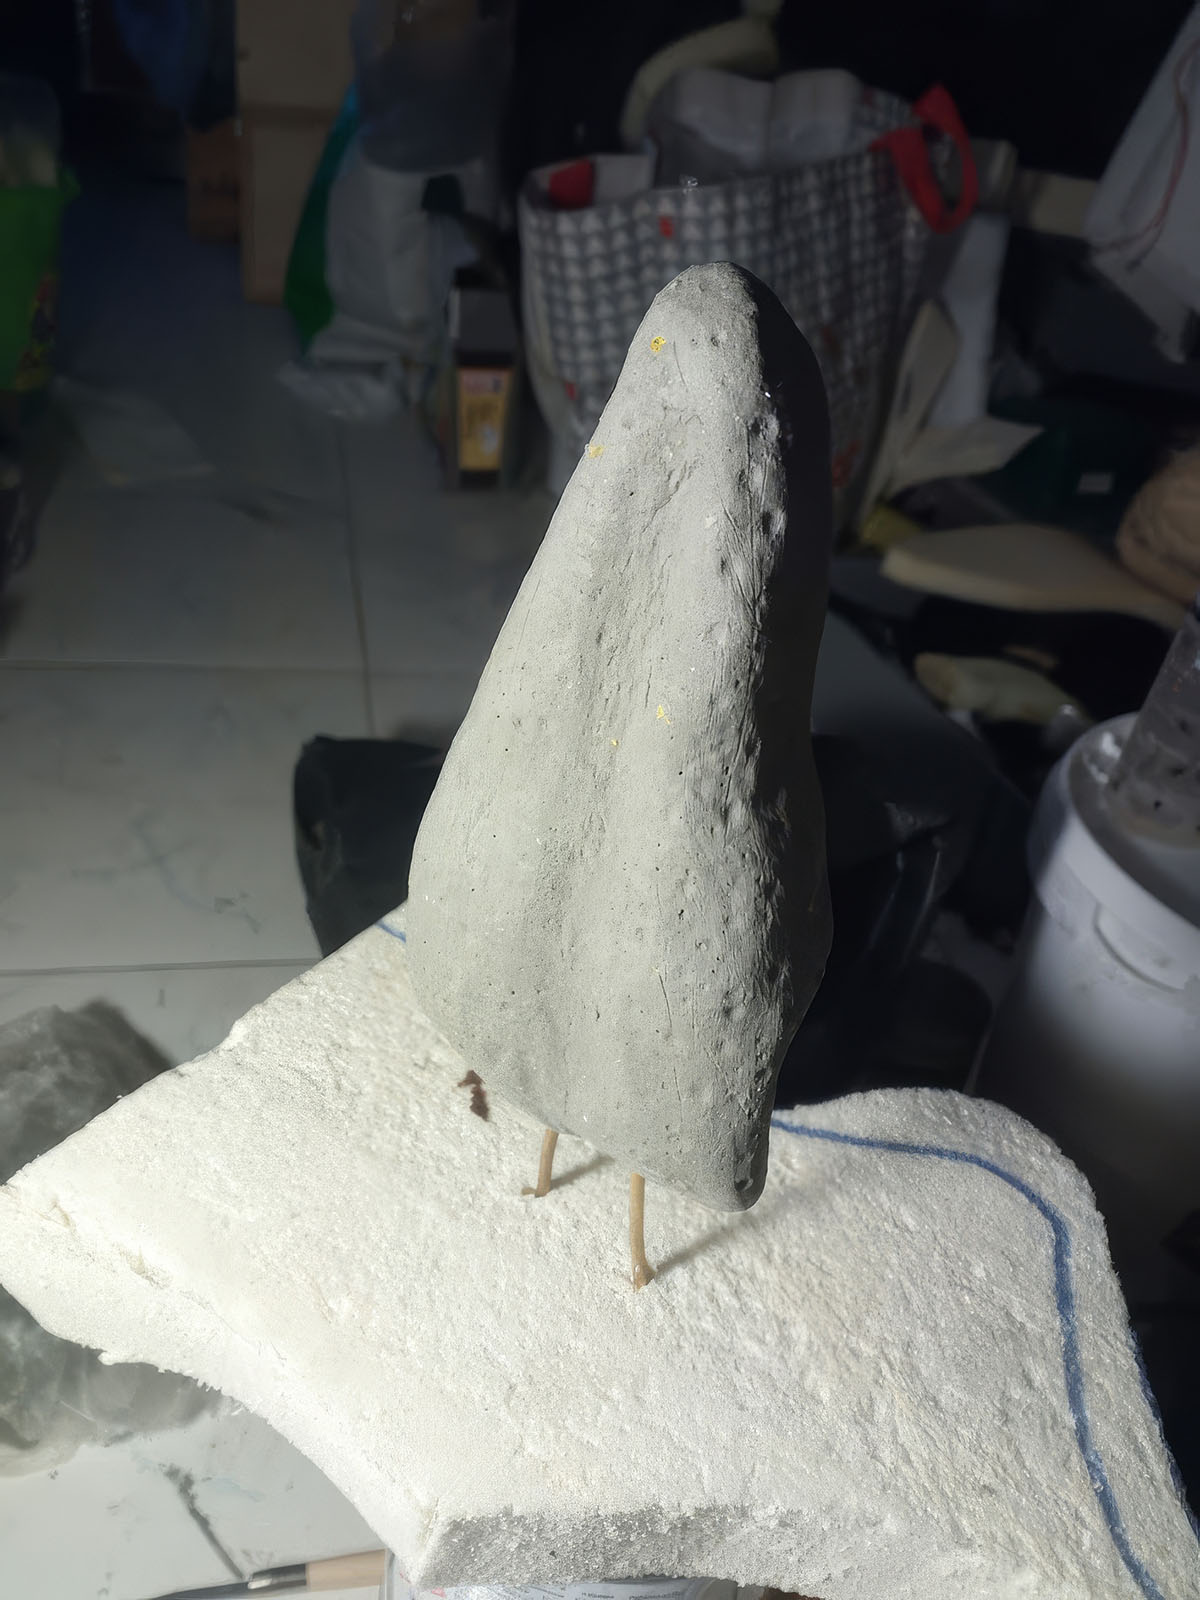
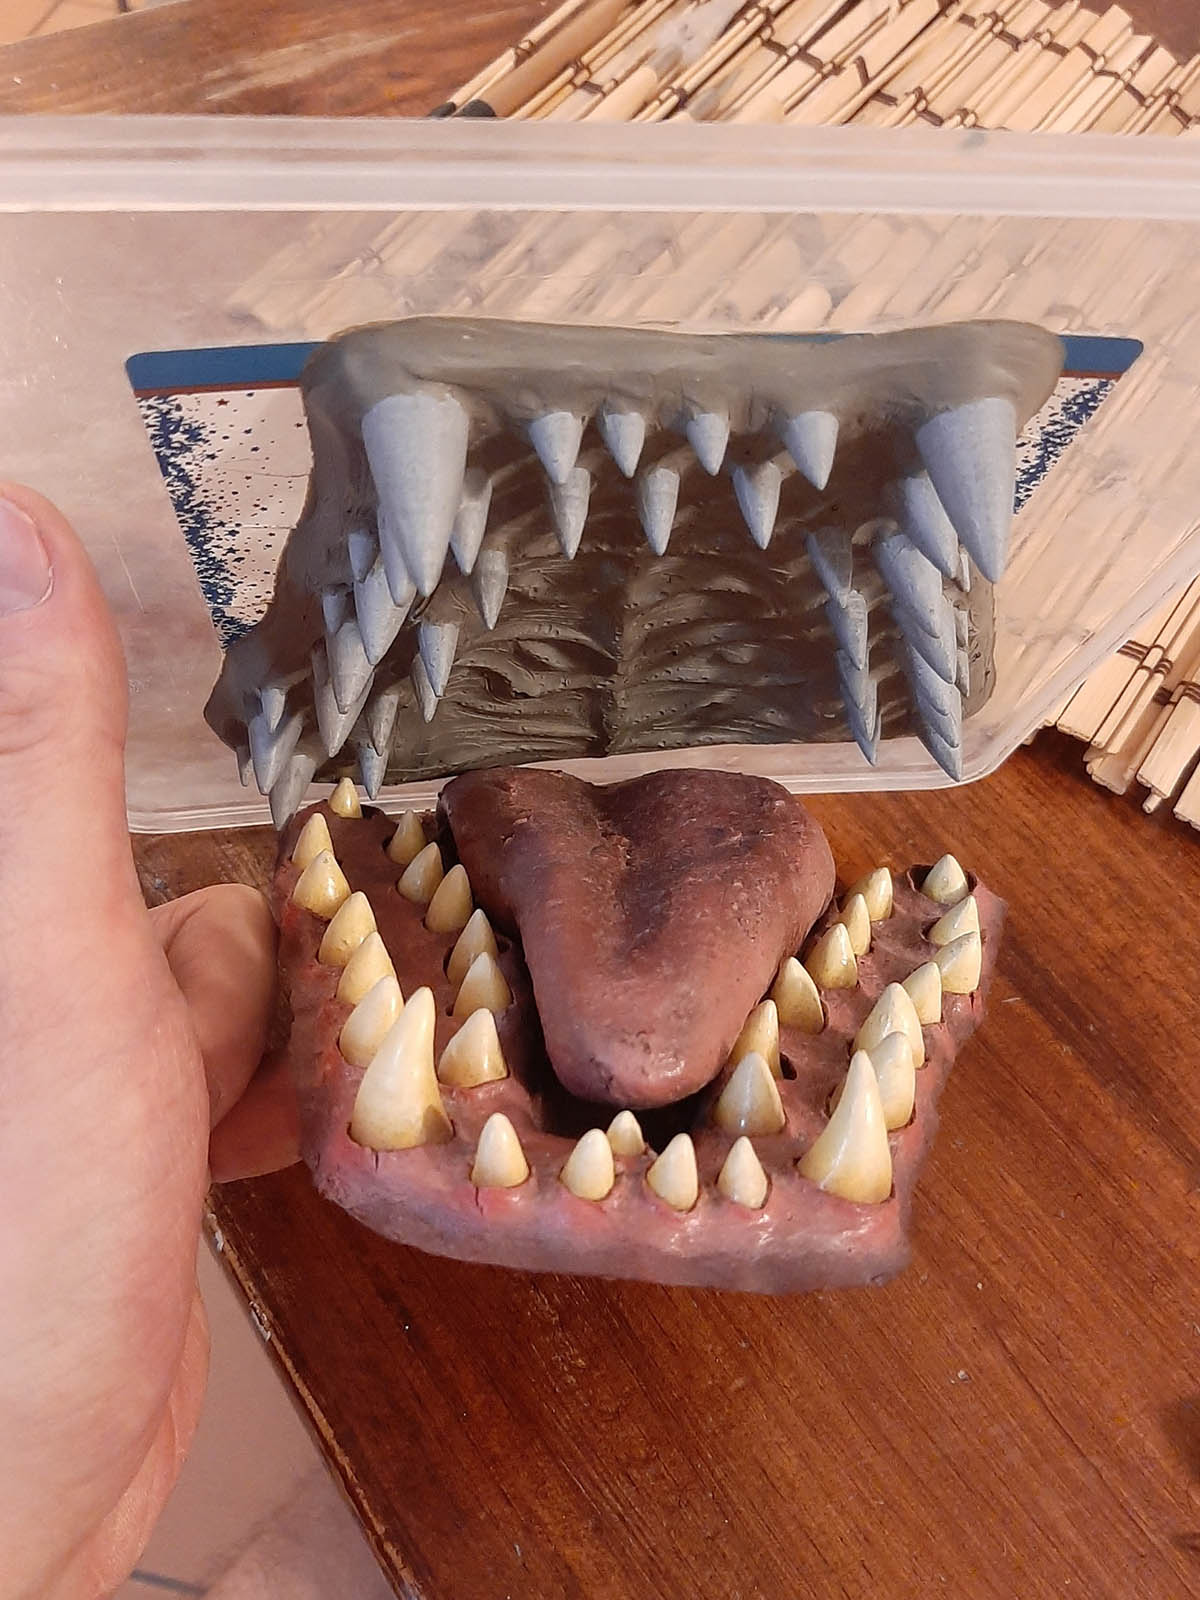
Once it was printed, he handed it over to me, and I sculpted the gums using professional sculpting clay before creating a plaster mold.
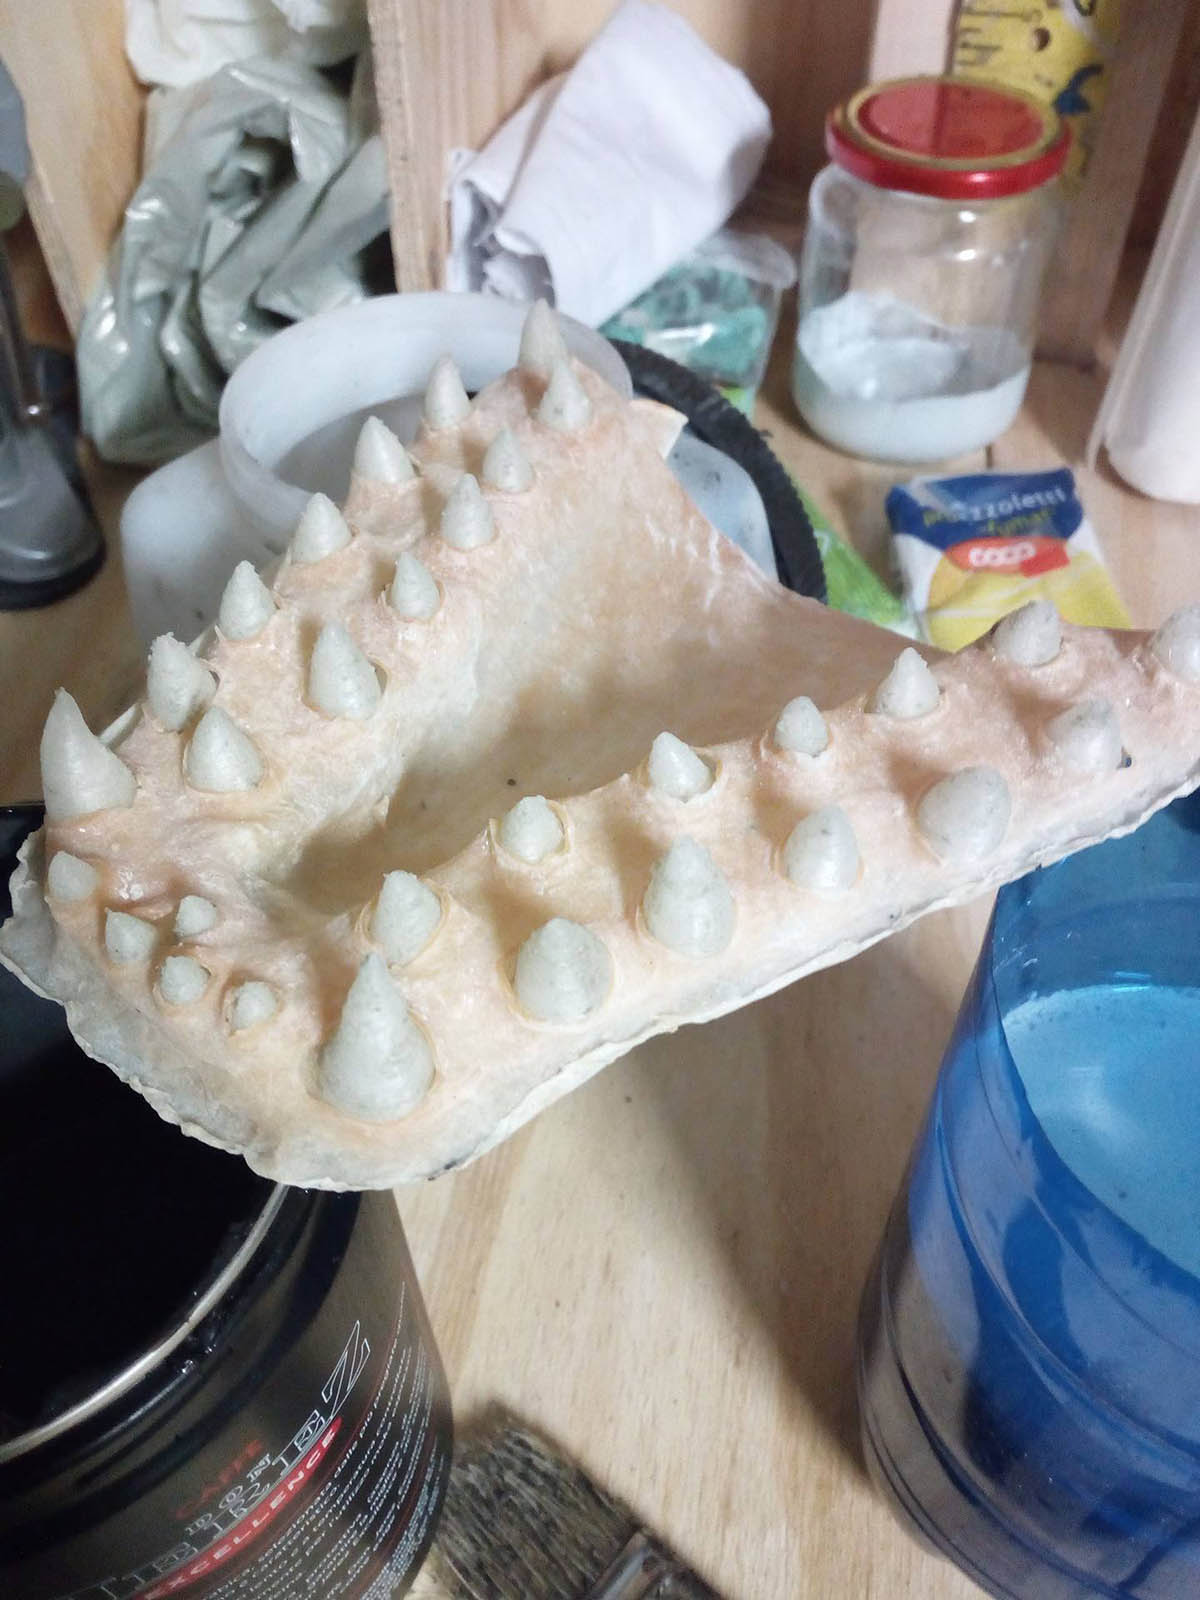
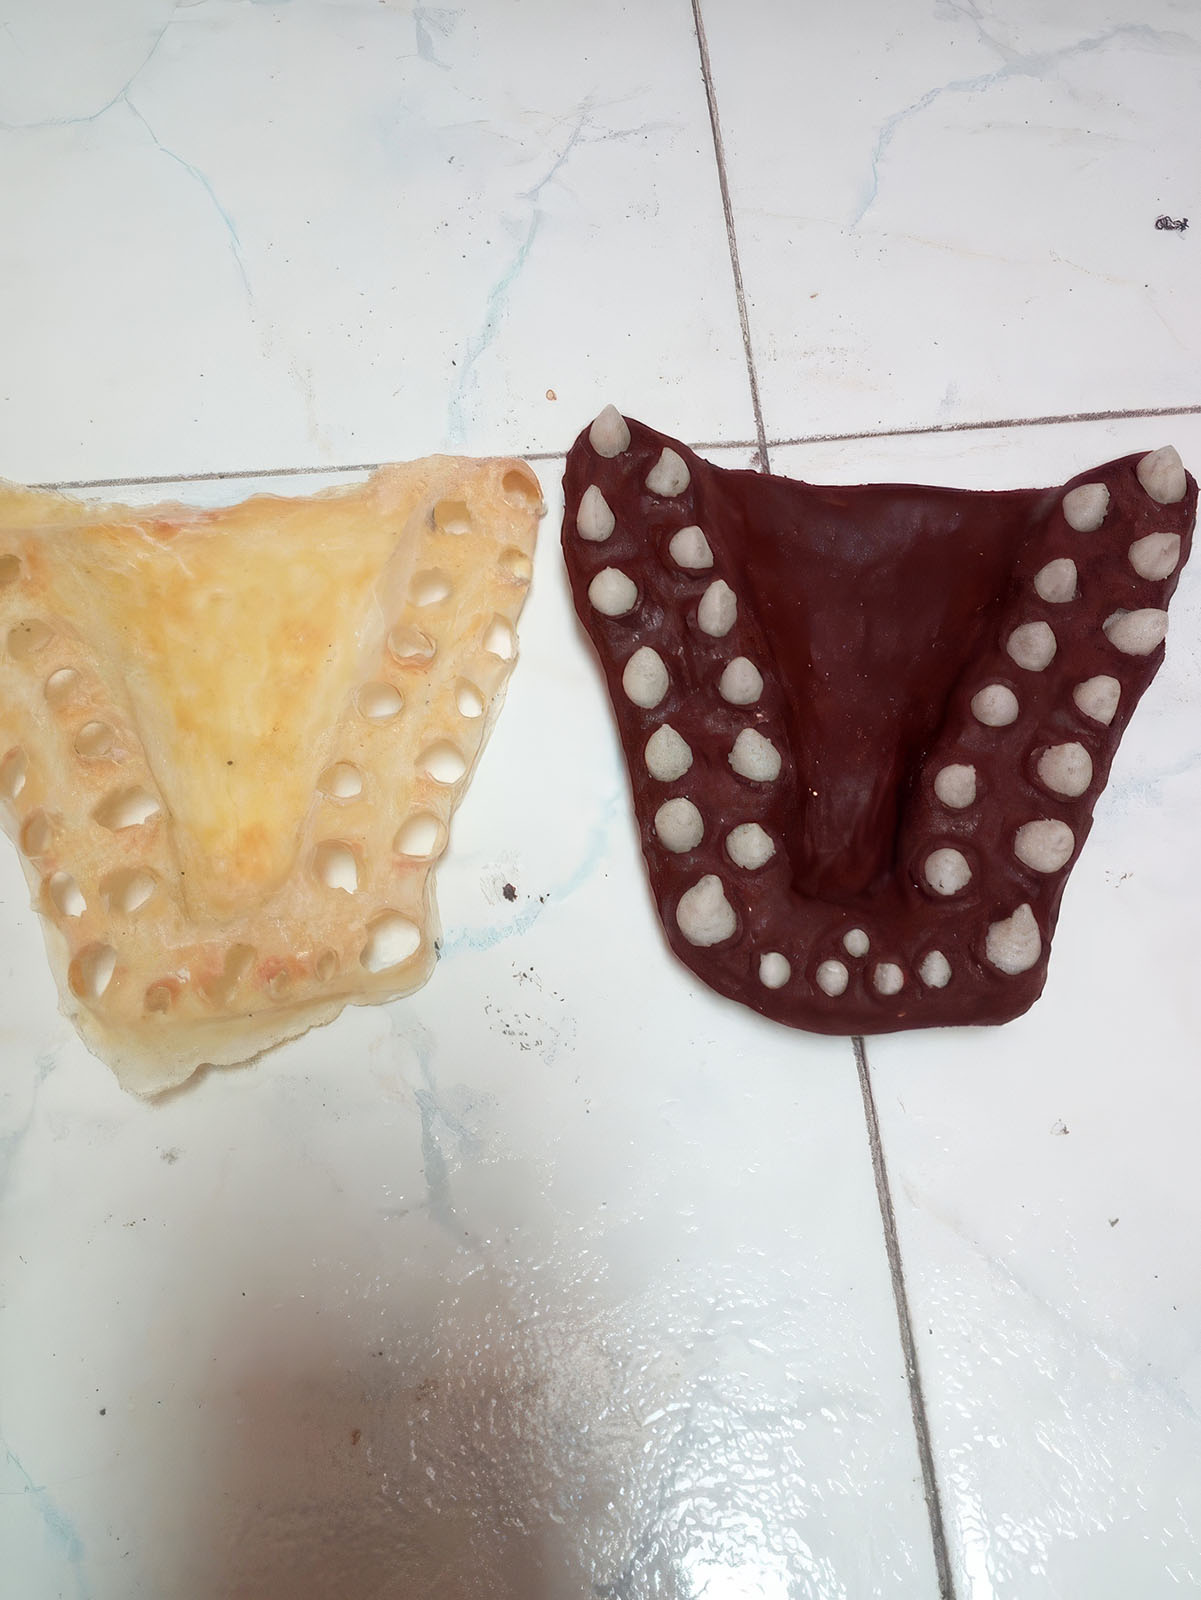
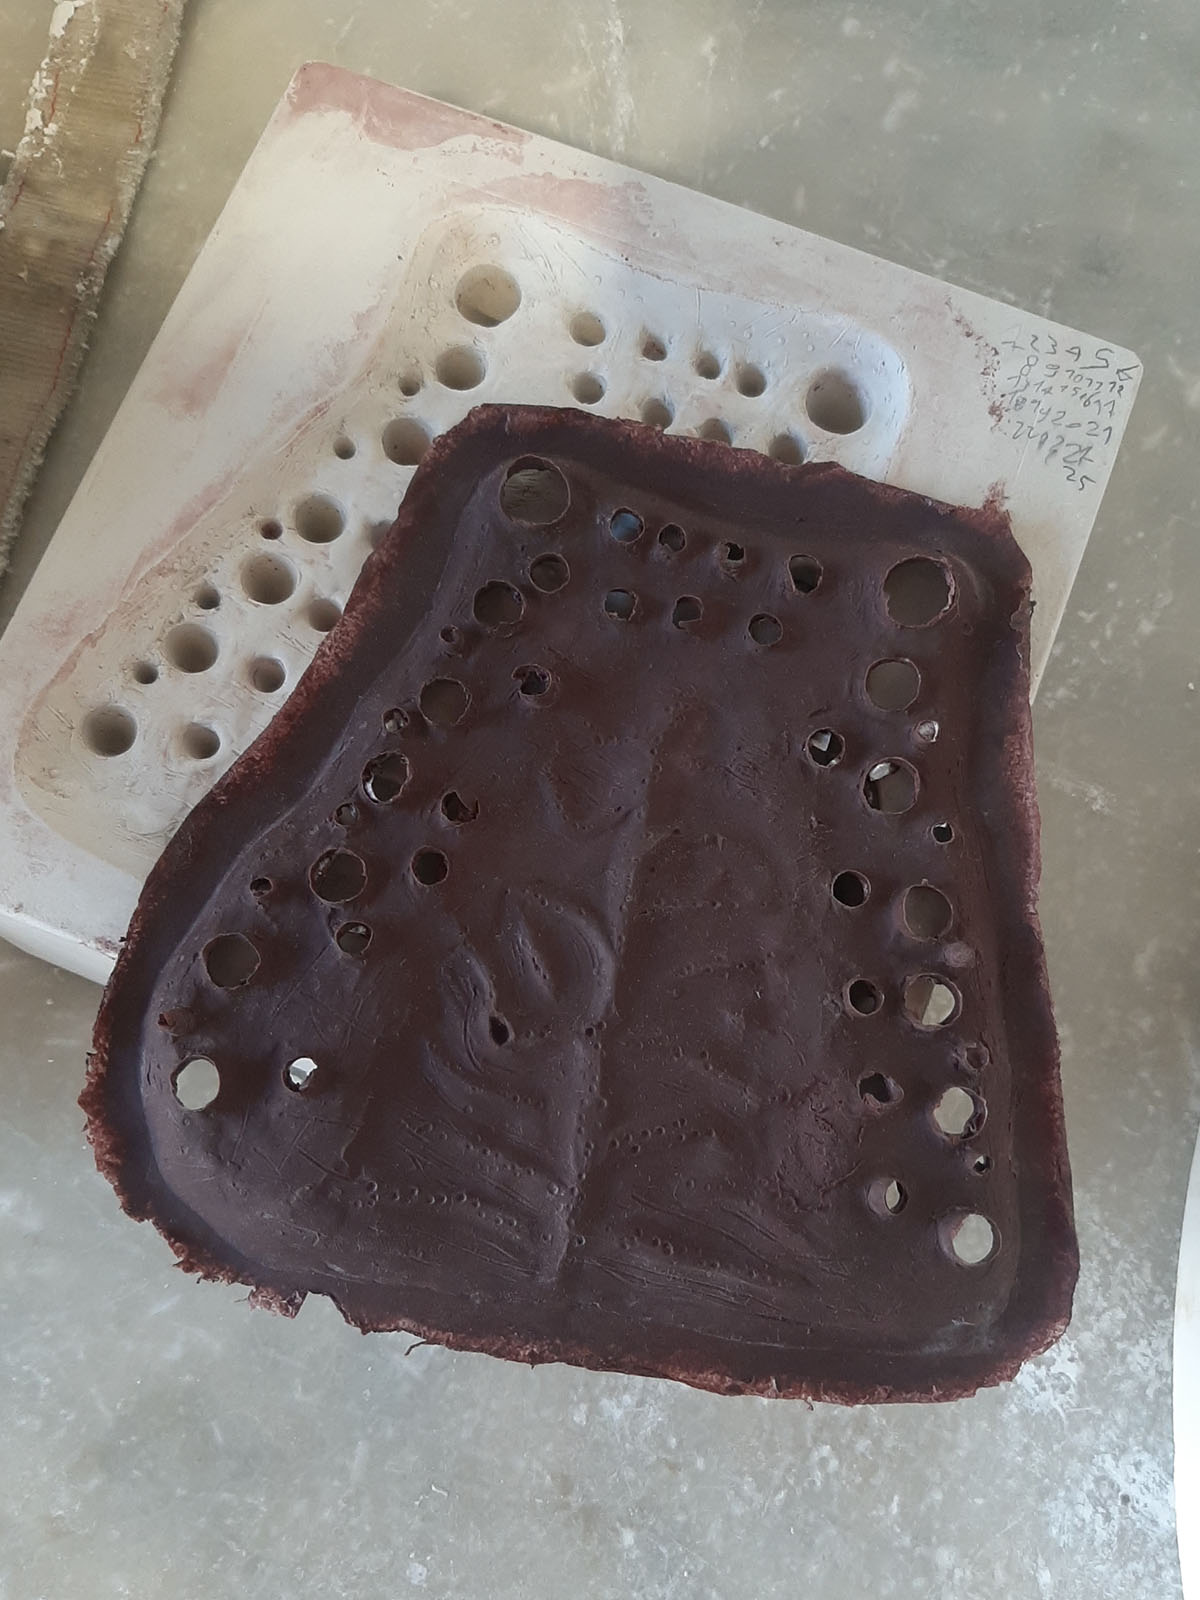
After removing the sculpture and the denture from the mold, I applied several layers of latex until I reached the desired thickness. I made an initial prototype to check the fit; once I confirmed the latex gums fit the denture perfectly, I applied a new round of latex—this time mixed with a base pigment—to prepare it for the final detail painting.
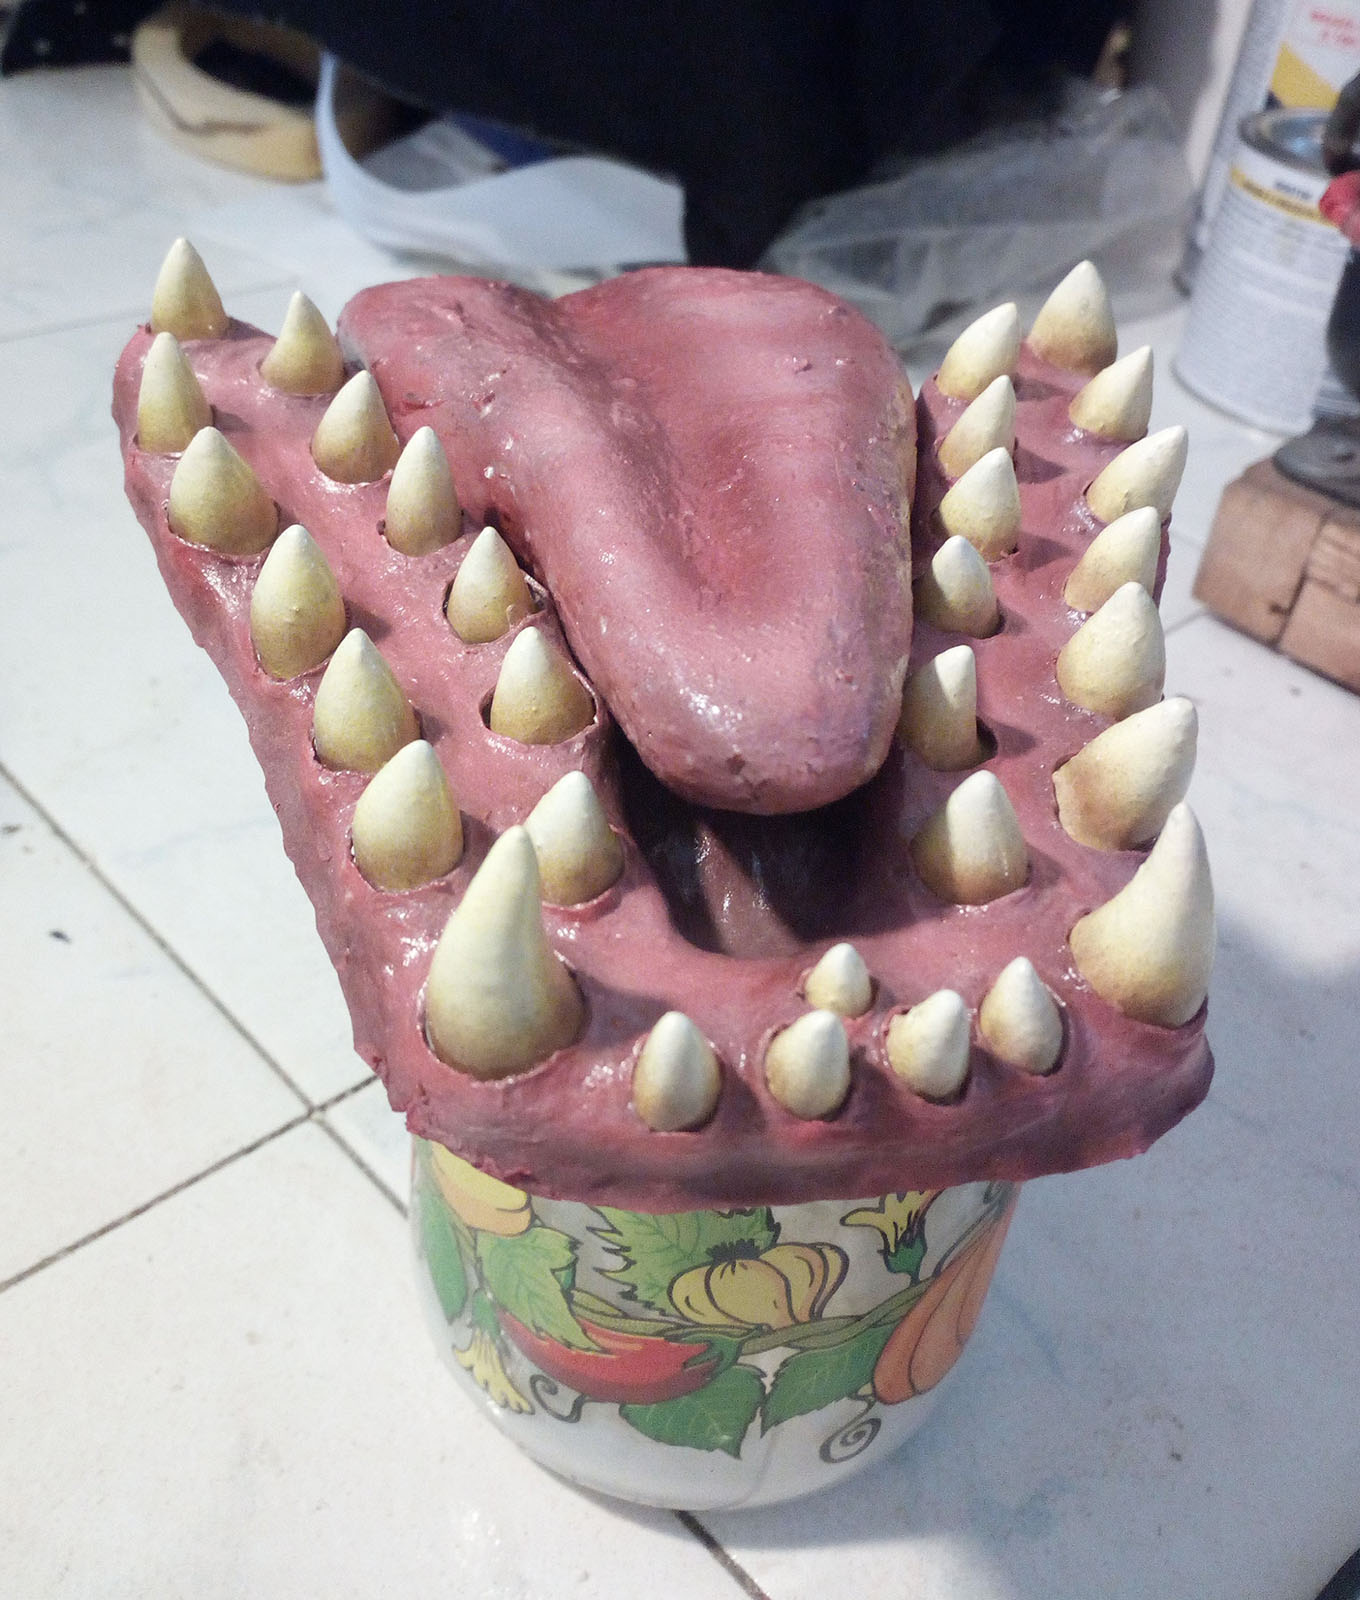
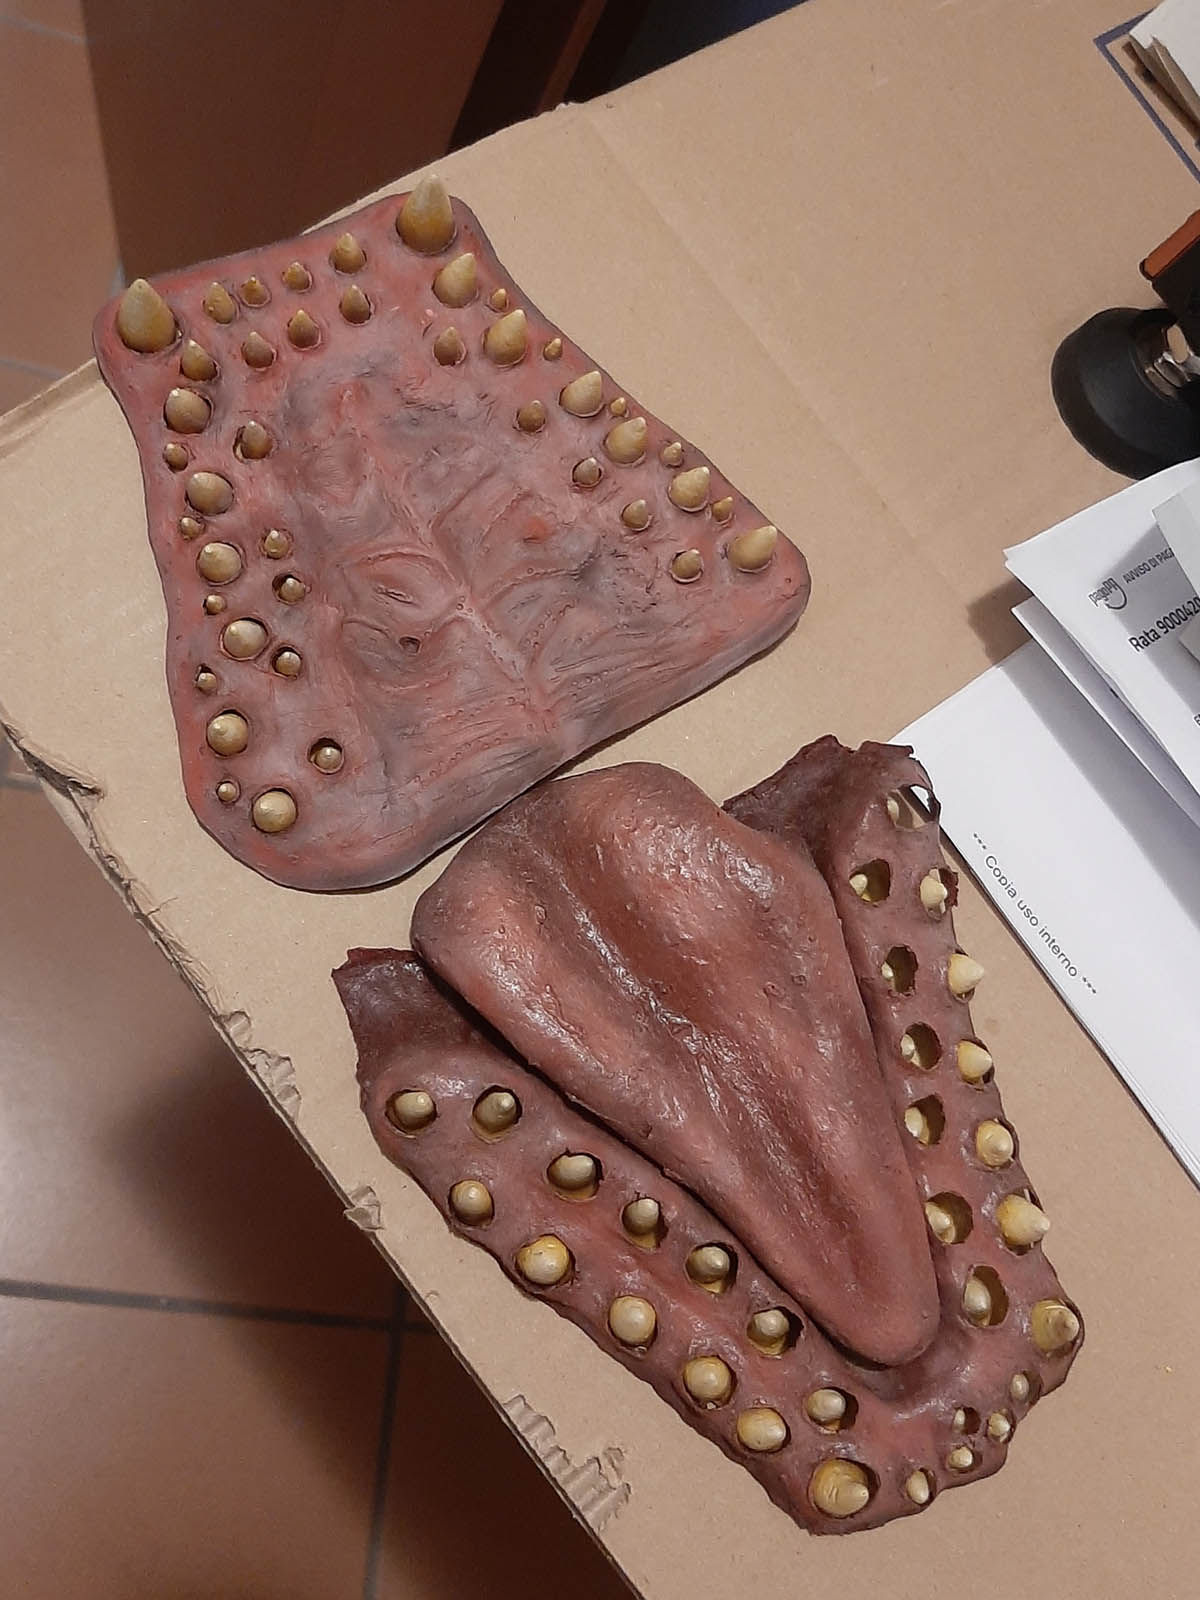
Next, I sculpted the tongue, carefully following the dimensions of the gums. This piece also went through the same process: a plaster mold followed by multiple layers of latex.
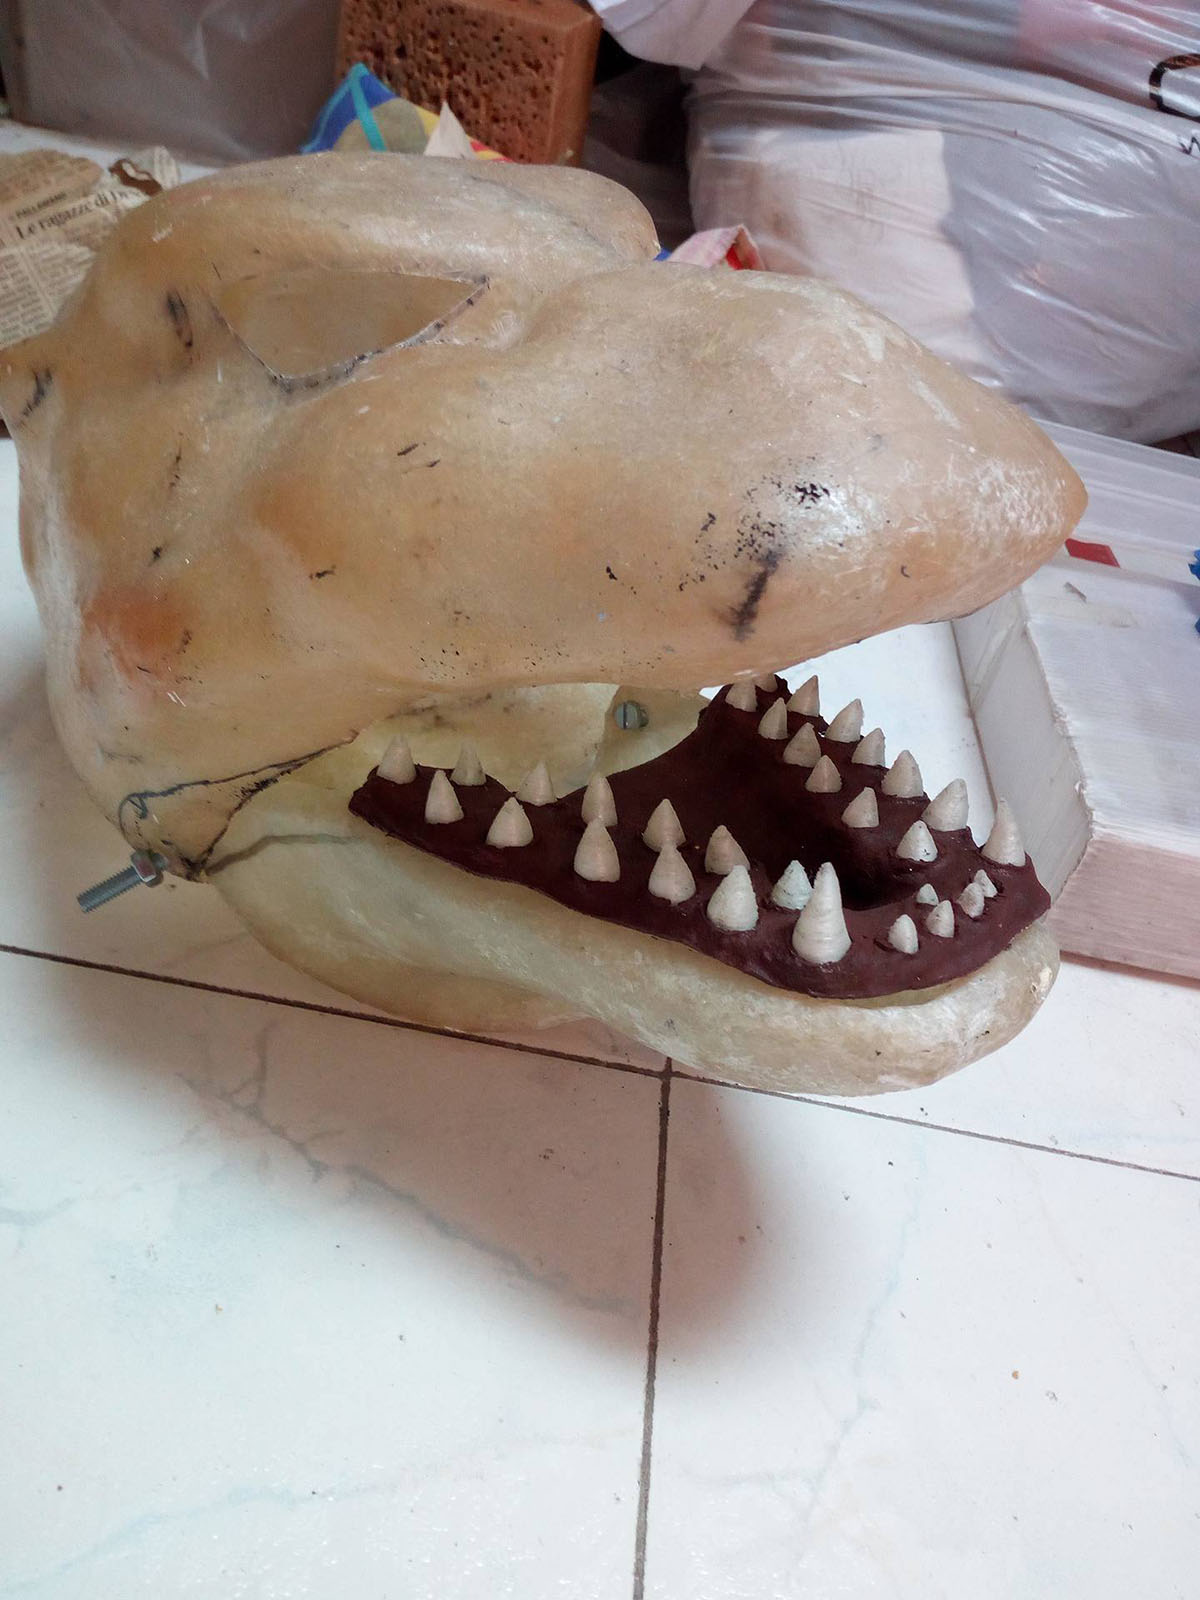
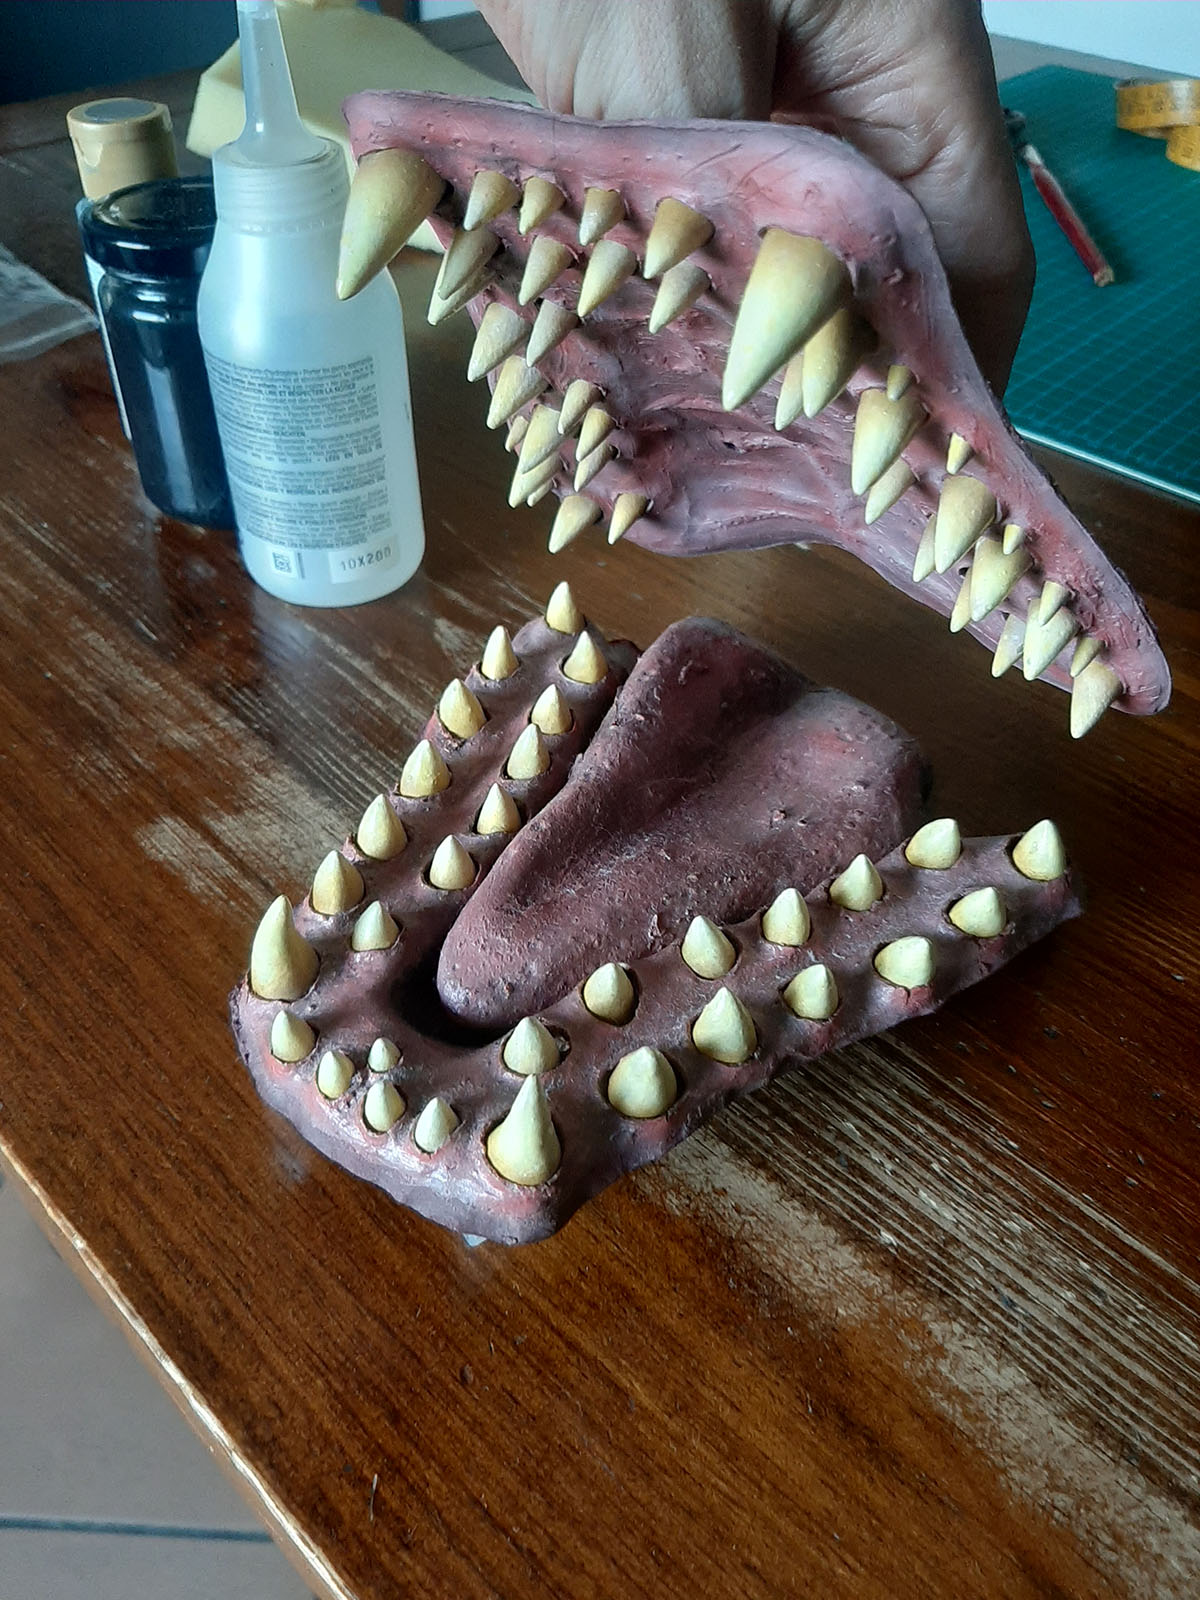
After painting the gums, denture, and tongue, I moved on to the upper teeth, following the exact same procedure used for the lower ones.
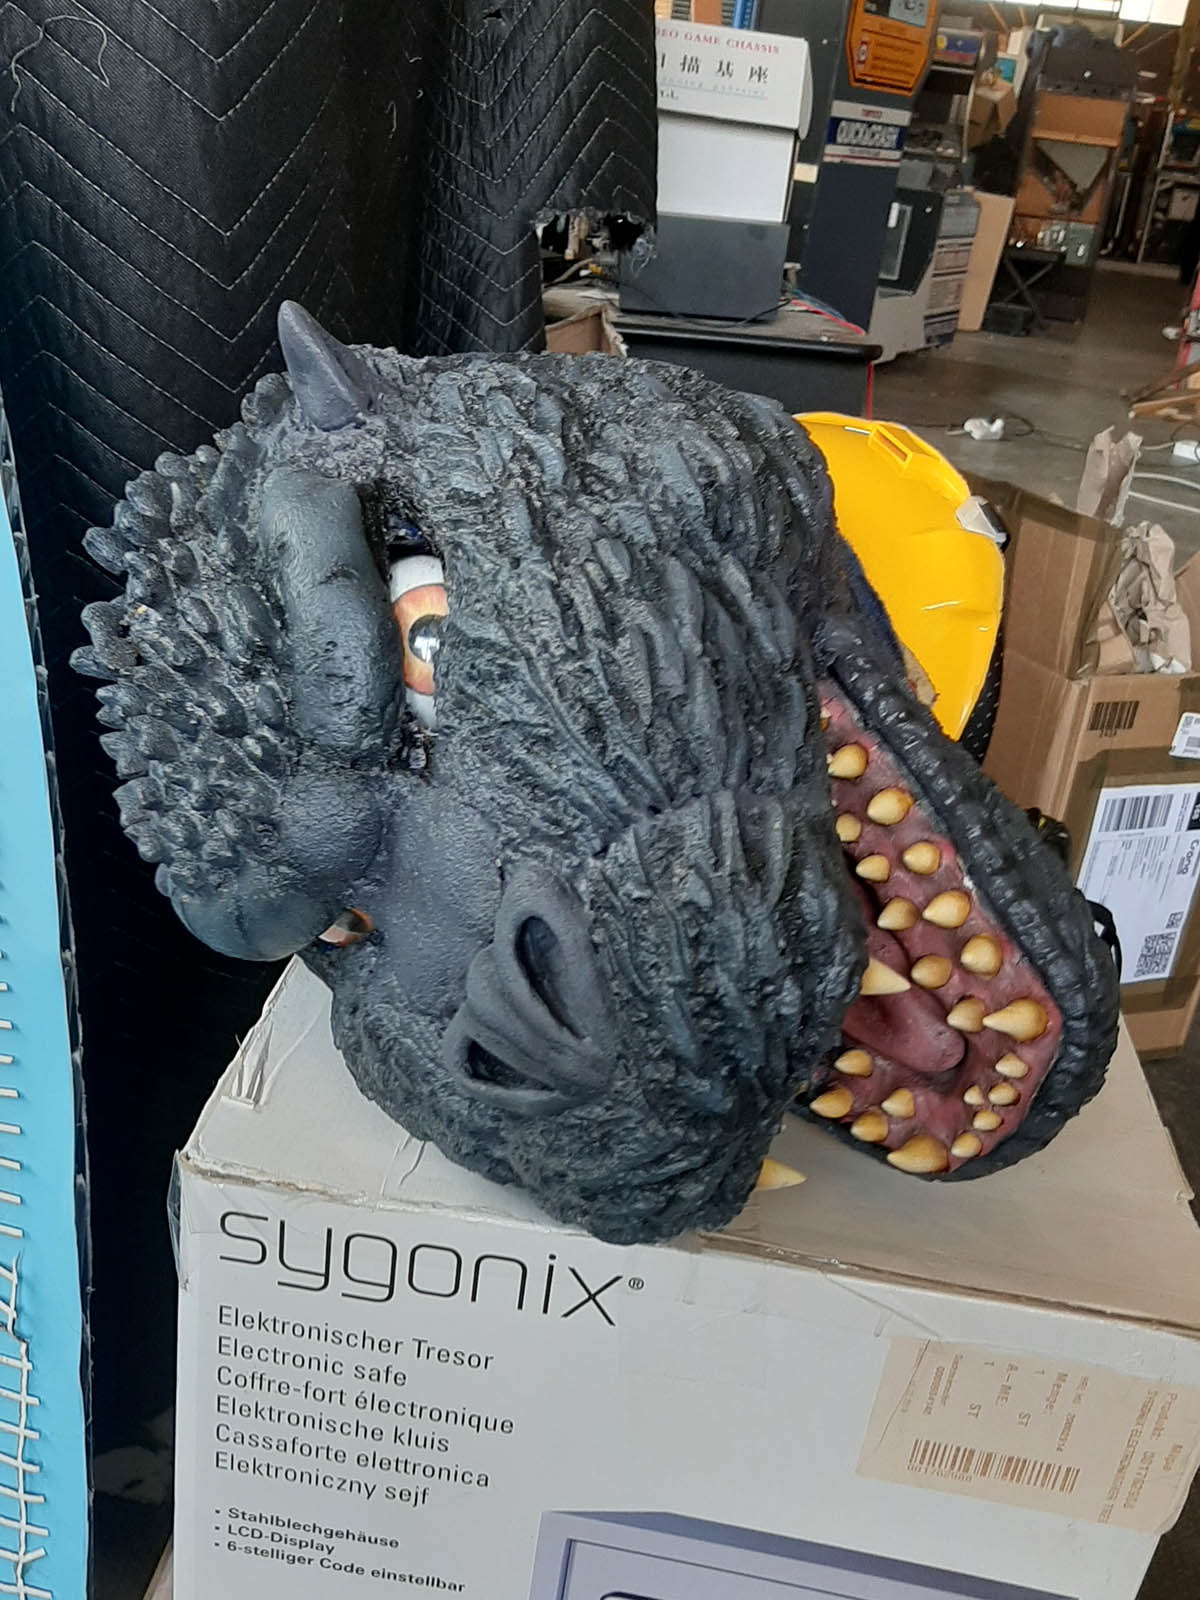
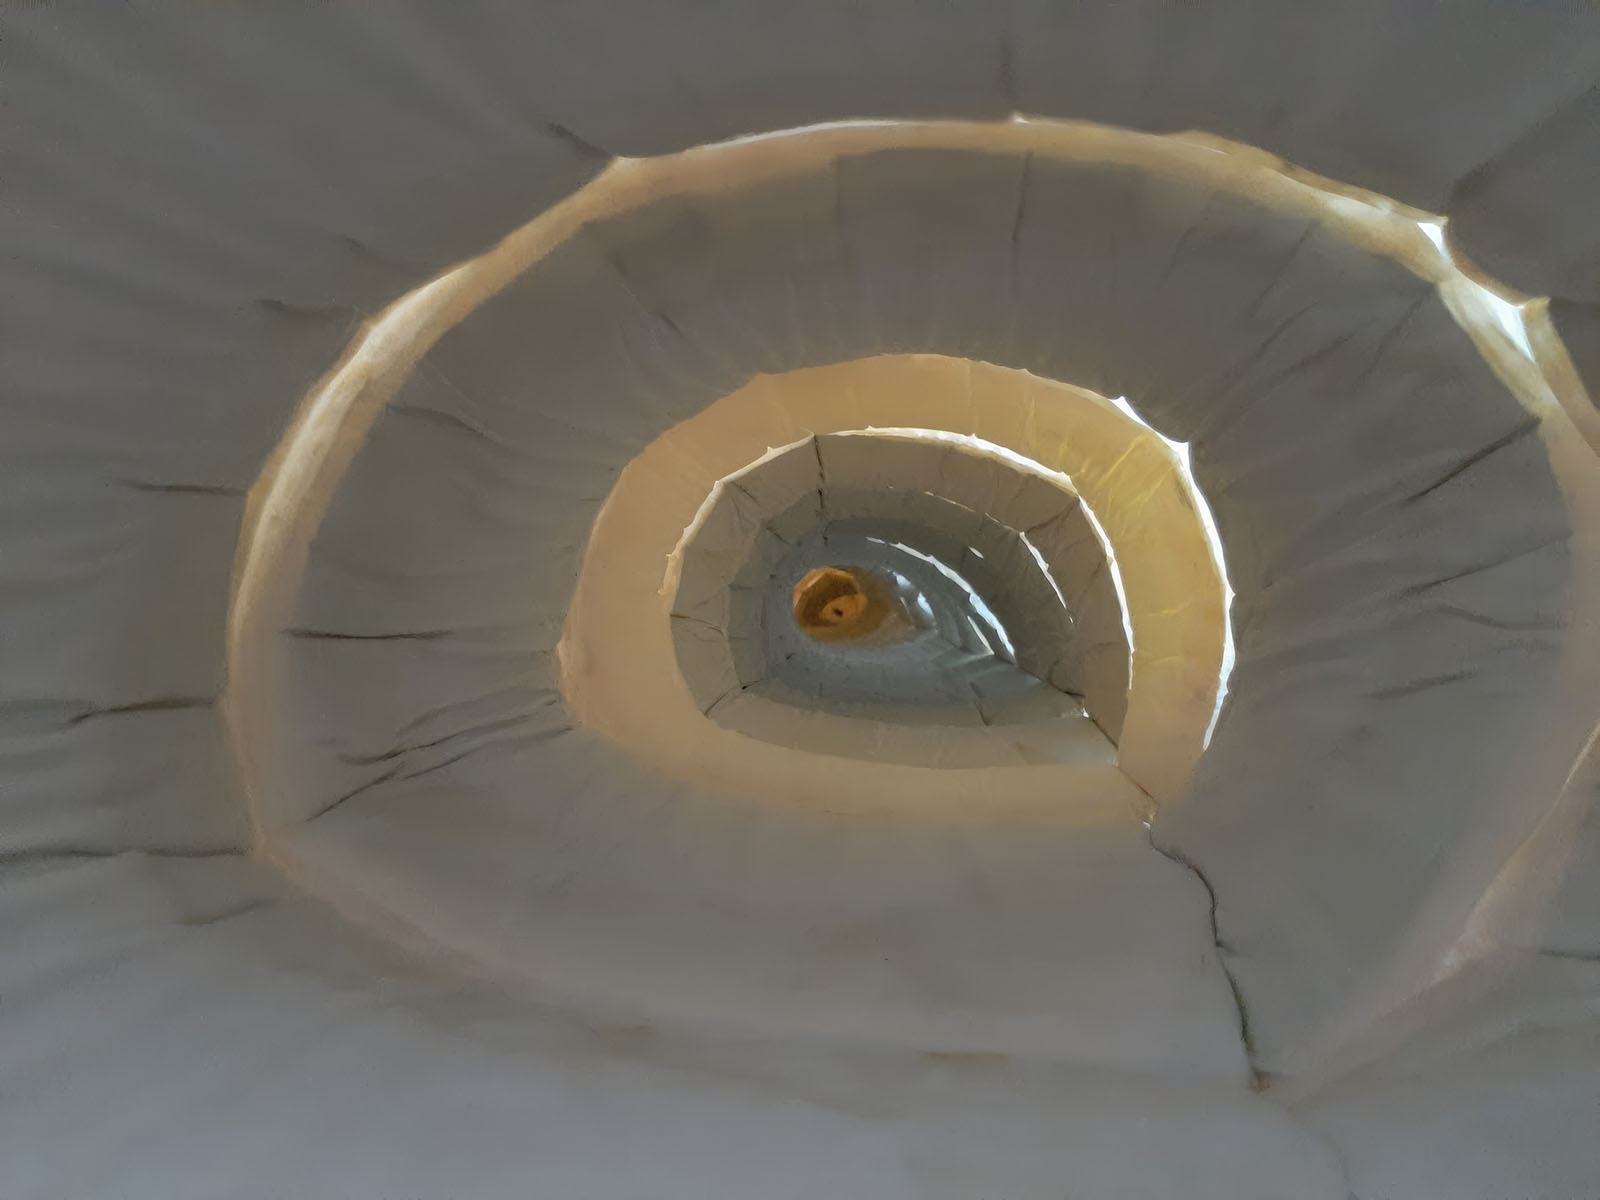
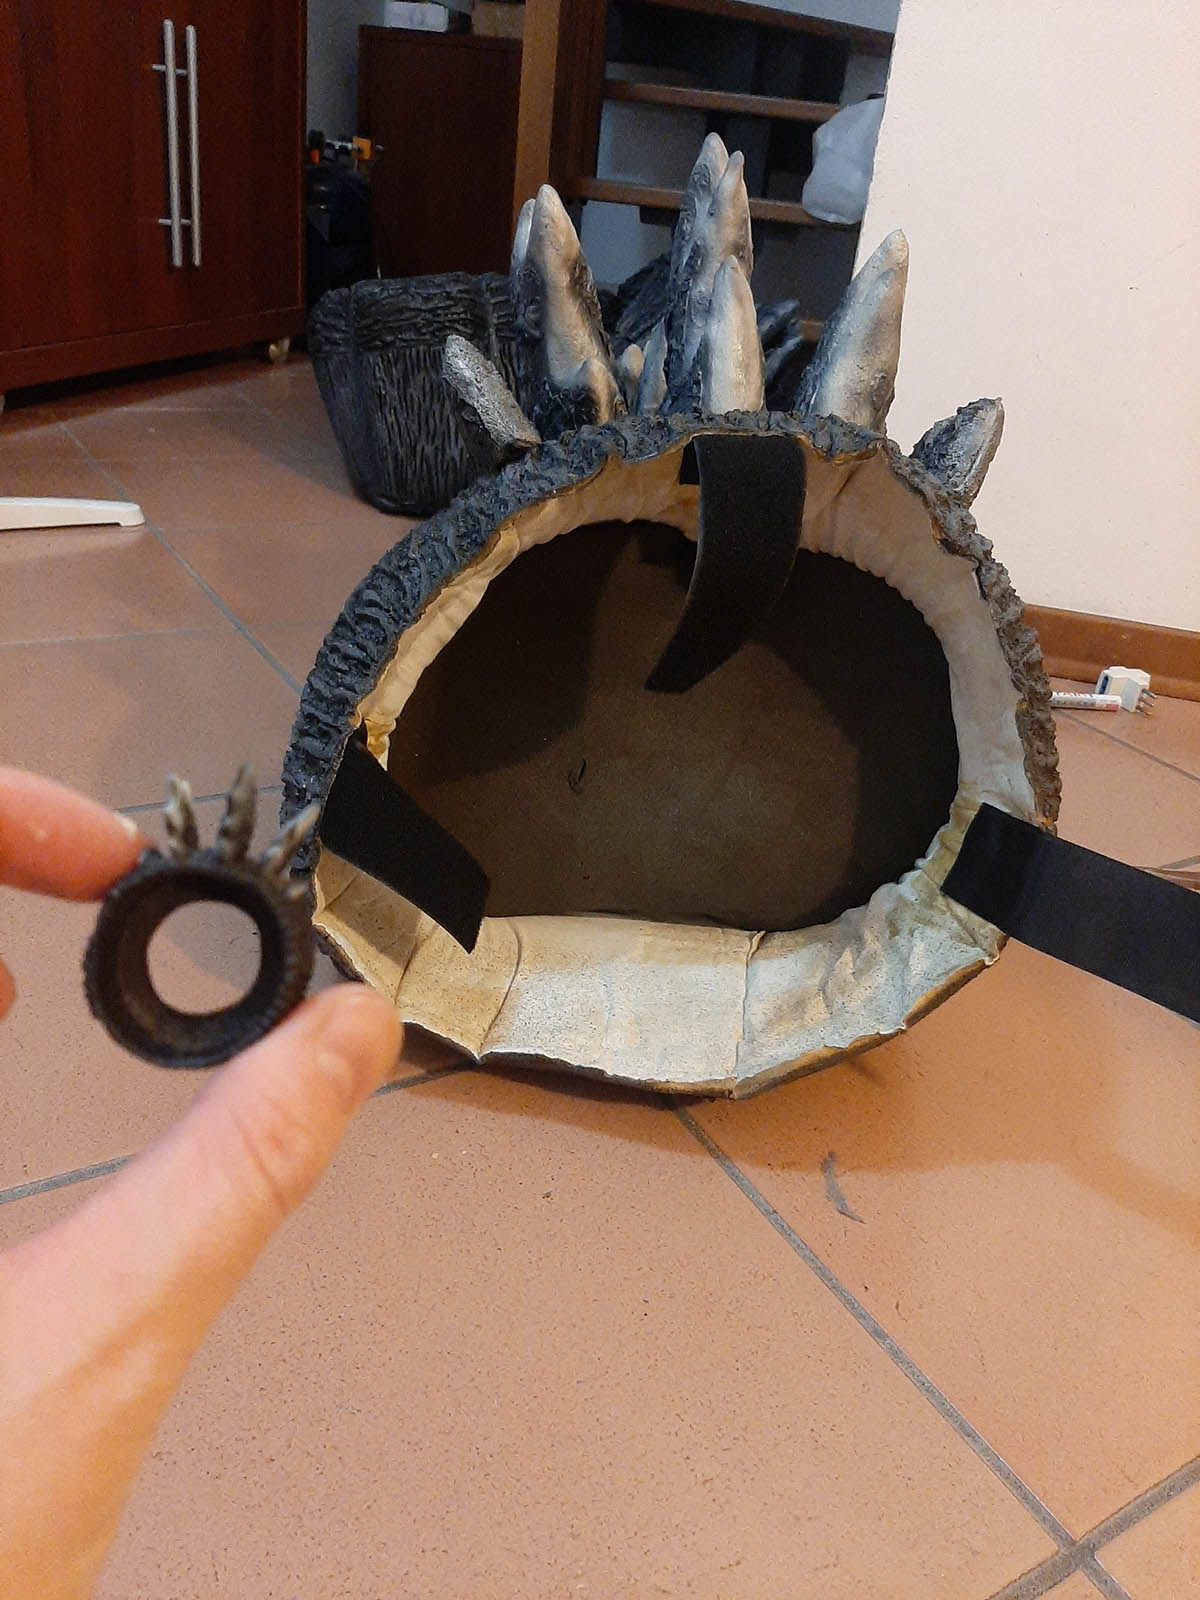
As shown in the last two photos, the final step was to permanently fuse all the mouth components into the mask.
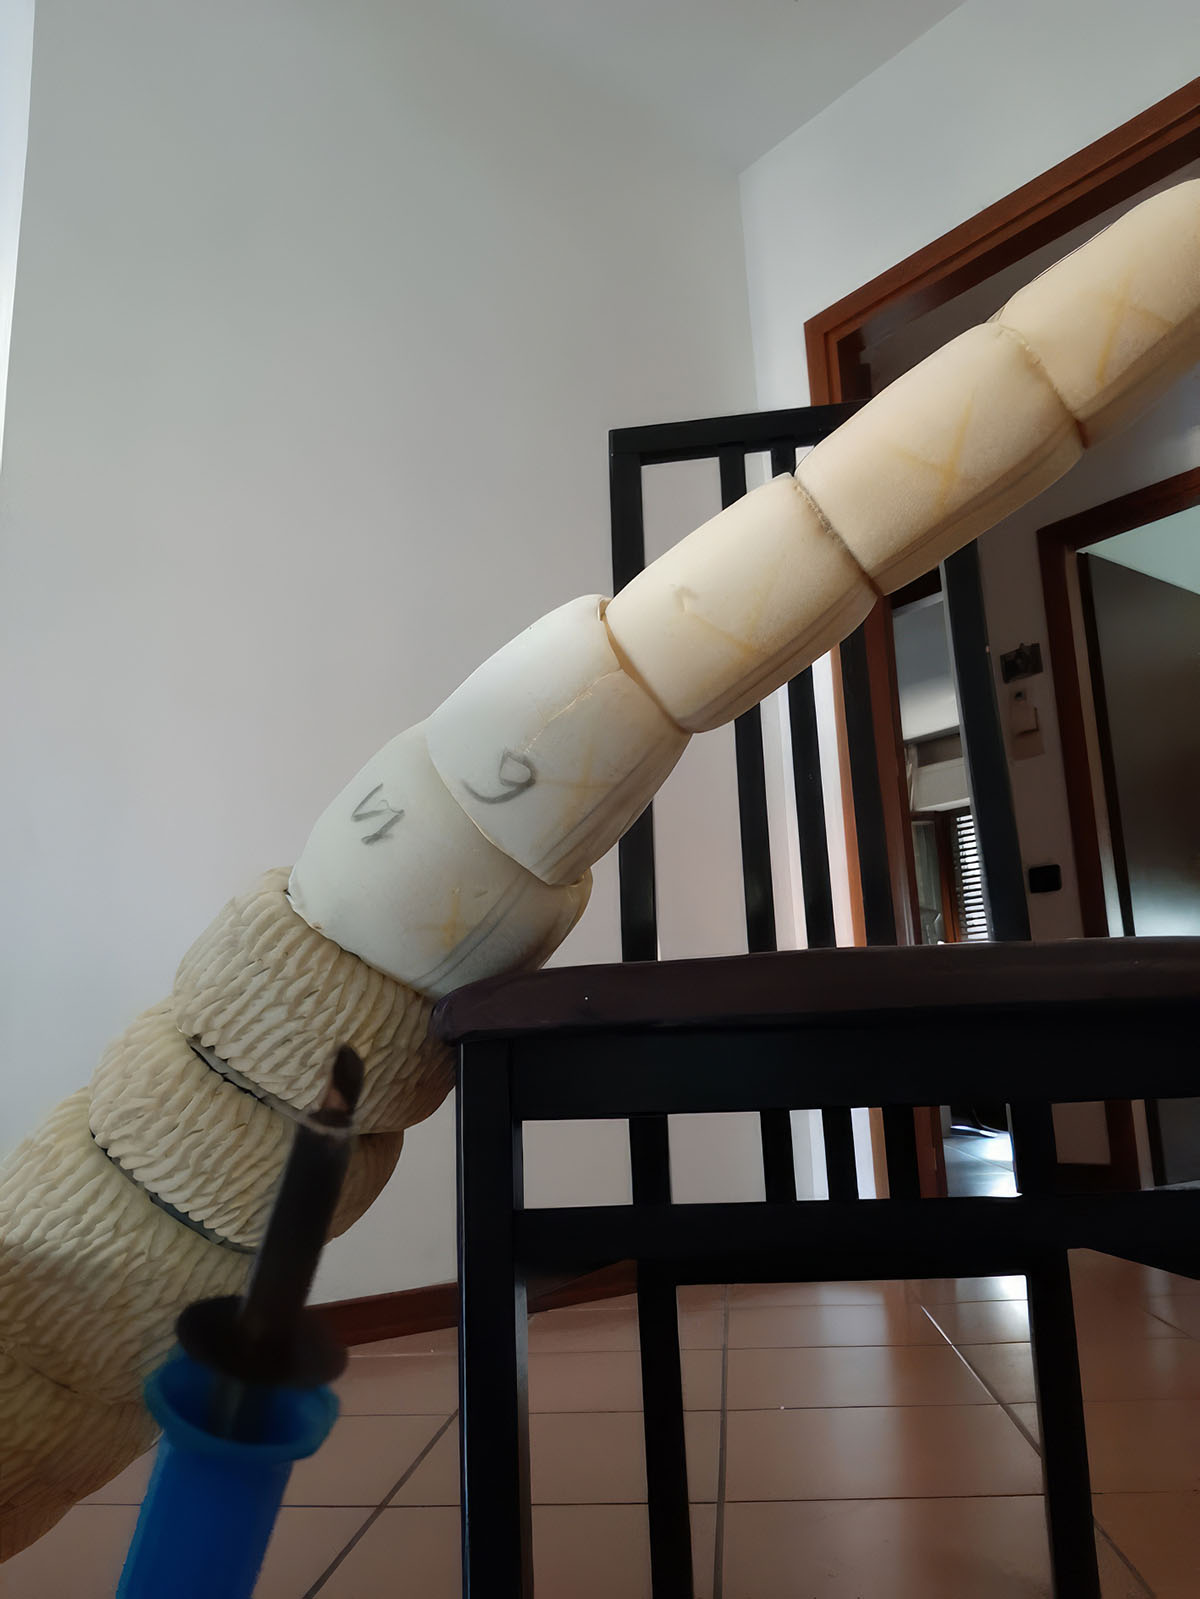
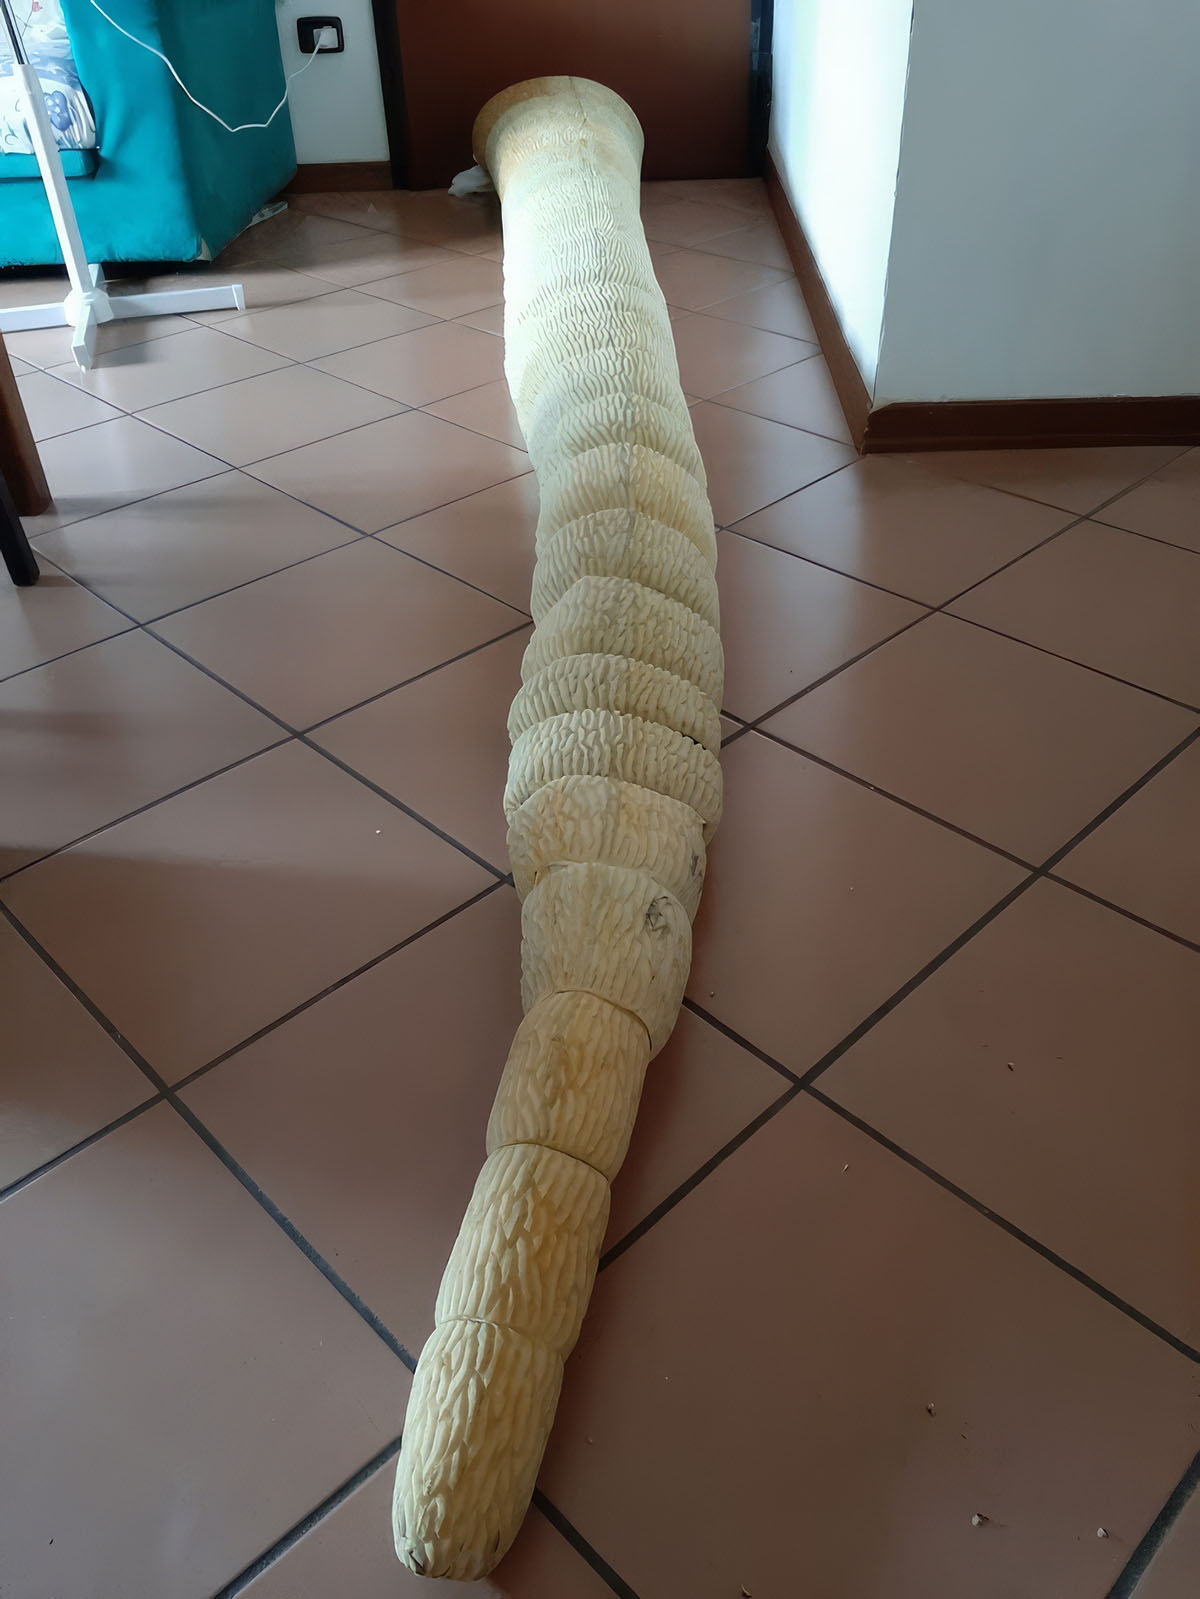
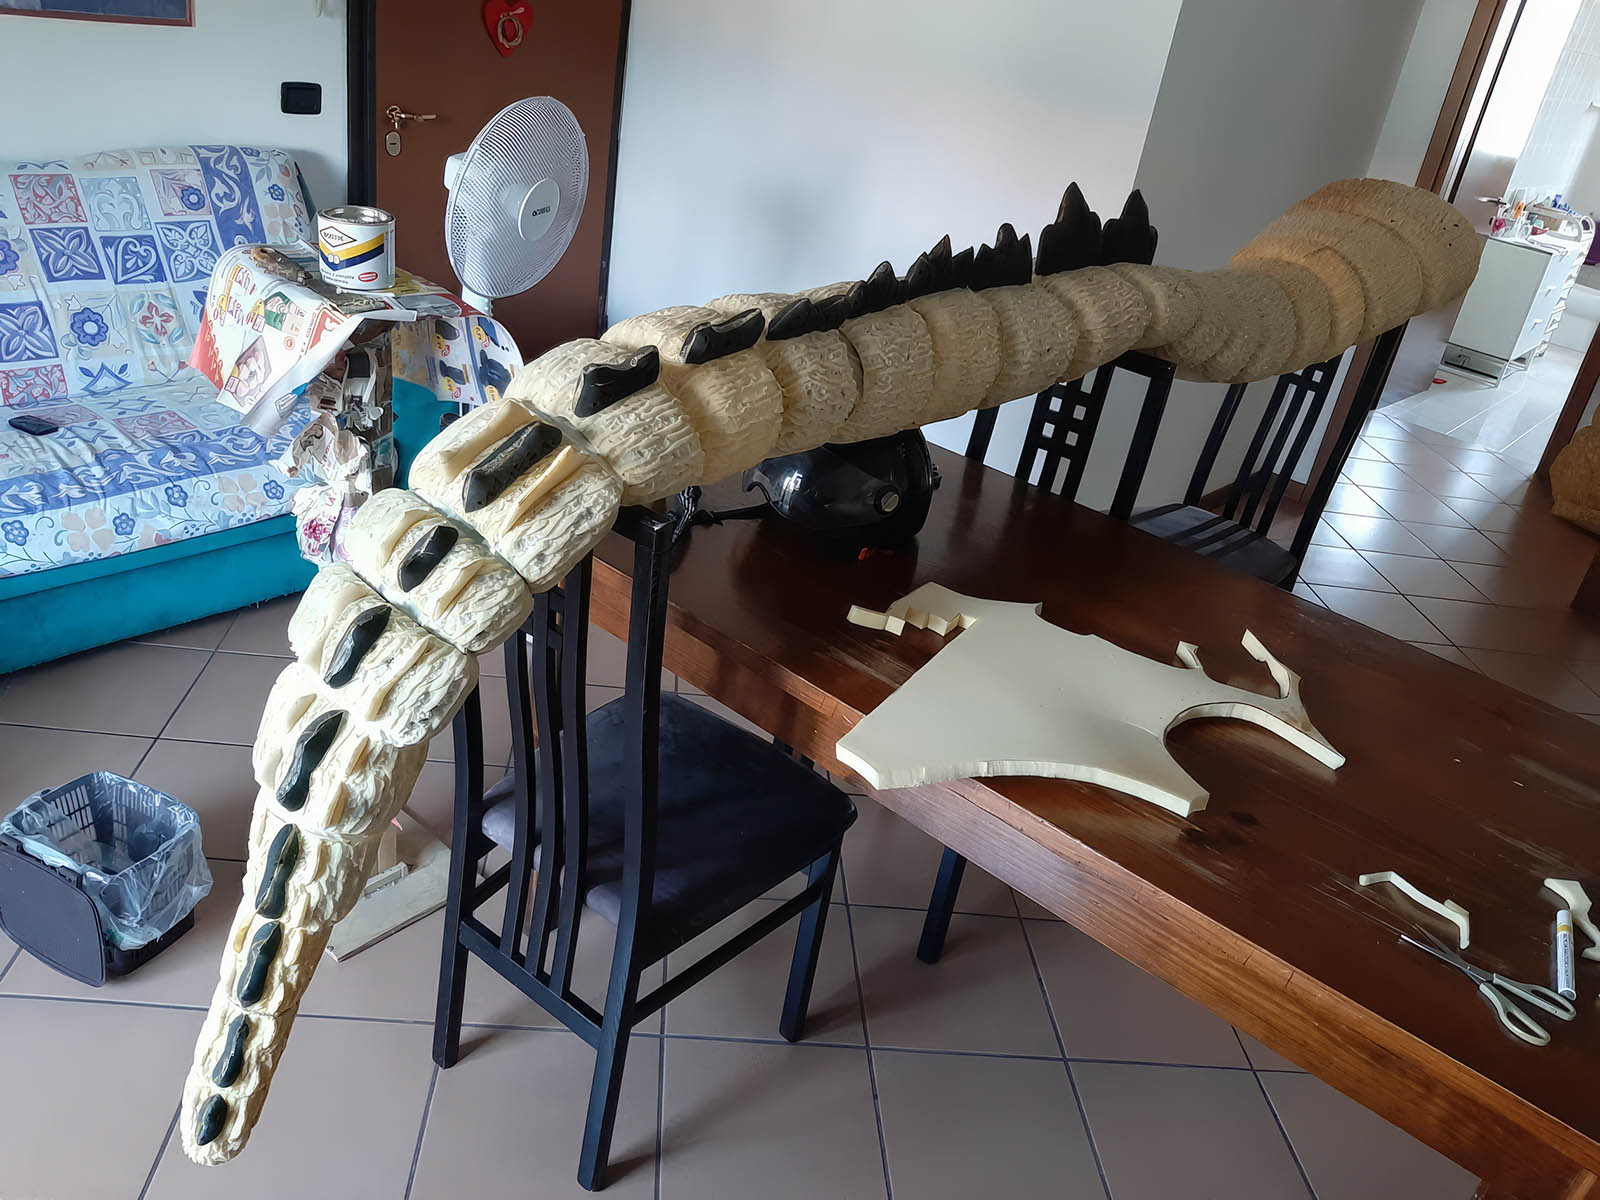
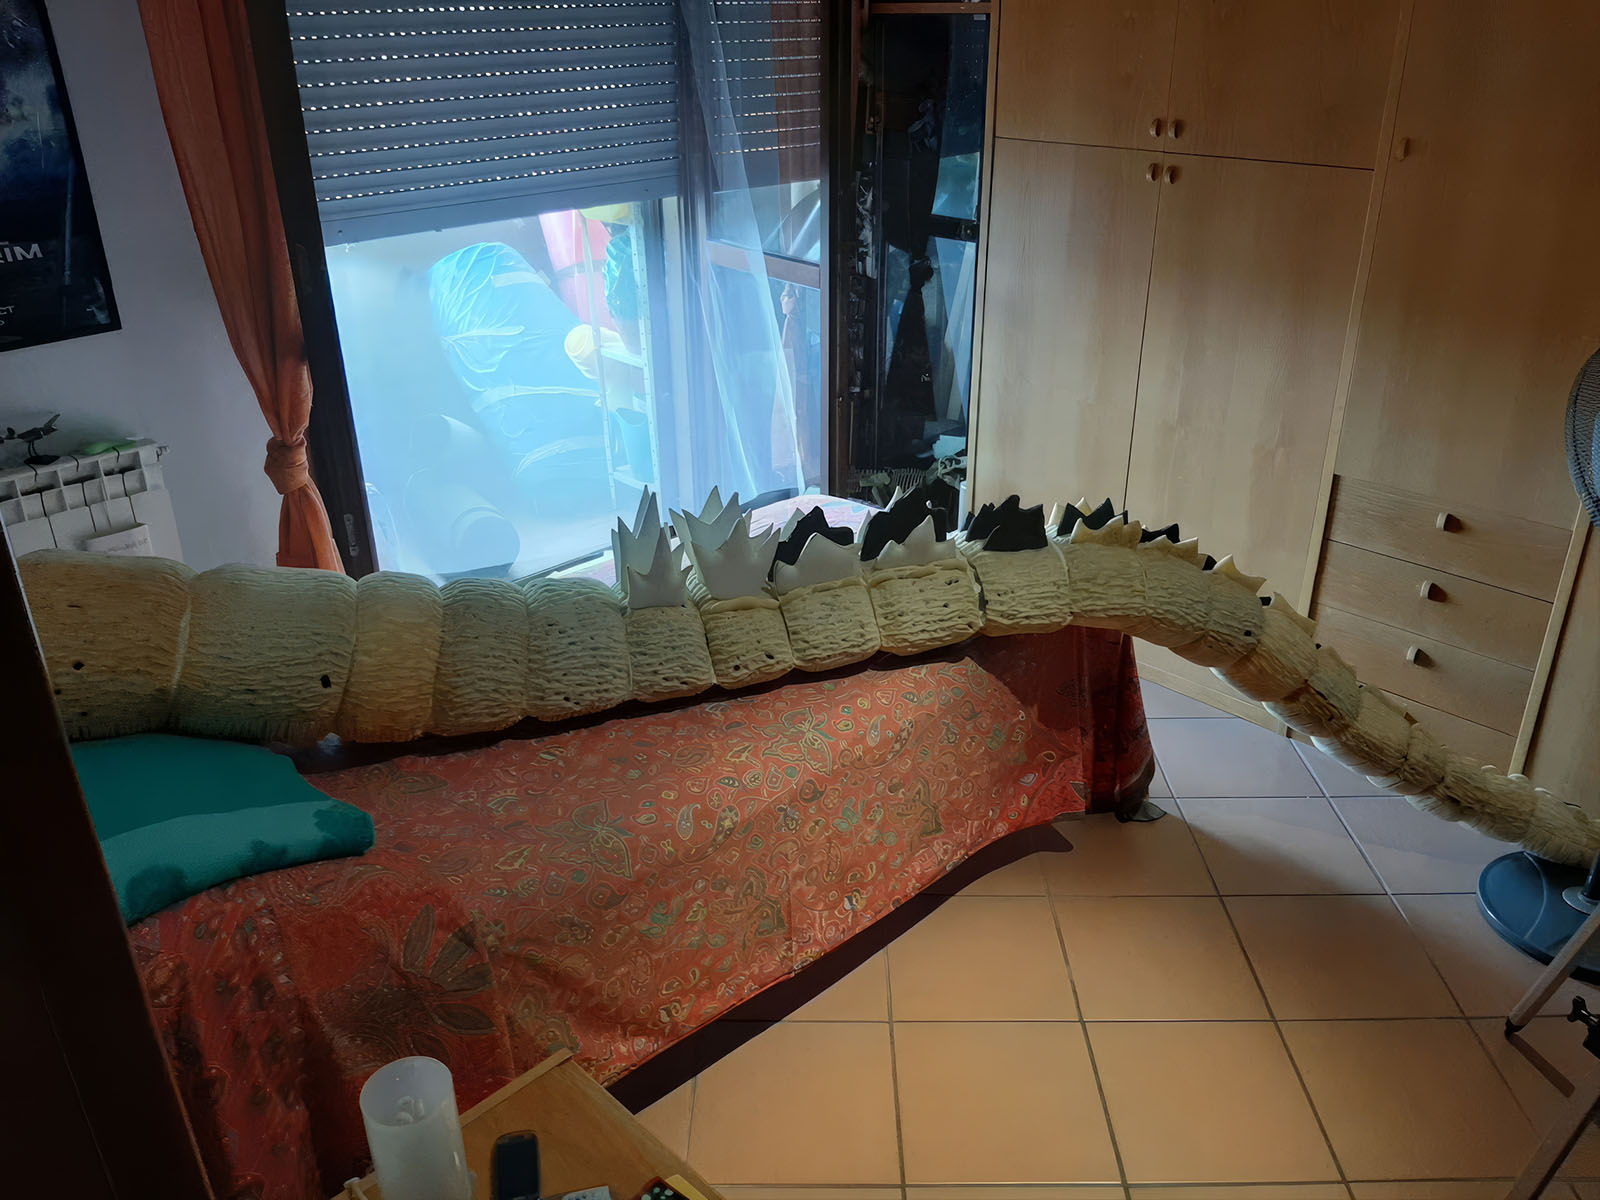
Tail
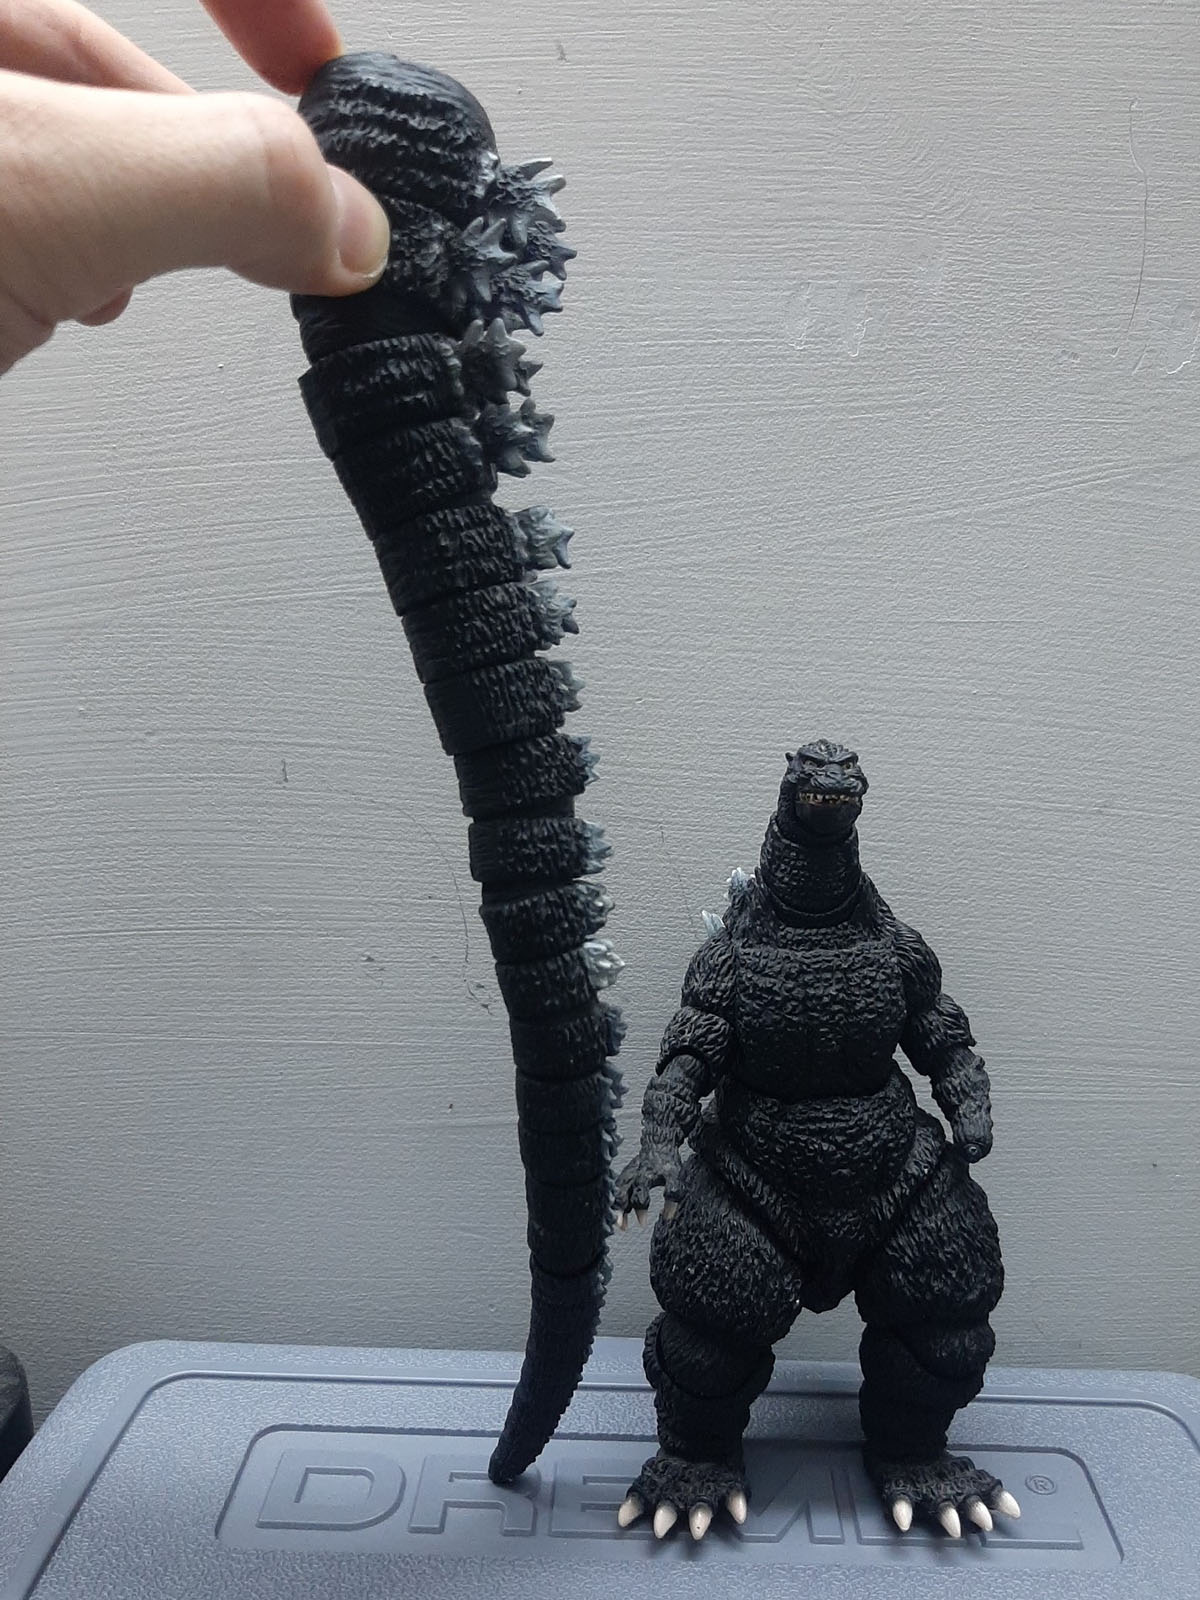
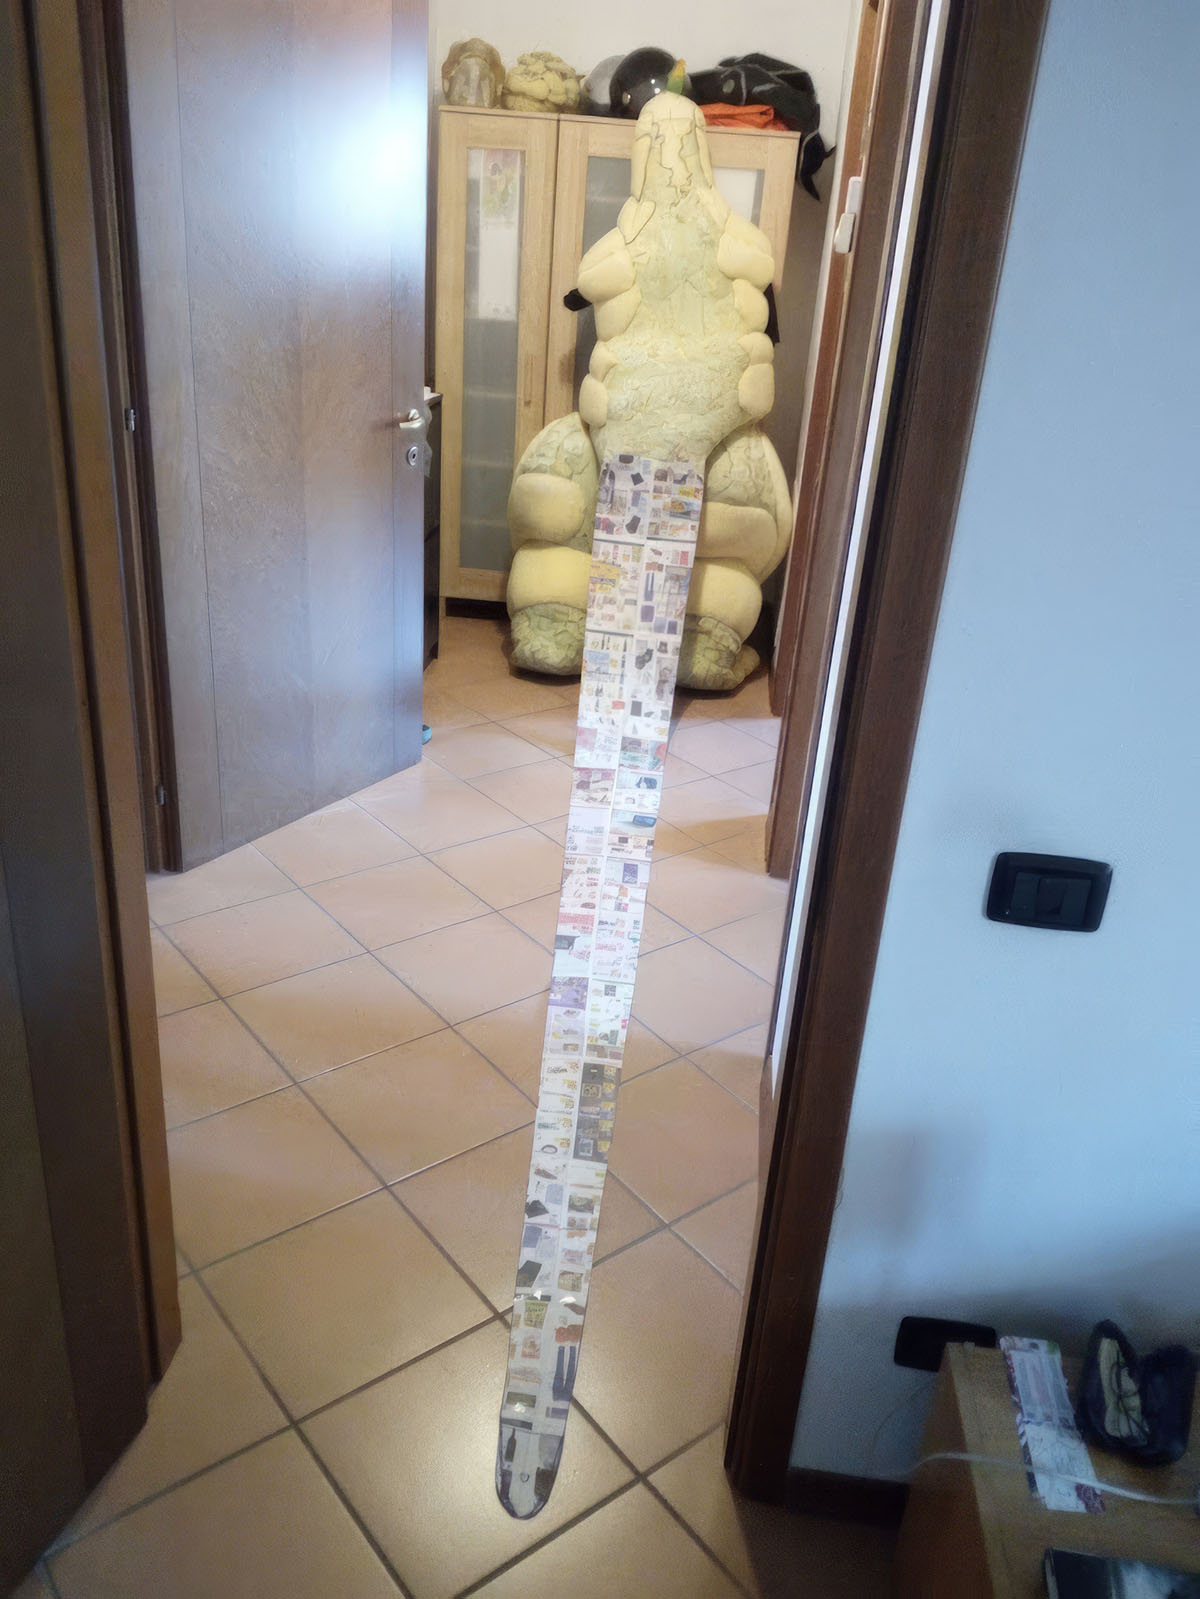
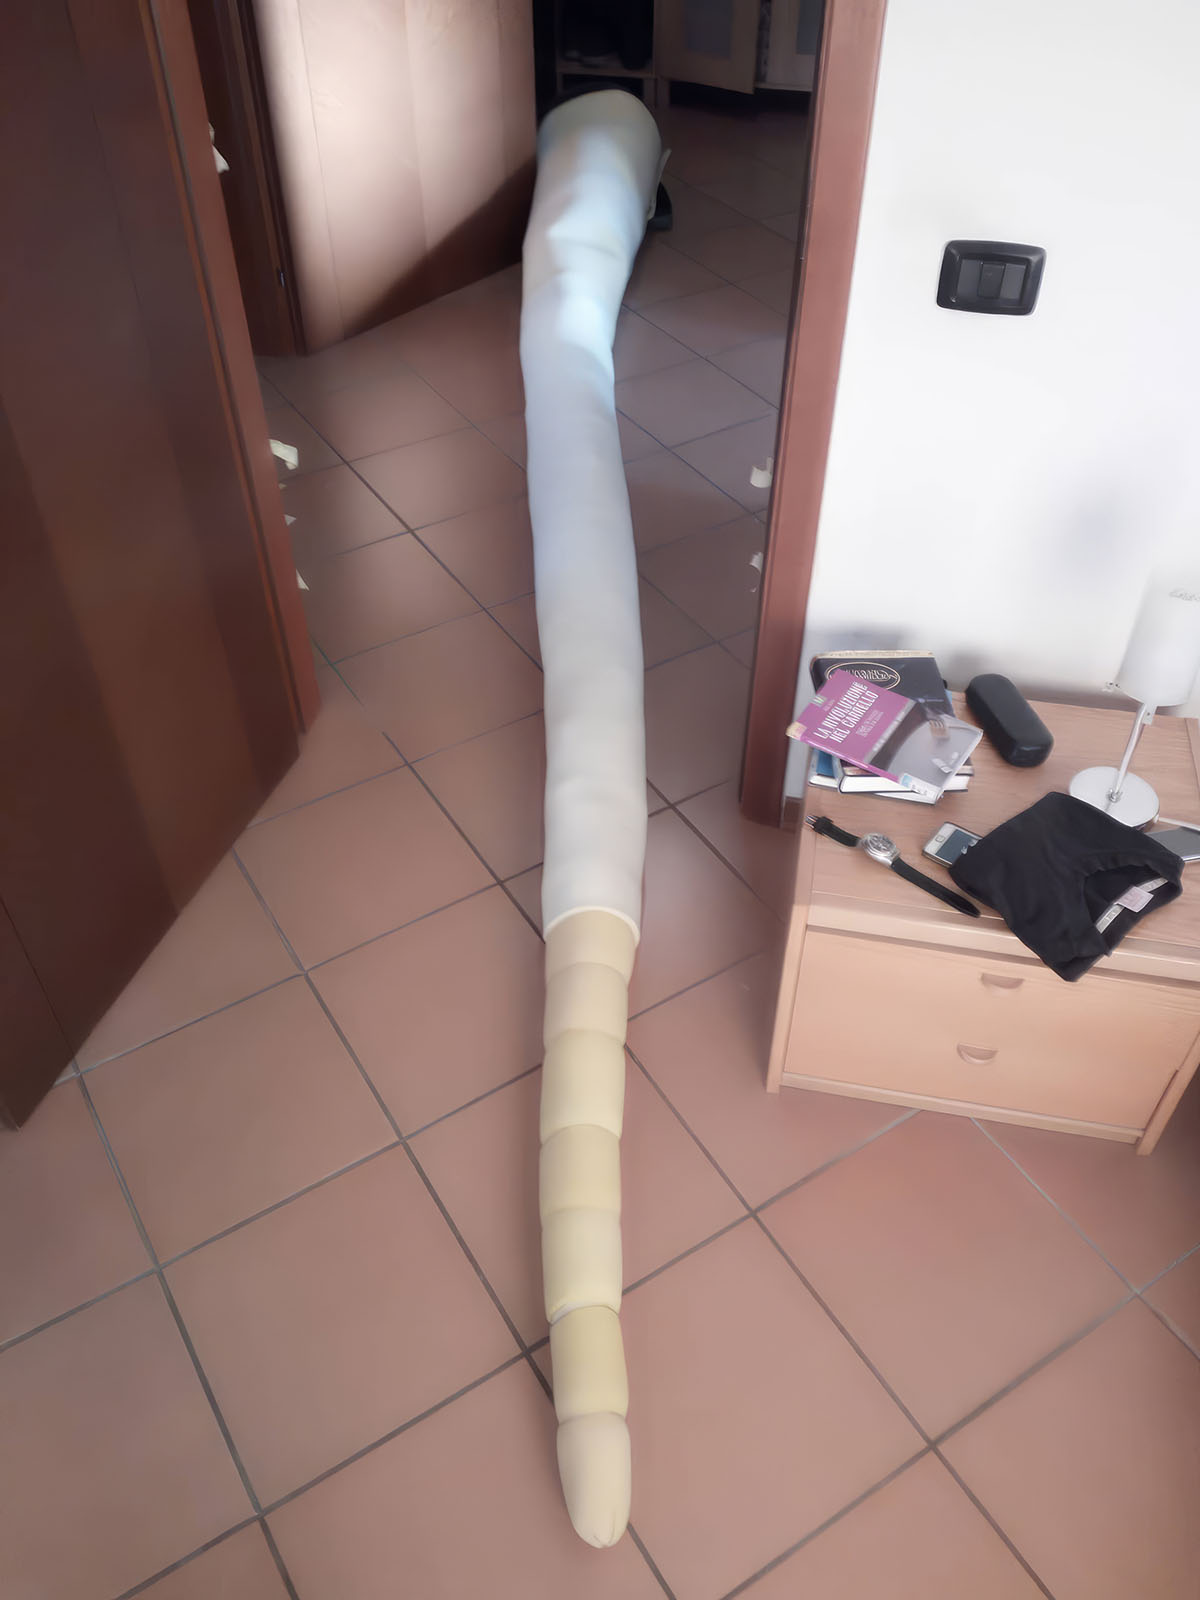
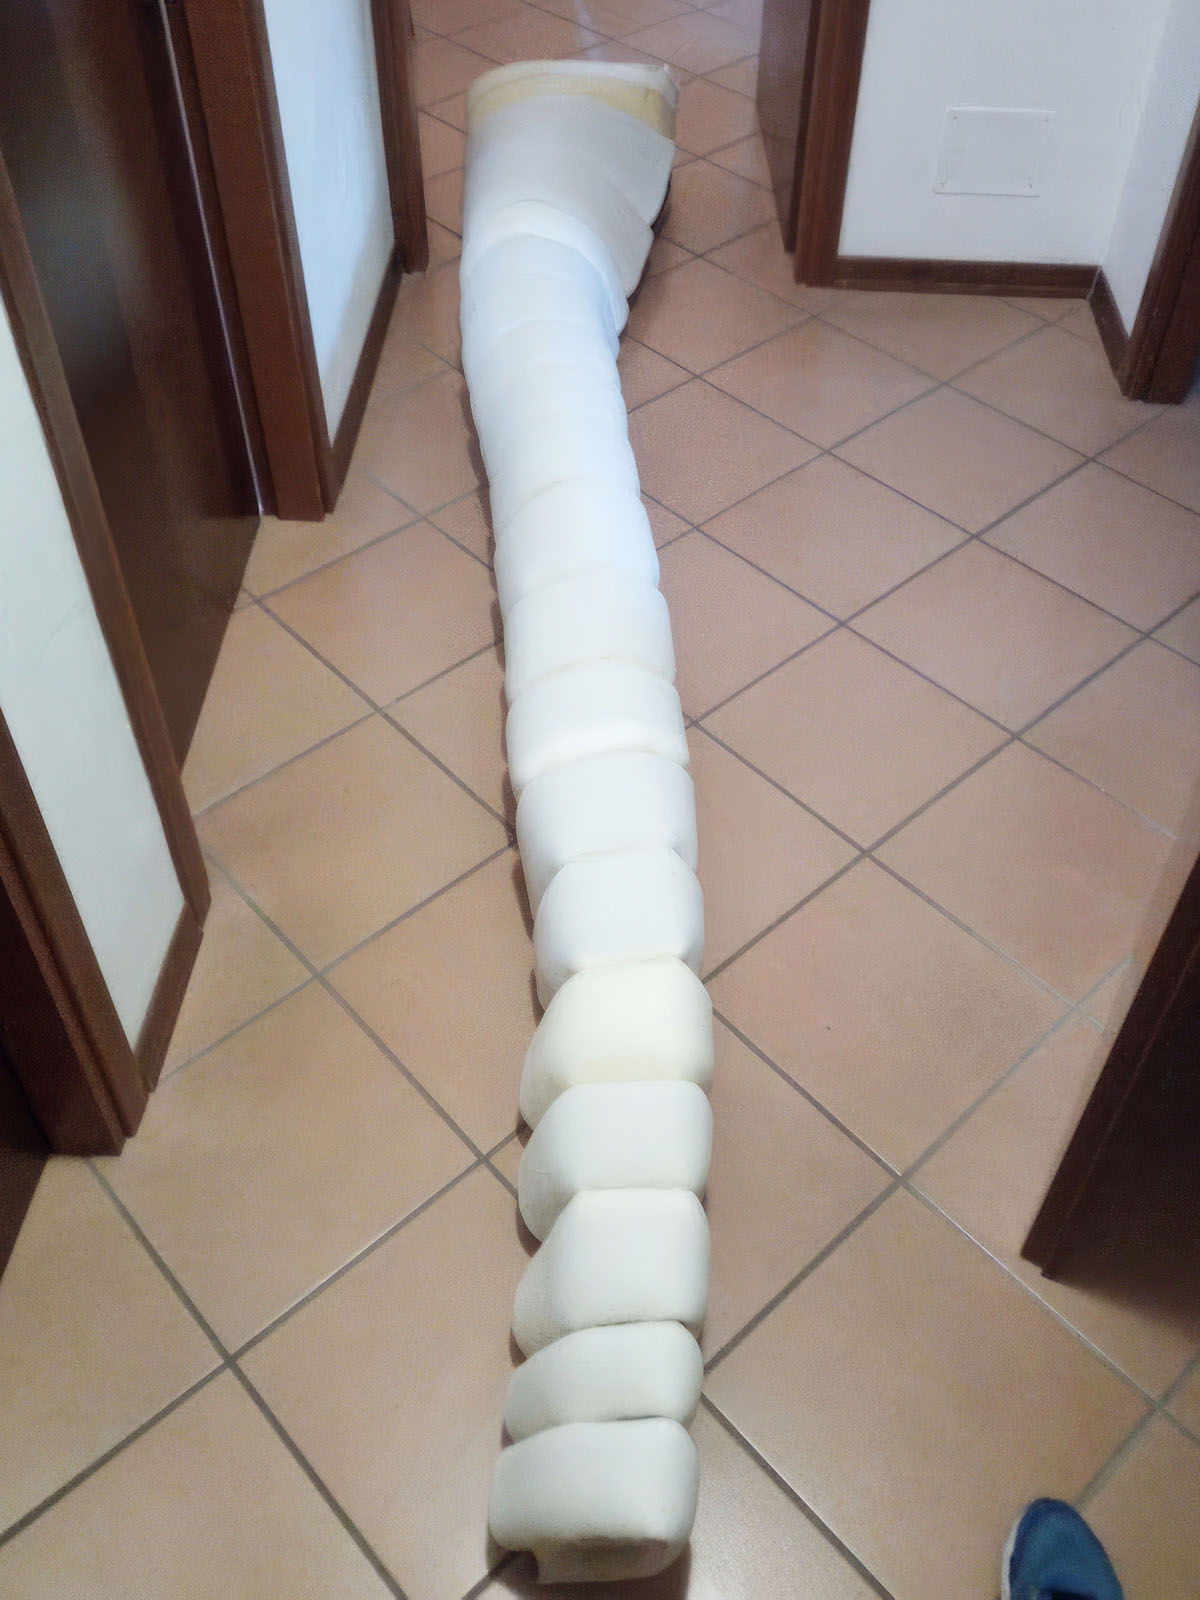
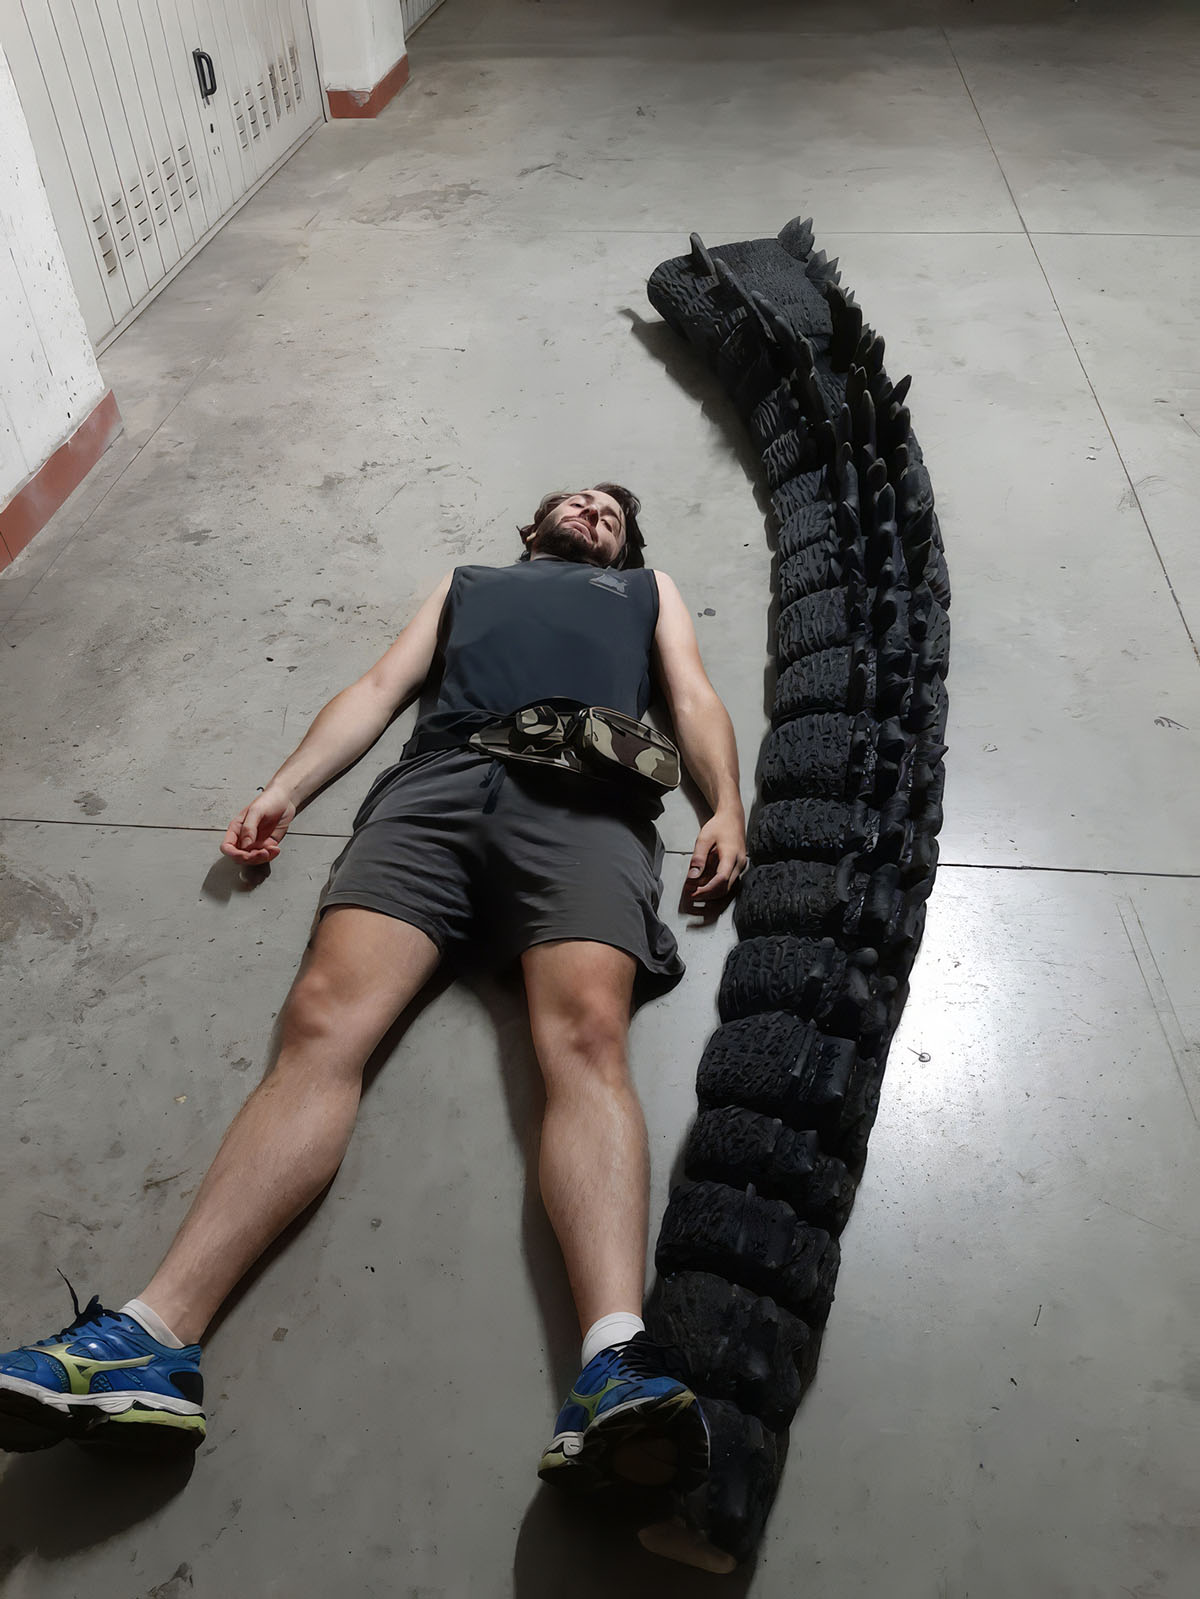
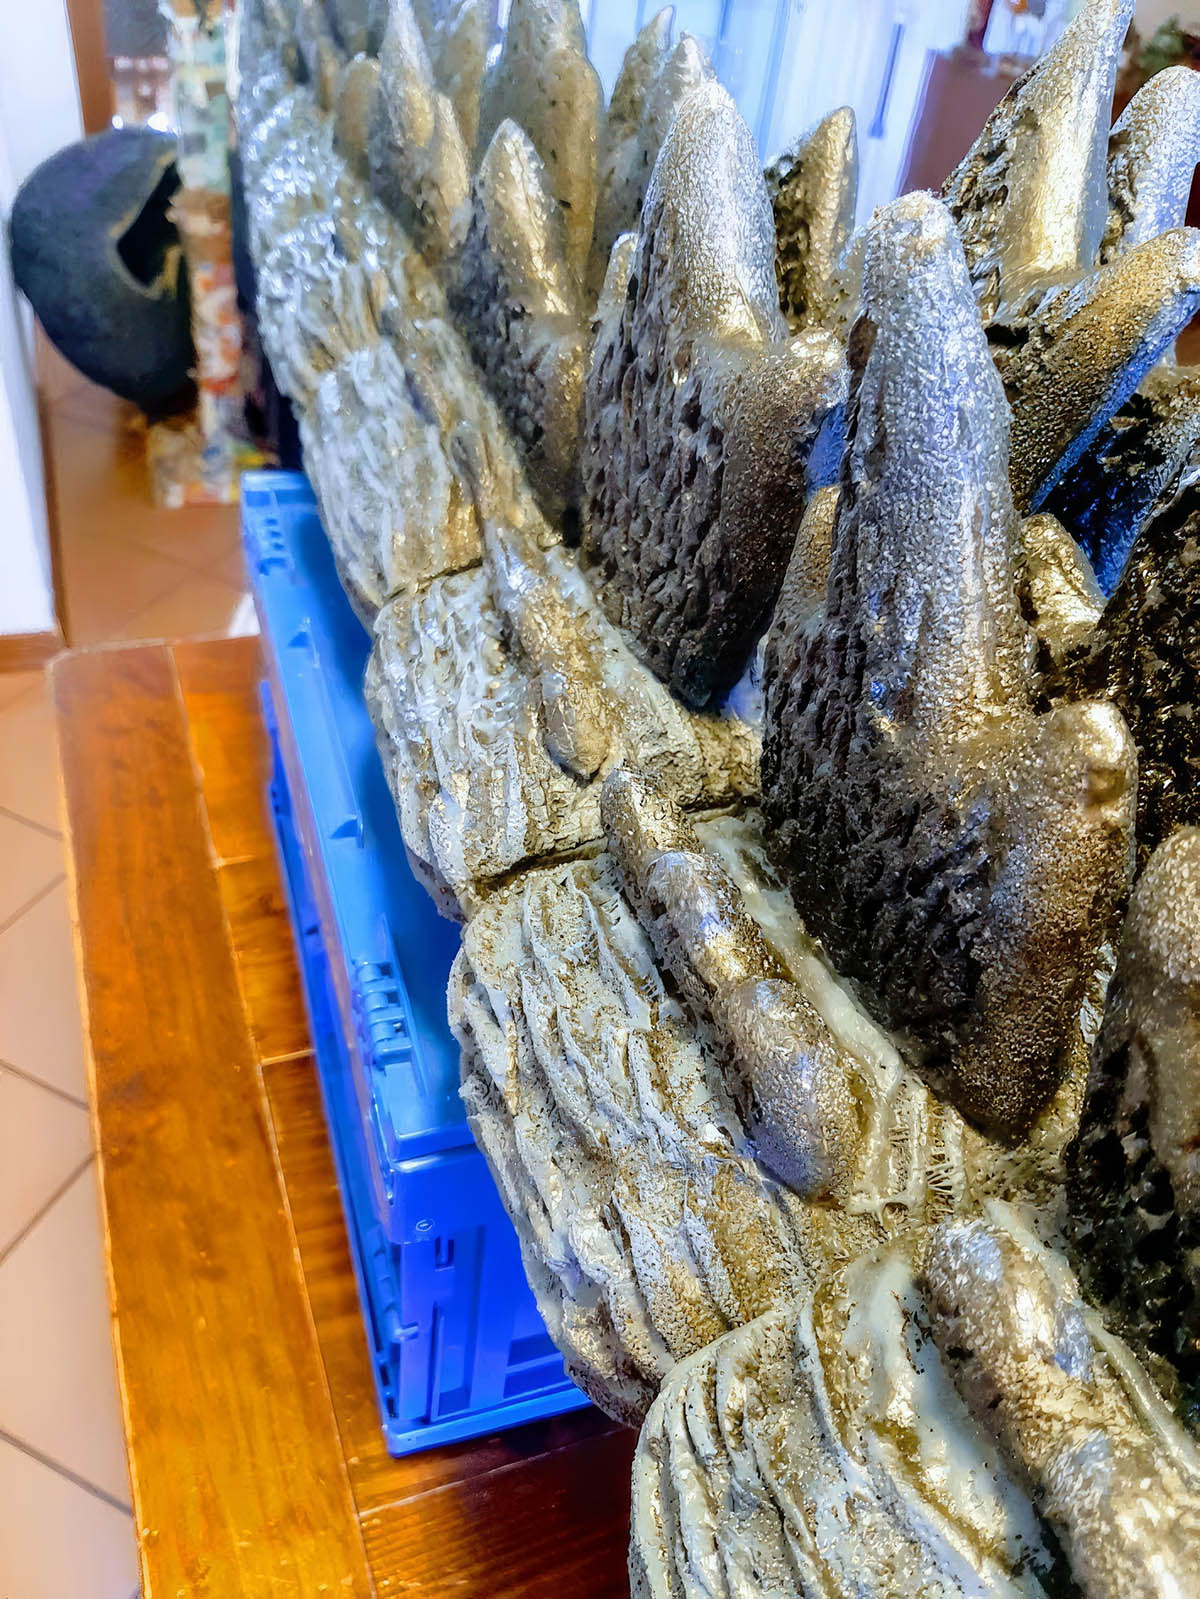
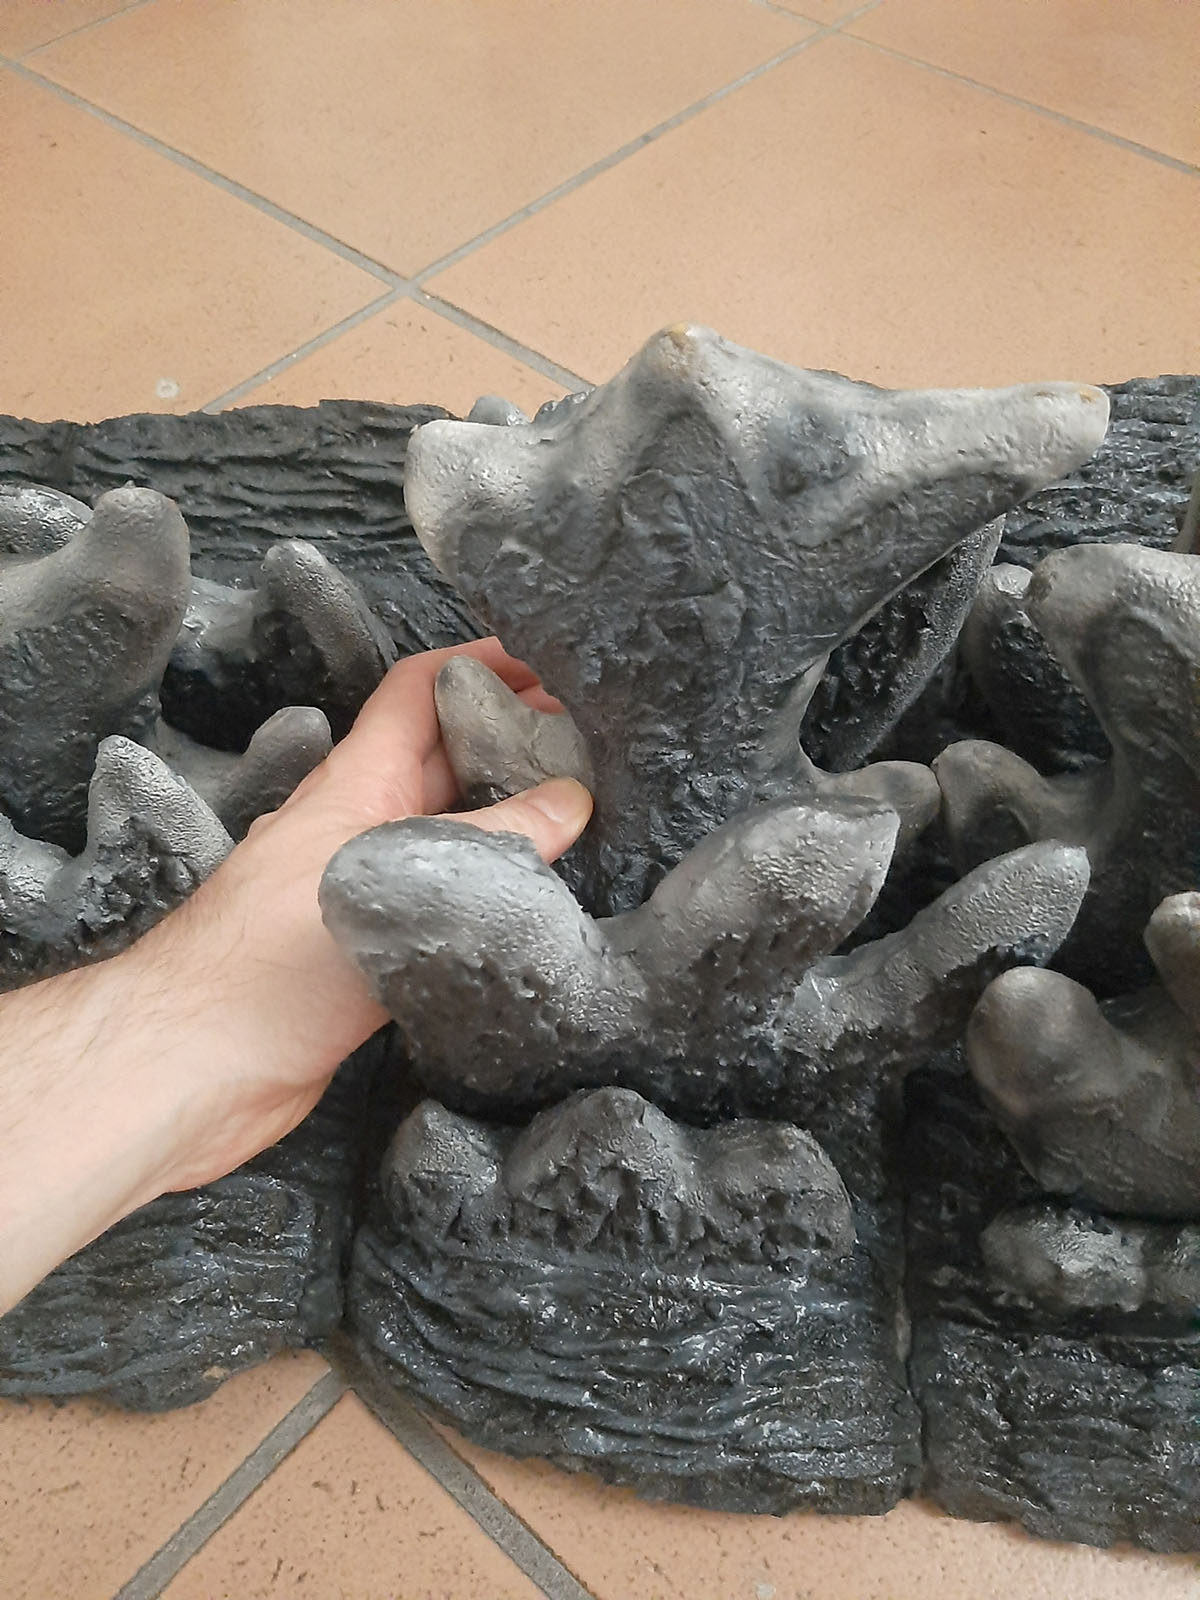
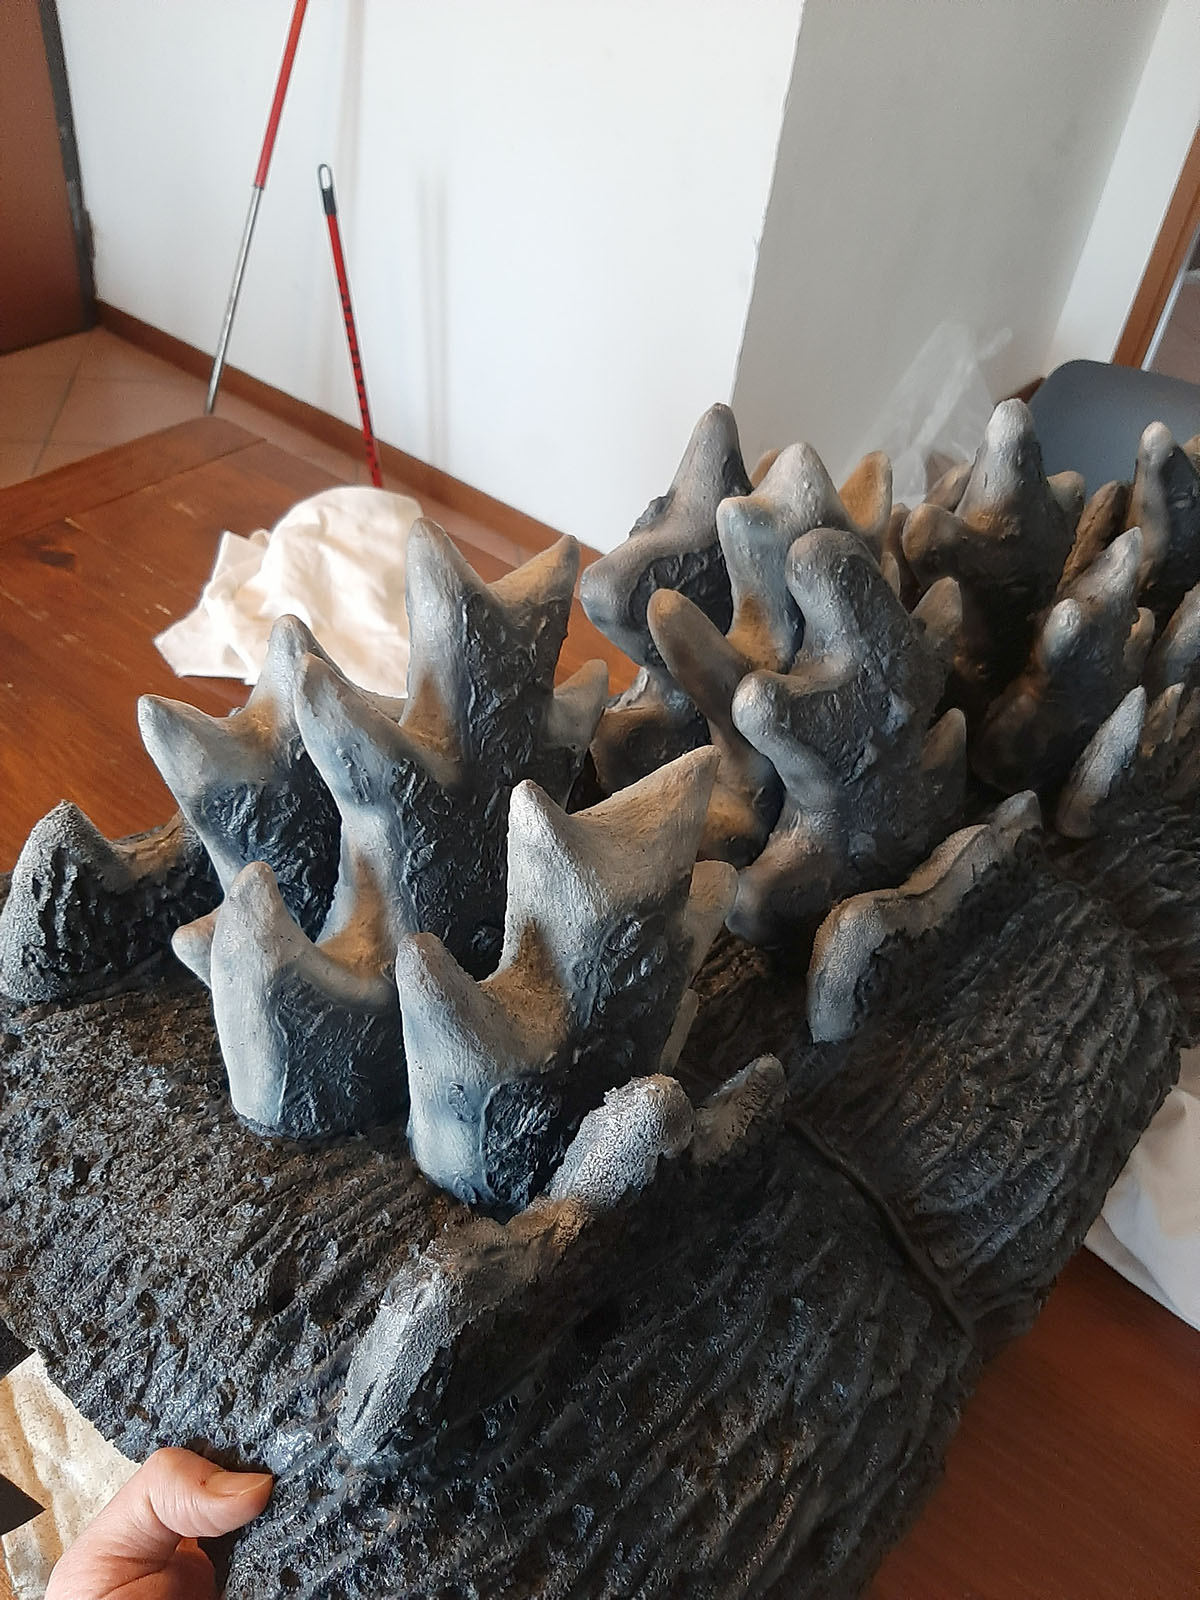
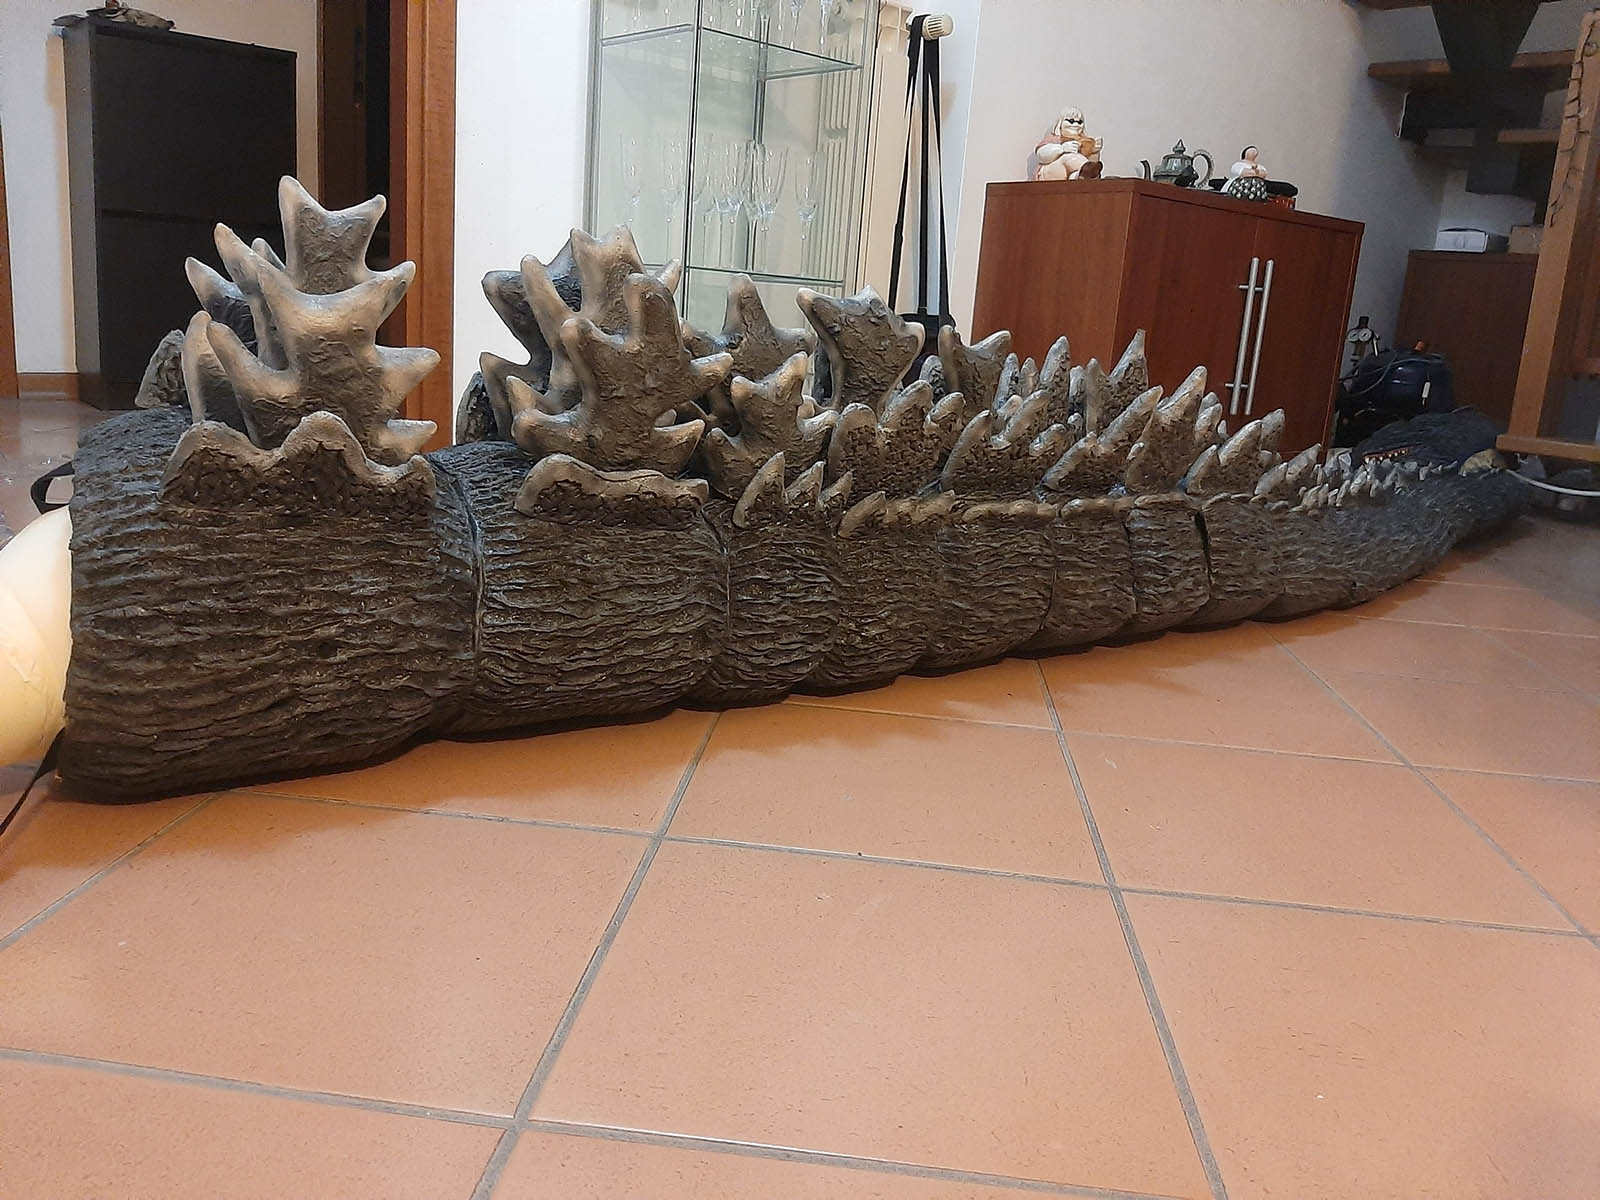
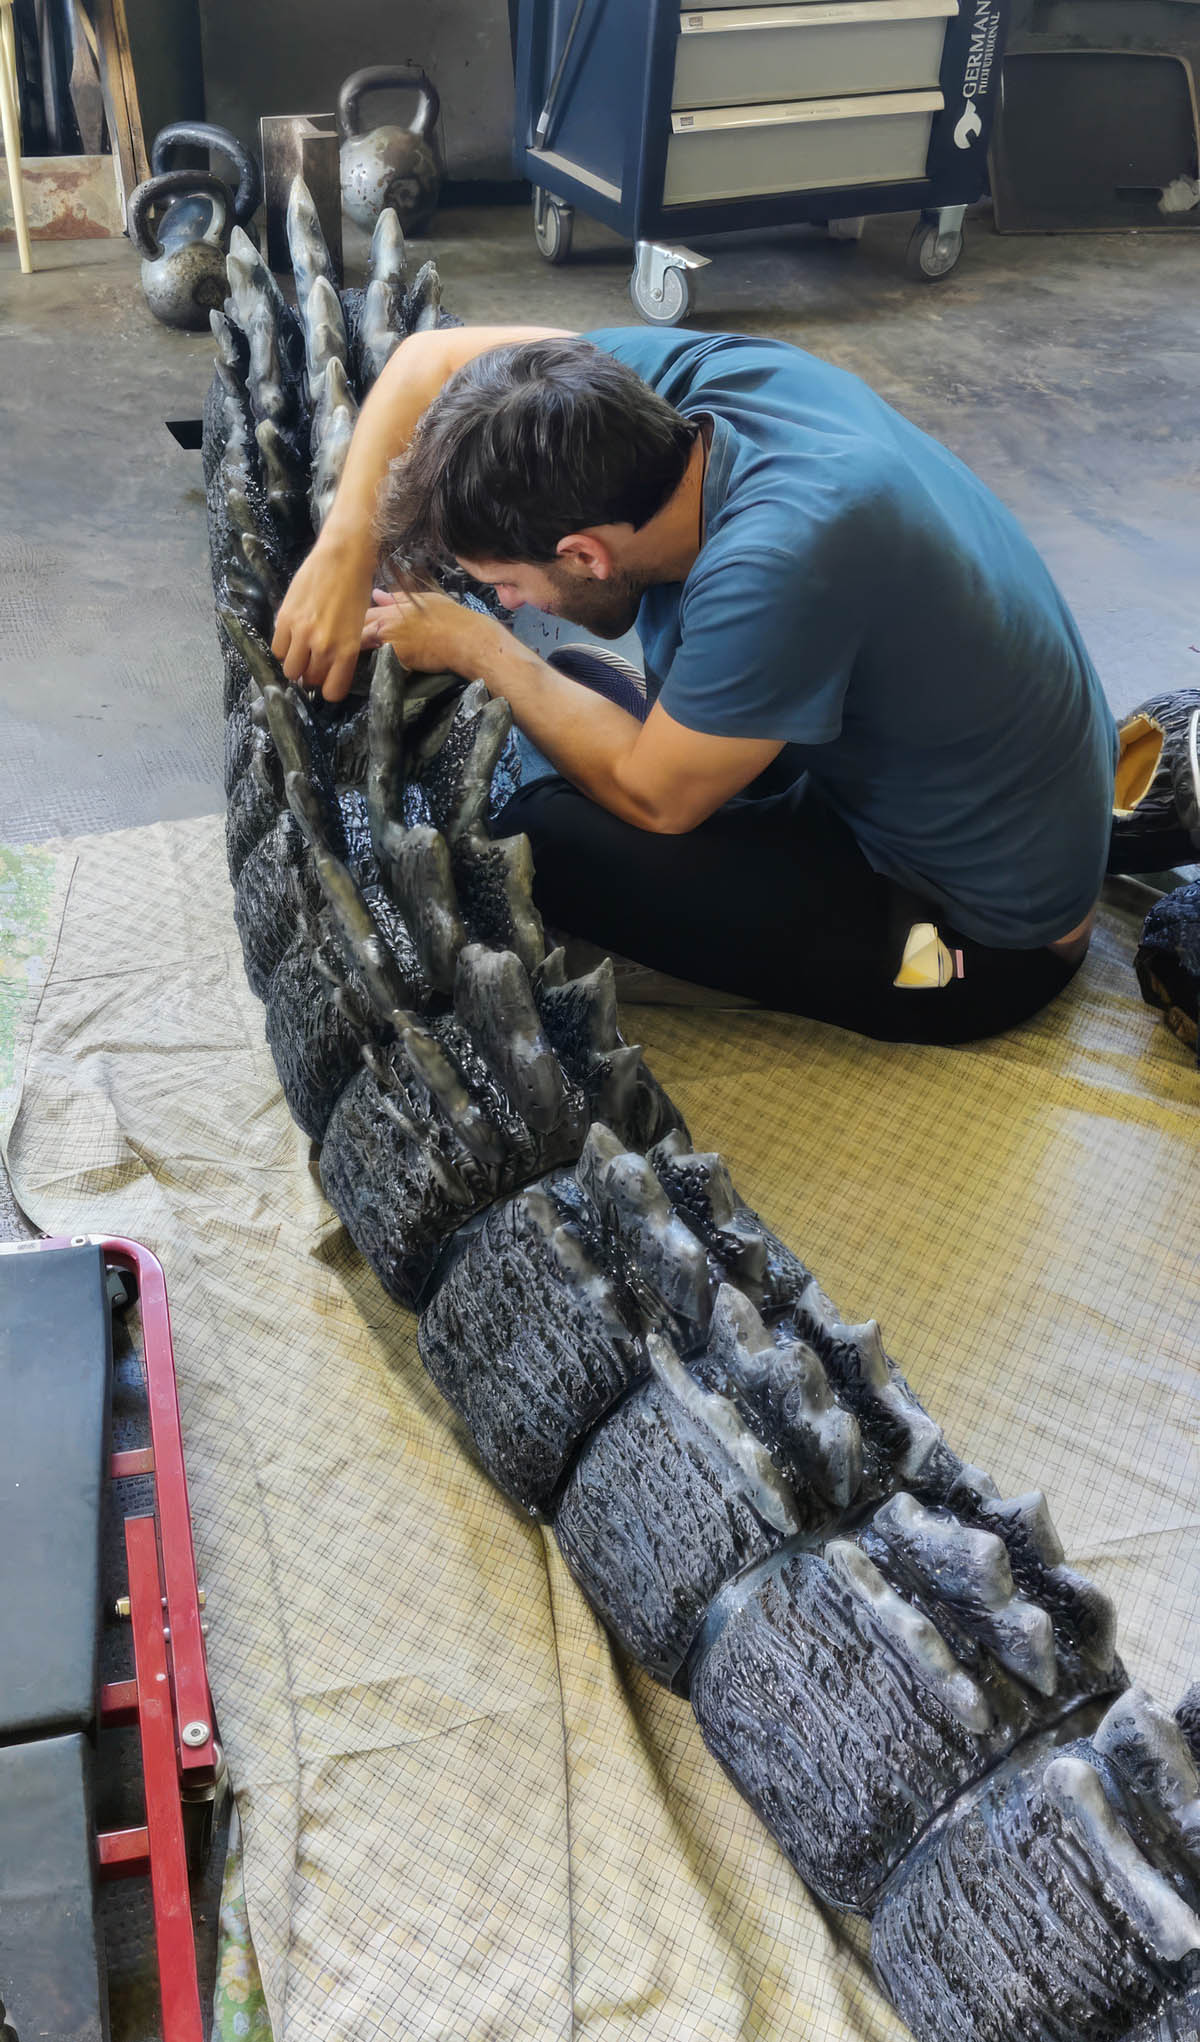
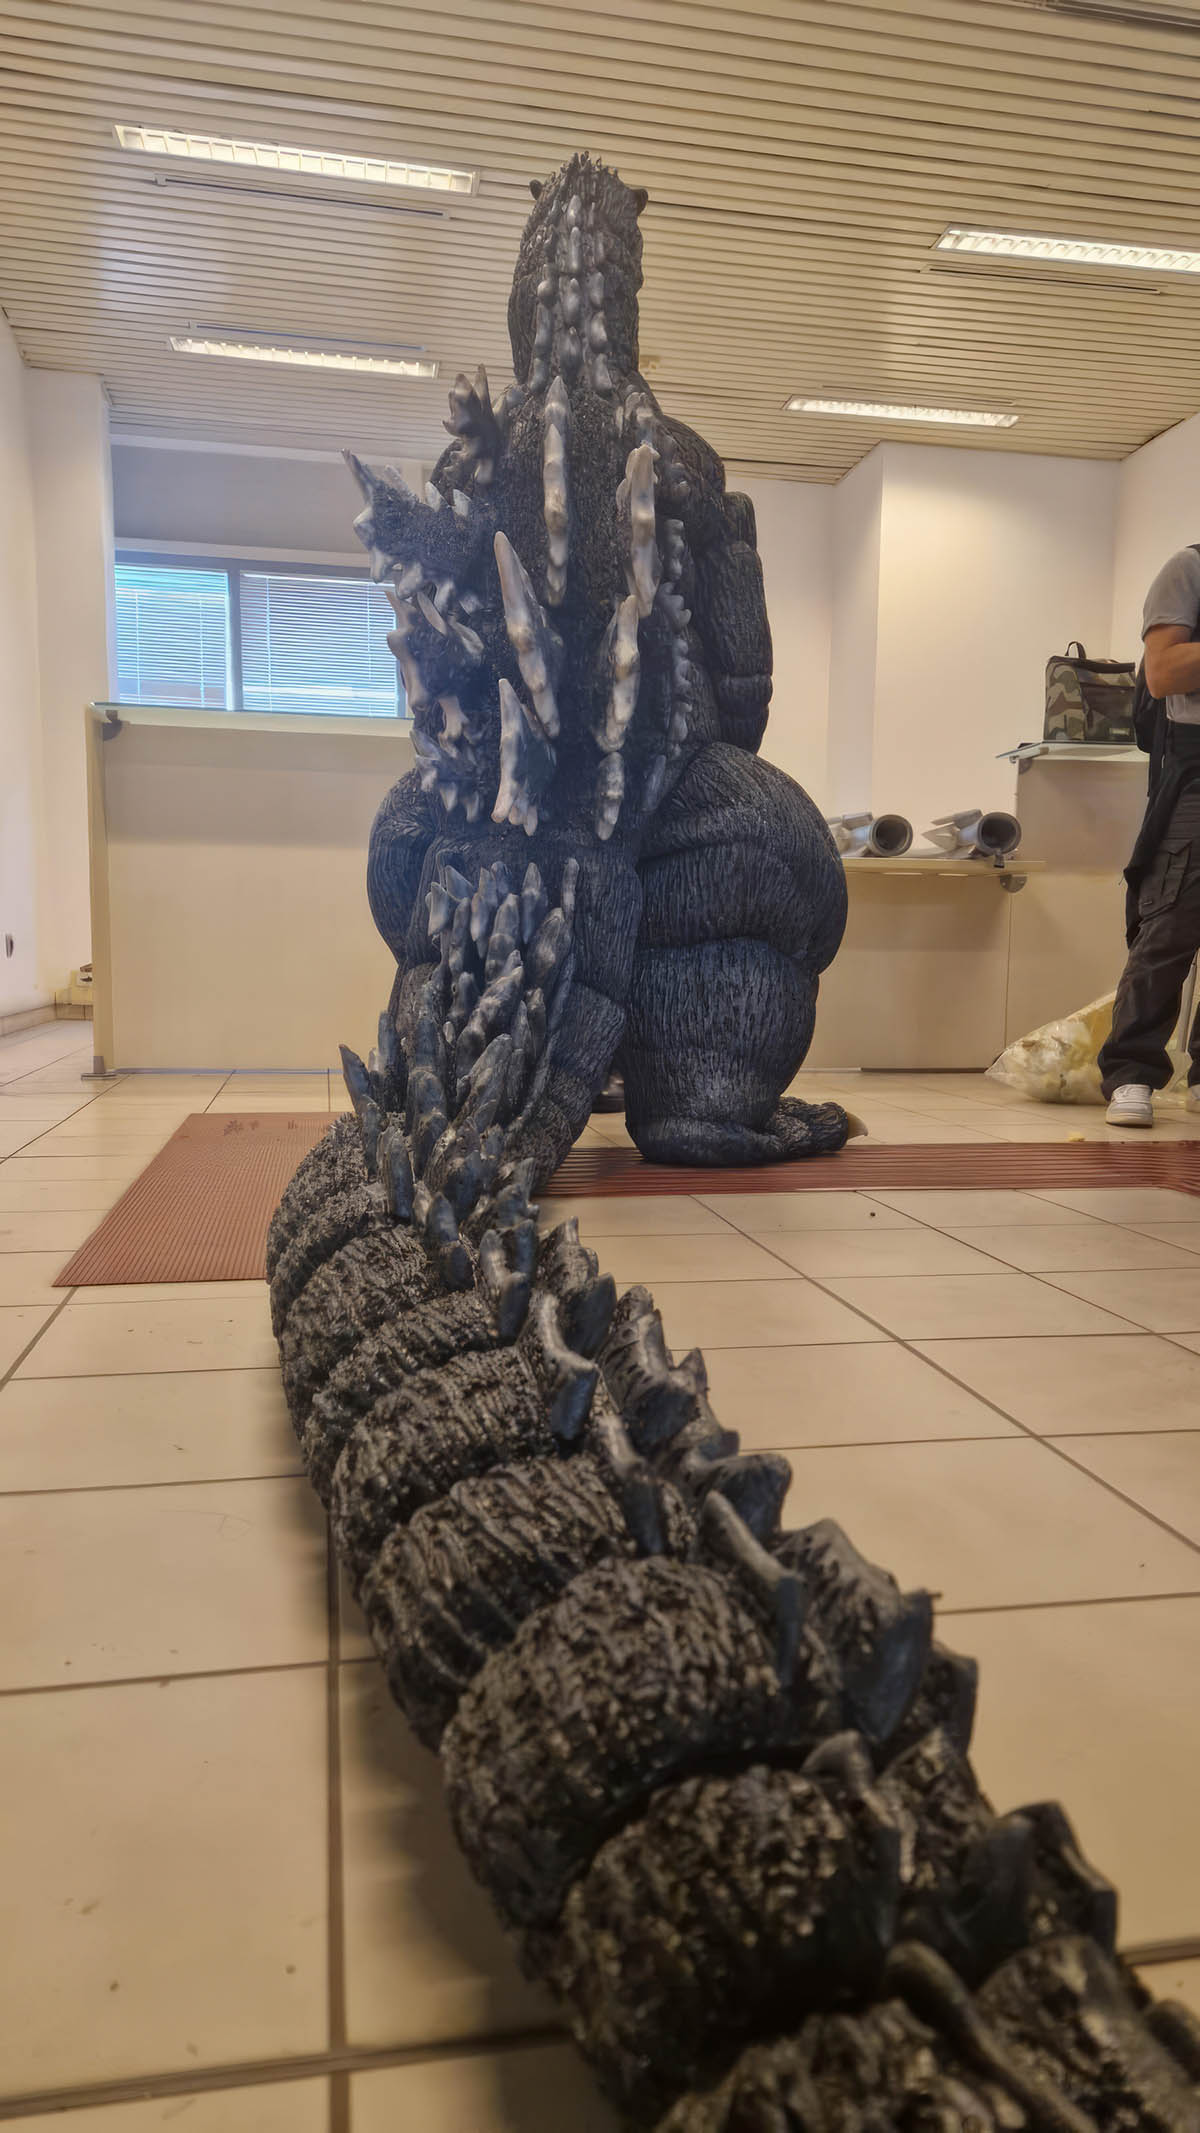
The tail was handcrafted by following the general proportions of the action figure as a reference, rather than using a 3D scan.
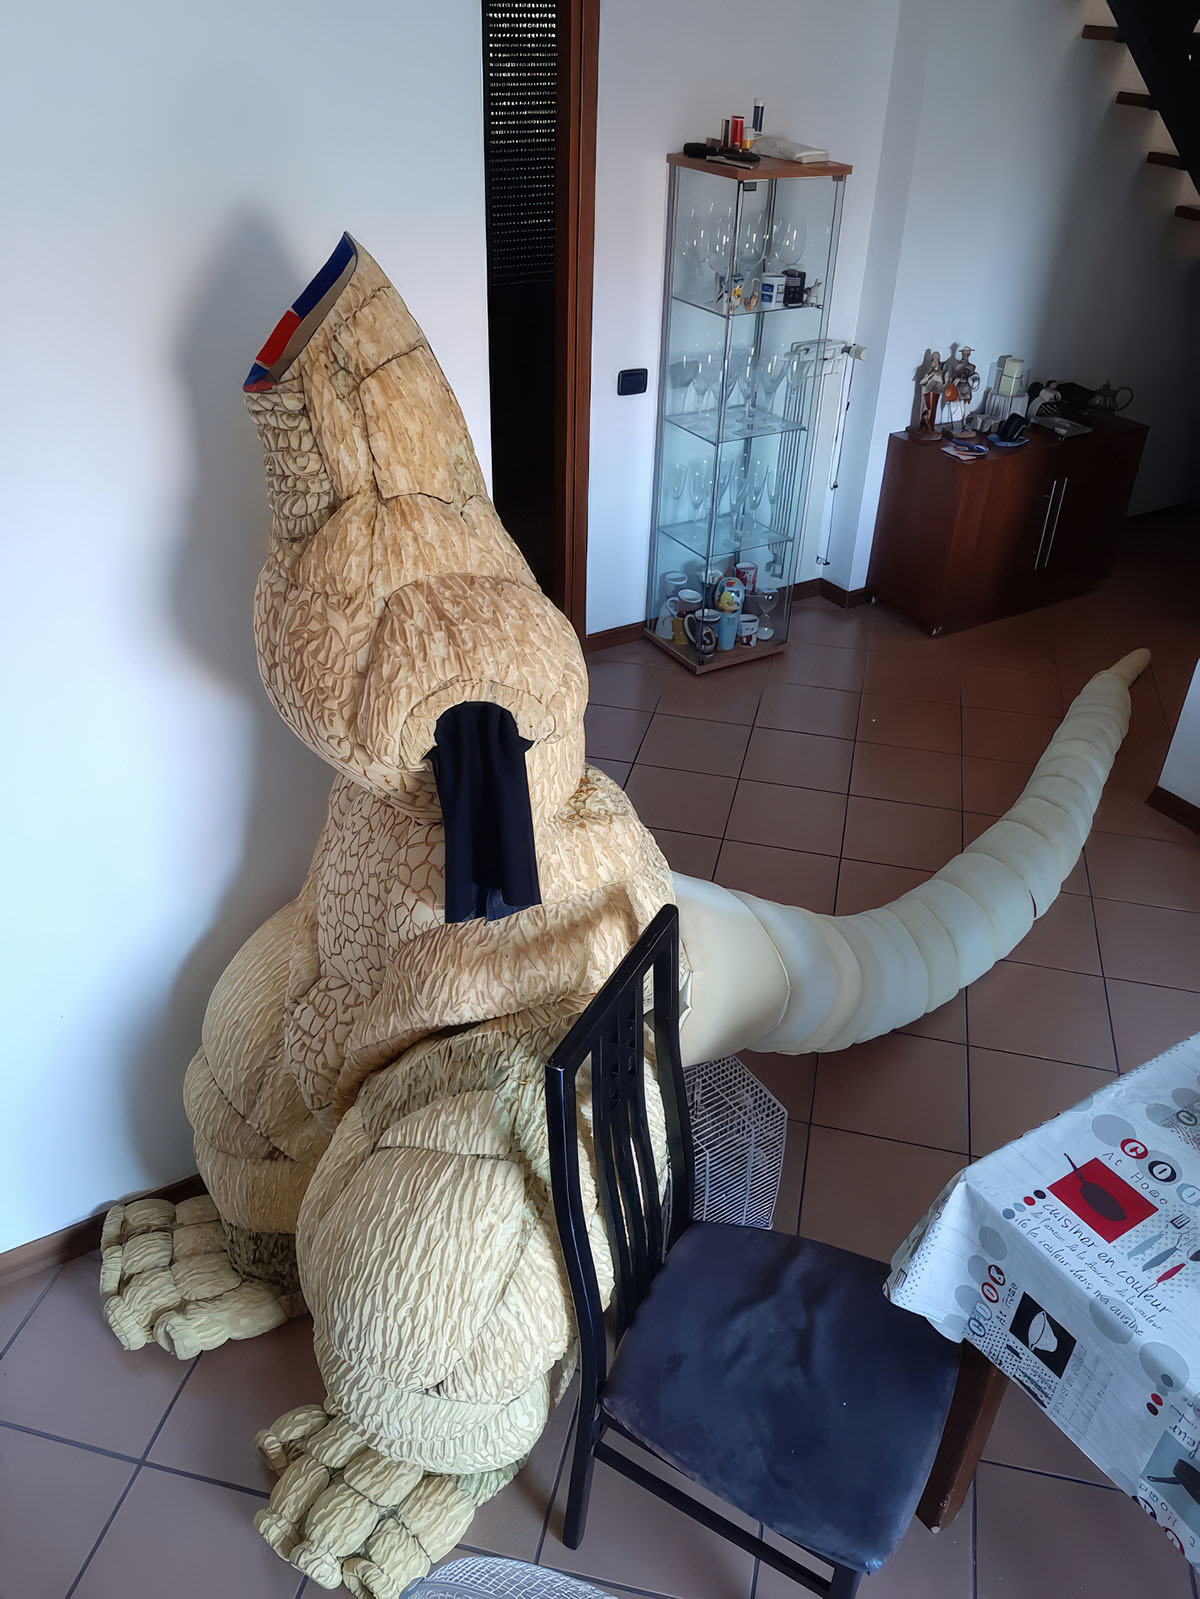
While keeping a close eye on the figure, I created a paper pattern and laid it over the costume. It was essential for the body to stand upright to ensure the proportions and dimensions were correct relative to the tail’s pattern.
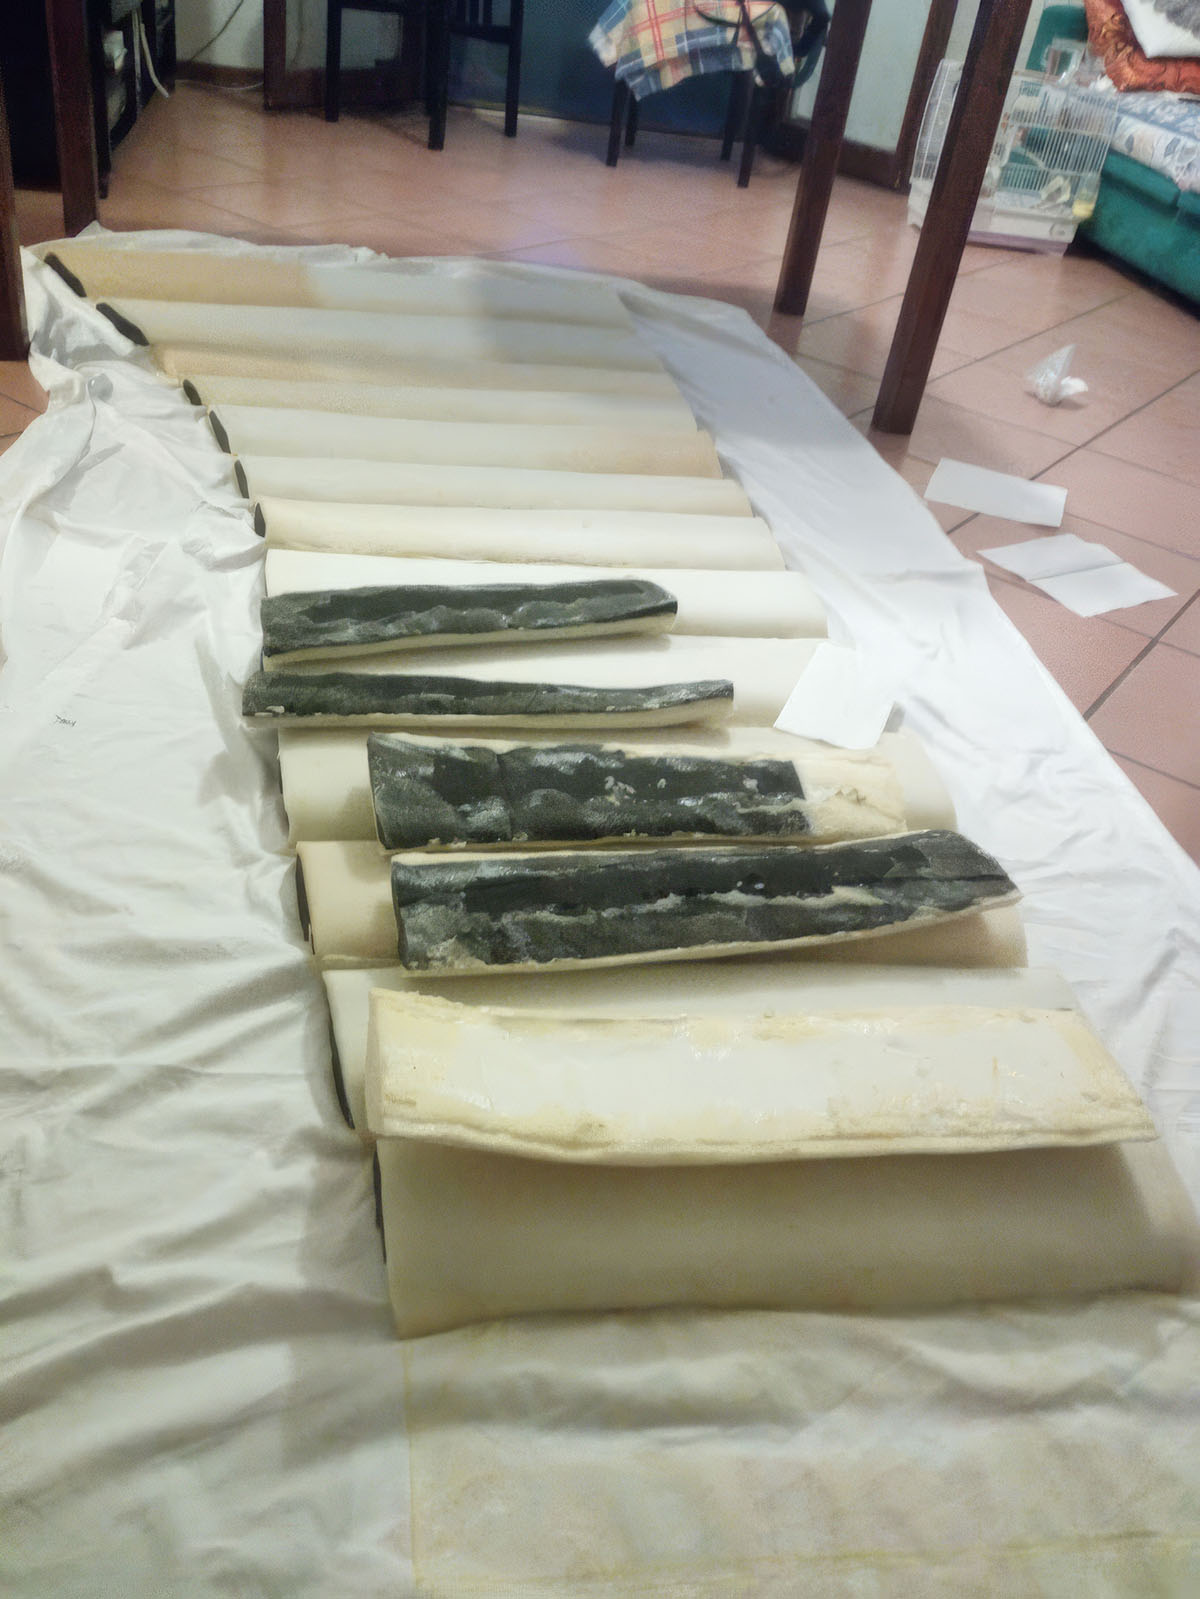
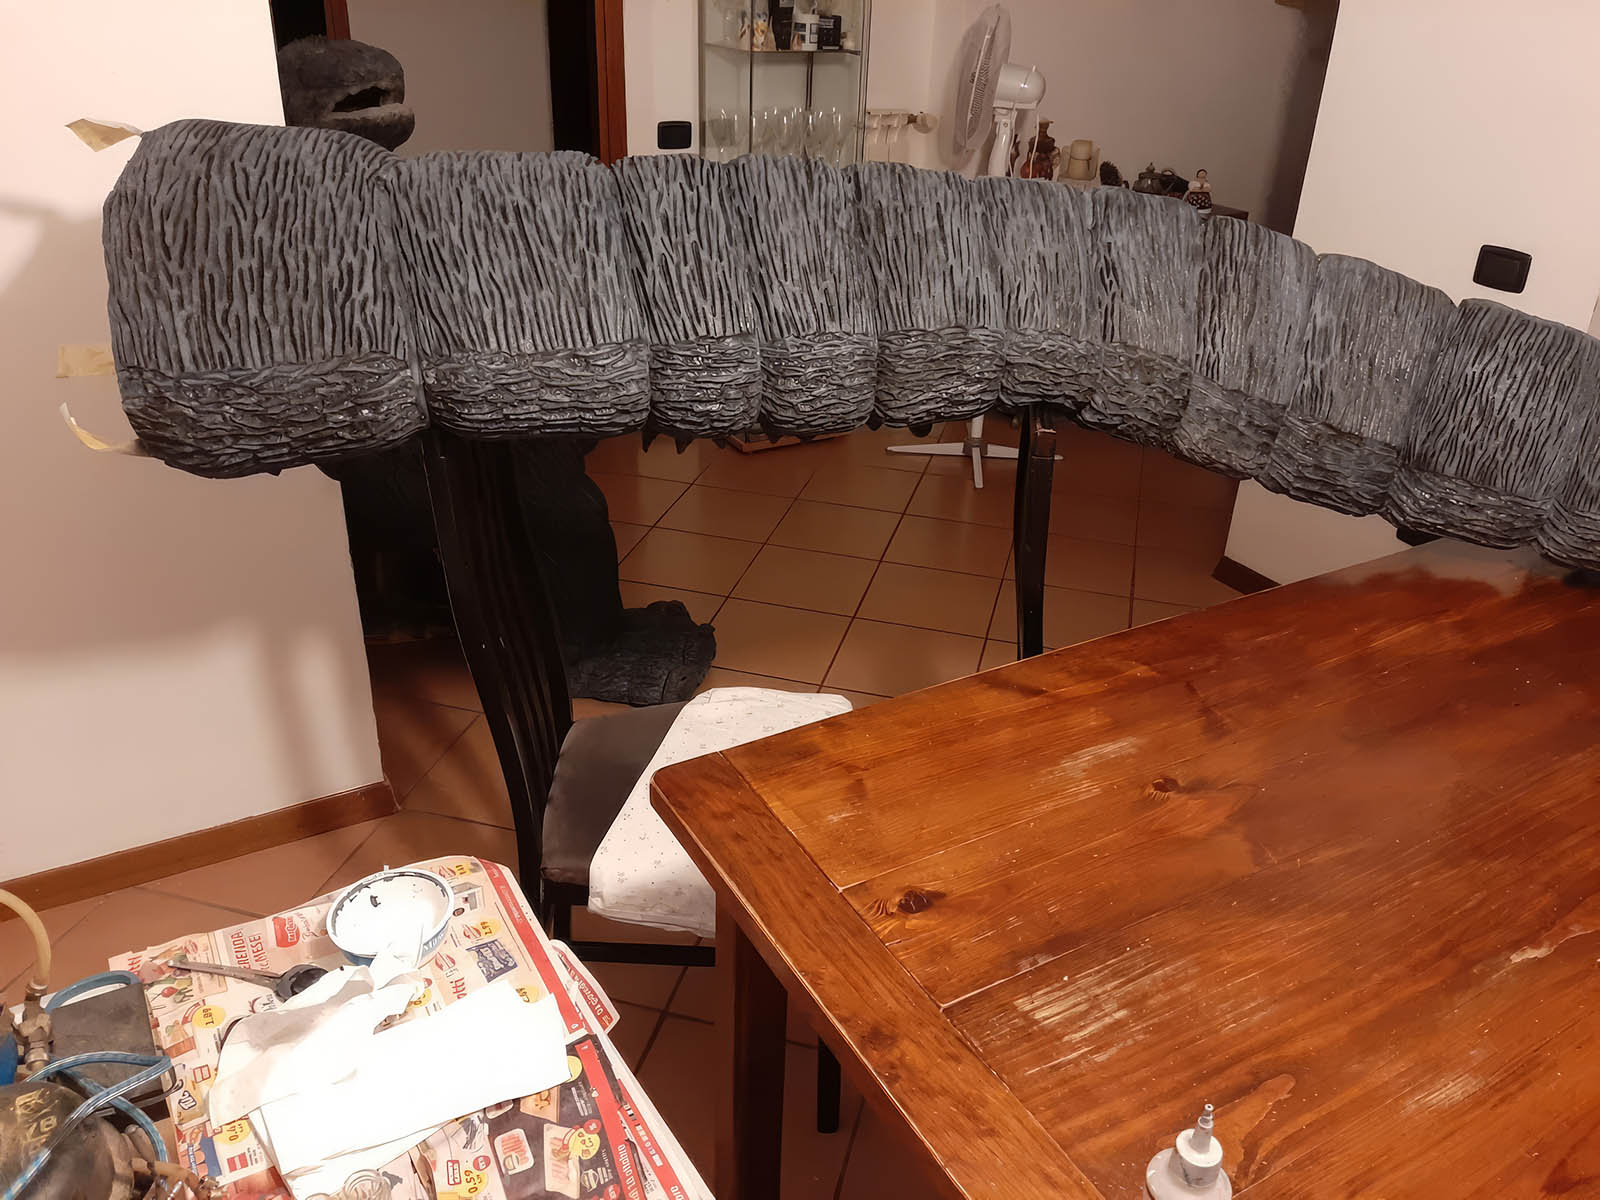
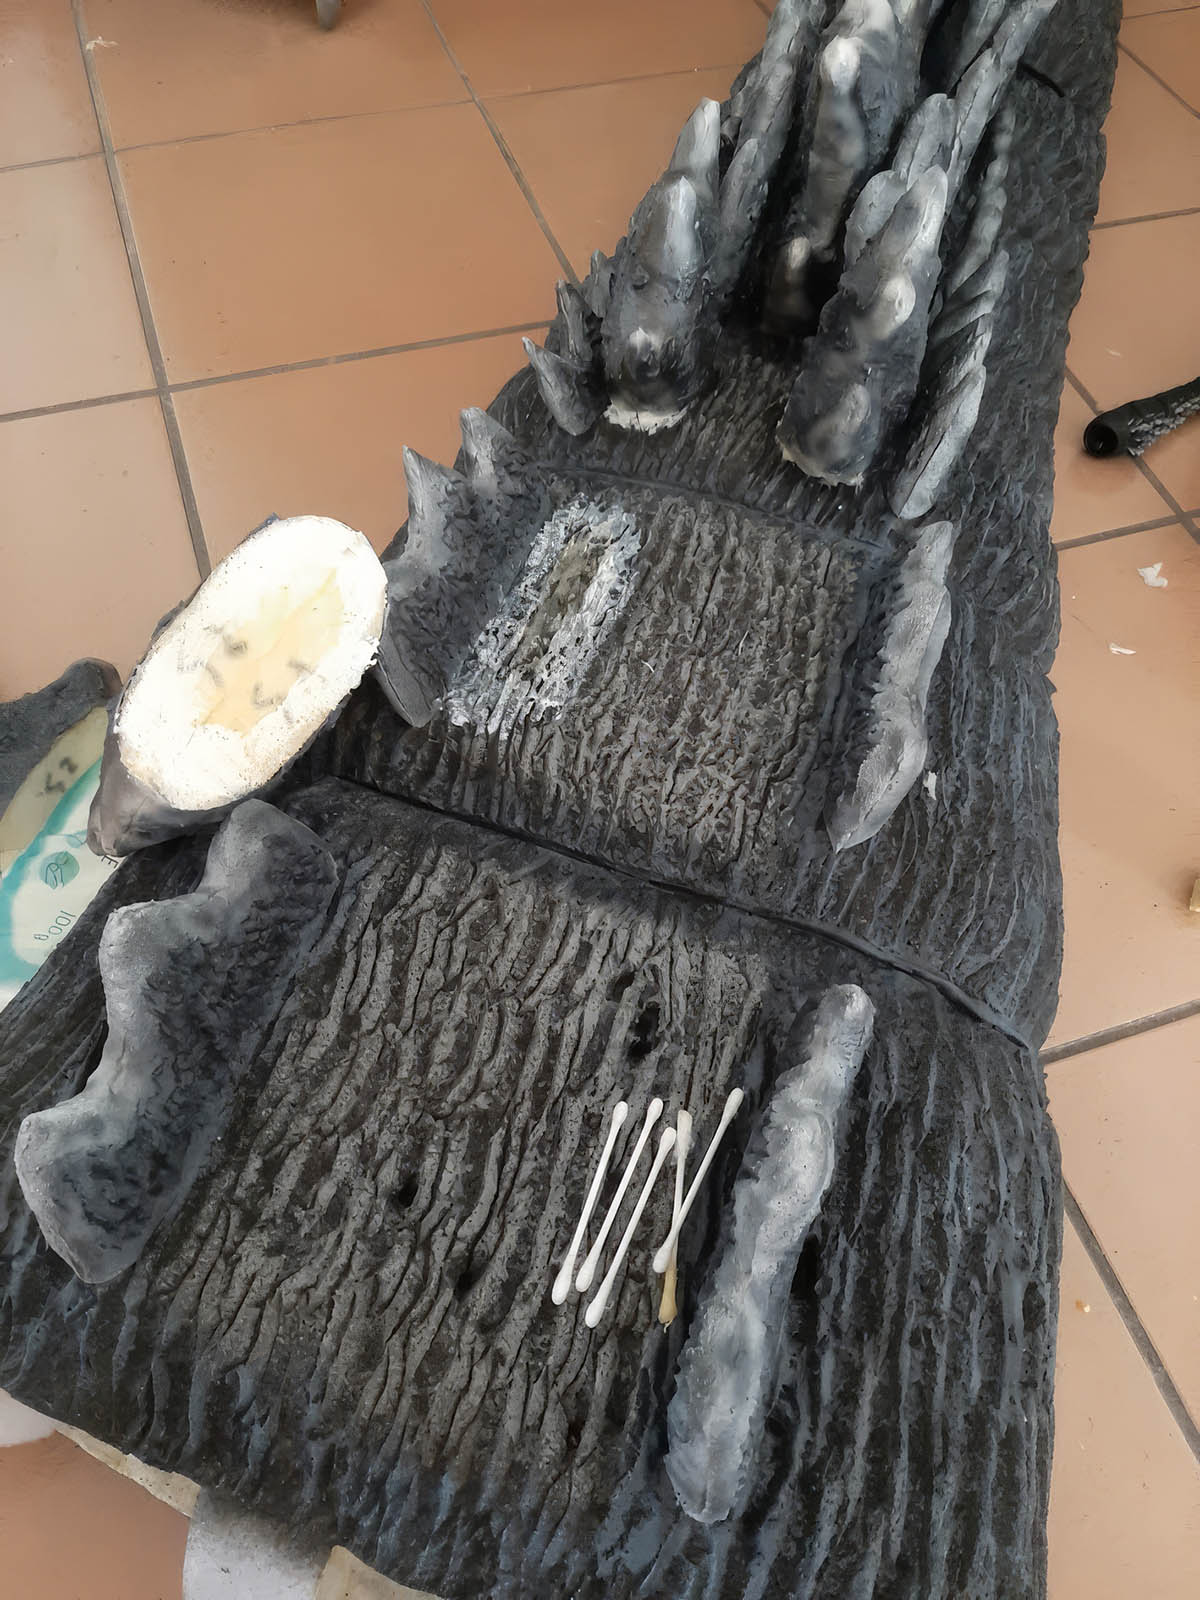
I cut white fabric to size and glued the various sections of the tail onto it. These sections were sculpted and sized according to the correct proportions, resulting in a long tail that I gradually hot-carved to create the texture.
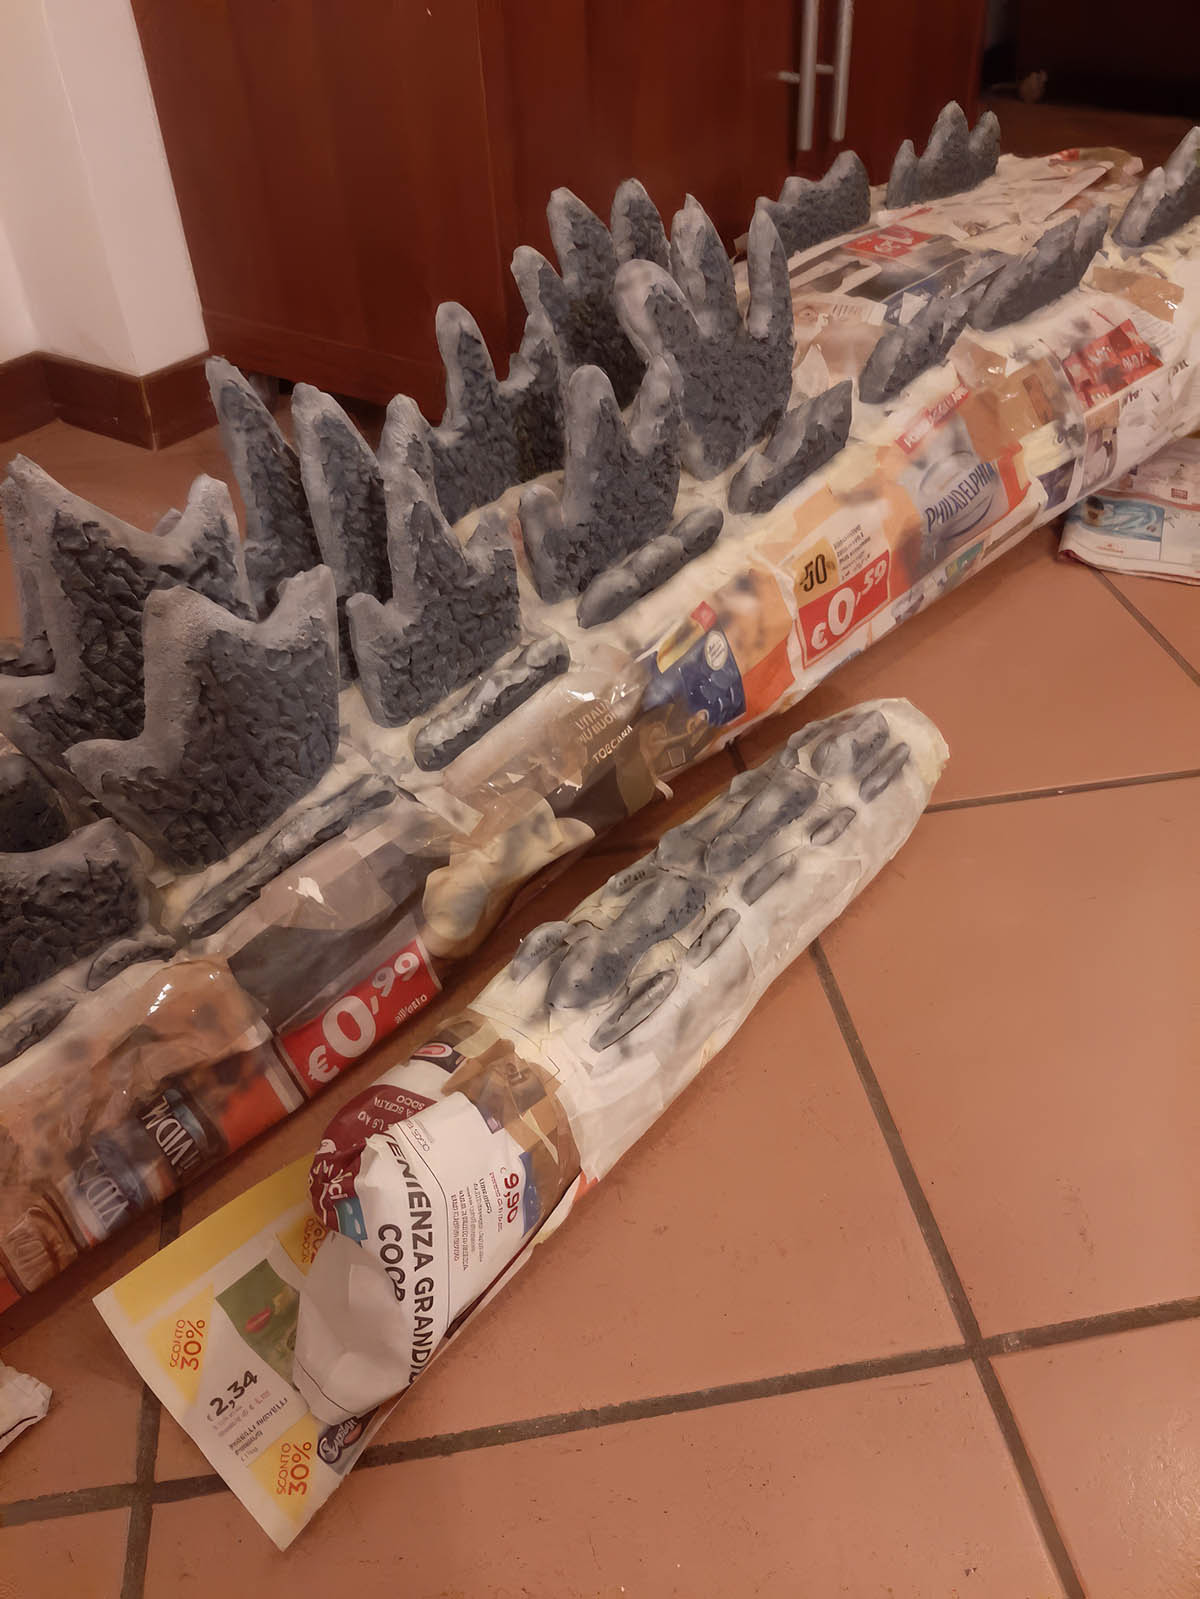
Since the tail is nearly twice as long as Godzilla’s body height, working on it was quite cumbersome—especially keeping it laid out to glue the dorsal fins. These fins, sculpted one by one and crafted differently from those on the back (as the tail fins don’t need to be hollow since they don’t light up in the film), provided the iconic look of Godzilla’s massive tail.
Like the rest of the suit, the tail received several coats of black latex. Then, through careful masking, it was airbrushed—first on the skin and later on the fins.
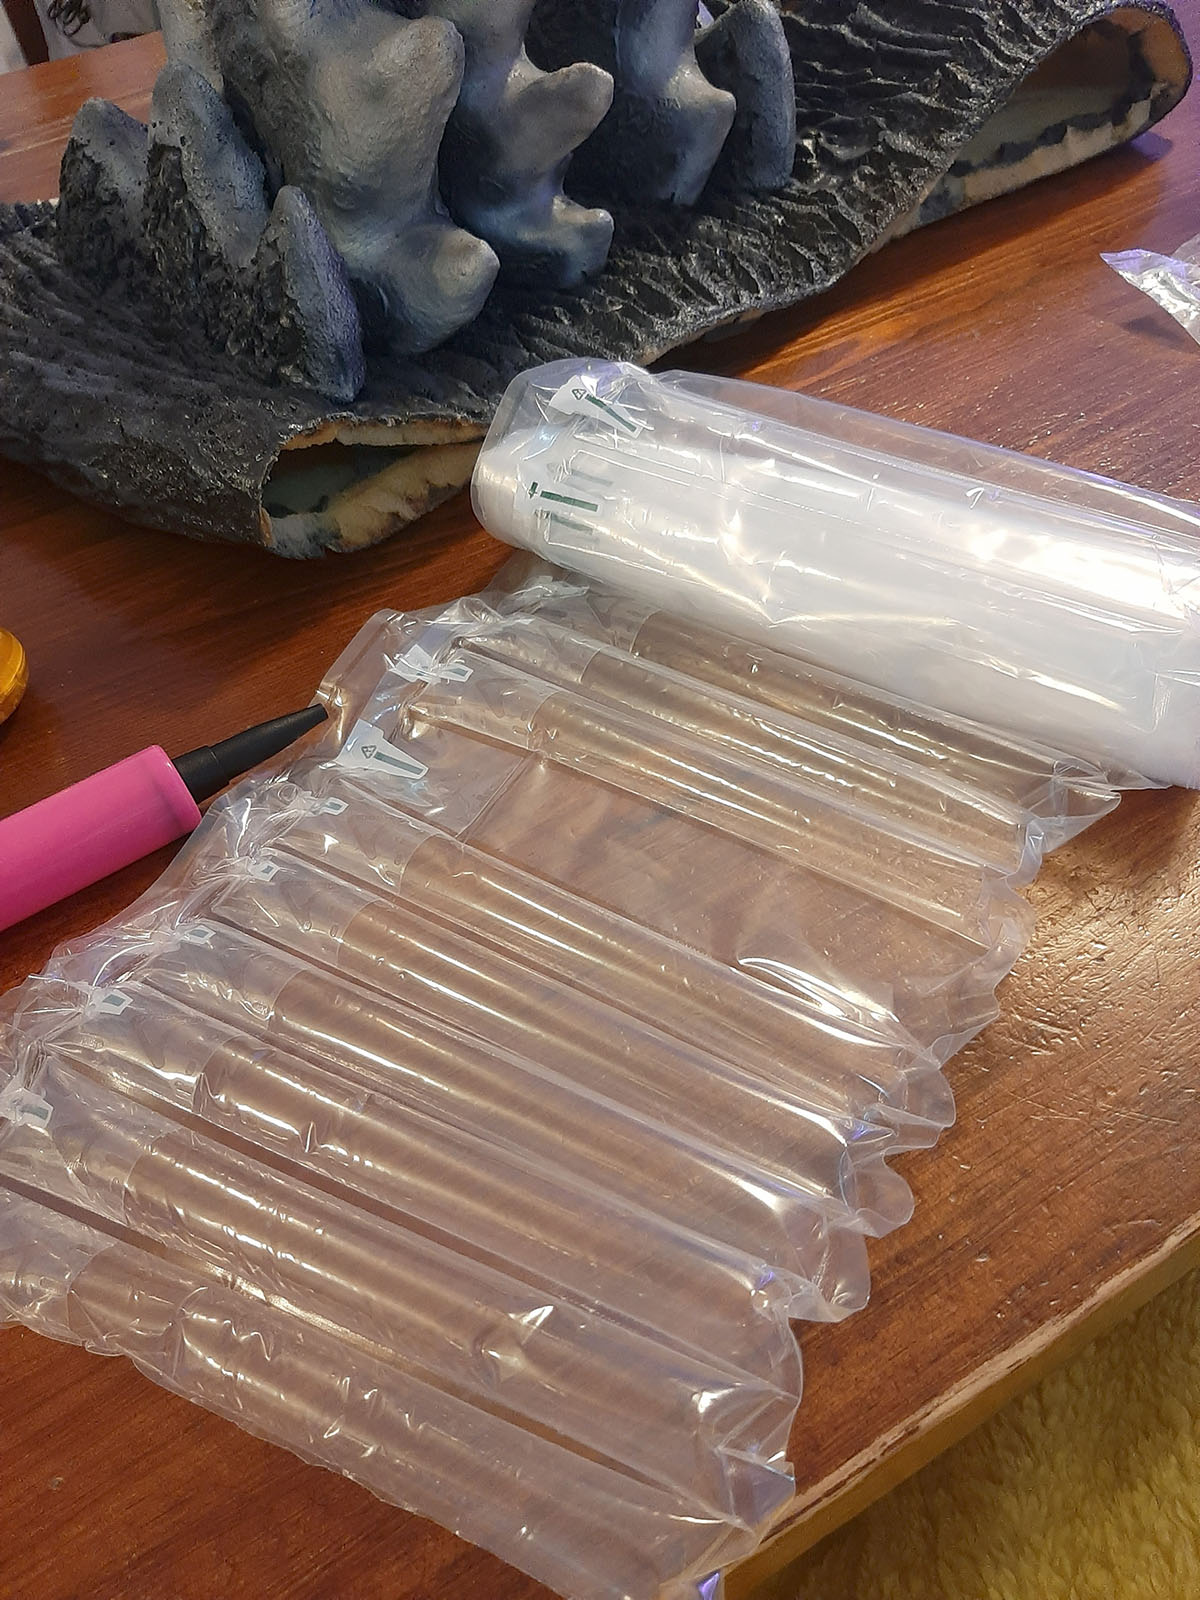
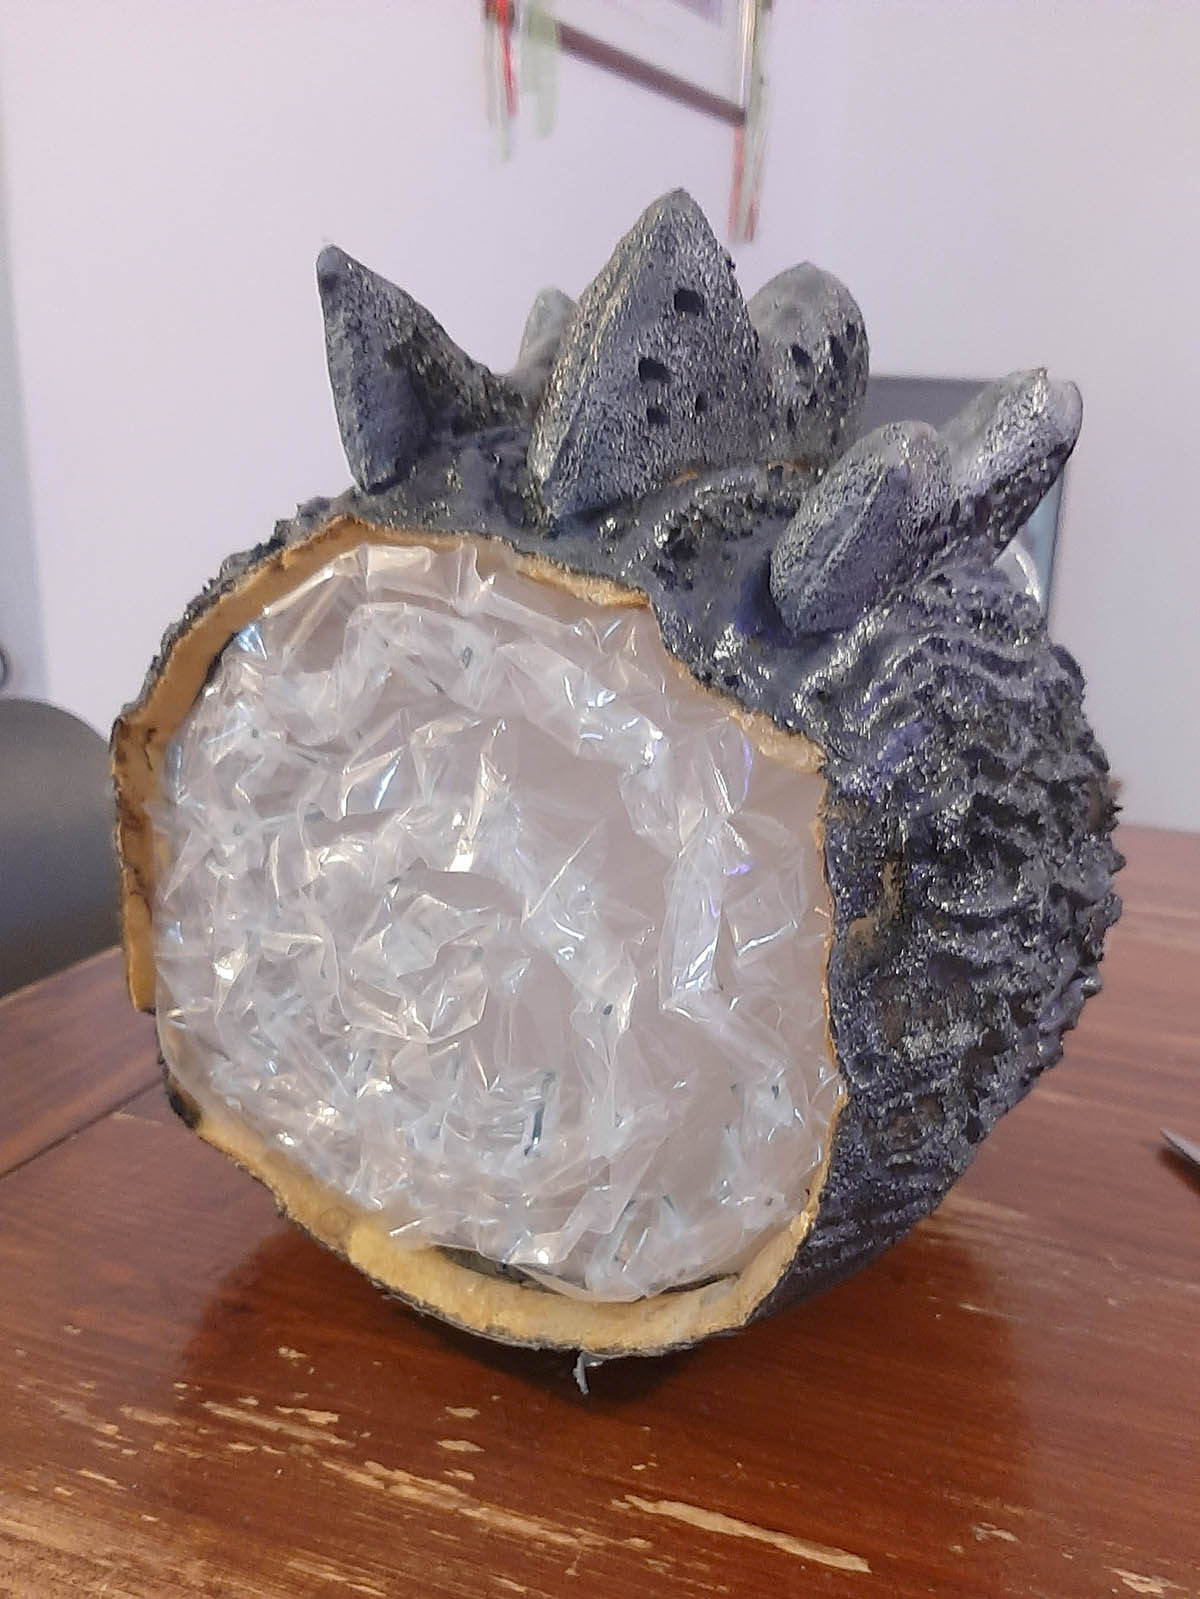
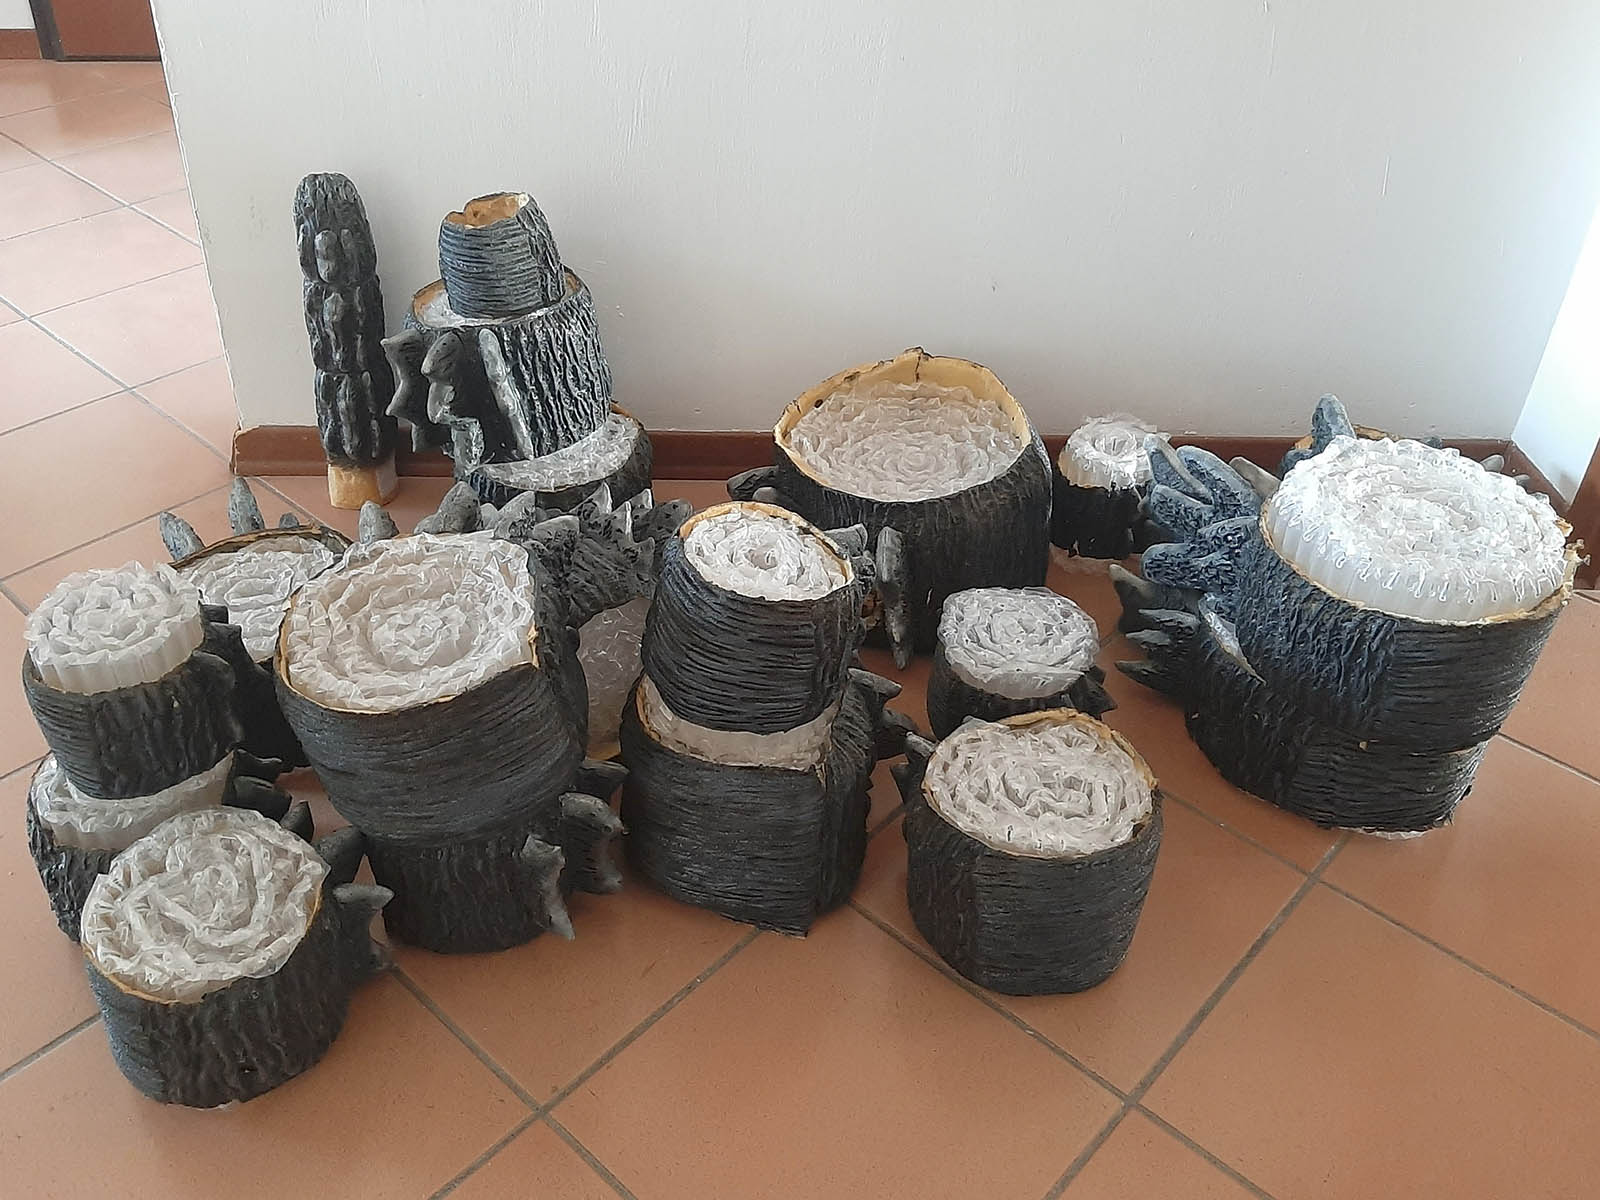
Before leaving for the finals in Nagoya, the tail needed to be lightened. Andrea suggested removing the fabric, thinning down the sections, and stuffing everything with air-bubble packing wrap. This idea made this part of the costume much lighter and easier to manage.
Body
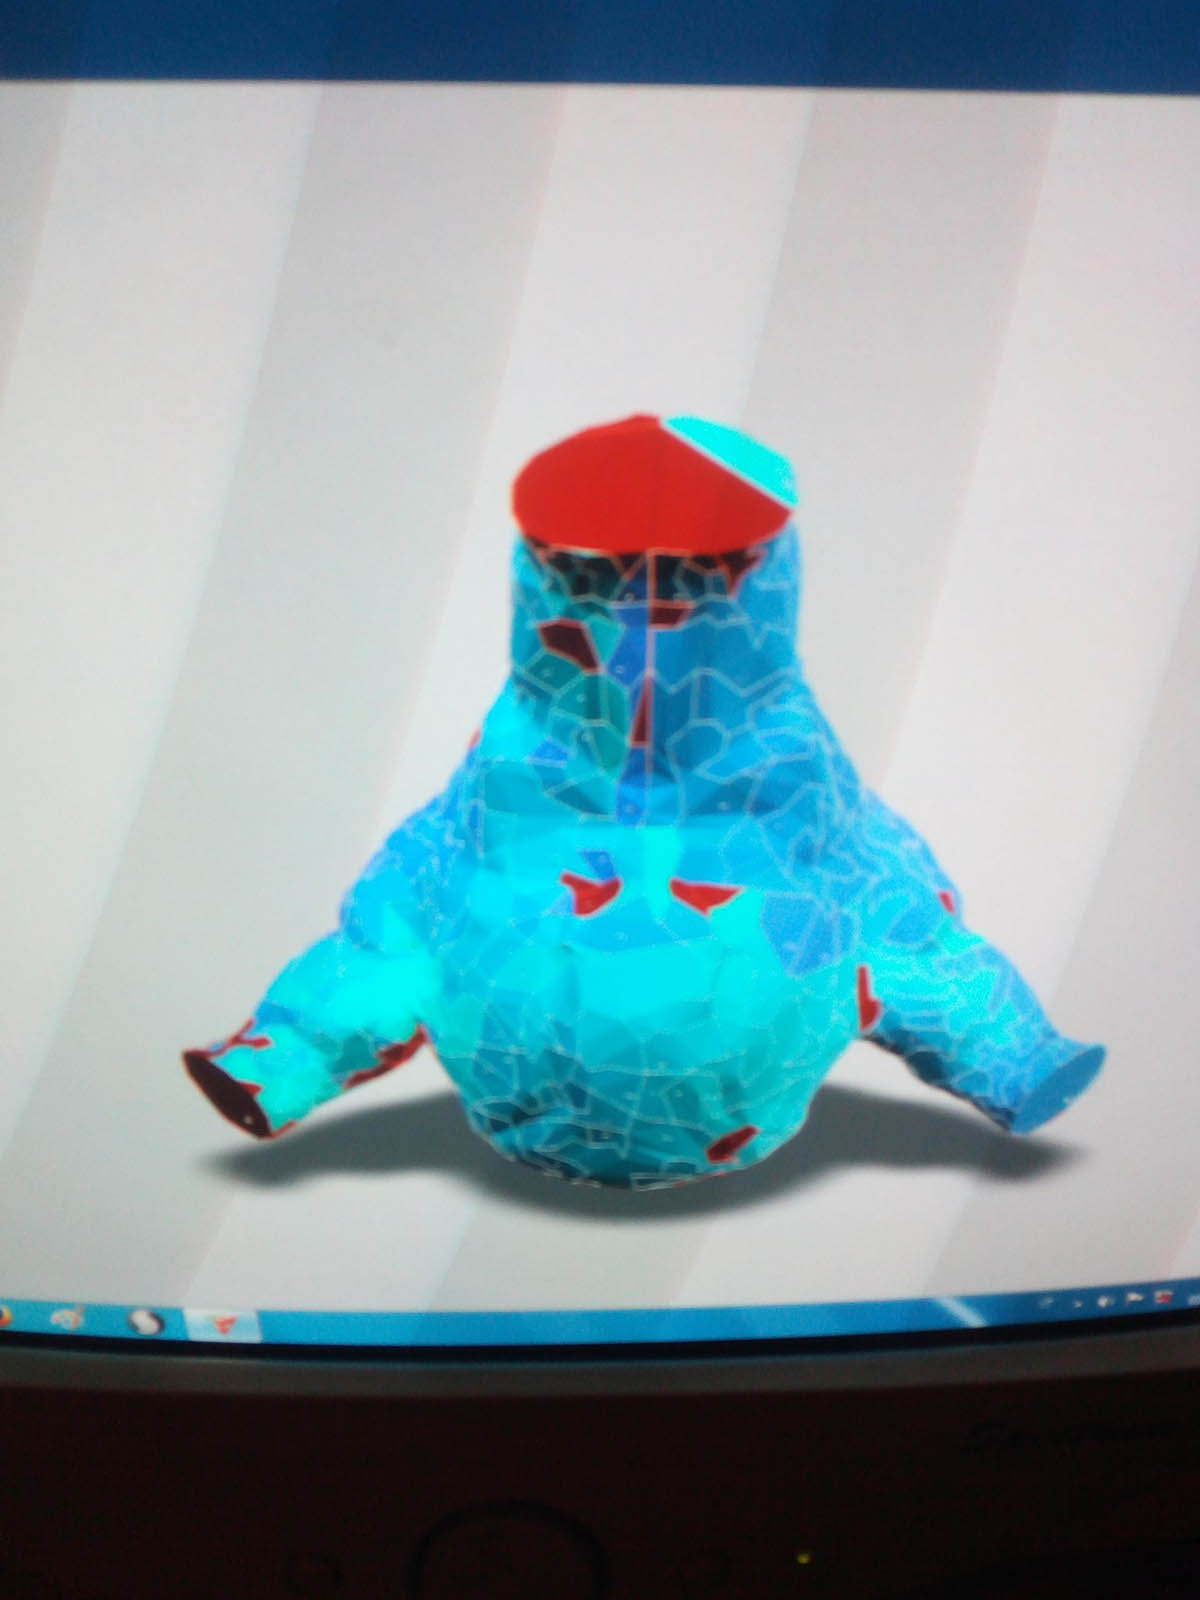
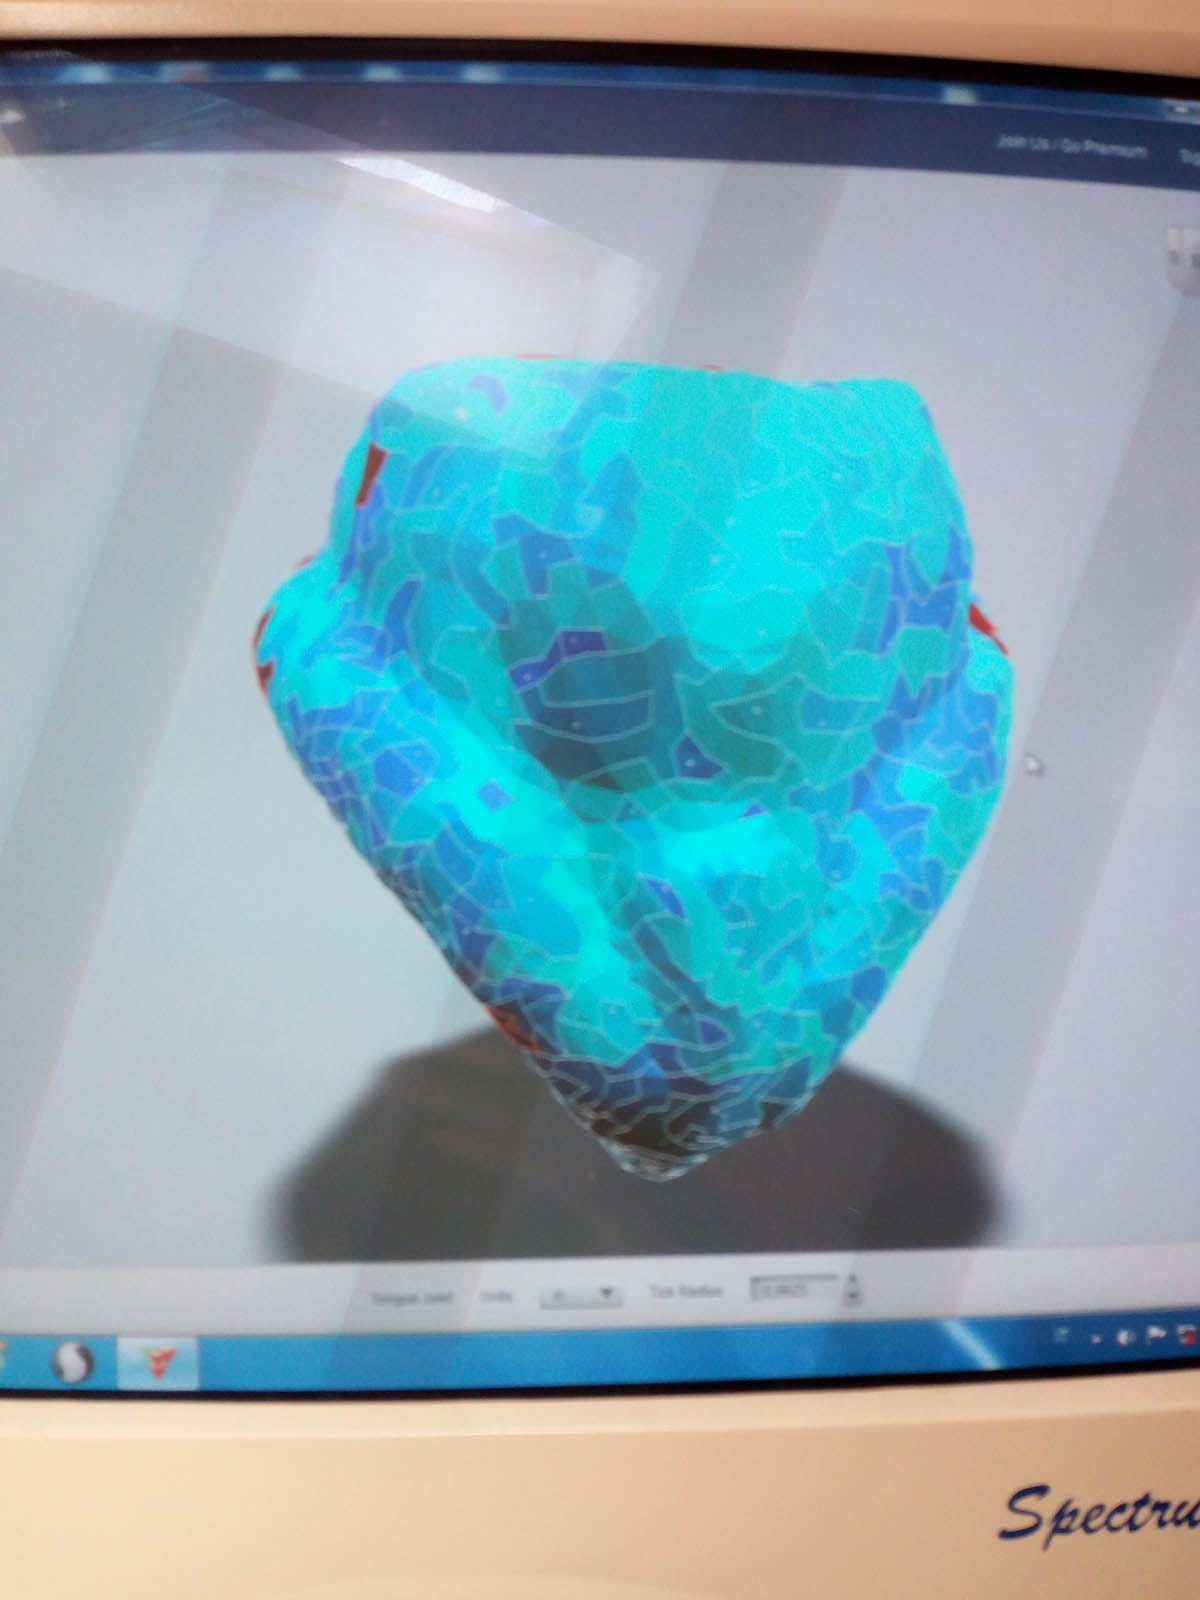
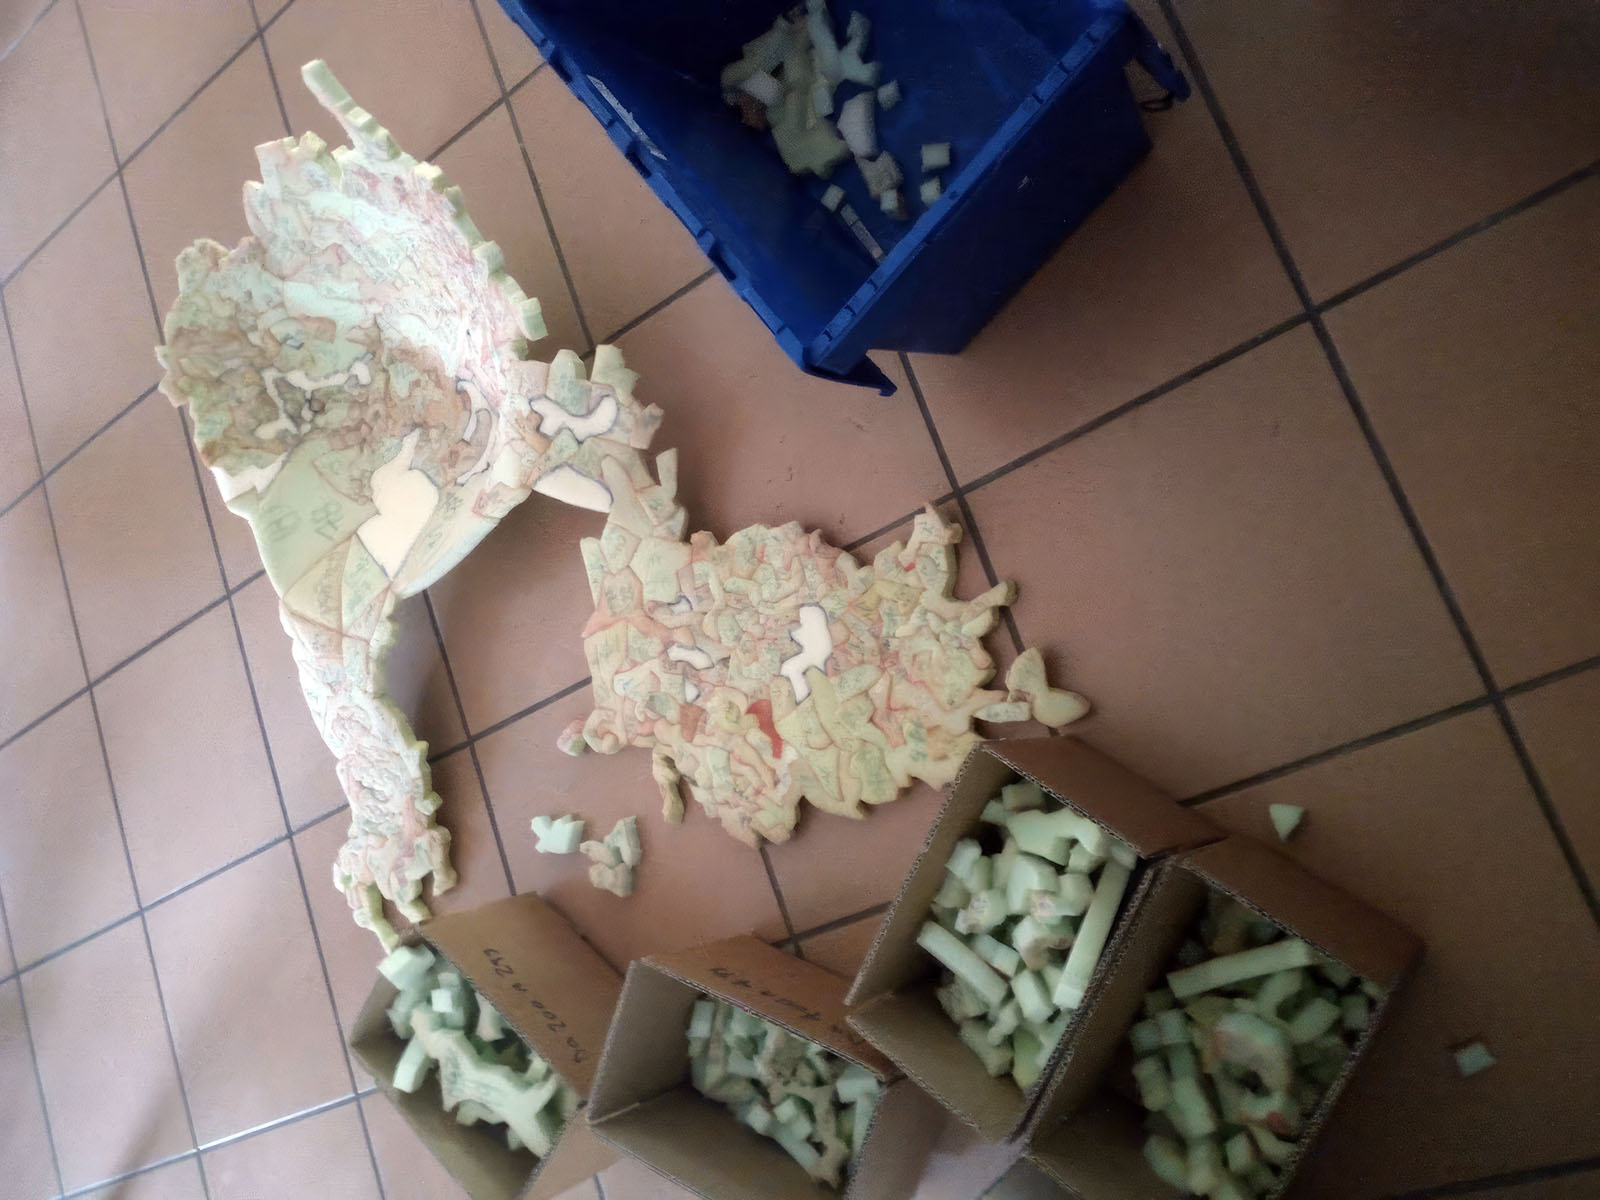
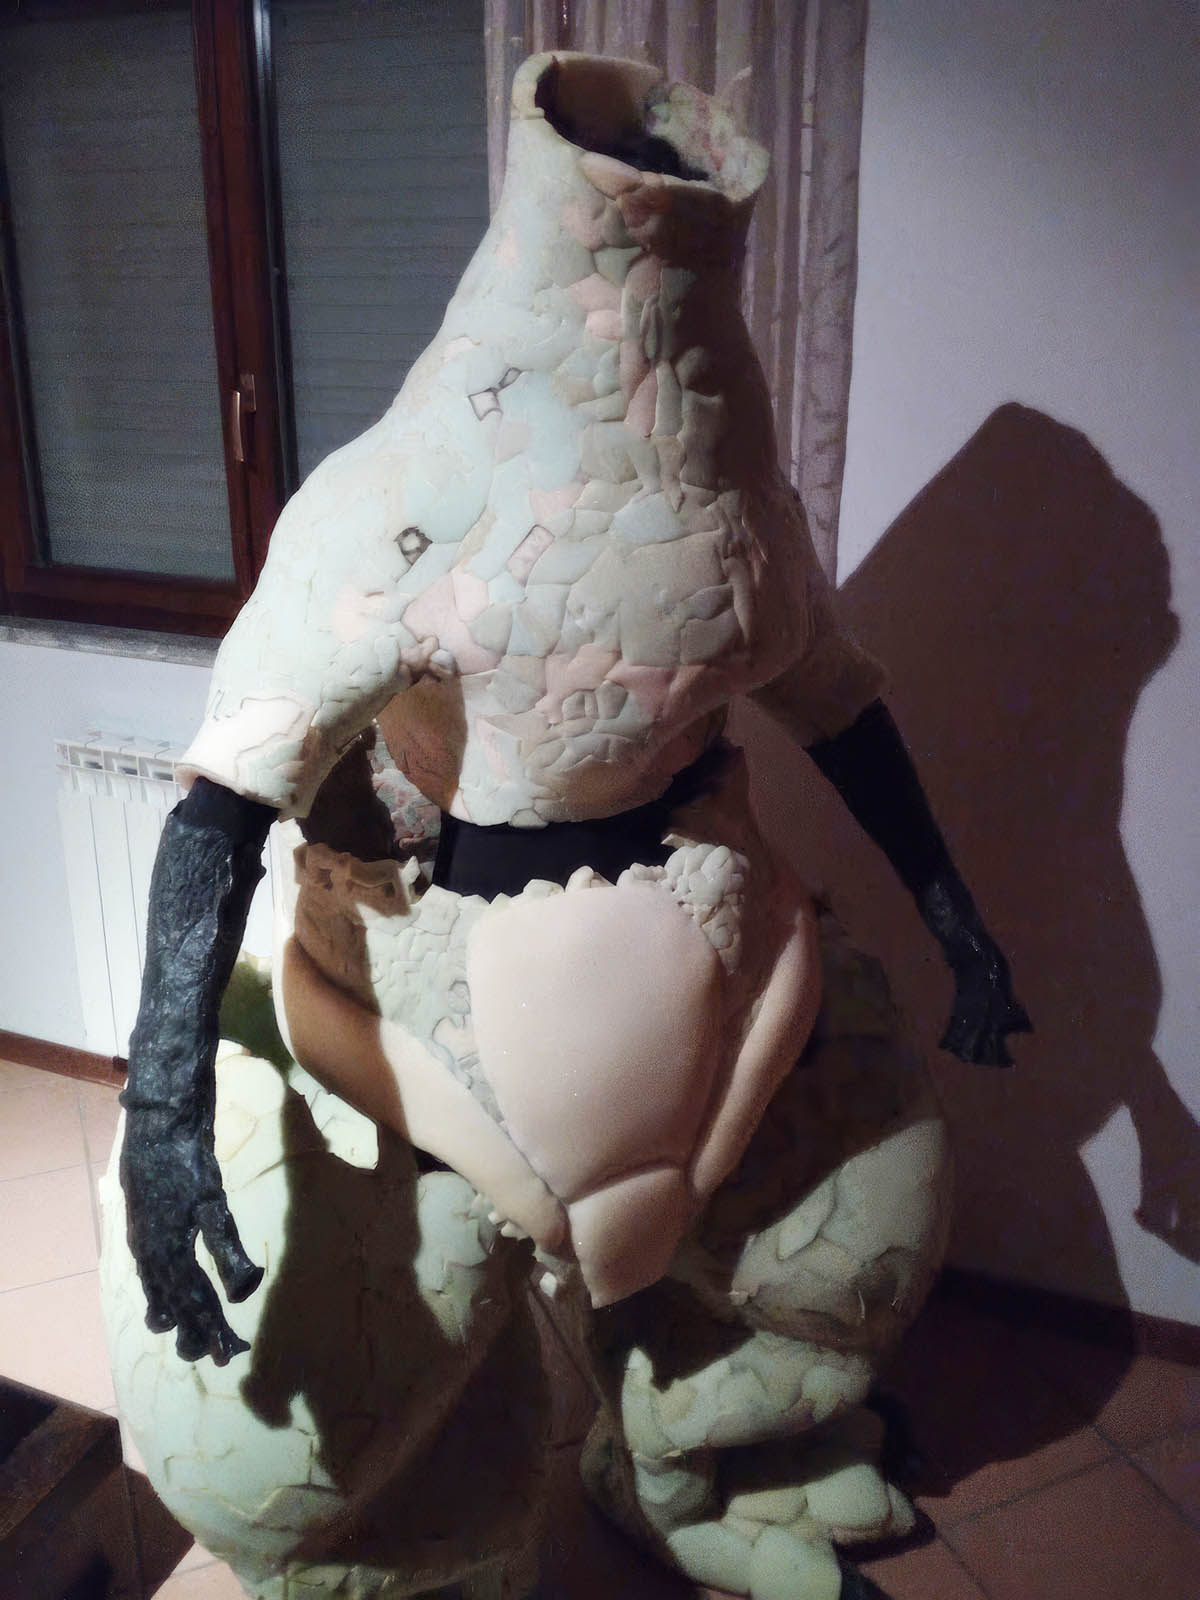
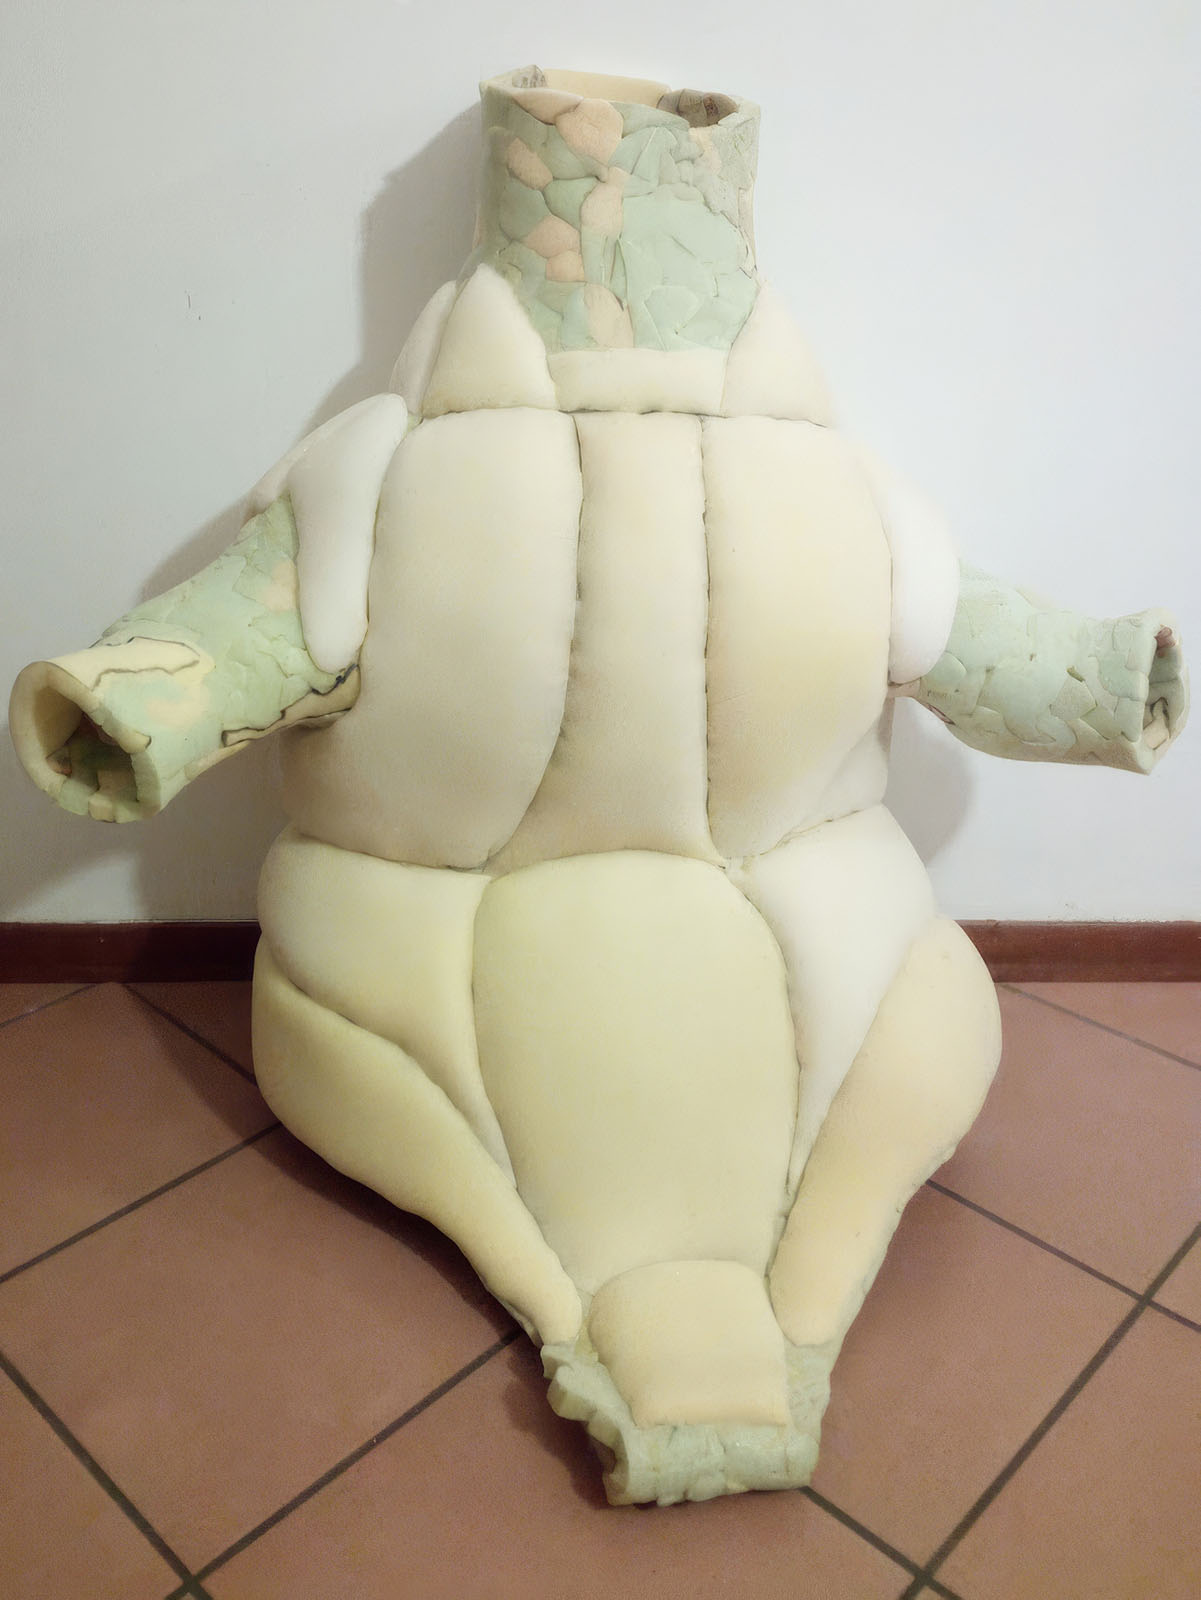
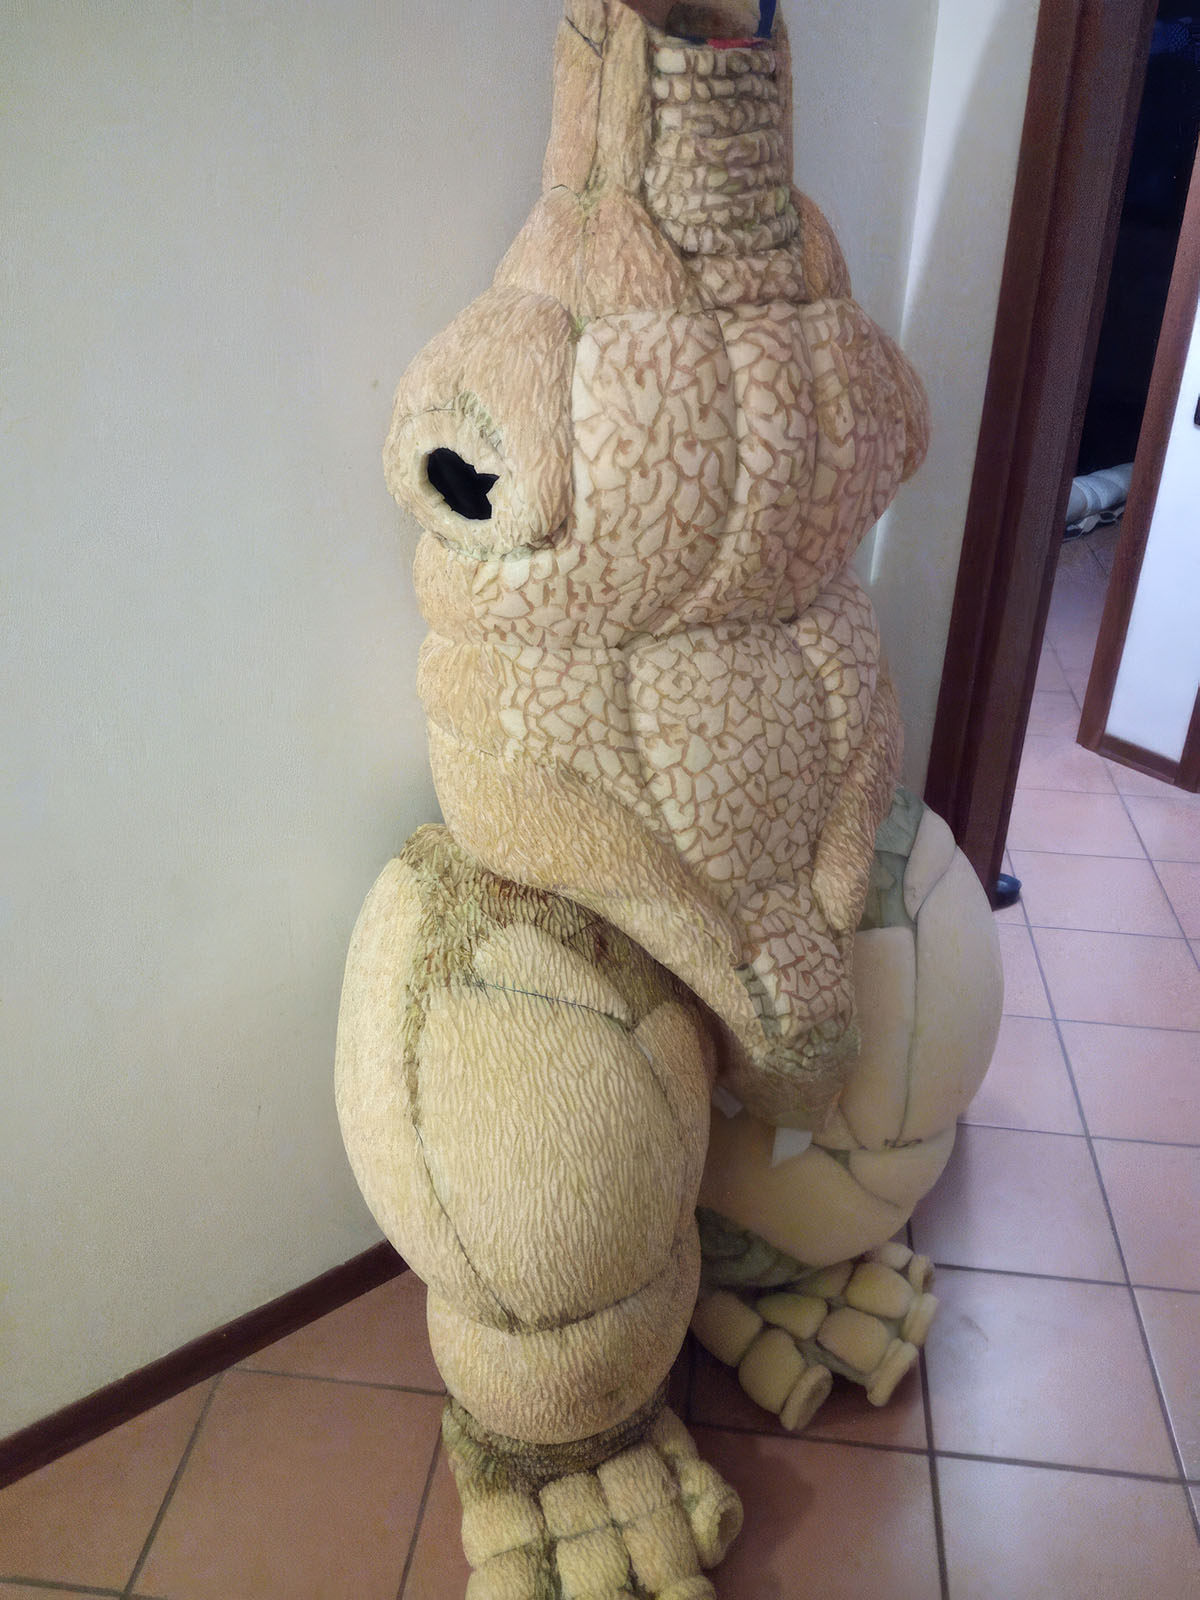
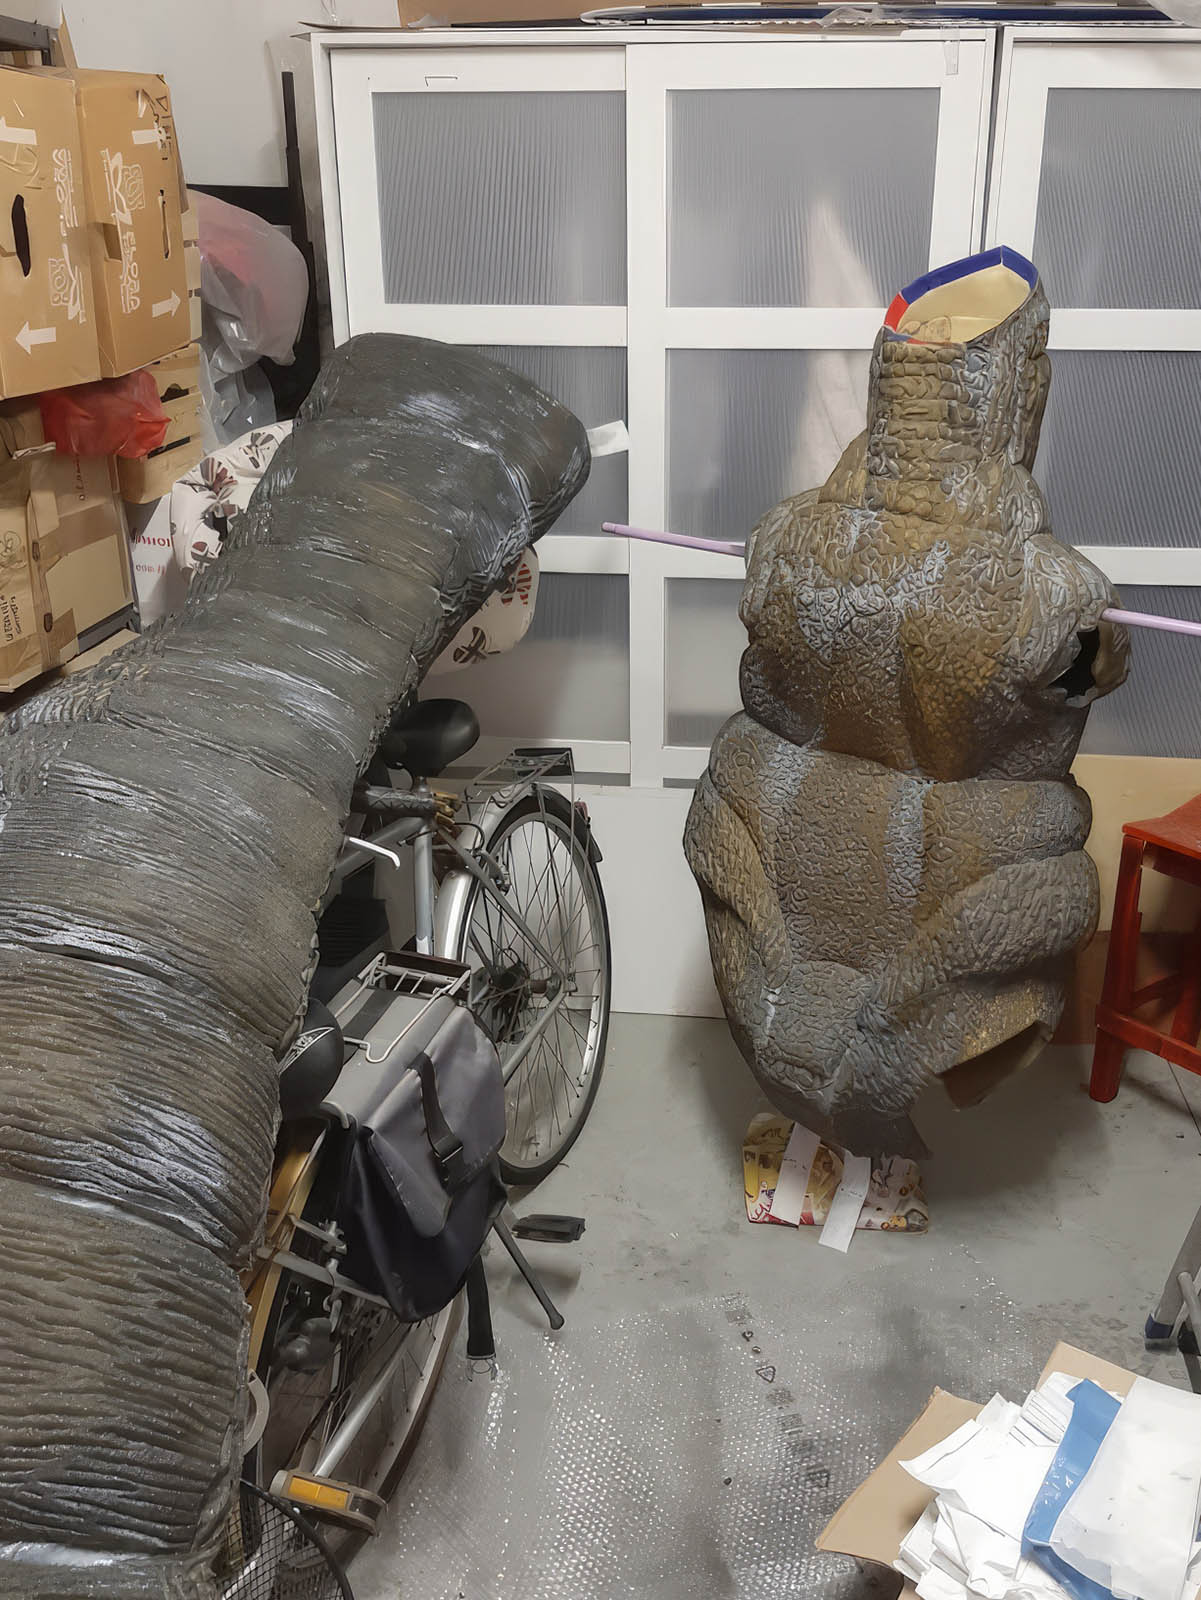
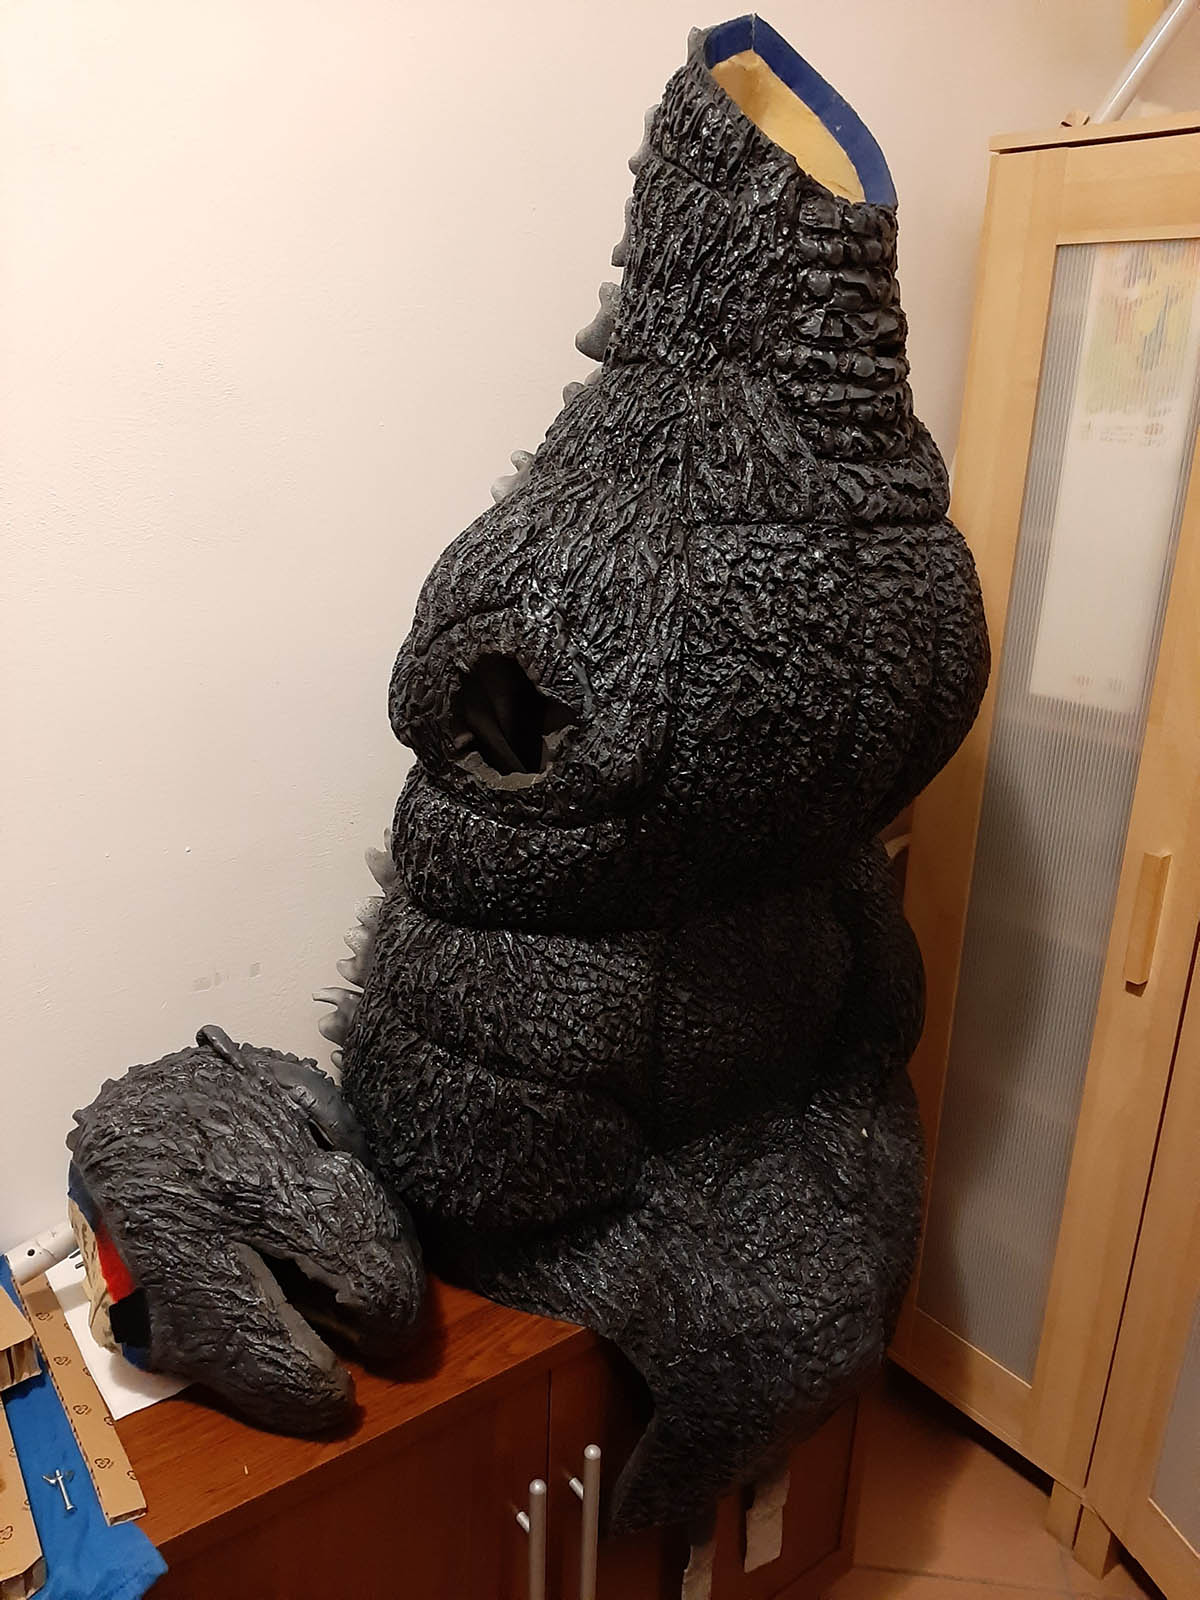
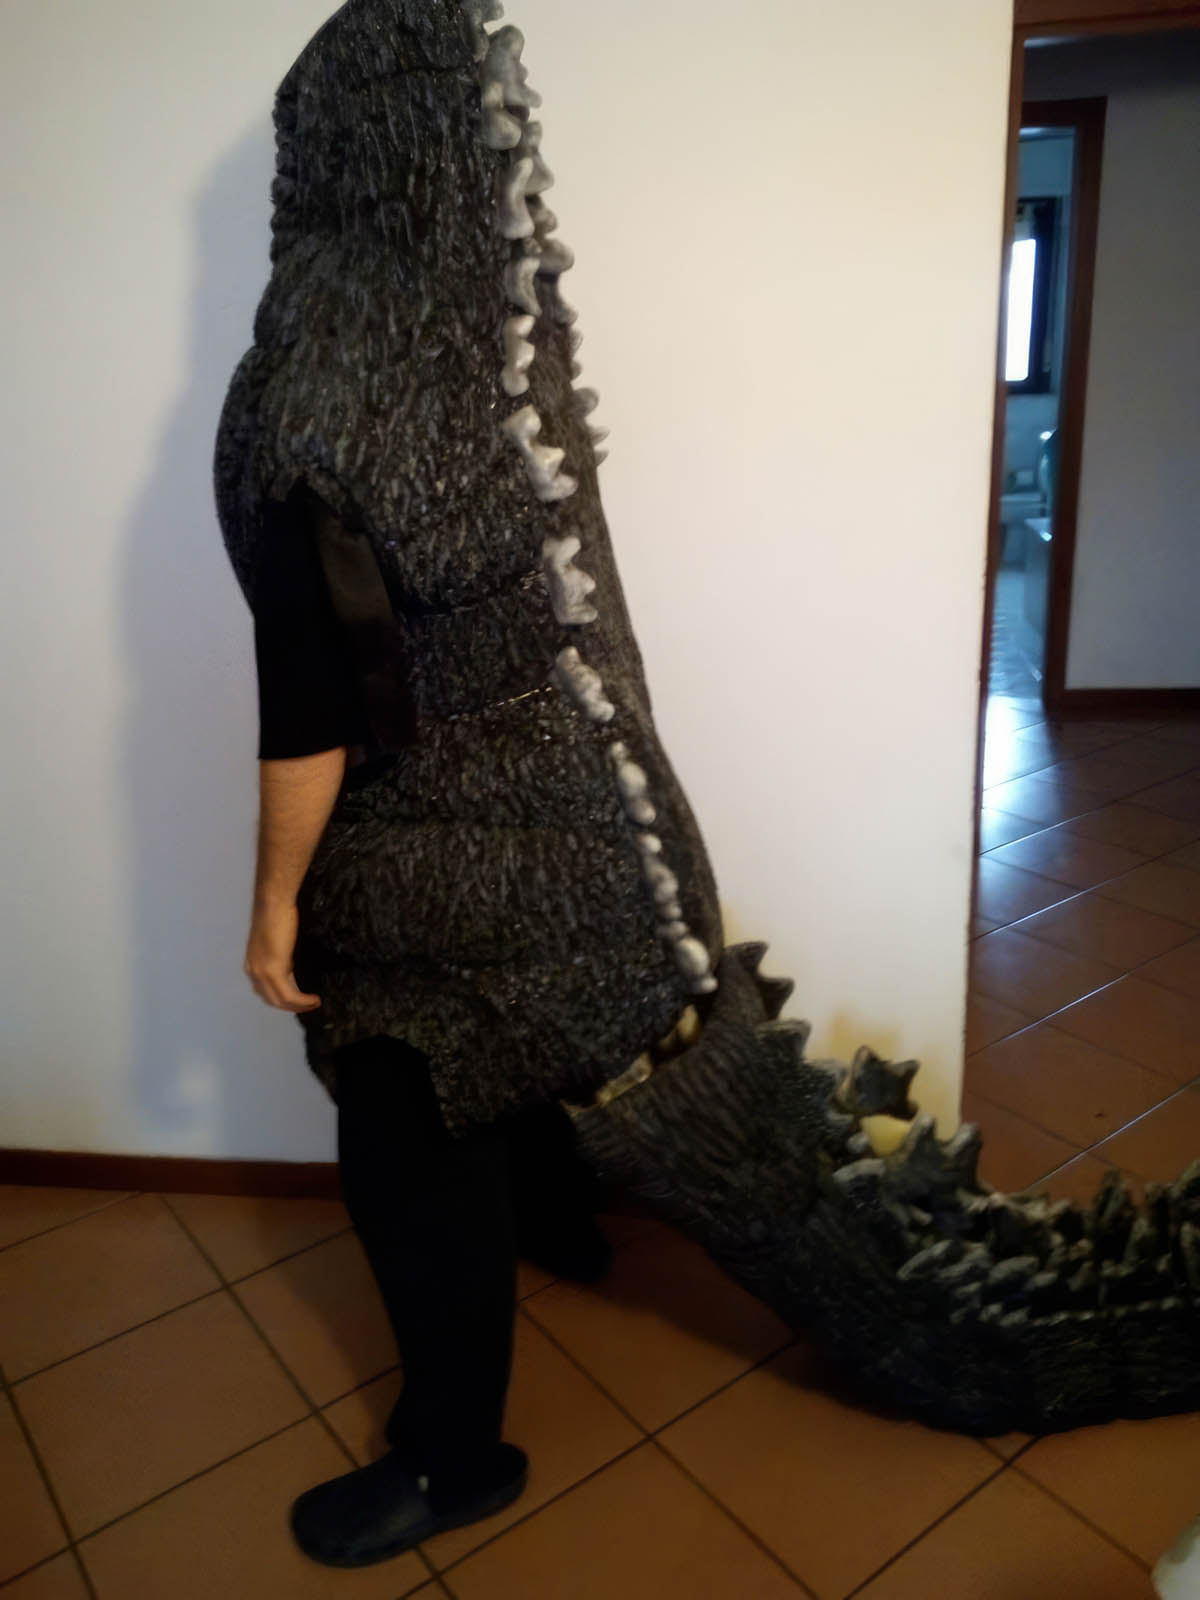
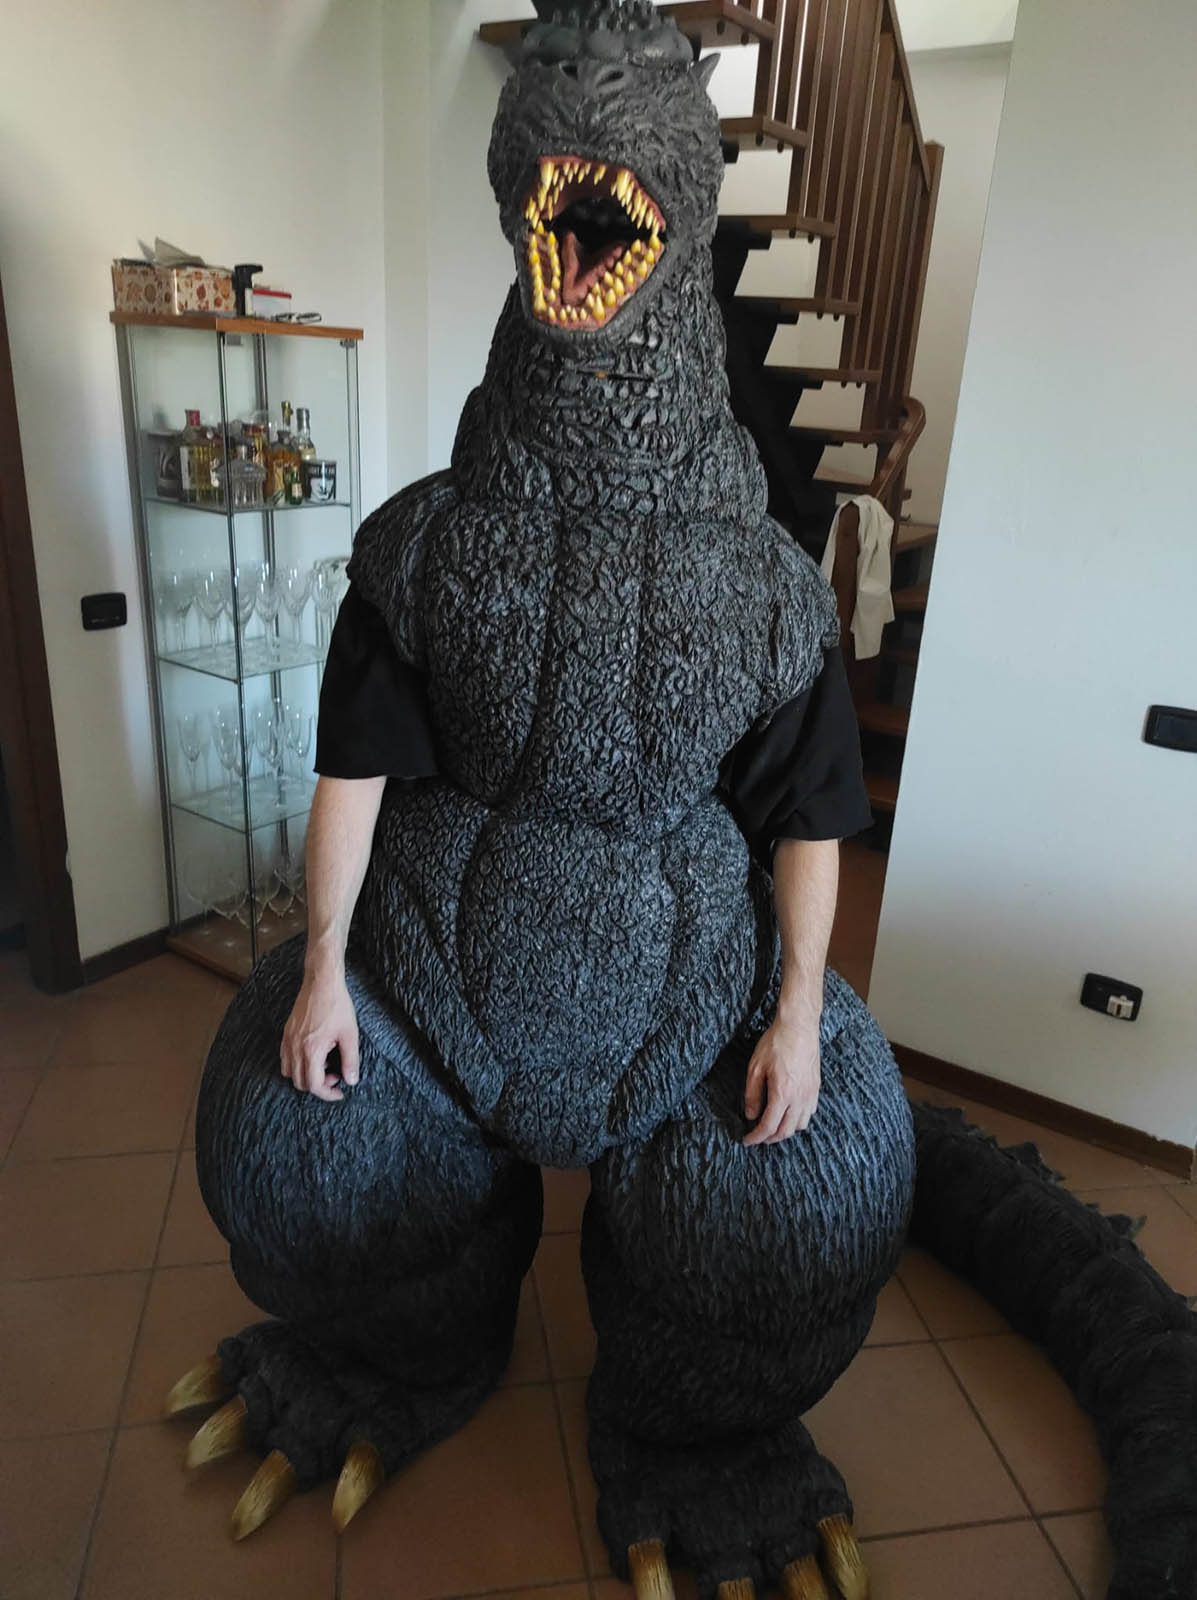
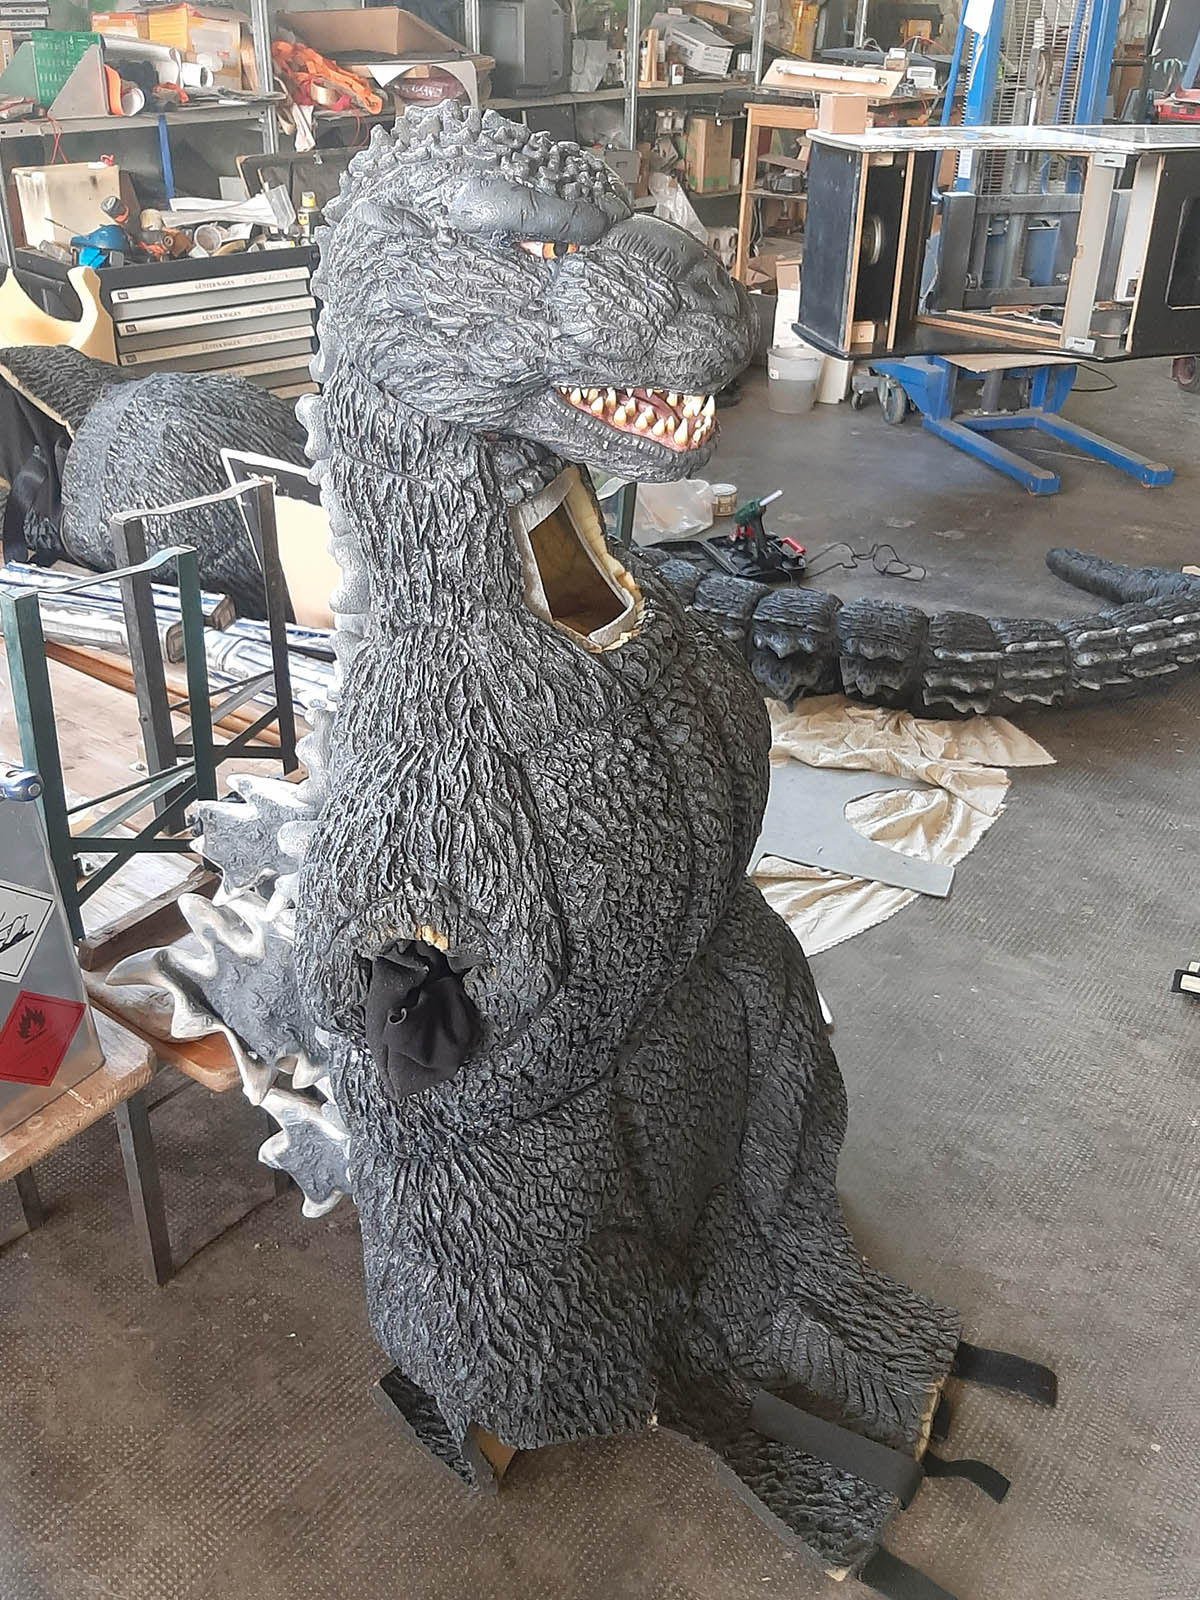
The entire body of the suit was derived from a 3D scan of the original action figure. The torso and pelvis were initially separate, mirroring the structure of the figure itself.
Once the two files were imported into Autodesk and scaled correctly, the software broke them down into a “puzzle” of numerous flat patterns to be transferred onto foam. After cutting them out, I glued them together—roughly 850 individual pieces—to slowly reveal the suit’s overall shape.
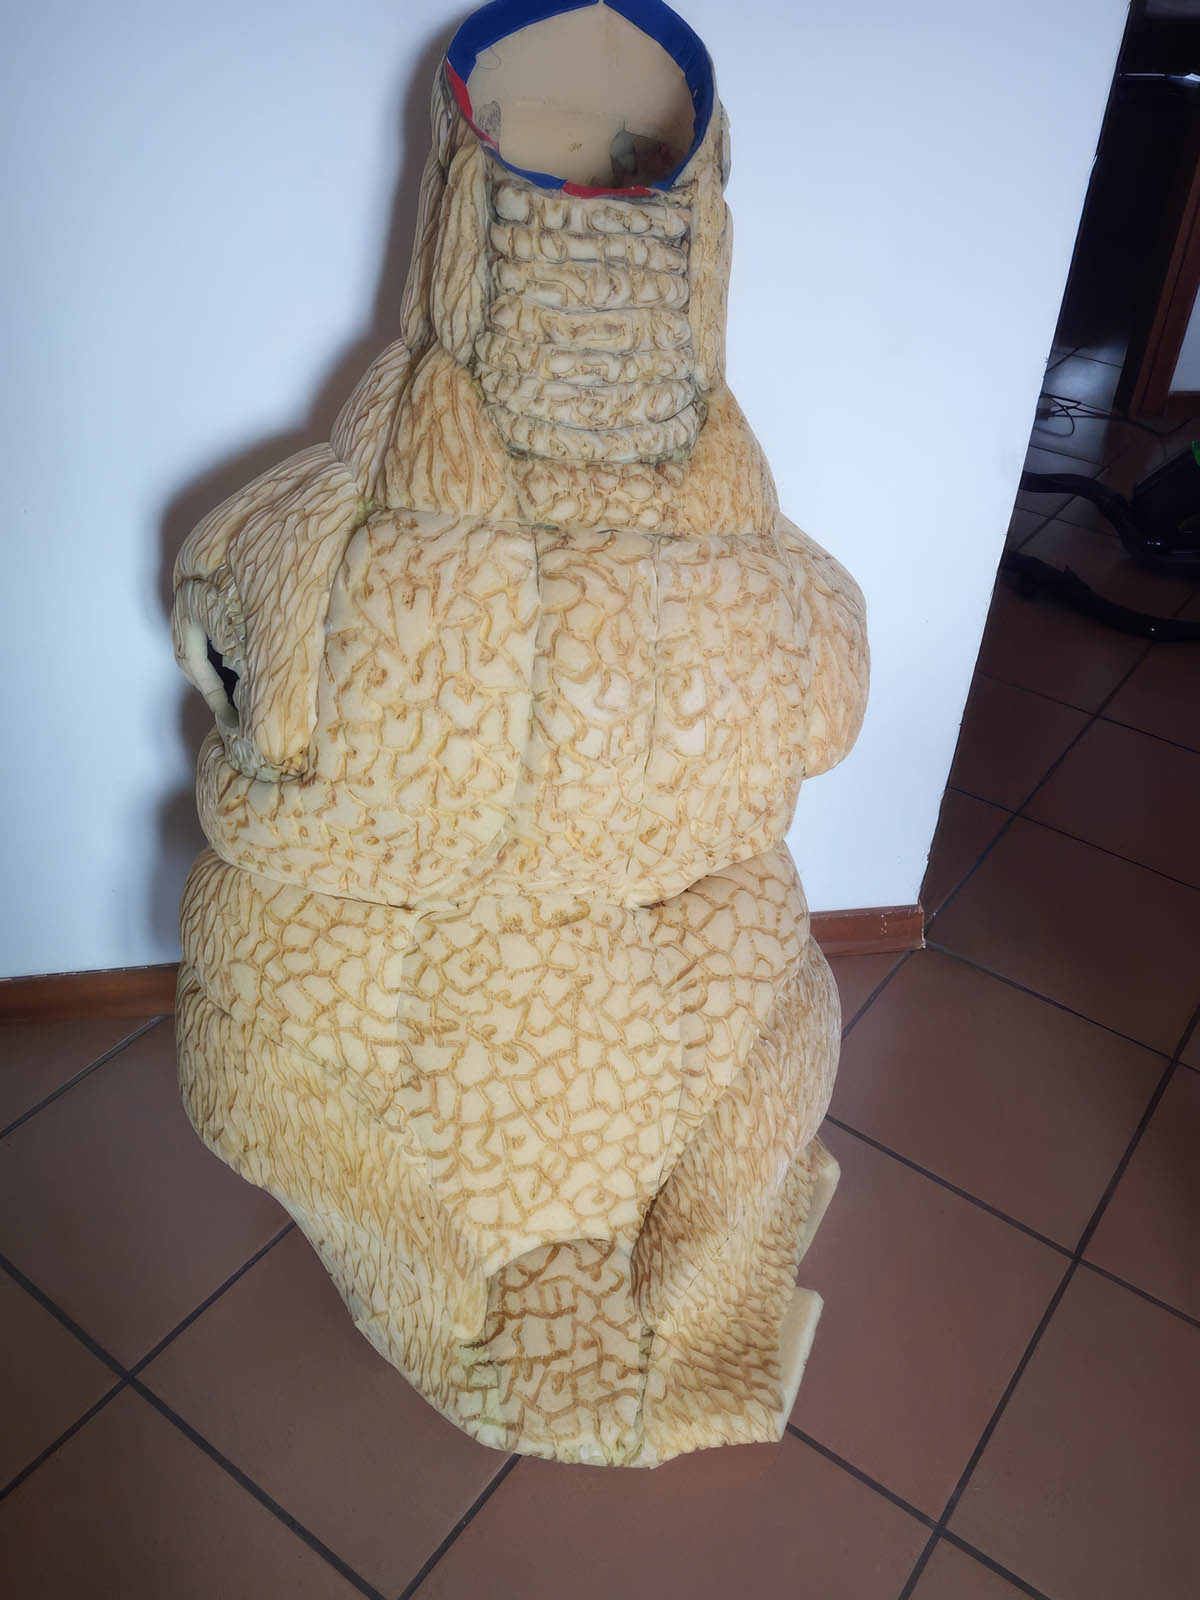
Godzilla’s musculature was then sculpted by layering additional foam onto the “puzzle” base. This was necessary because 3D scans often lose fine anatomical details, resulting in a surface that is too smooth; I needed more pronounced muscle definition to bring the character to life.
After replicating the skin texture across the entire body and crafting the small neck fins, I applied layers of black-pigmented latex until achieving a seamless finish. Finally, the surface was treated and detailed via airbrushing.
Visibility is provided by a slit in the neck, which I later converted into a detachable window. This modification significantly improves airflow during breaks. This same neck area also houses the Velcro strips used to secure the head from the inside.
Last but not least was the engineering of the attachment points for the tail and dorsal fins—a crucial step that served as the foundation for the subsequent phases of the build.
Special Effects
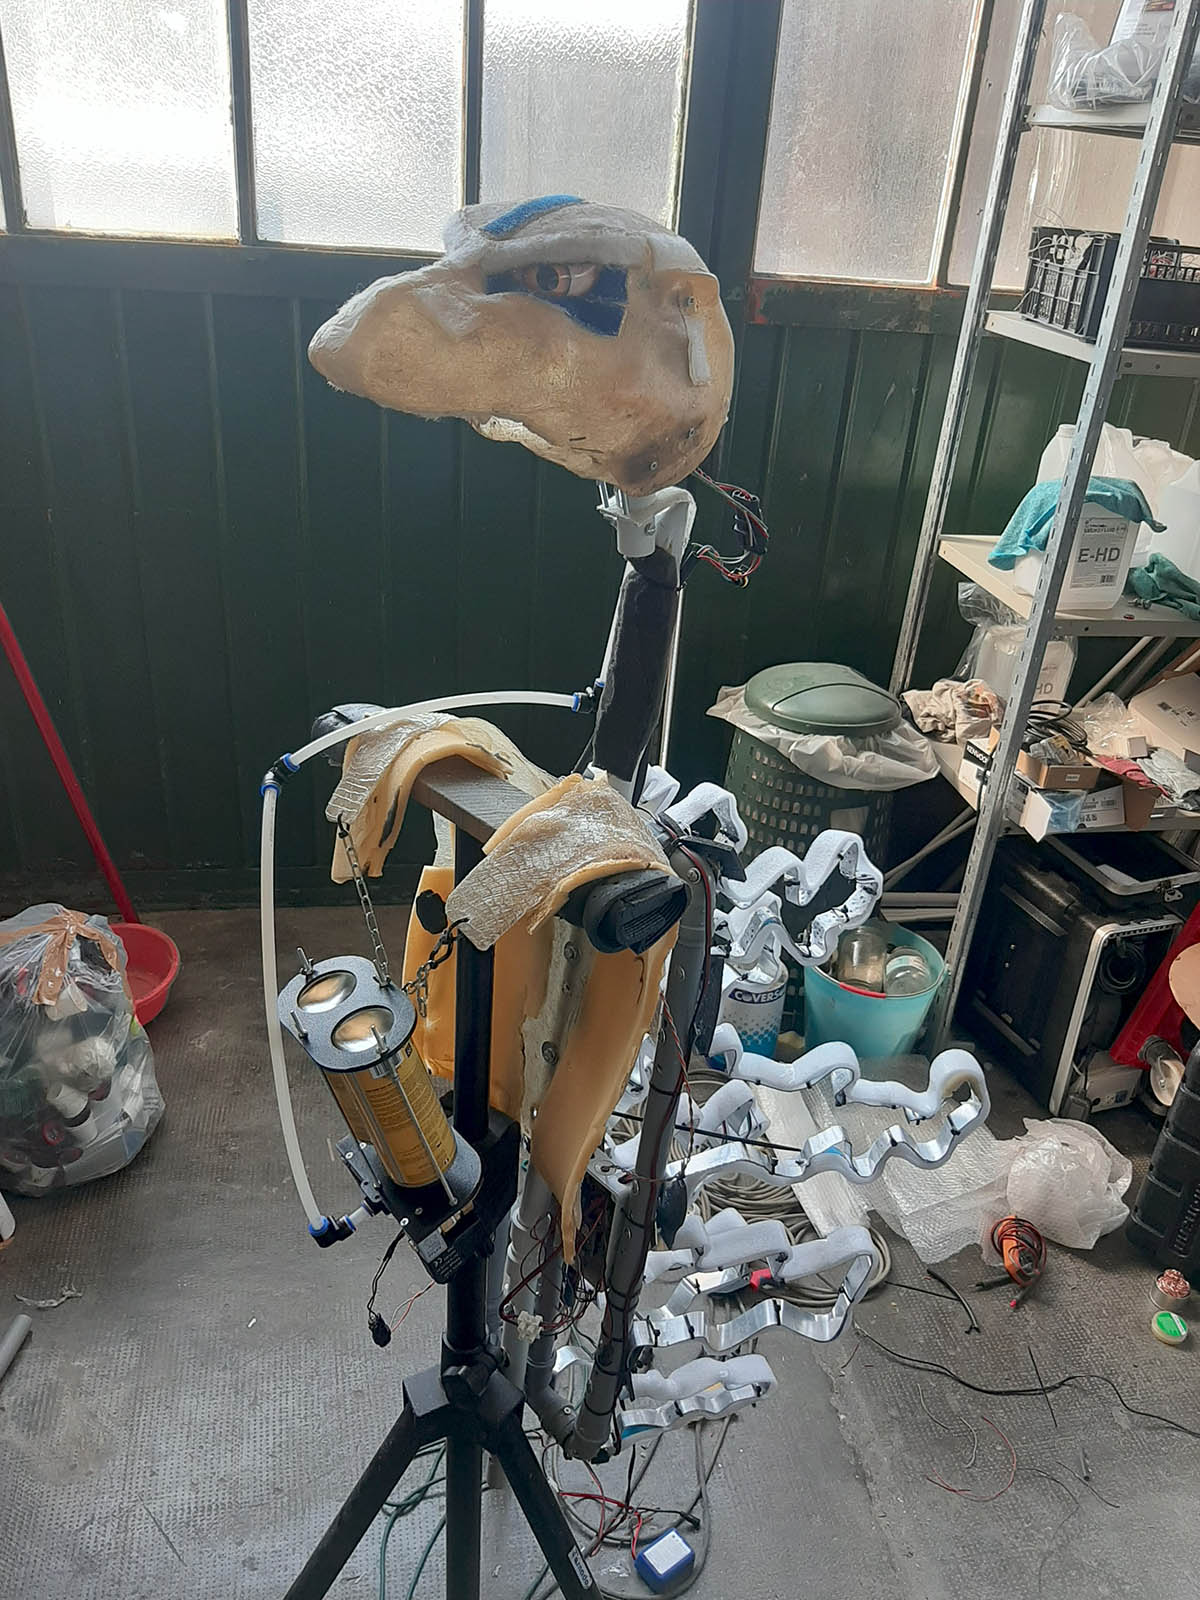
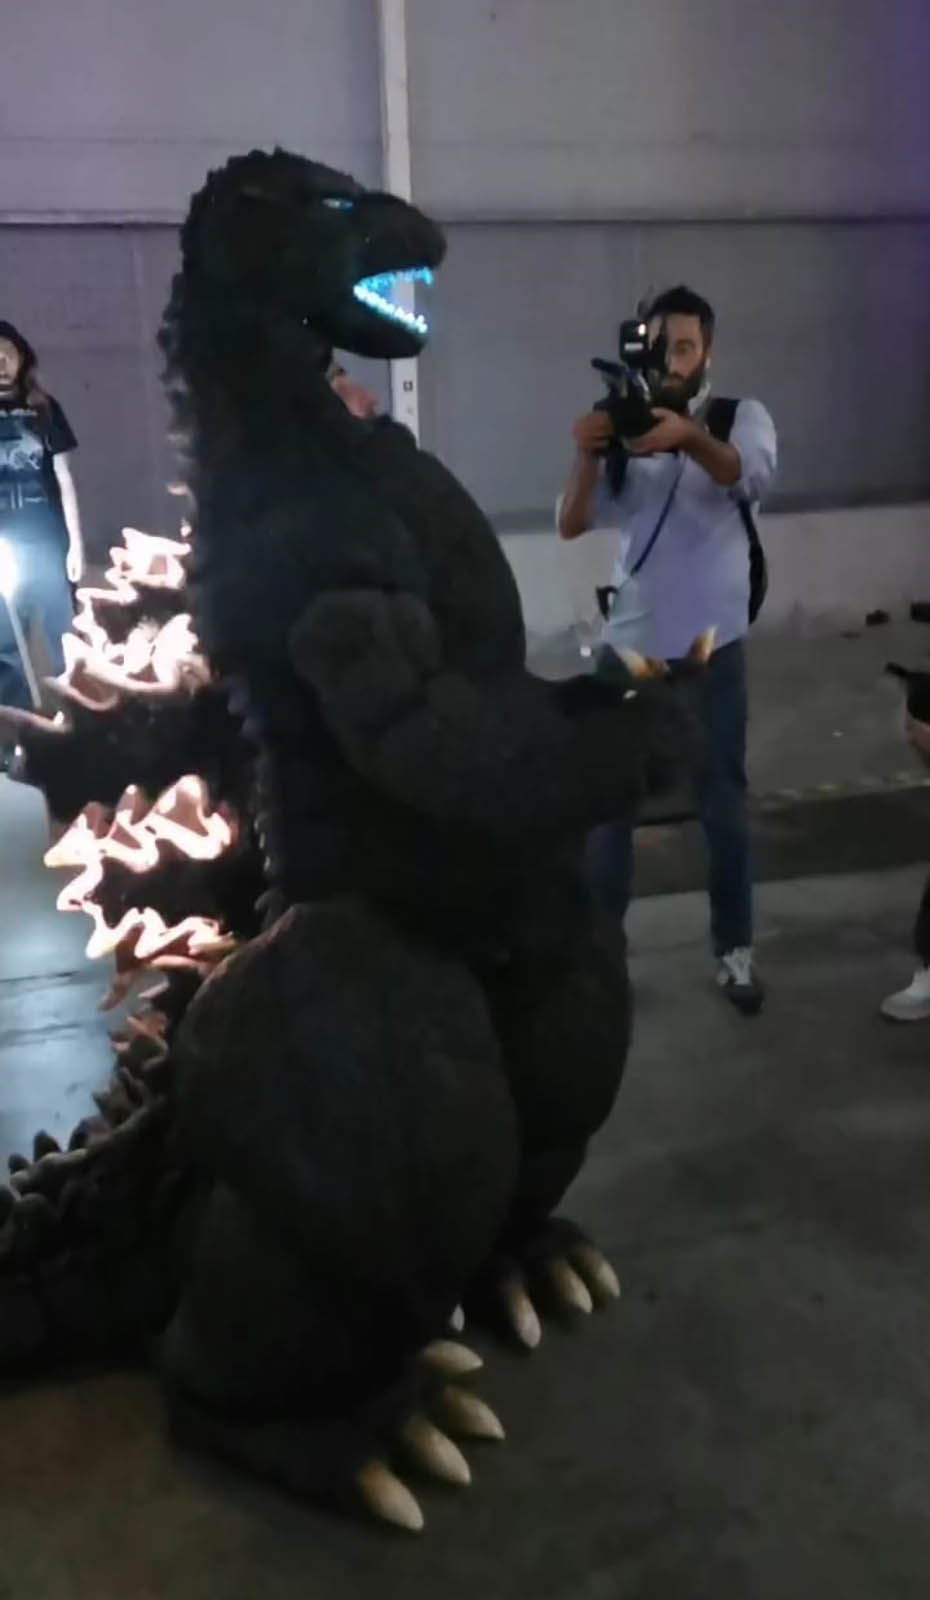
The special effects integrated into this Godzilla suit include a motorized jaw, illuminated dorsal fins and eyes, and a functional “atomic breath” effect.
Electronics & Lighting
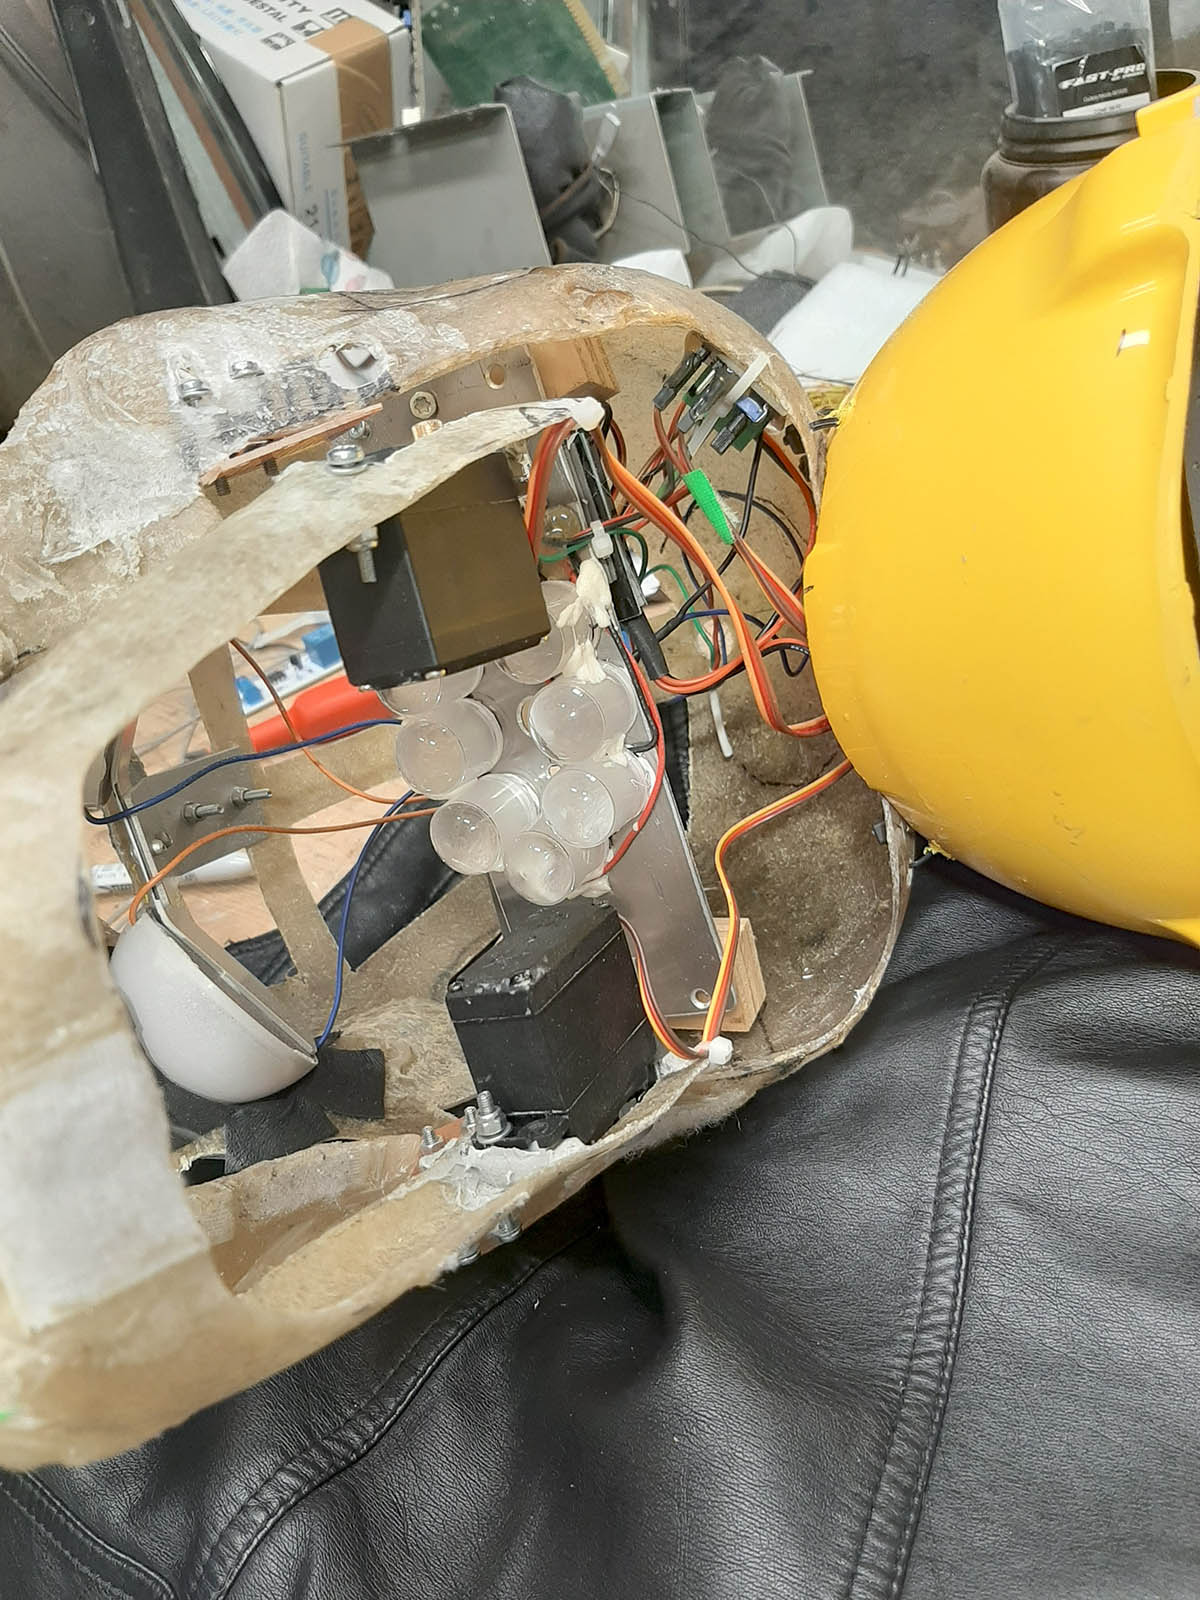
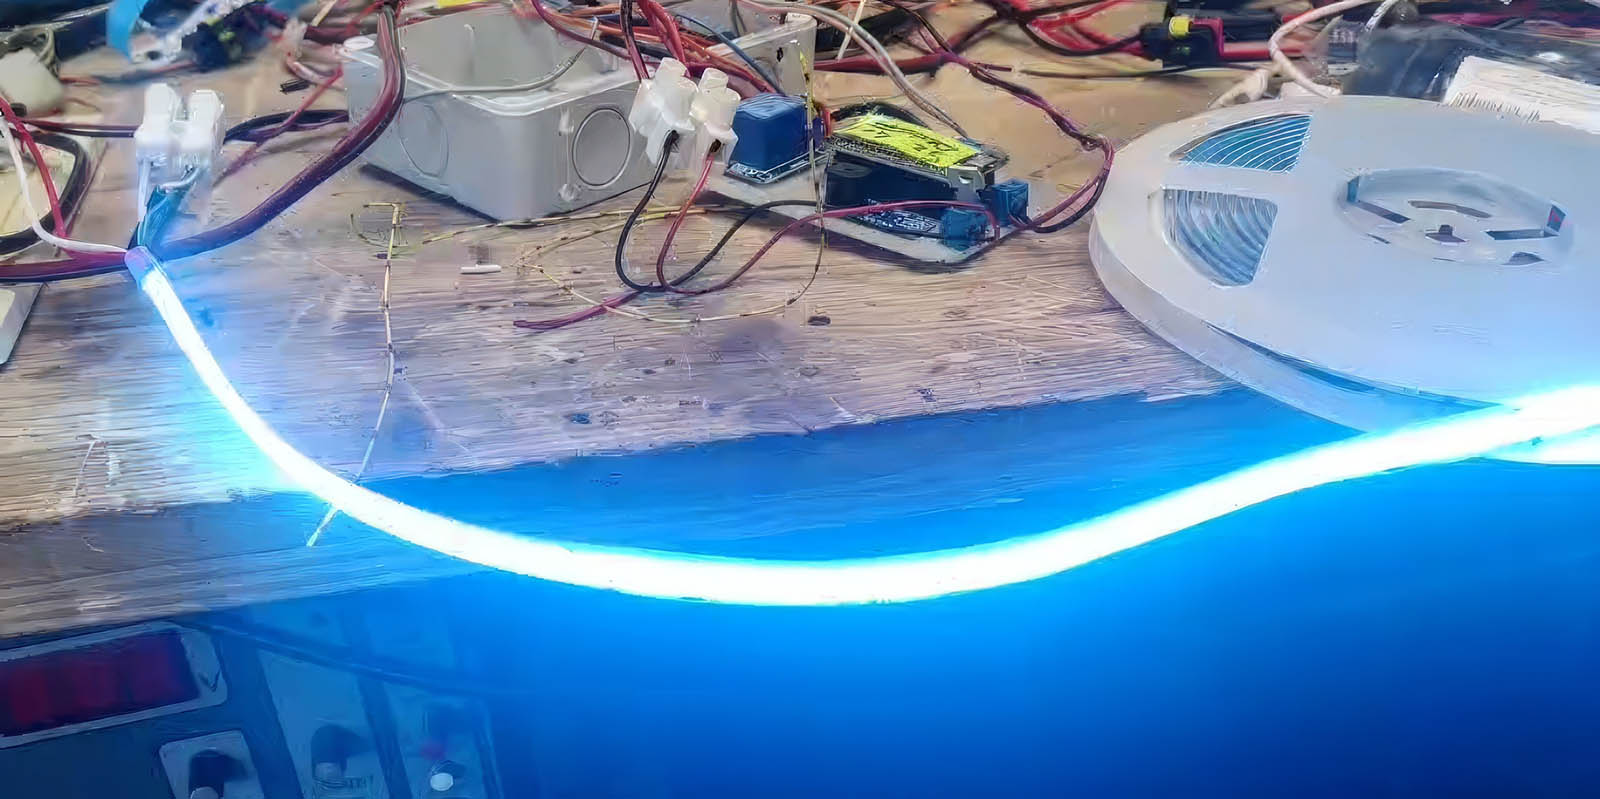
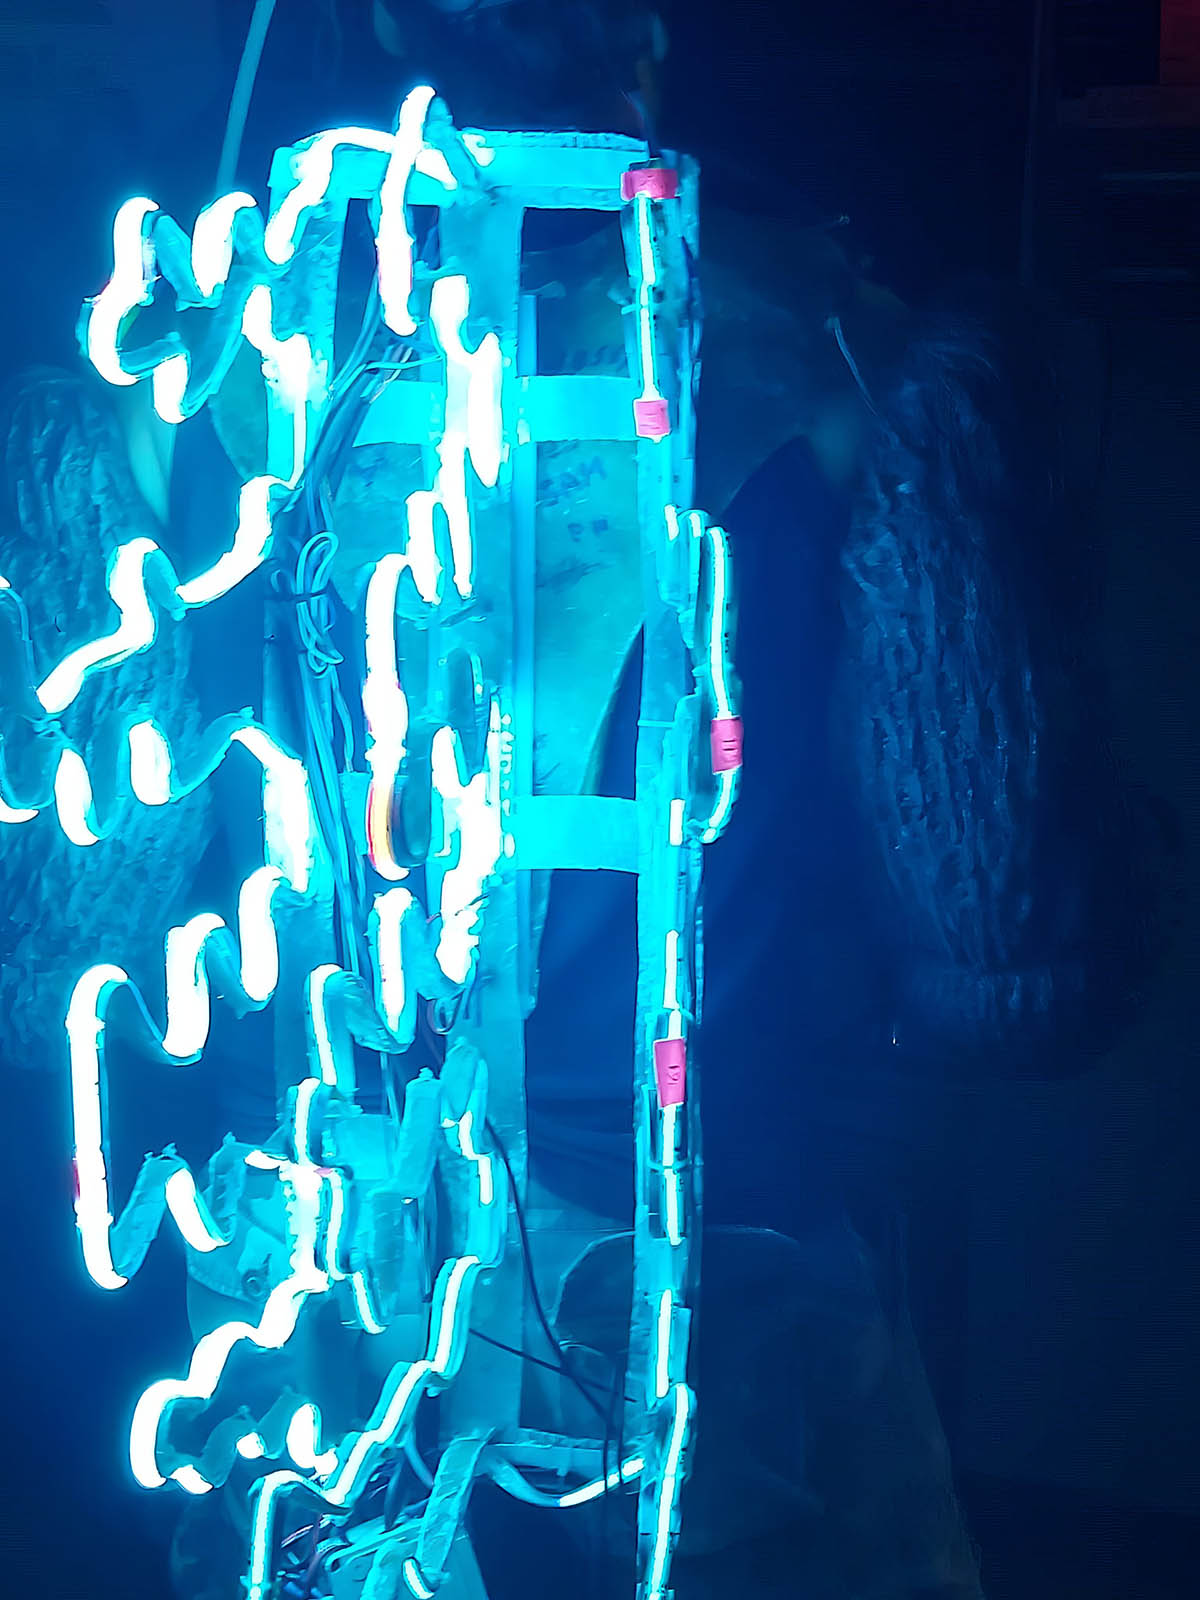
Andrea engineered these effects starting with the programming and management of the LED system. A single LED strip runs internally through the dorsal fins via the main chassis, while separate LEDs illuminate the eyes. The entire system is powered by a 12V supply and controlled by an Arduino microcontroller.
Structural Integration
The components are mounted onto the main harness and central PVC frame that form the suit’s internal structure. All wiring is securely routed and fastened along the harness and the internal fin reinforcement.
The Atomic Breath Mechanism
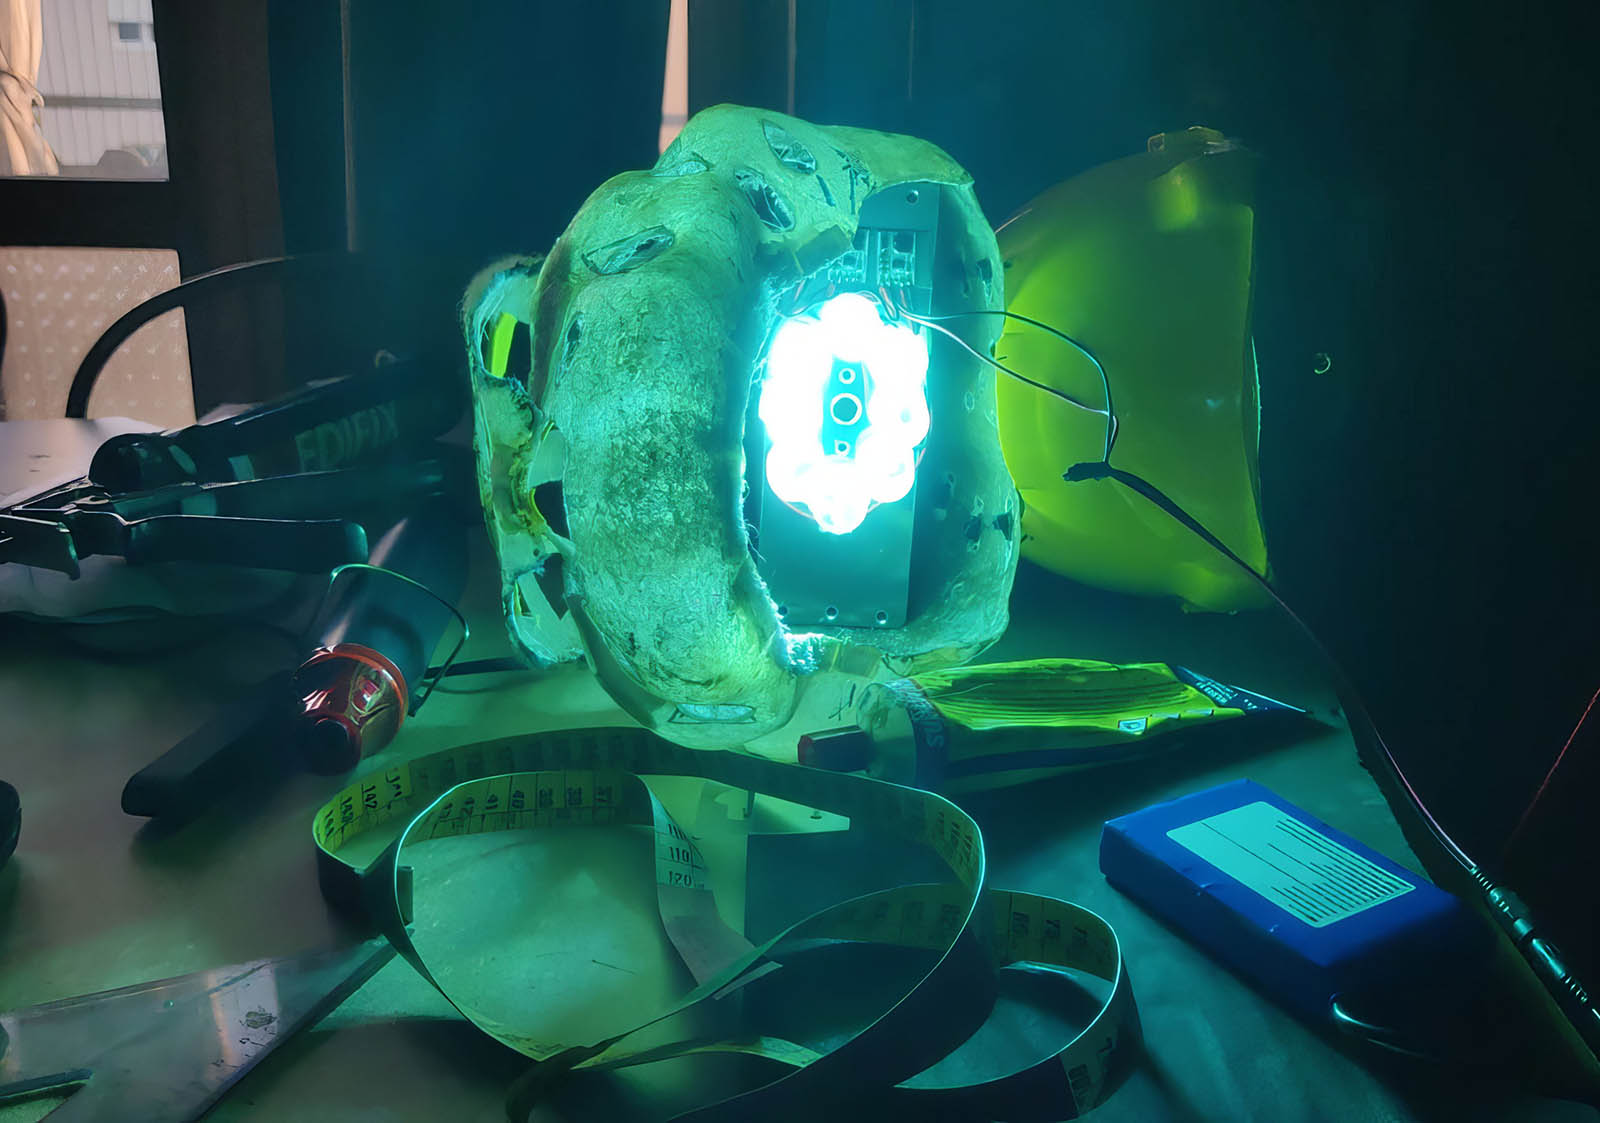
The servos for the jaw movement and the eye lighting are housed within the skull, alongside the delivery nozzle for the atomic breath. This effect is triggered by a solenoid valve mounted on the fiberglass chest plate, which is connected to two cans of compressed air (standard PC dusters).
Activation Sequence
A trigger button located in the left hand initiates the following sequence:
- Dorsal Fin Glow: A 10-second light sequence climbs up the back.
- Atomic Blast: Once the sequence ends, the solenoid activates, depressing the nozzles on the compressed air cans.
- Visual Effect: As the air travels through the mouth nozzle, it is “painted” bright blue by a dedicated LED ring surrounding the outlet.
- Eyes: As an homage to Burning Godzilla, the eyes glow red simultaneously with the fin sequence.
Operational Timing
For the best visual impact, the jaw must be opened a few seconds before the blast begins. To ensure perfect timing, the system provides an audible cue via a buzzer located near the performer’s head, signaling exactly when to trigger the mouth mechanism.
Scenography
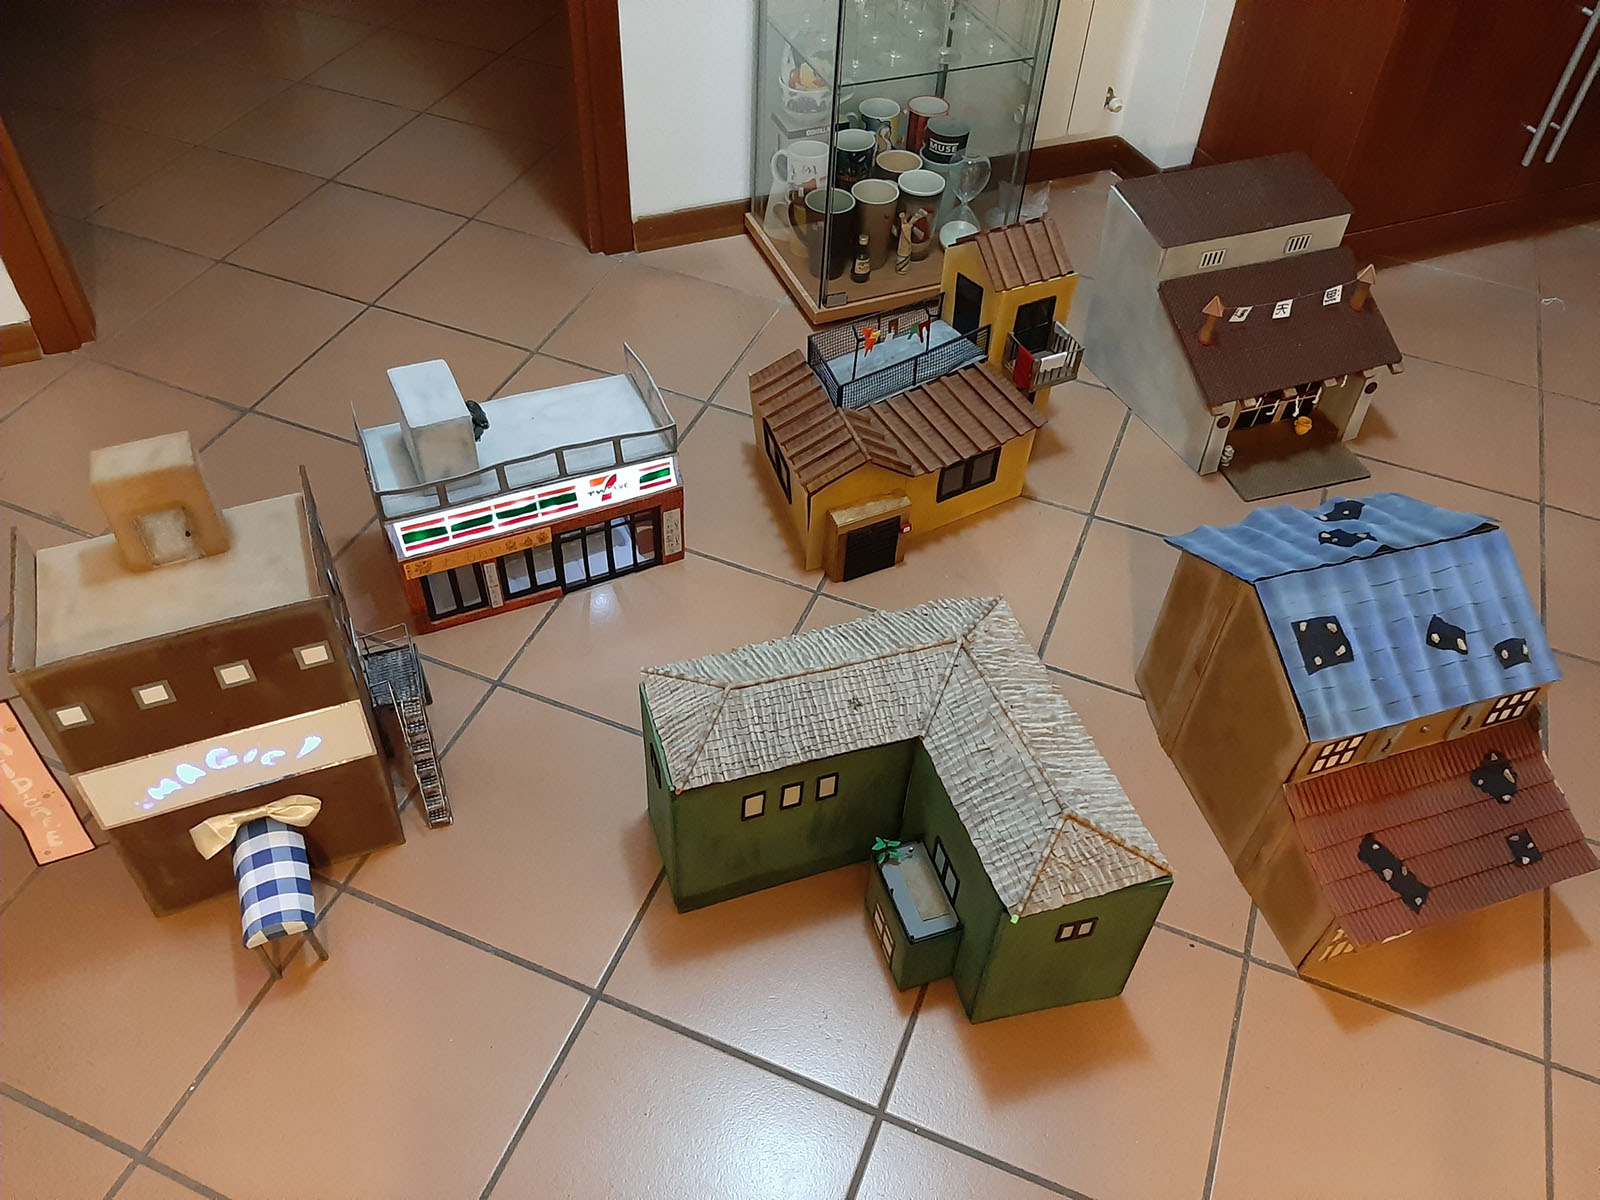
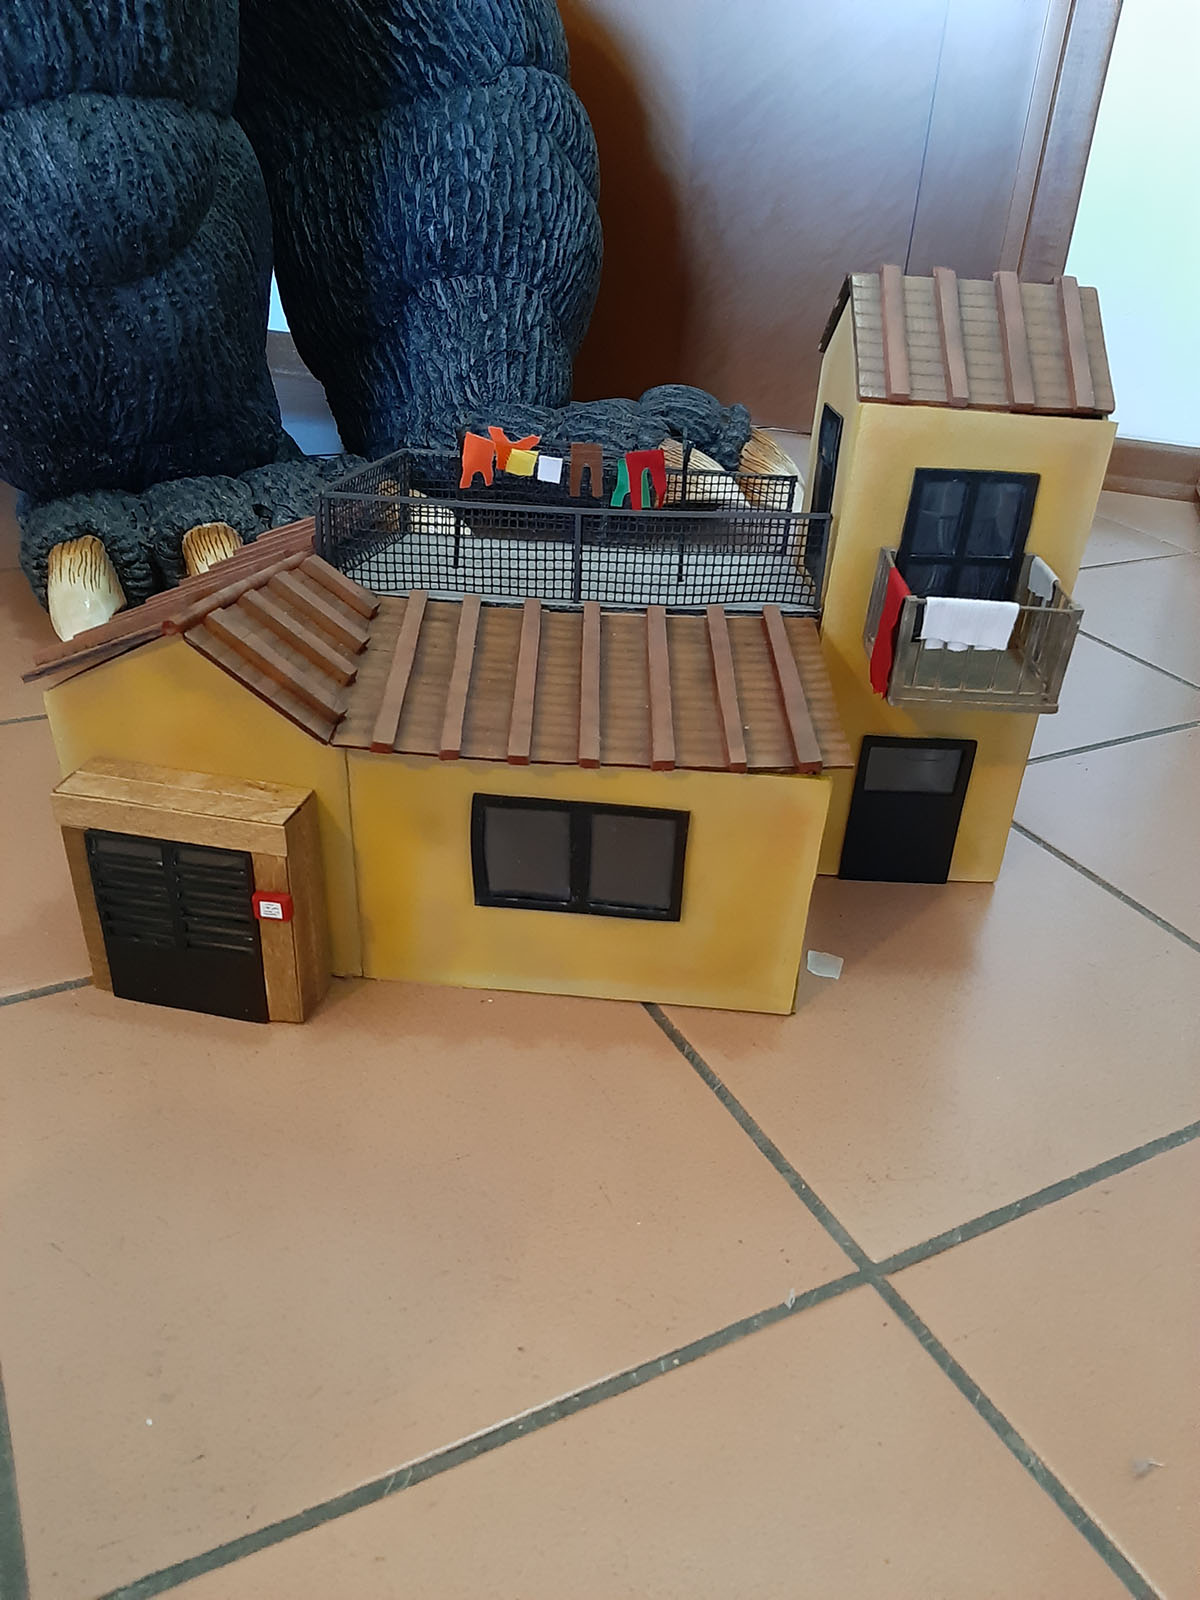
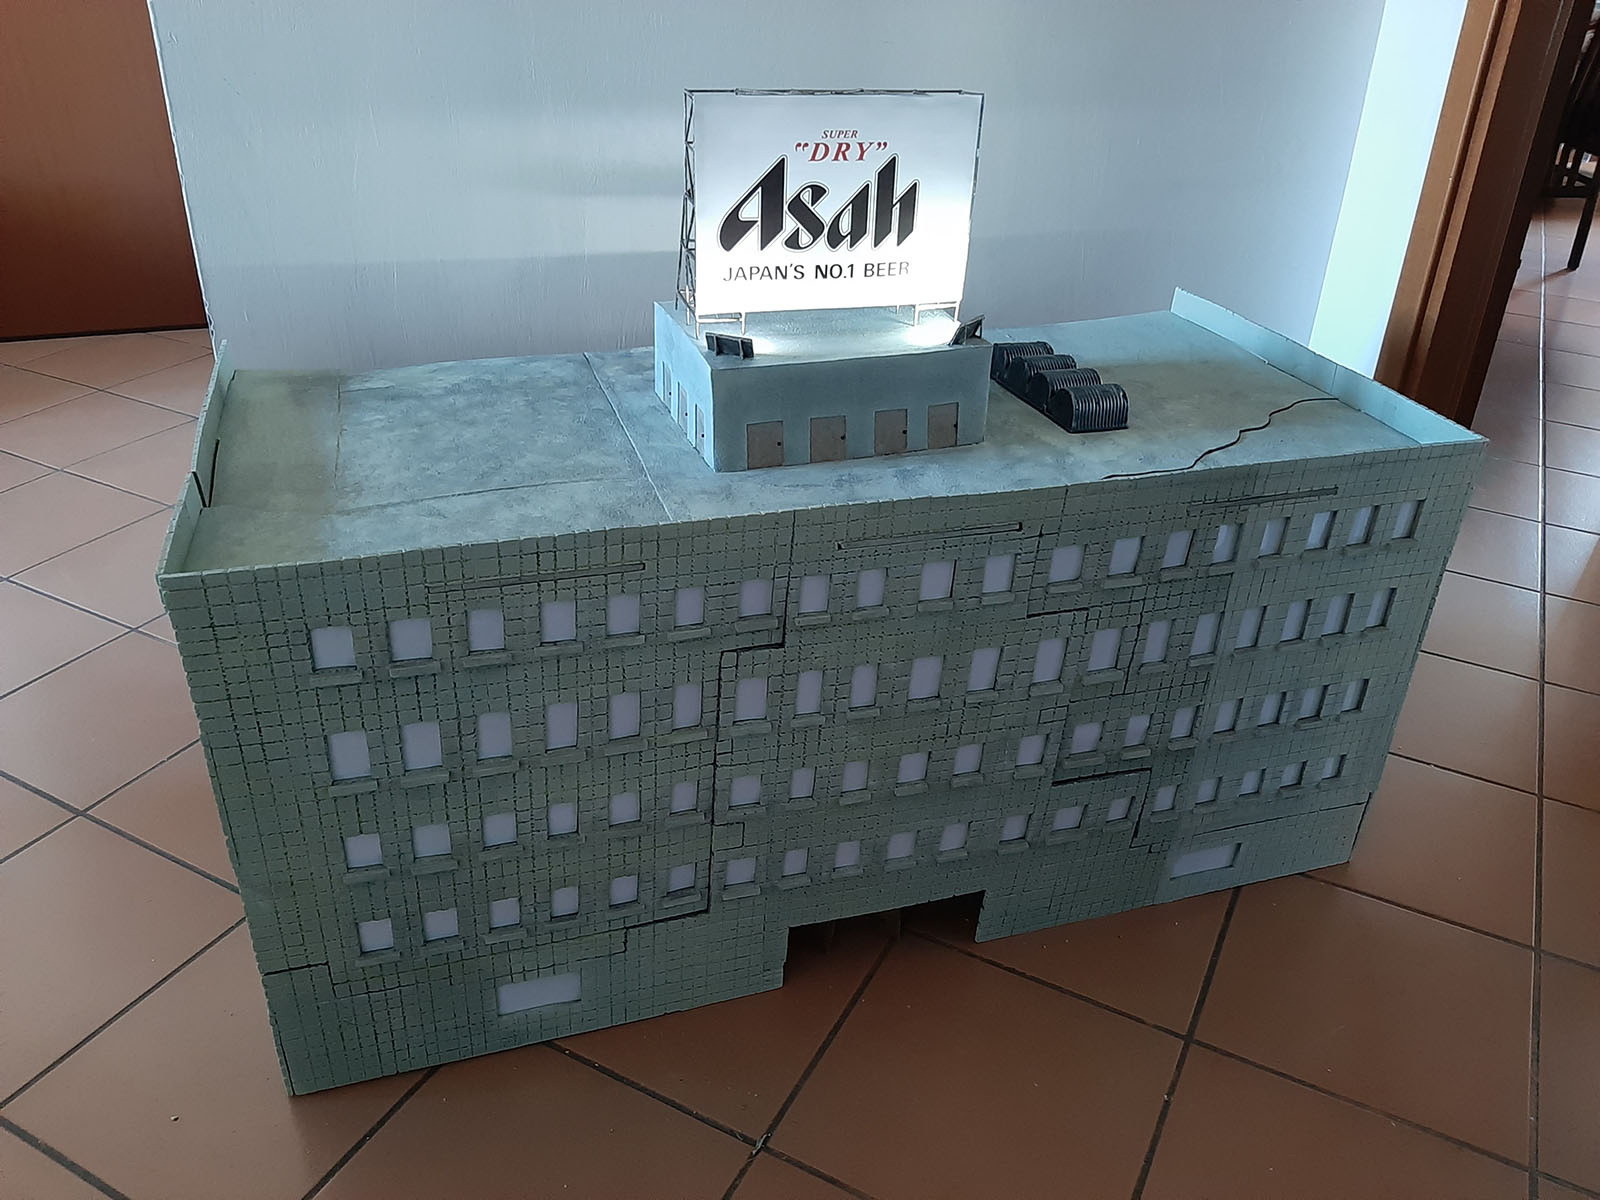
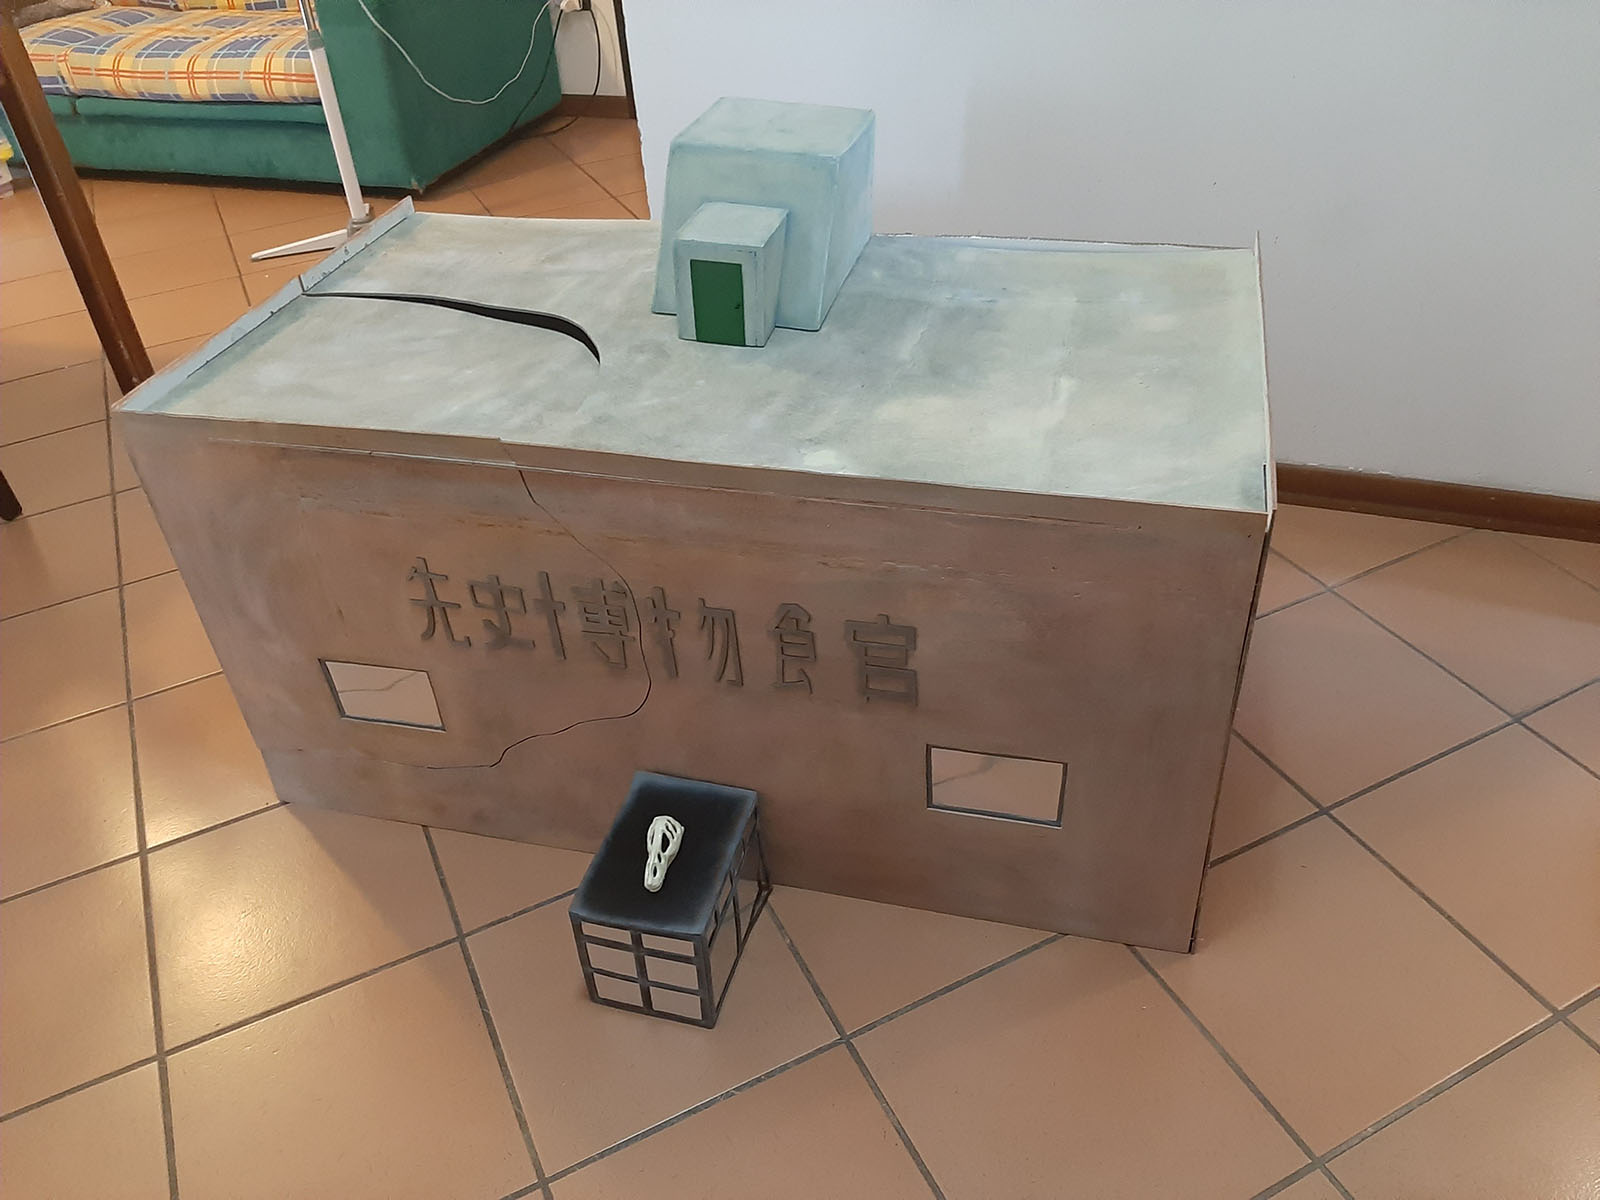
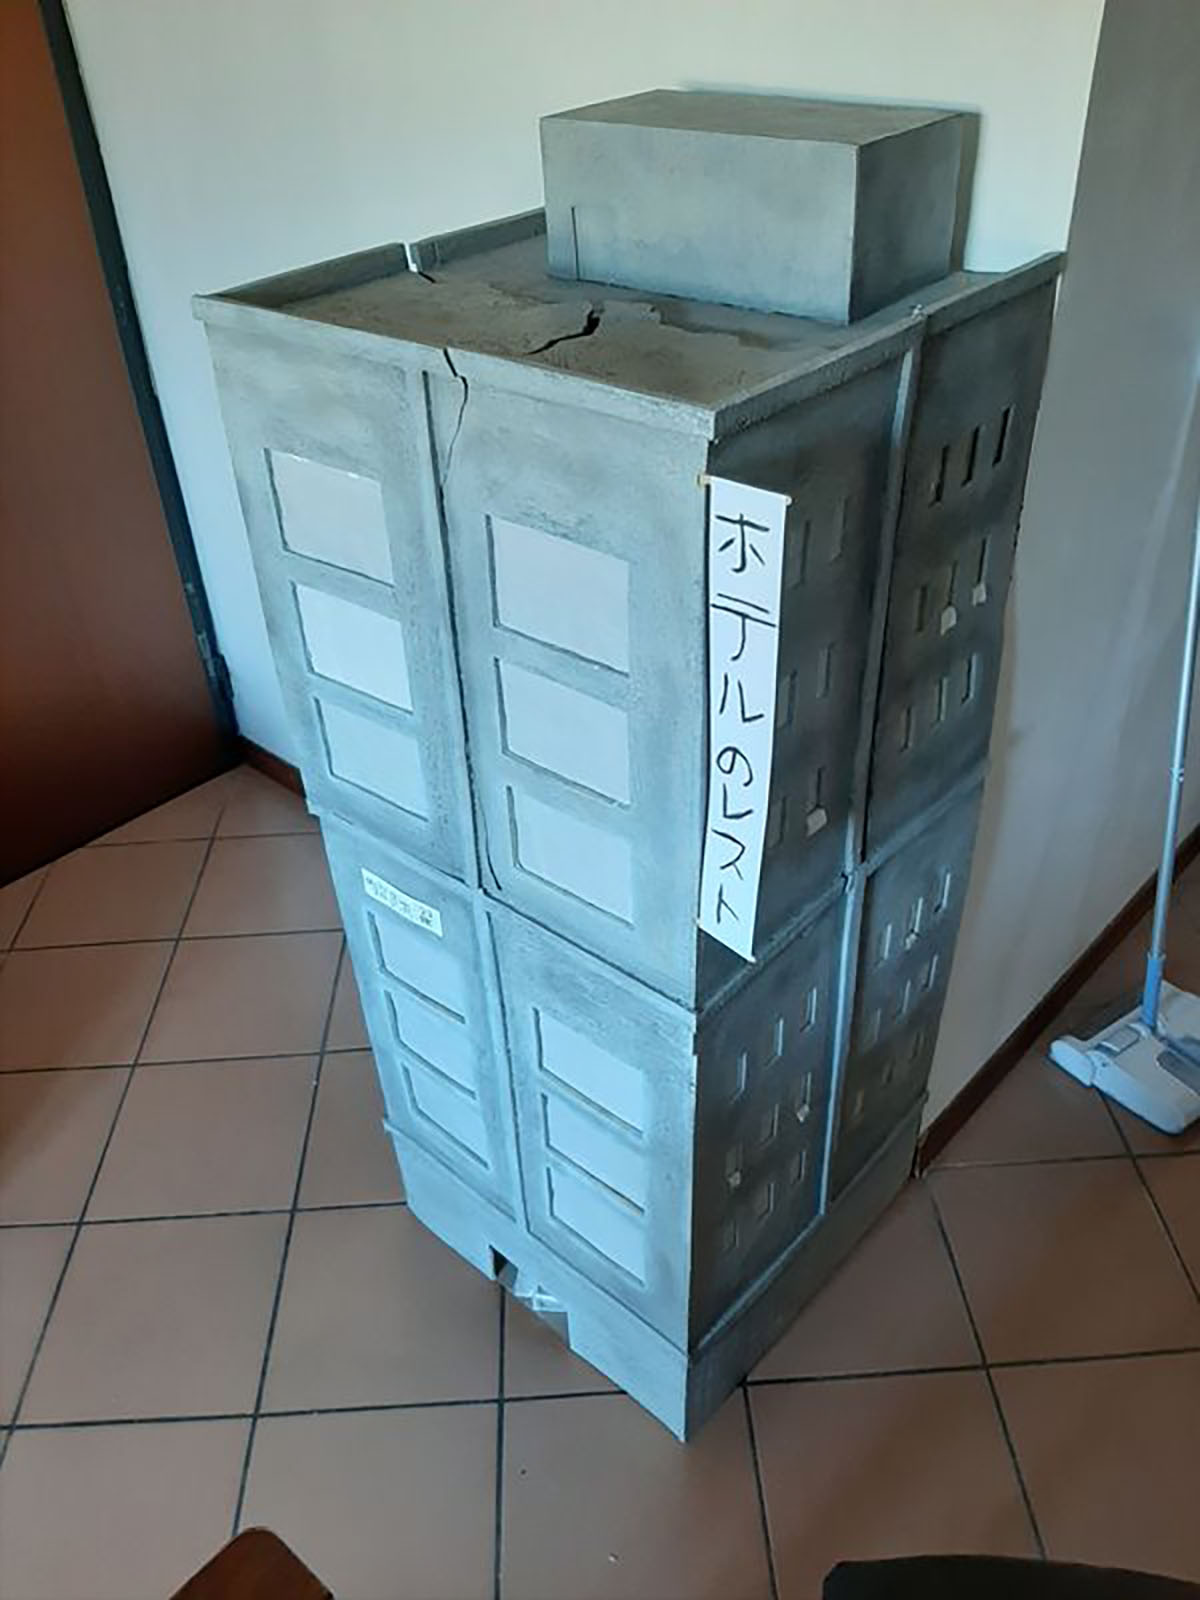
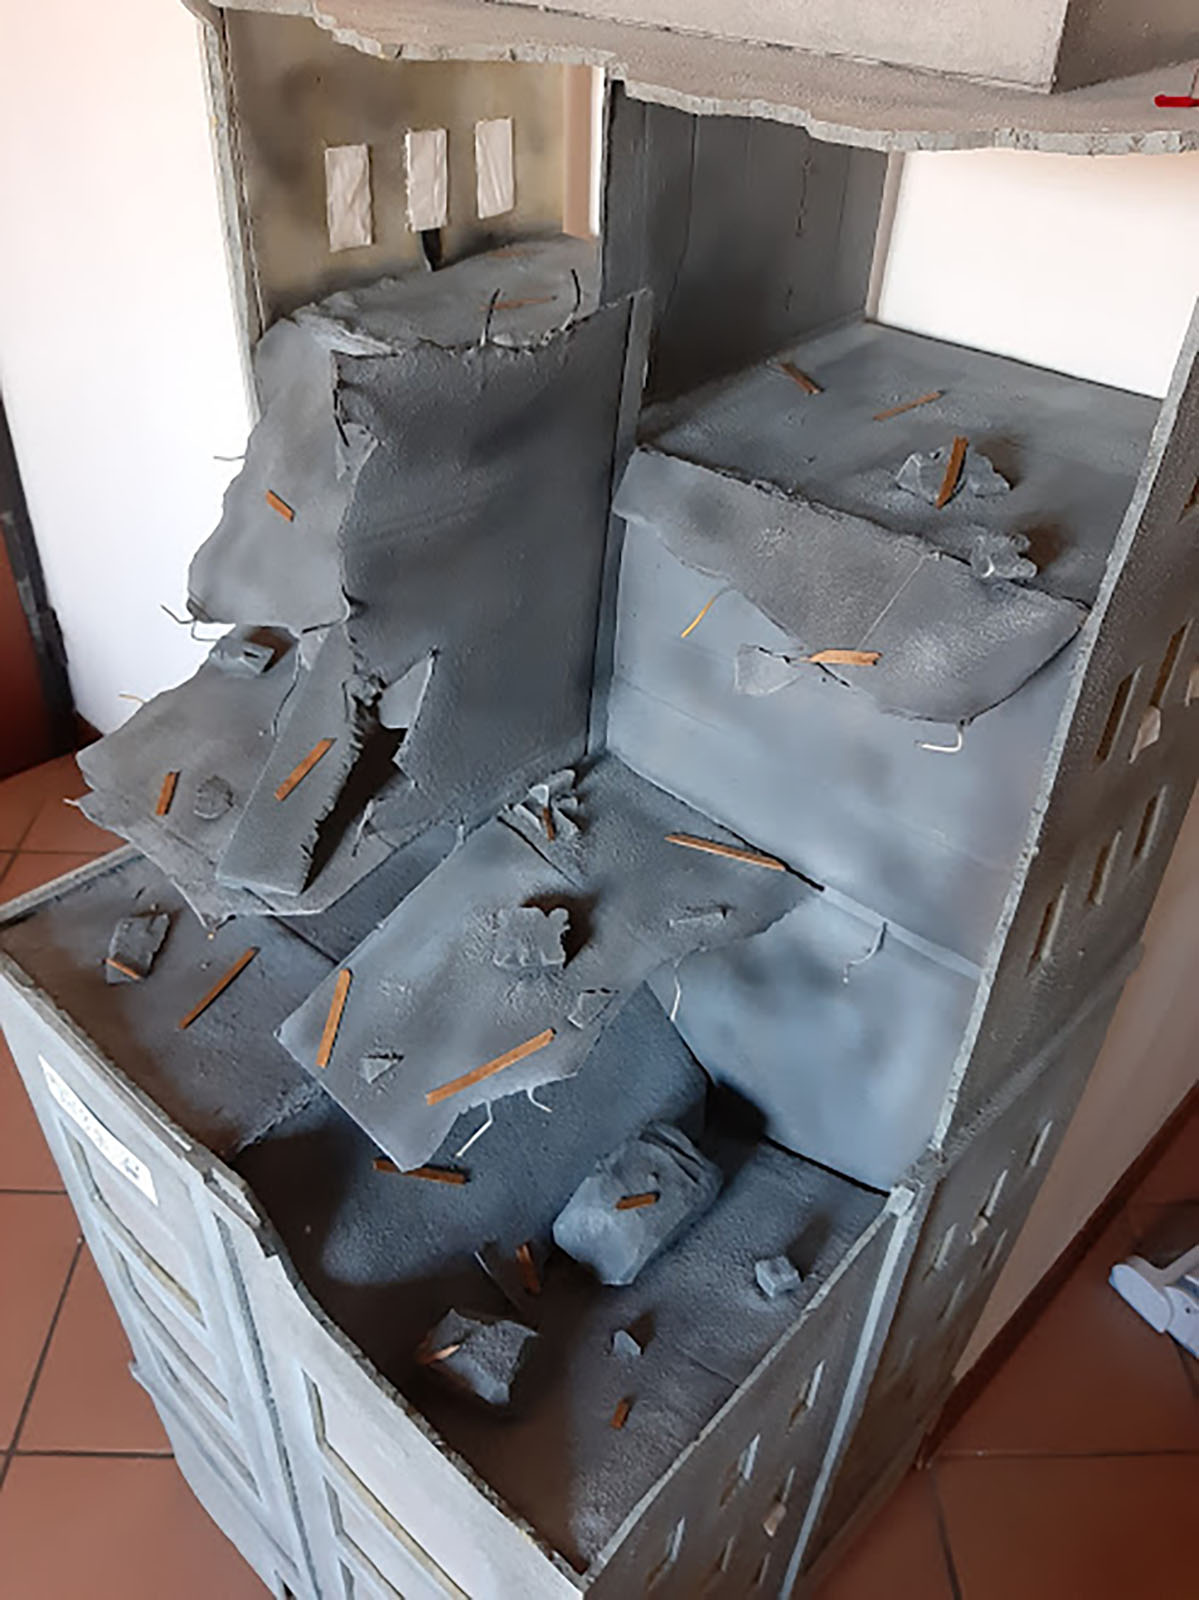
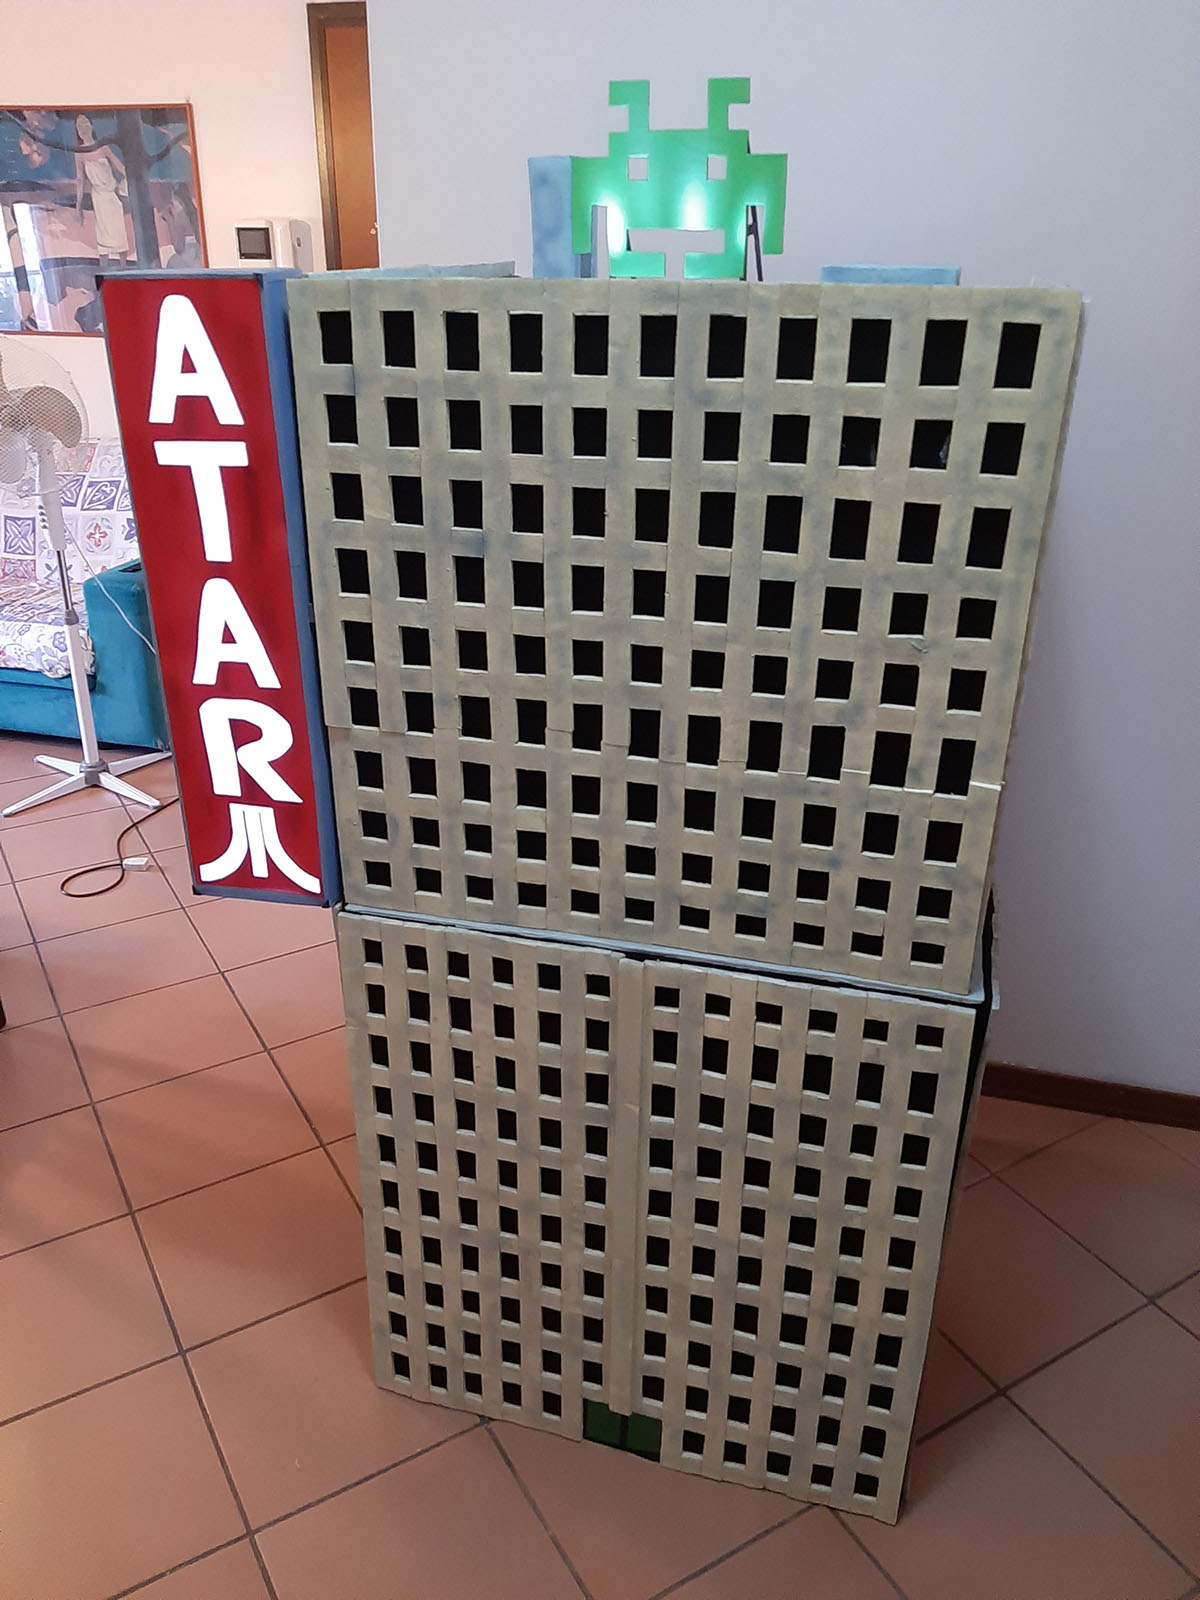
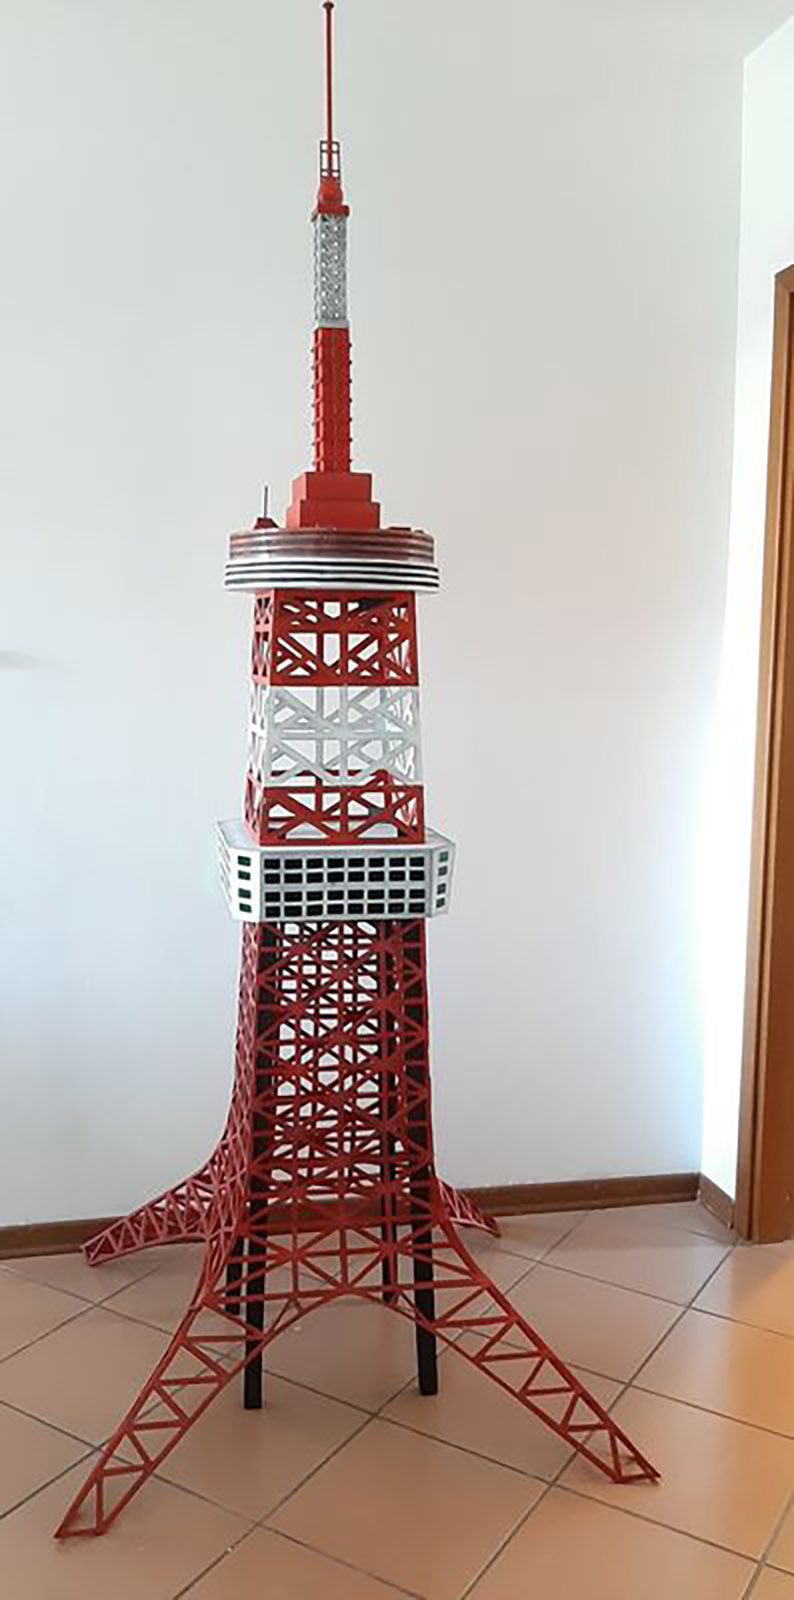
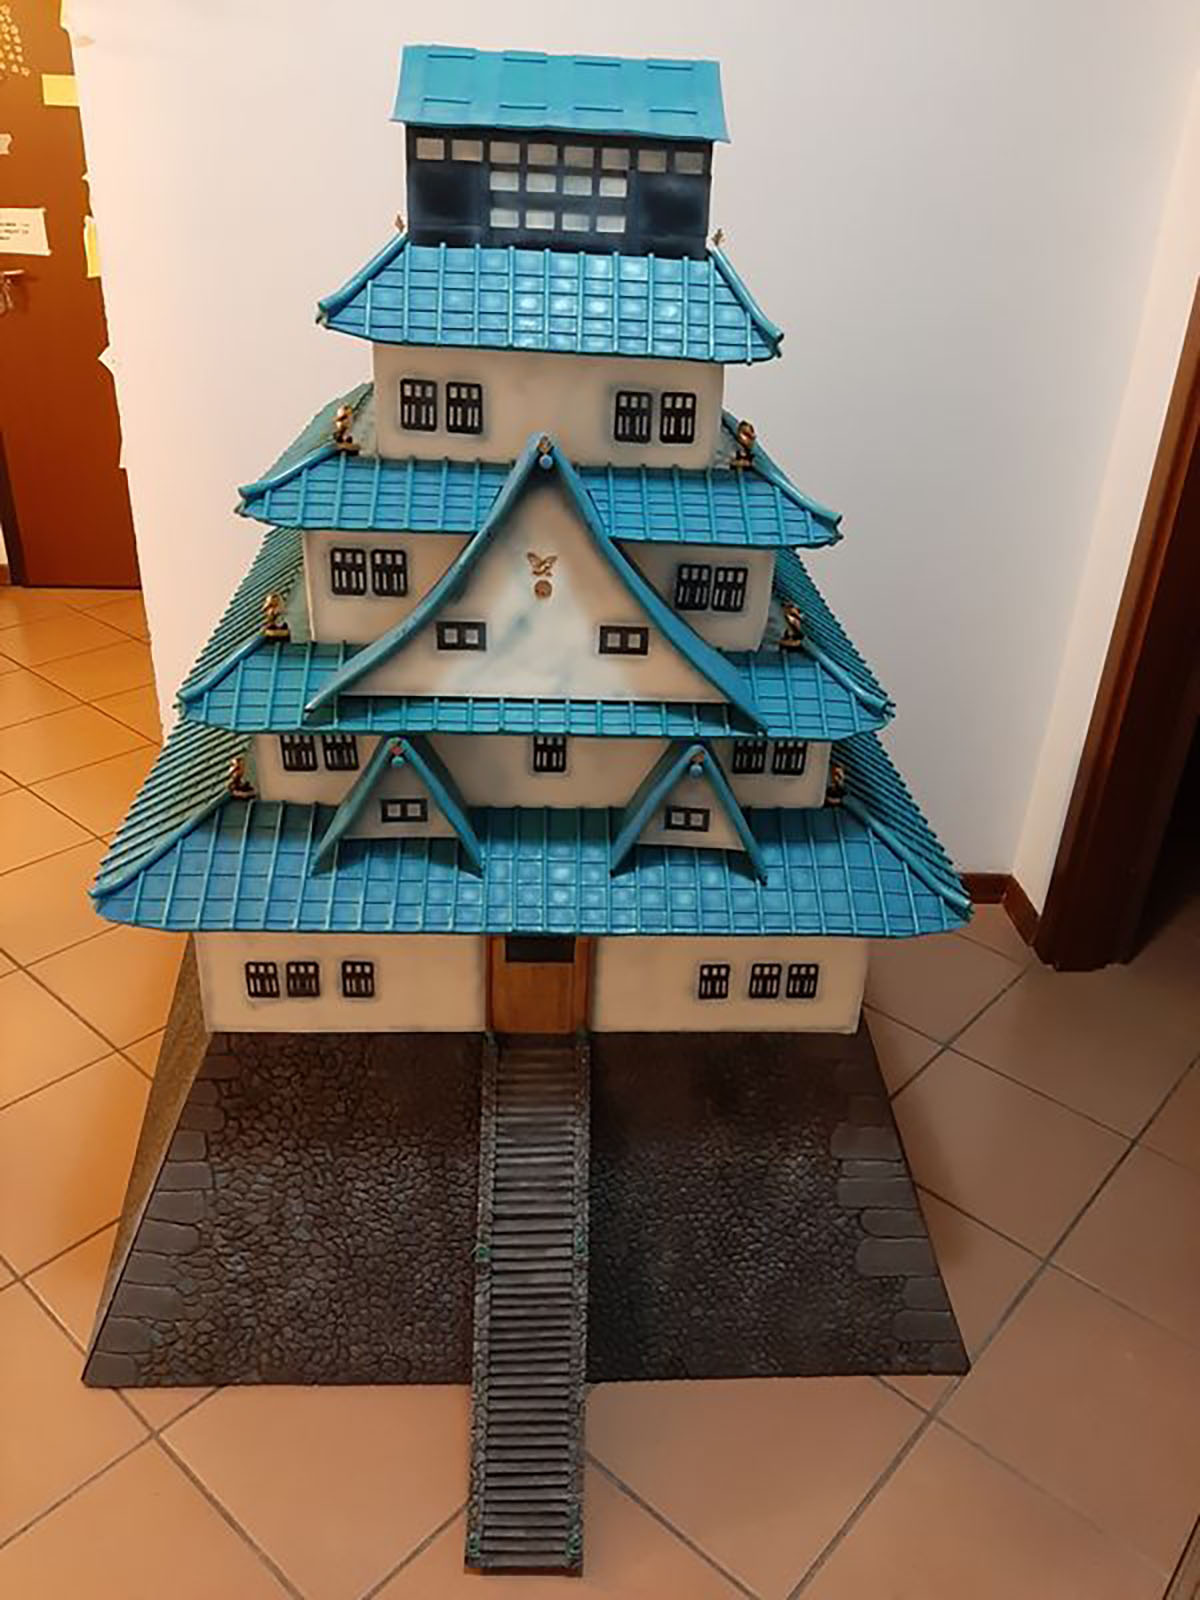
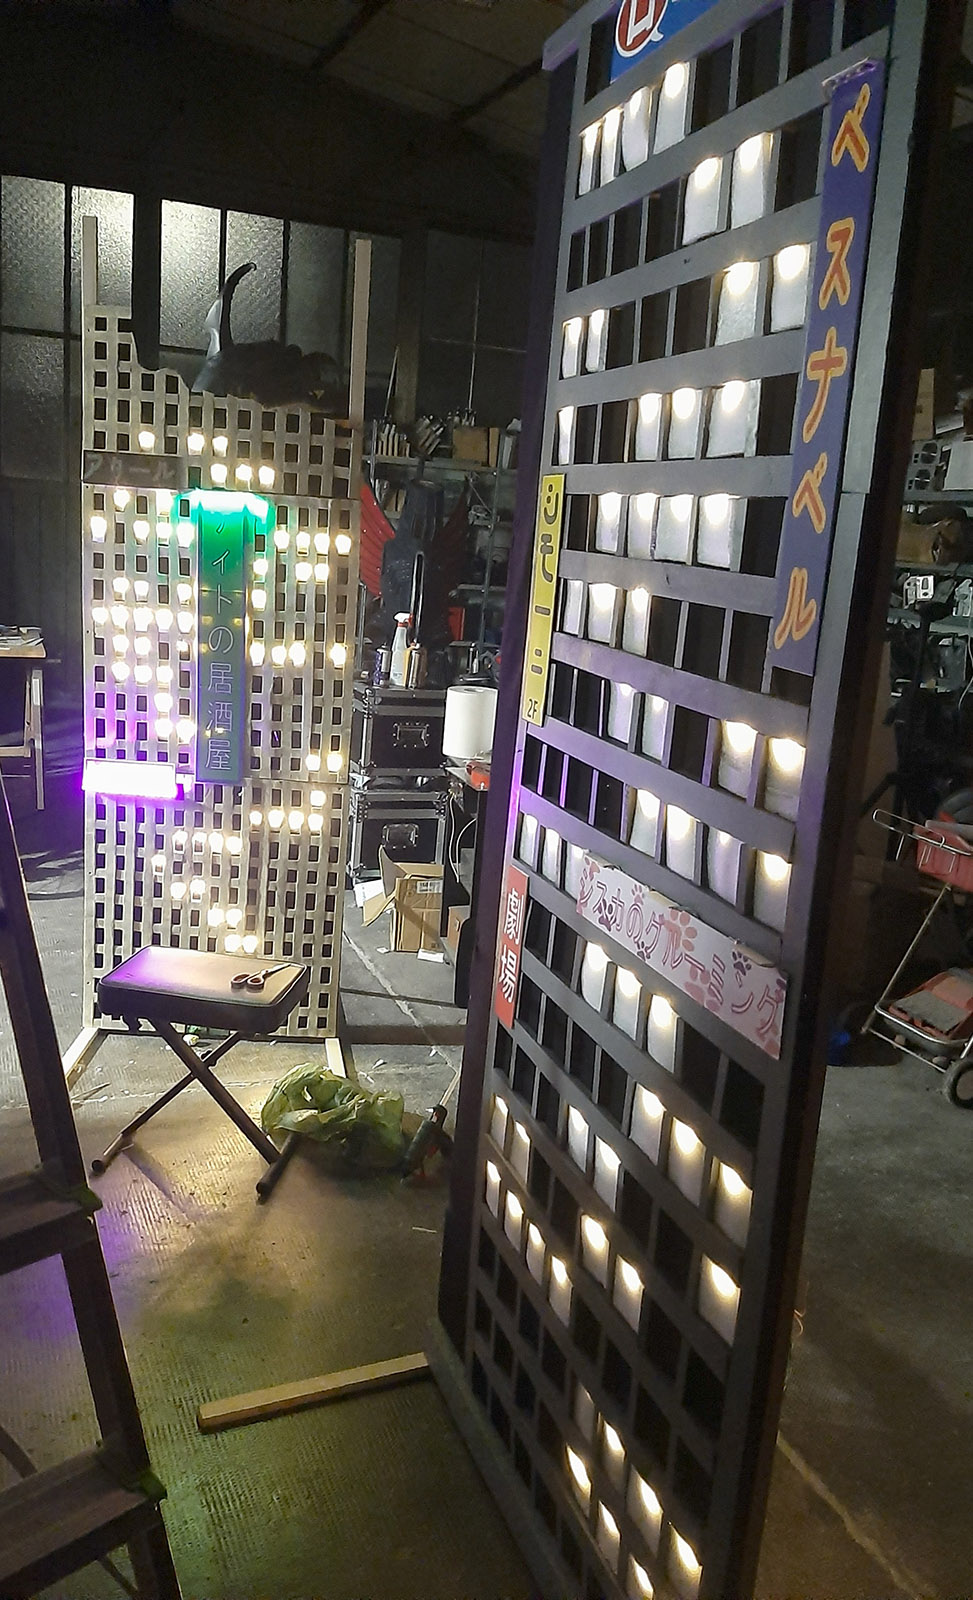
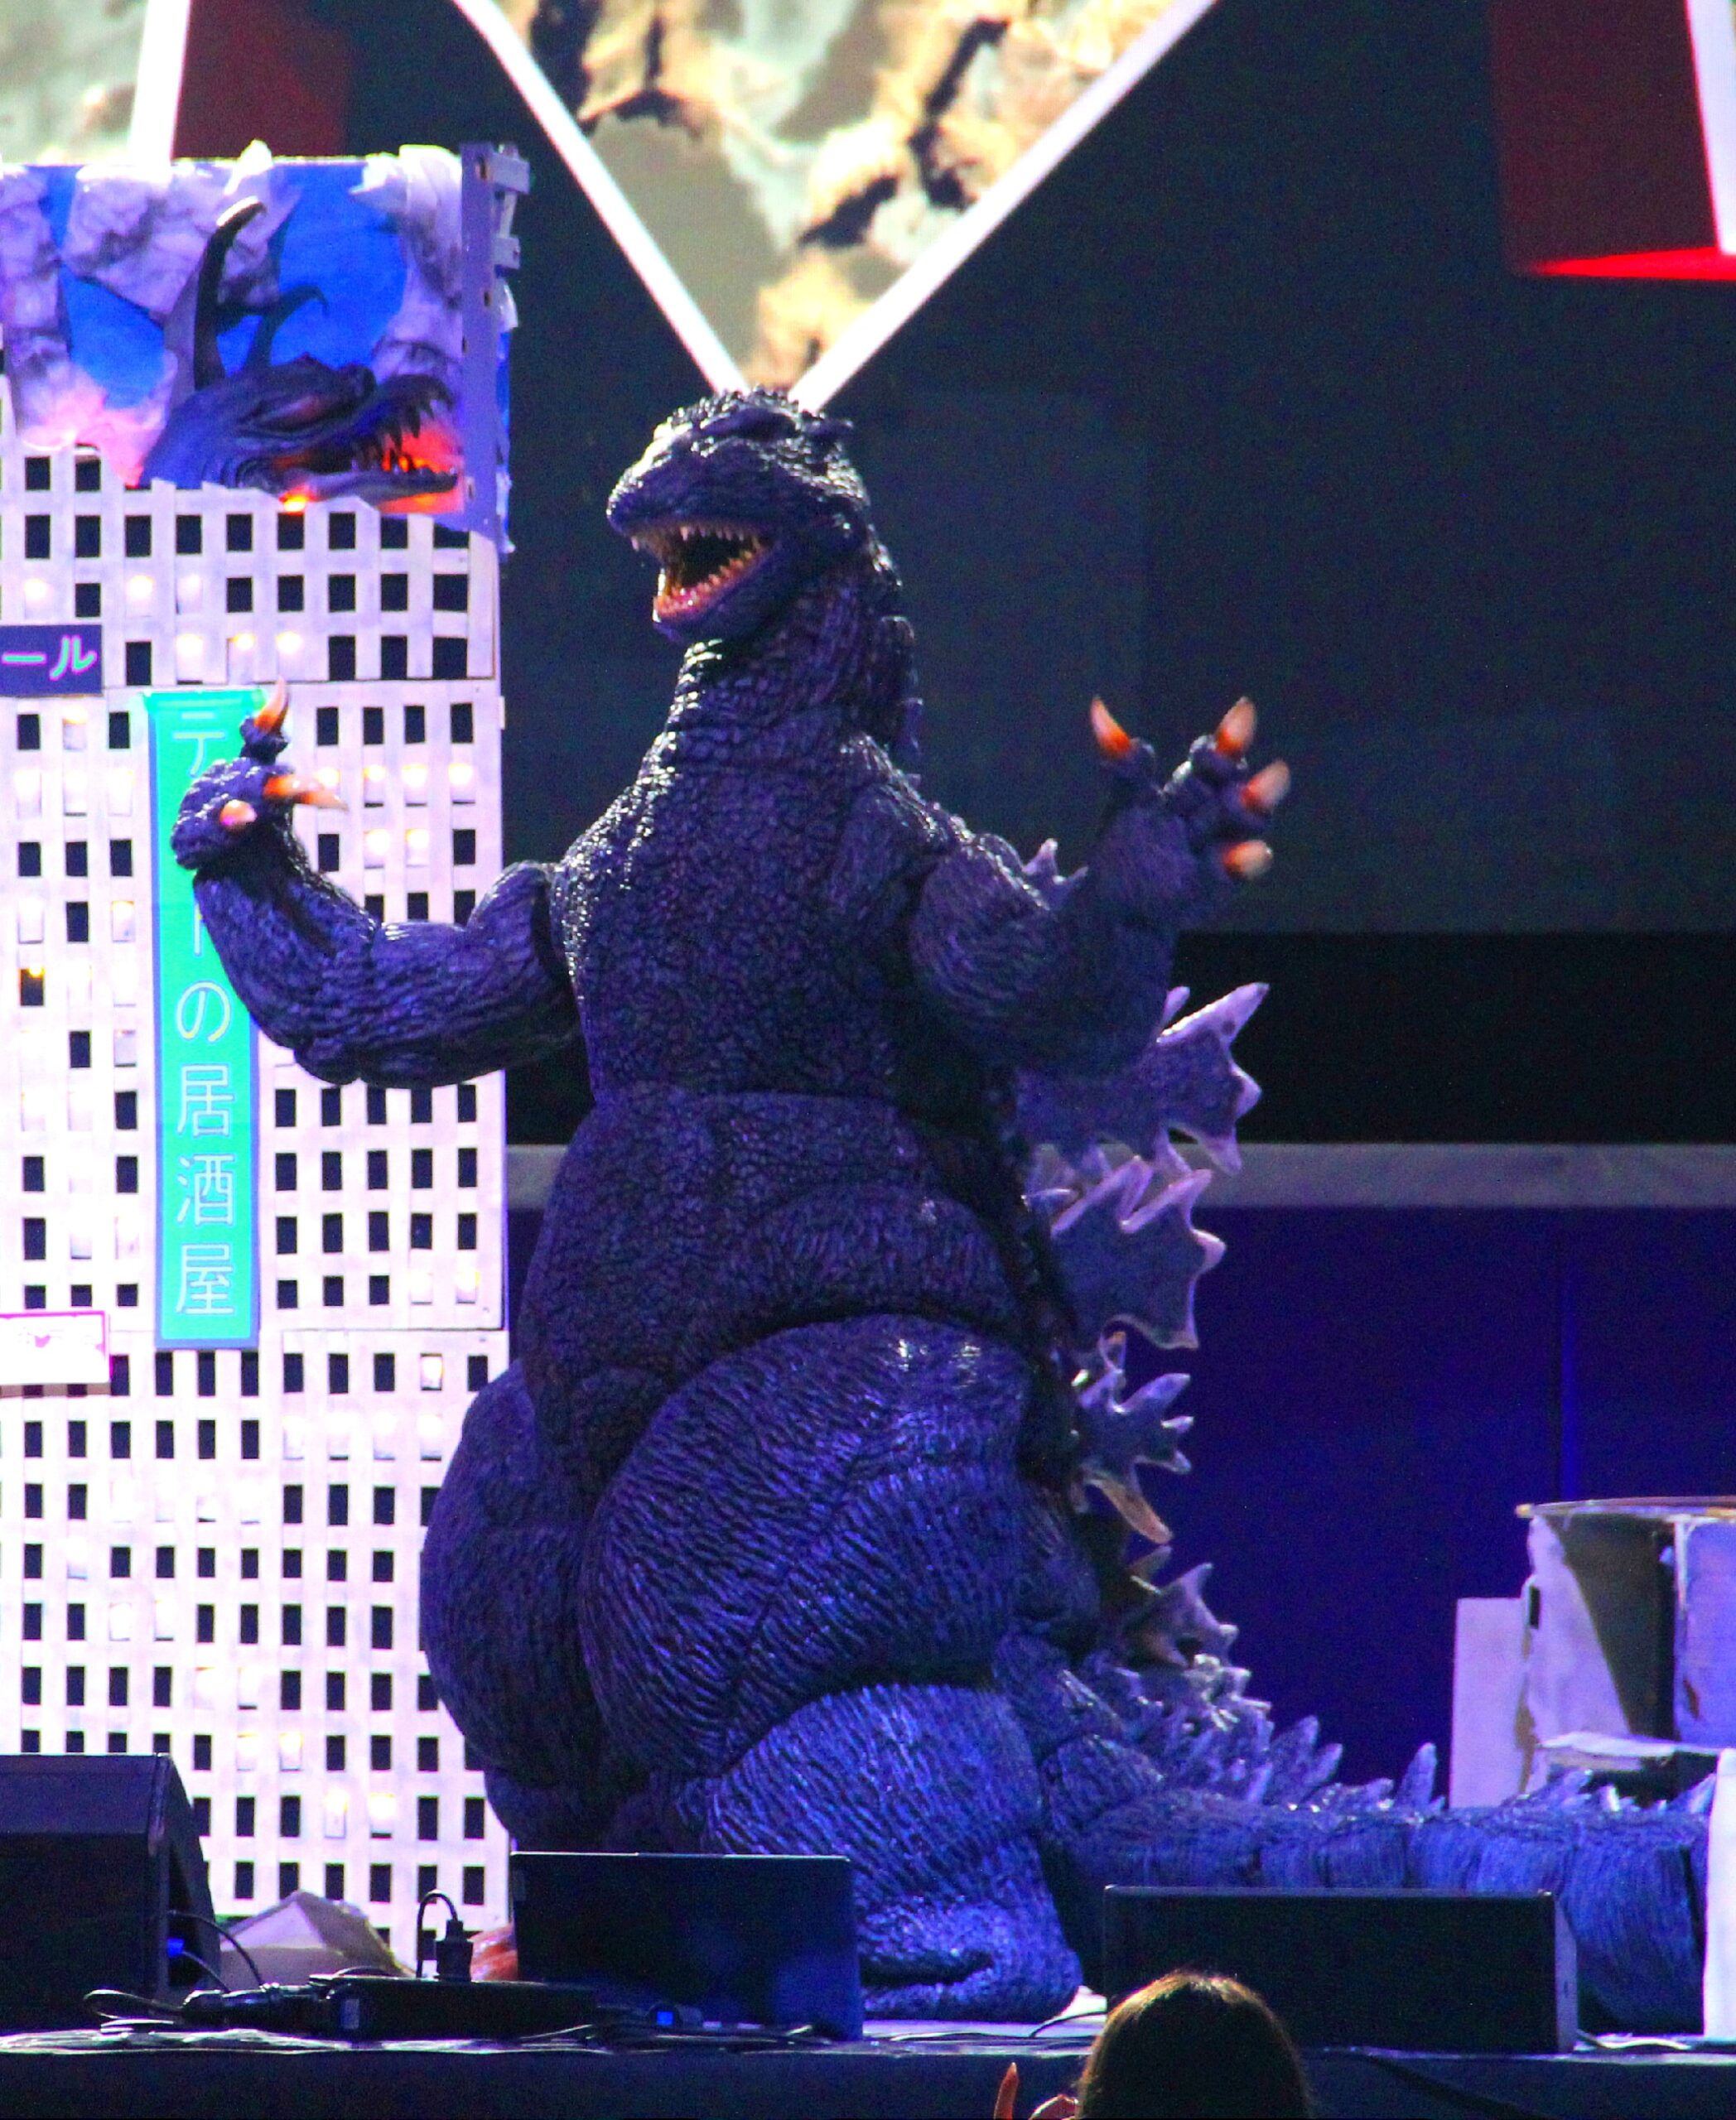
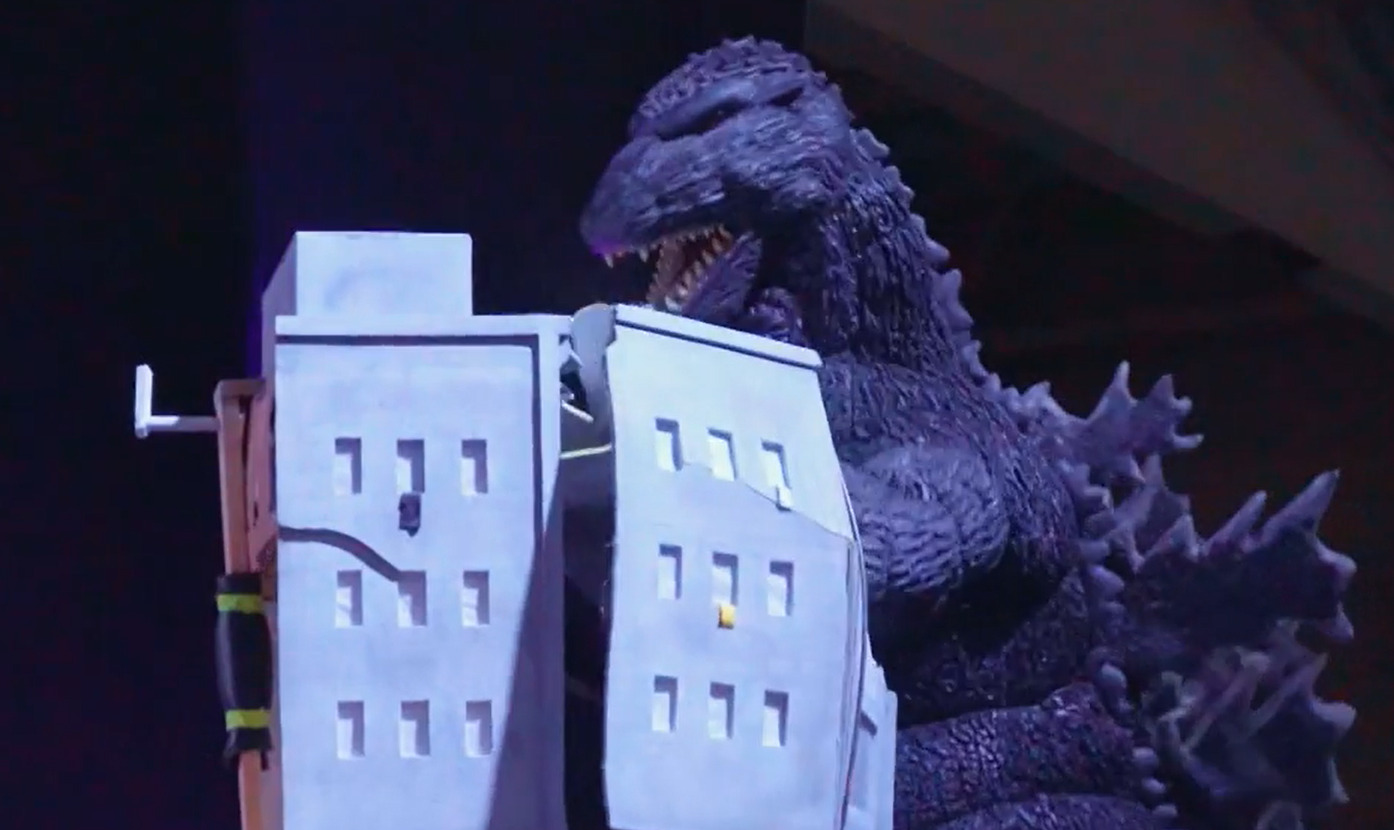
I designed buildings of various scales inspired by pictures of japan,to enhance the scene, the overall display, and any potential photography.
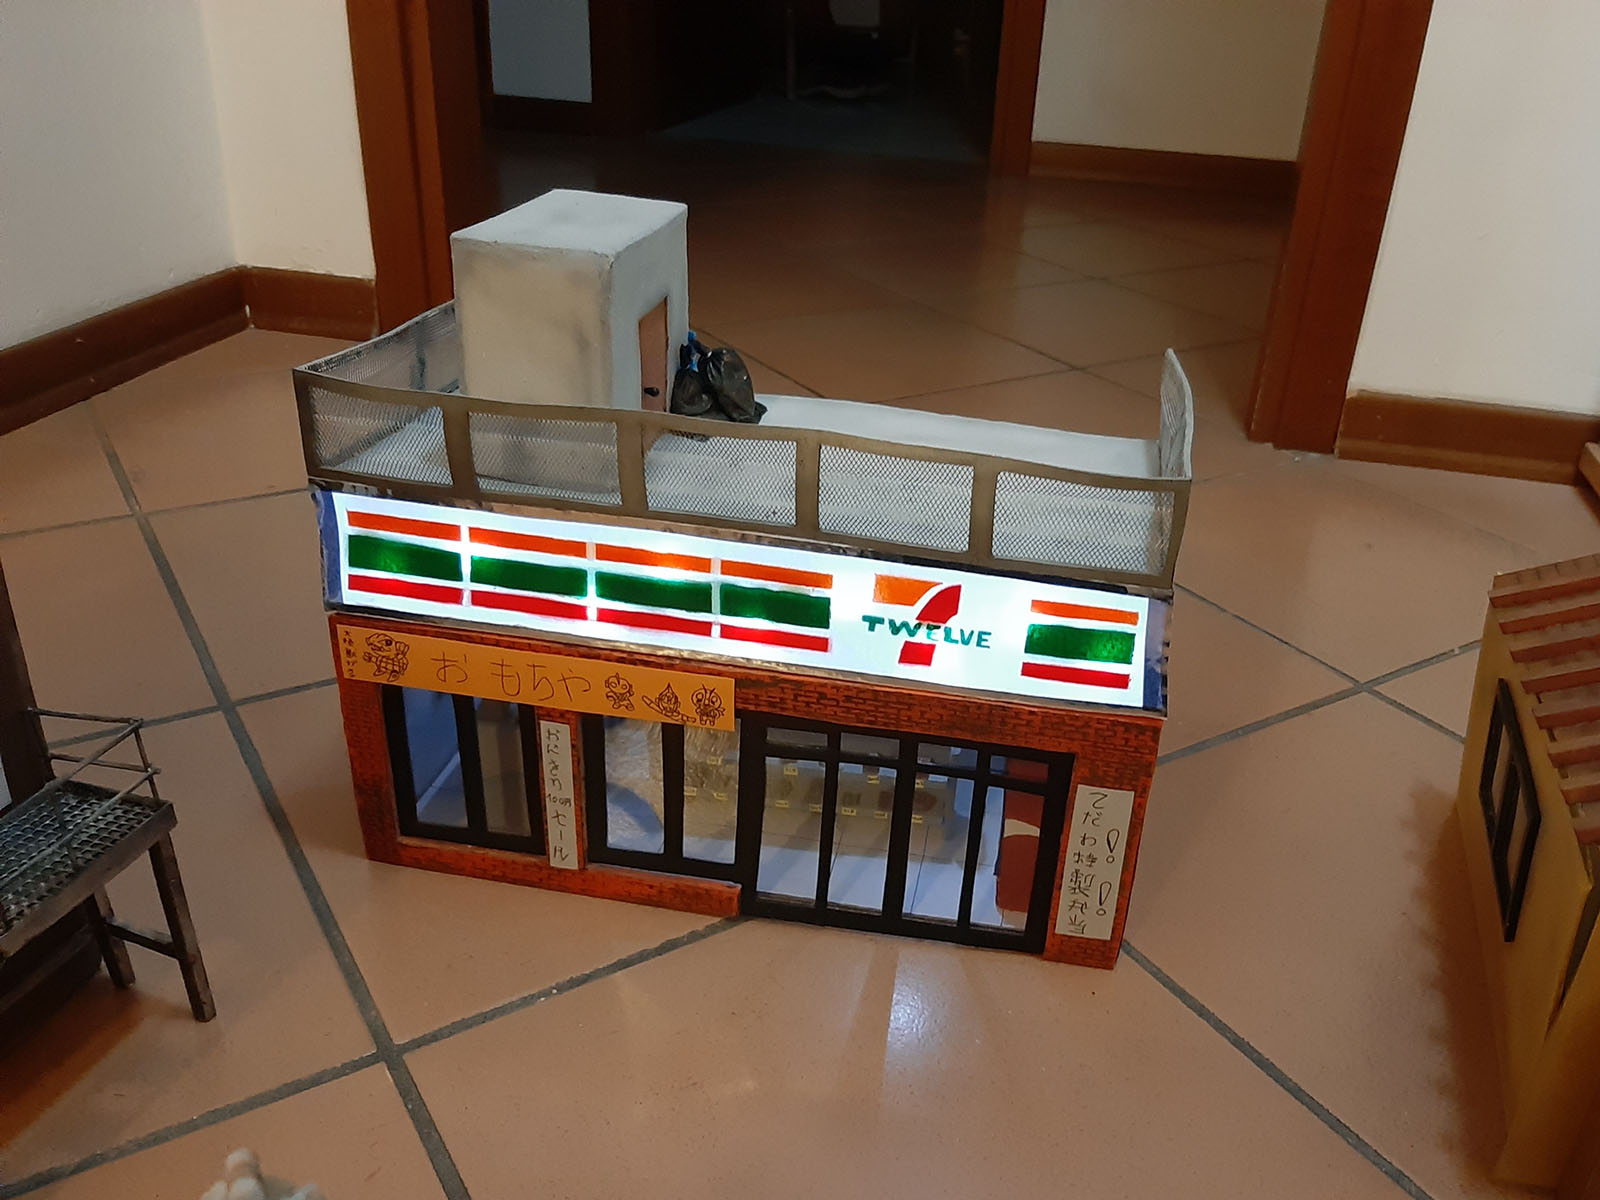
Most of the structures are ‘pre-damaged’—designed to collapse upon impact. The interiors are built to look already devastated, and for added realism, some feature internal lighting and hanging laundry.
They are primarily constructed using thin expanded polystyrene (EPS), paper, and plastic of various sizes, with windows made from transparent acetate sheets.
The surfaces were treated with a glue and sand mixture to replicate a realistic wall texture. I applied the paint using a combination of brushwork and airbrushing.
Finally, custom-made fictional signs were added as finishing touches.
I aimed to create generic buildings rather than city-specific ones, allowing them to be arranged and combined according to personal preference.
The Train
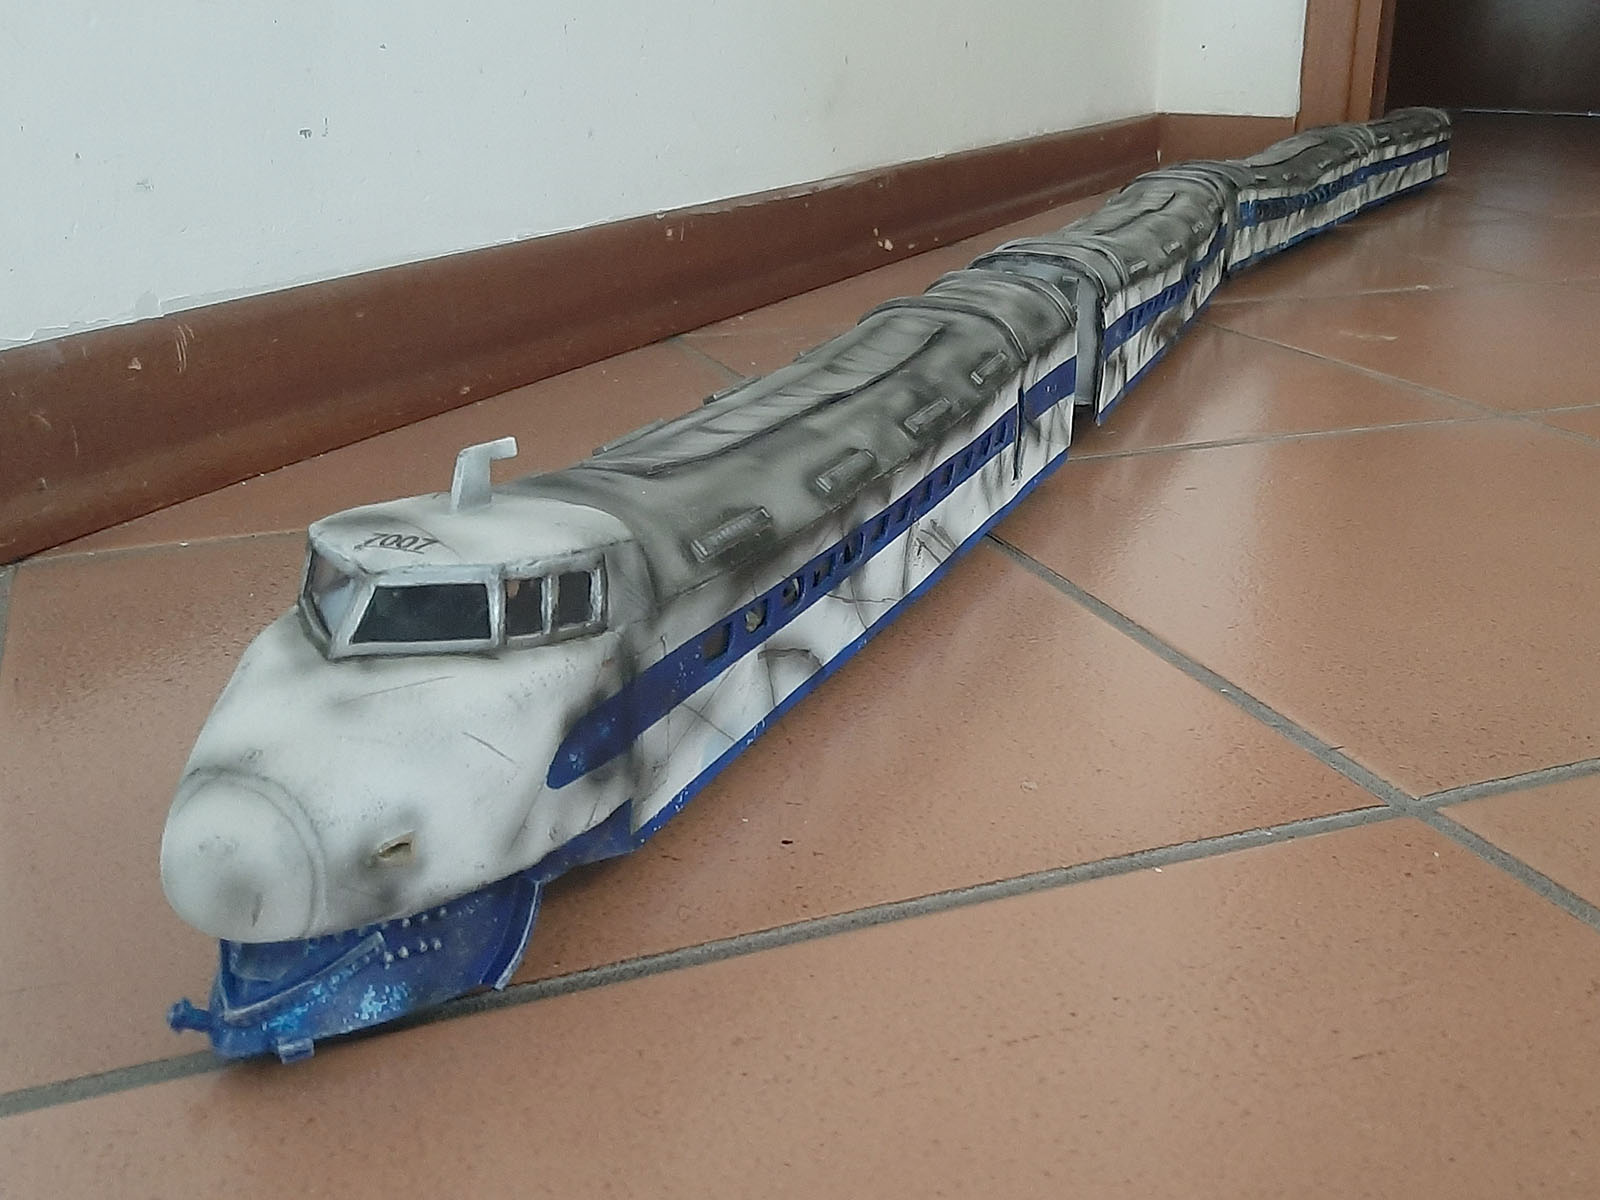
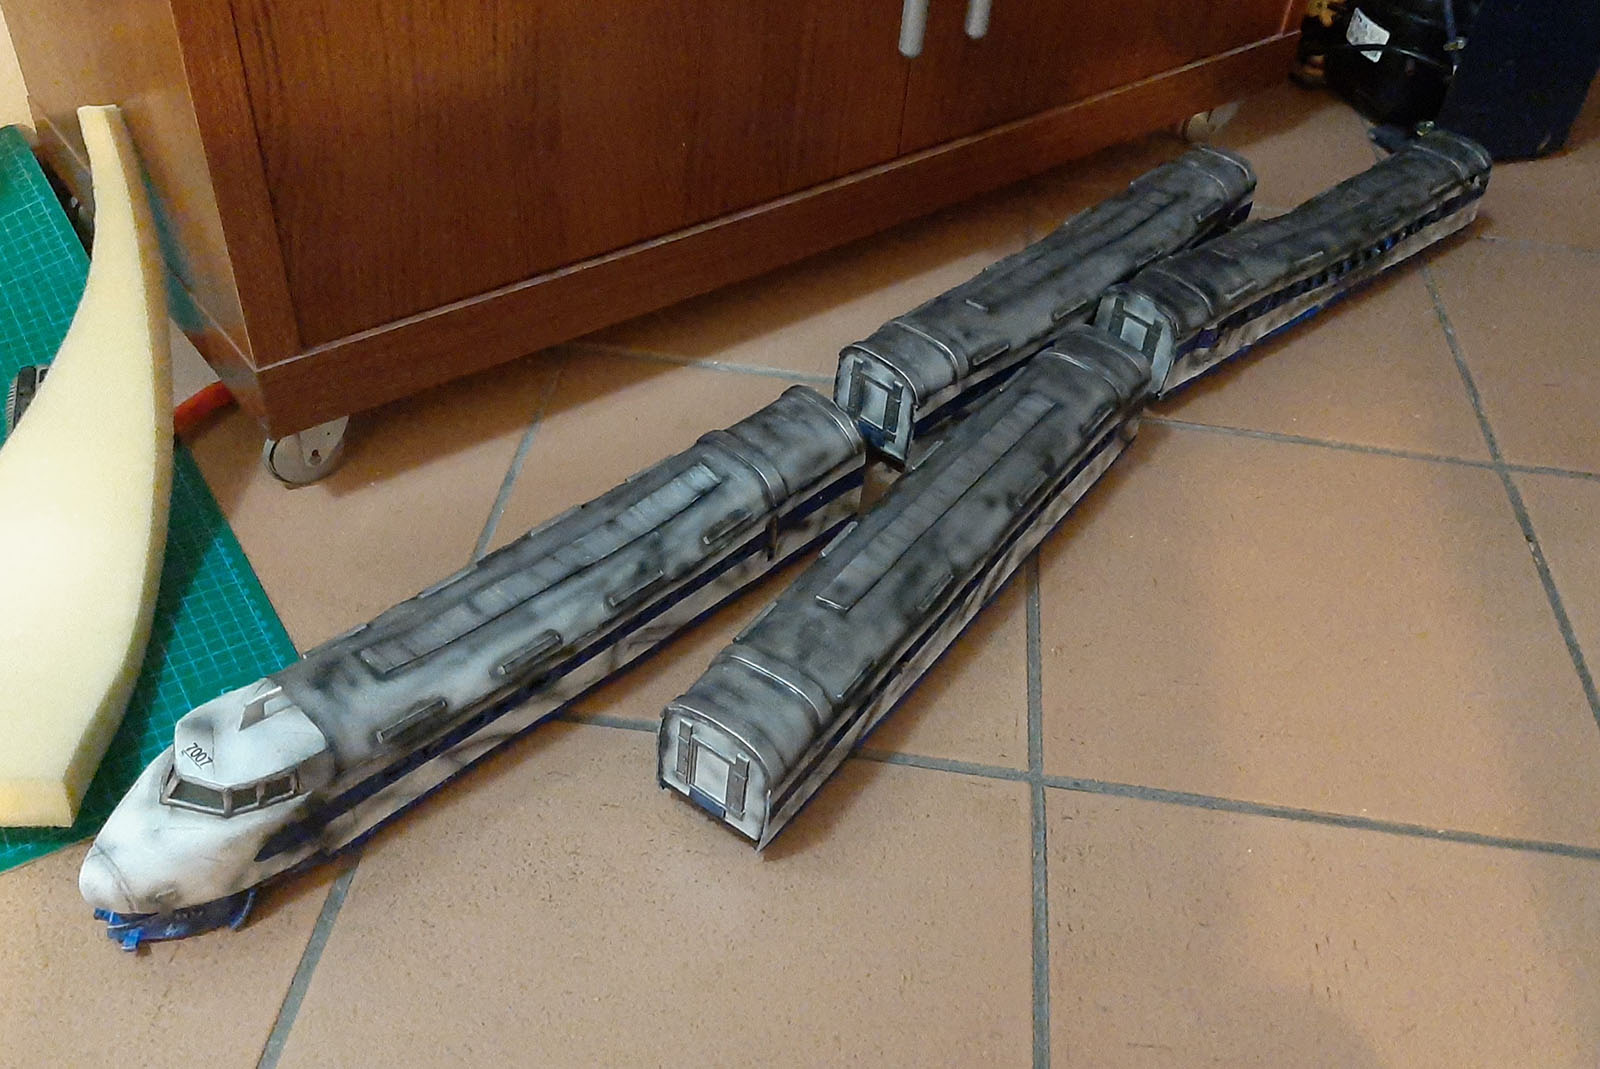
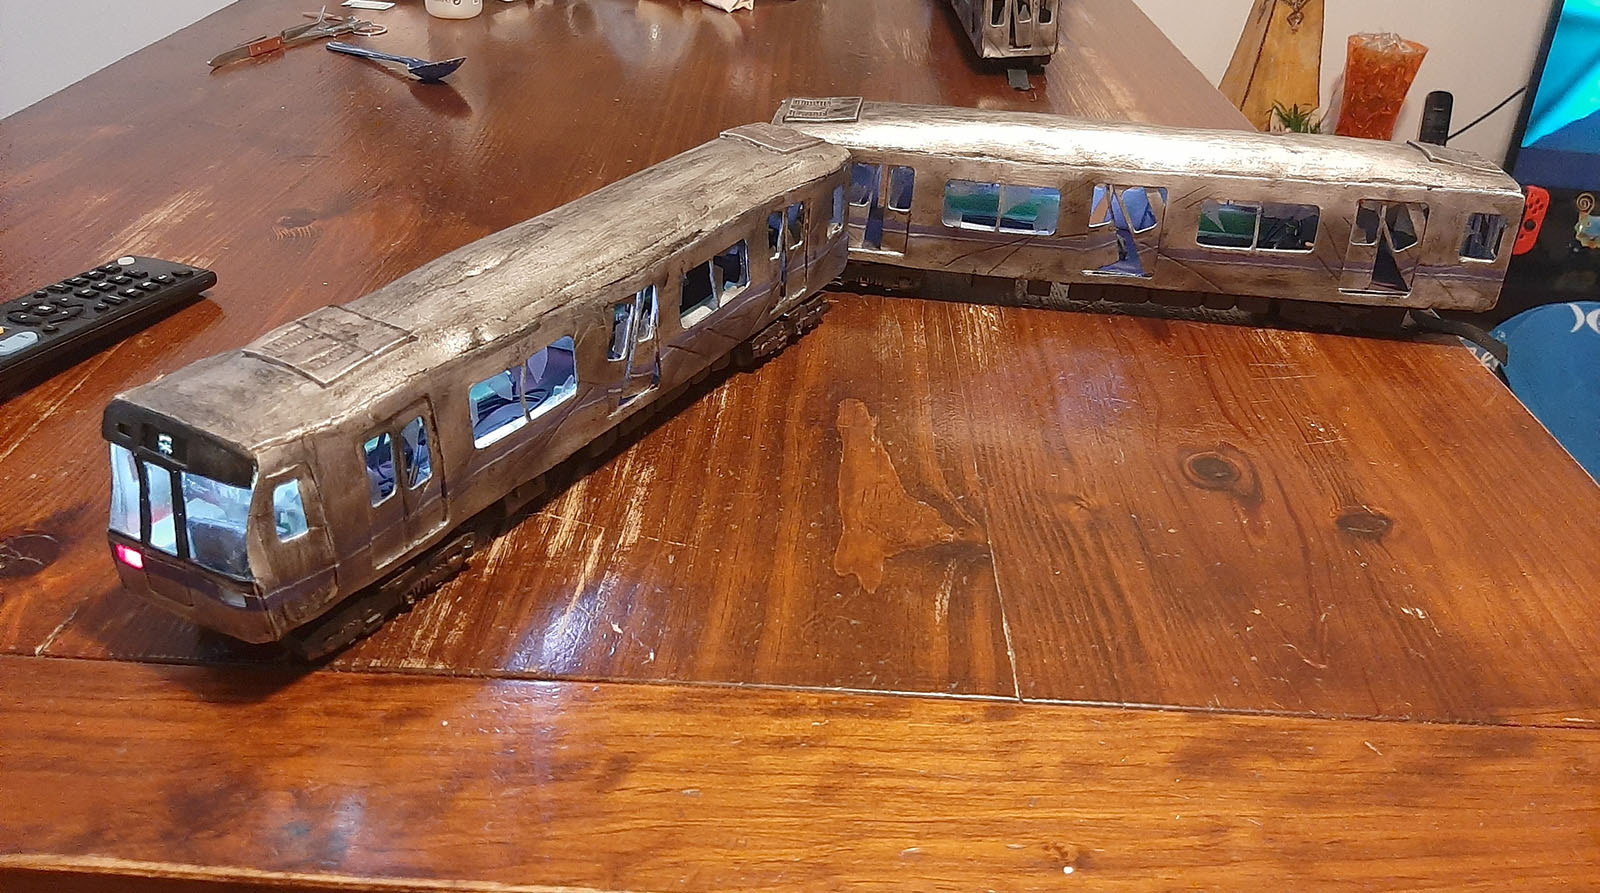
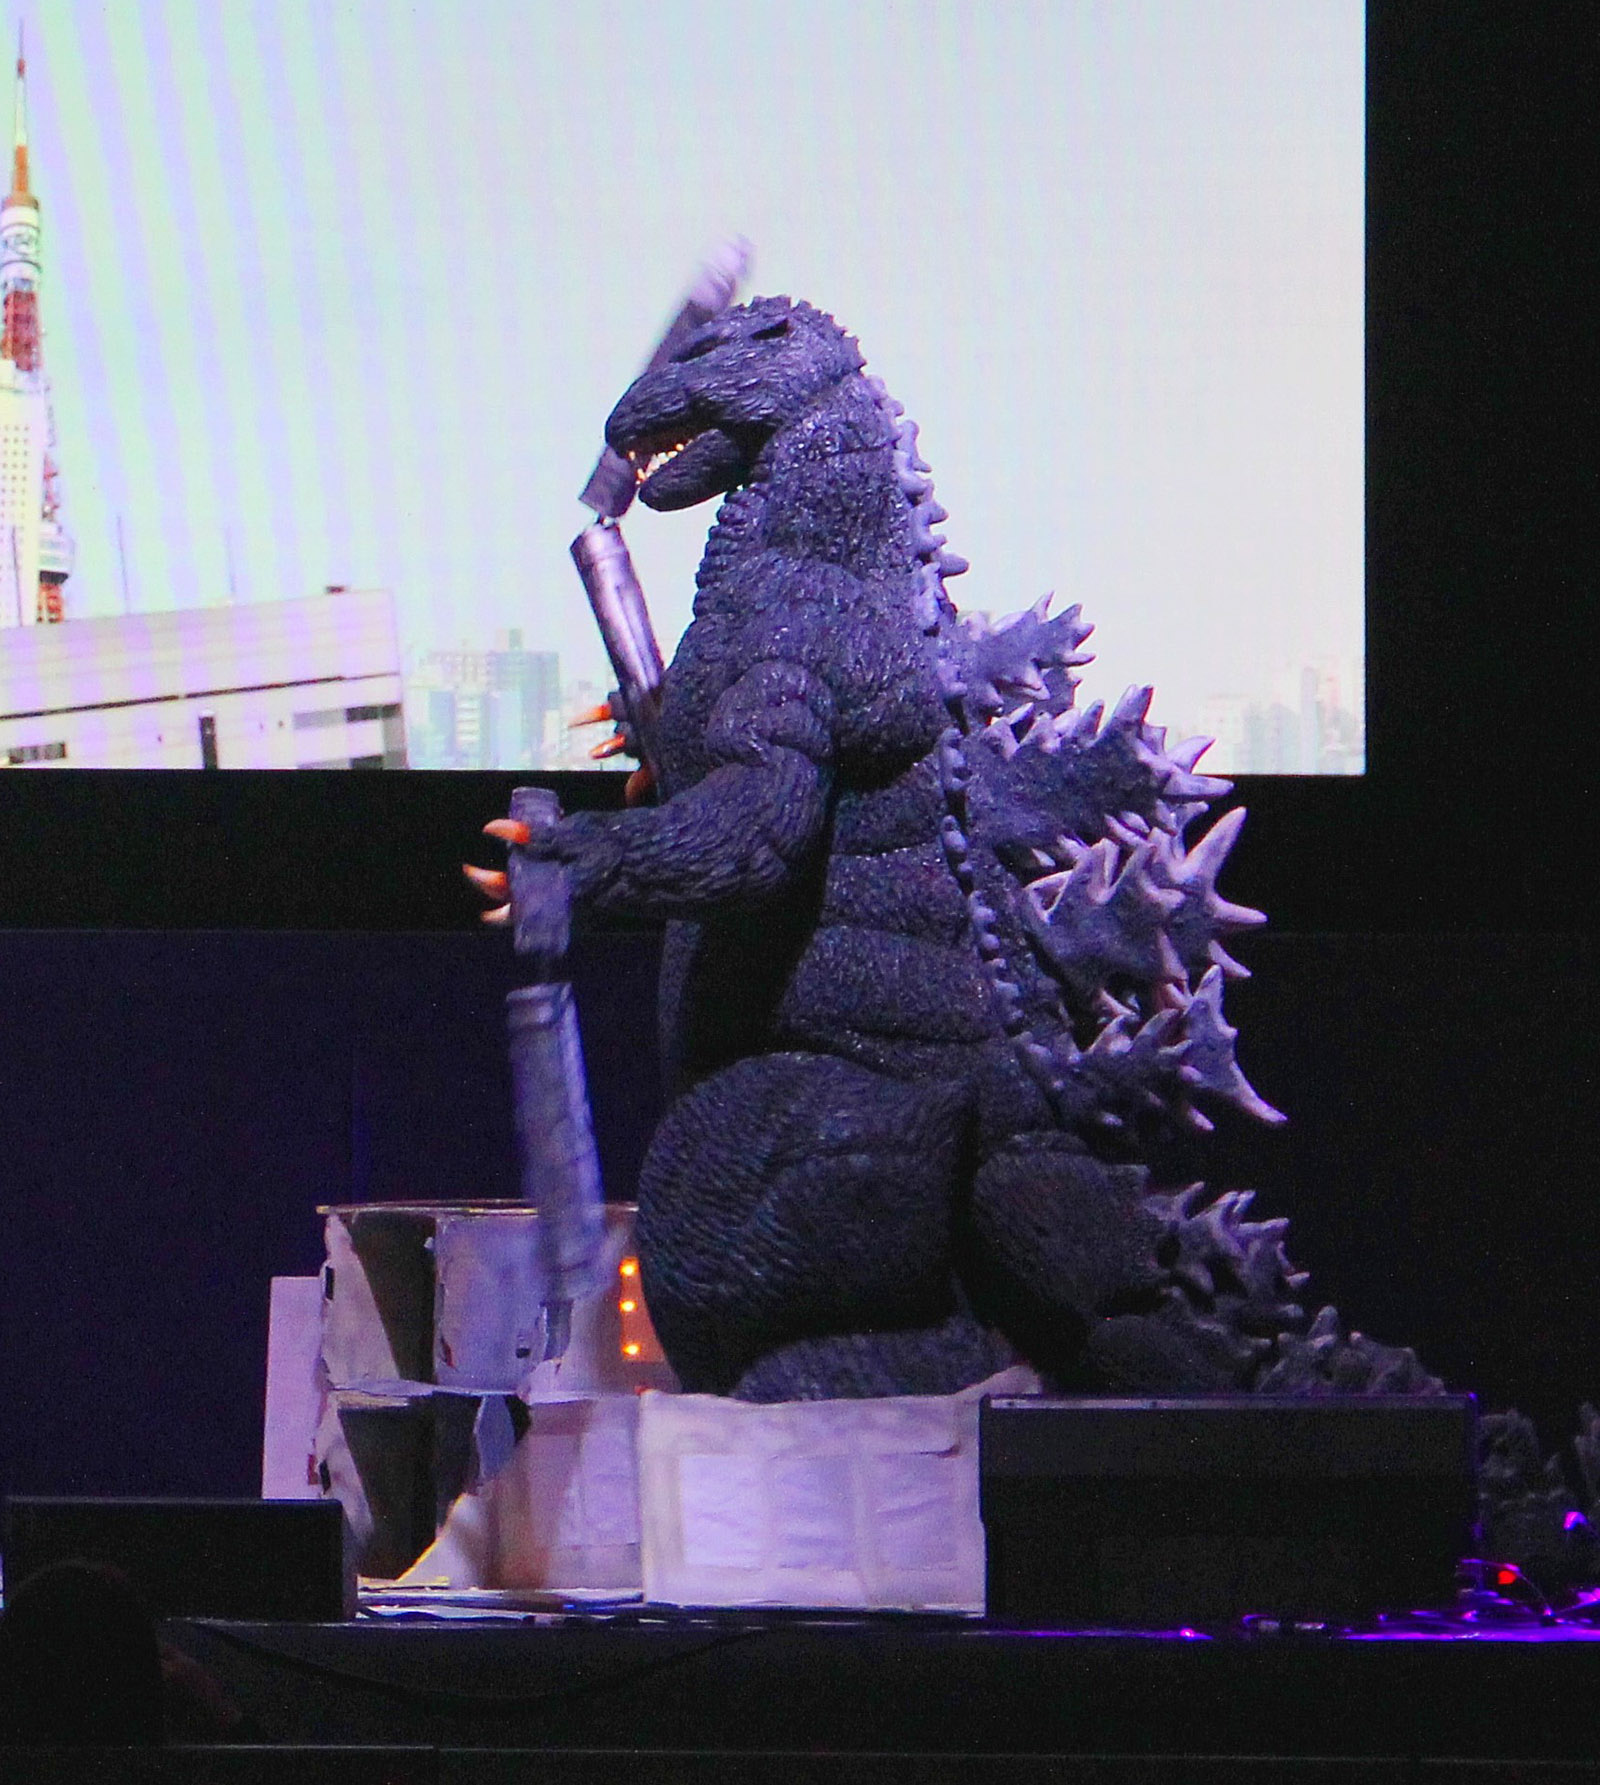
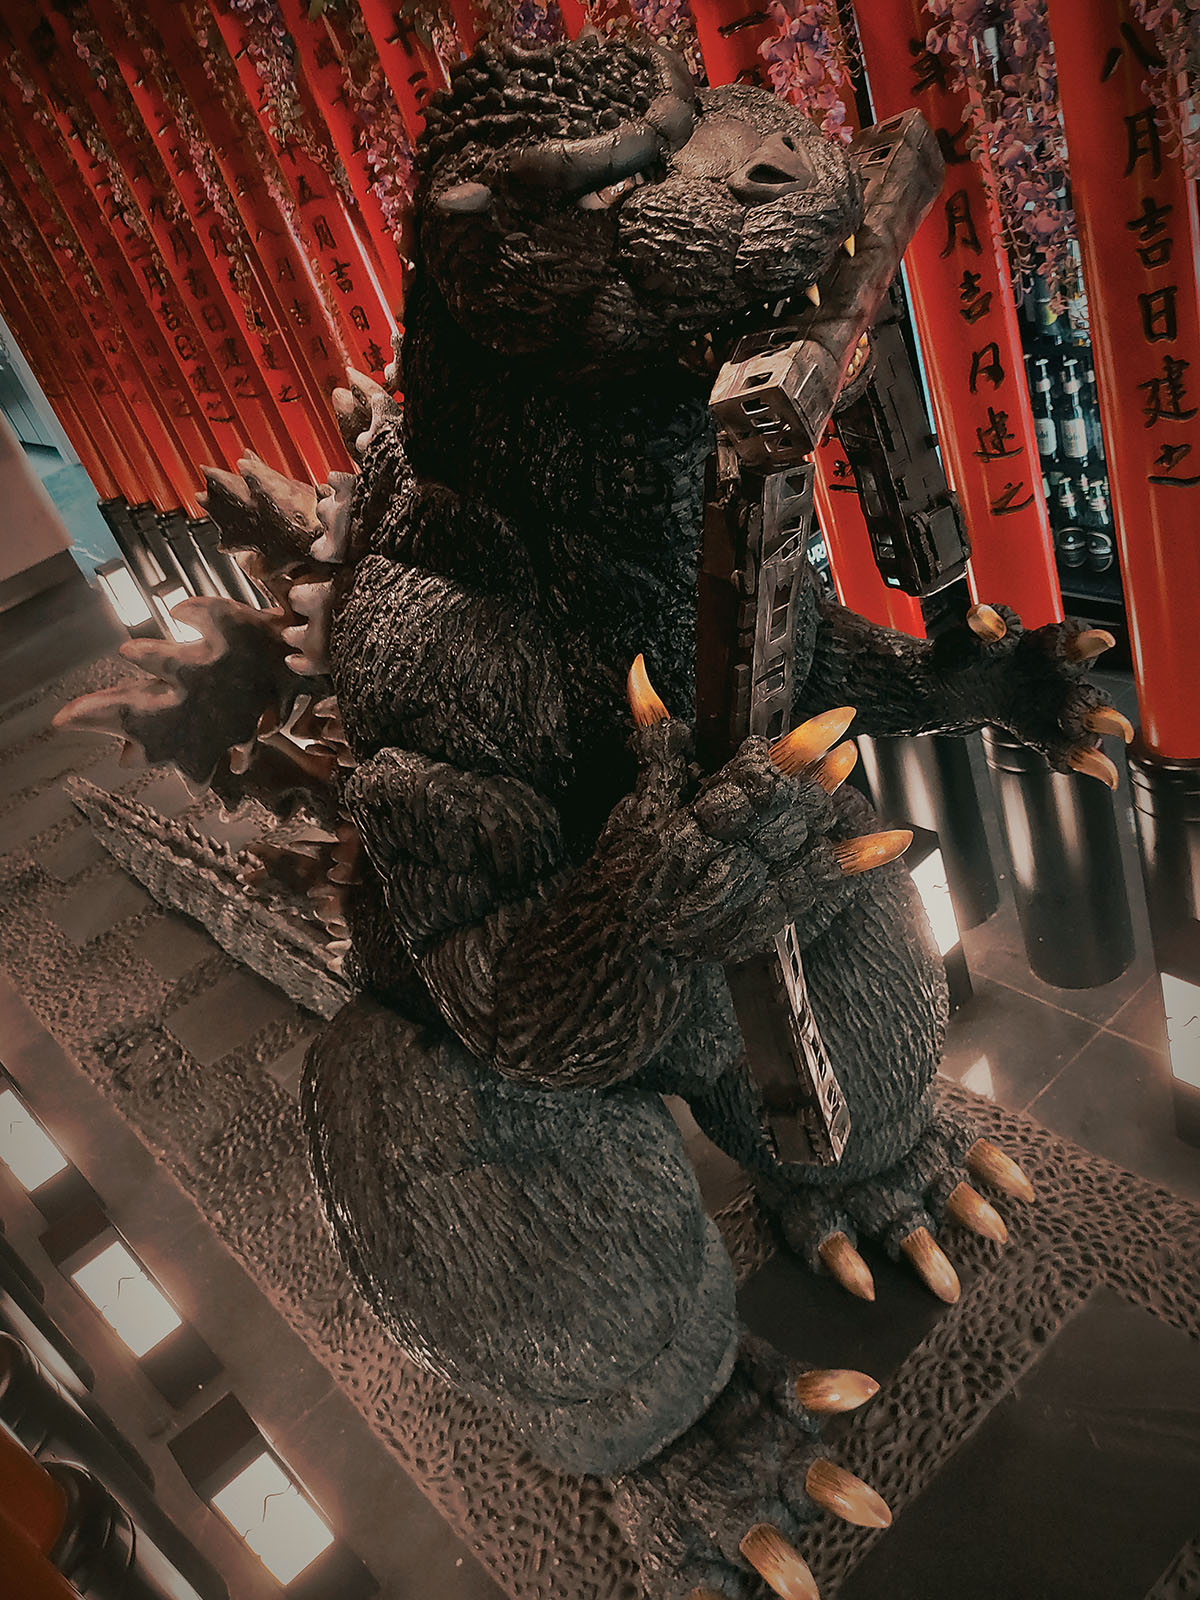
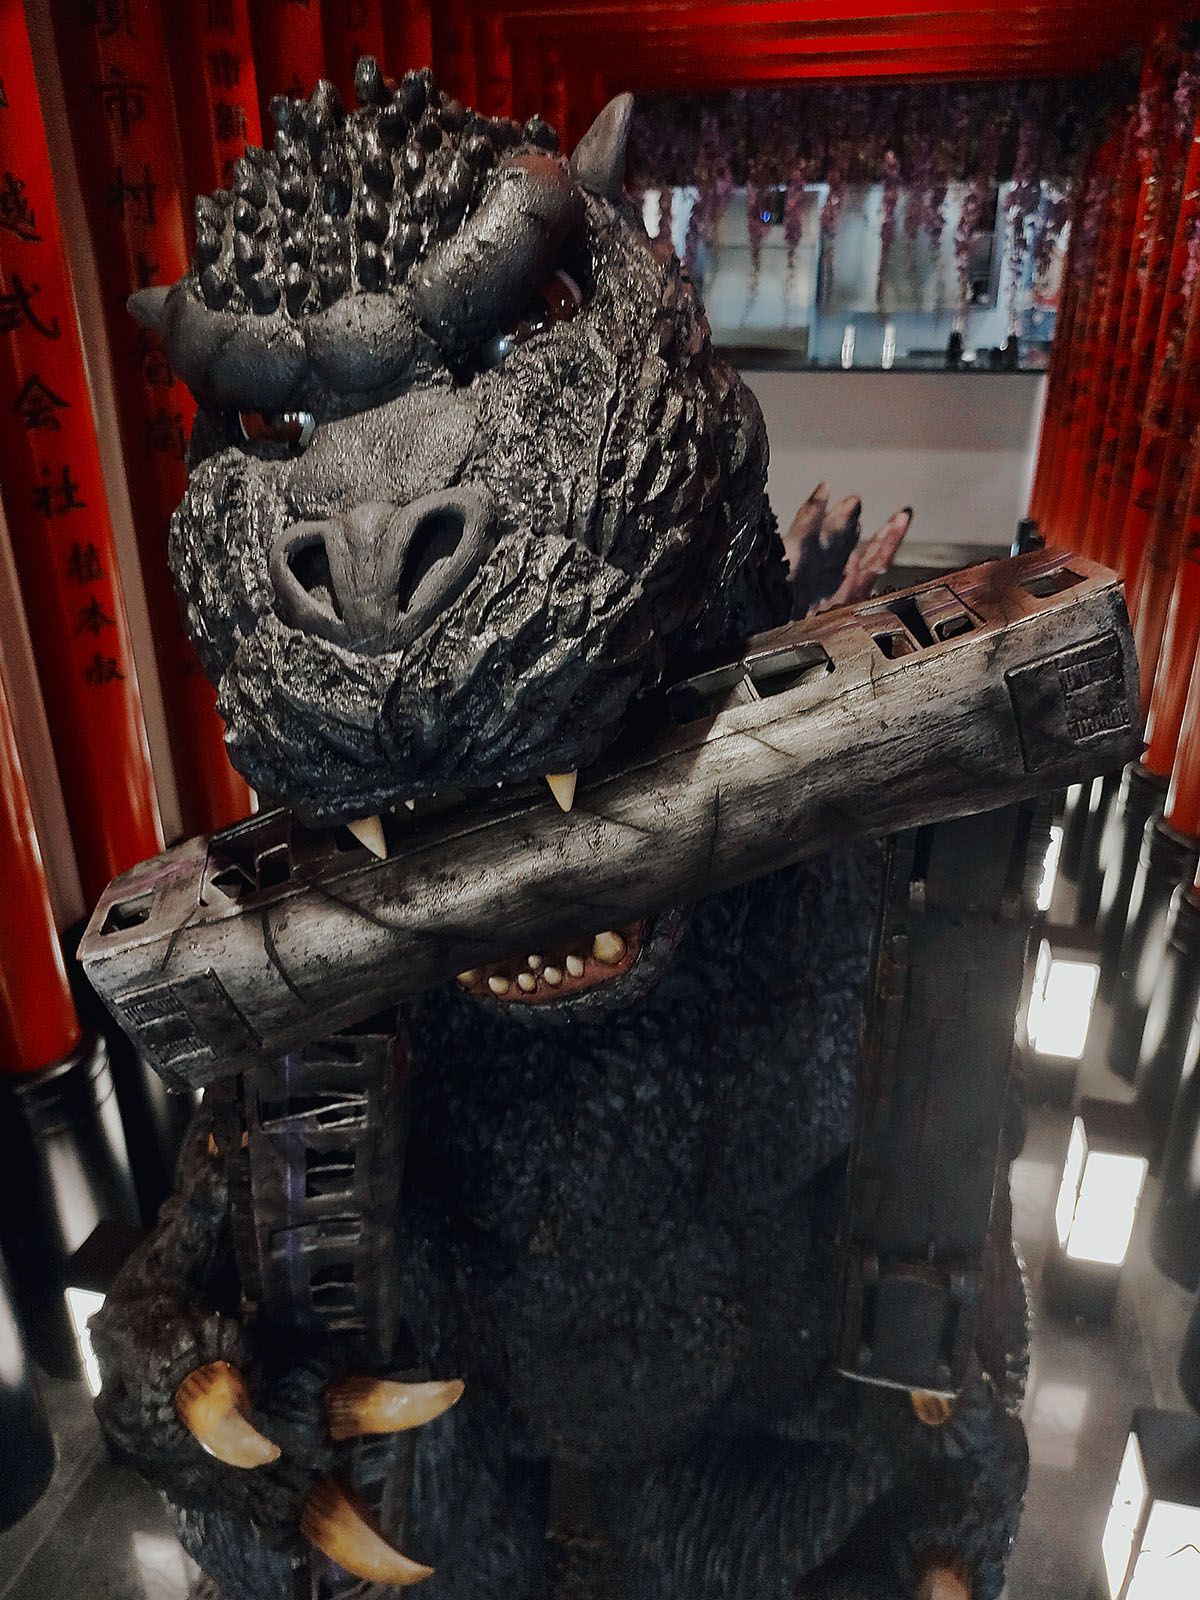
Andrea and I decided that Godzilla needed an “accessory,” and nothing could be better than a train—his favorite snack. The idea was for me to use it like nunchucks against Gigan during the scene, and that’s exactly what we did.
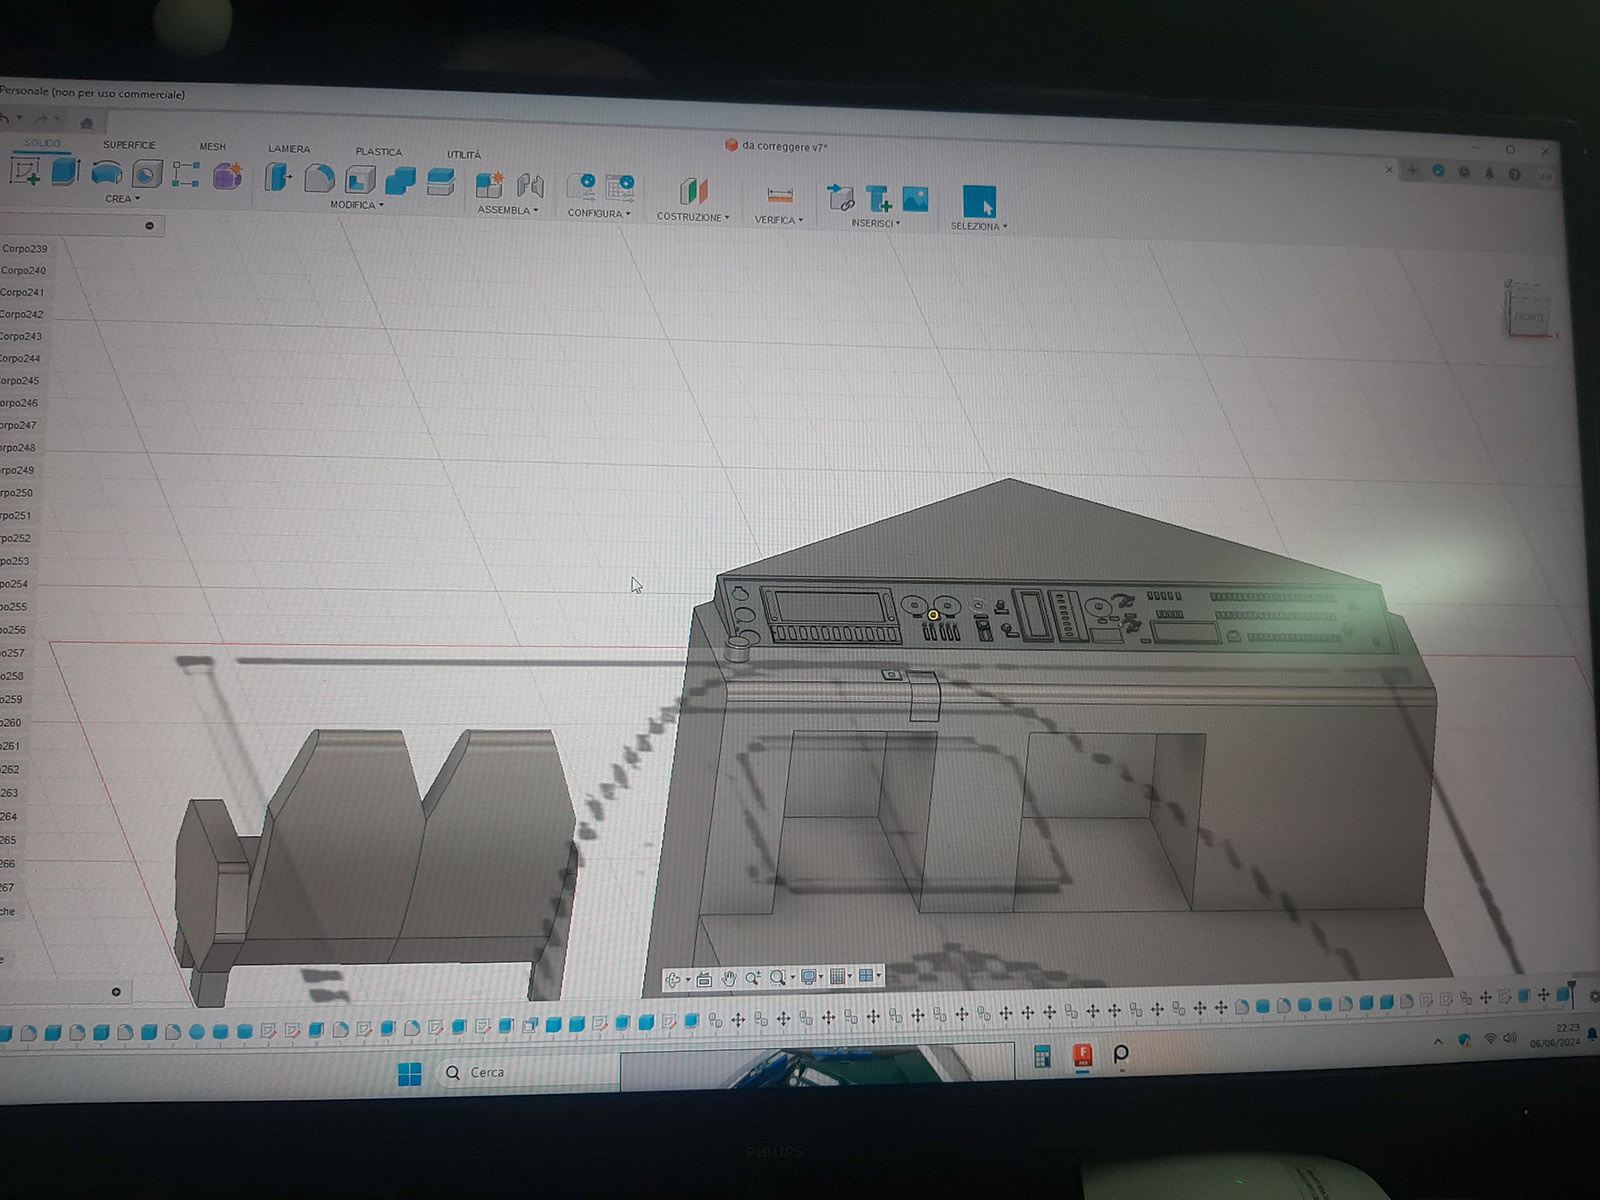
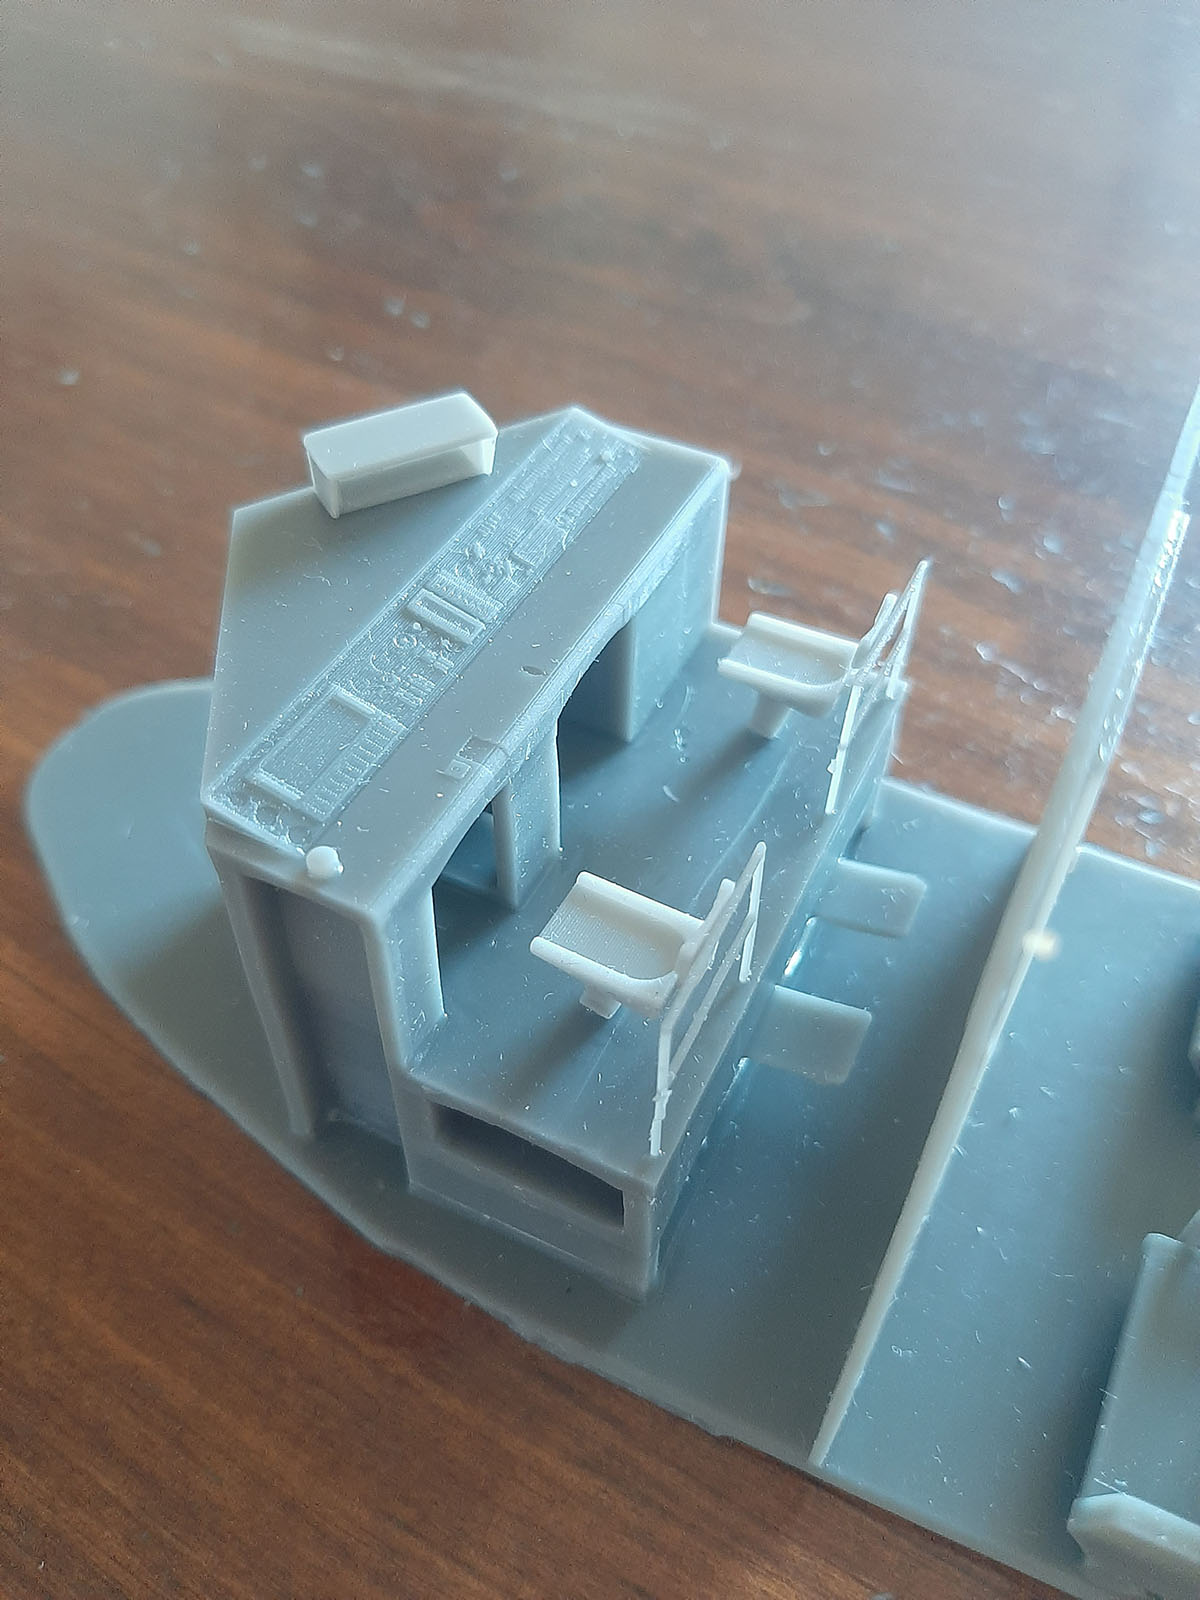
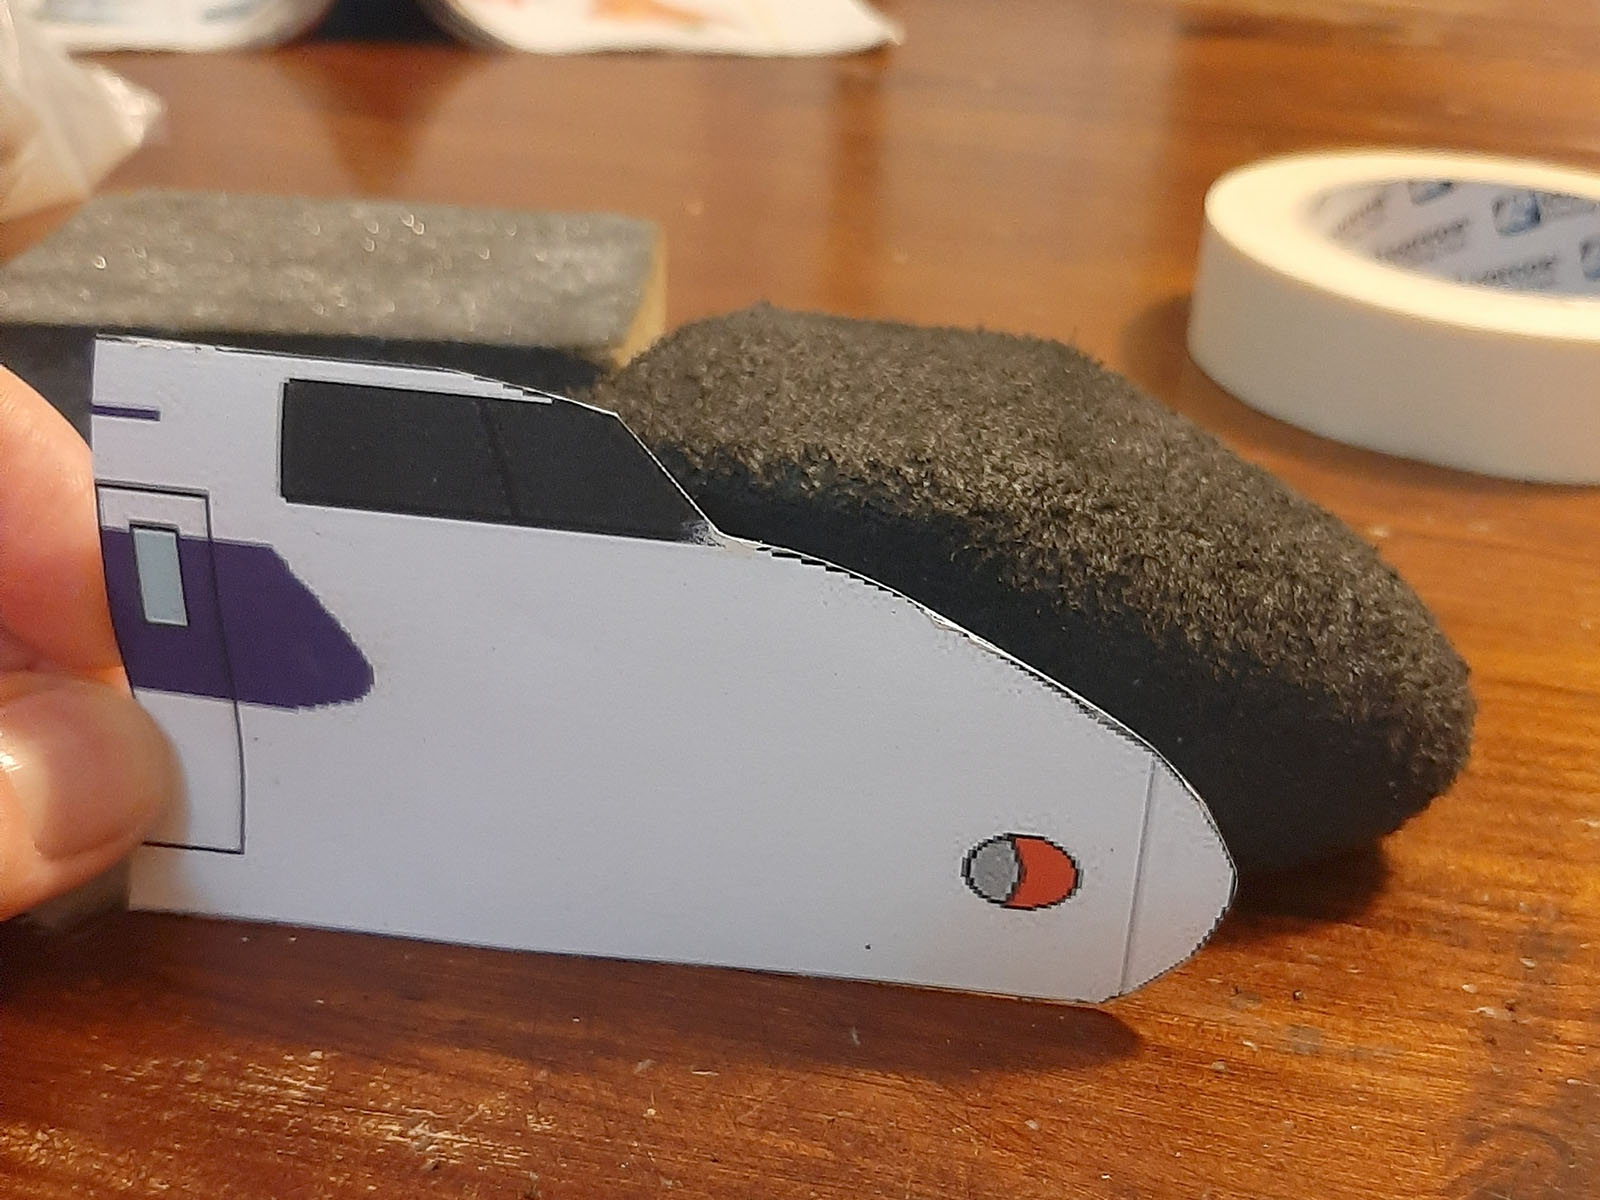
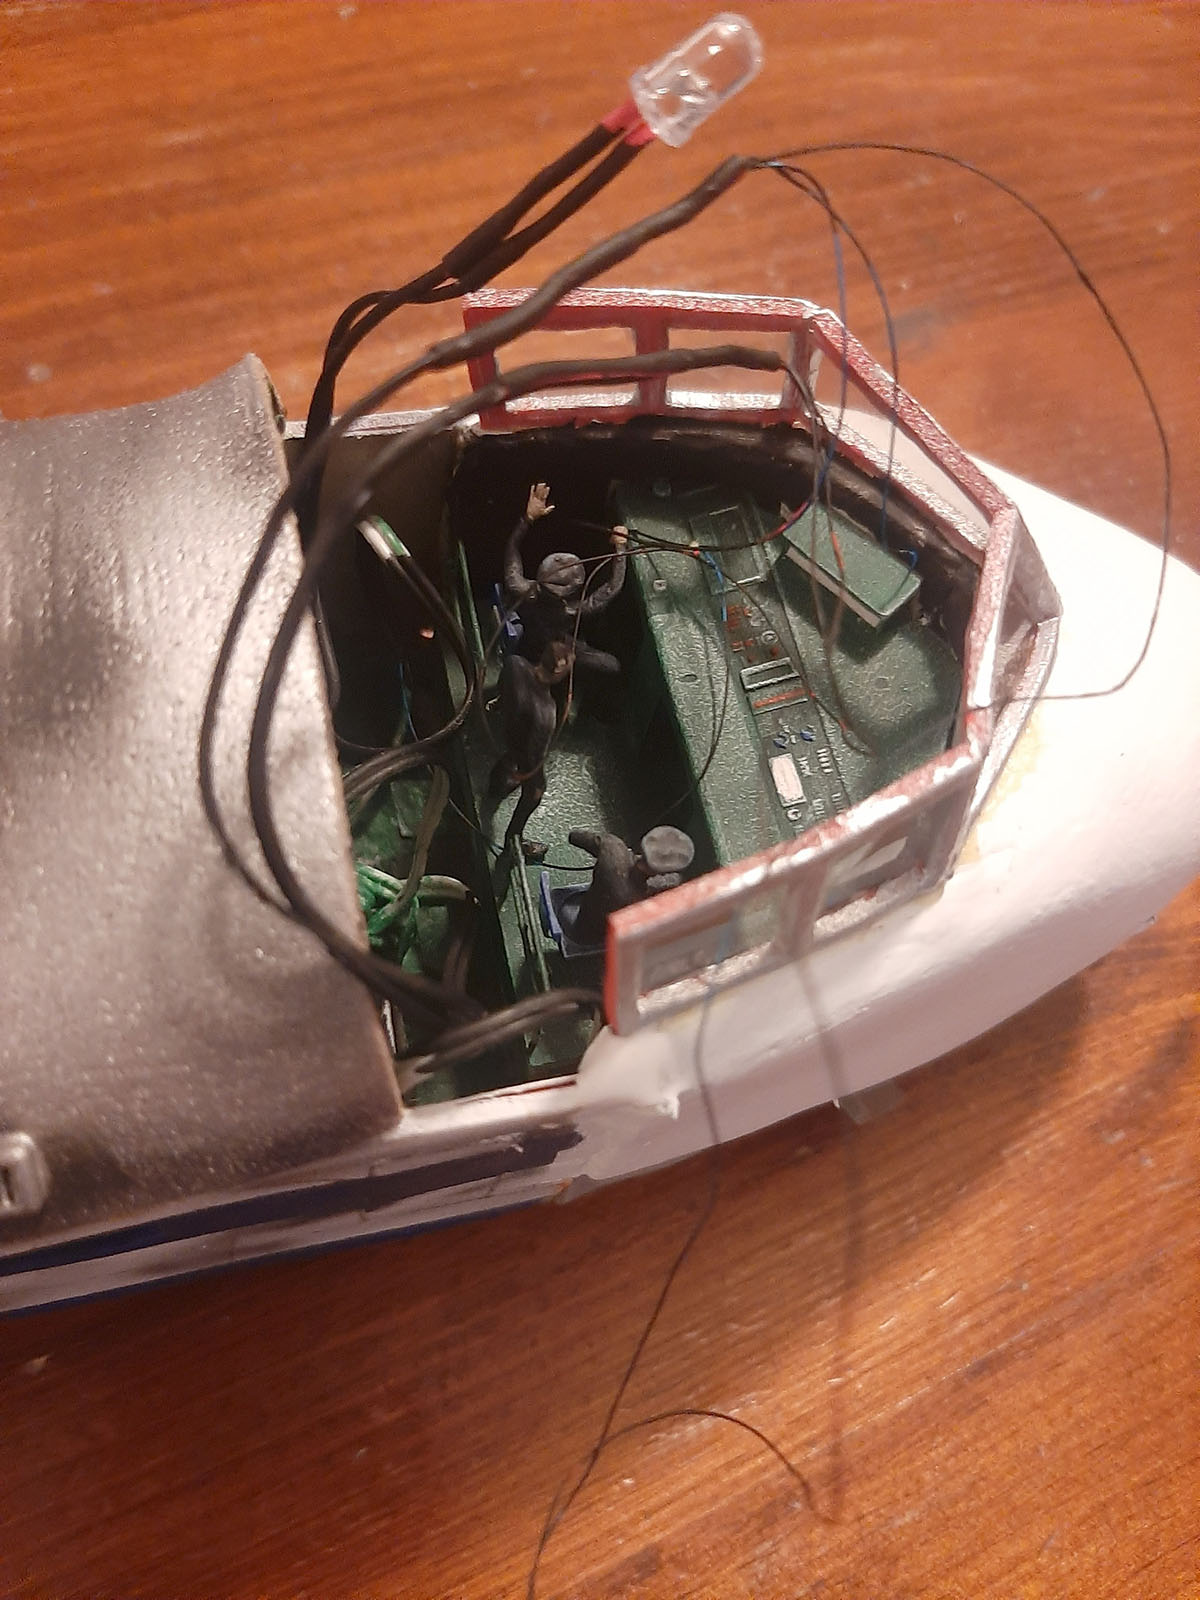
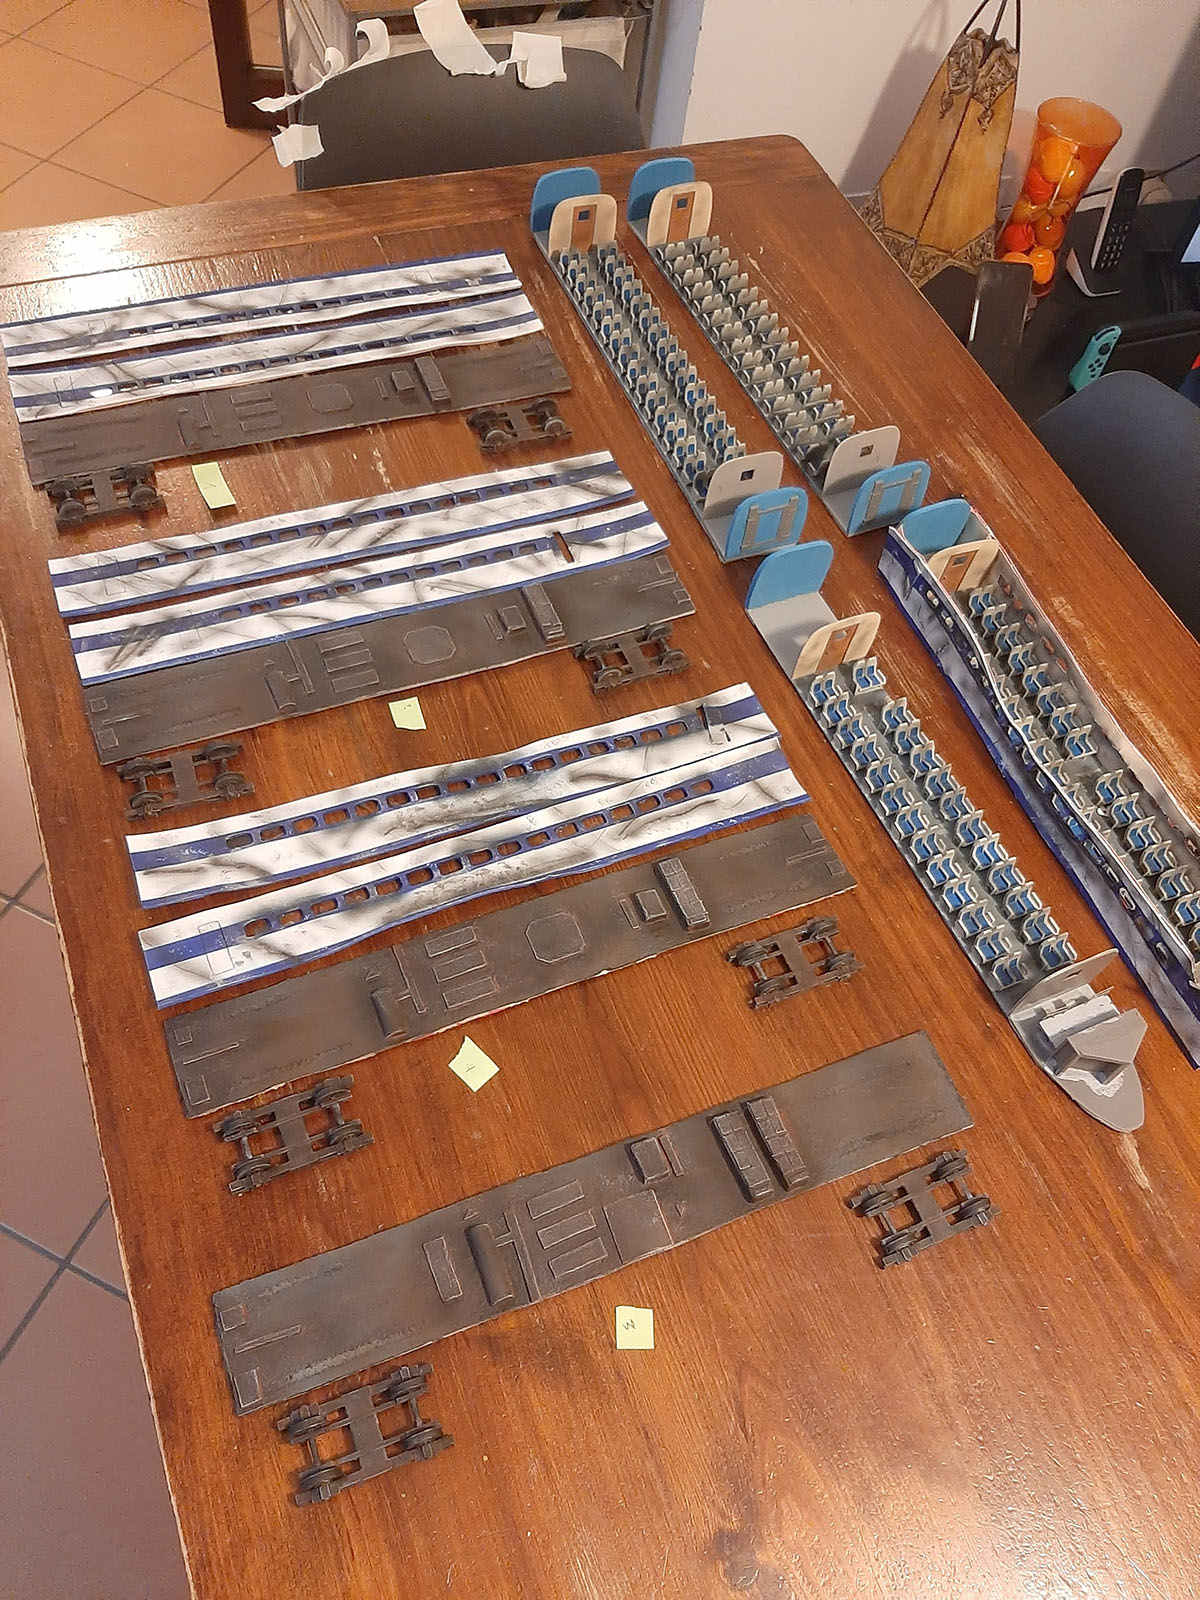
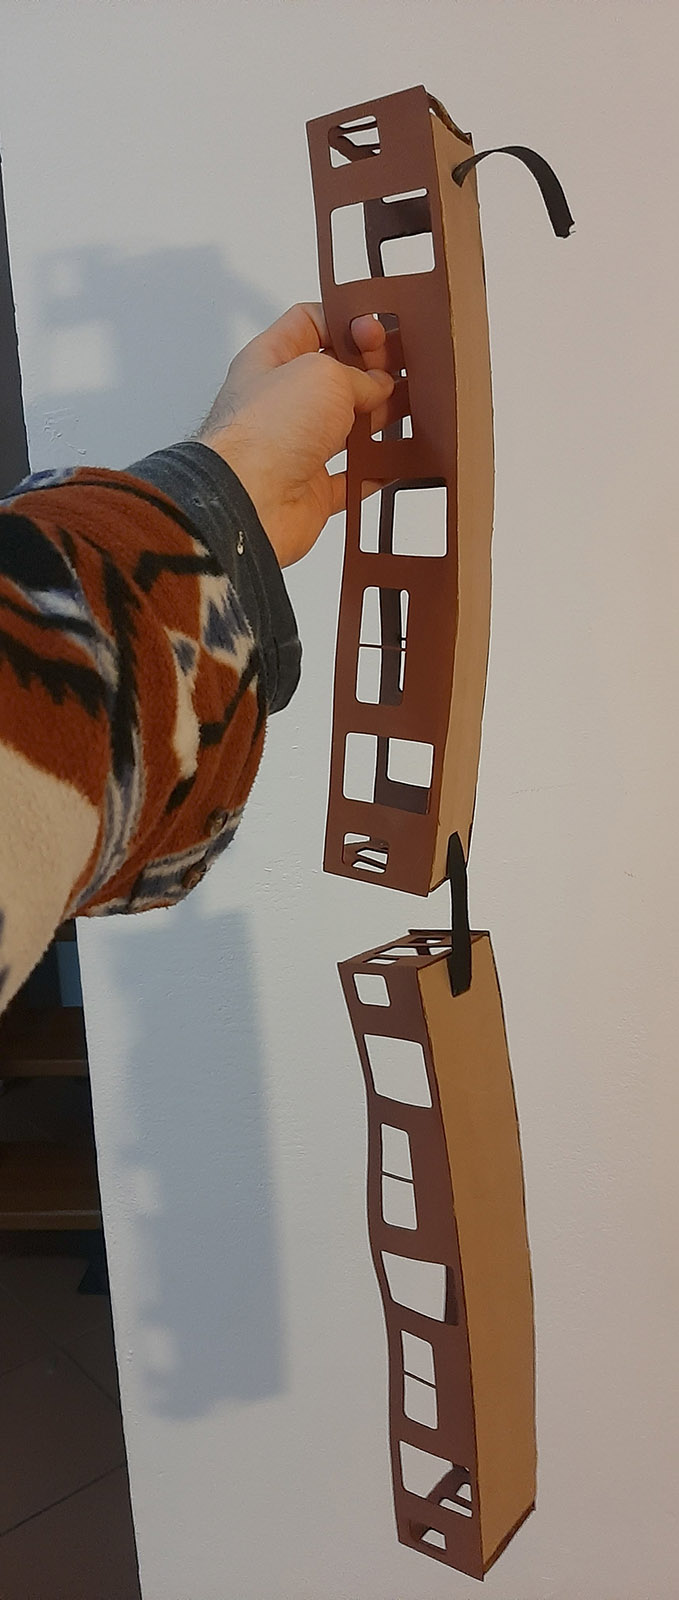
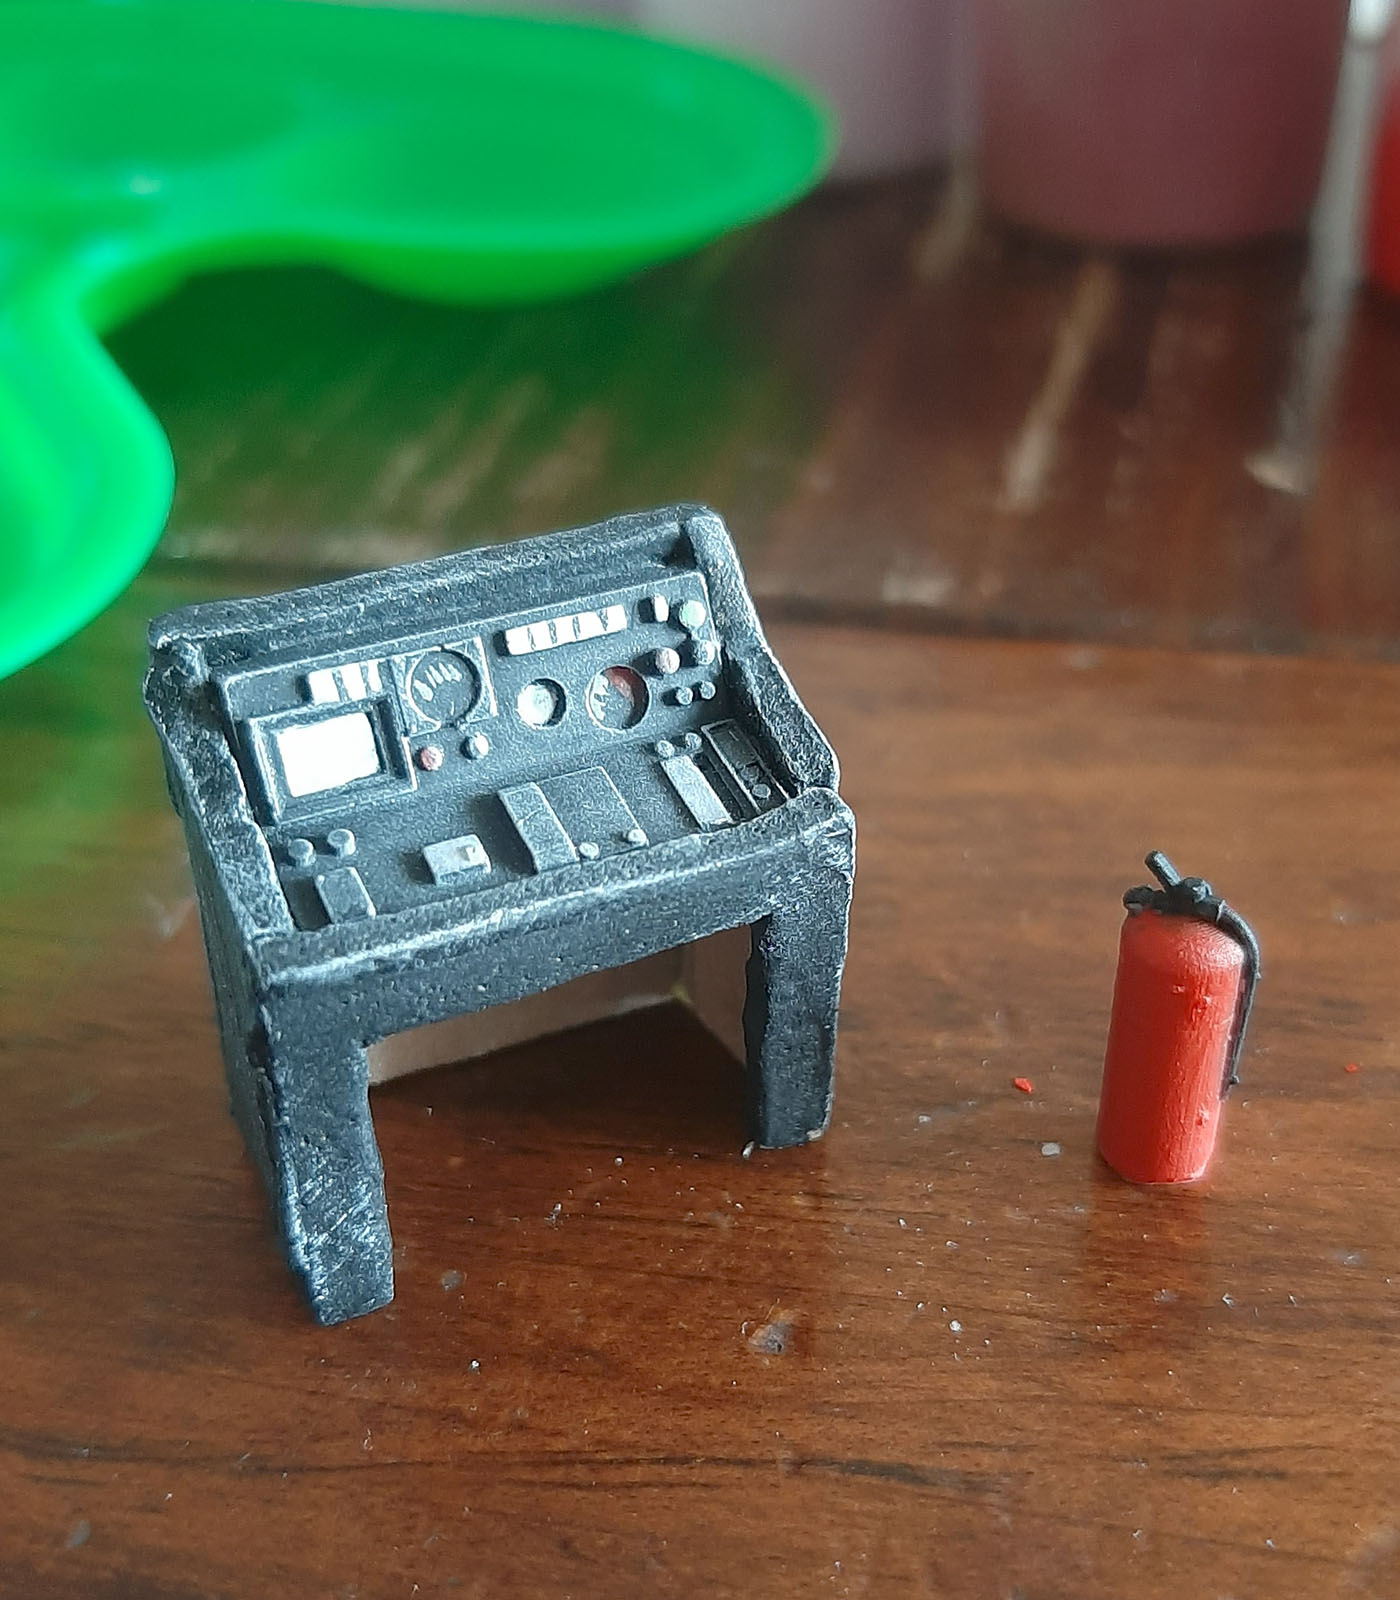
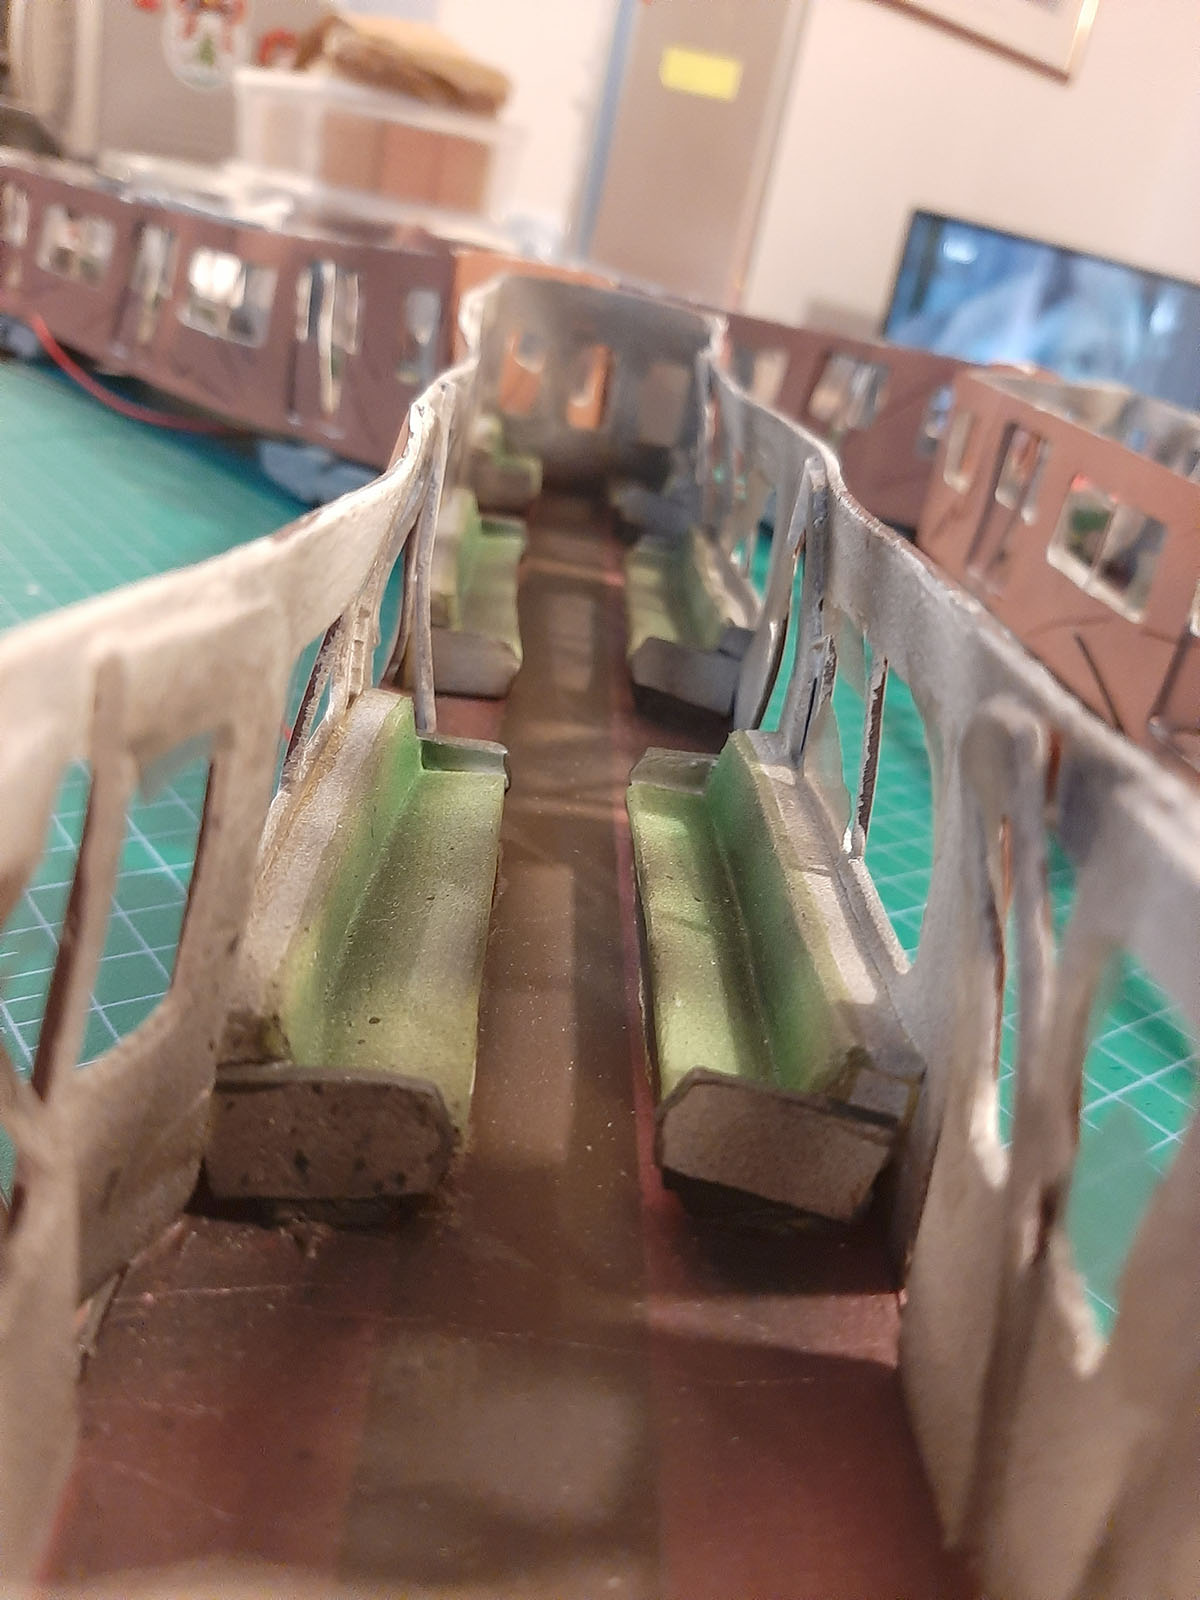
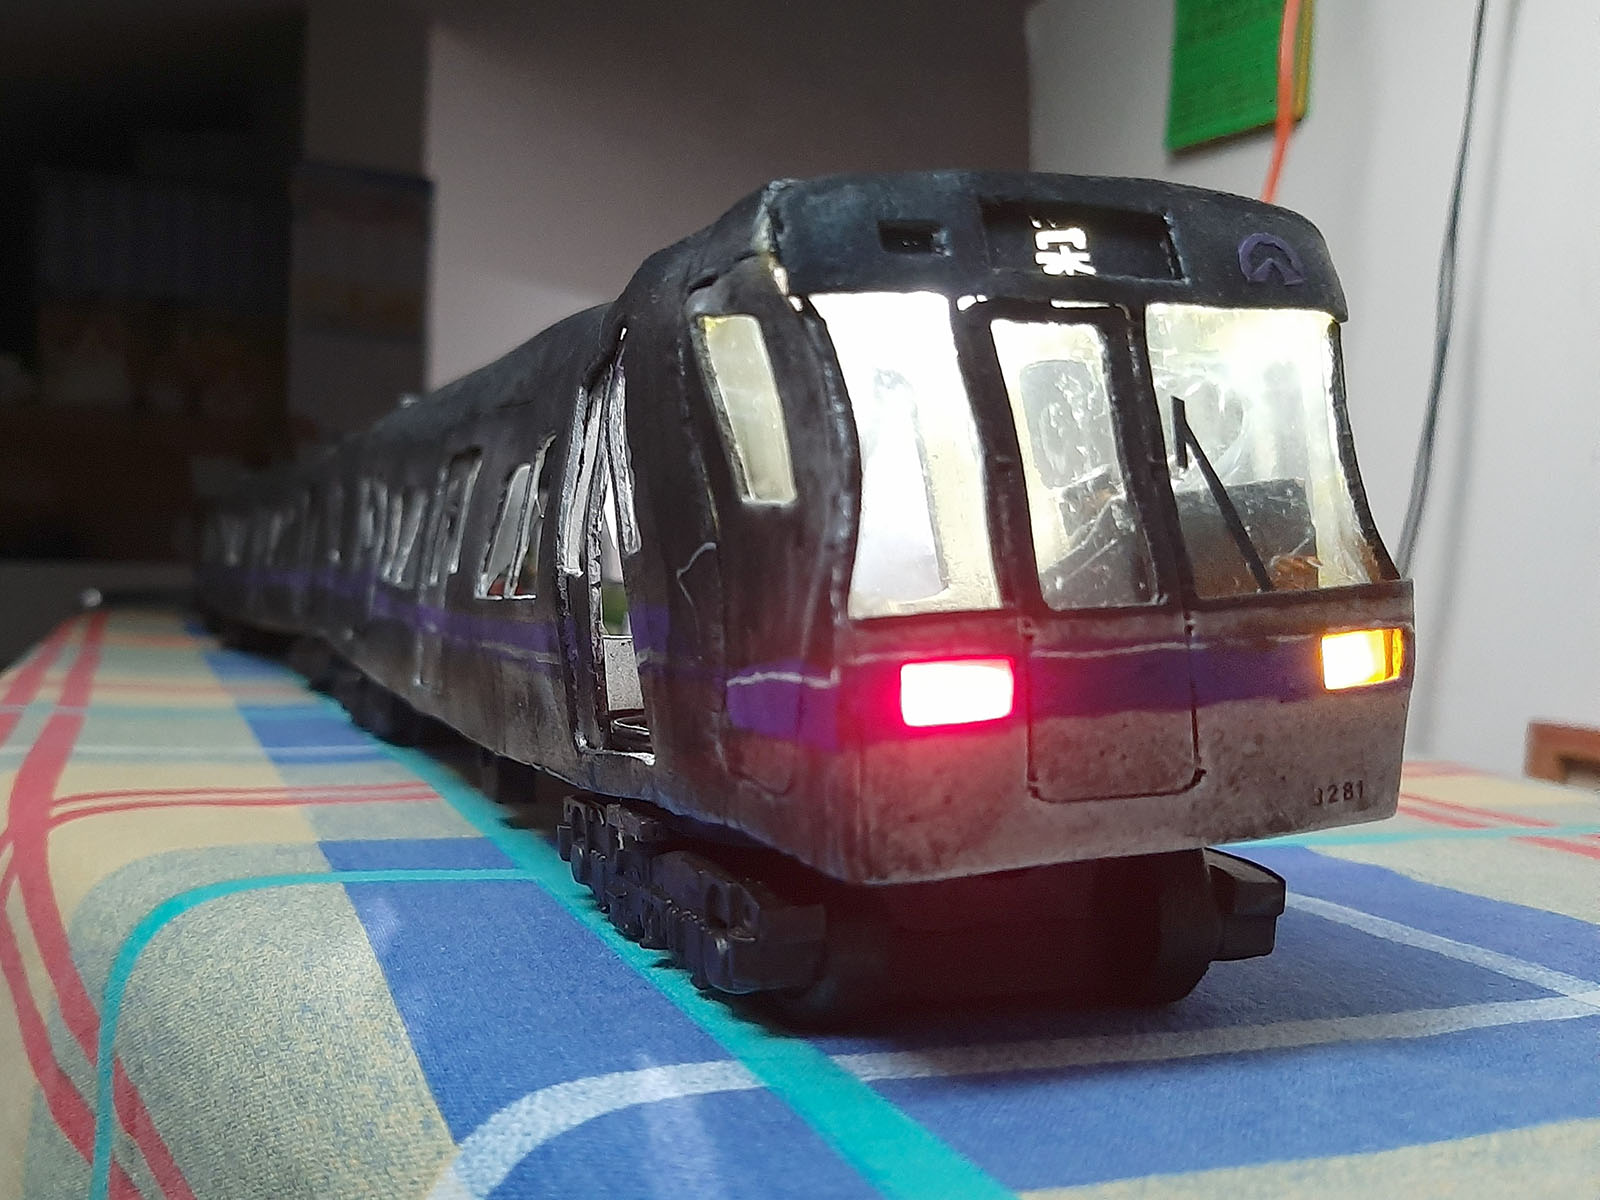
The first train I built was the Shinkansen Type 0 (since our first battle was set in Tokyo). I started by 3D designing the interiors, which I then resin-printed and painted along with the bogies. The nose of the train was sculpted following the lines of the paper pattern.
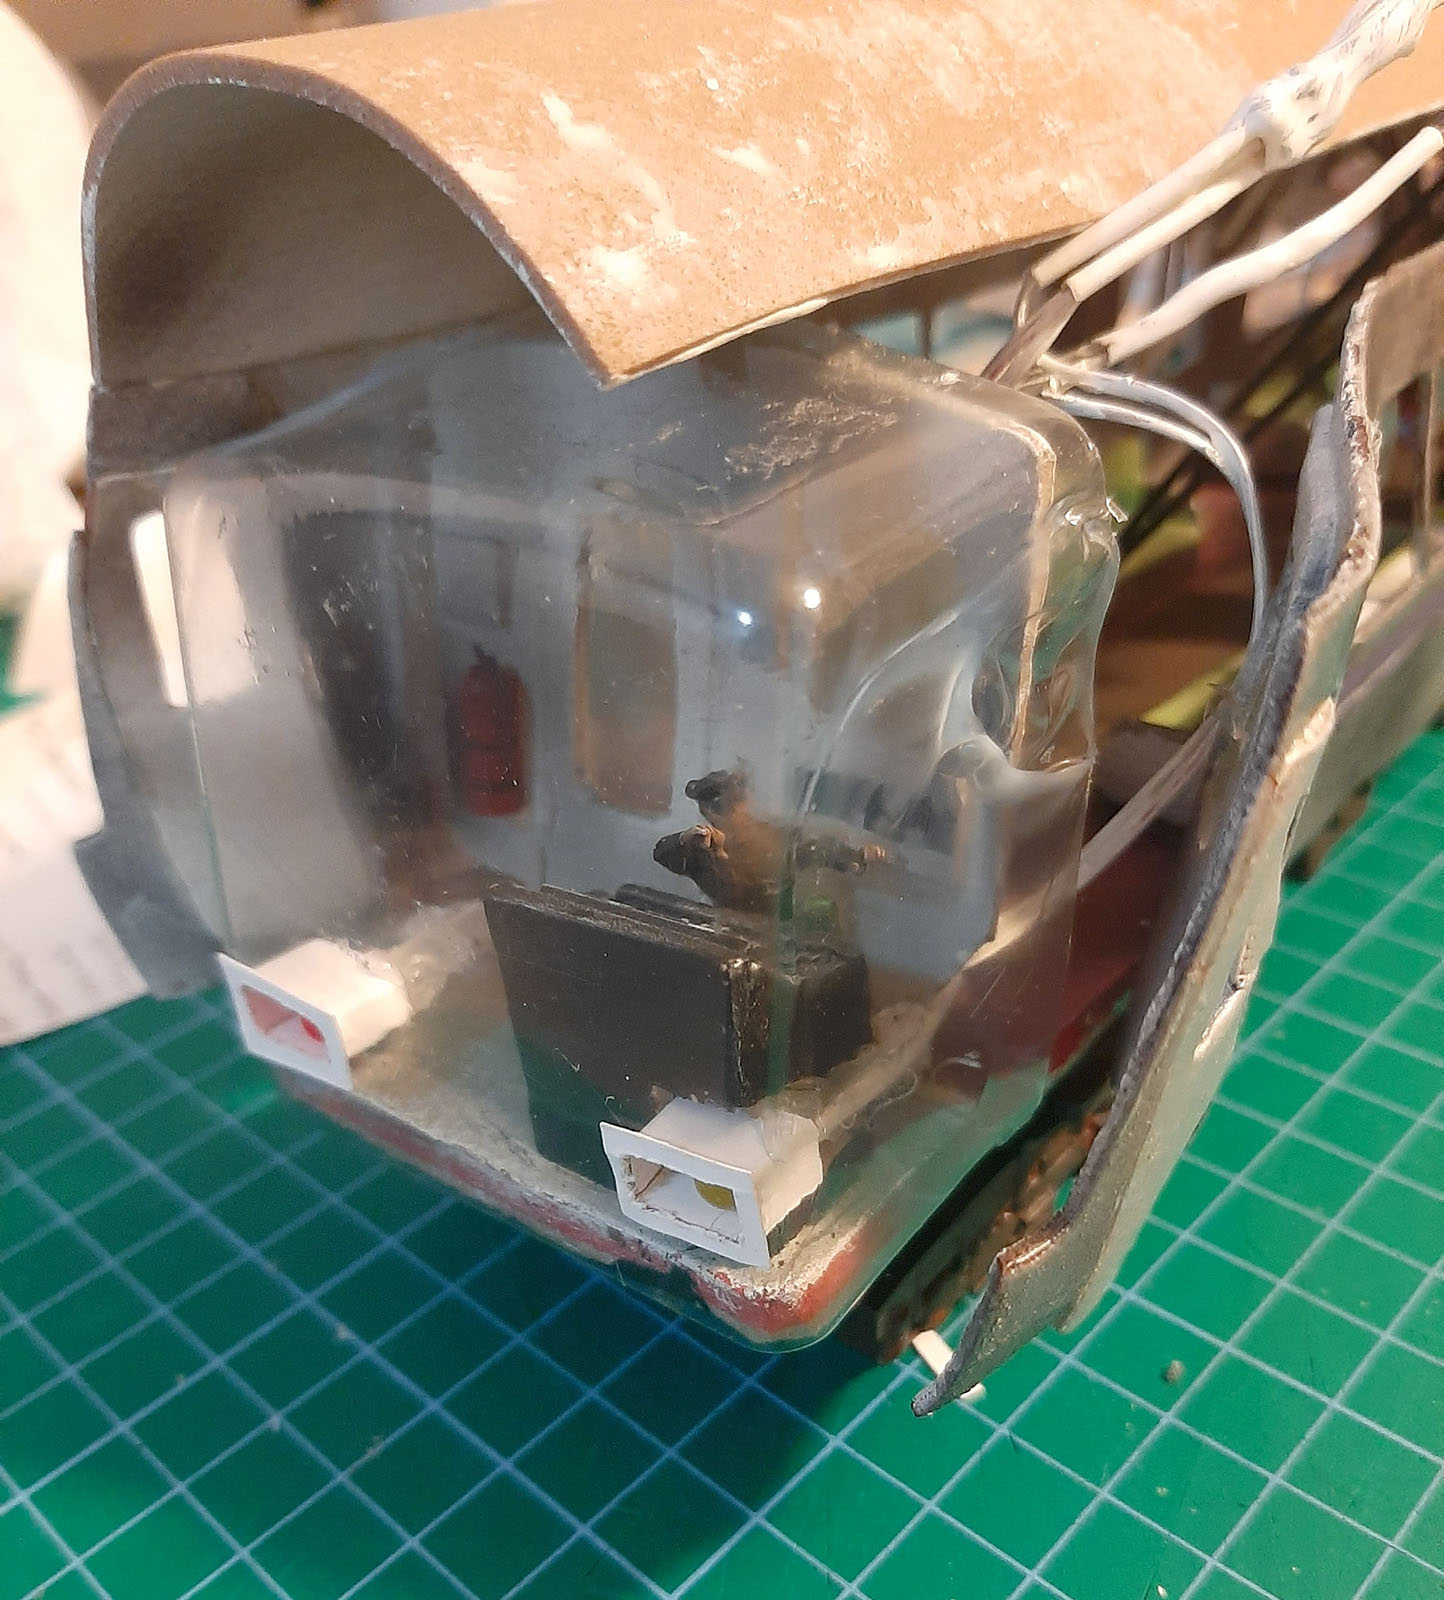
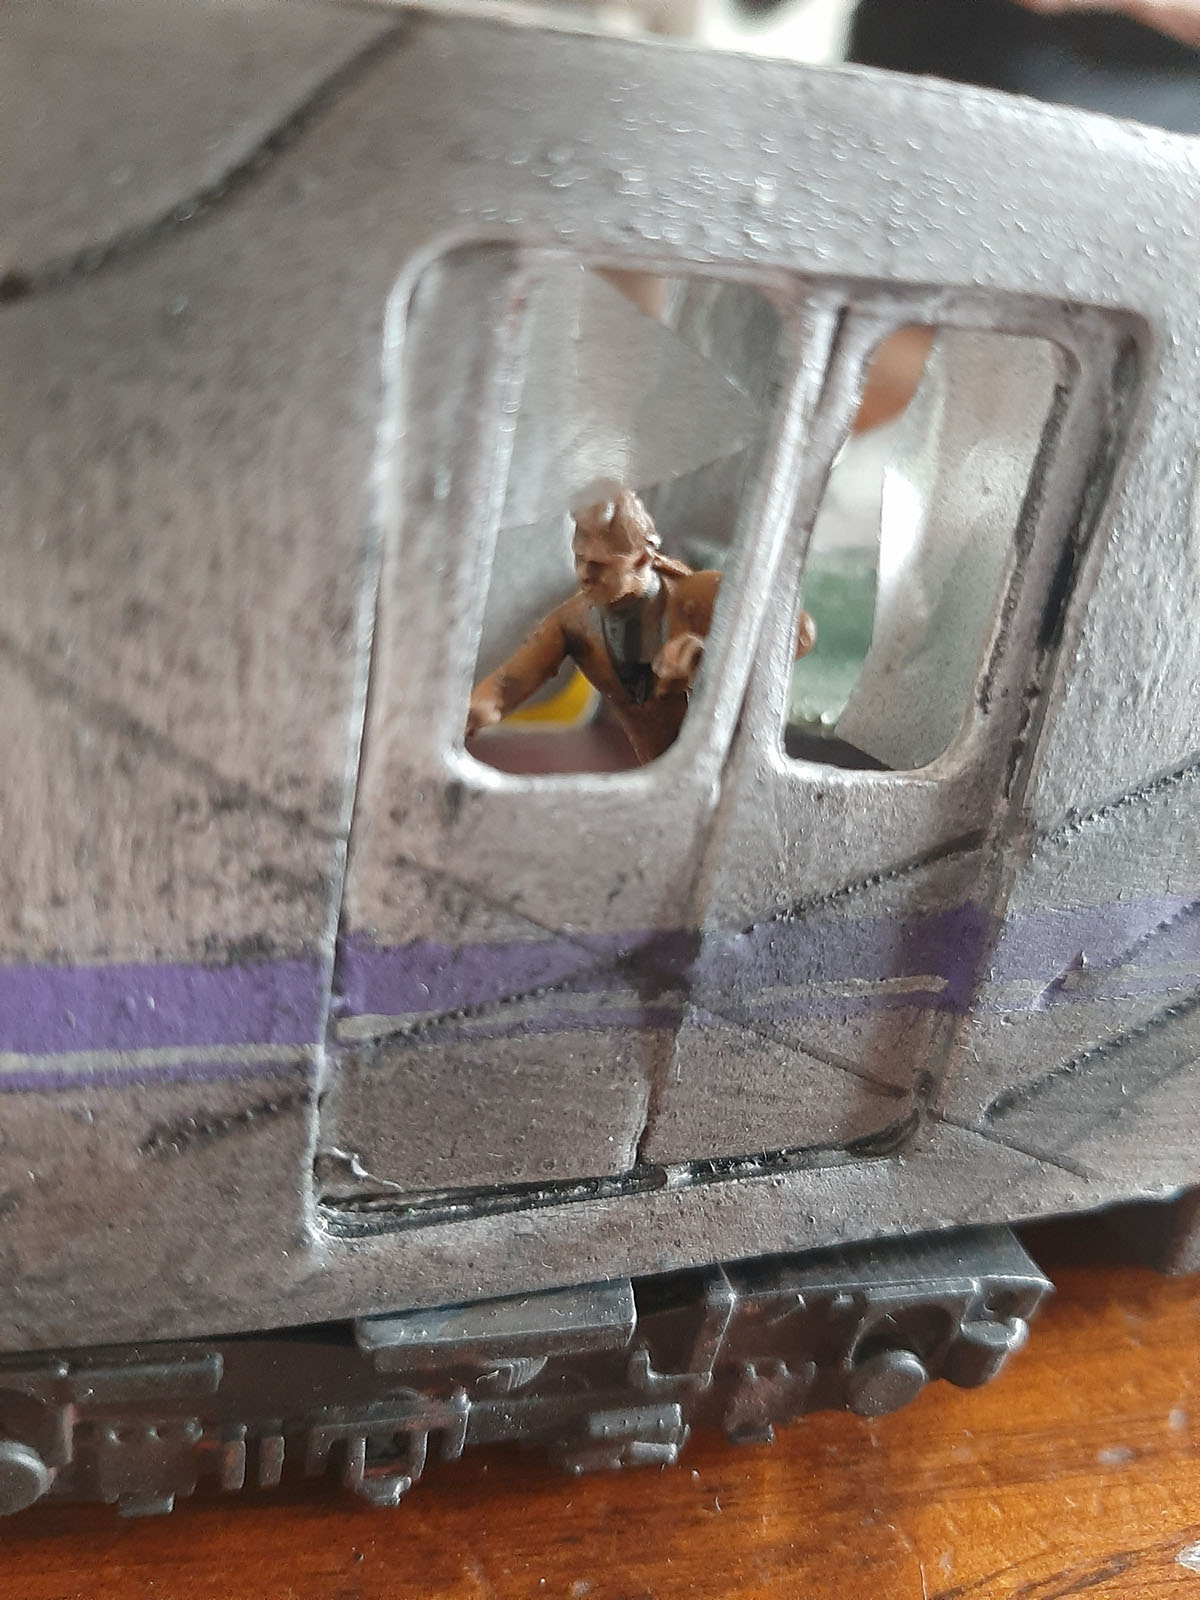
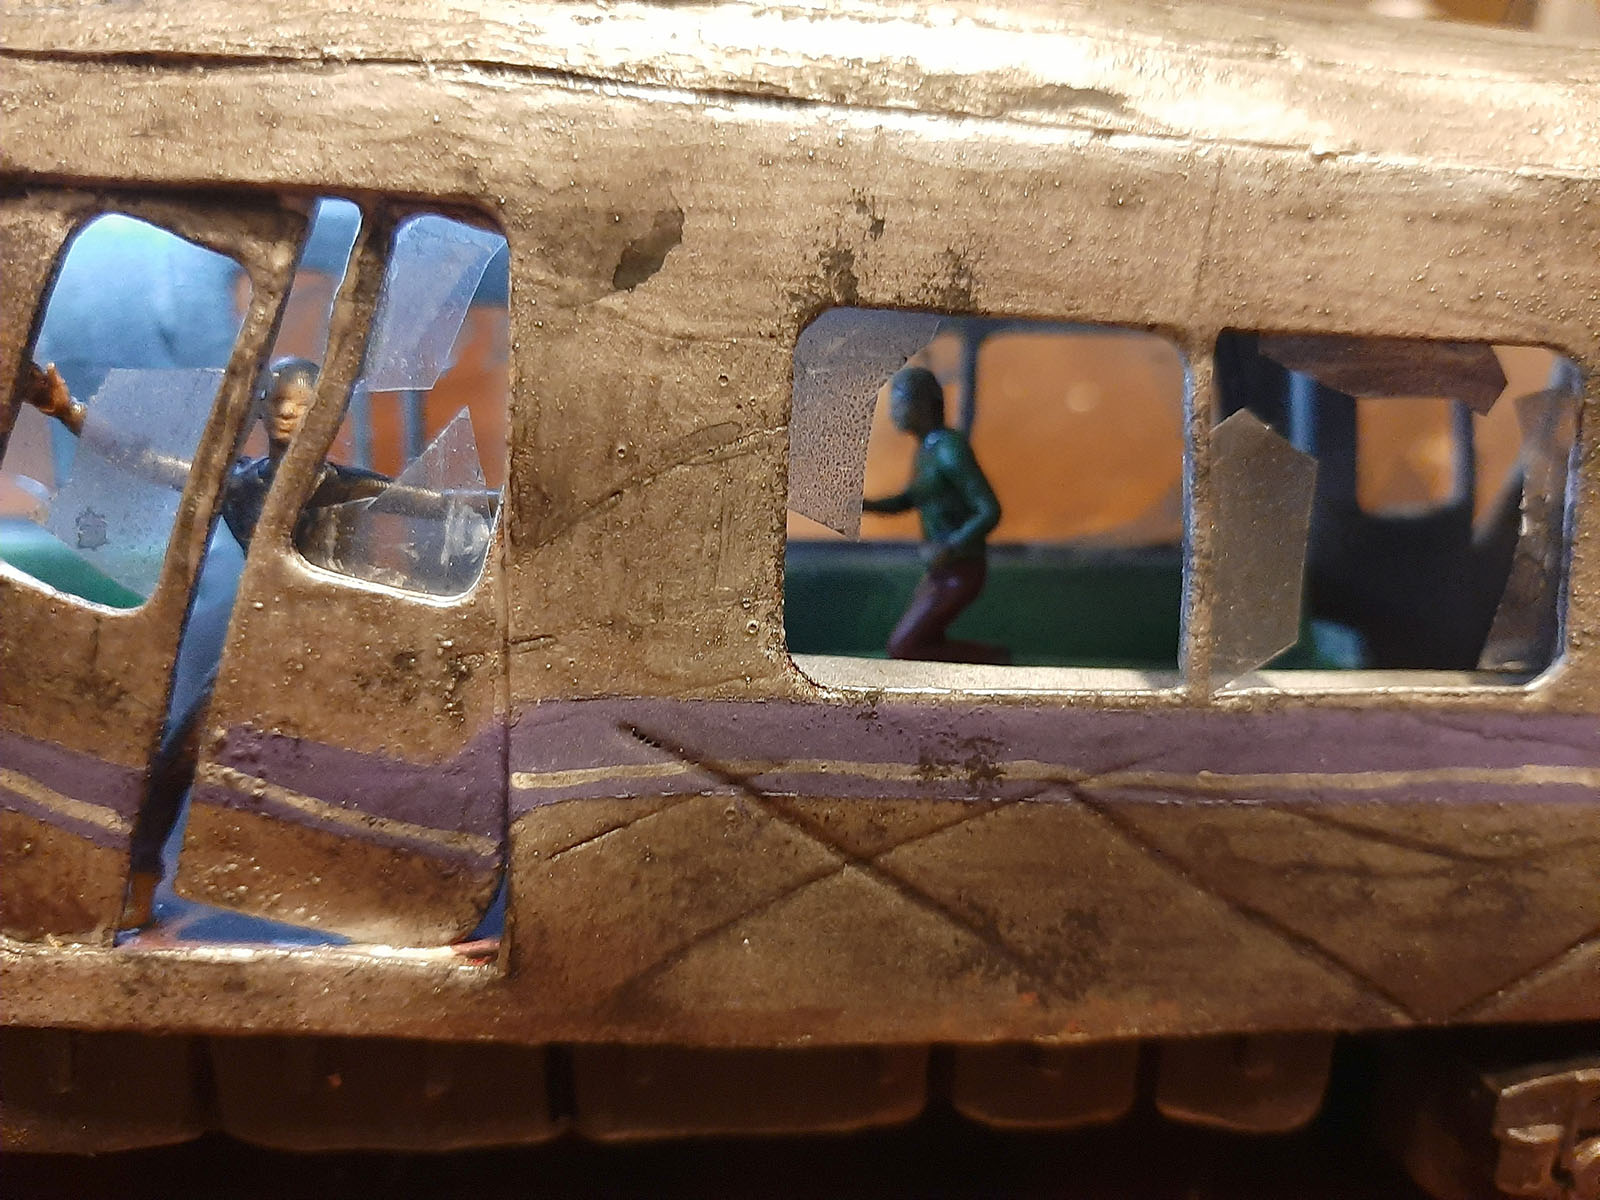
After assembling and gluing all the pieces, I wired the LEDs for the interior and cockpit lighting. Before sealing the roofs of each carriage, I placed the passengers inside.
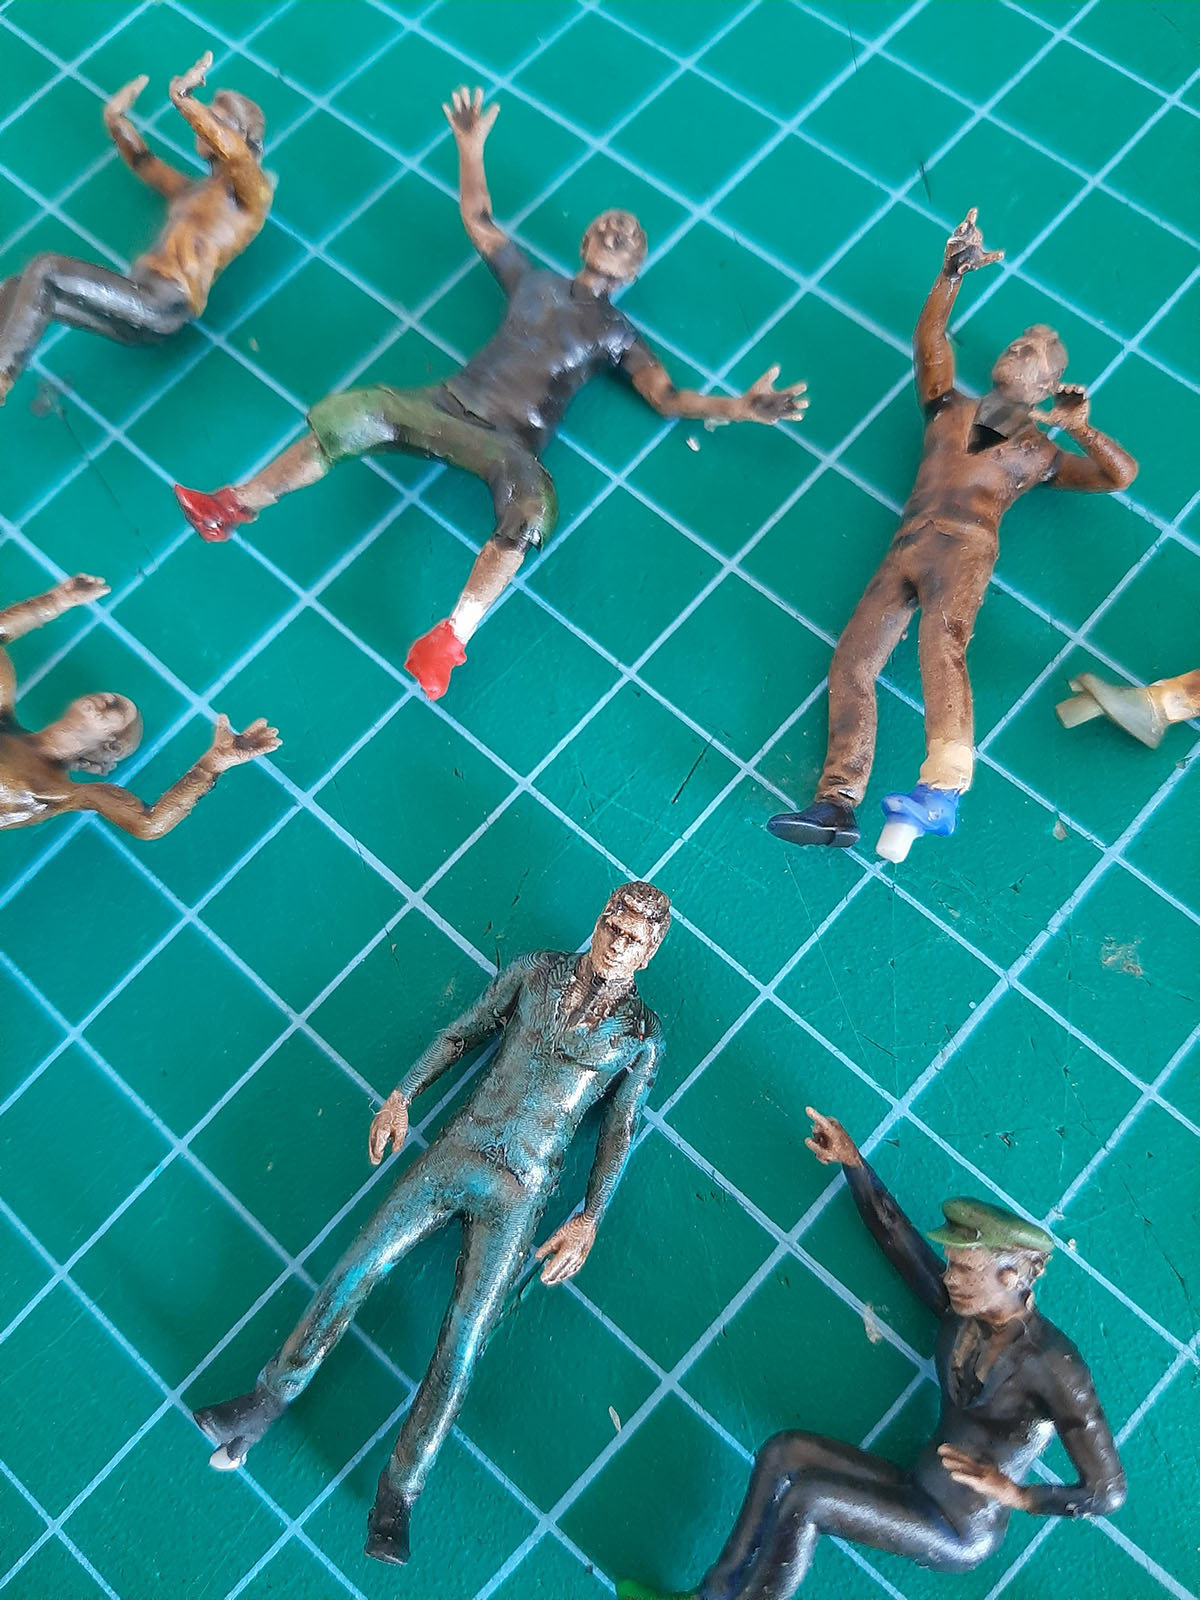
I developed the occupants myself using Mixamo software, which allows you to pose and clothe 3D human figures before printing them; I chose poses depicting flight or terror. With the crew positioned inside each car, I finally glued the roofs down, and the train was ready. I followed this exact same process for the second train I built: the Nagoya Meijo Line.
This second “nunchuck train” is much lighter than the Shinkansen, as it was made entirely out of EVA foam. The idea stemmed from the fact that the World Cosplay Summit finals take place in Nagoya. To break the fourth wall between us and the audience, we decided to set our second and final battle right there, recreating the subway line that passes near the Aichi Arts Center where the event is held.
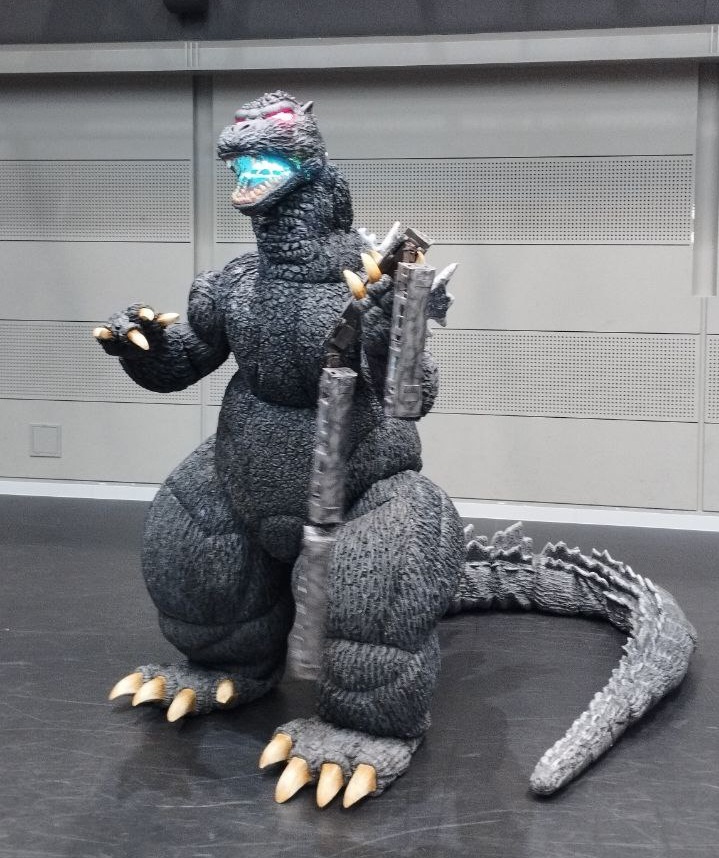
FINISHED COSTUME
MatteoSimoni_Godzilla94_finished costume_01
MatteoSimoni_Godzilla94_finished costume_02
MatteoSimoni_Godzilla94_finished costume_03
MatteoSimoni_Godzilla94_finished costume_04
MatteoSimoni_Godzilla94_finished costume_05
MatteoSimoni_Godzilla94_finished costume_06
MatteoSimoni_Godzilla94_finished costume_07
MatteoSimoni_Godzilla94_finished costume_08
MatteoSimoni_Godzilla94_finished costume_09
MatteoSimoni_Godzilla94_finished costume_10
MatteoSimoni_Godzilla94_finished costume_11
MatteoSimoni_Godzilla94_finished costume_12
MatteoSimoni_Godzilla94_finished costume_13
MatteoSimoni_Godzilla94_finished costume_14
MatteoSimoni_Godzilla94_finished costume_15
MatteoSimoni_Godzilla94_finished costume_16
World Cosplay Summit 2025 Team Italy
Godzilla vs Gigan On Stage!
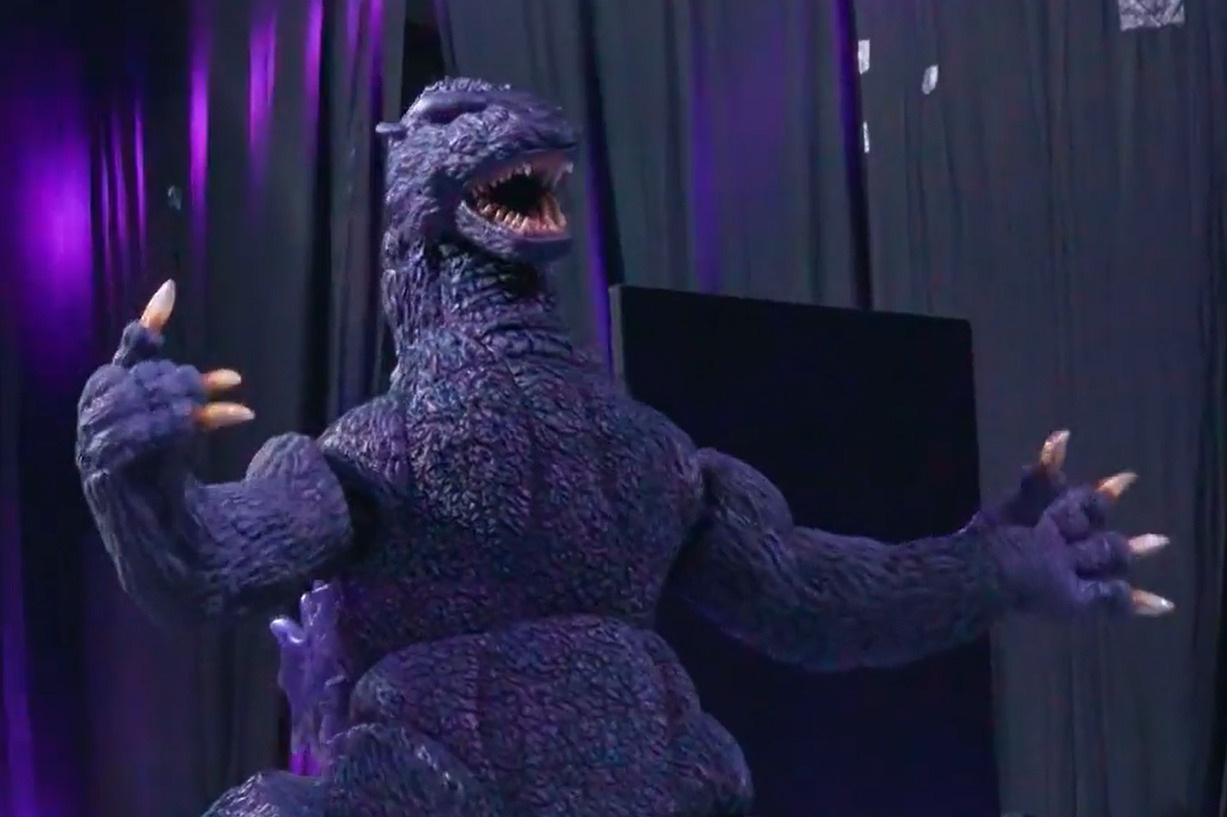
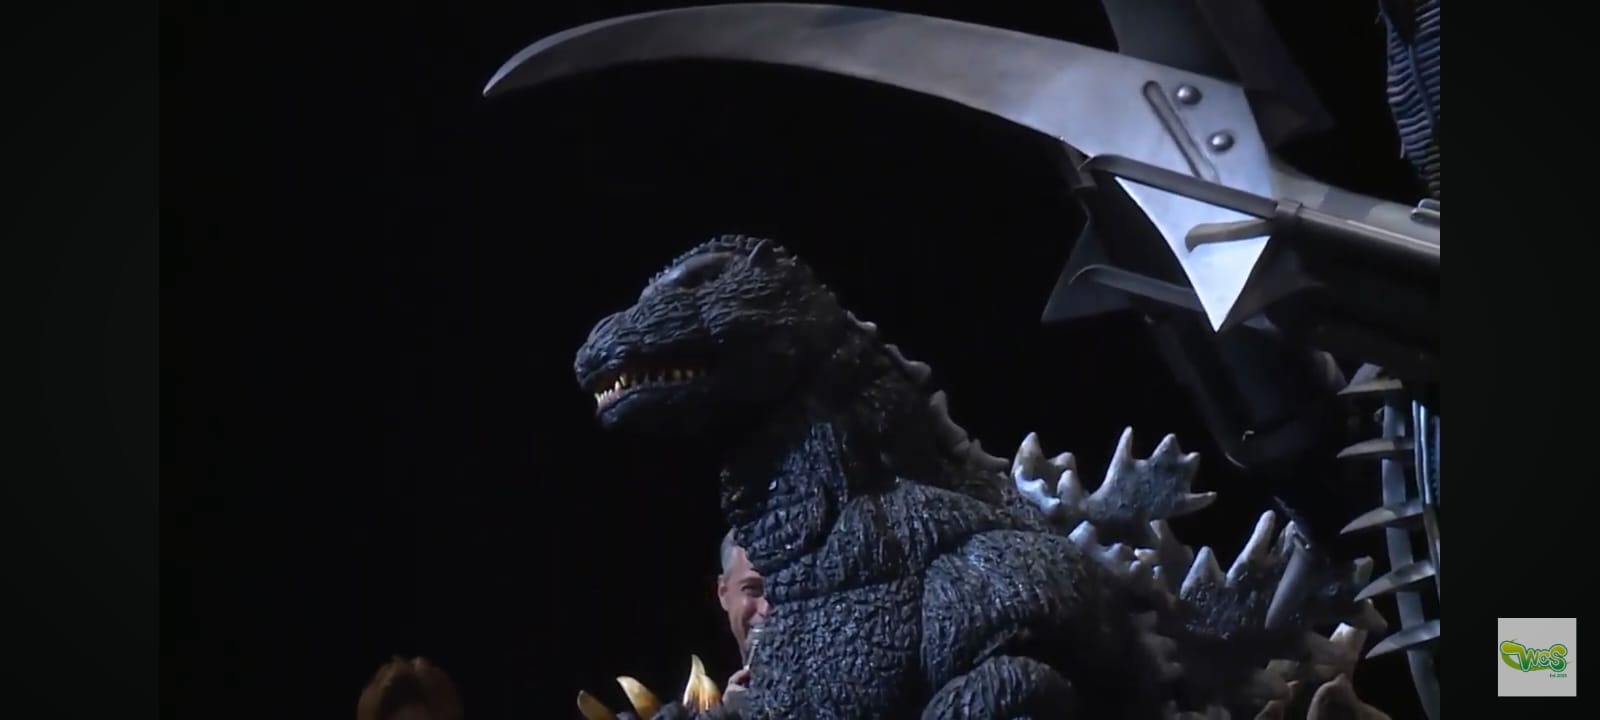
Witness Godzilla and Gigan duking it out on the literal world stage! By Team Italy of the World Cosplay Summit 2025 Championship starring MATT OF THE MONSTERS as Godzilla and ANDREA RE VEGA as Gigan!

Links
Contact
Have you already completed your own Godzilla costume and want to feature it here? Then by all means contact me and we’ll work together to add your costuming experience to this site.