King of the Monsters
Tristan Domay's Godzilla 1991
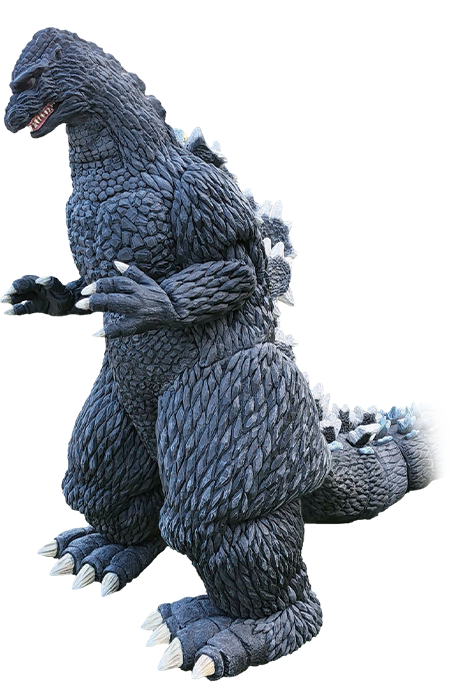
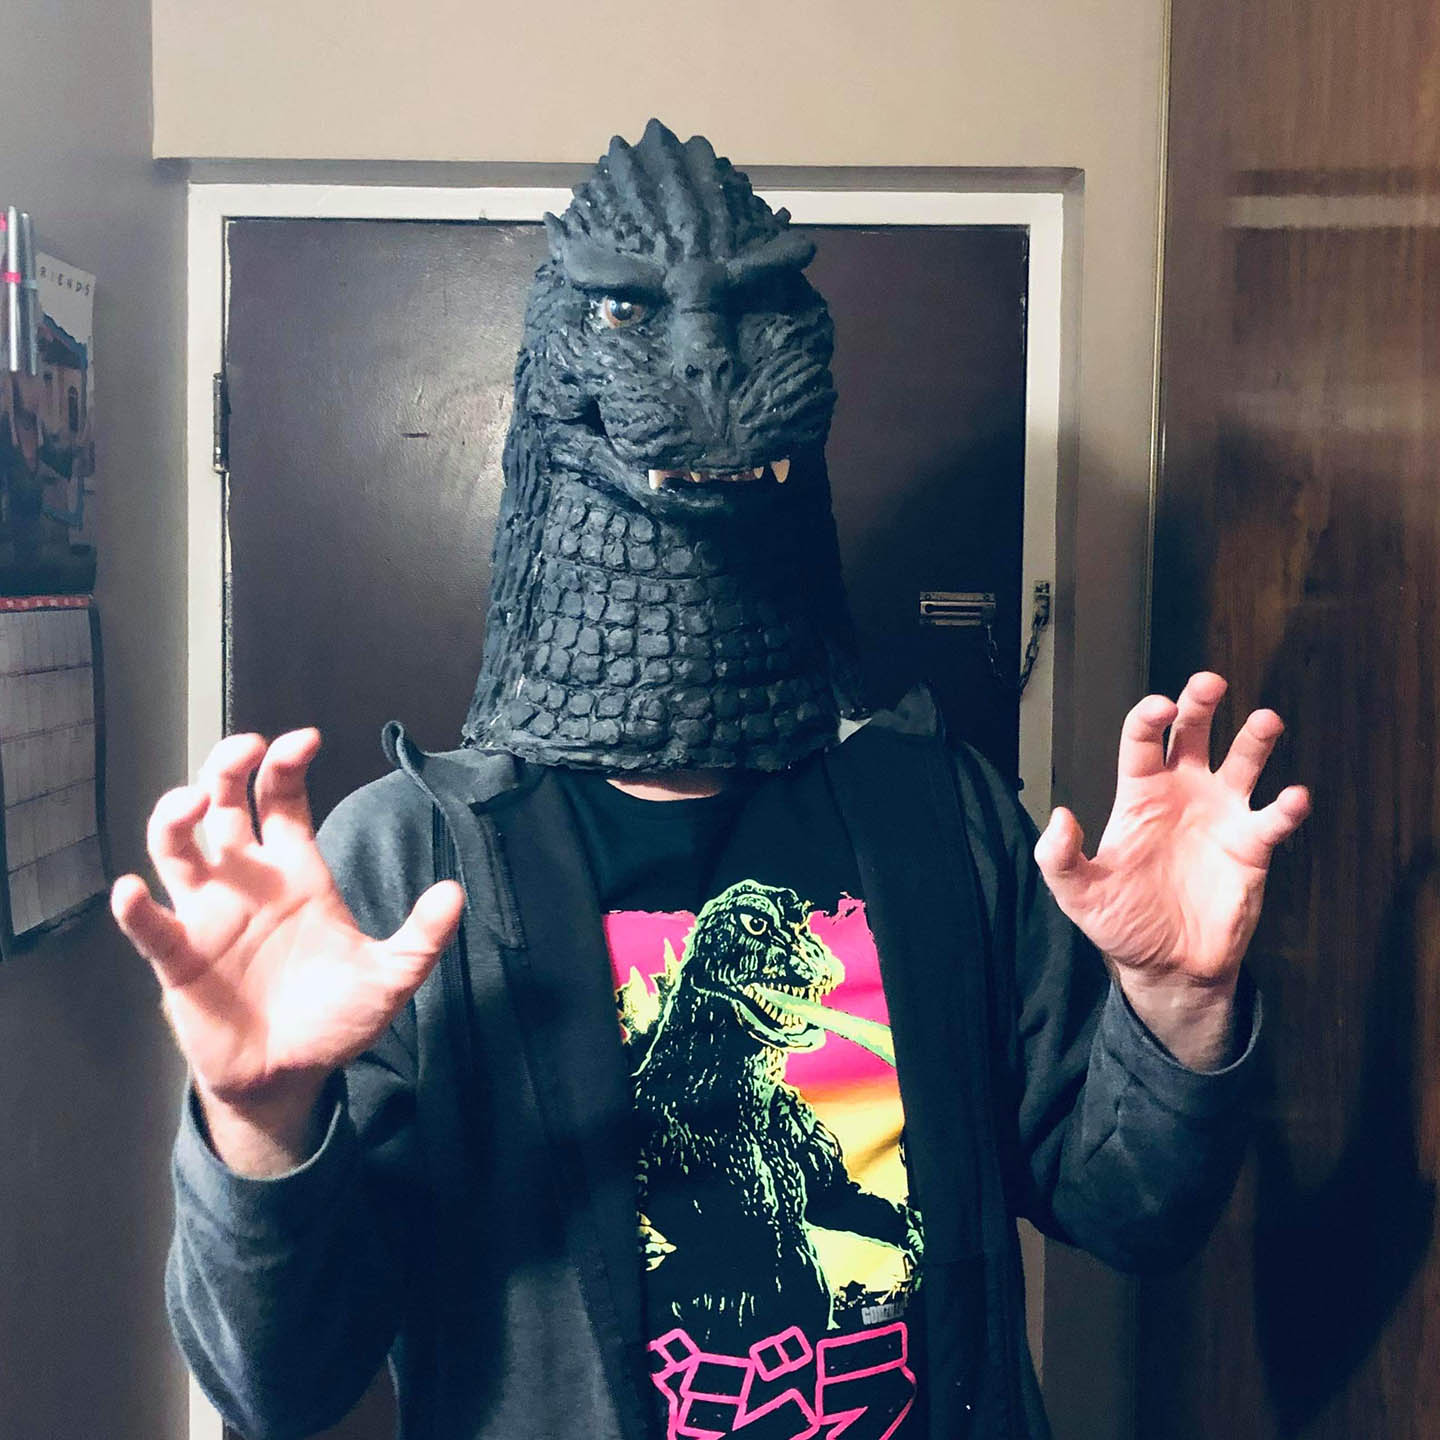
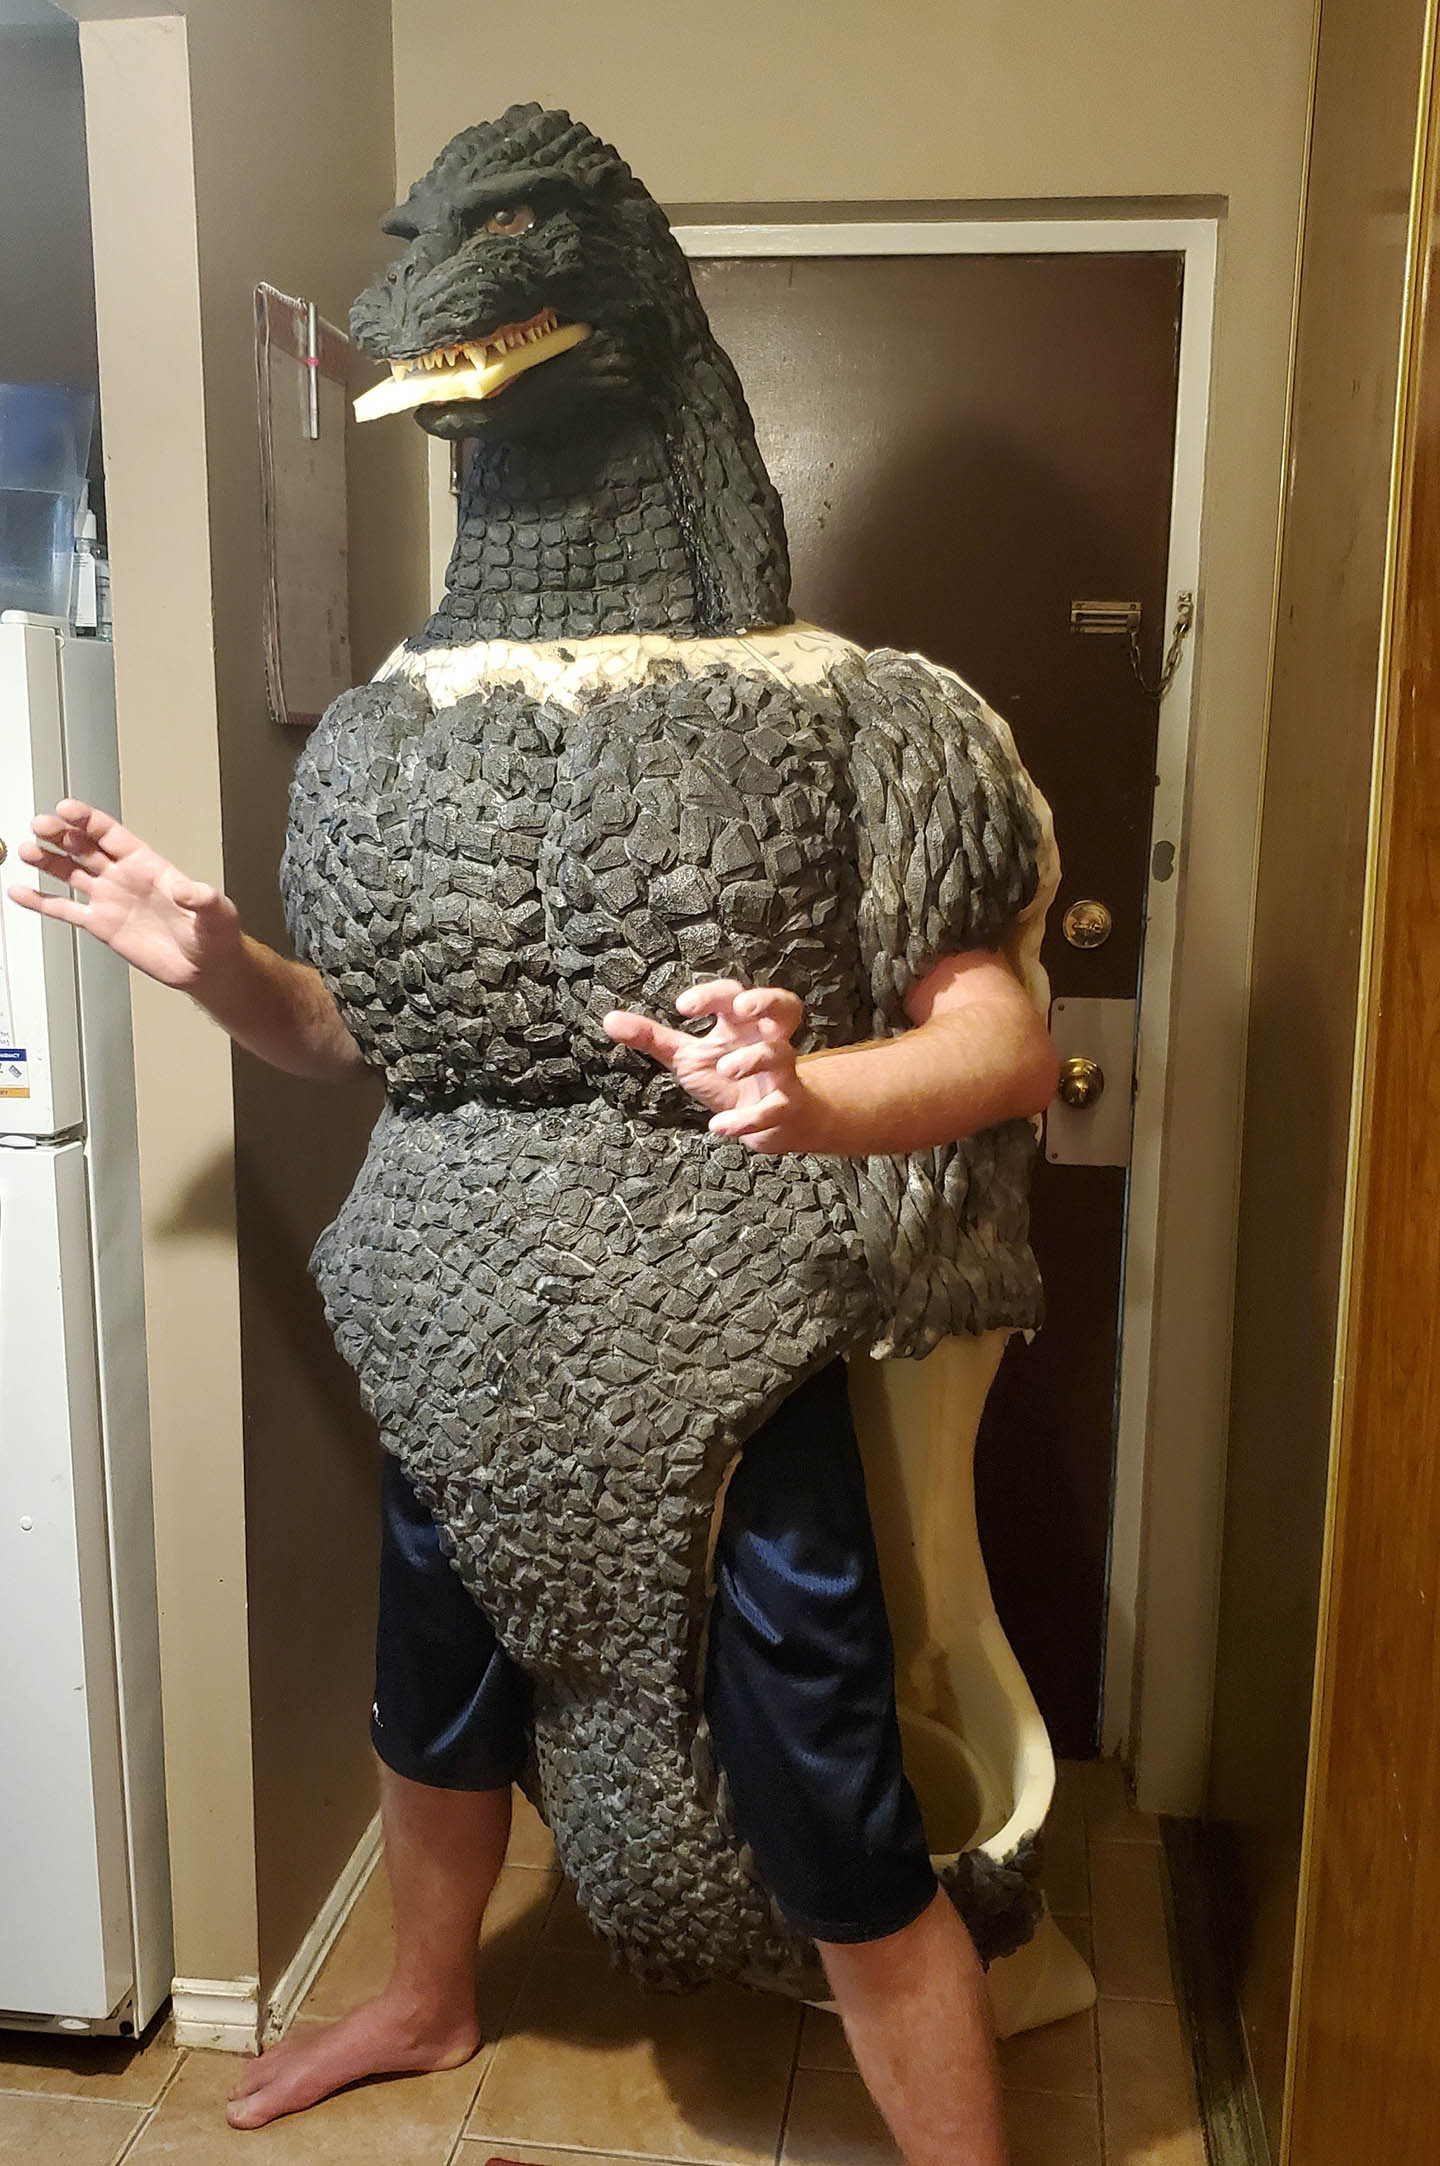
I got into cosplay quite by accident. When I was in high school I made costumes of Godzilla, Gamera and Rodan, partly because I was so inspired by the costumes I'd seen on the convention circuit, and partly because I had aspirations of being a filmmaker. I wanted to make movies. My movies needed monsters. And since buying them wasn't an option, I knew I'd need to learn how to make them myself. Fast forward to 2019... It had been many years since I made anything and I decided it was time for a creative reset. I decided to make the Godzilla suit I'd always dreamed of, and when I was a kid, the cool new Godzilla, was the Heisei version...
G-Fest 2022
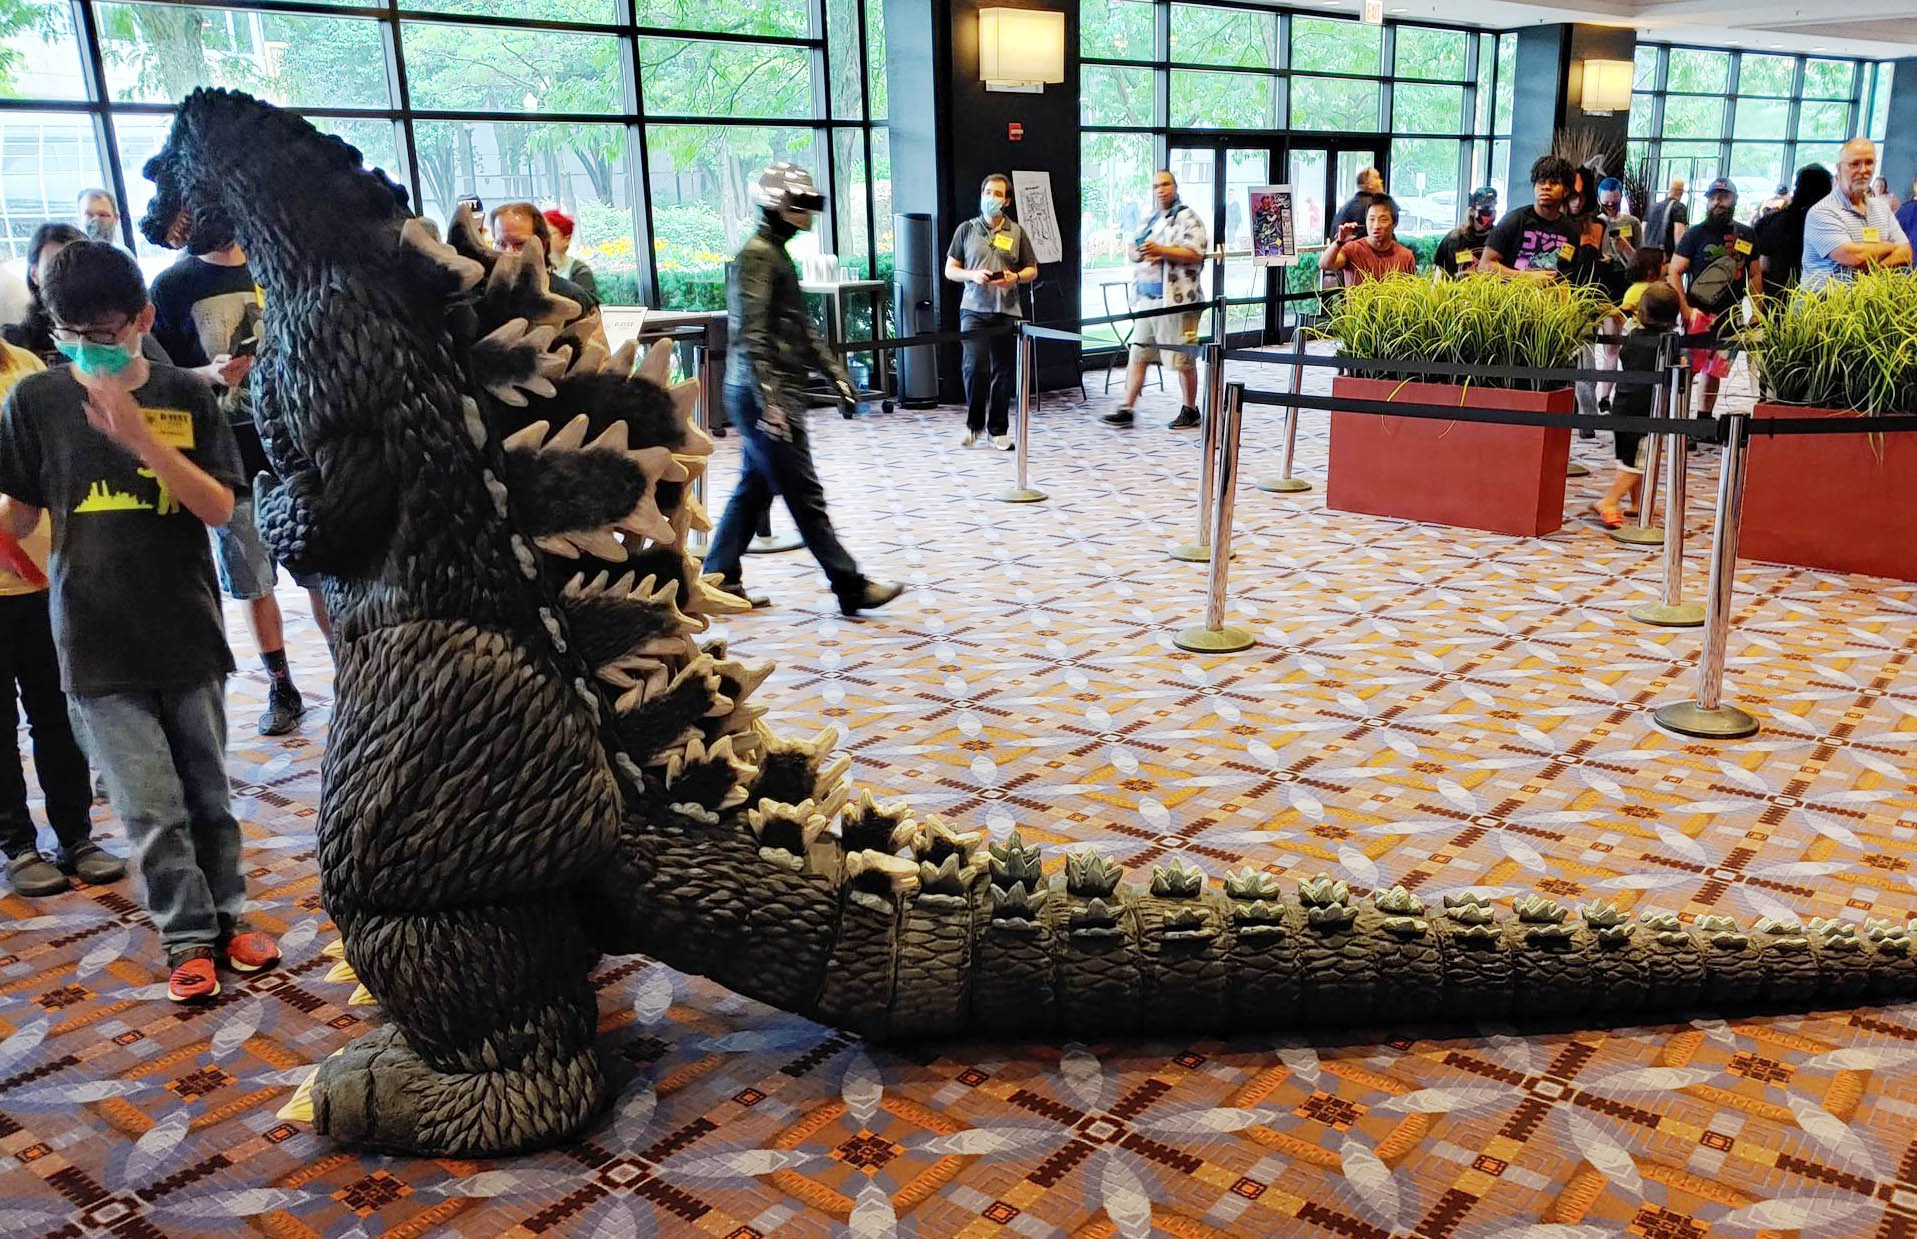
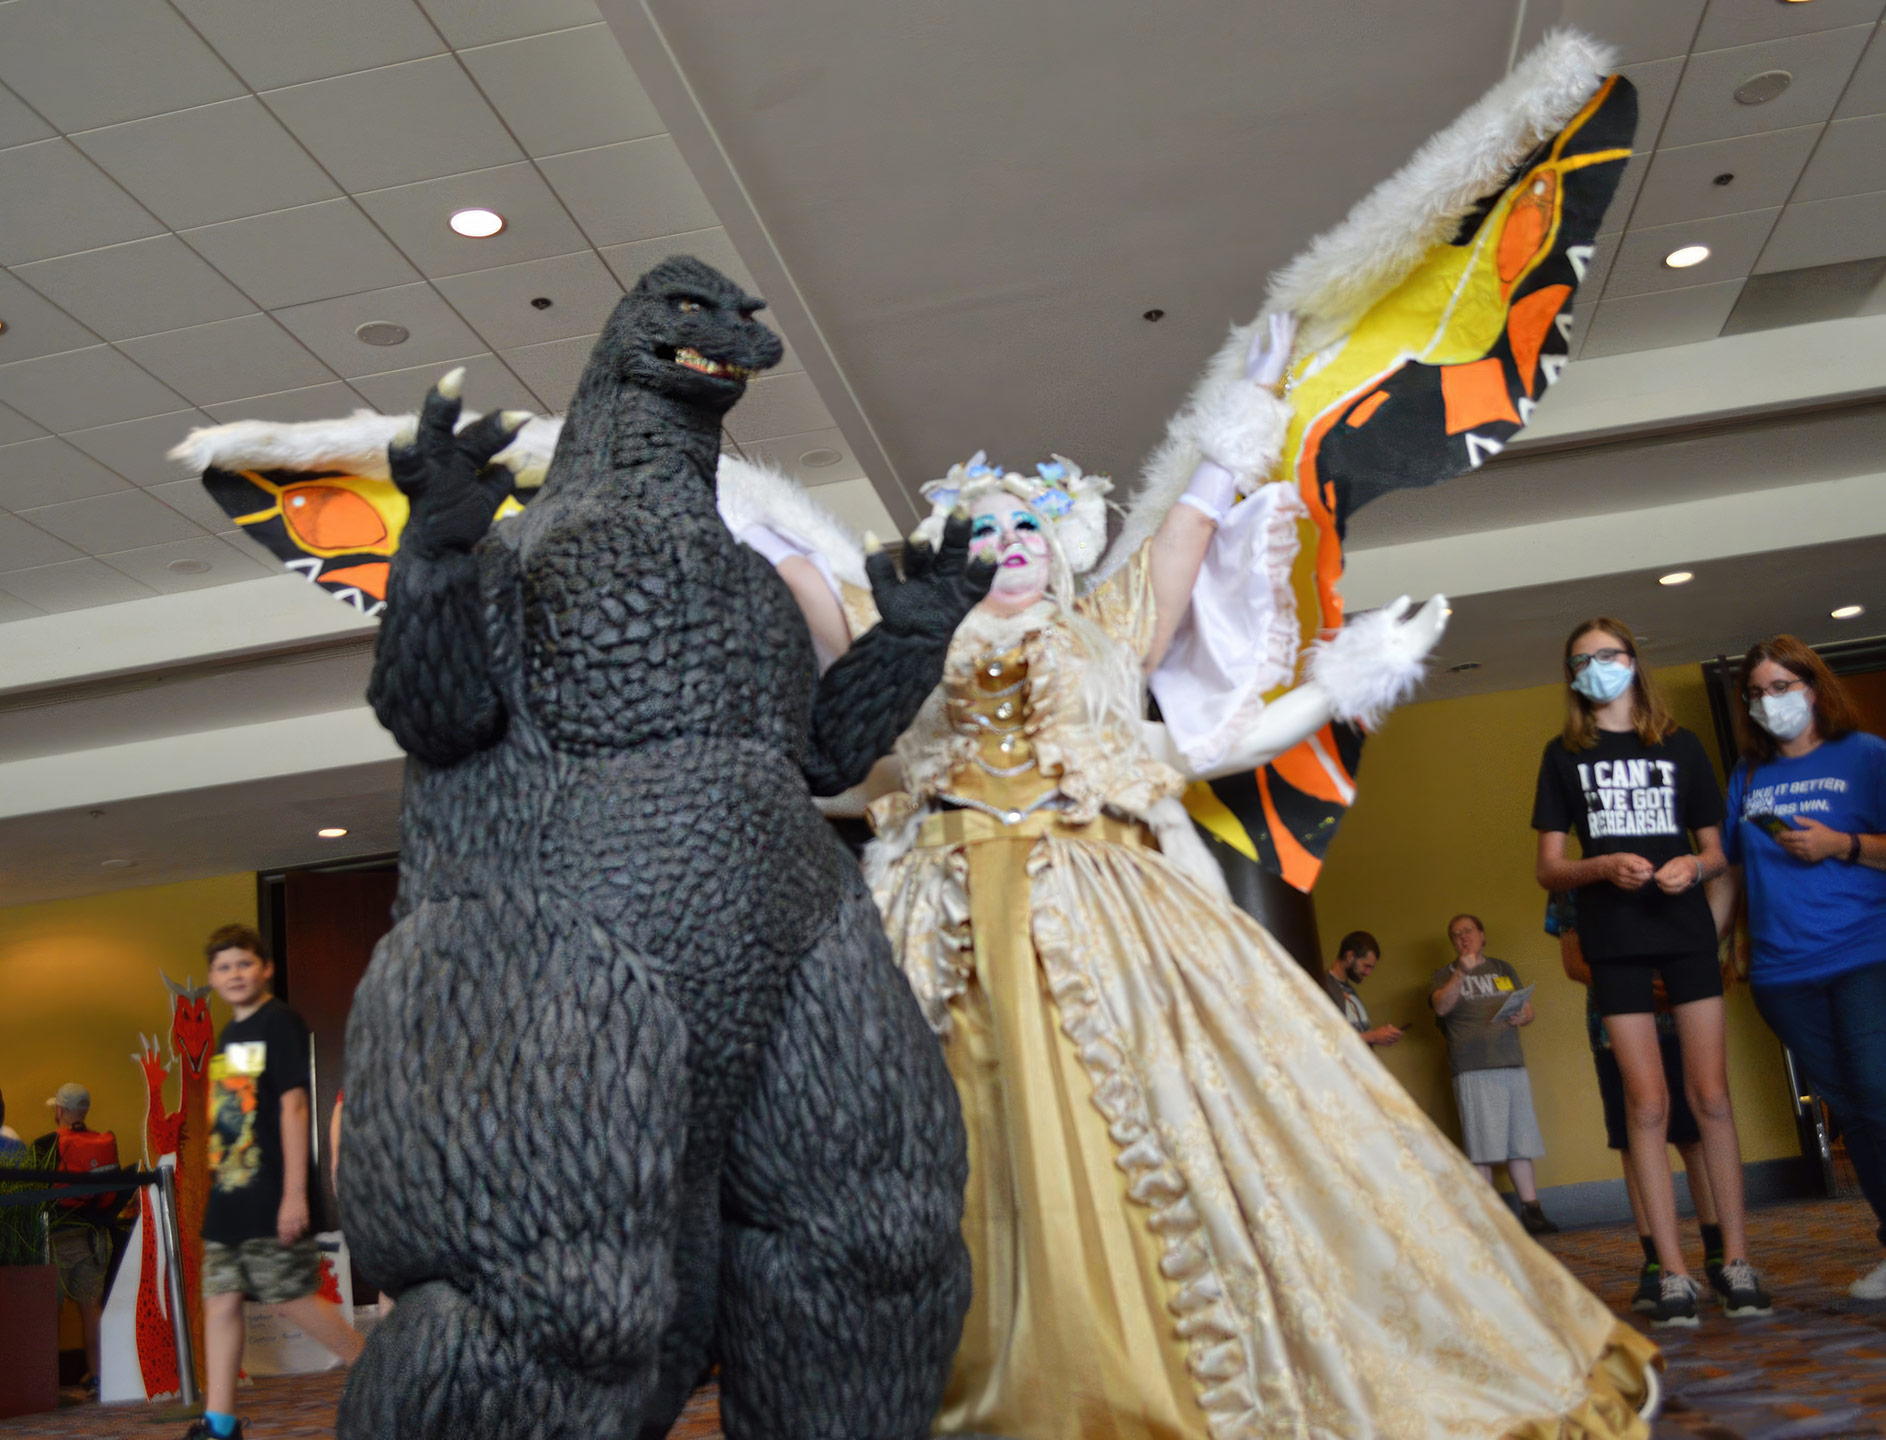
Leading the Parade
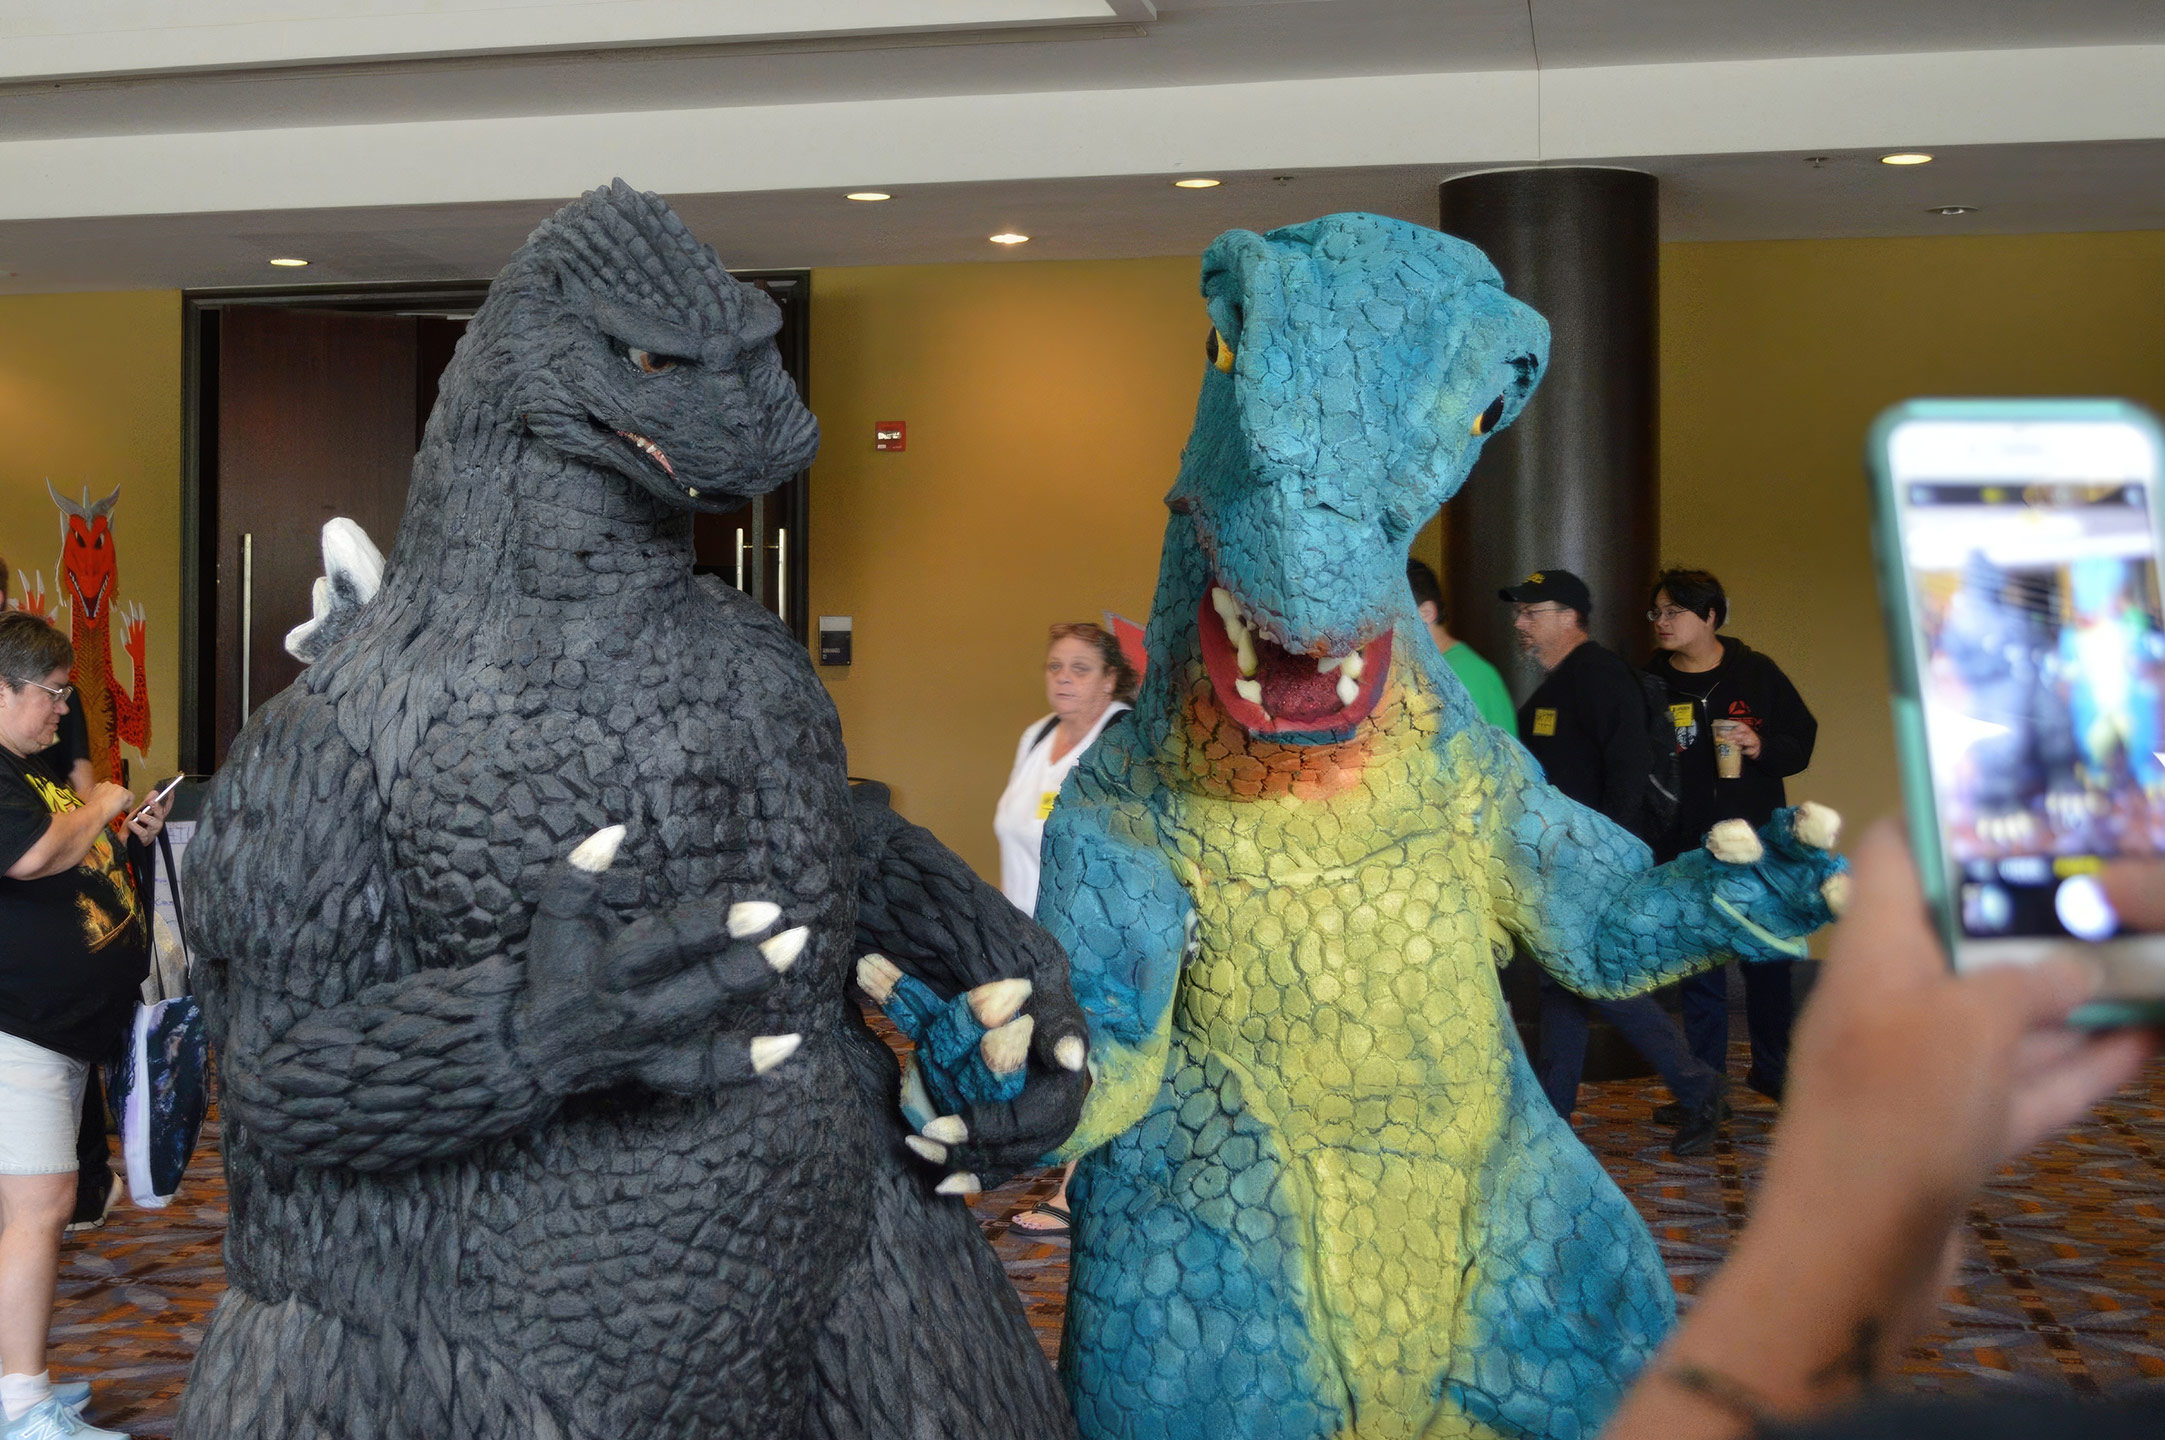
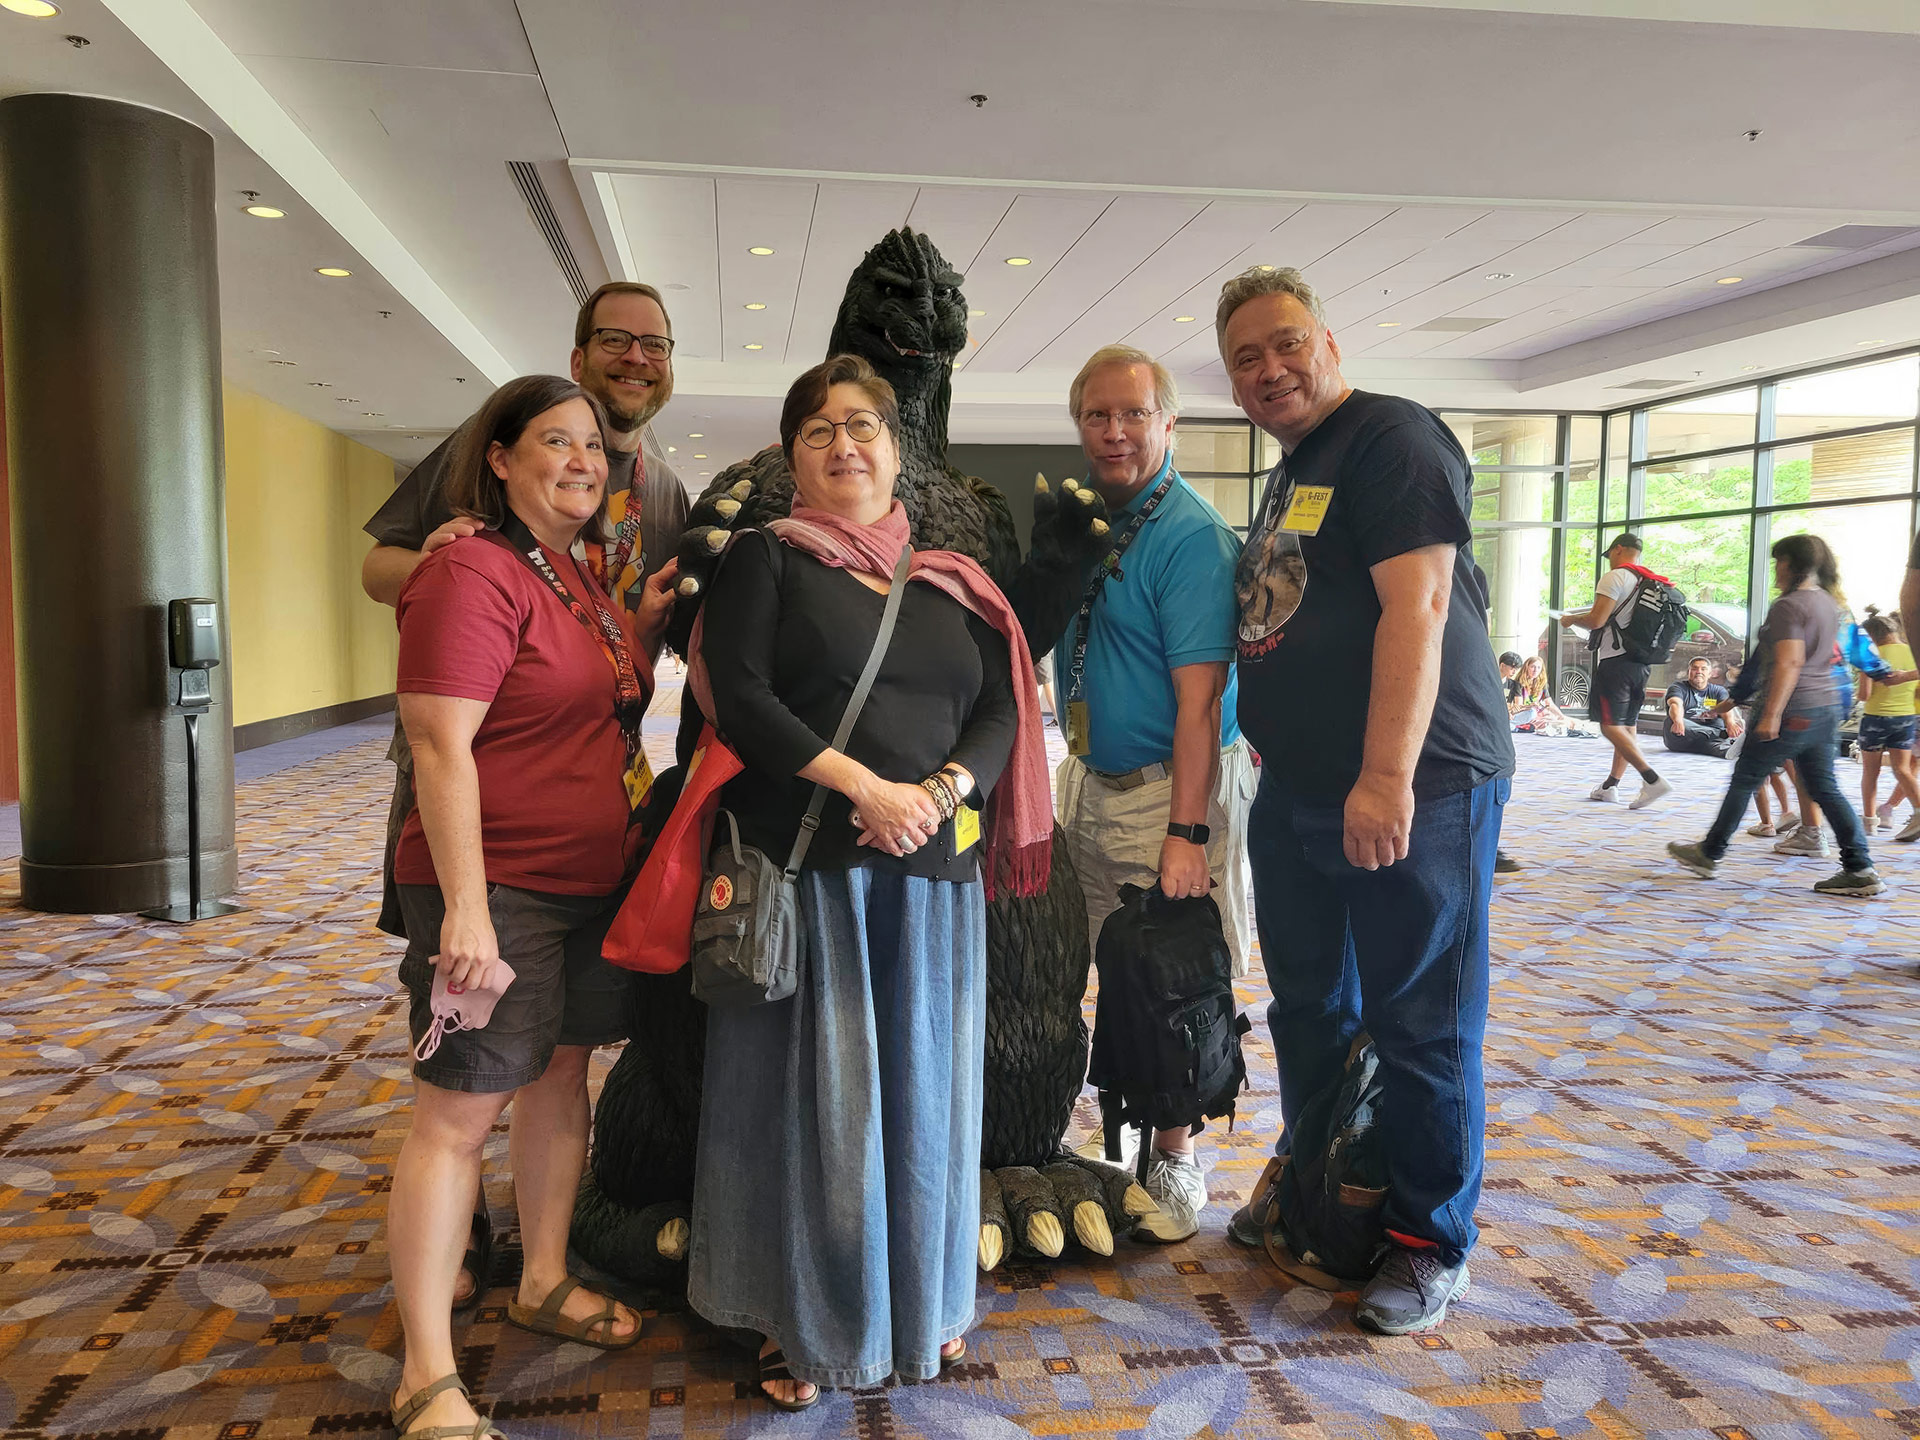
Nothing compares to the feeling of walking onto a convention floor with a completed costume. At G-Fest in 2022, I did not compete in the costume contest, but was given the opportunity to open and lead the costume parade on Saturday night. It was both an honor and a thrill.
BUILDING THE COSTUME
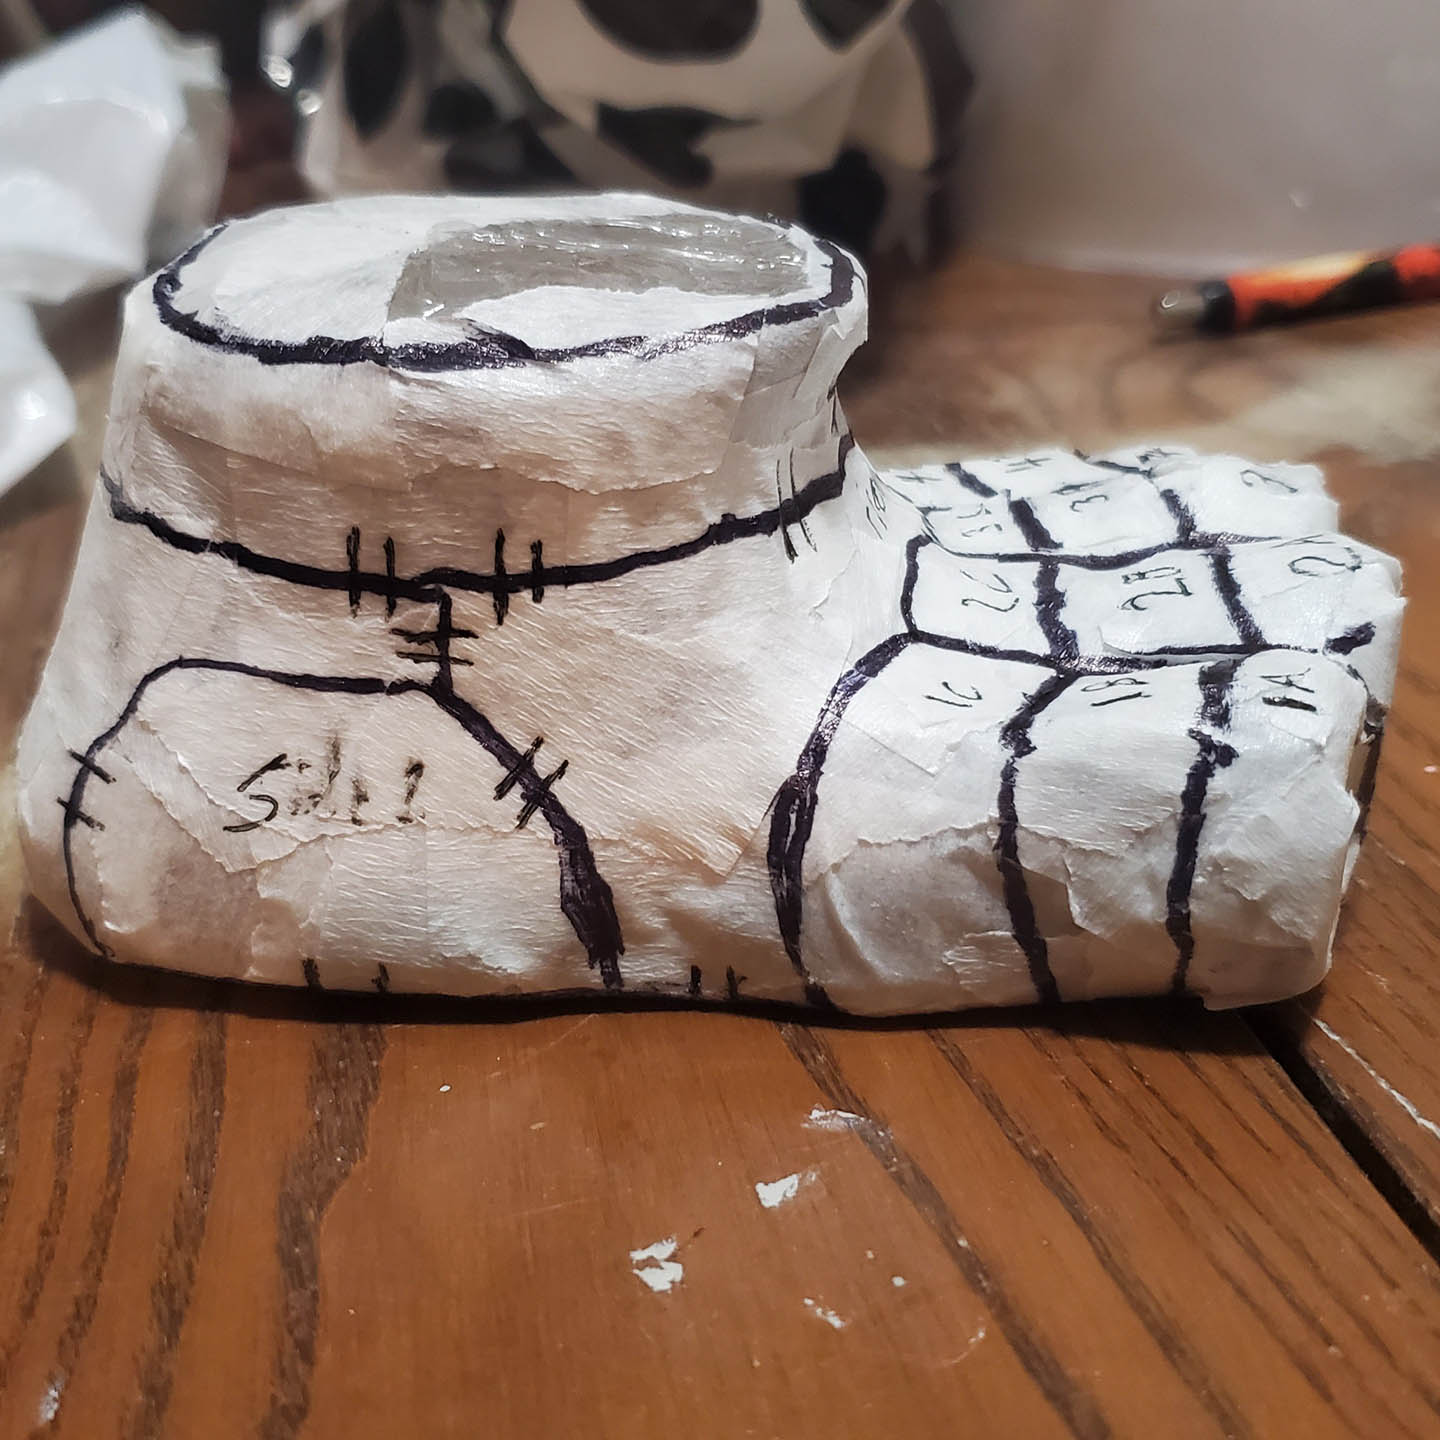
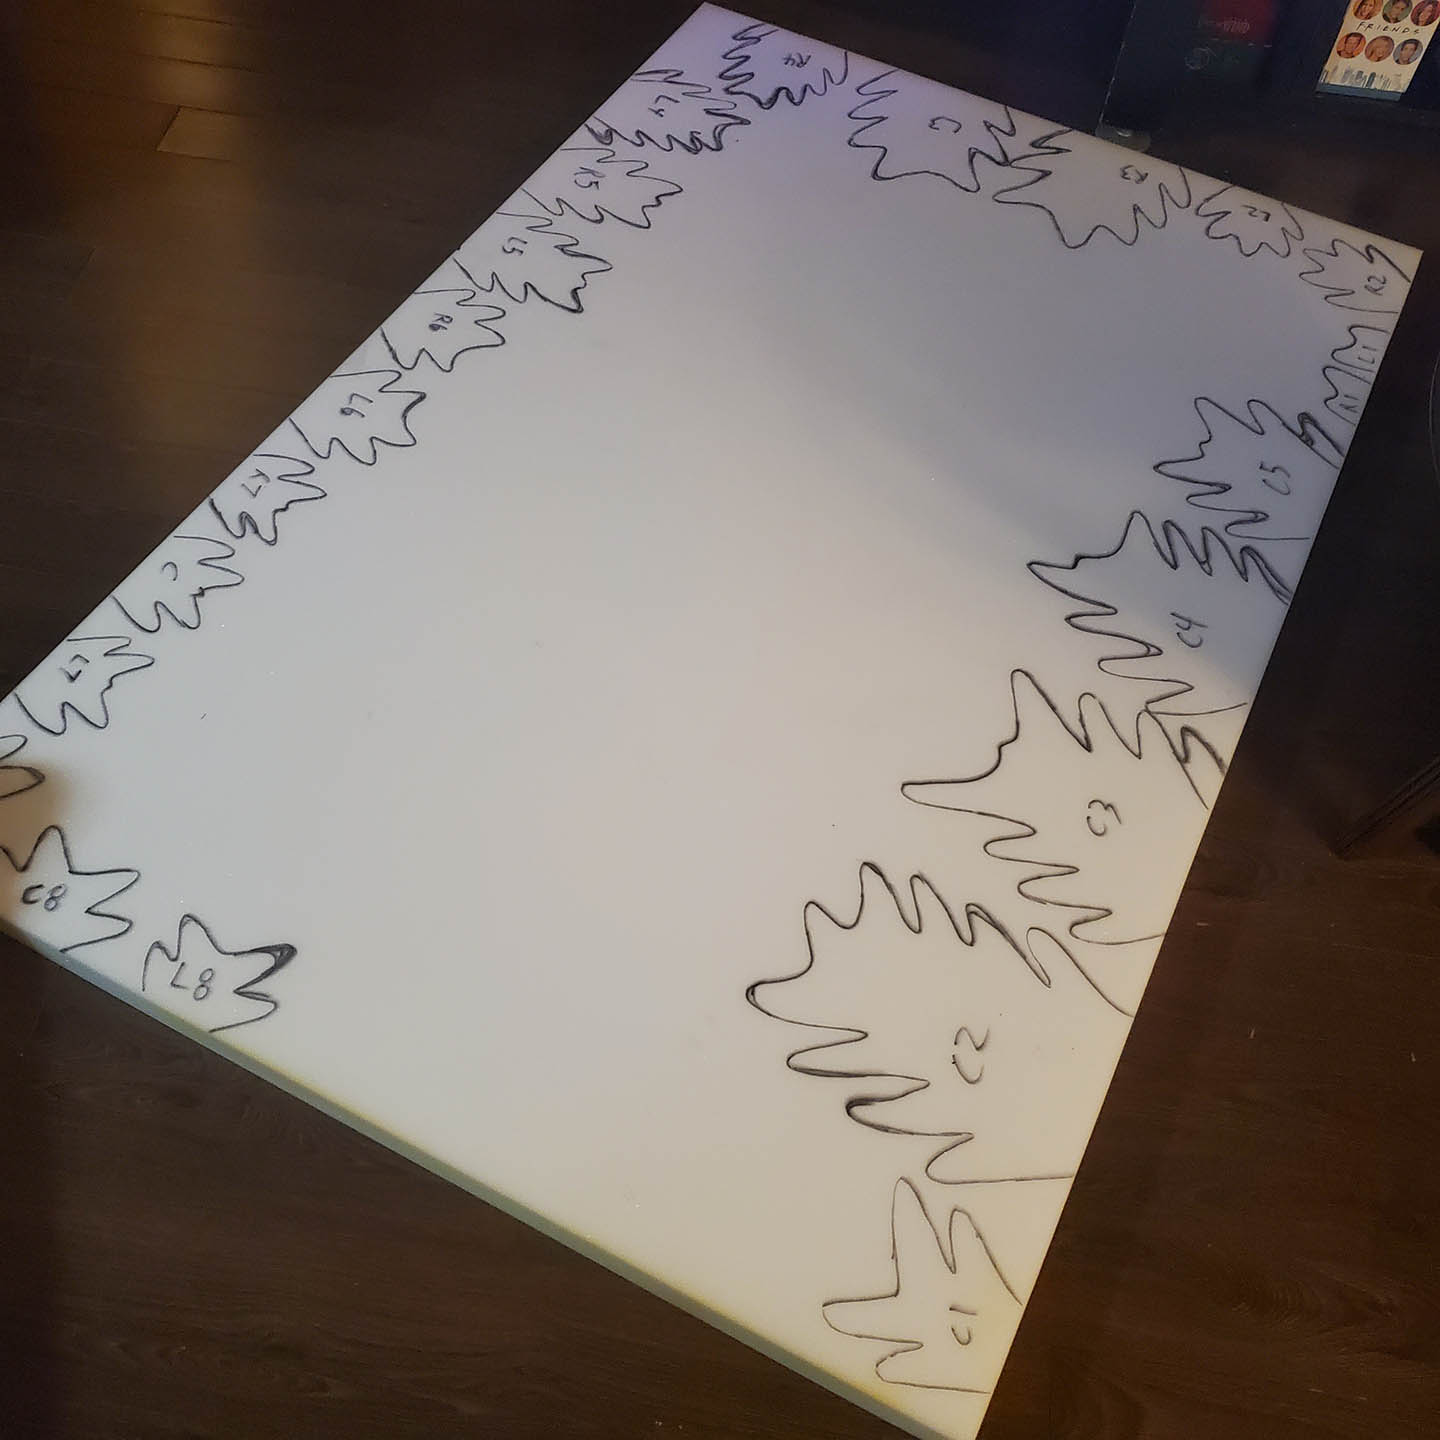
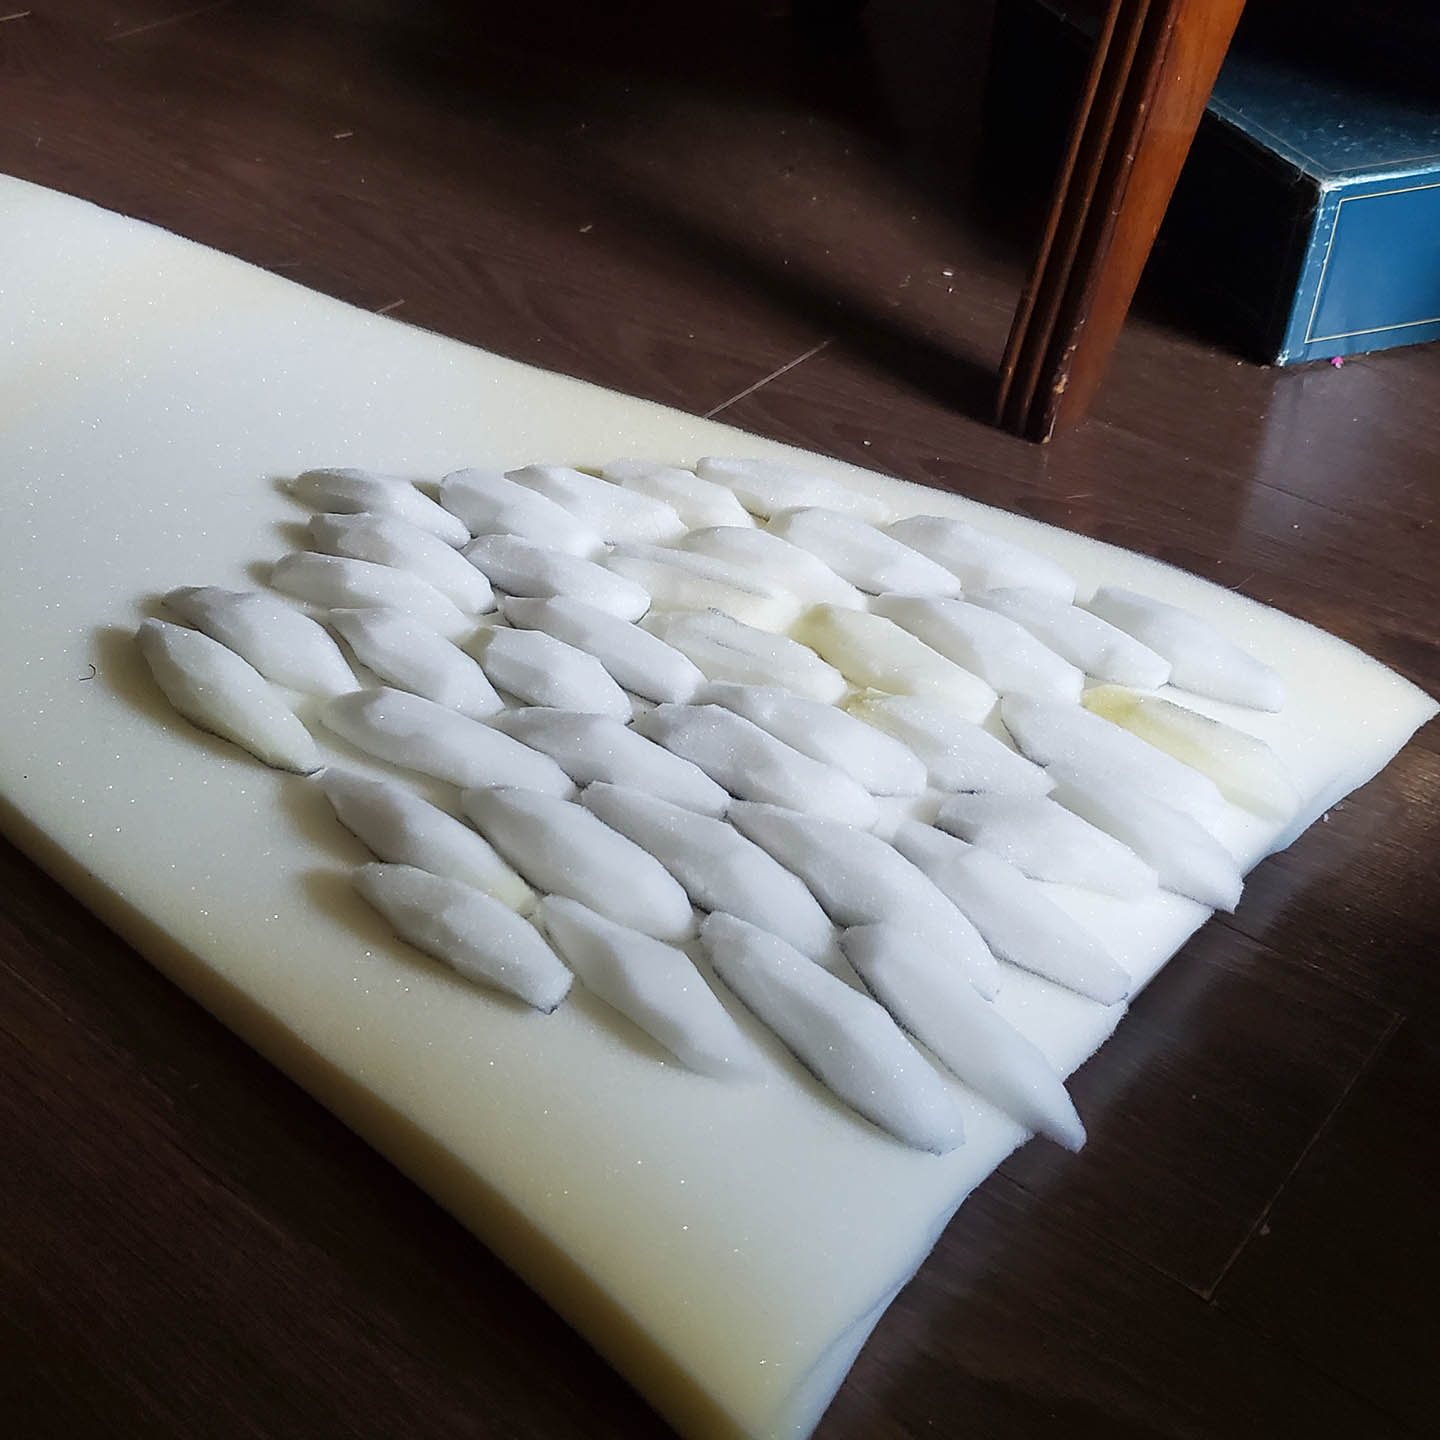
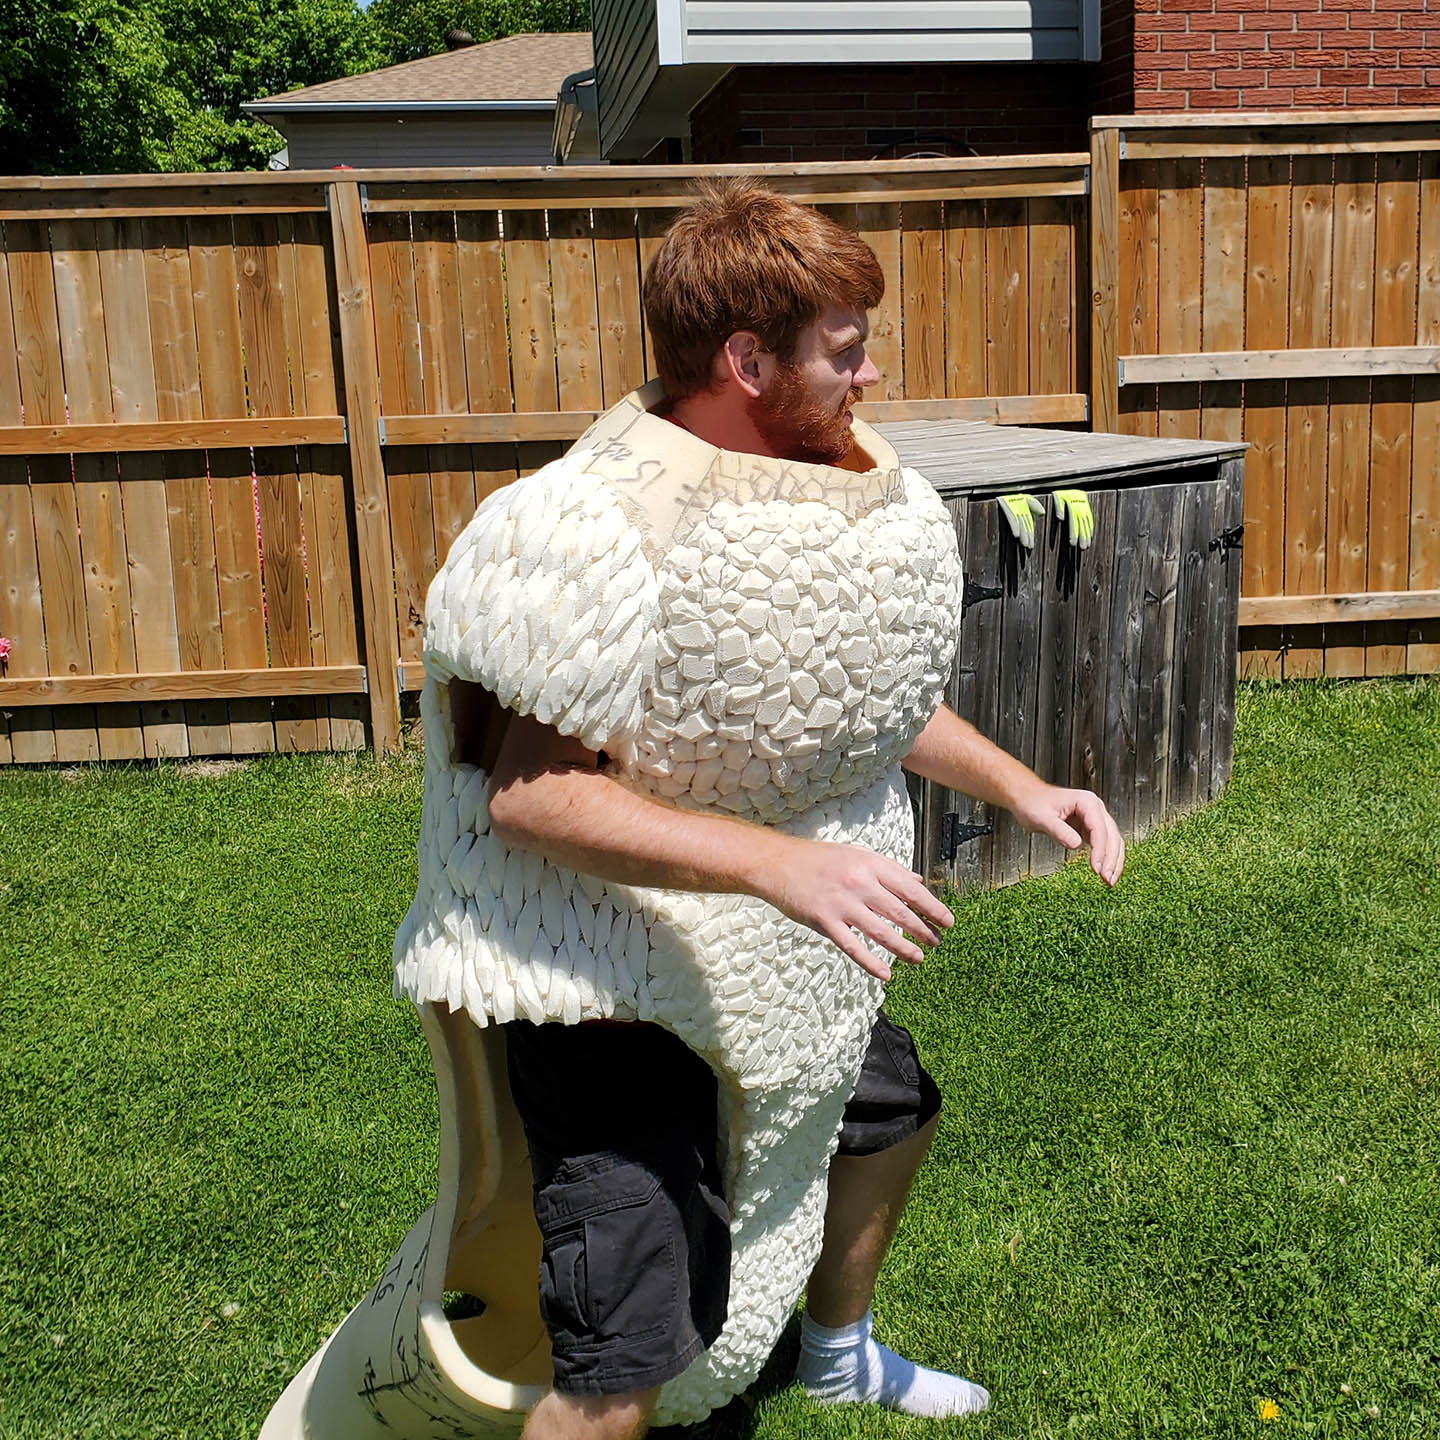
Legs and Torso
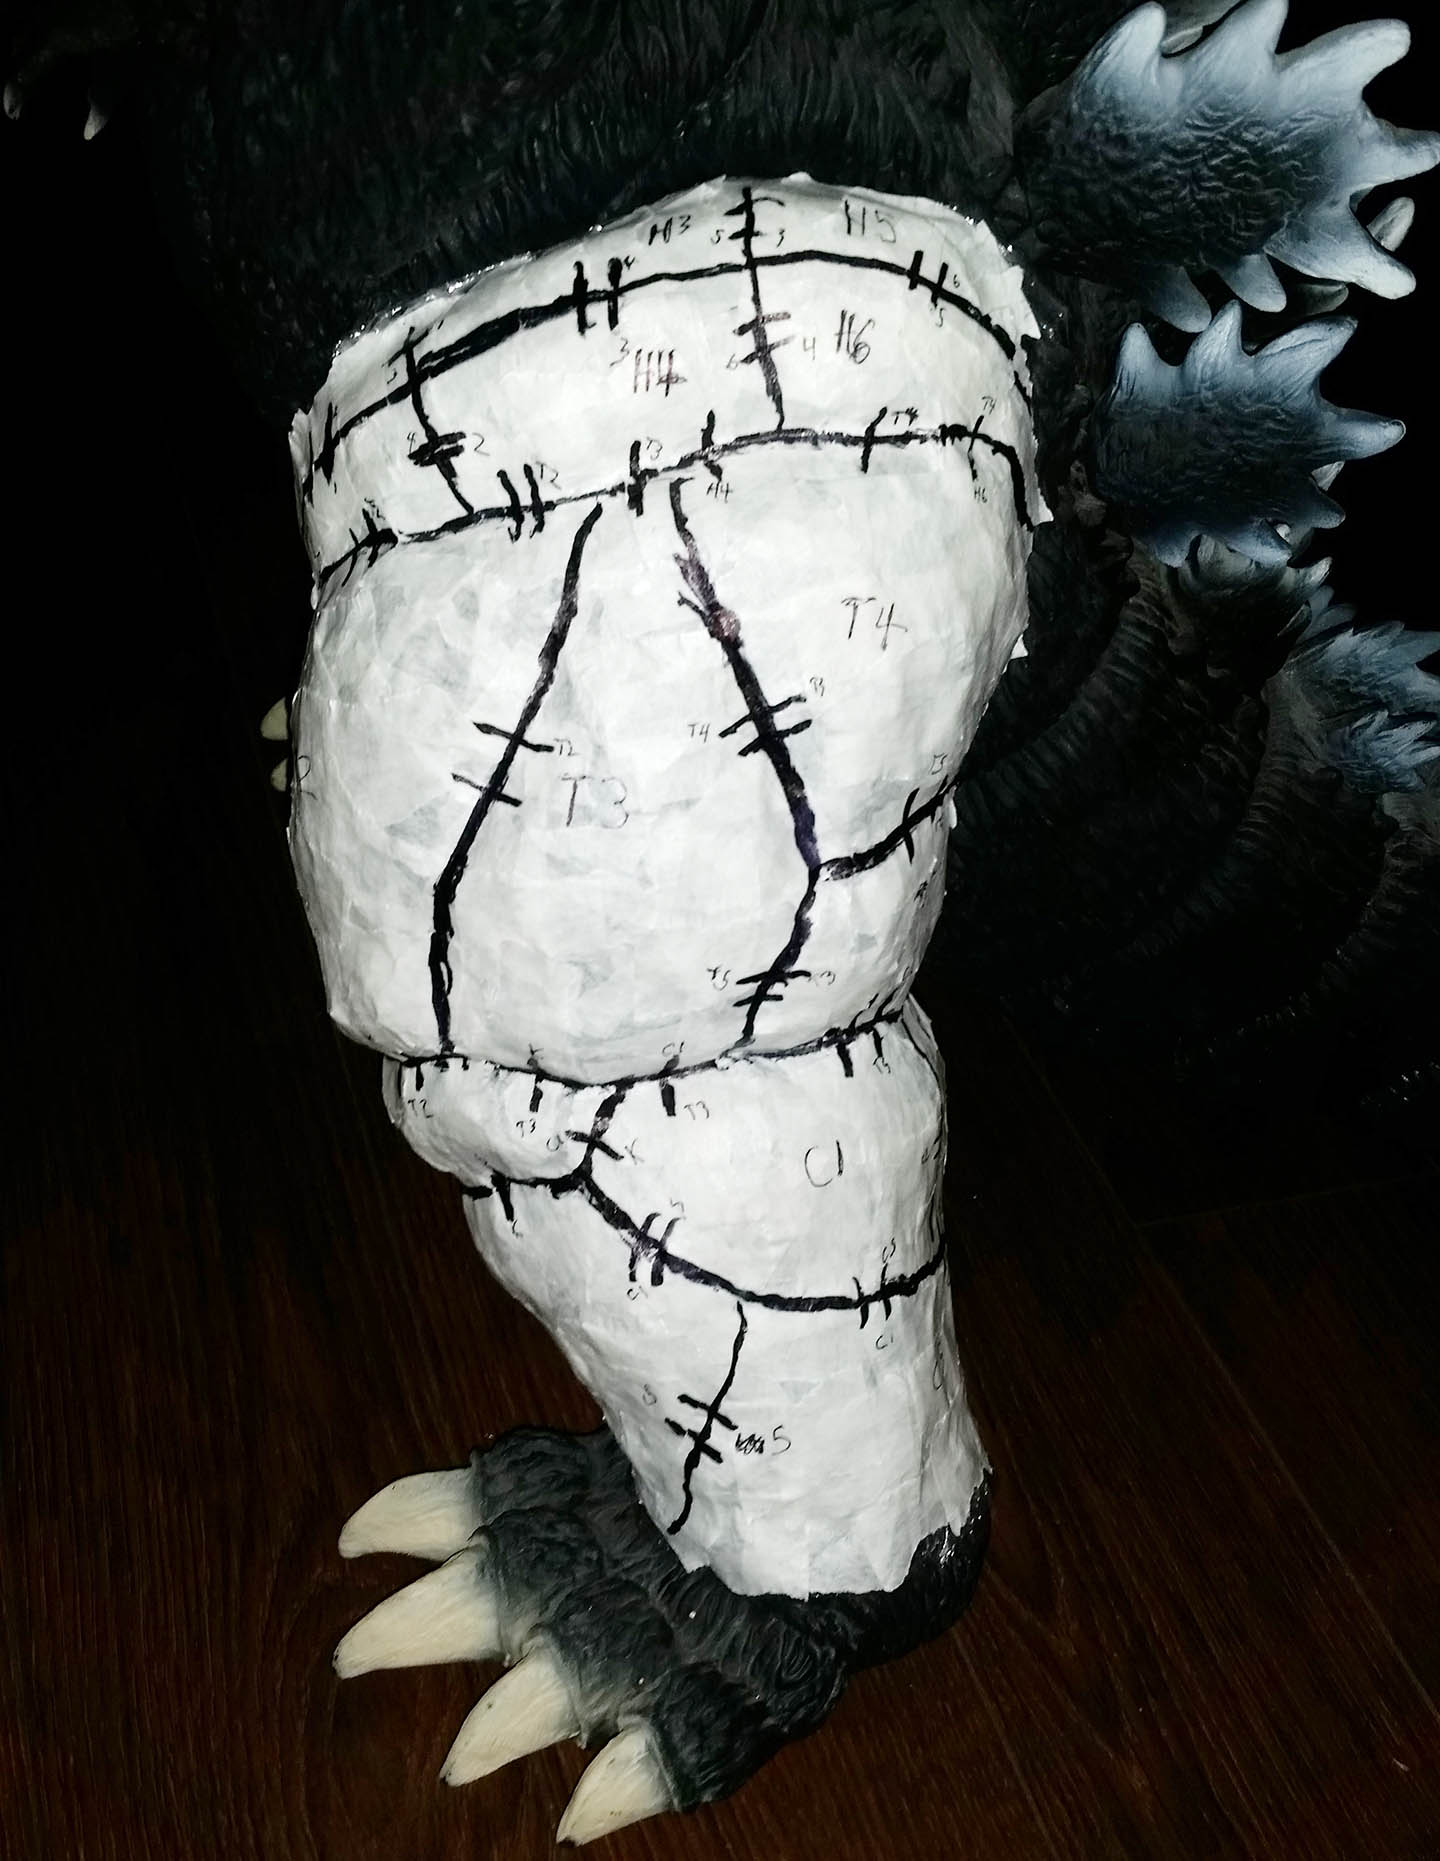
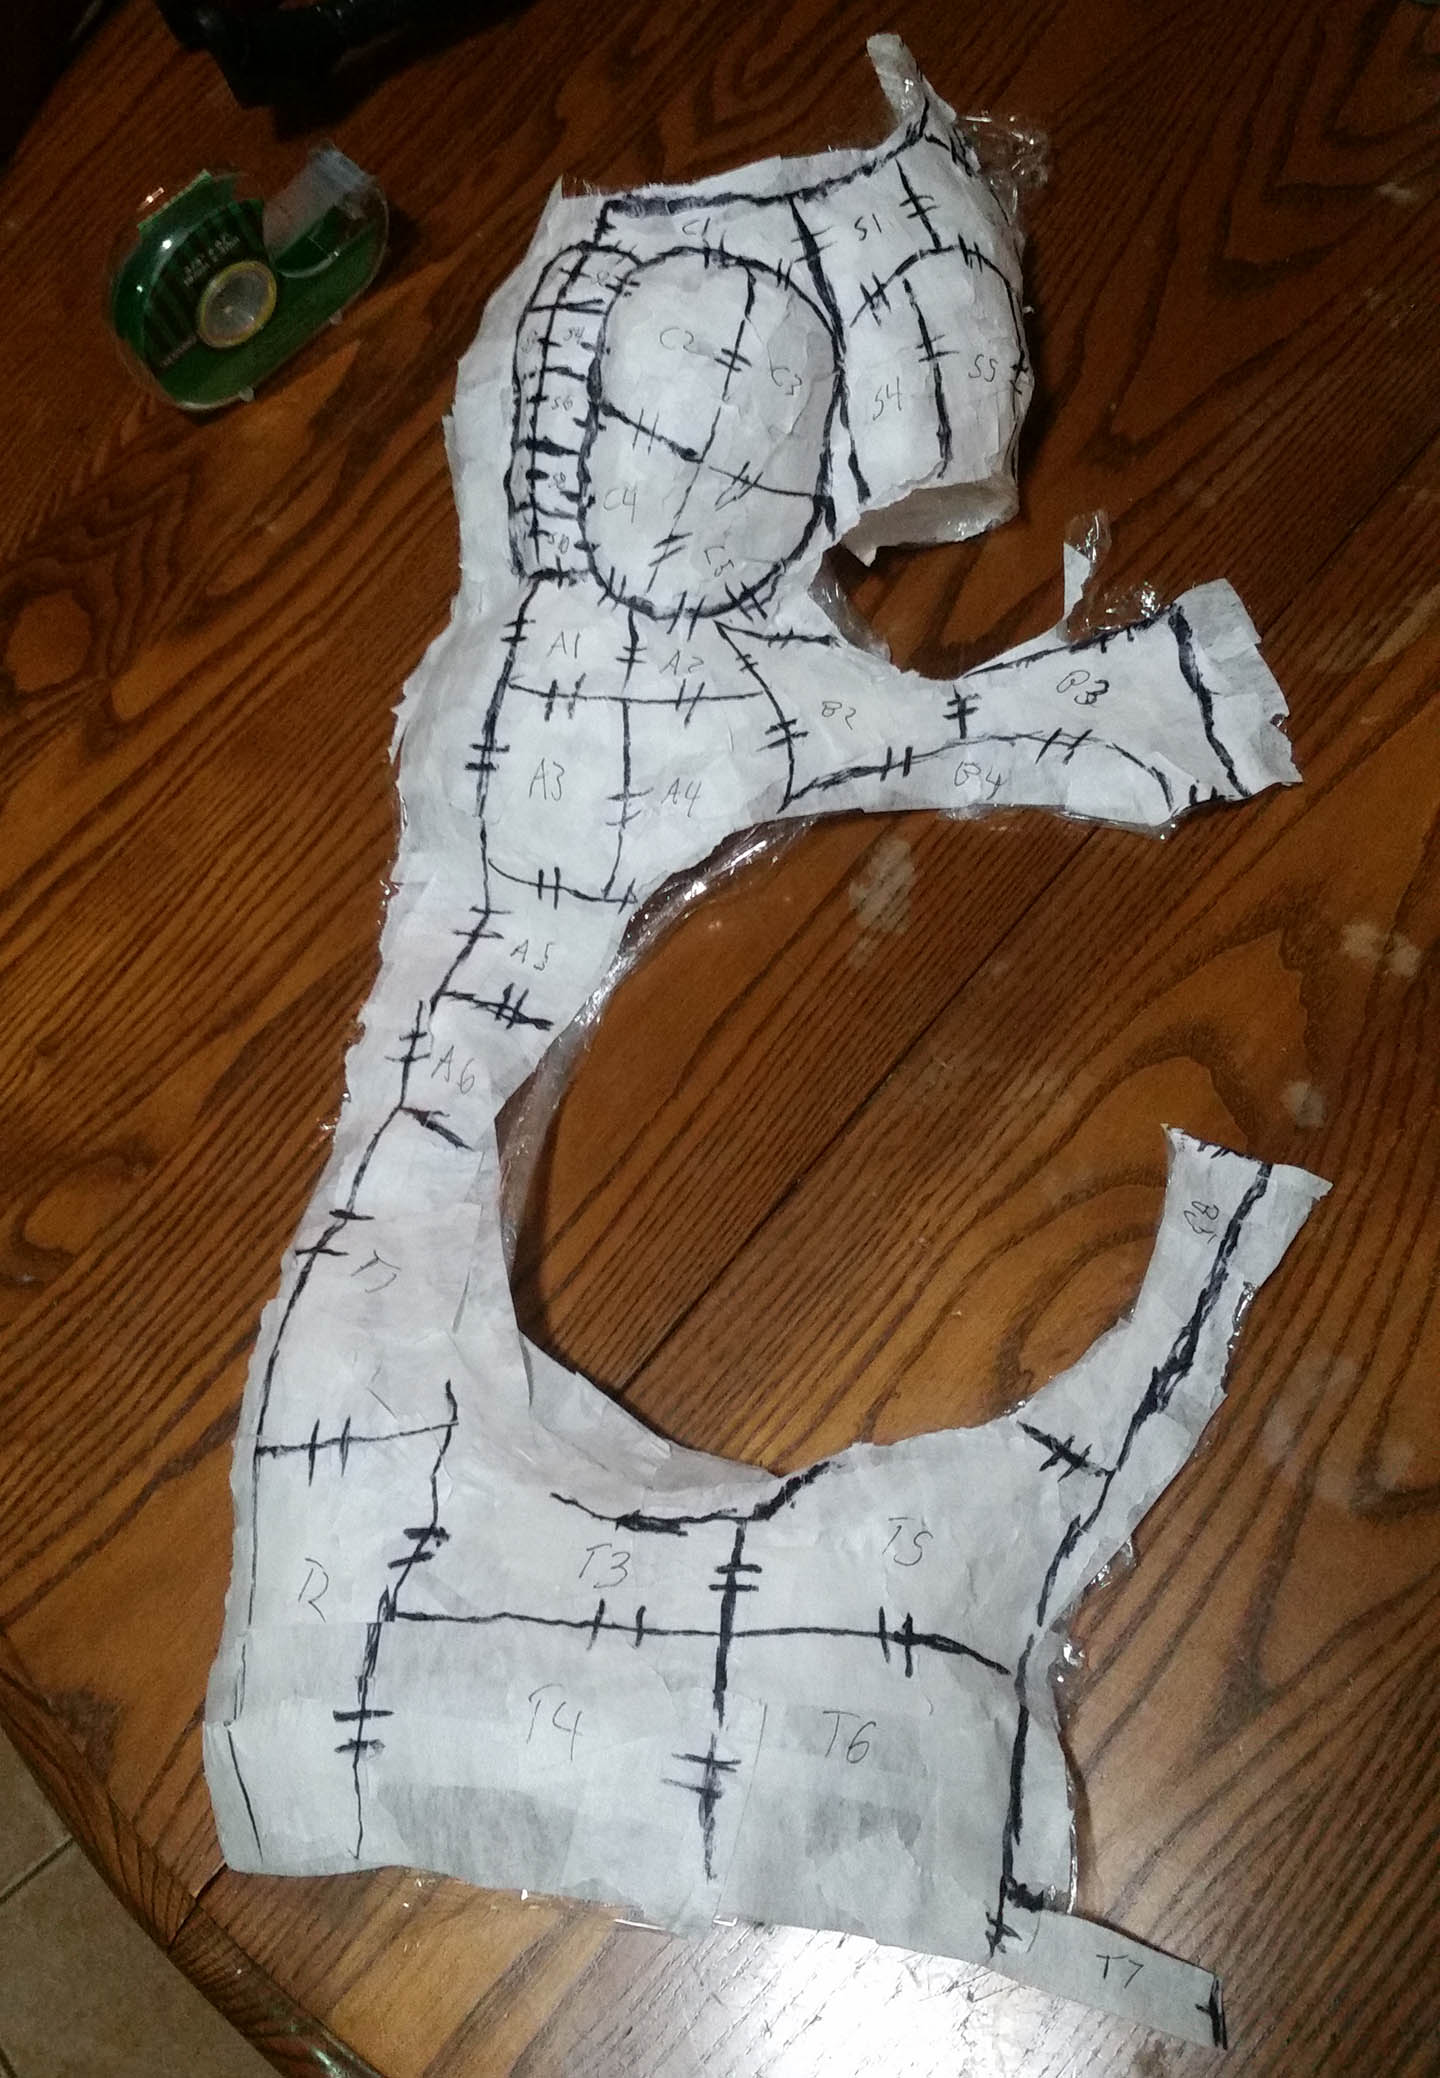
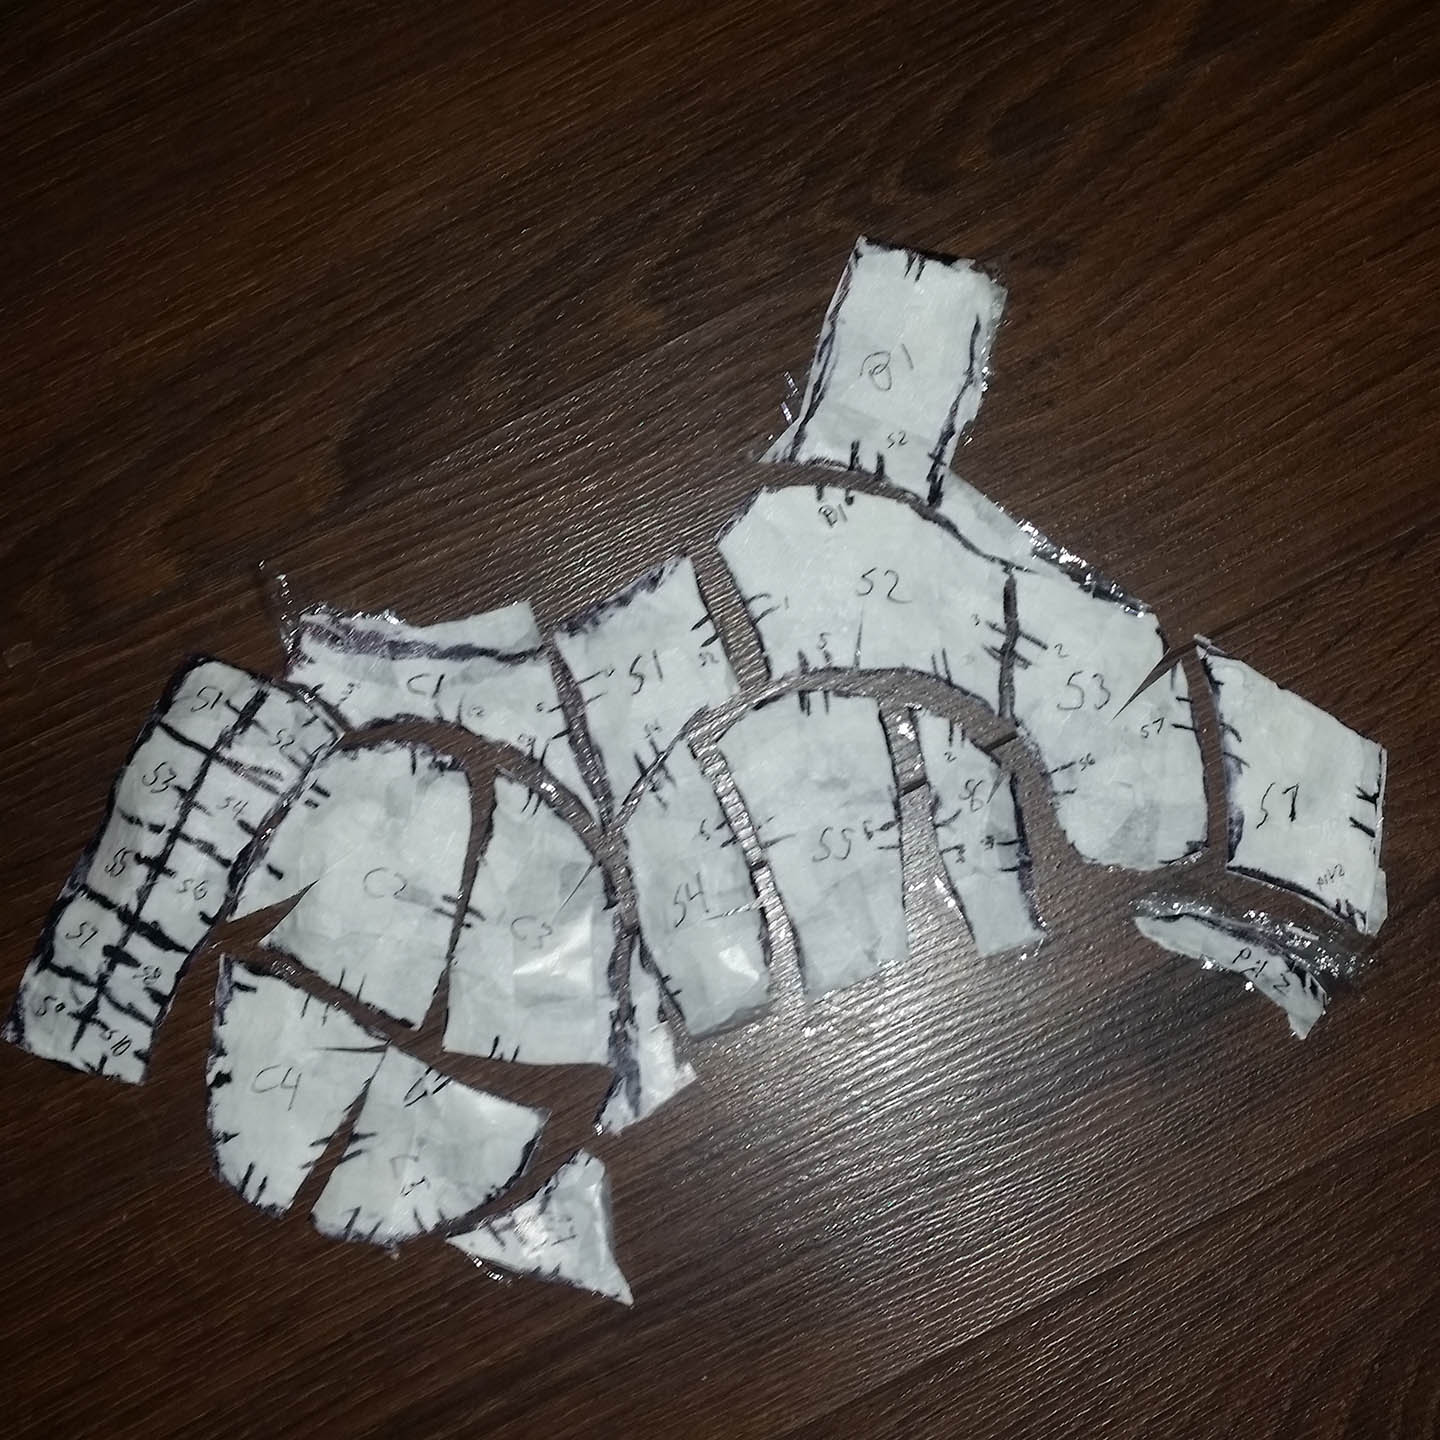
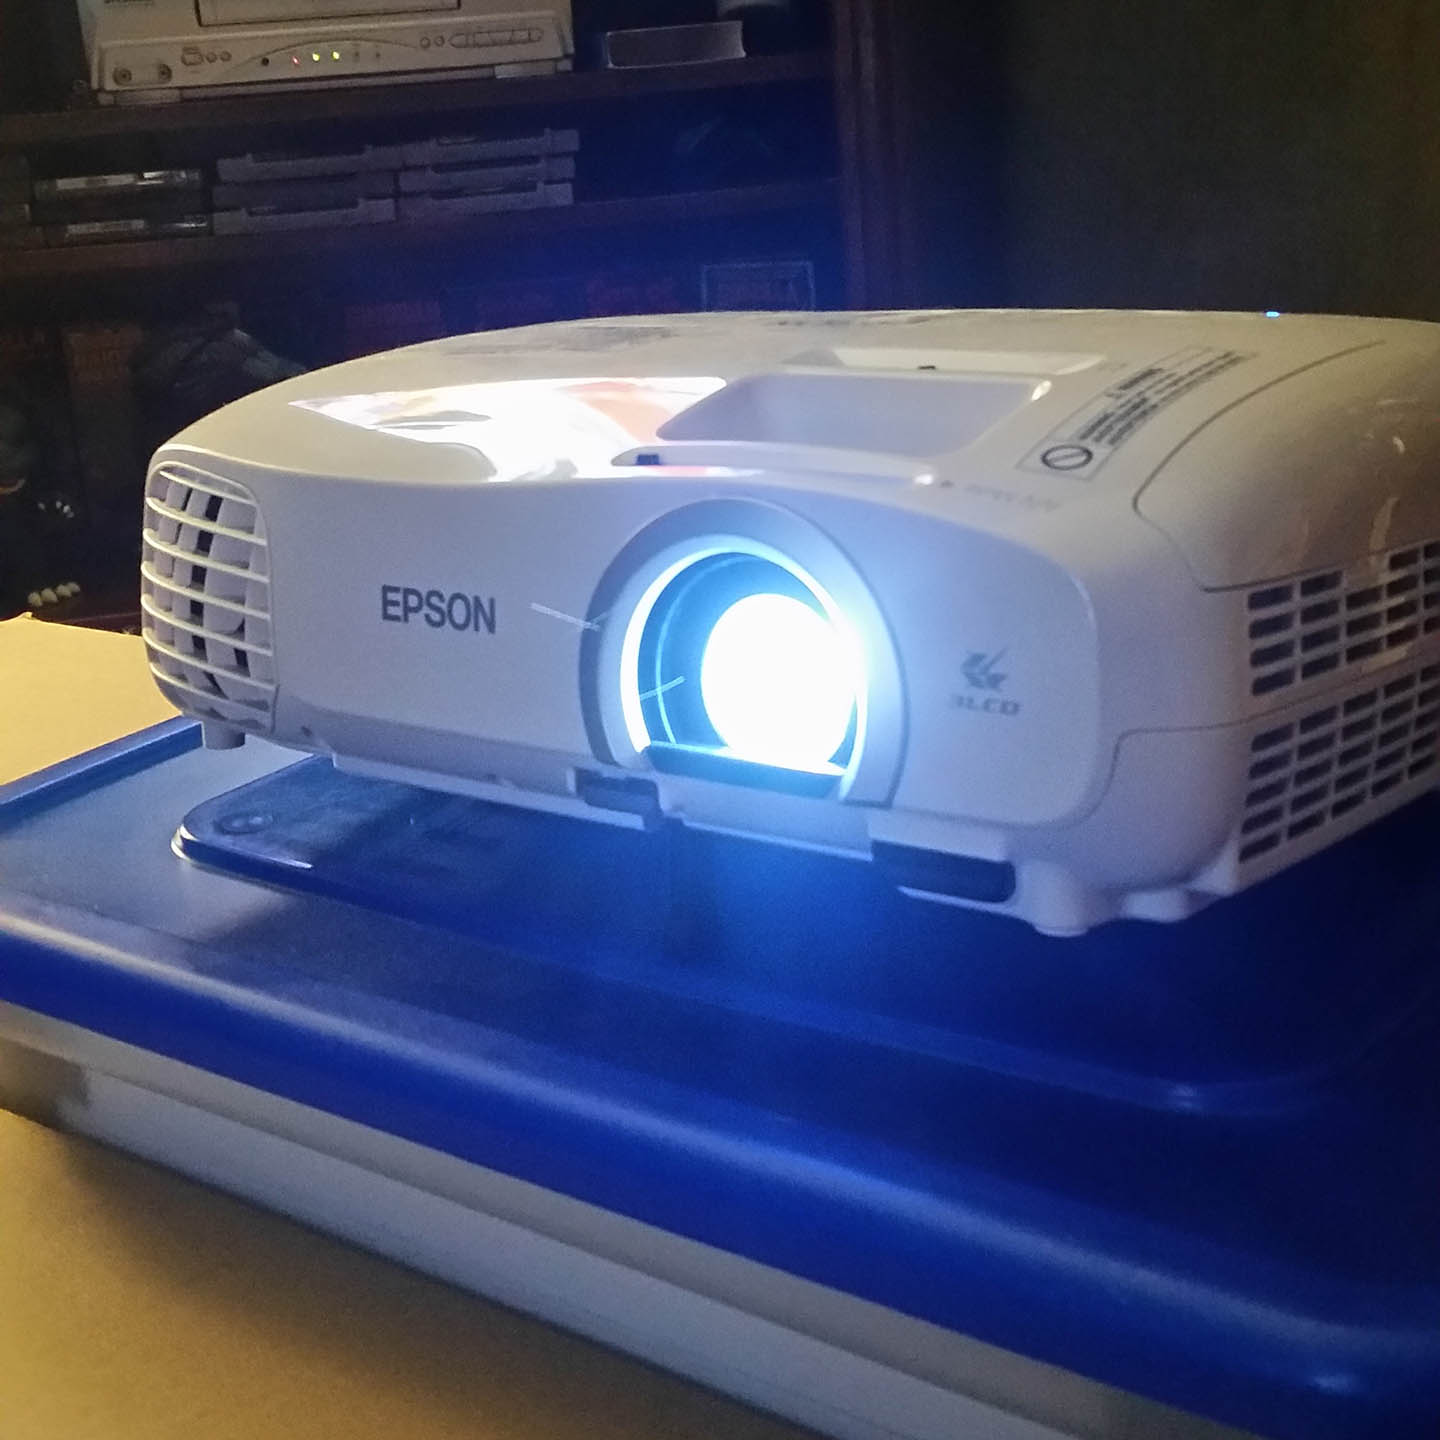
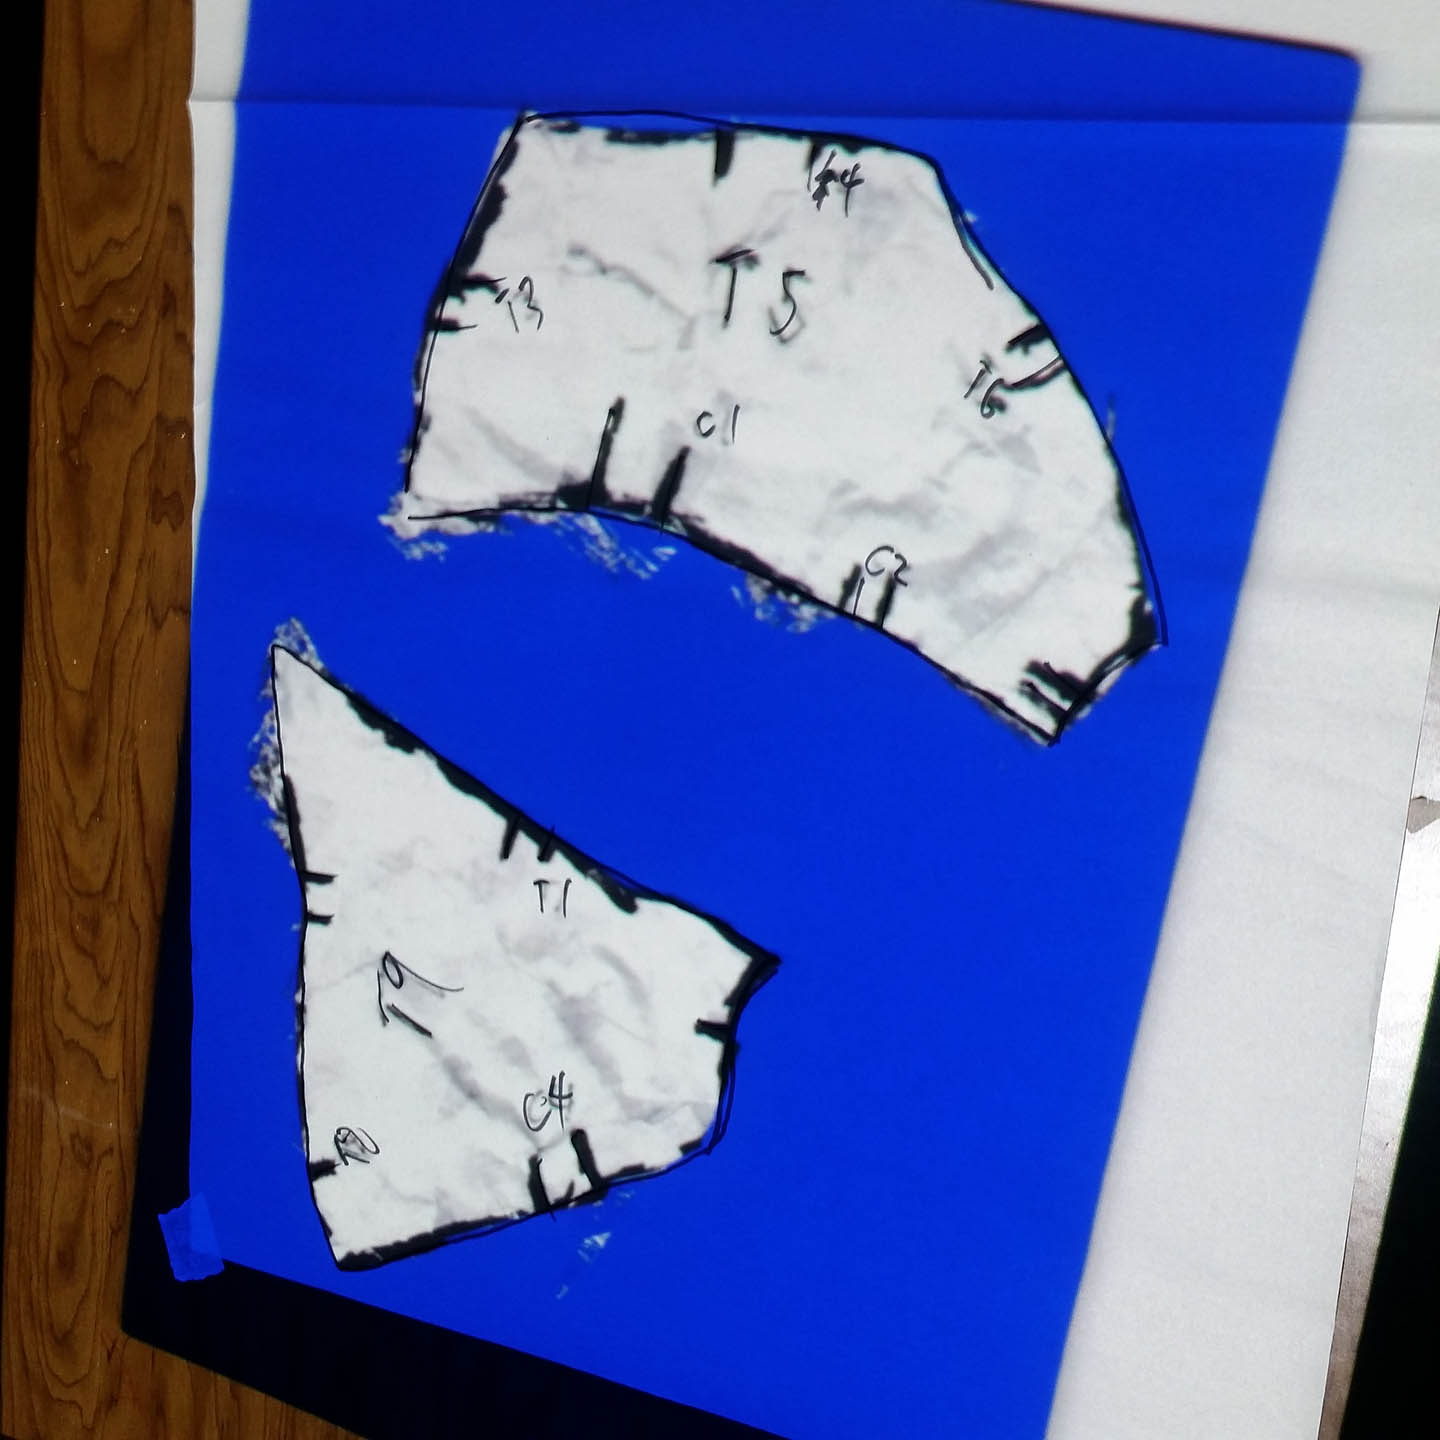
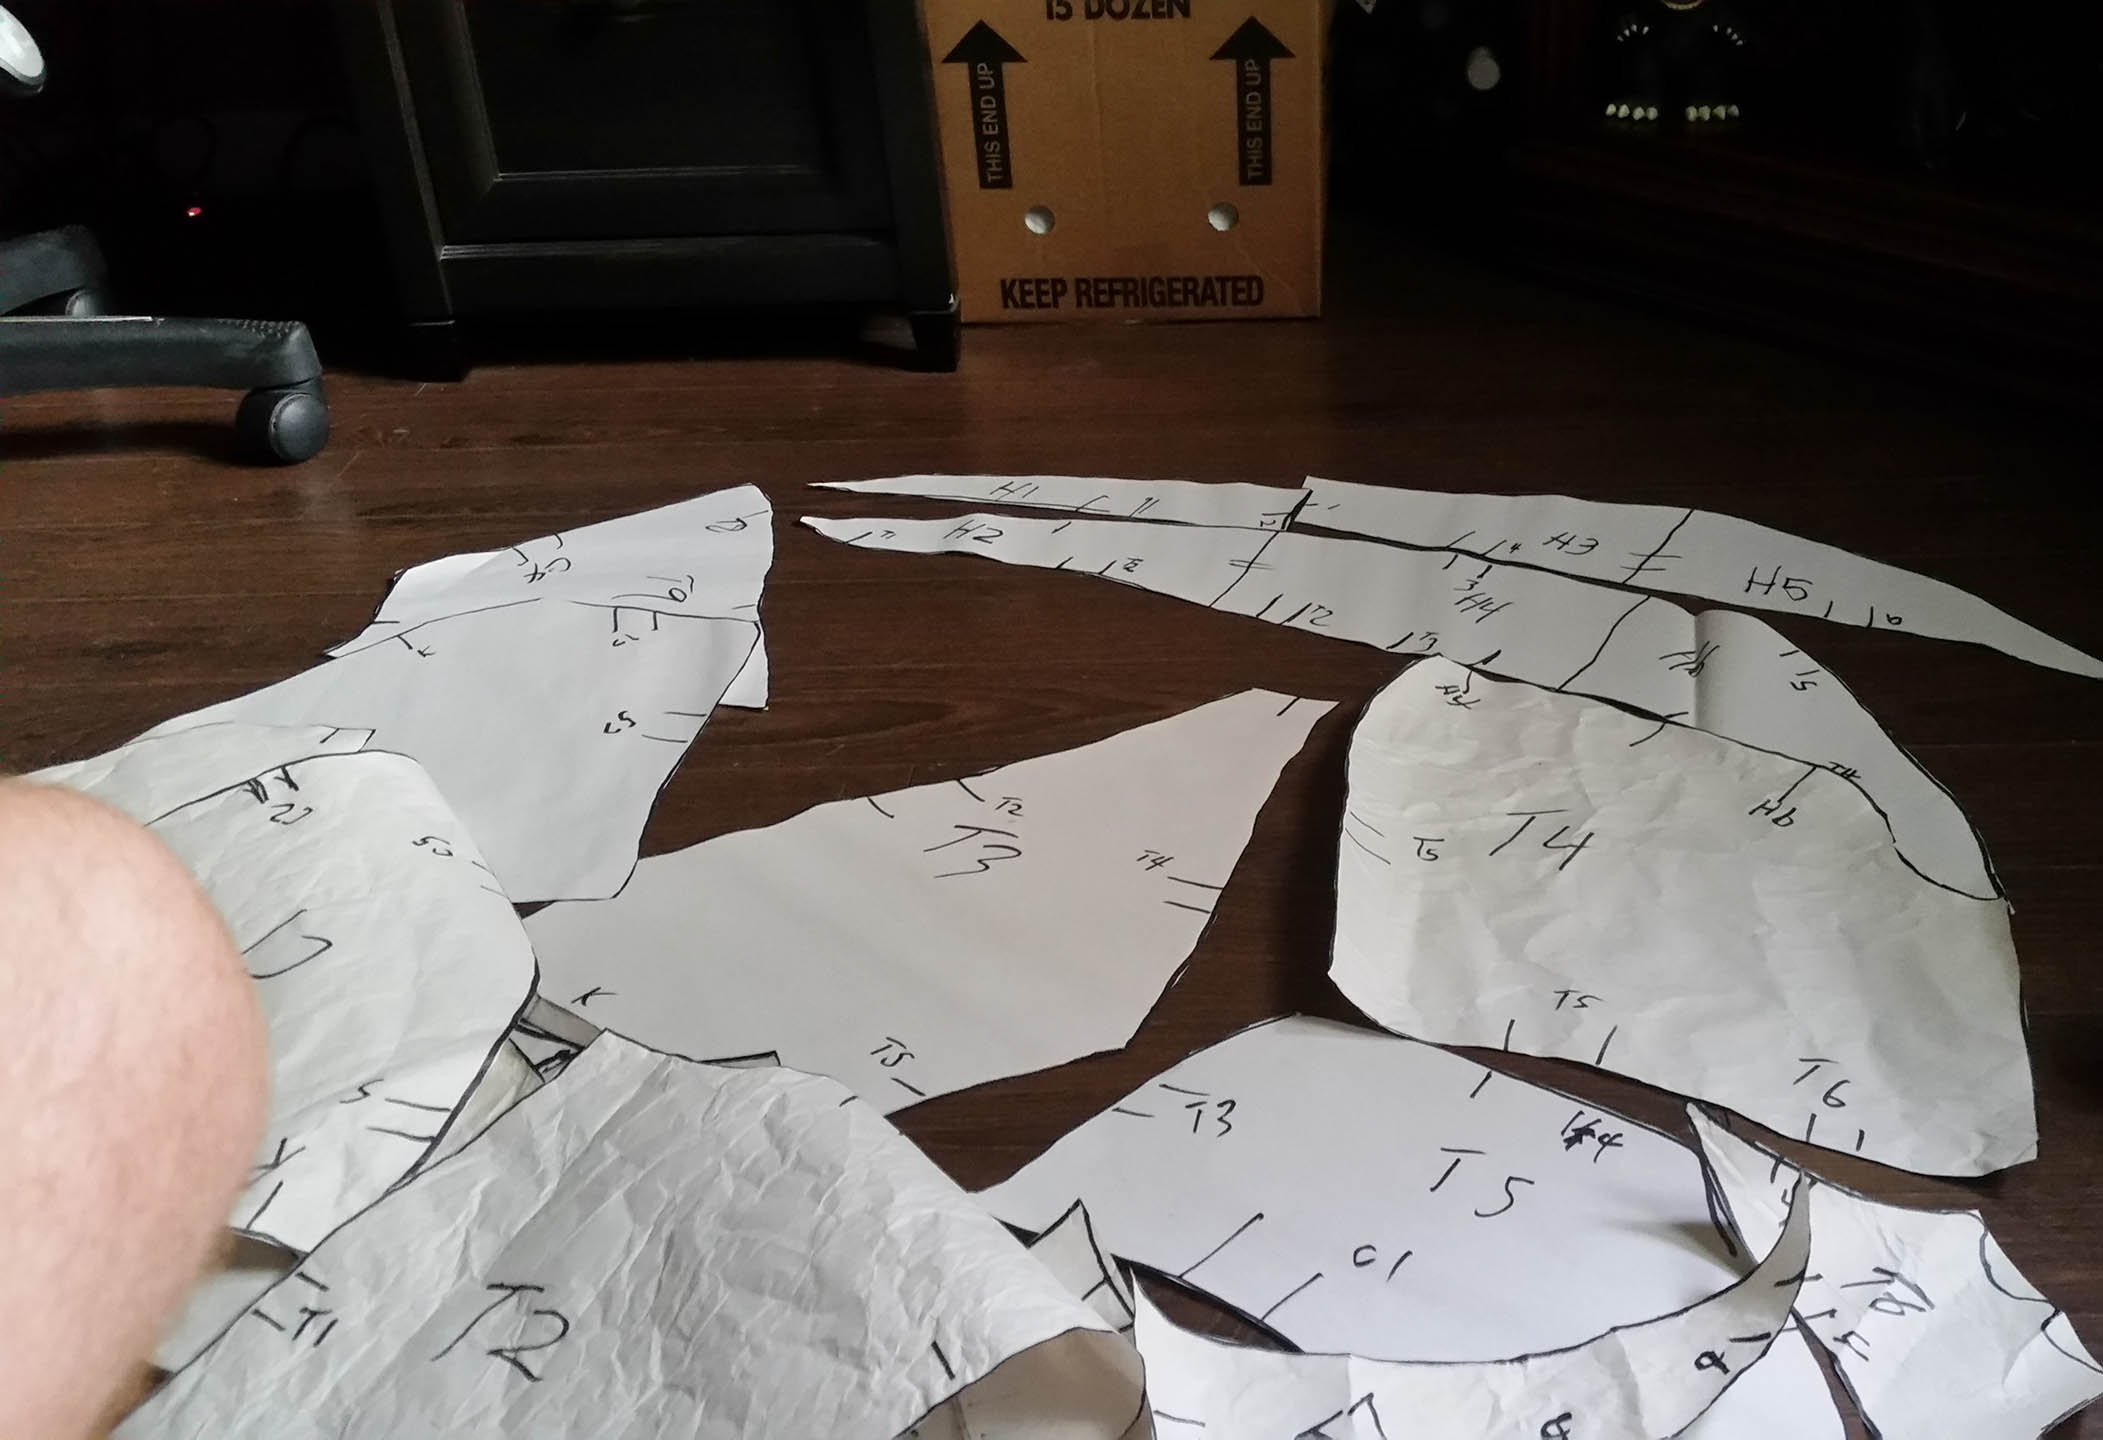
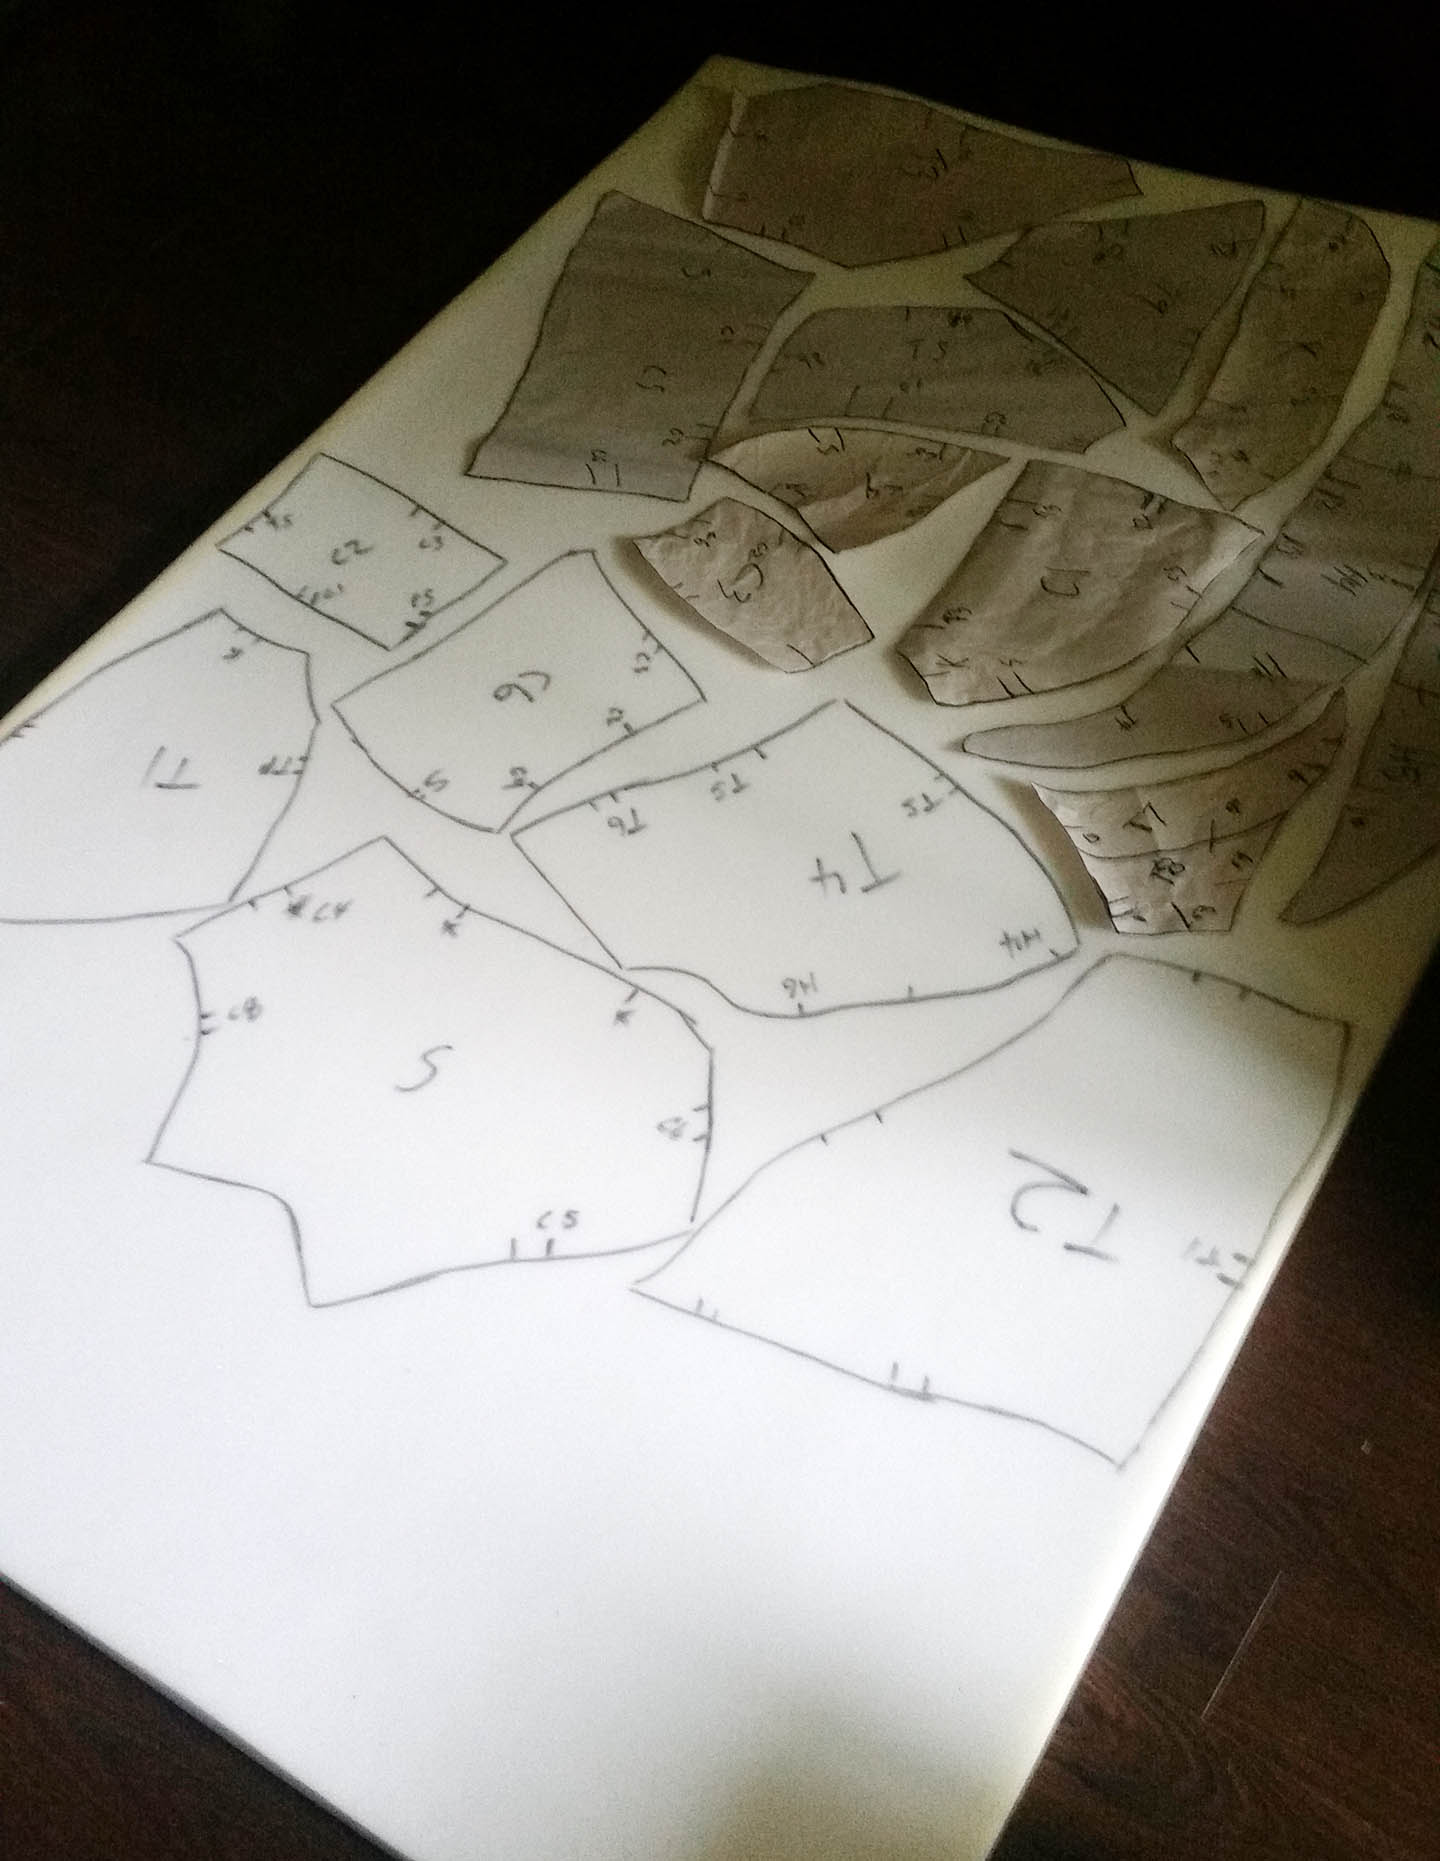
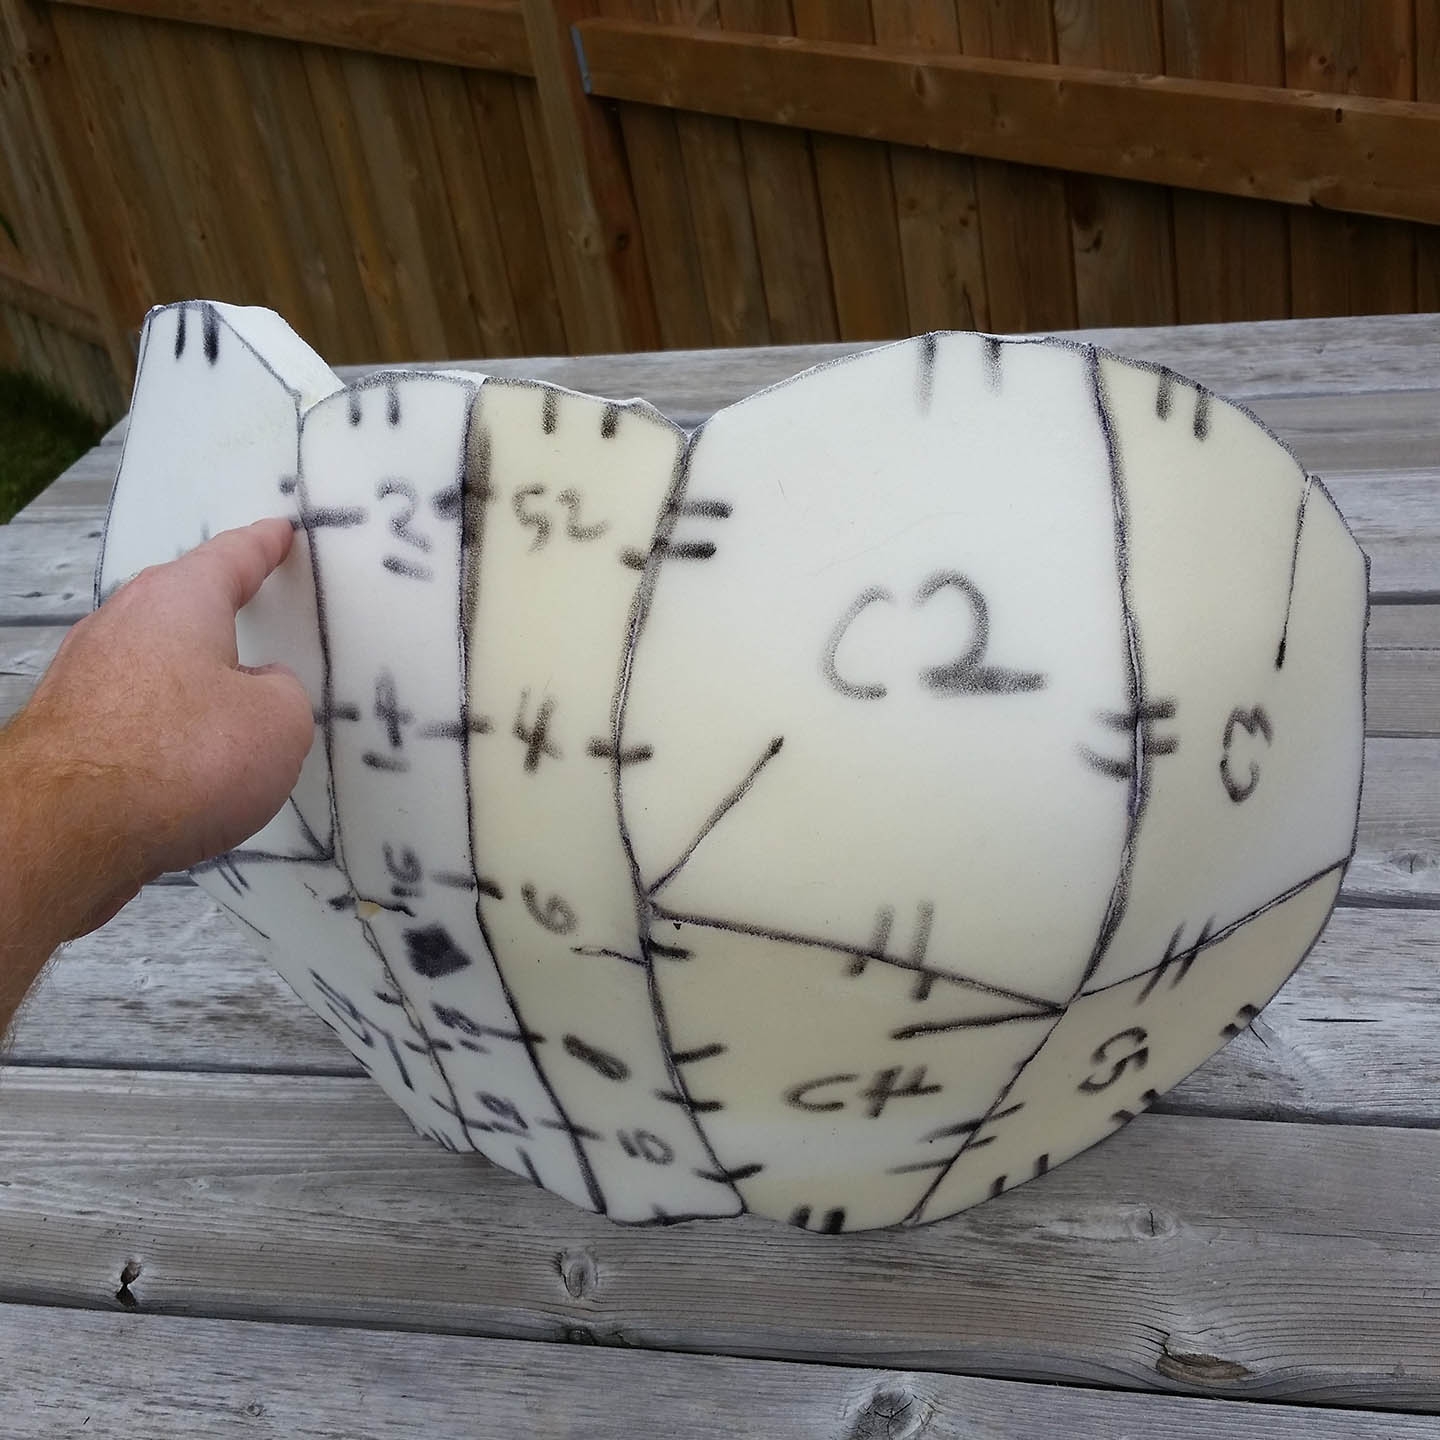
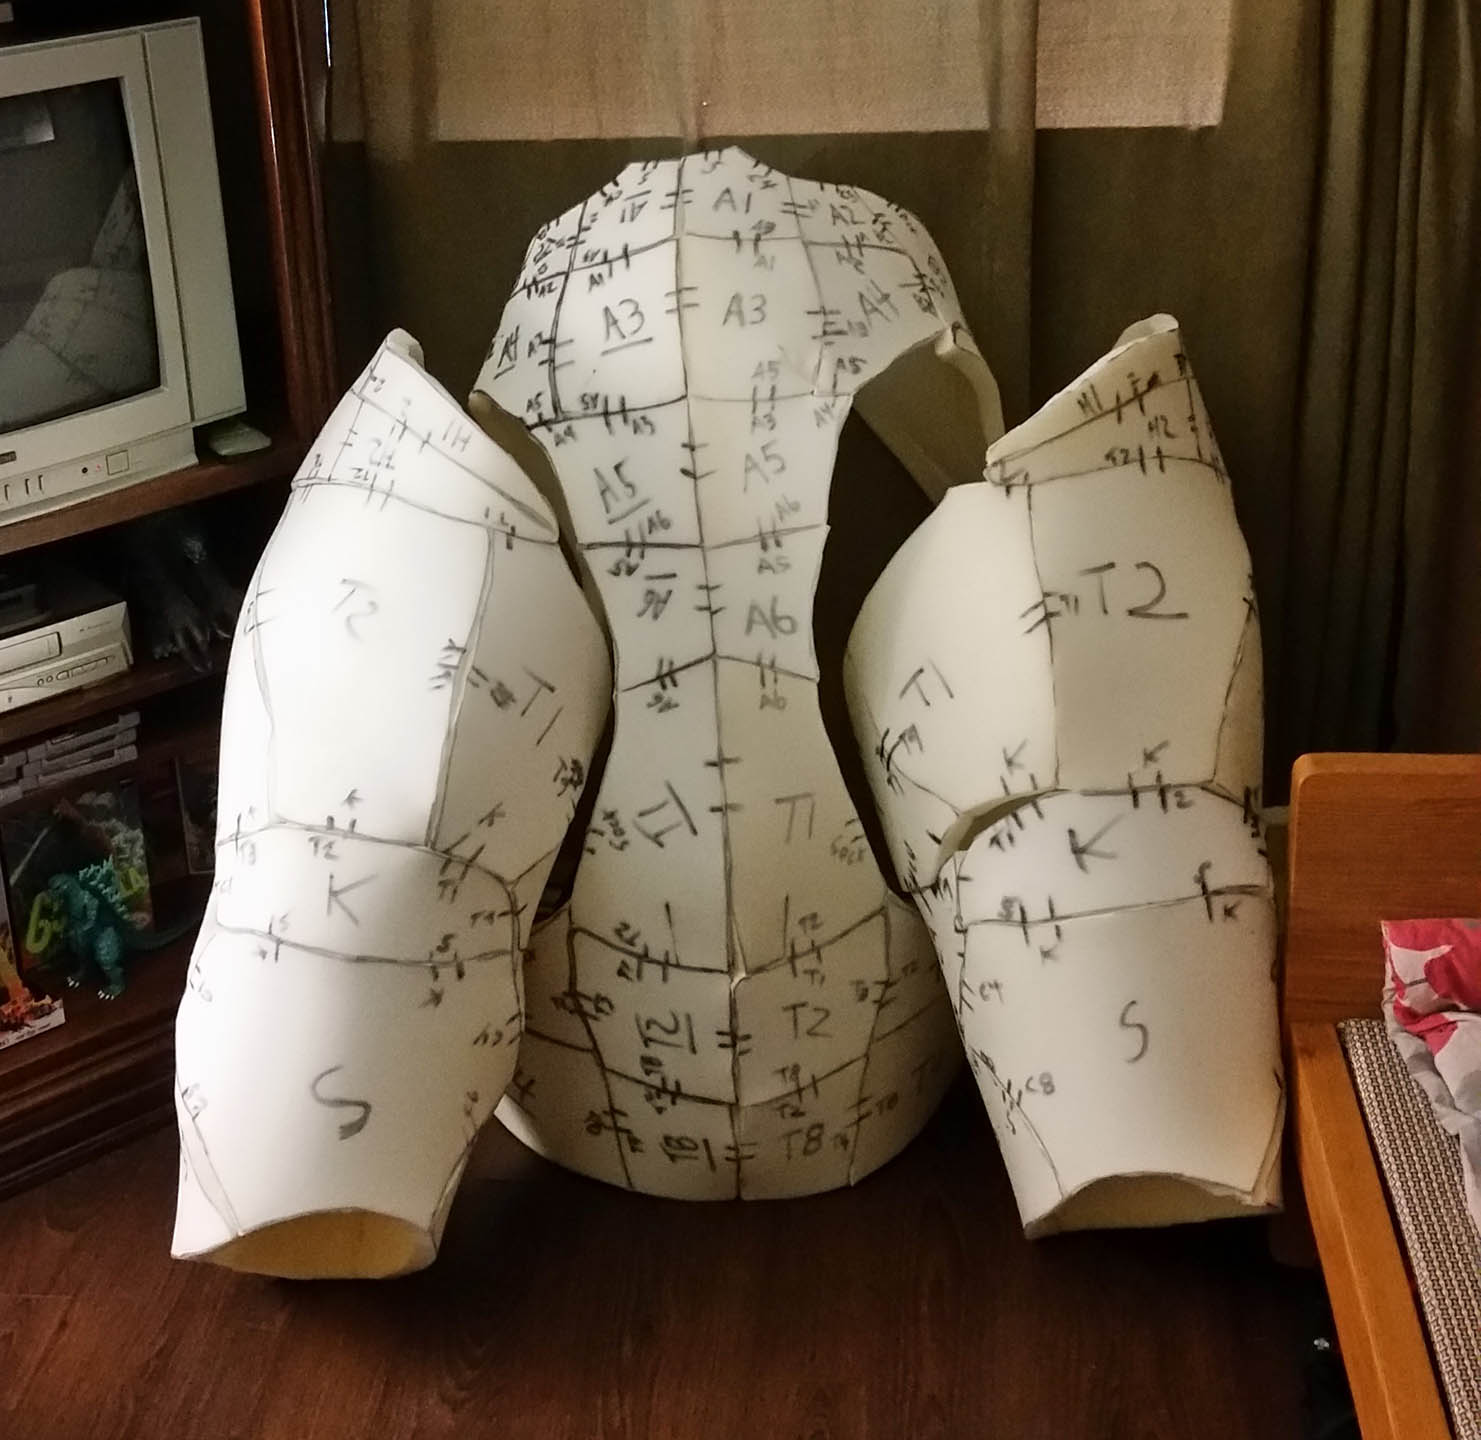
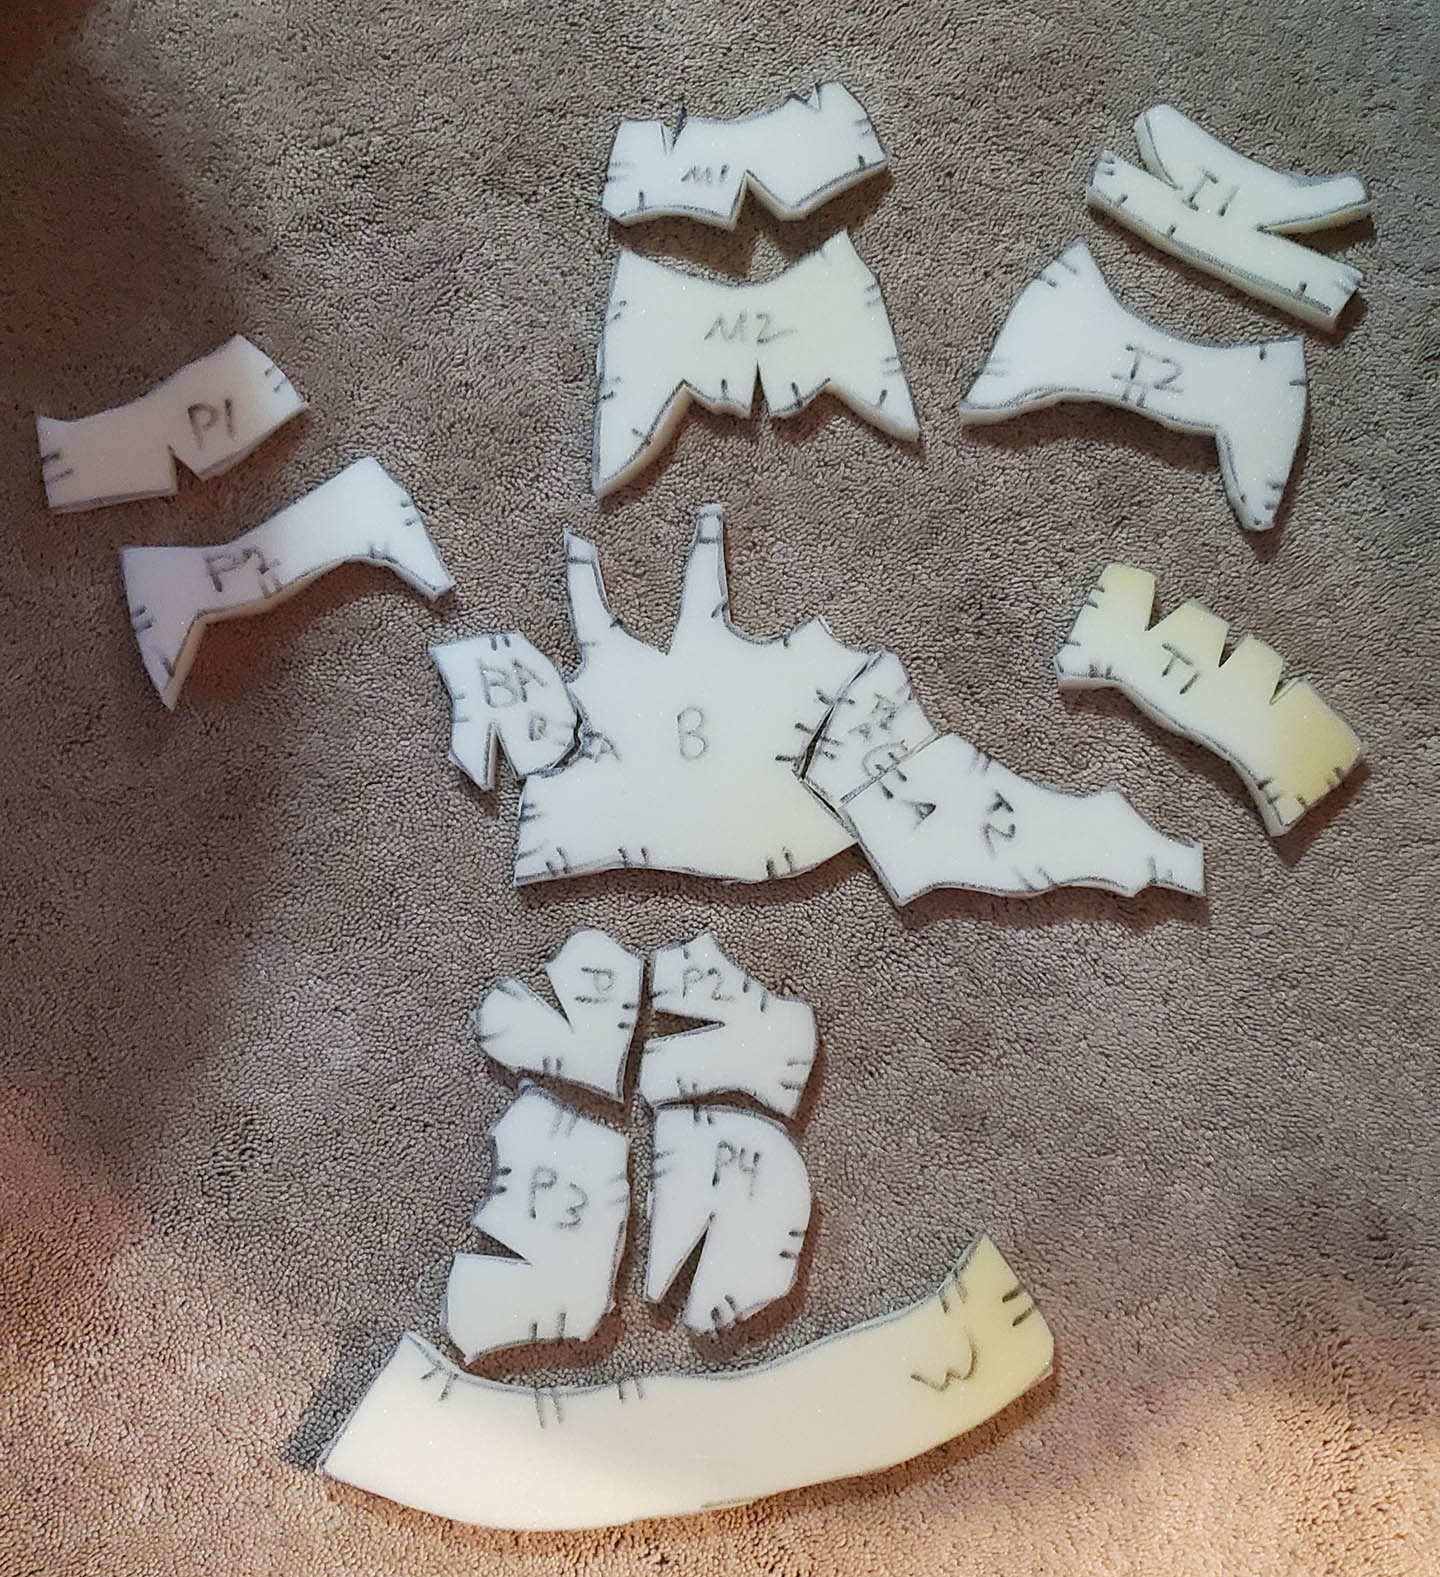
Taking inspiration from the work of Krys Baioa and Sean Sumagaysay, I decided to fabricate my Godzilla suit primarily through the use of patterns. To begin, I covered a large Bandai Godzilla figure in a combination of cling wrap and painter’s tape. Using a marker I drew and labeled the various pattern pieces, paying attention to the different joints and muscle groups. These pattern pieces were then removed from the figure and cut out. They were scanned into a computer and scaled up to human size using a projector.
In hindsight, I wish I had used clay to sculpt my own maquette of the suit instead of using an action figure as my base. The figure, while large and detailed, did not match my own proportions, which resulted in the legs having to be rescaled and the back taken in. It also created a lot of unnecessary math when enlarging the pattern pieces to my own size.
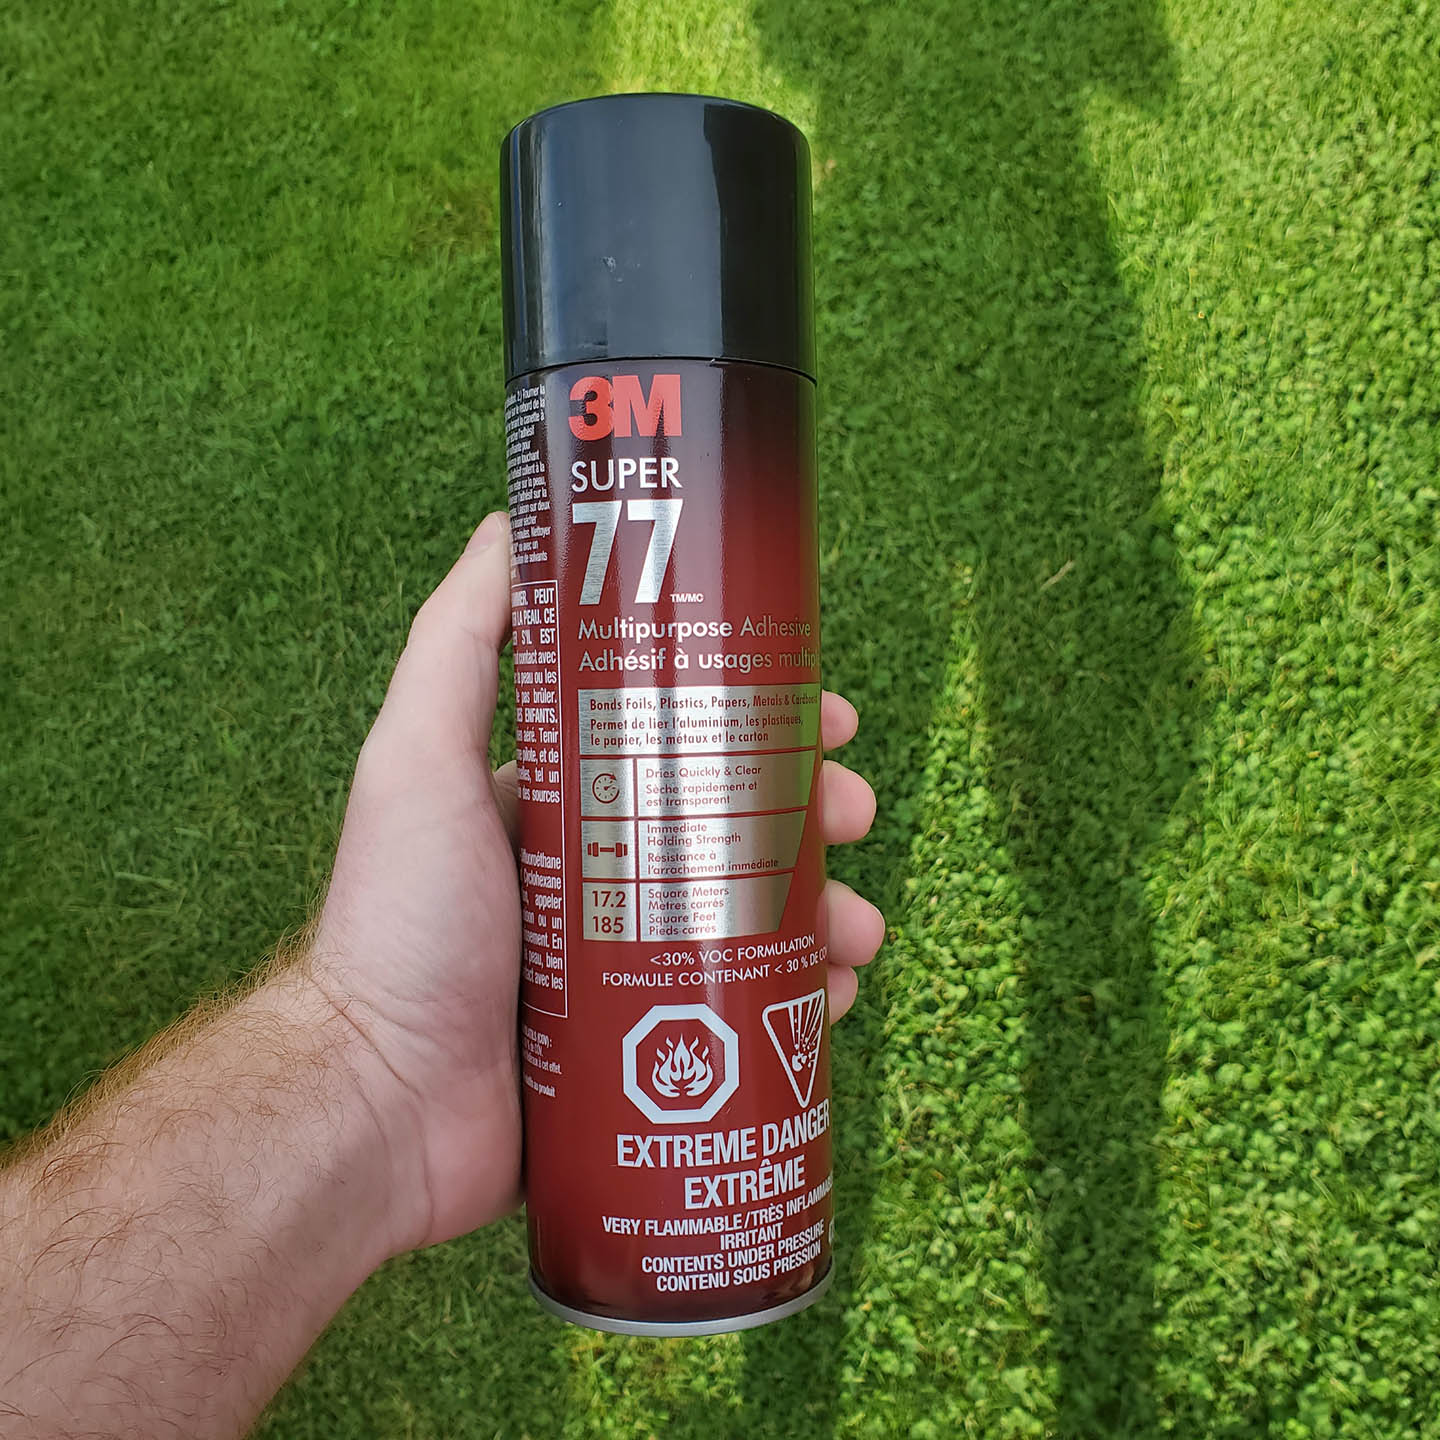
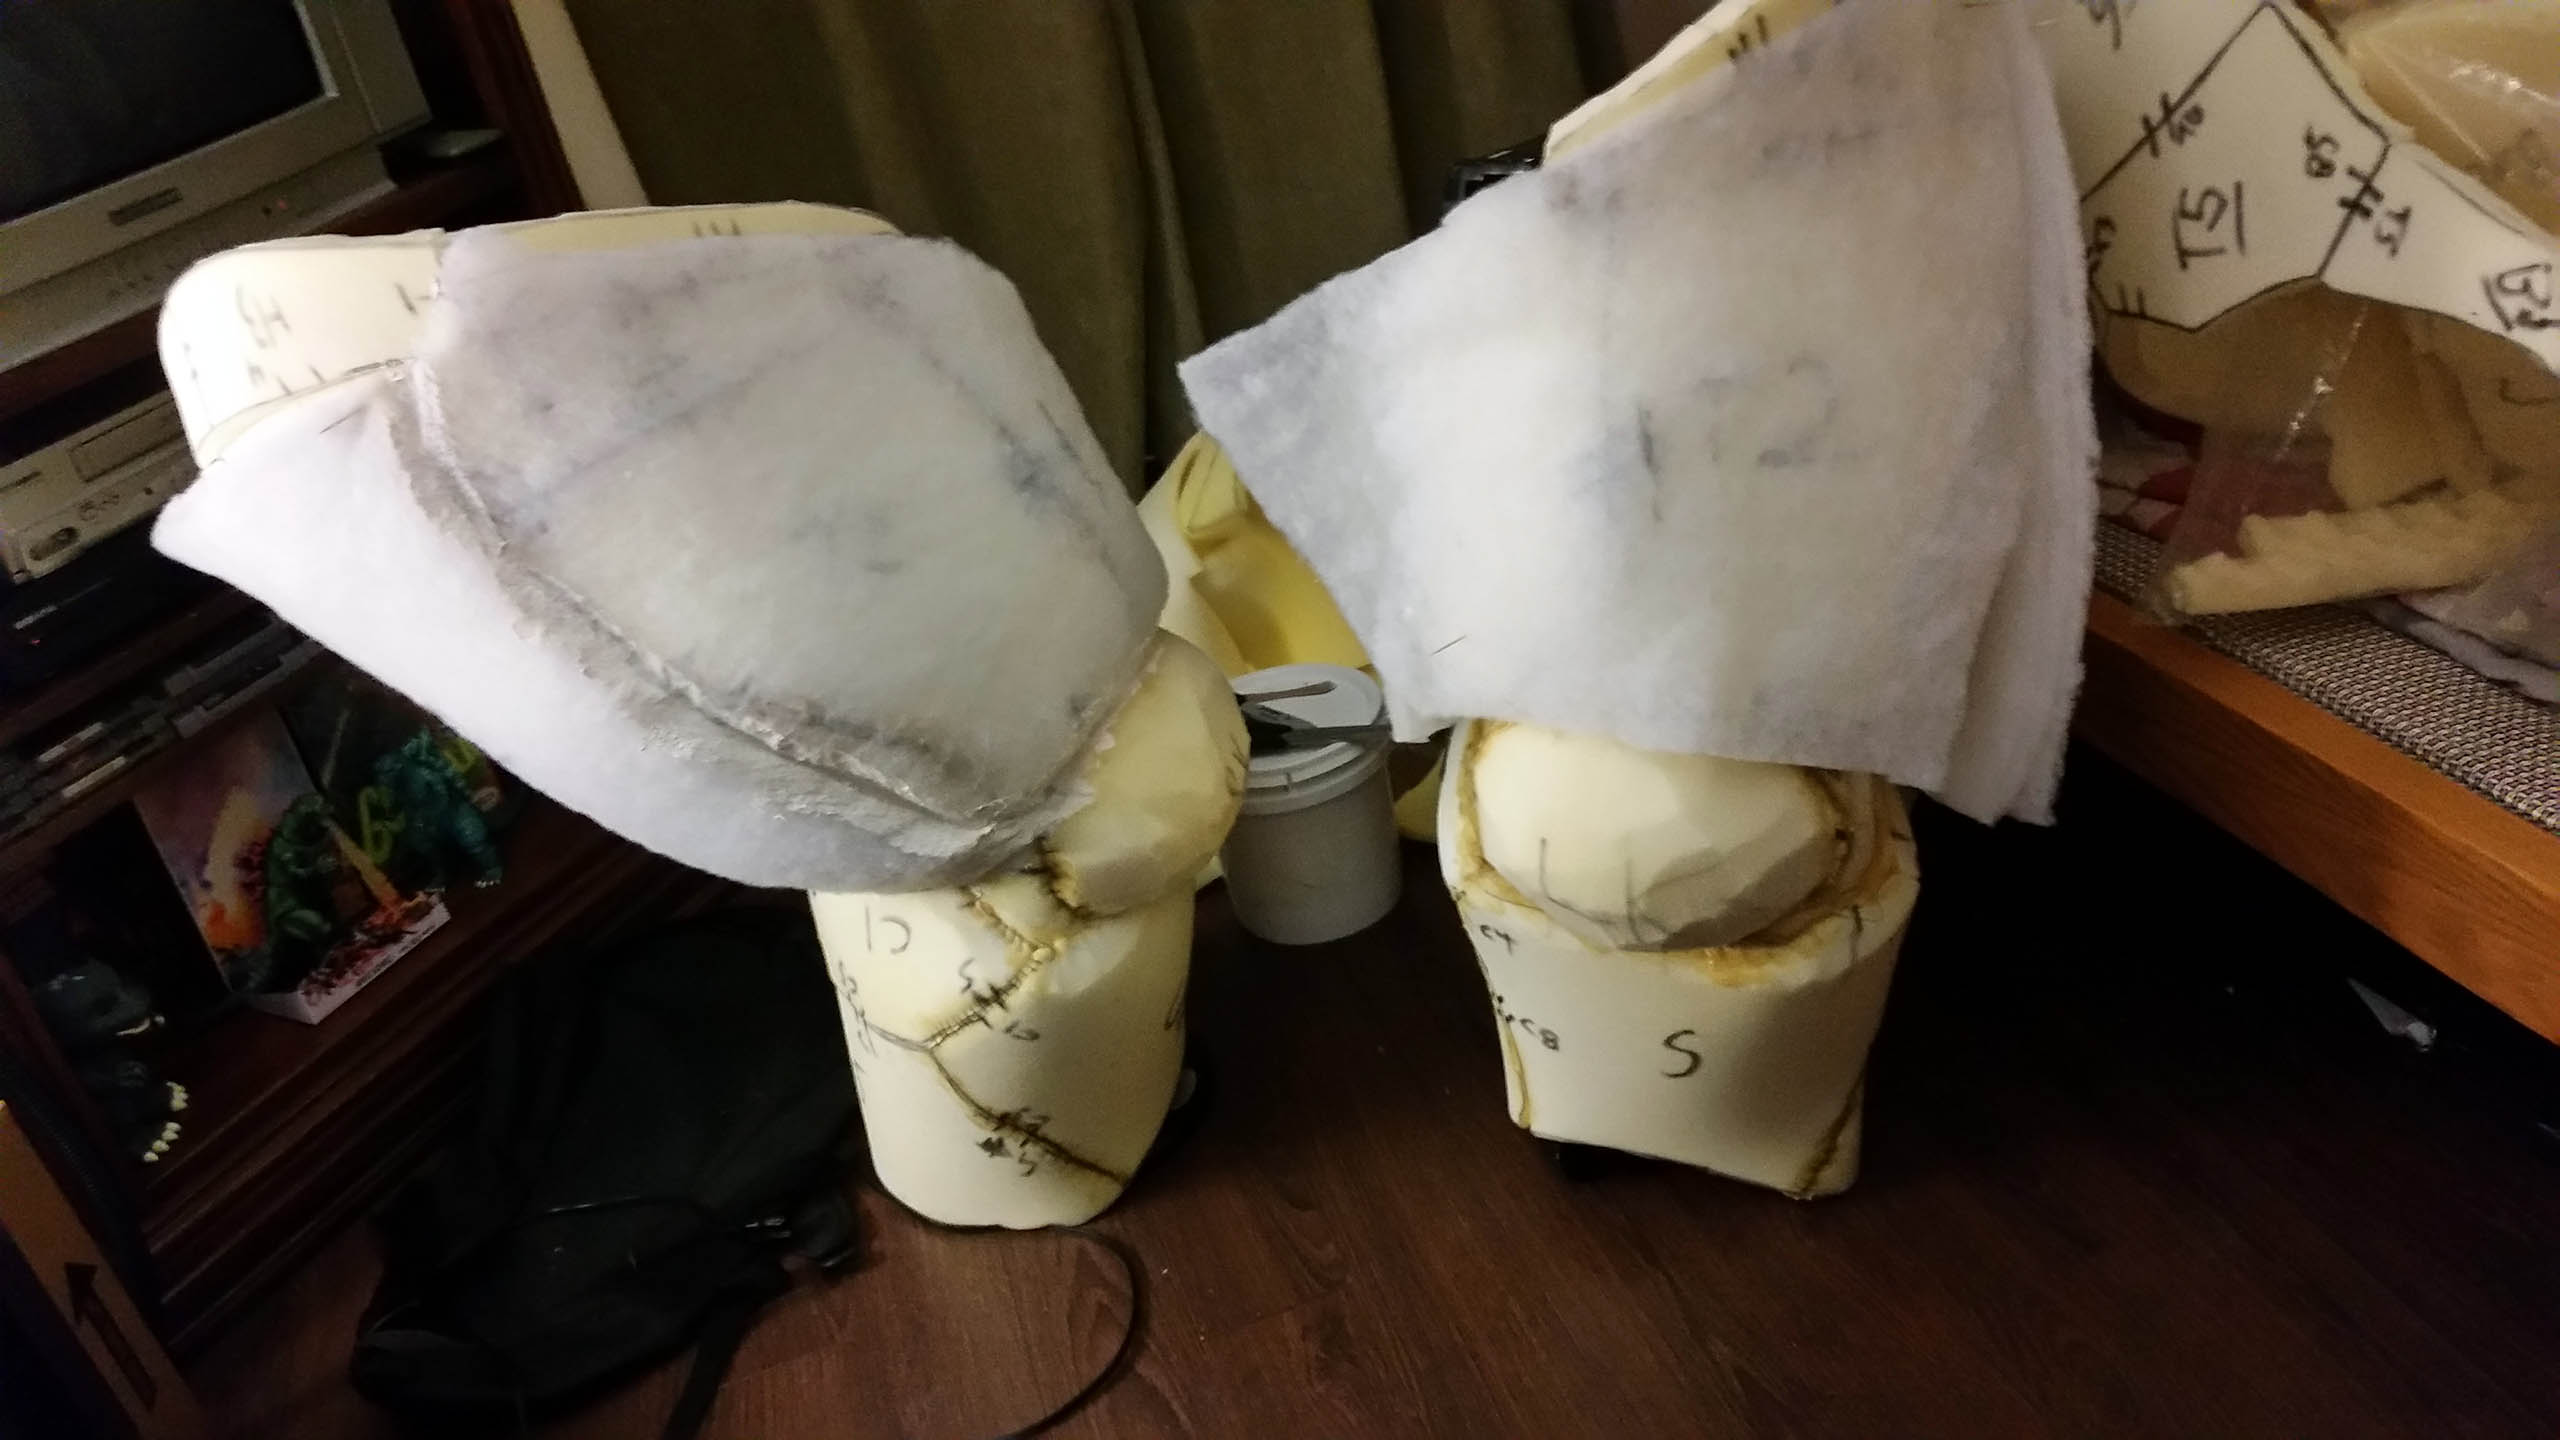
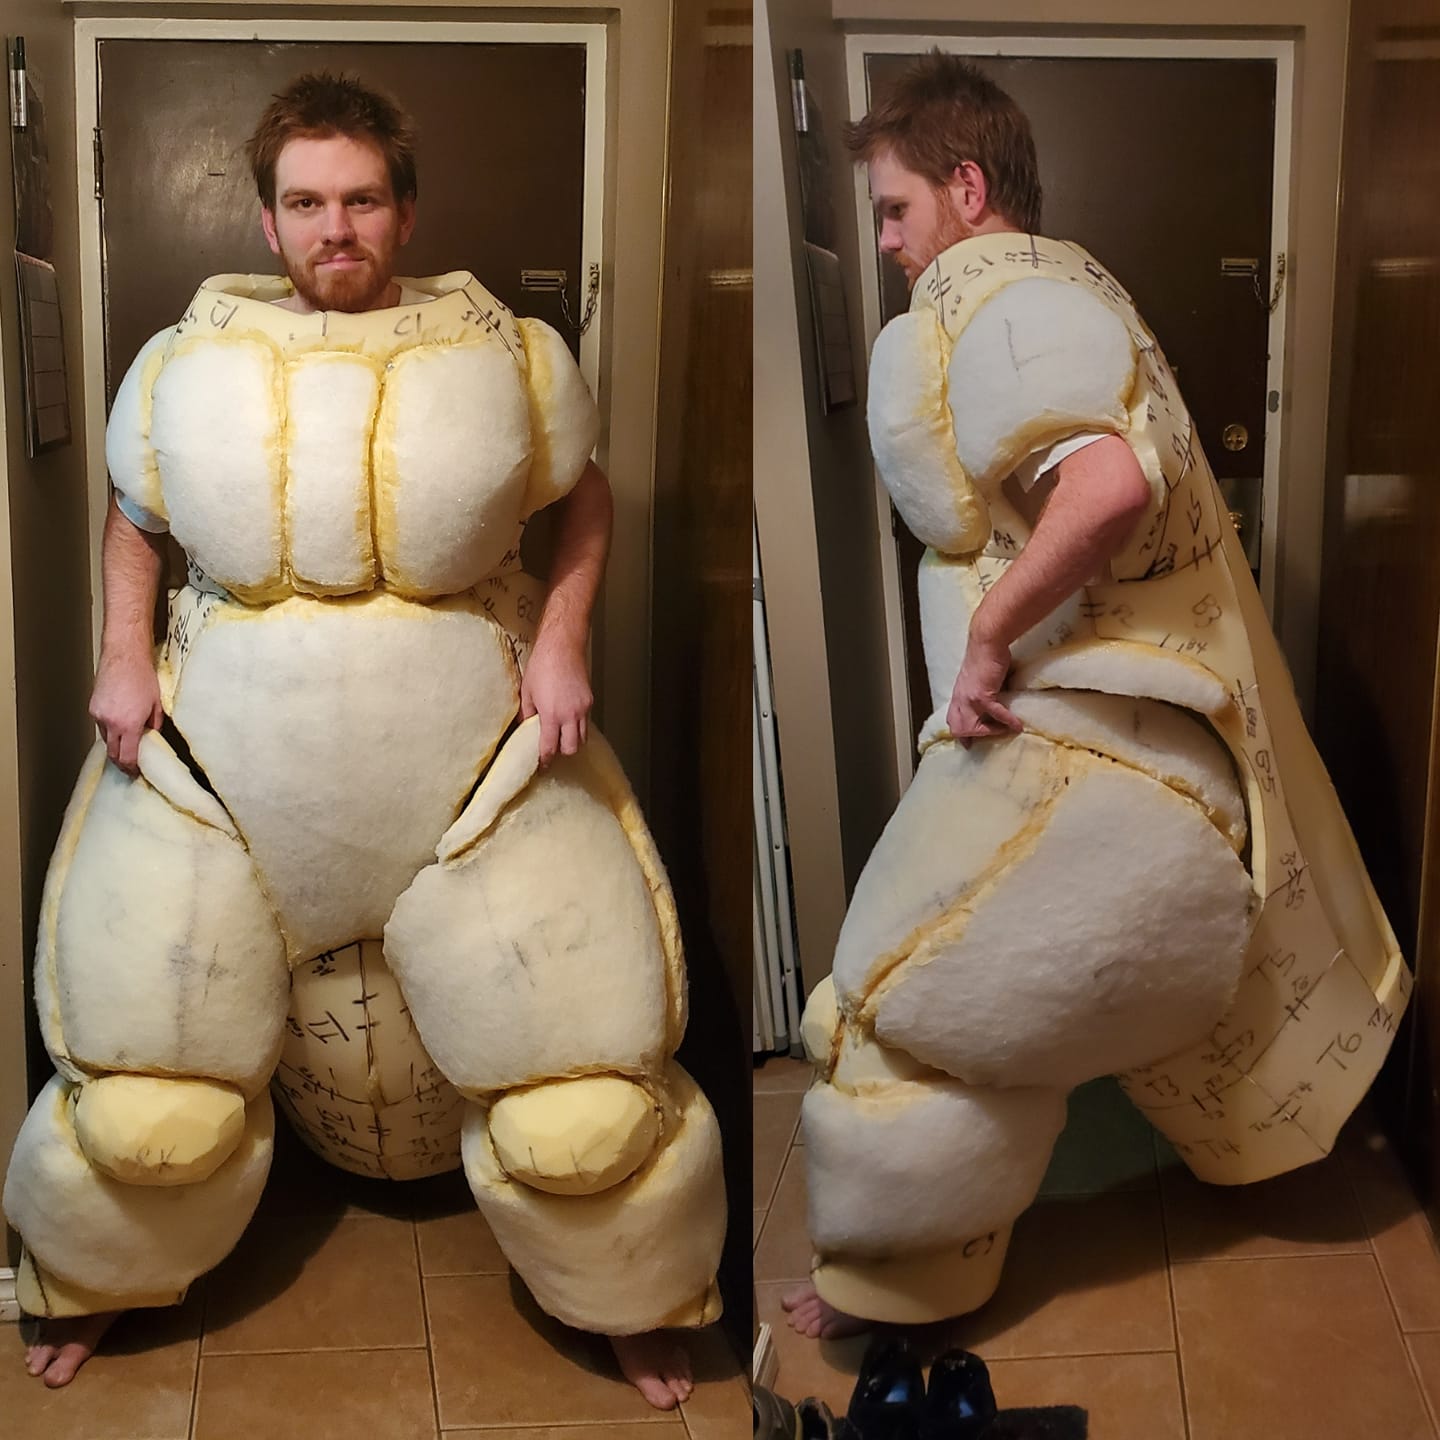
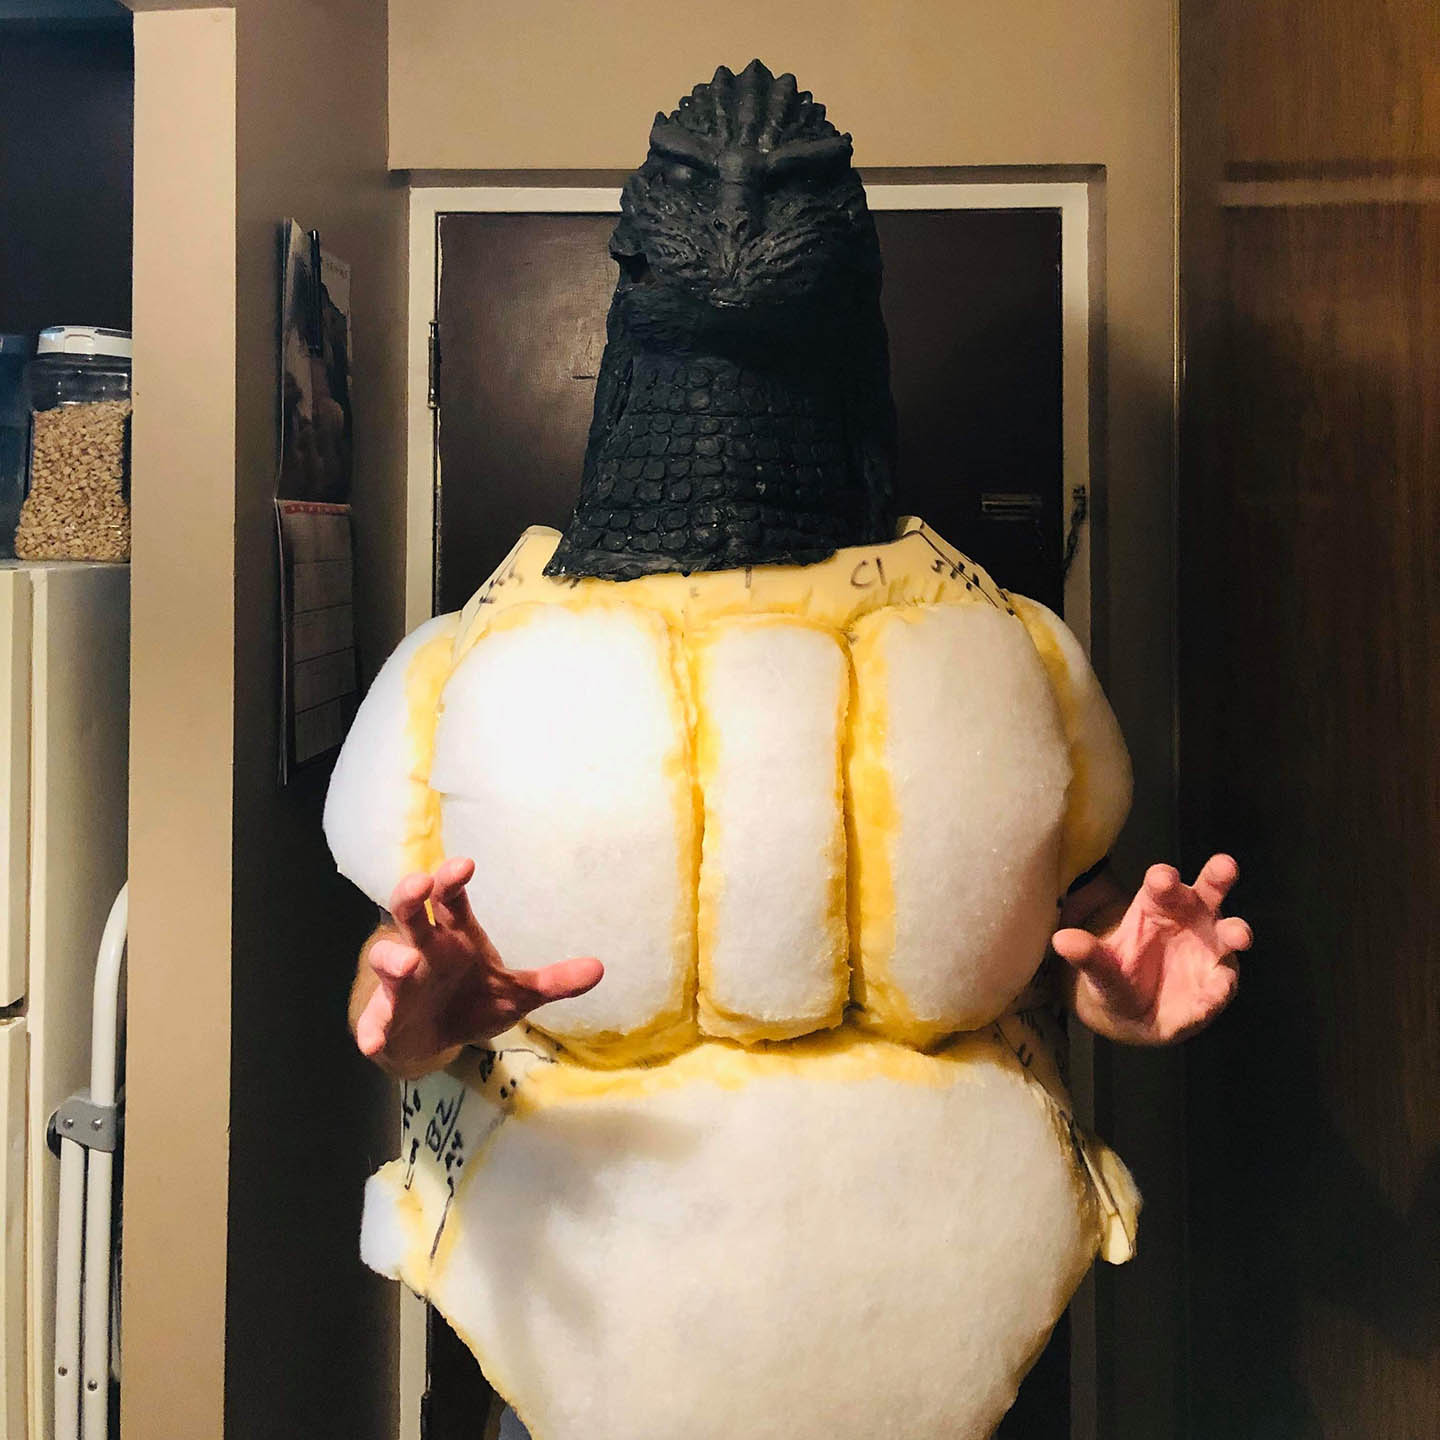
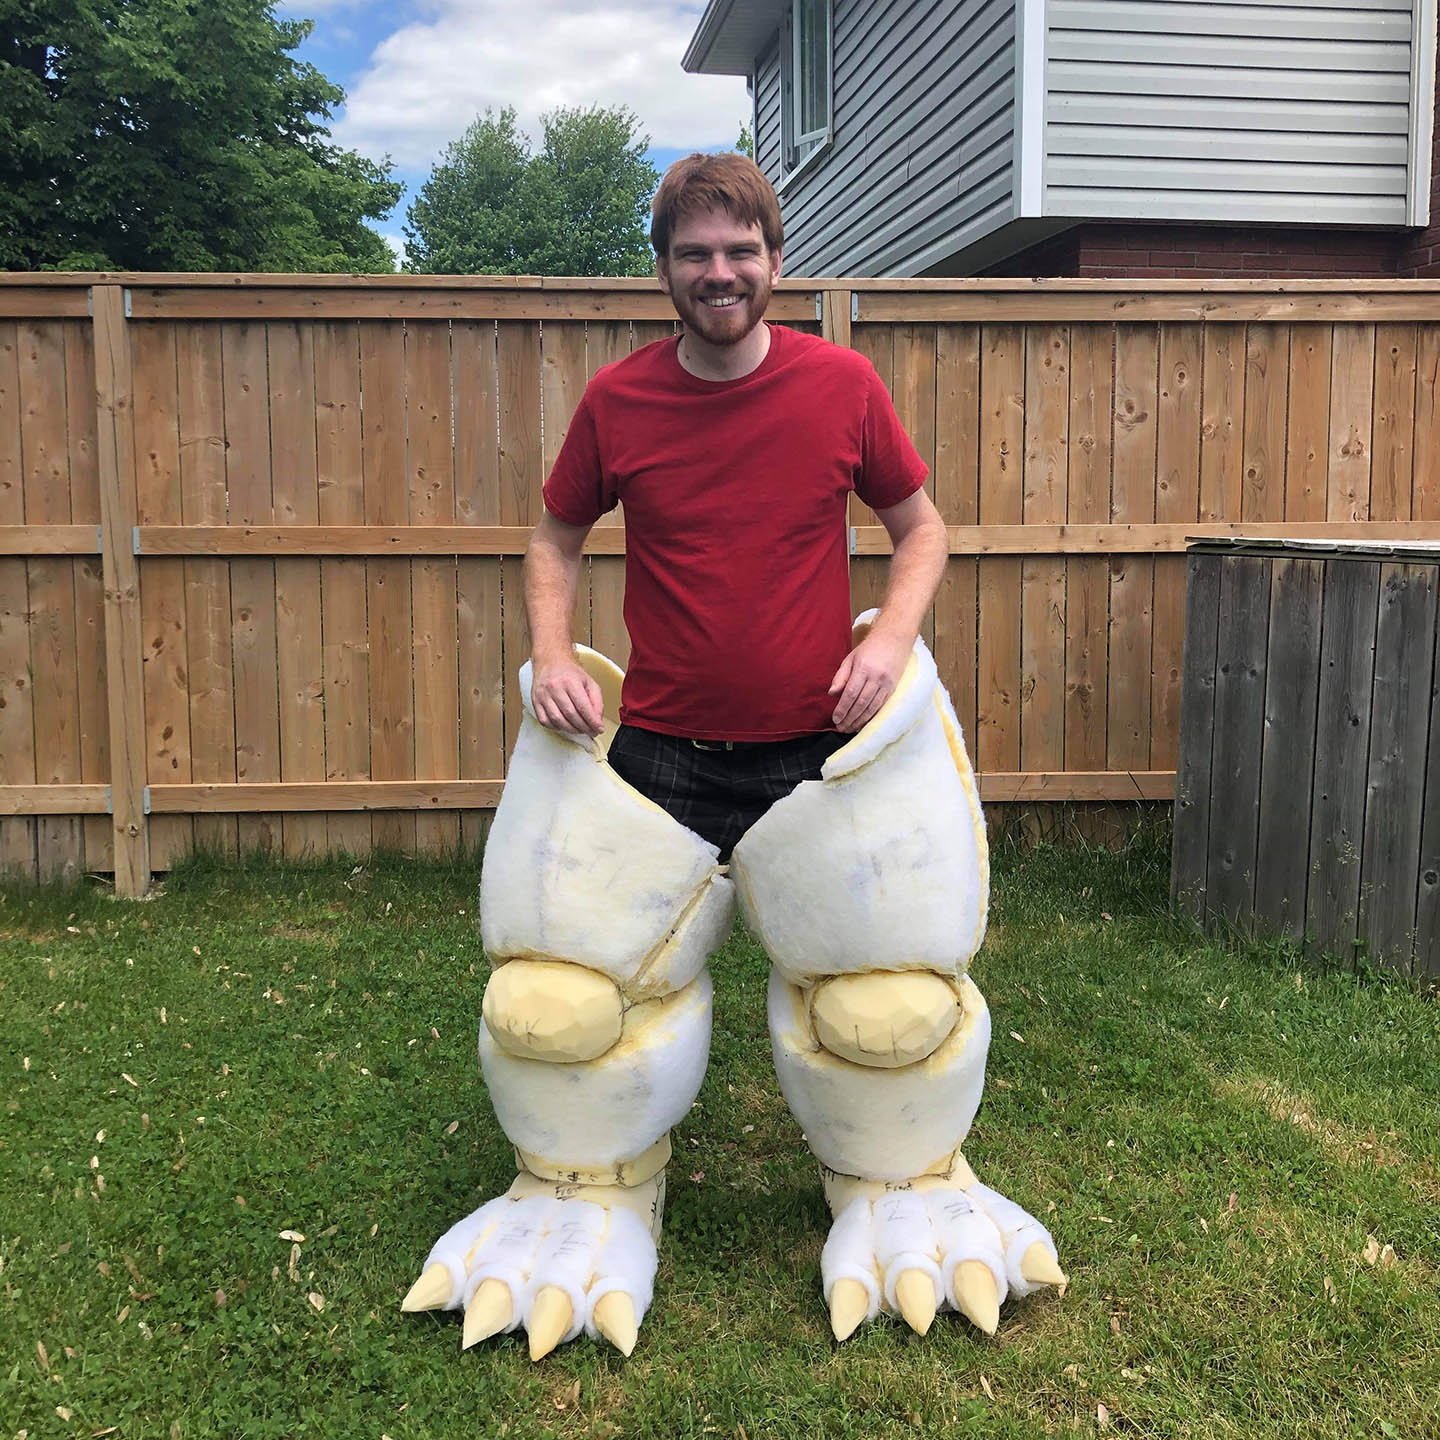
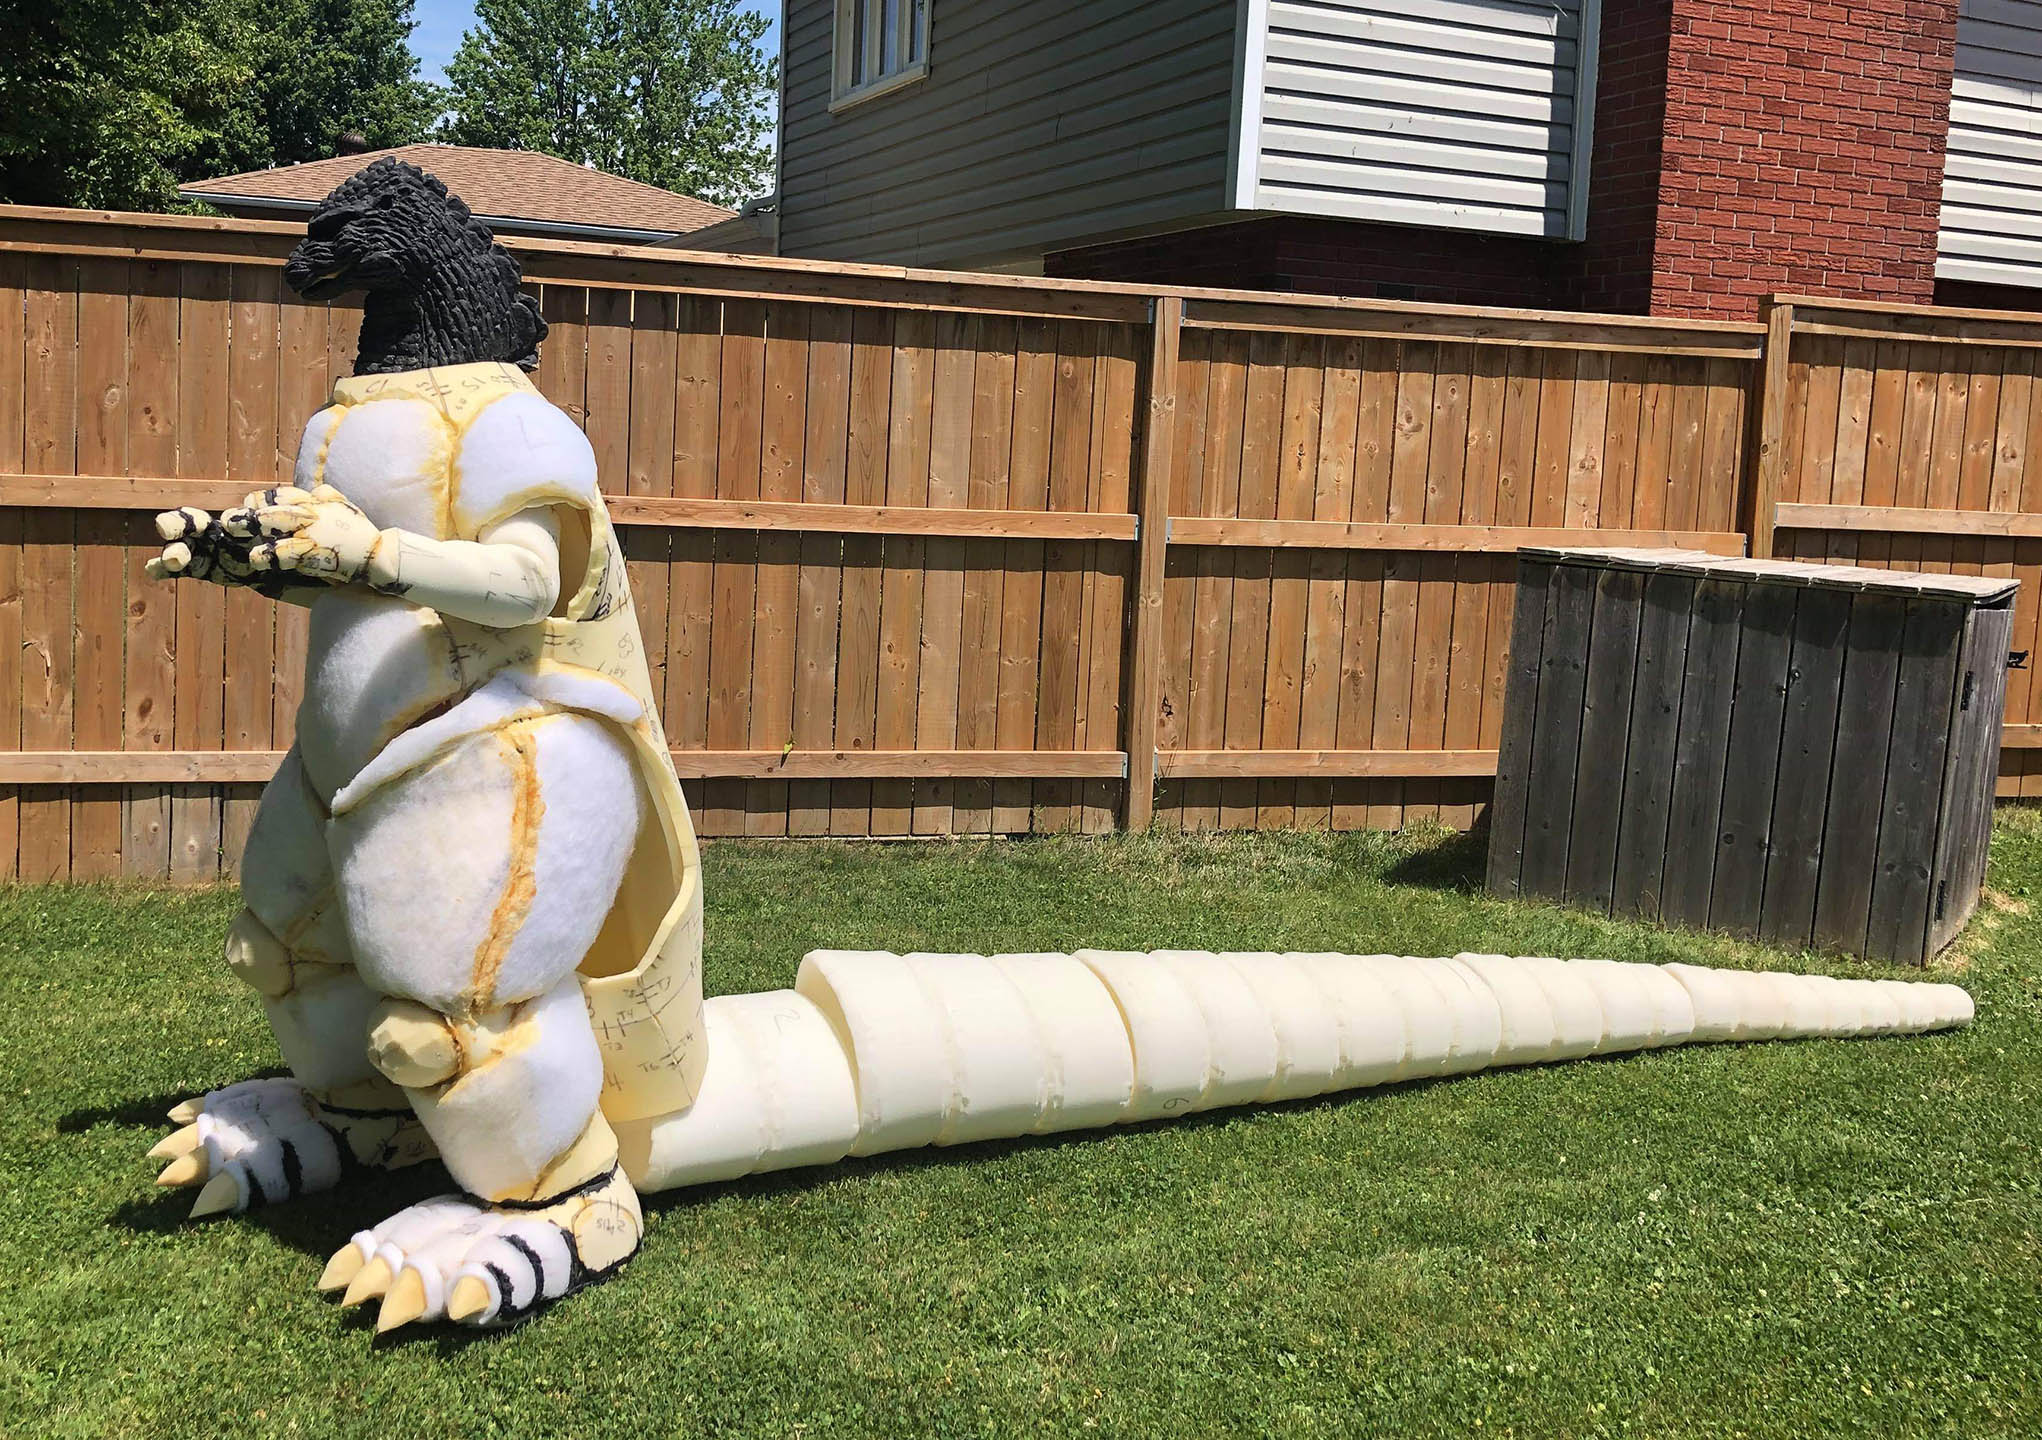
After tracing the pattern pieces onto large sheets of paper, I transferred them to 1 inch thick upholstery foam which was cut out and assembled into the legs and torso using Super 77 spray adhesive. Definition was added to the muscles by cutting the foam pieces at an angle wherever I wanted an indentation. I also layered thin sheets of cotton batting across the surface to smooth out and beef up certain areas. This was also applied using Super 77.
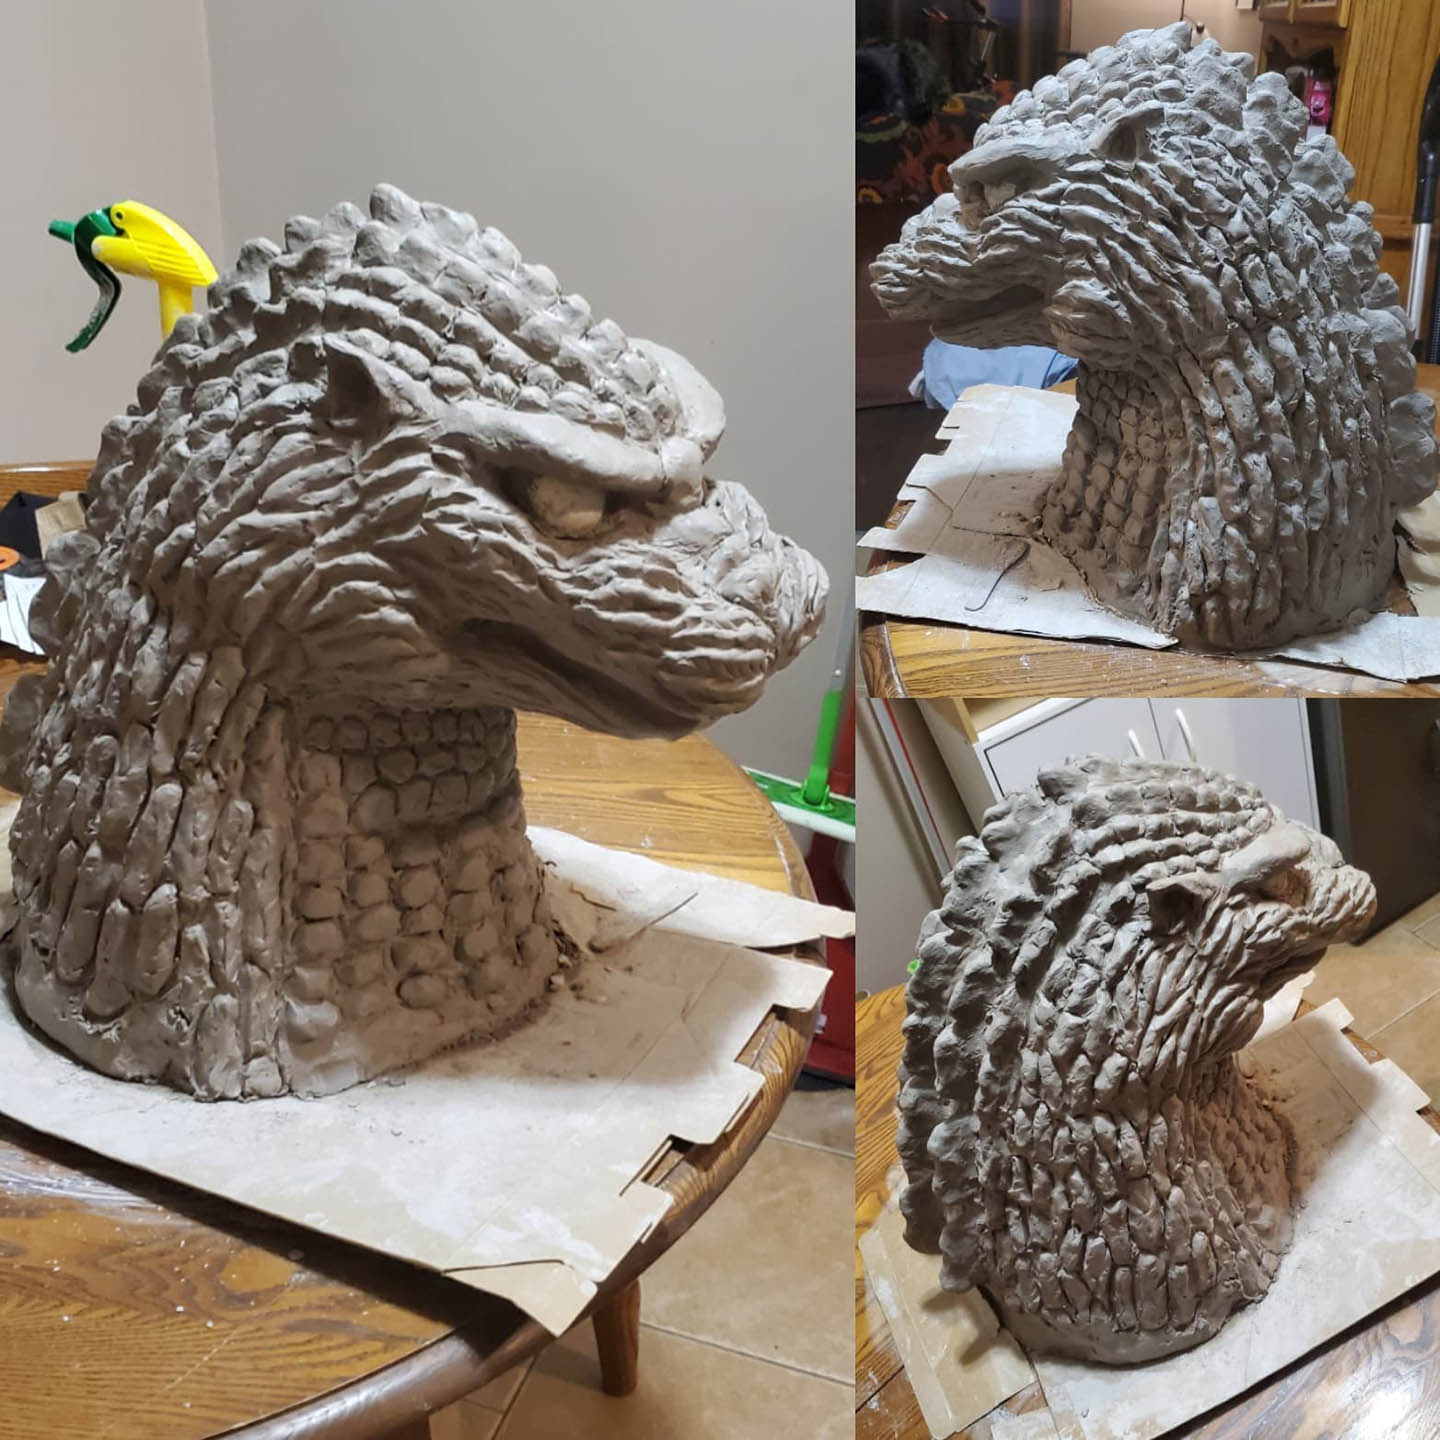
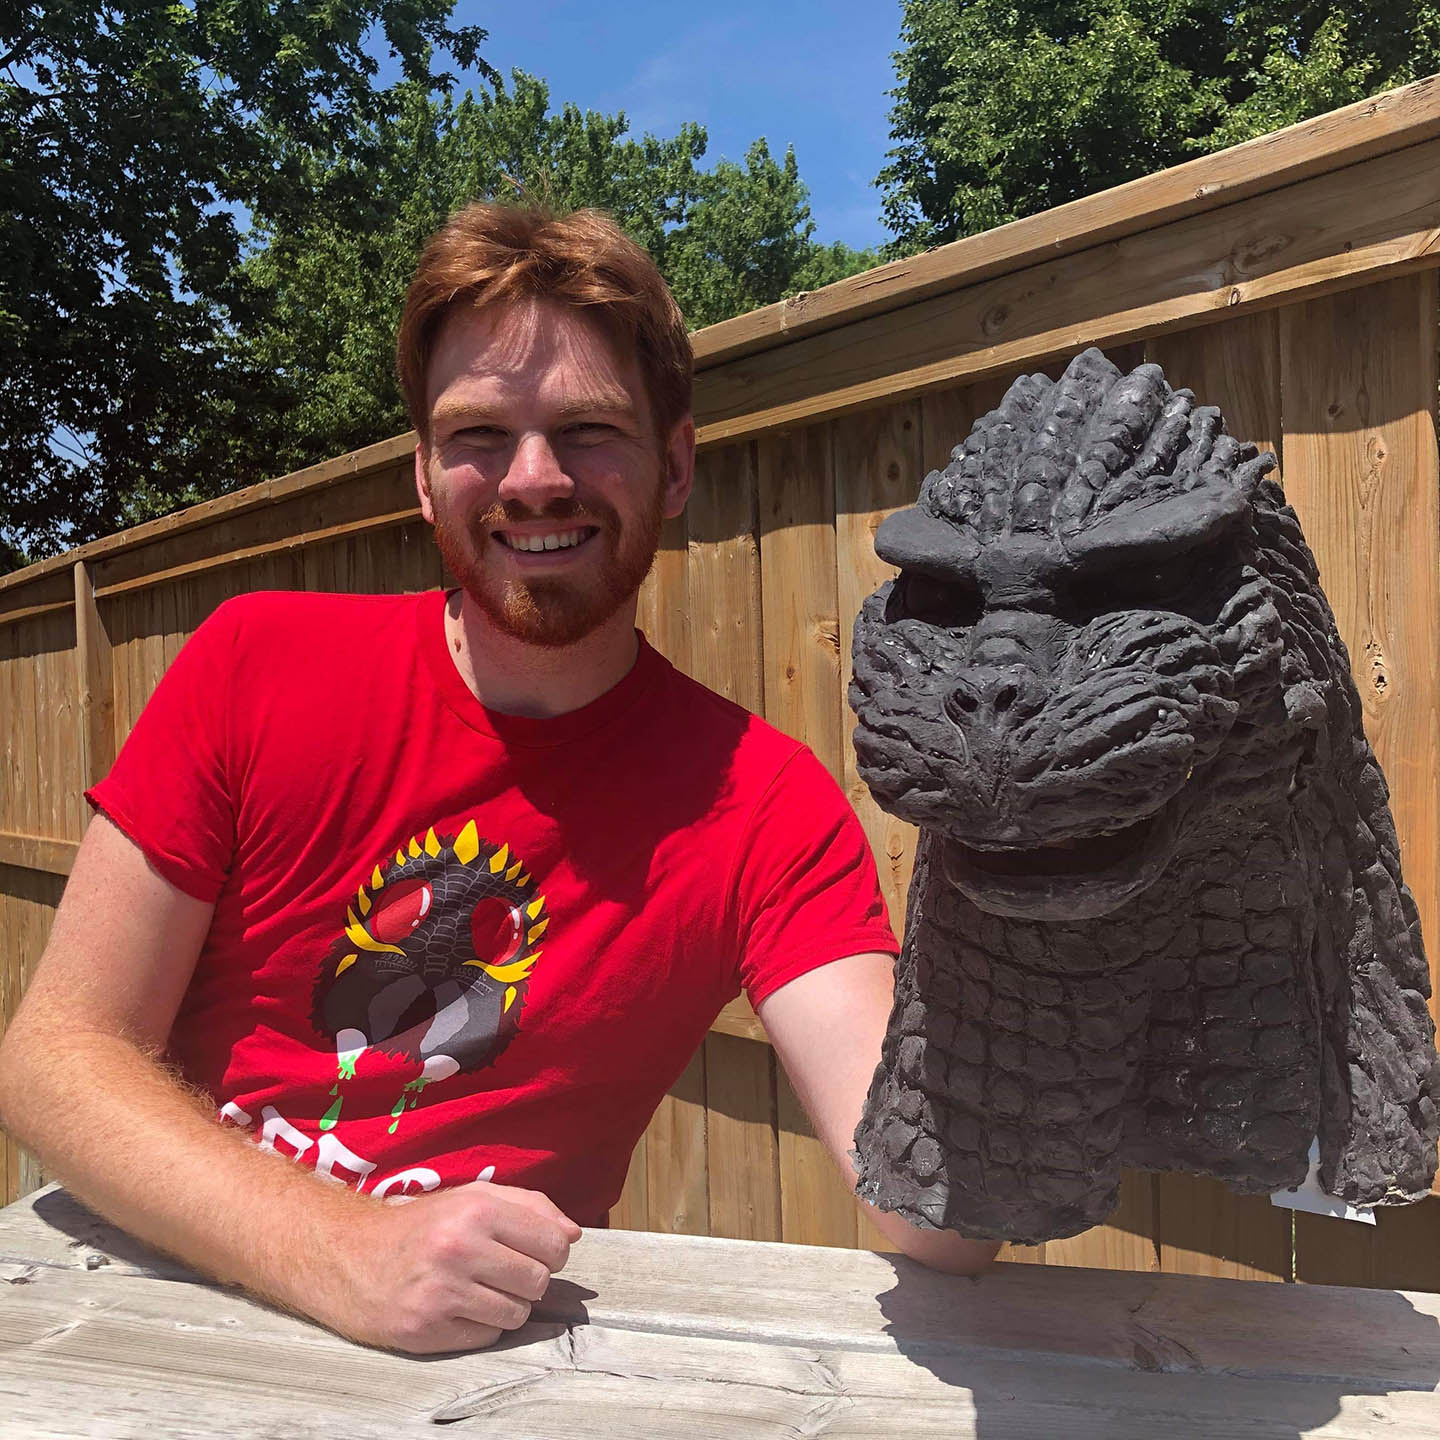
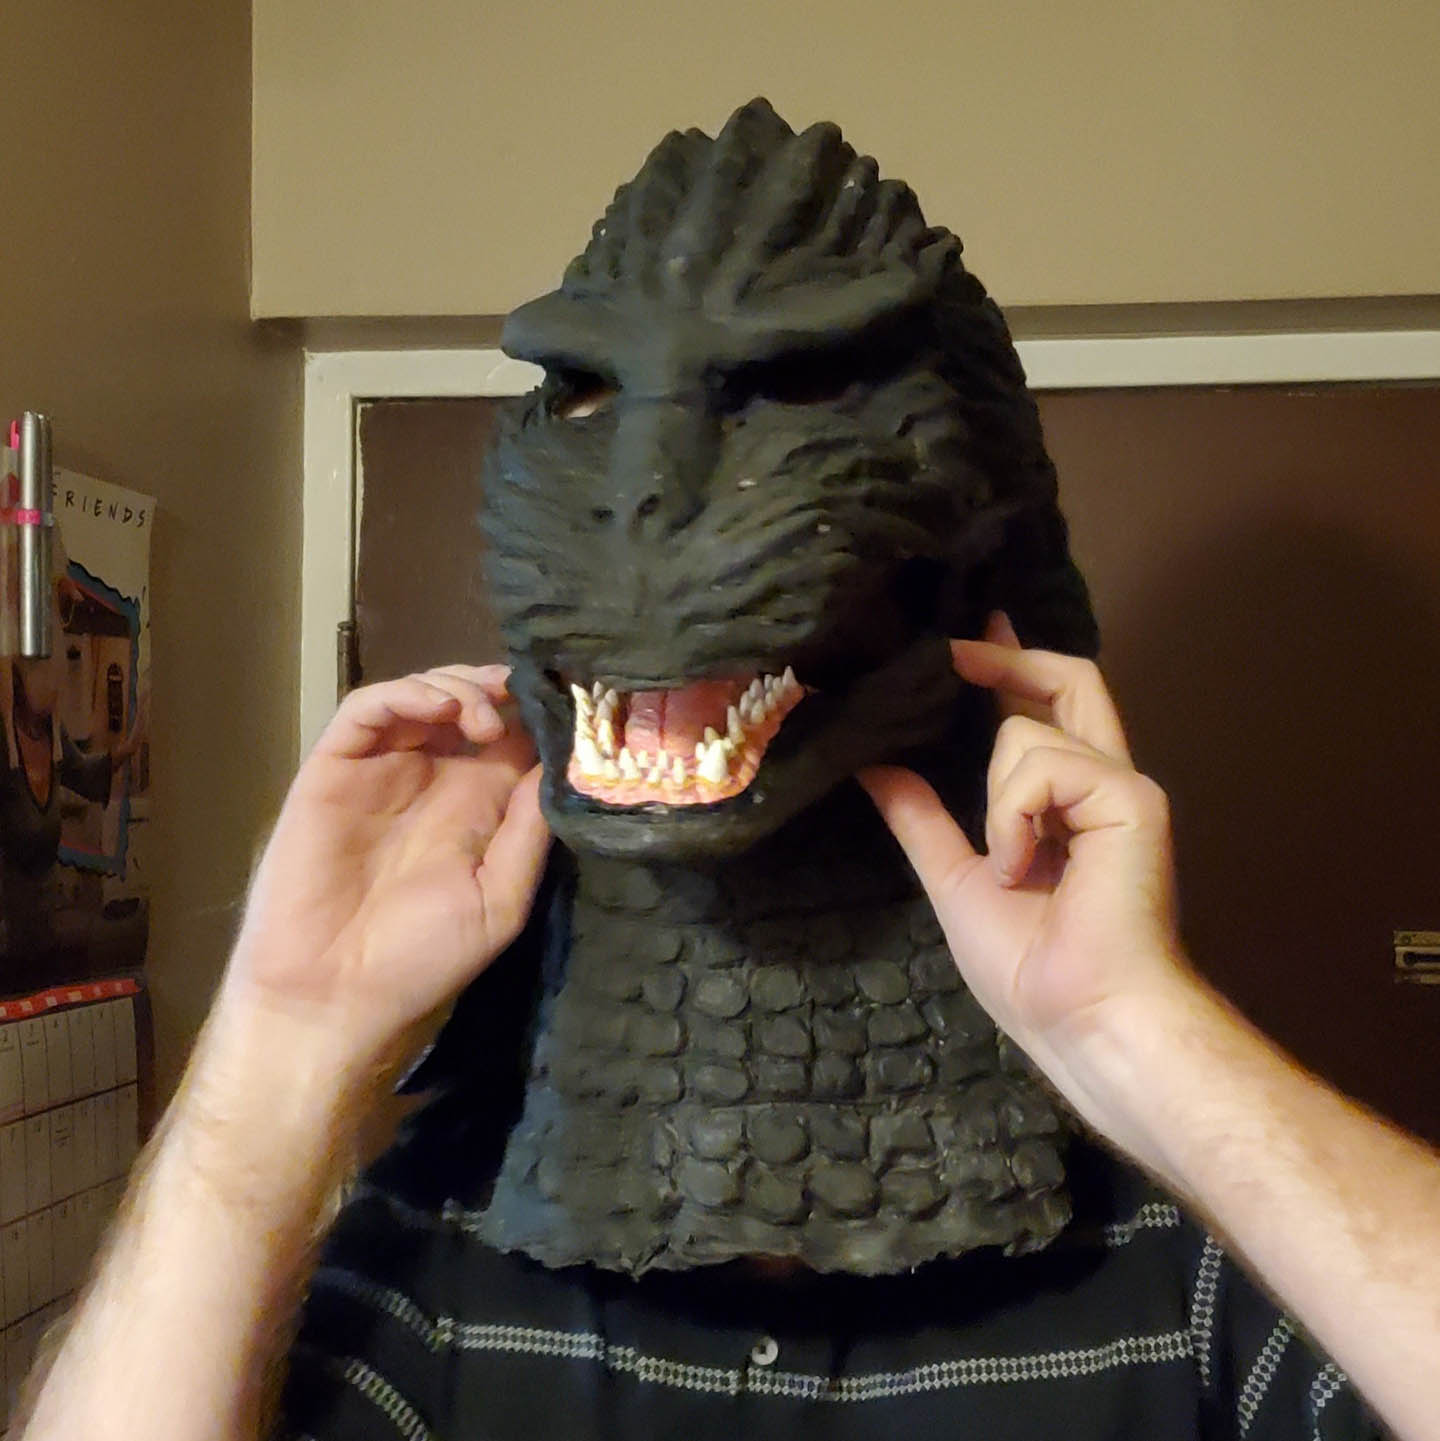
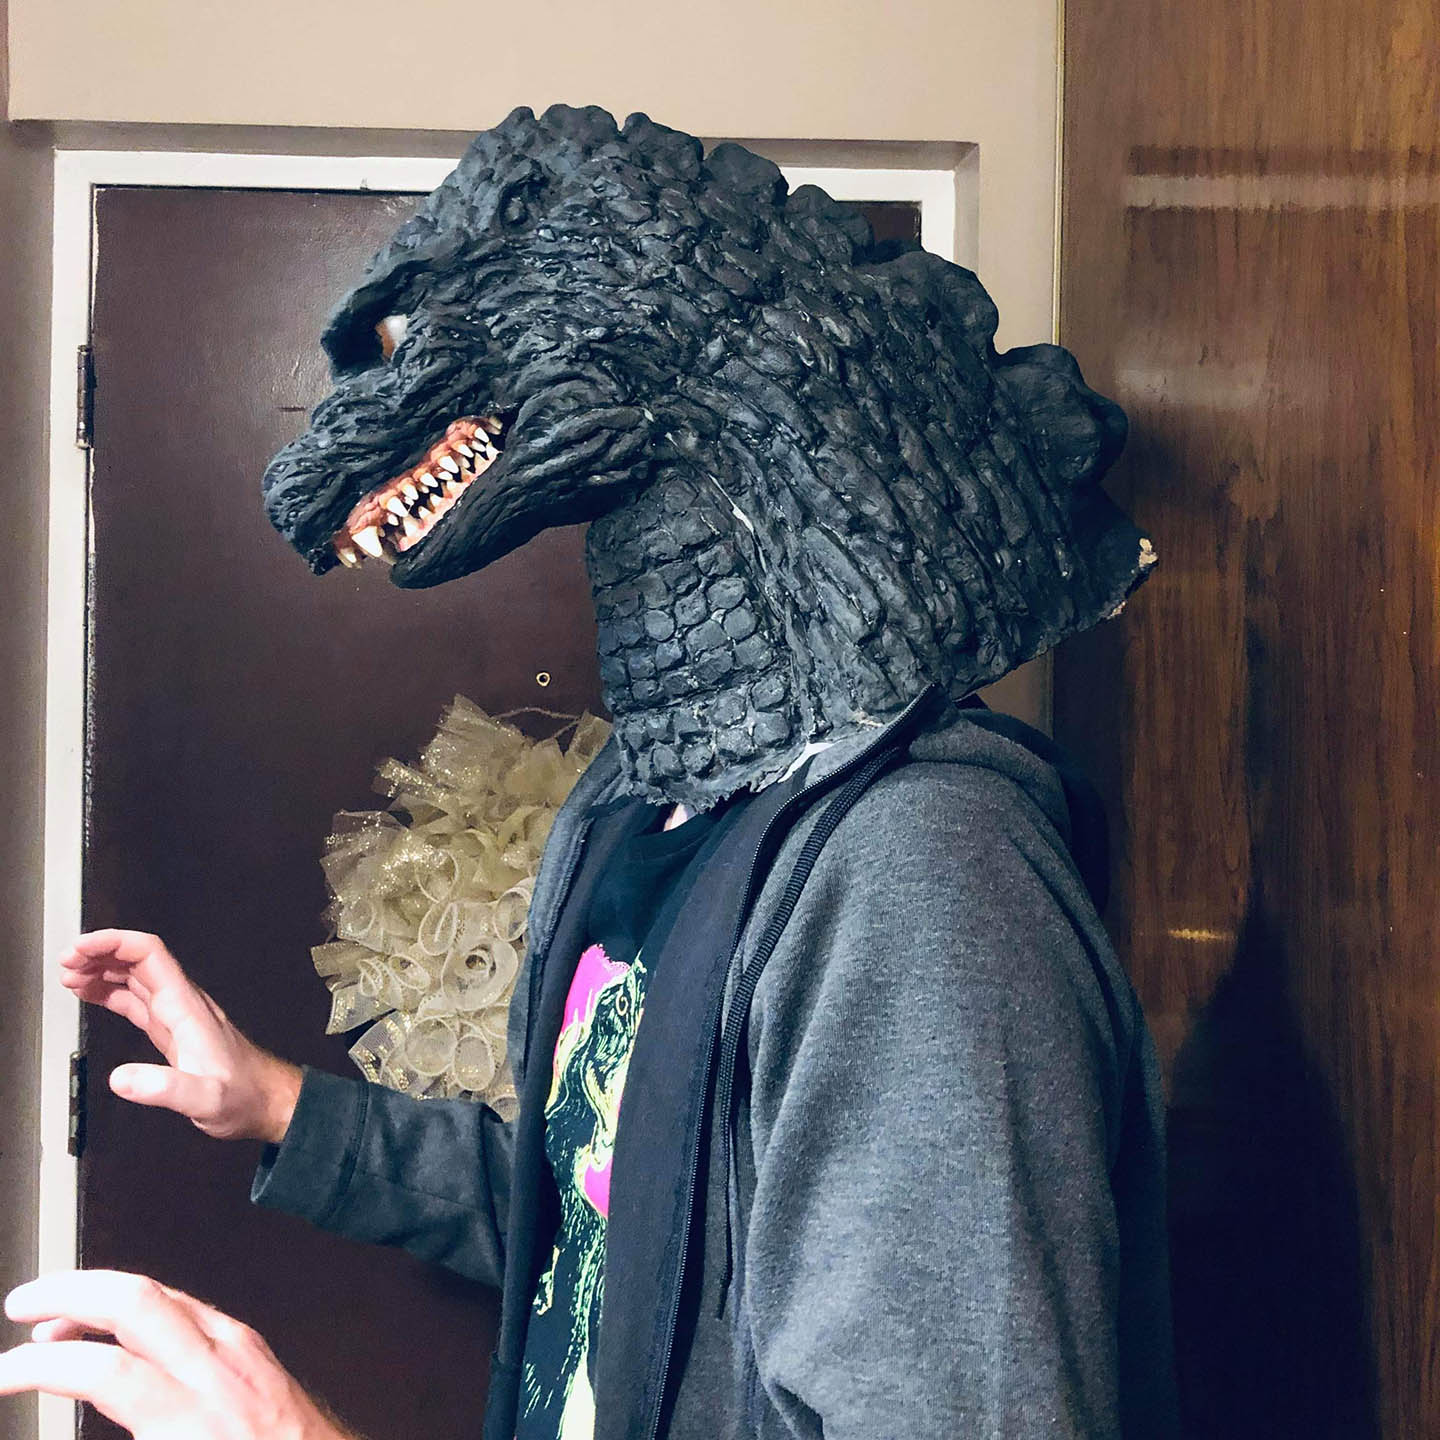
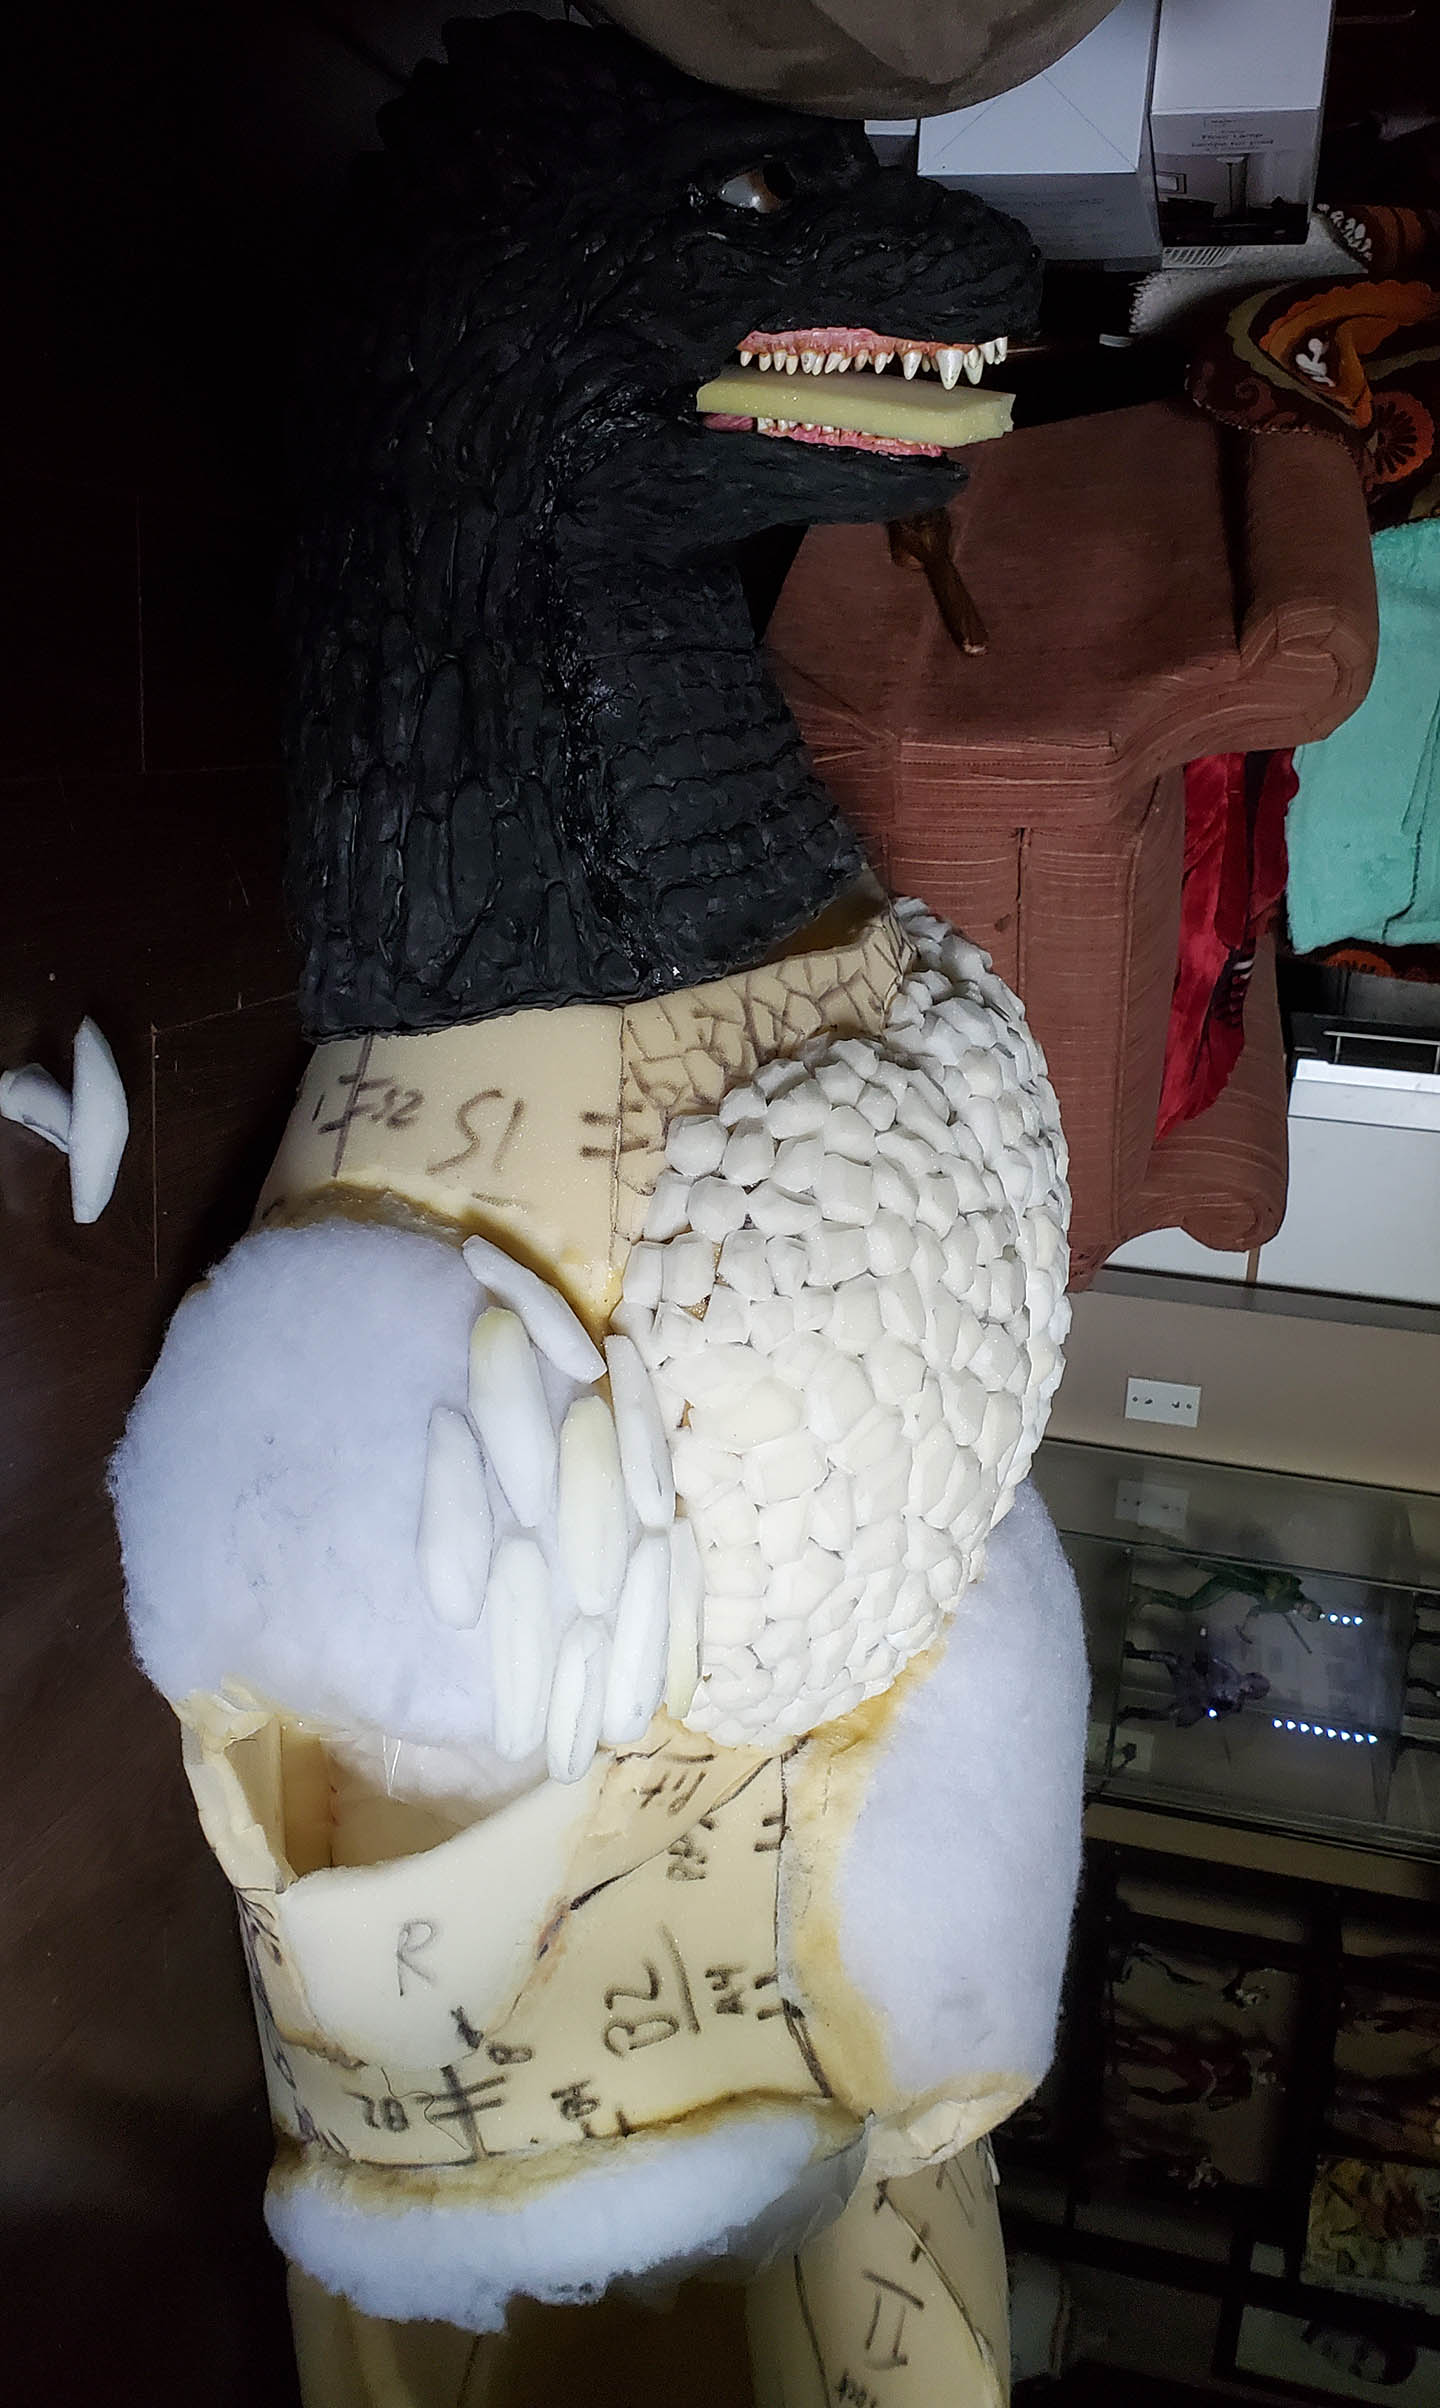
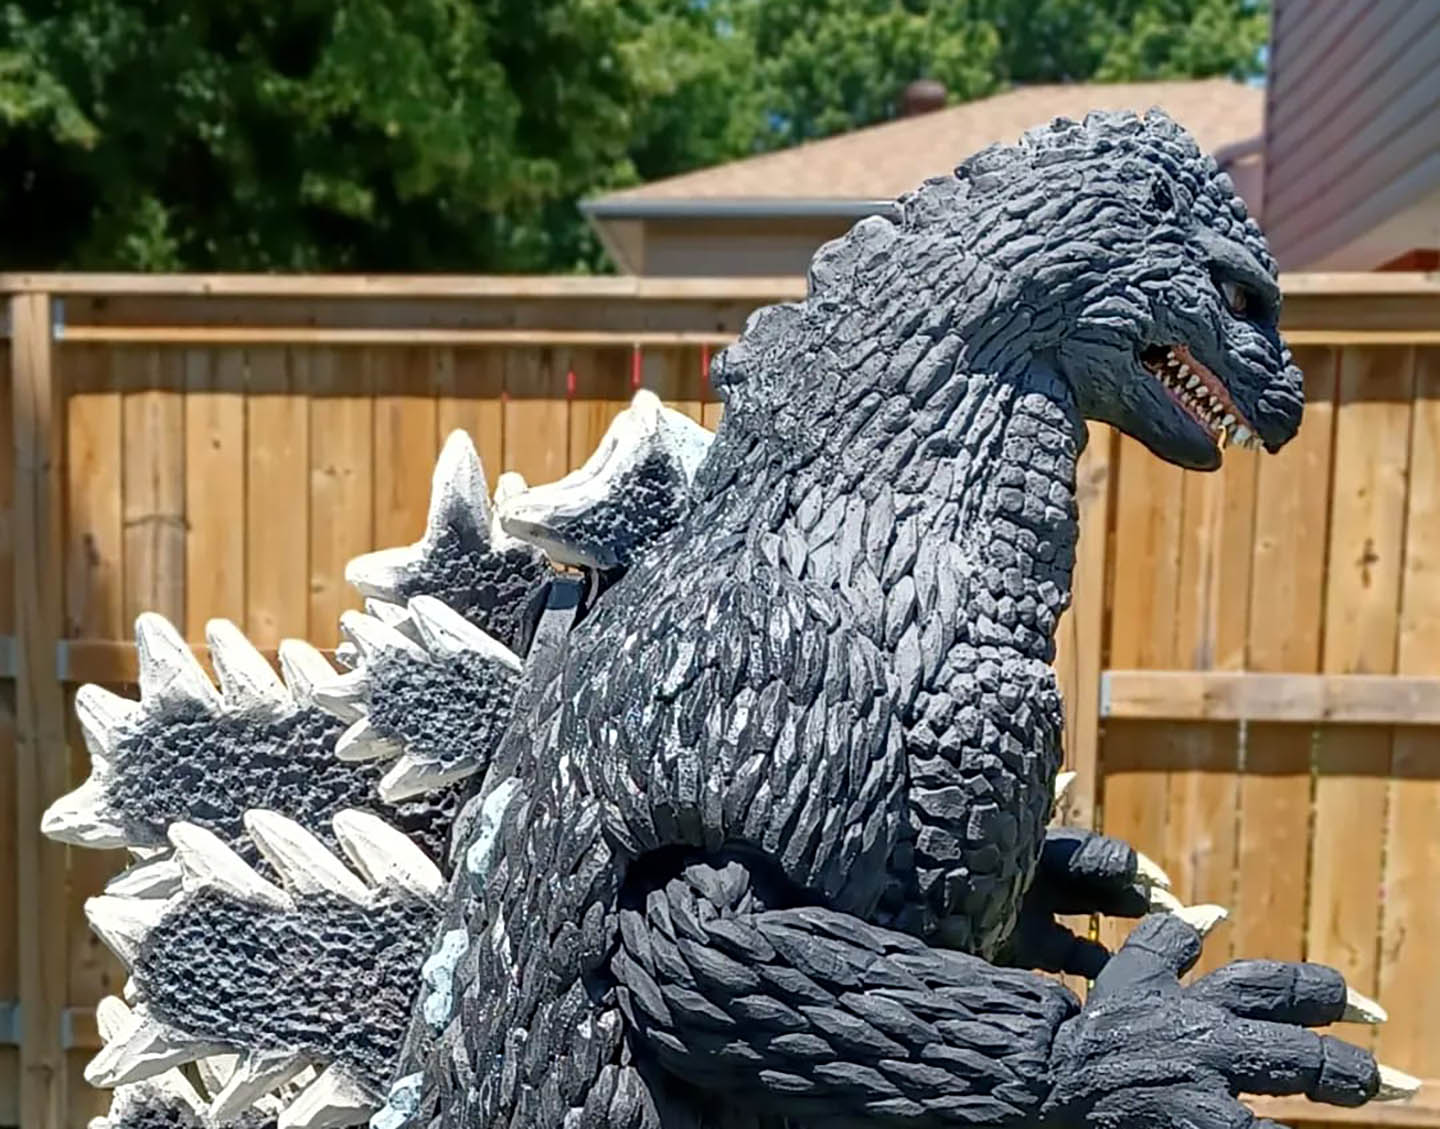
The Head
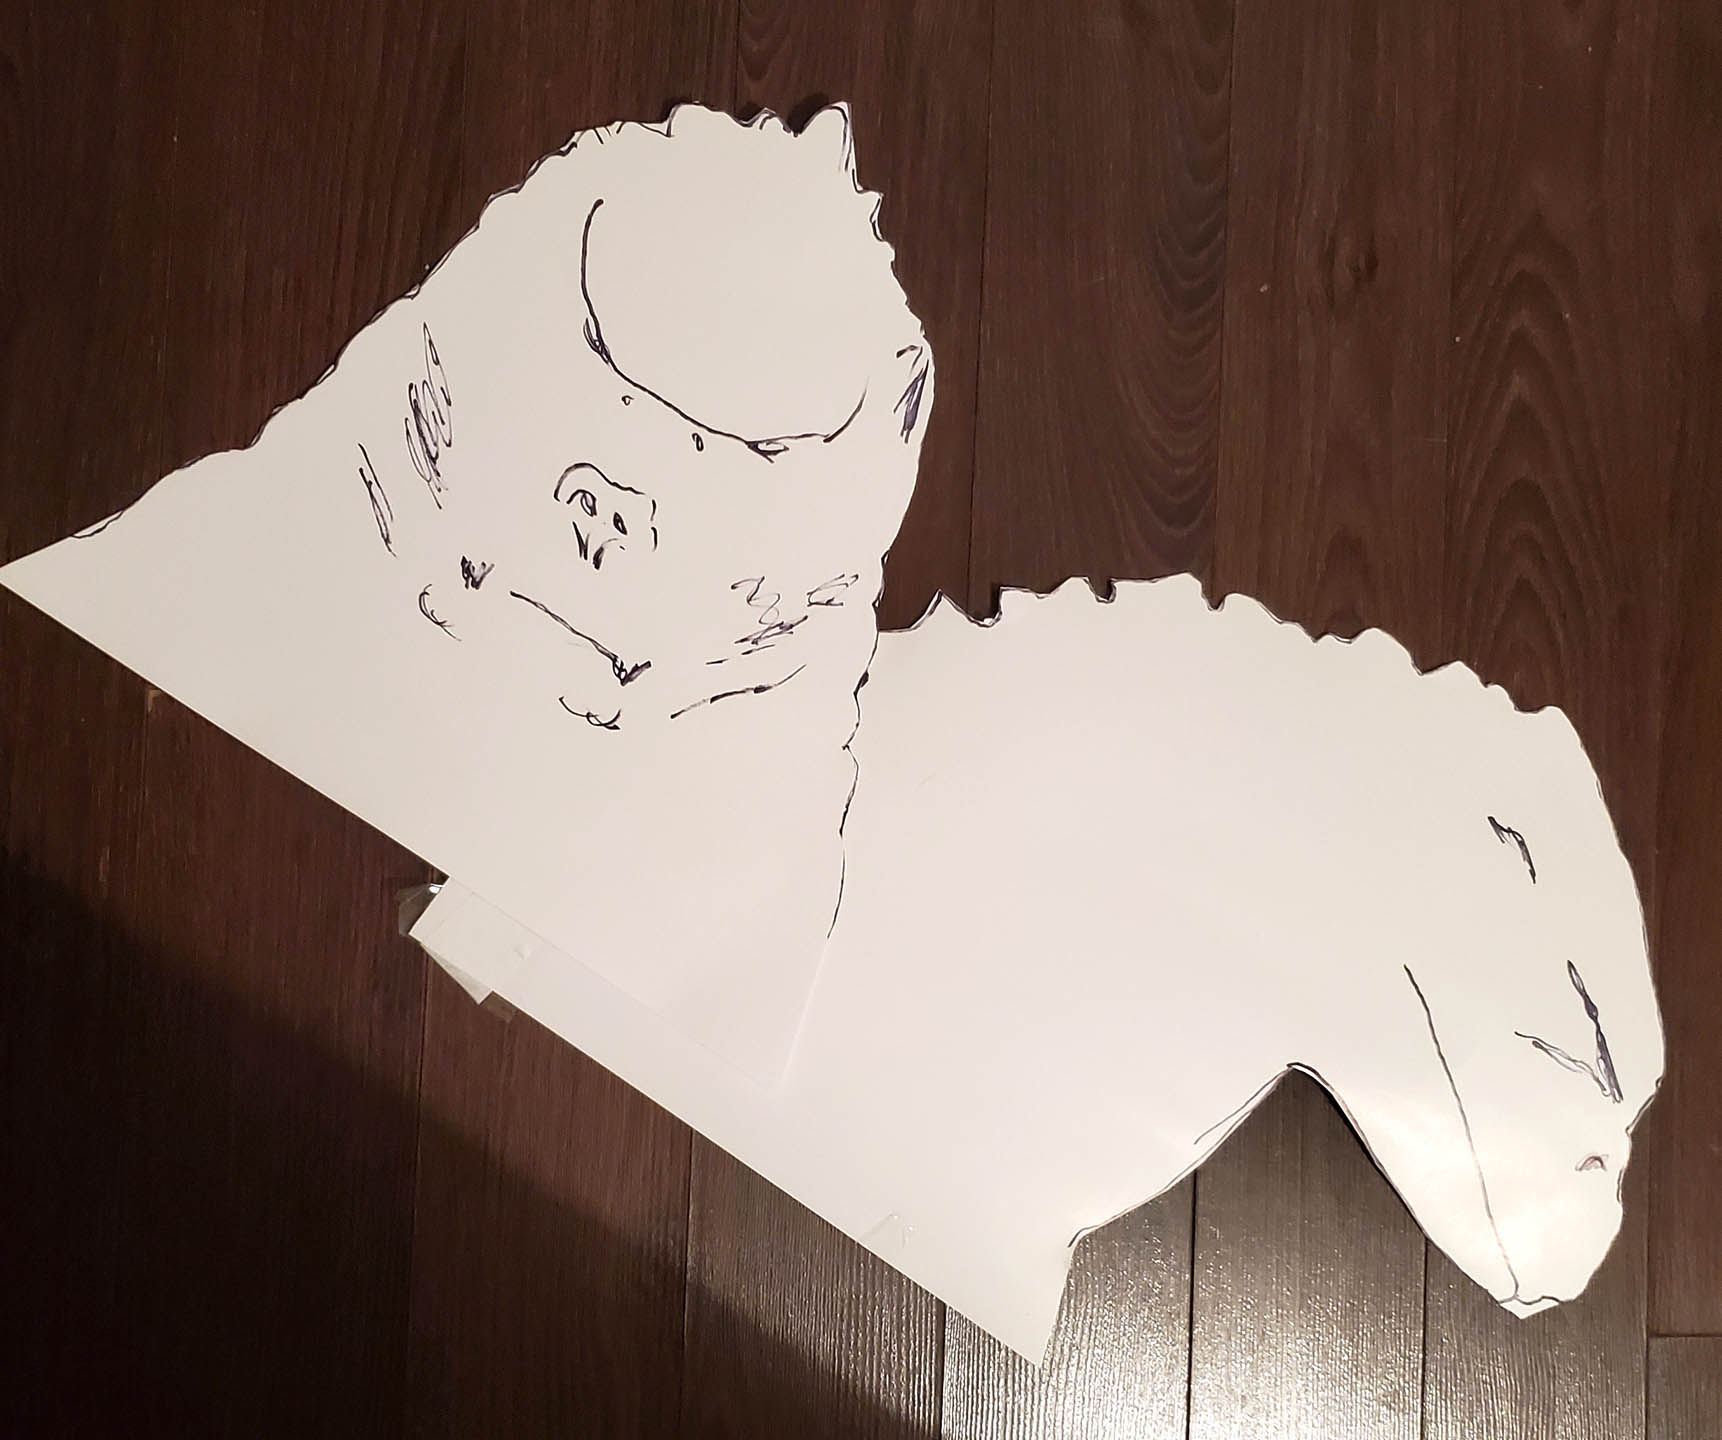
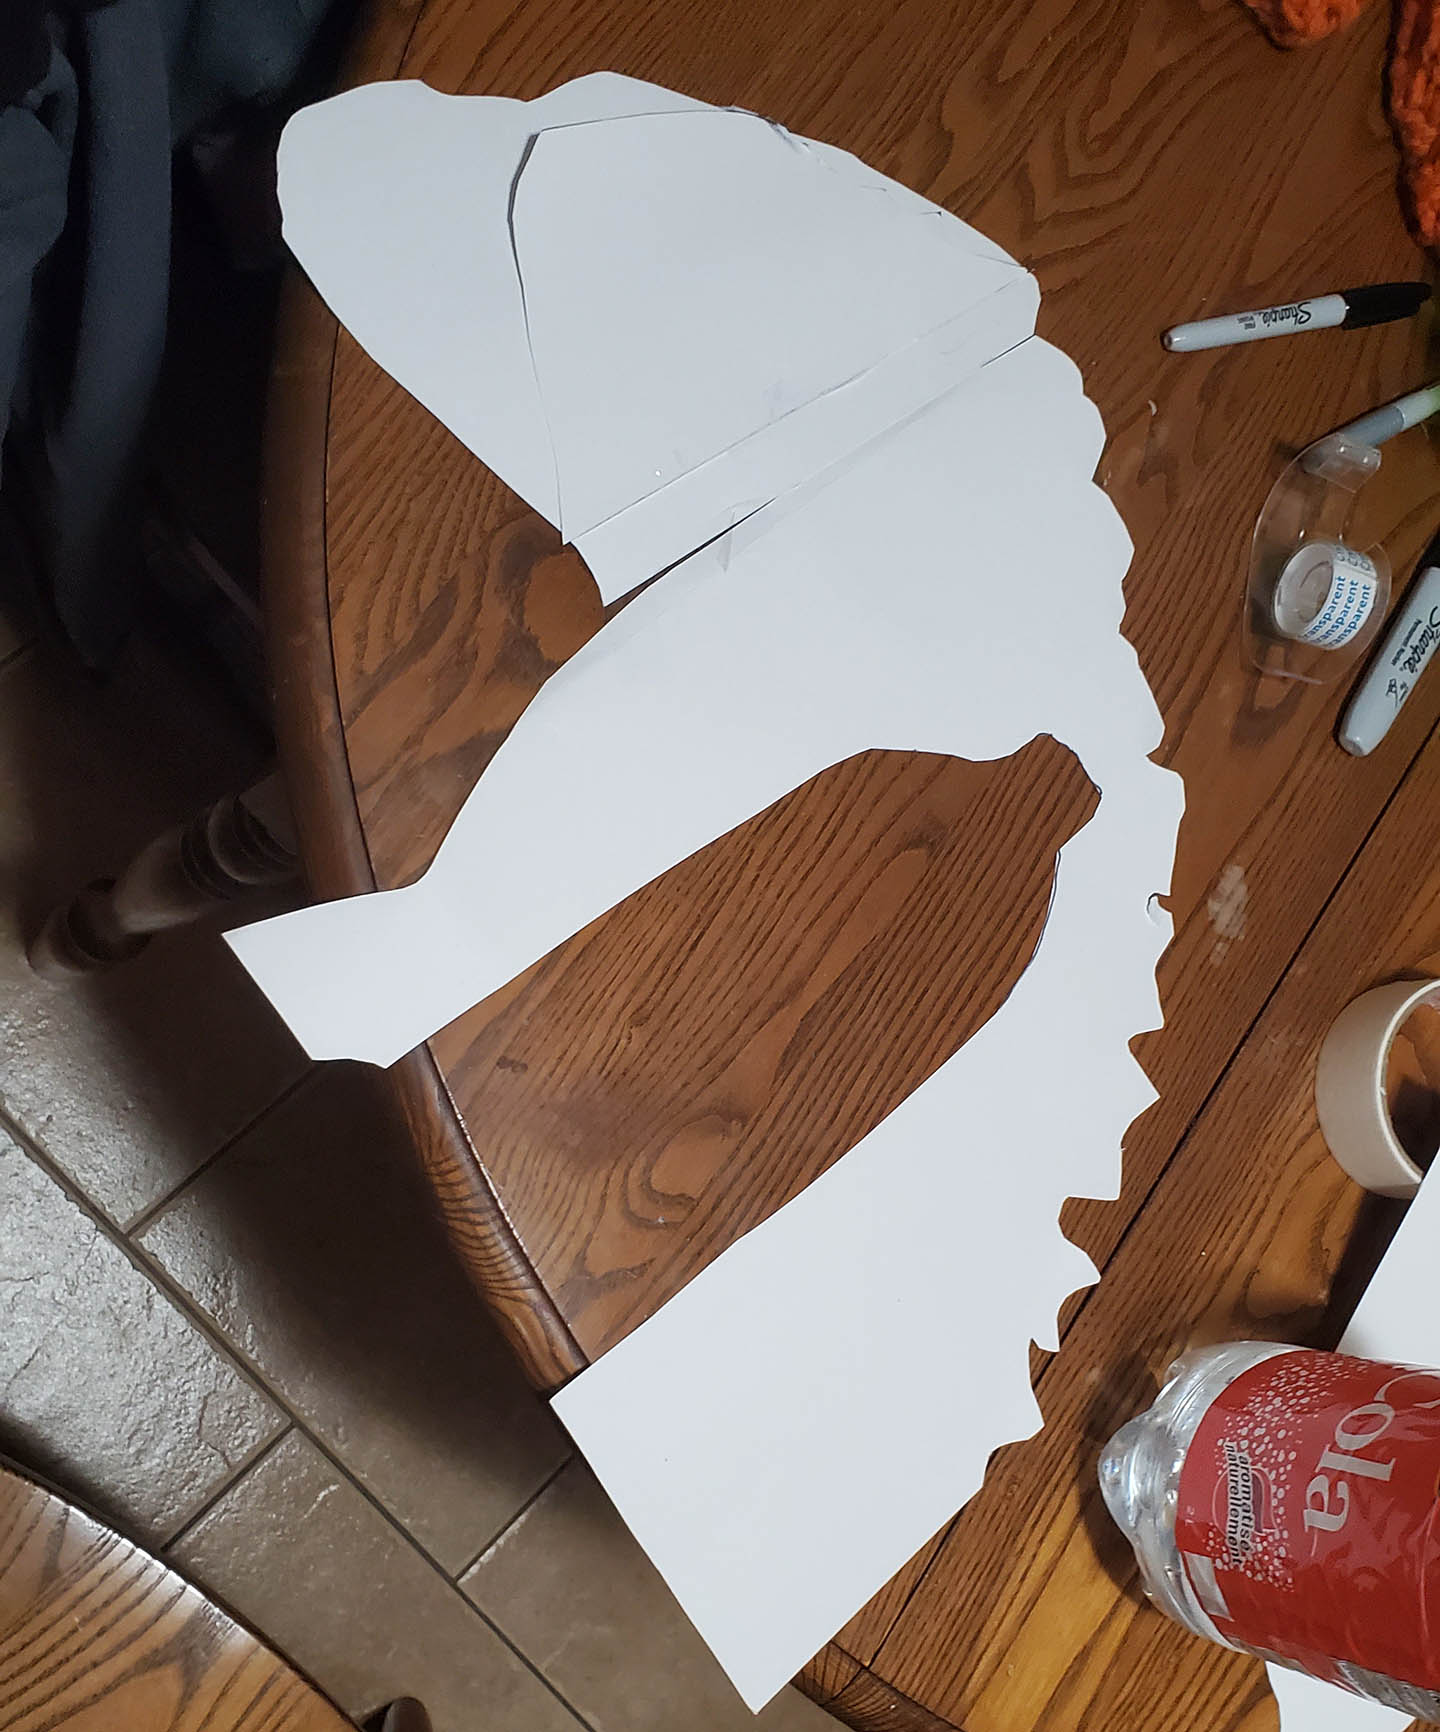
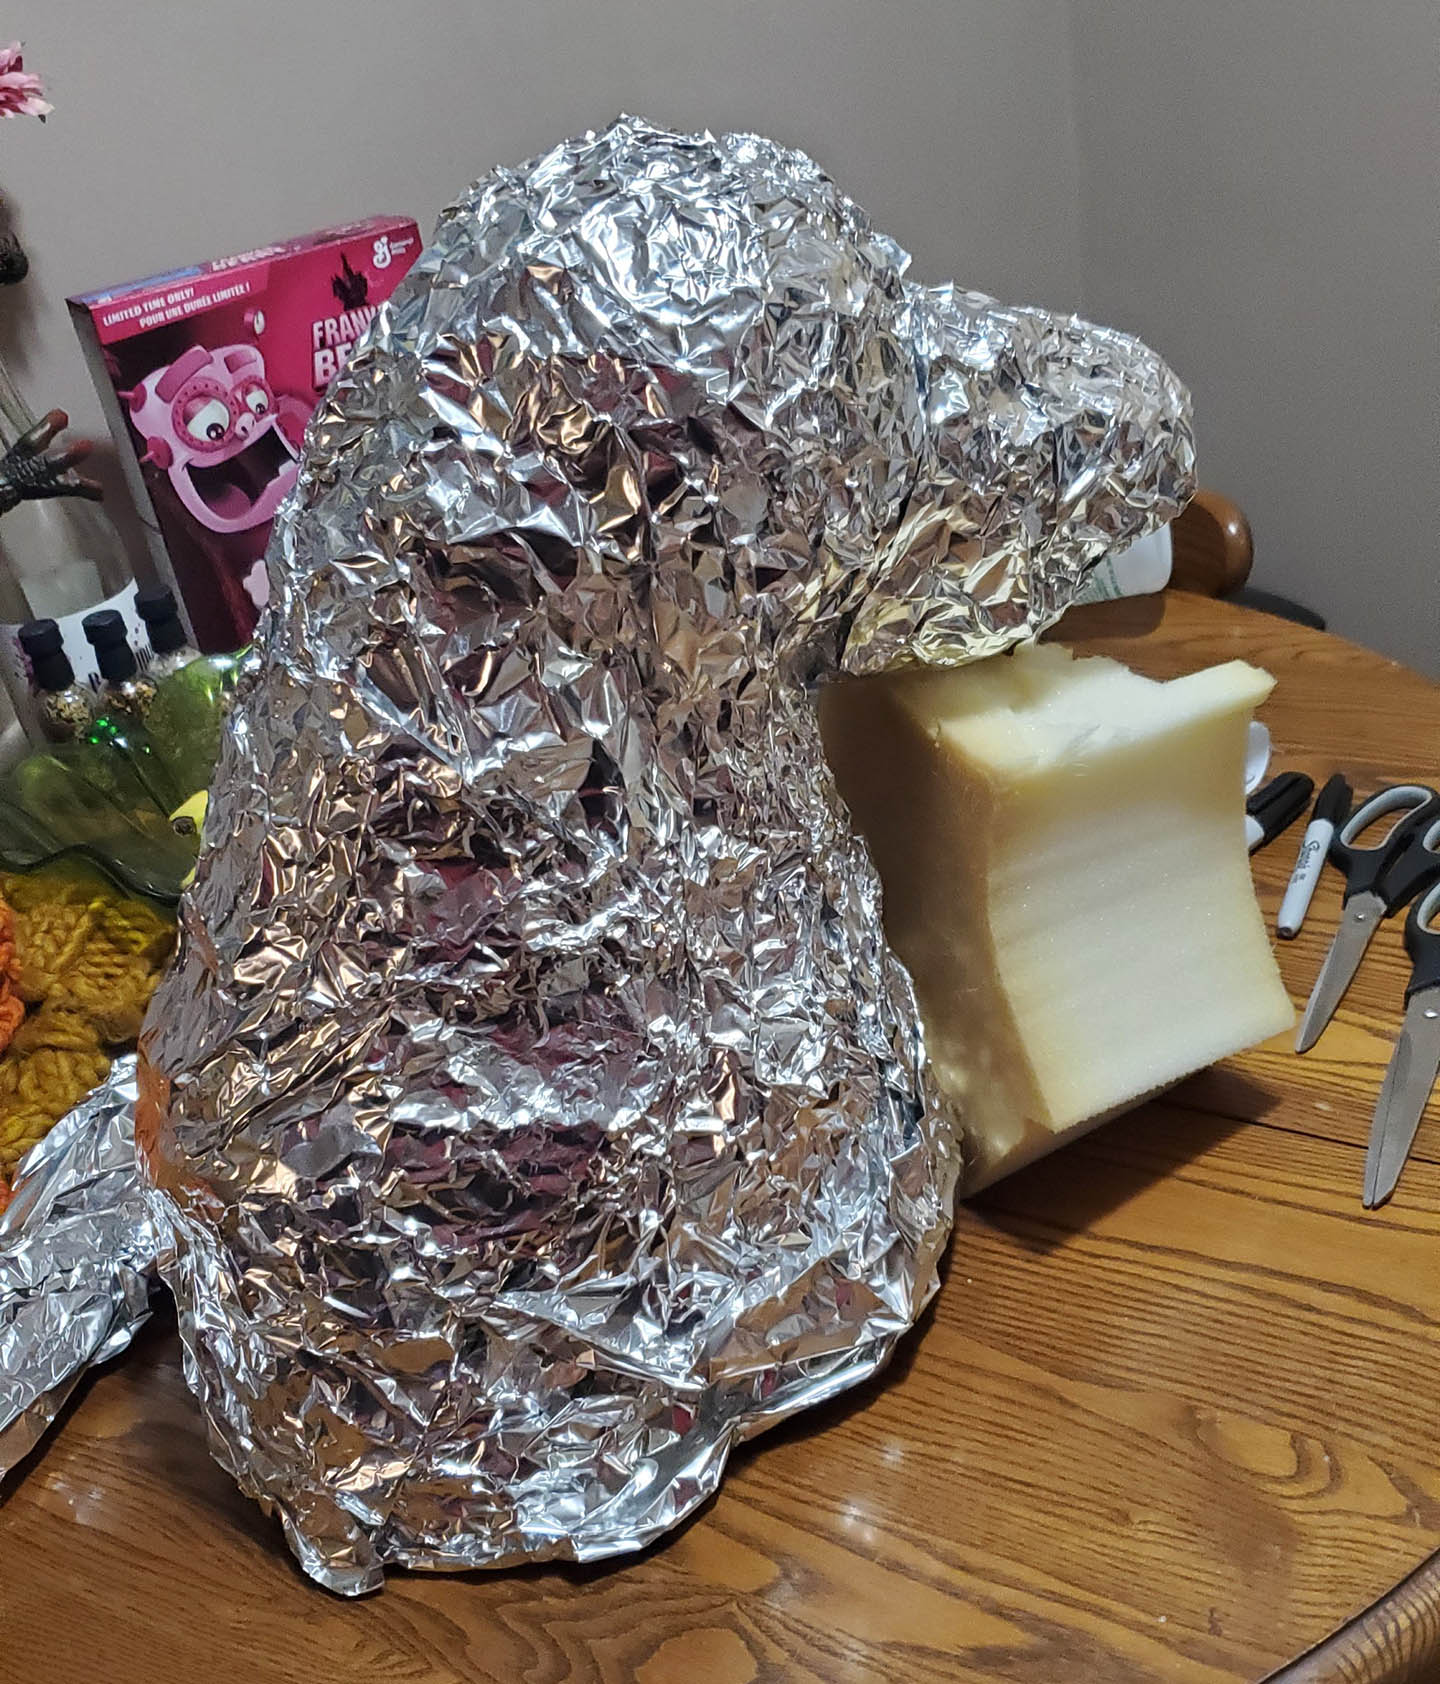
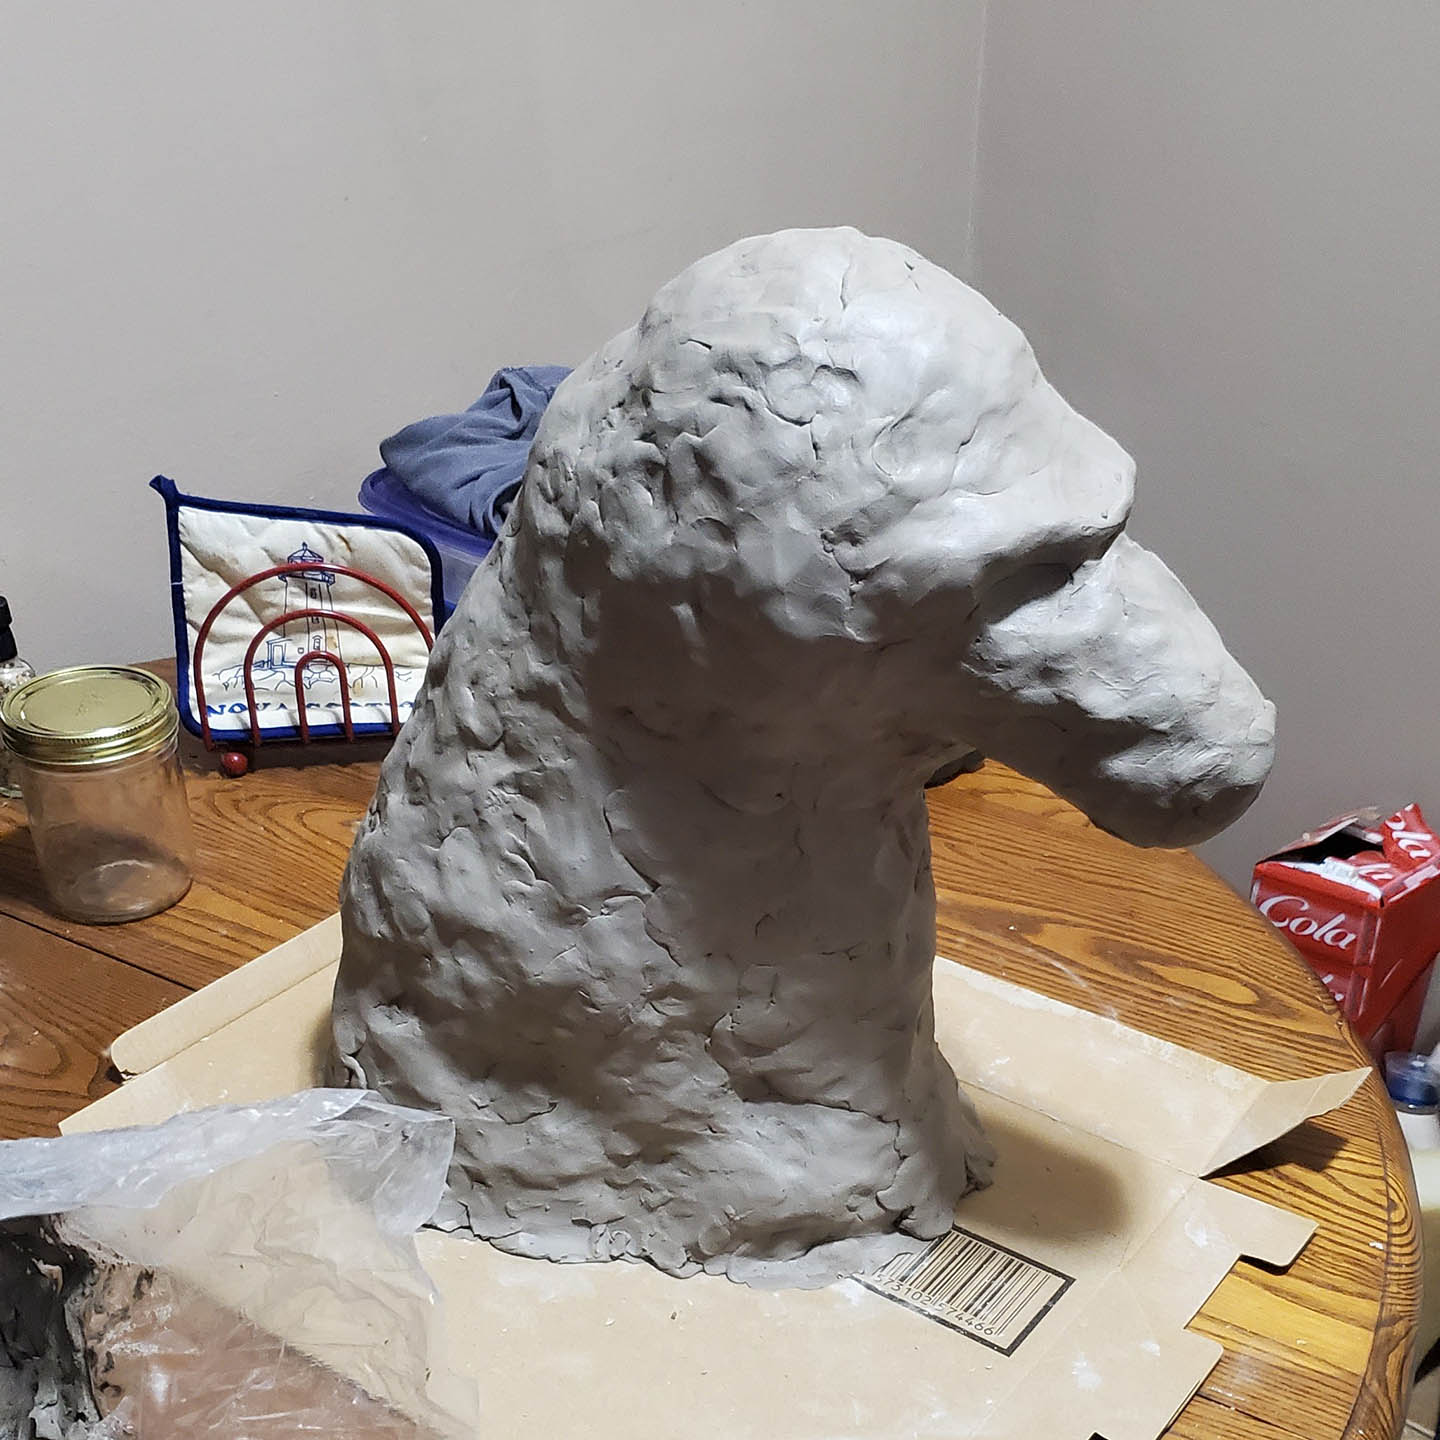
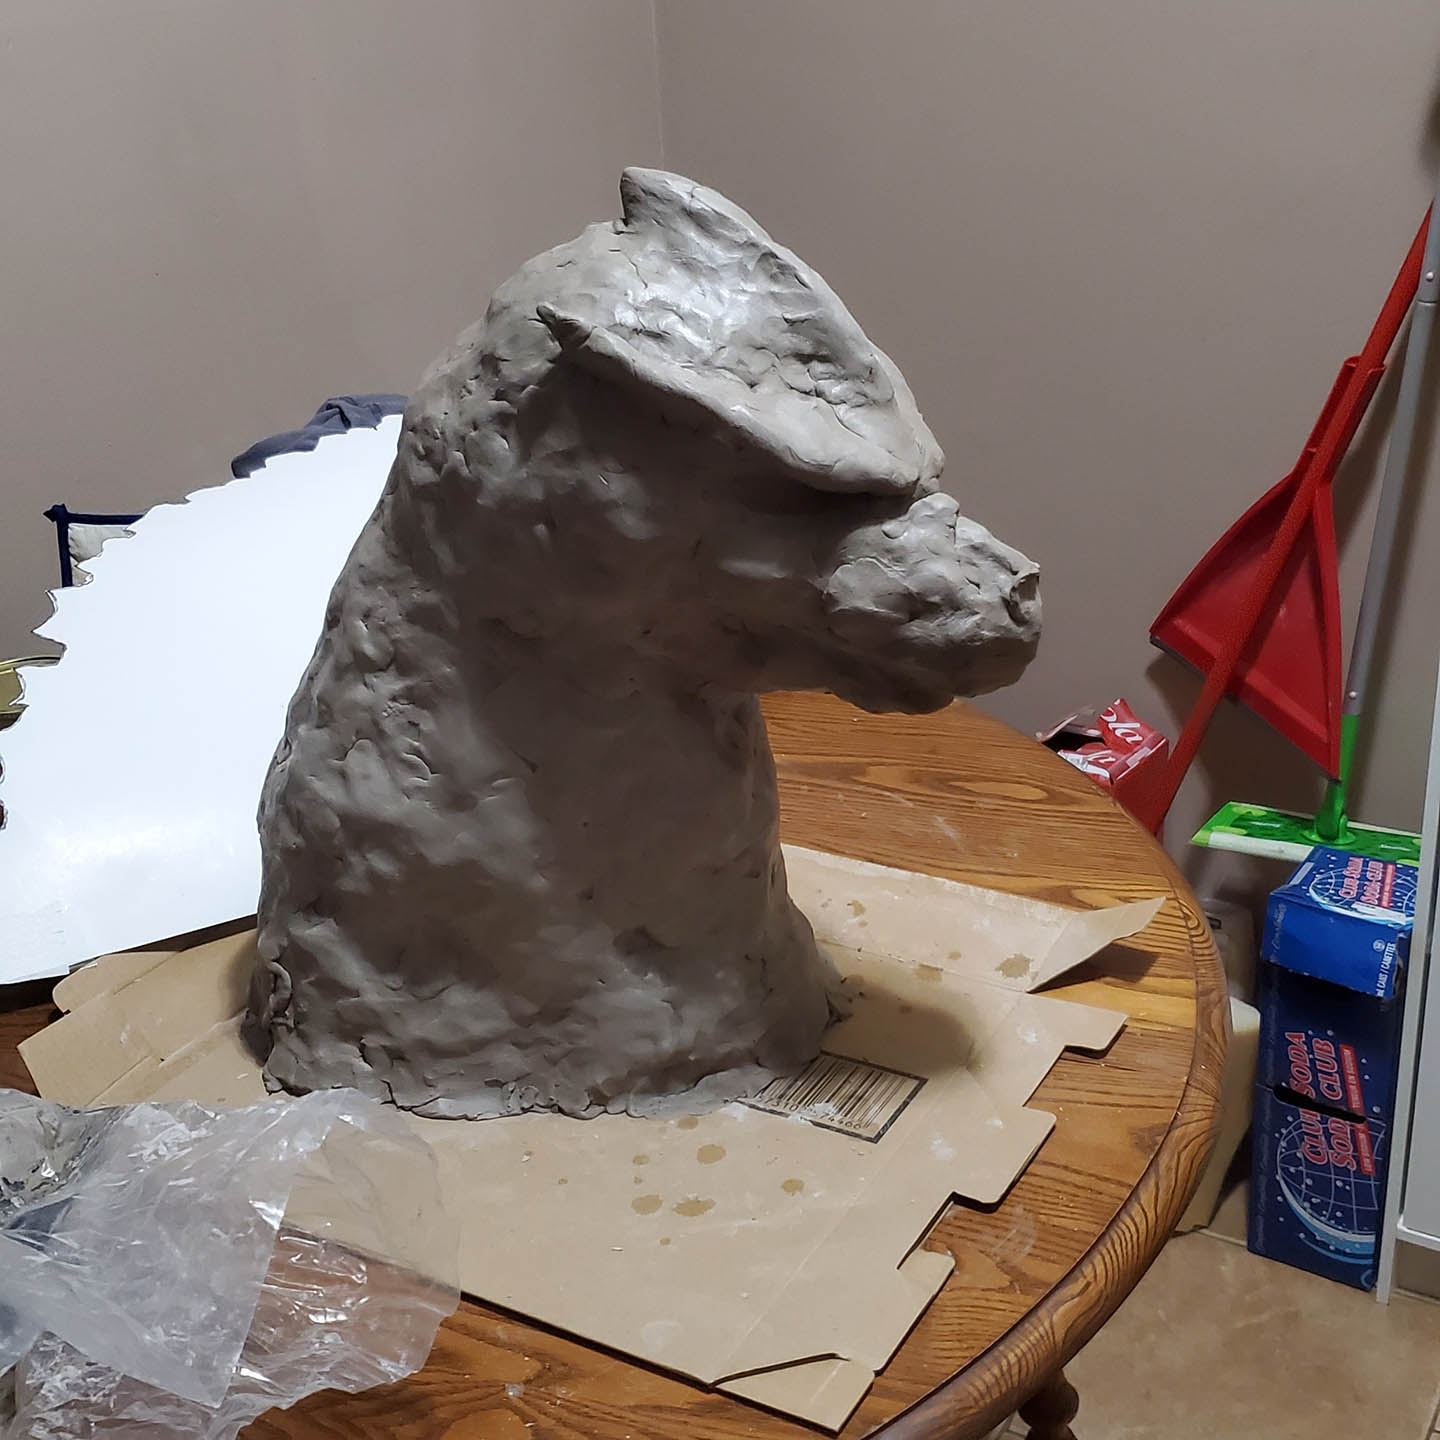
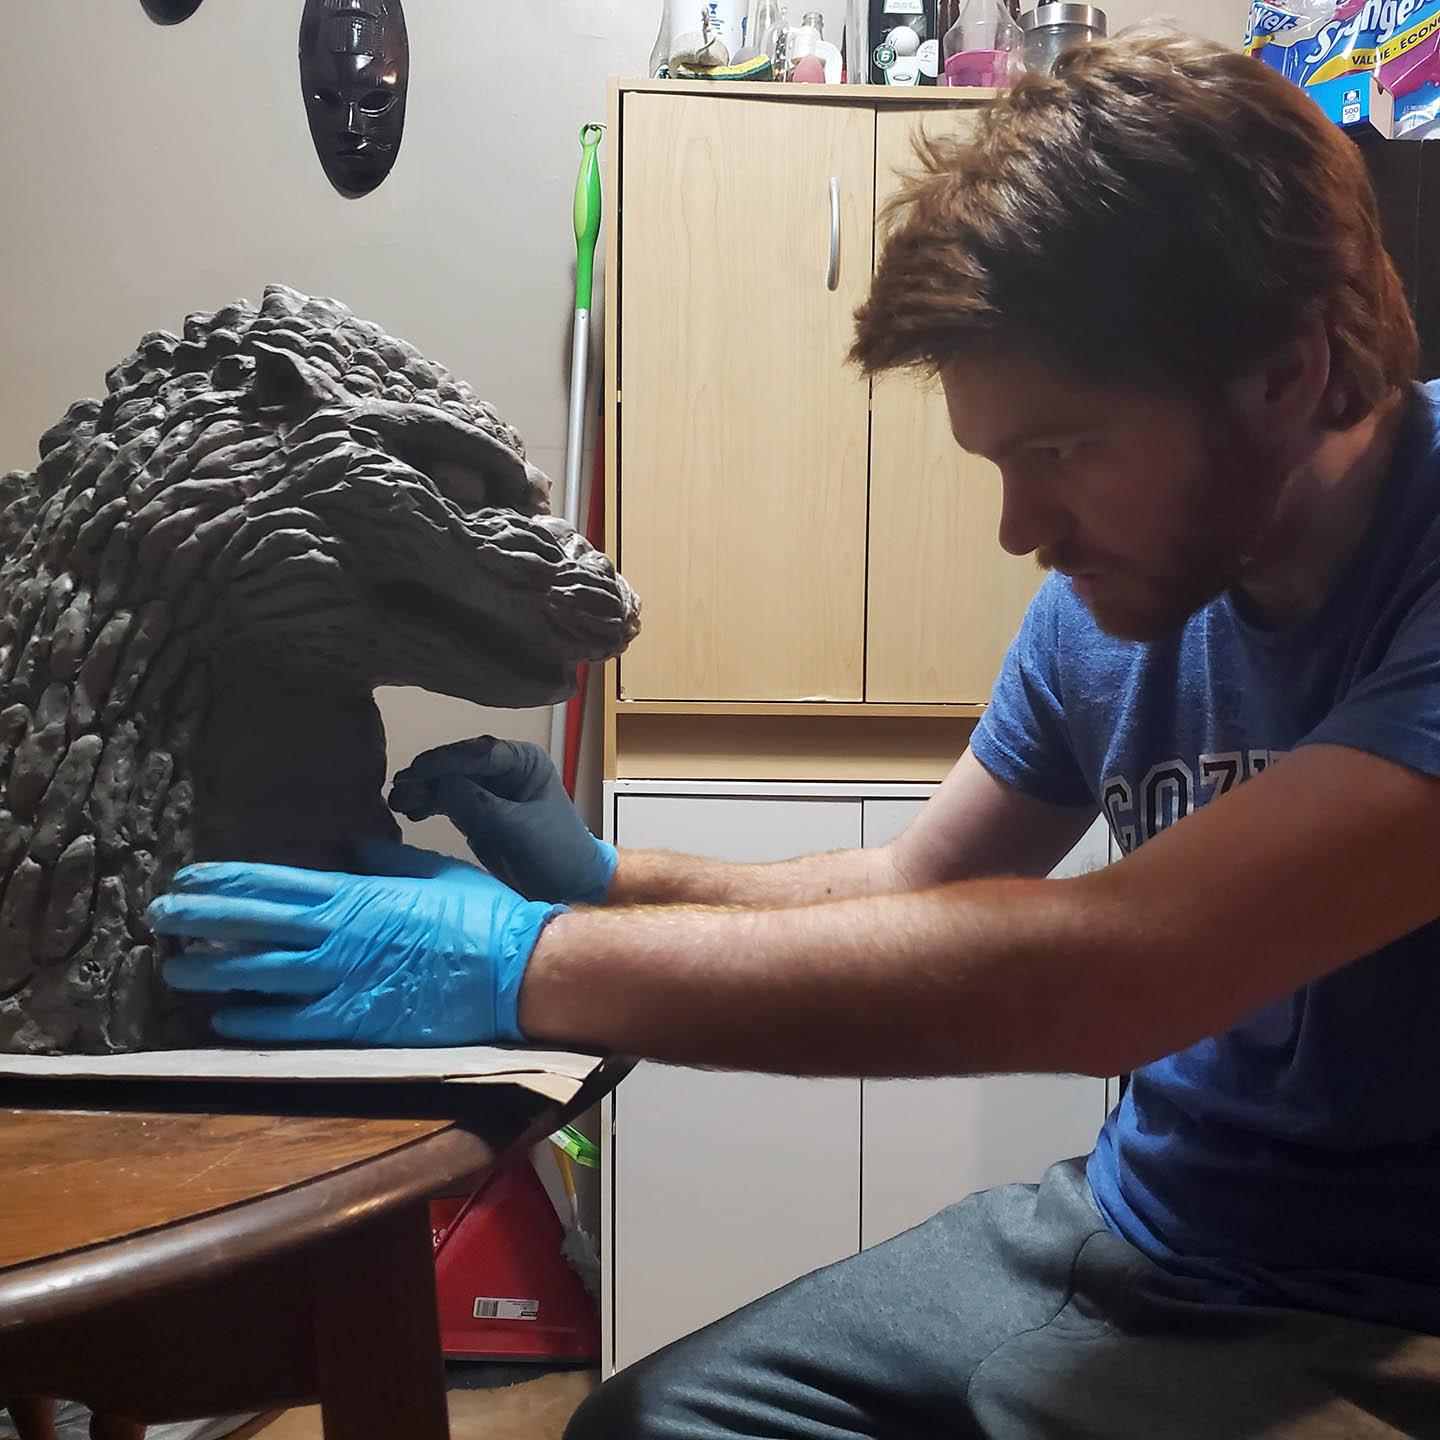
The head started with 2 rough templates of the silhouette drawn on bristol board; one for the front, and one for the profile. These were used as reference points throughout the sculpting process so I was always sure the finished product would fit and scale properly with the suit. From here, I built a rough mockup of Godzilla’s head out of tin foil, wrapped around a large pop bottle filled with water. This gave my sculpture a crude anchor and structural support. Godzilla was sculpted in WED clay on top of this base over the course of 2 months. Ping pong balls were inserted into the clay as placeholders for eyes.
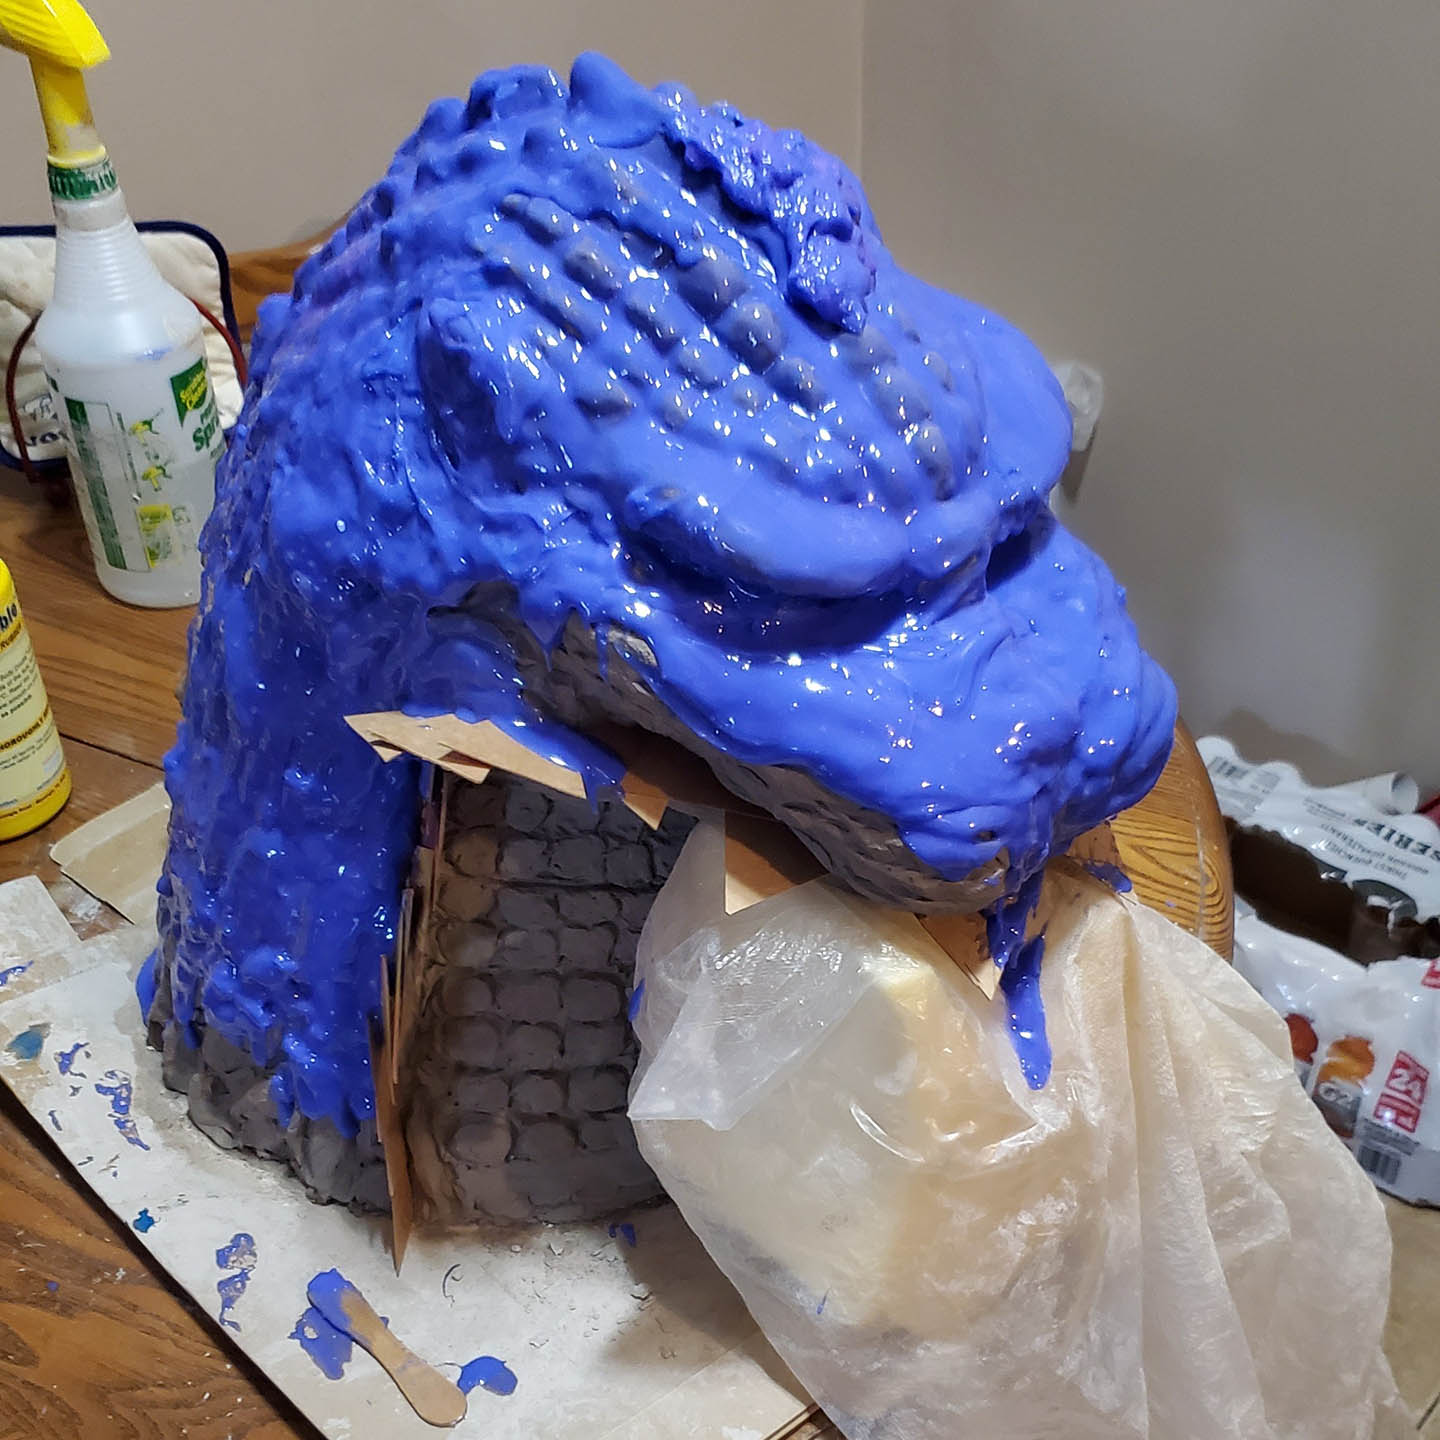
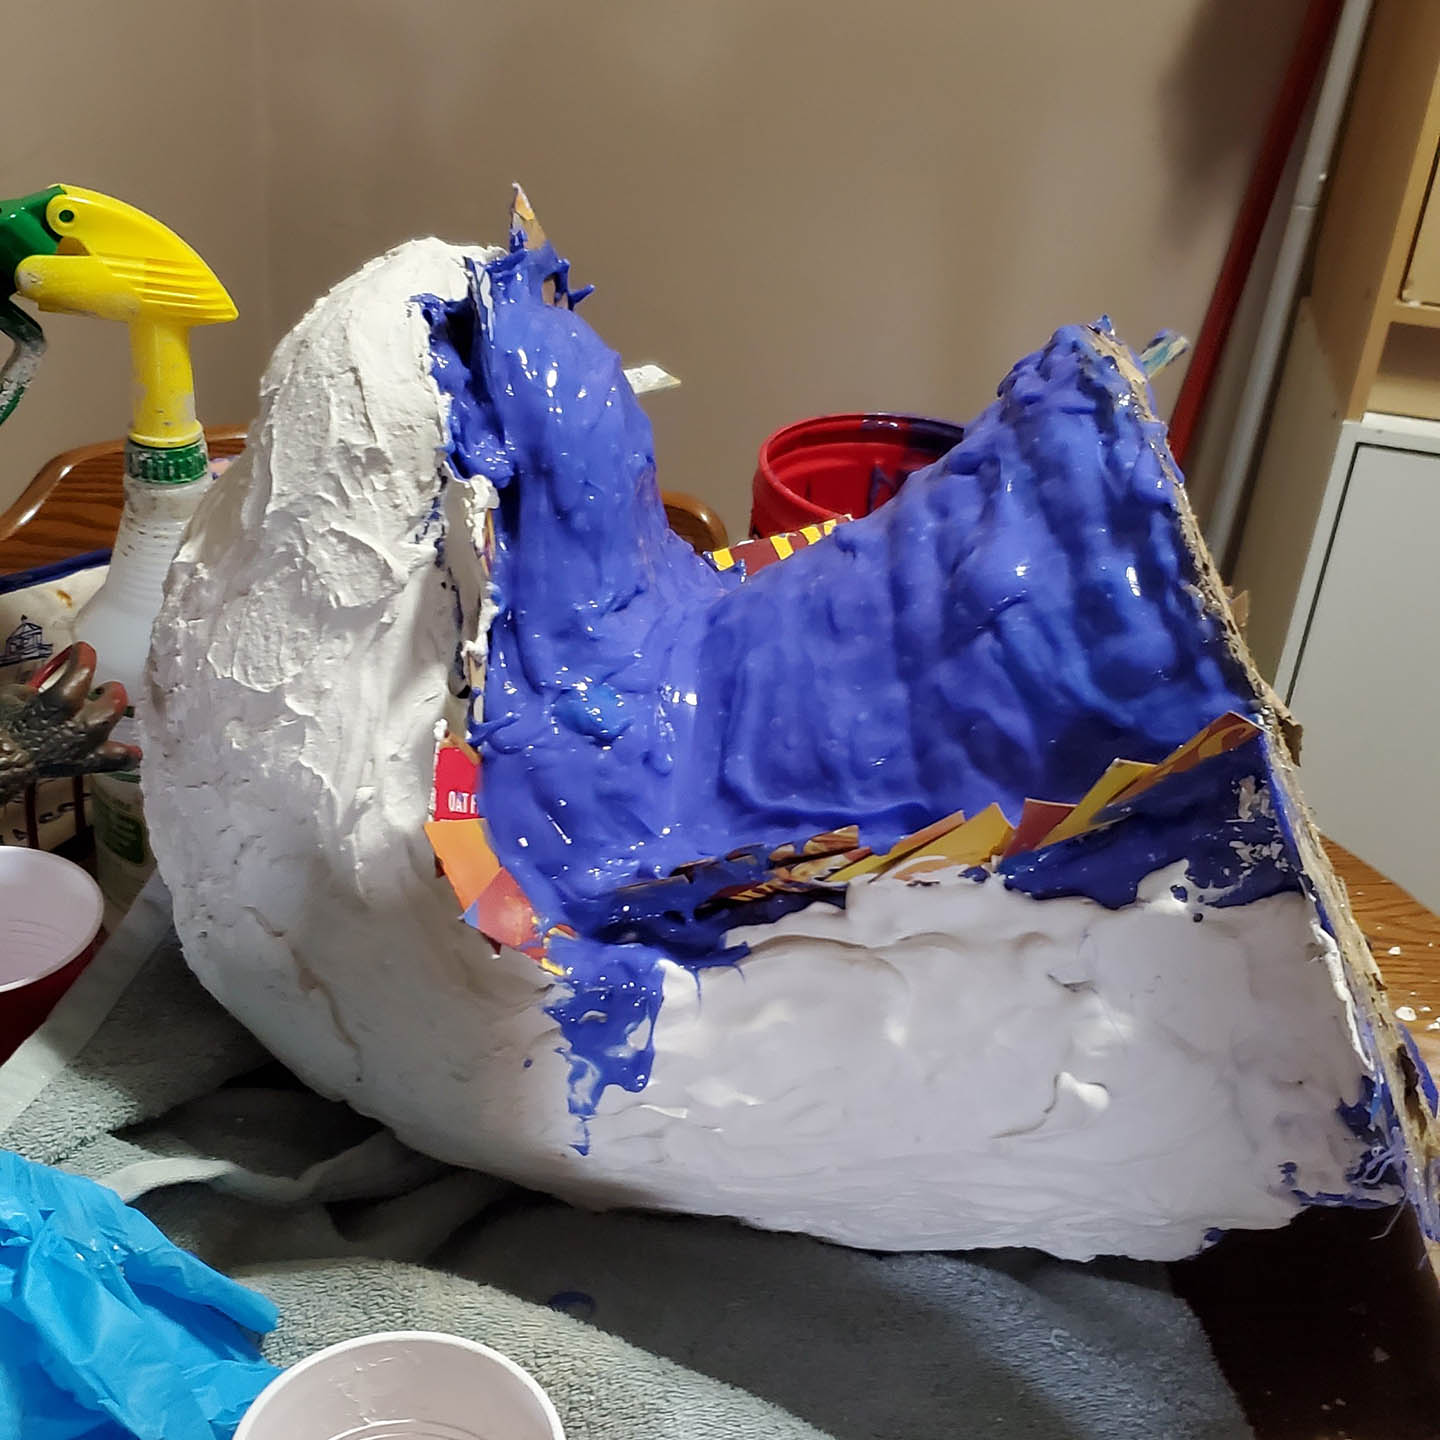
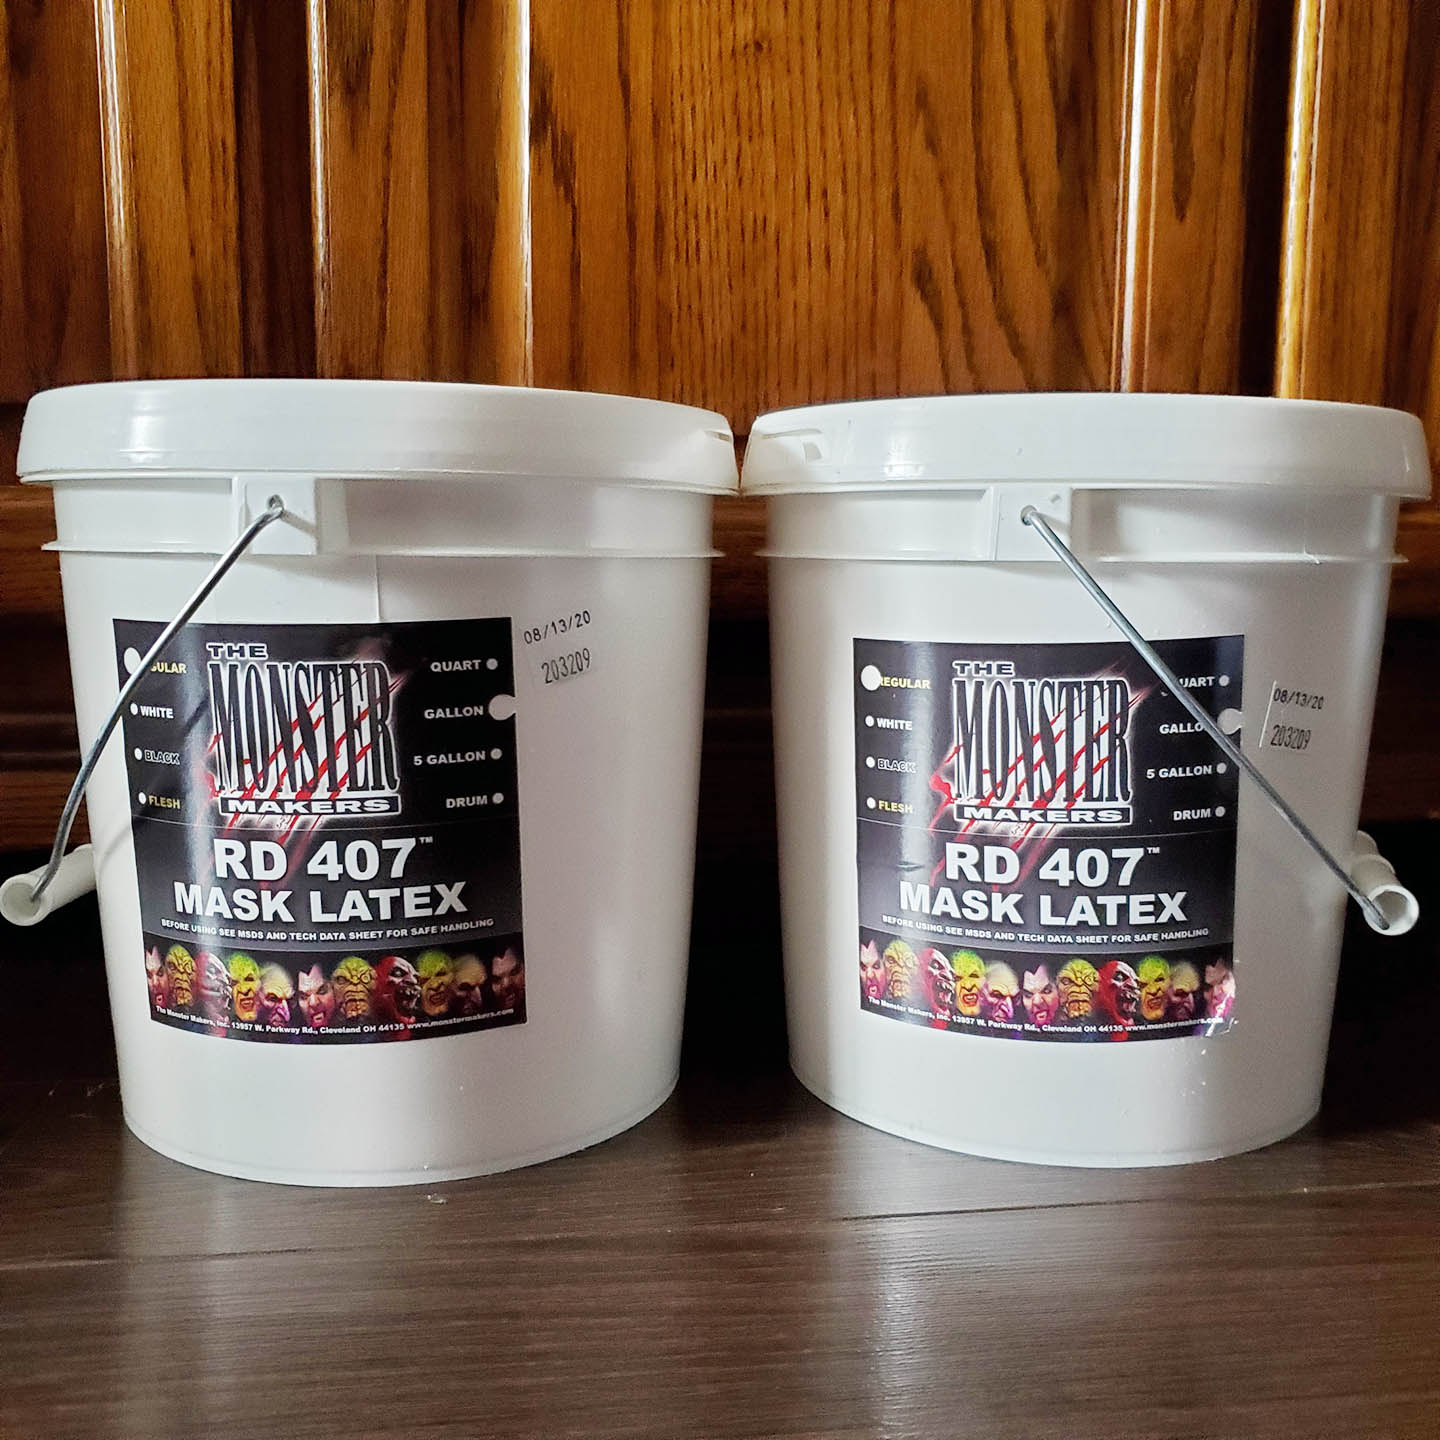
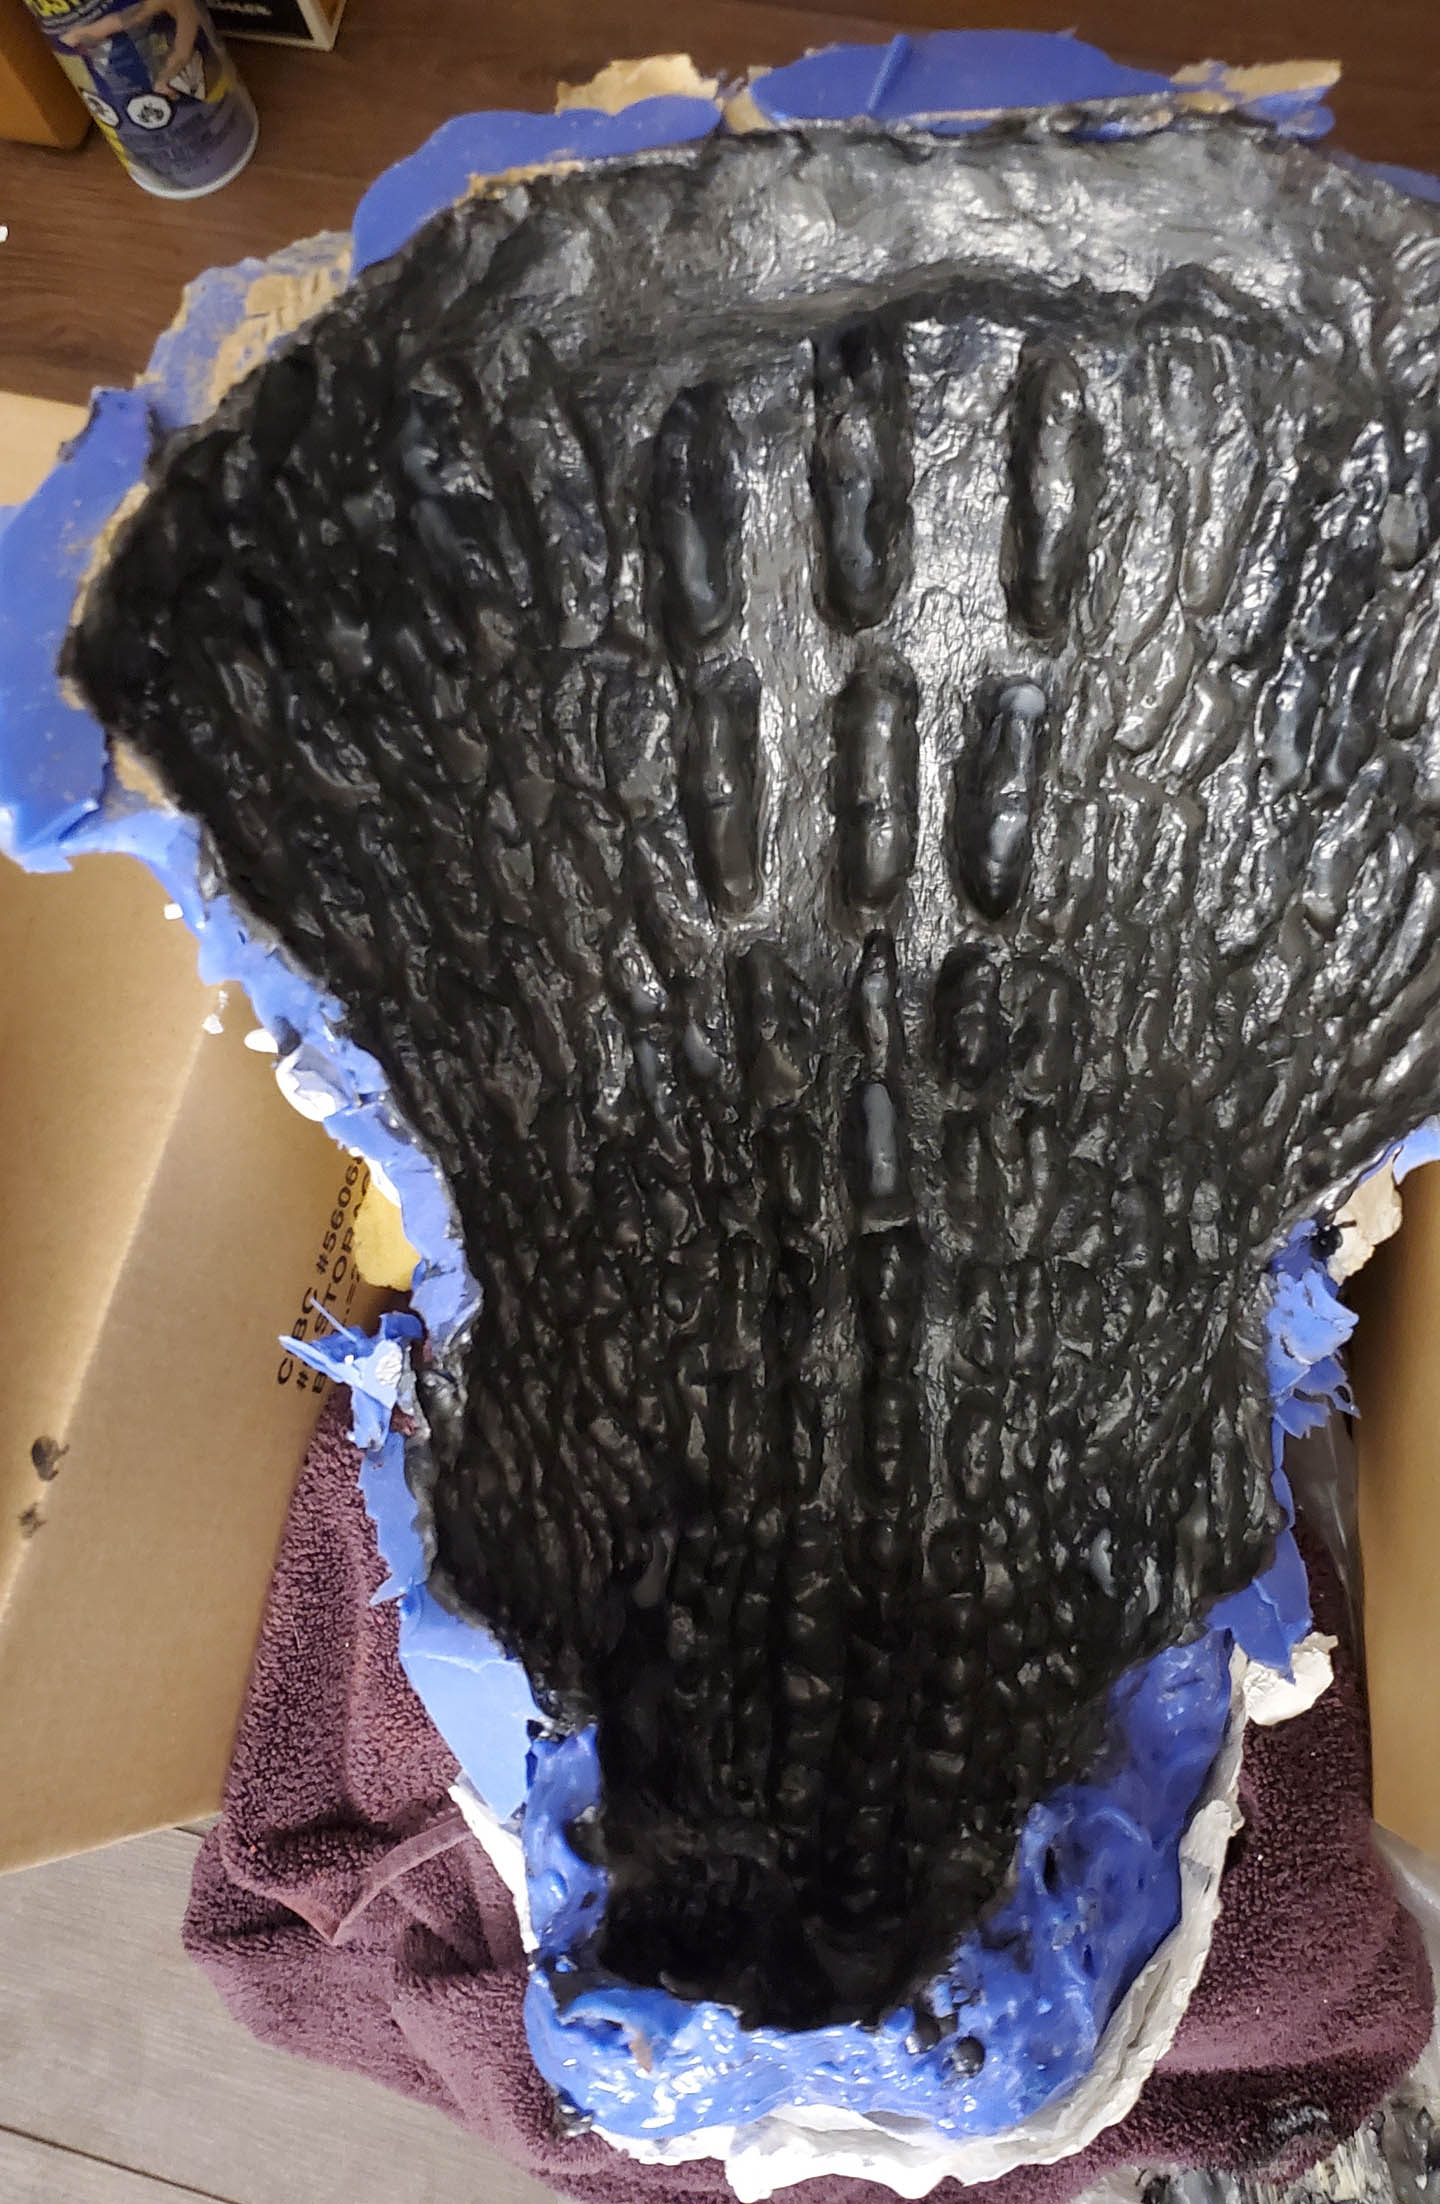
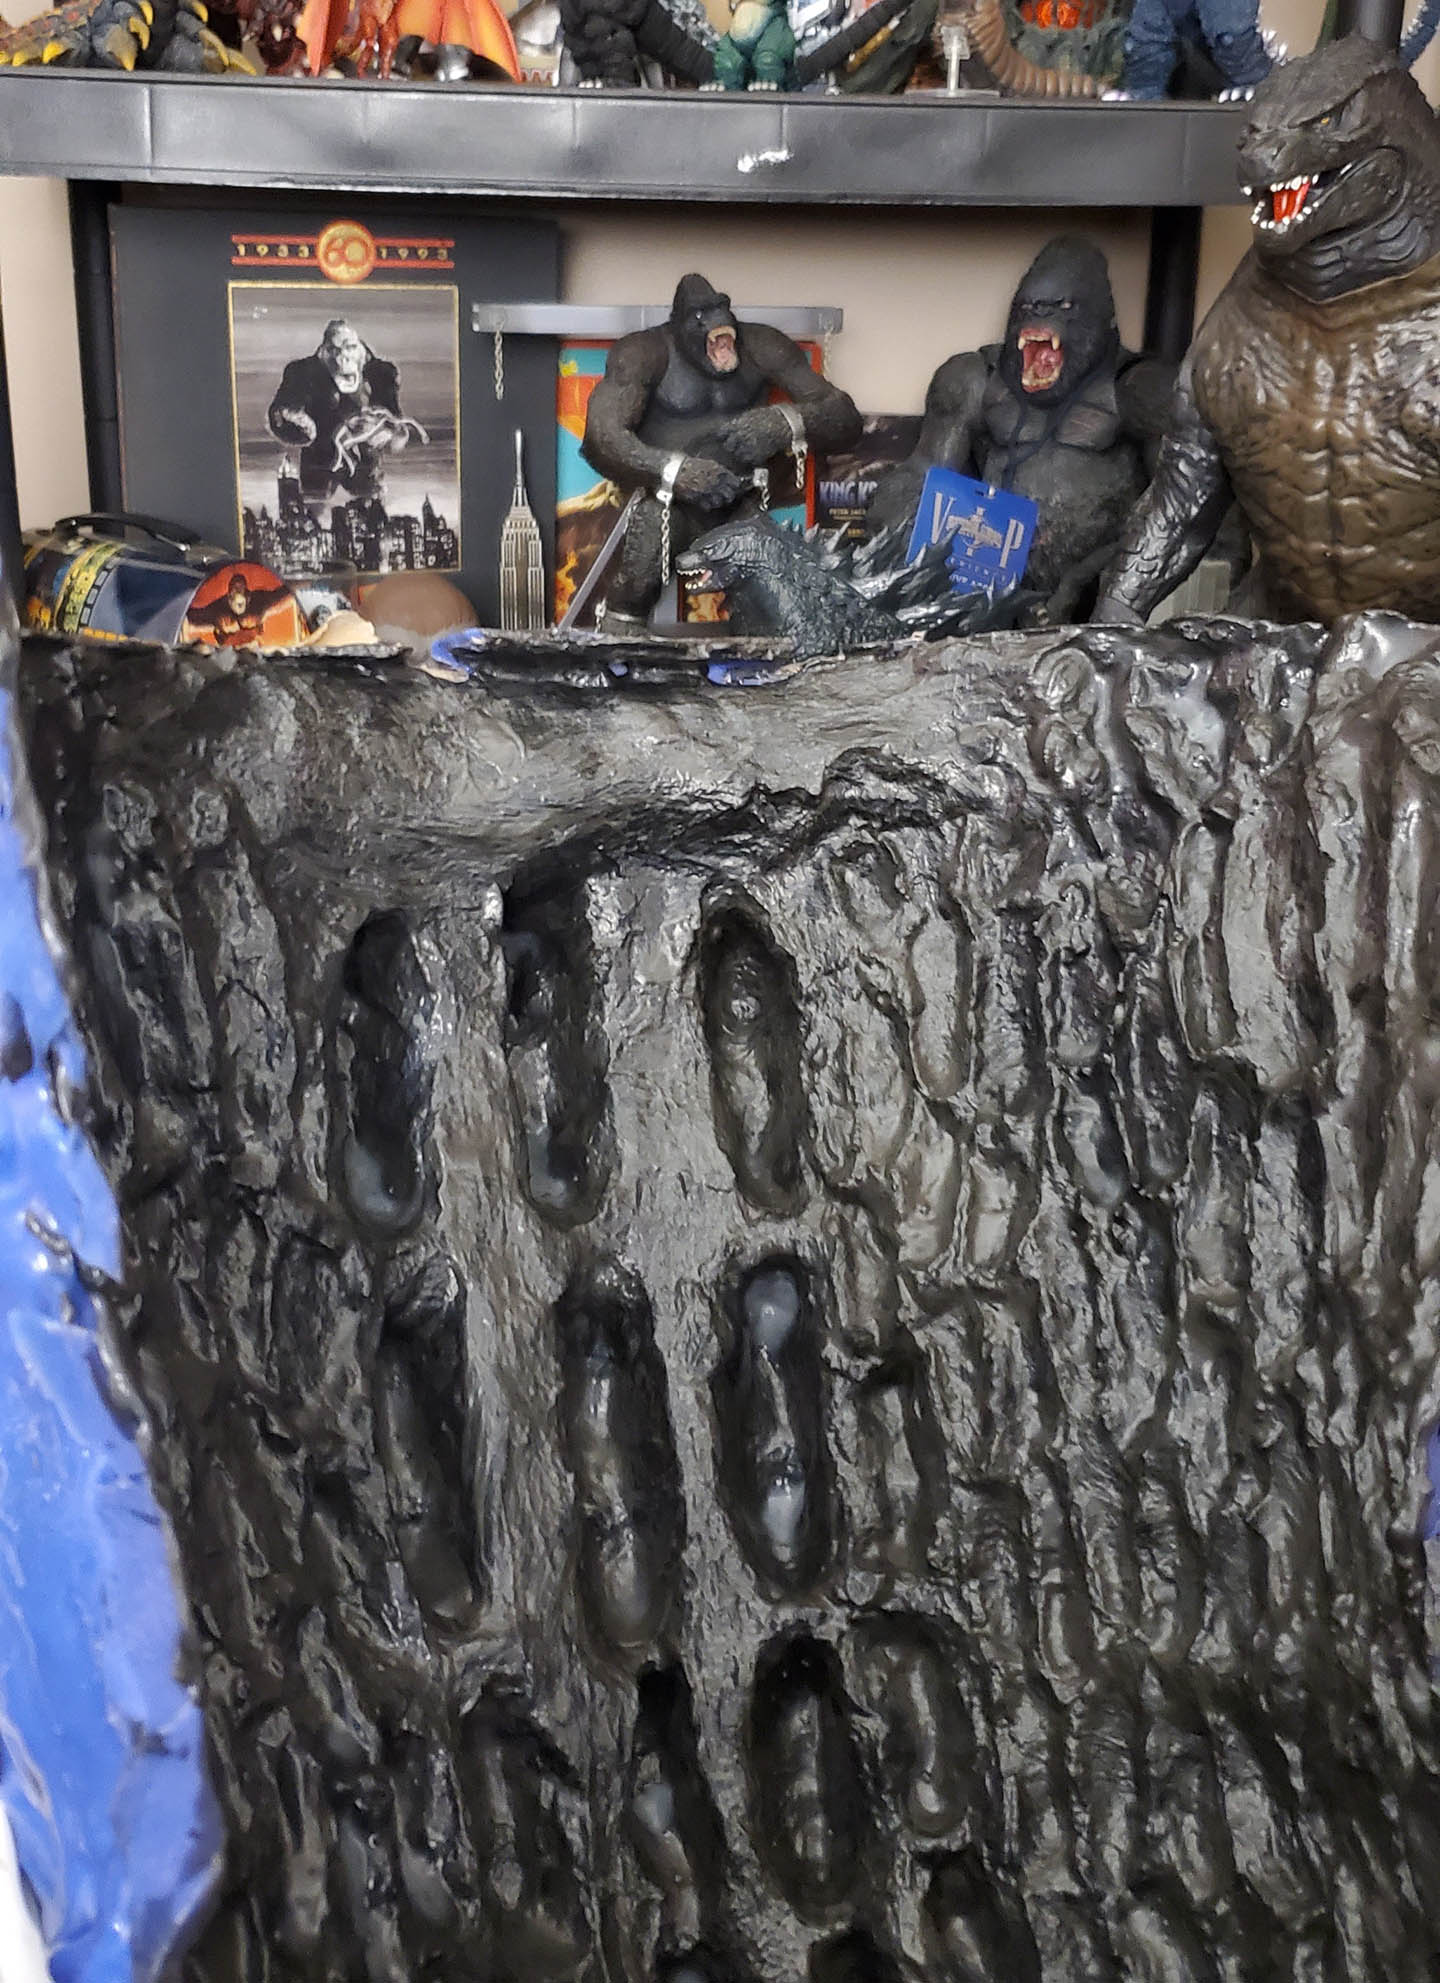
Turning the clay sculpture into a rubber mask was another battle altogether. The sculpture was divided into 2 parts, upper and lower jaw, using pieces of cardboard I embedded in the clay. Each side was covered in Smooth-On silicone, and once that was dry, a shell of plaster was applied over top. This plaster shell, the mother mold, allowed the rubbery silicone mold to hold its shape once it was removed from the sculpture. Into the silicone mold I painted several layers of Monster Makers liquid latex, occasionally adding thin sheets of foam and cotton batting to reinforce areas like the face and back of the neck. The resulting mask was eventually pulled from the mold.
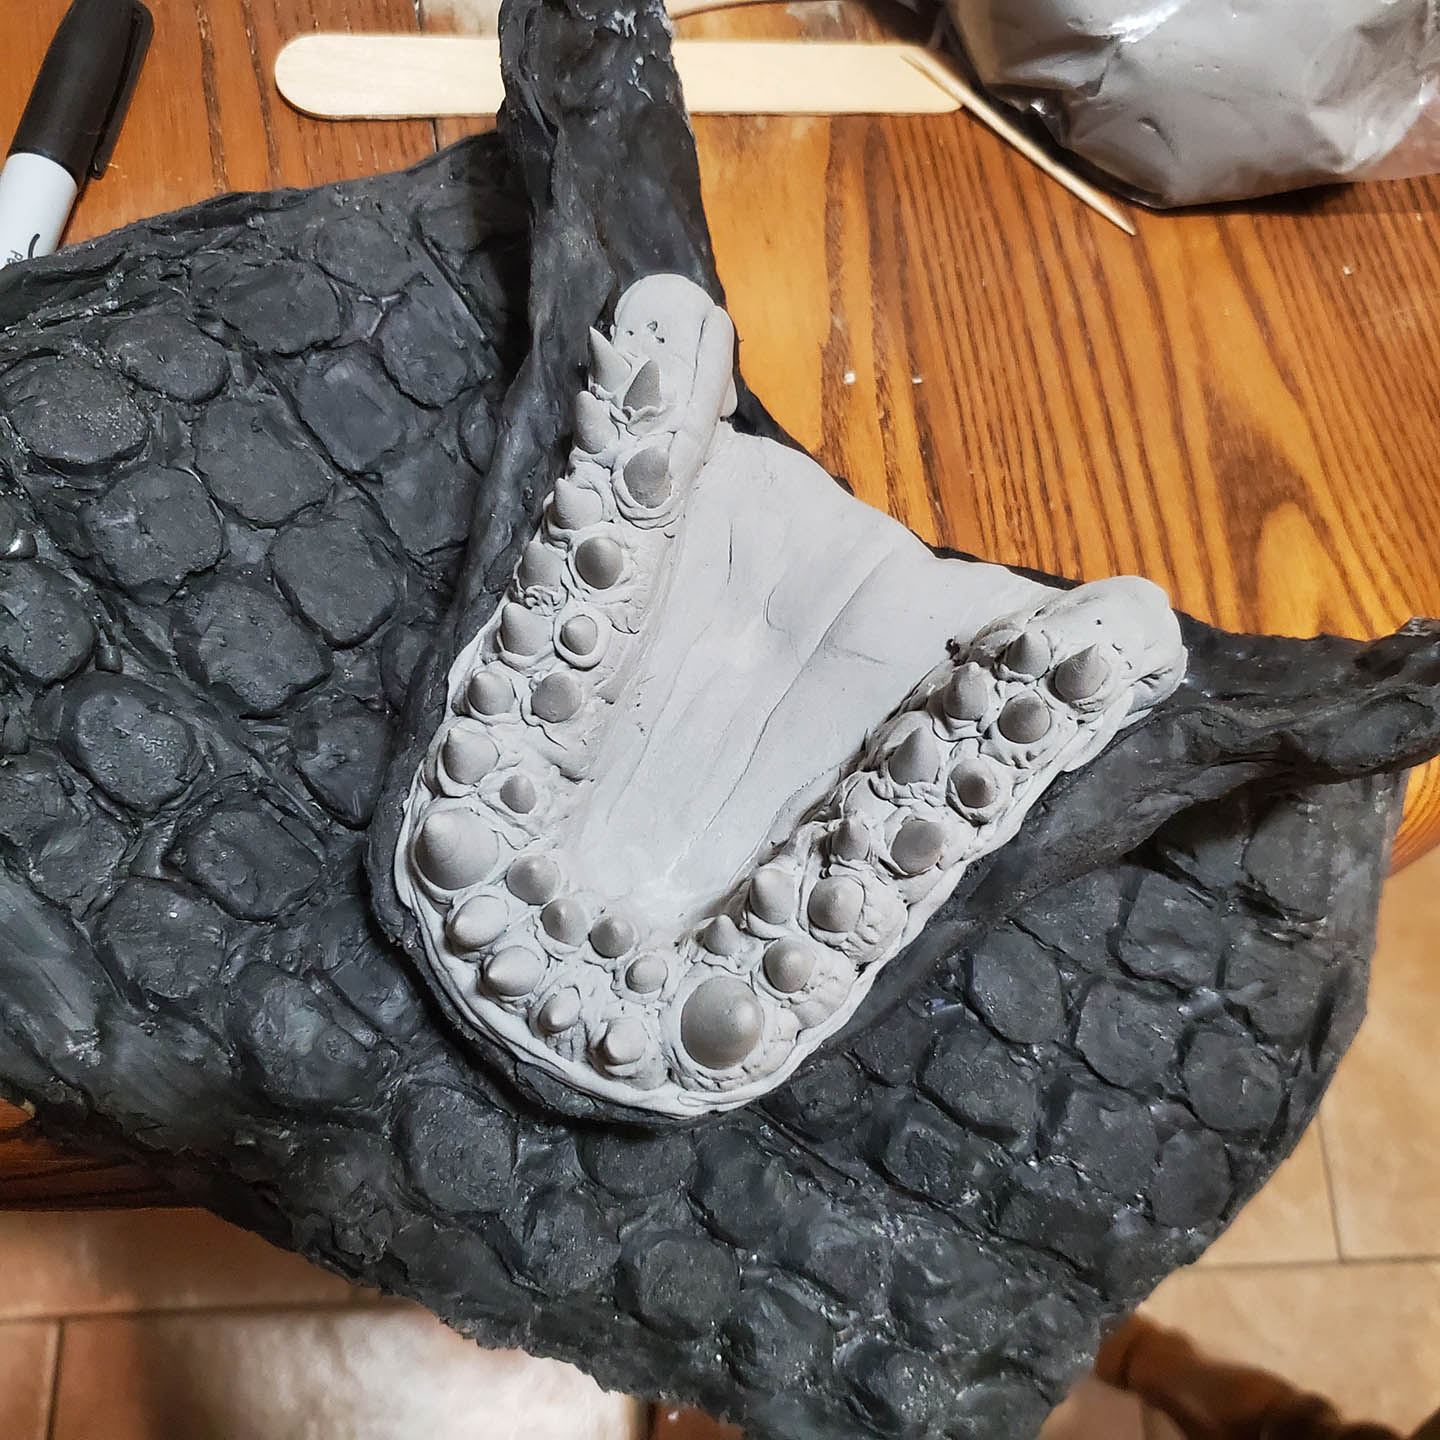
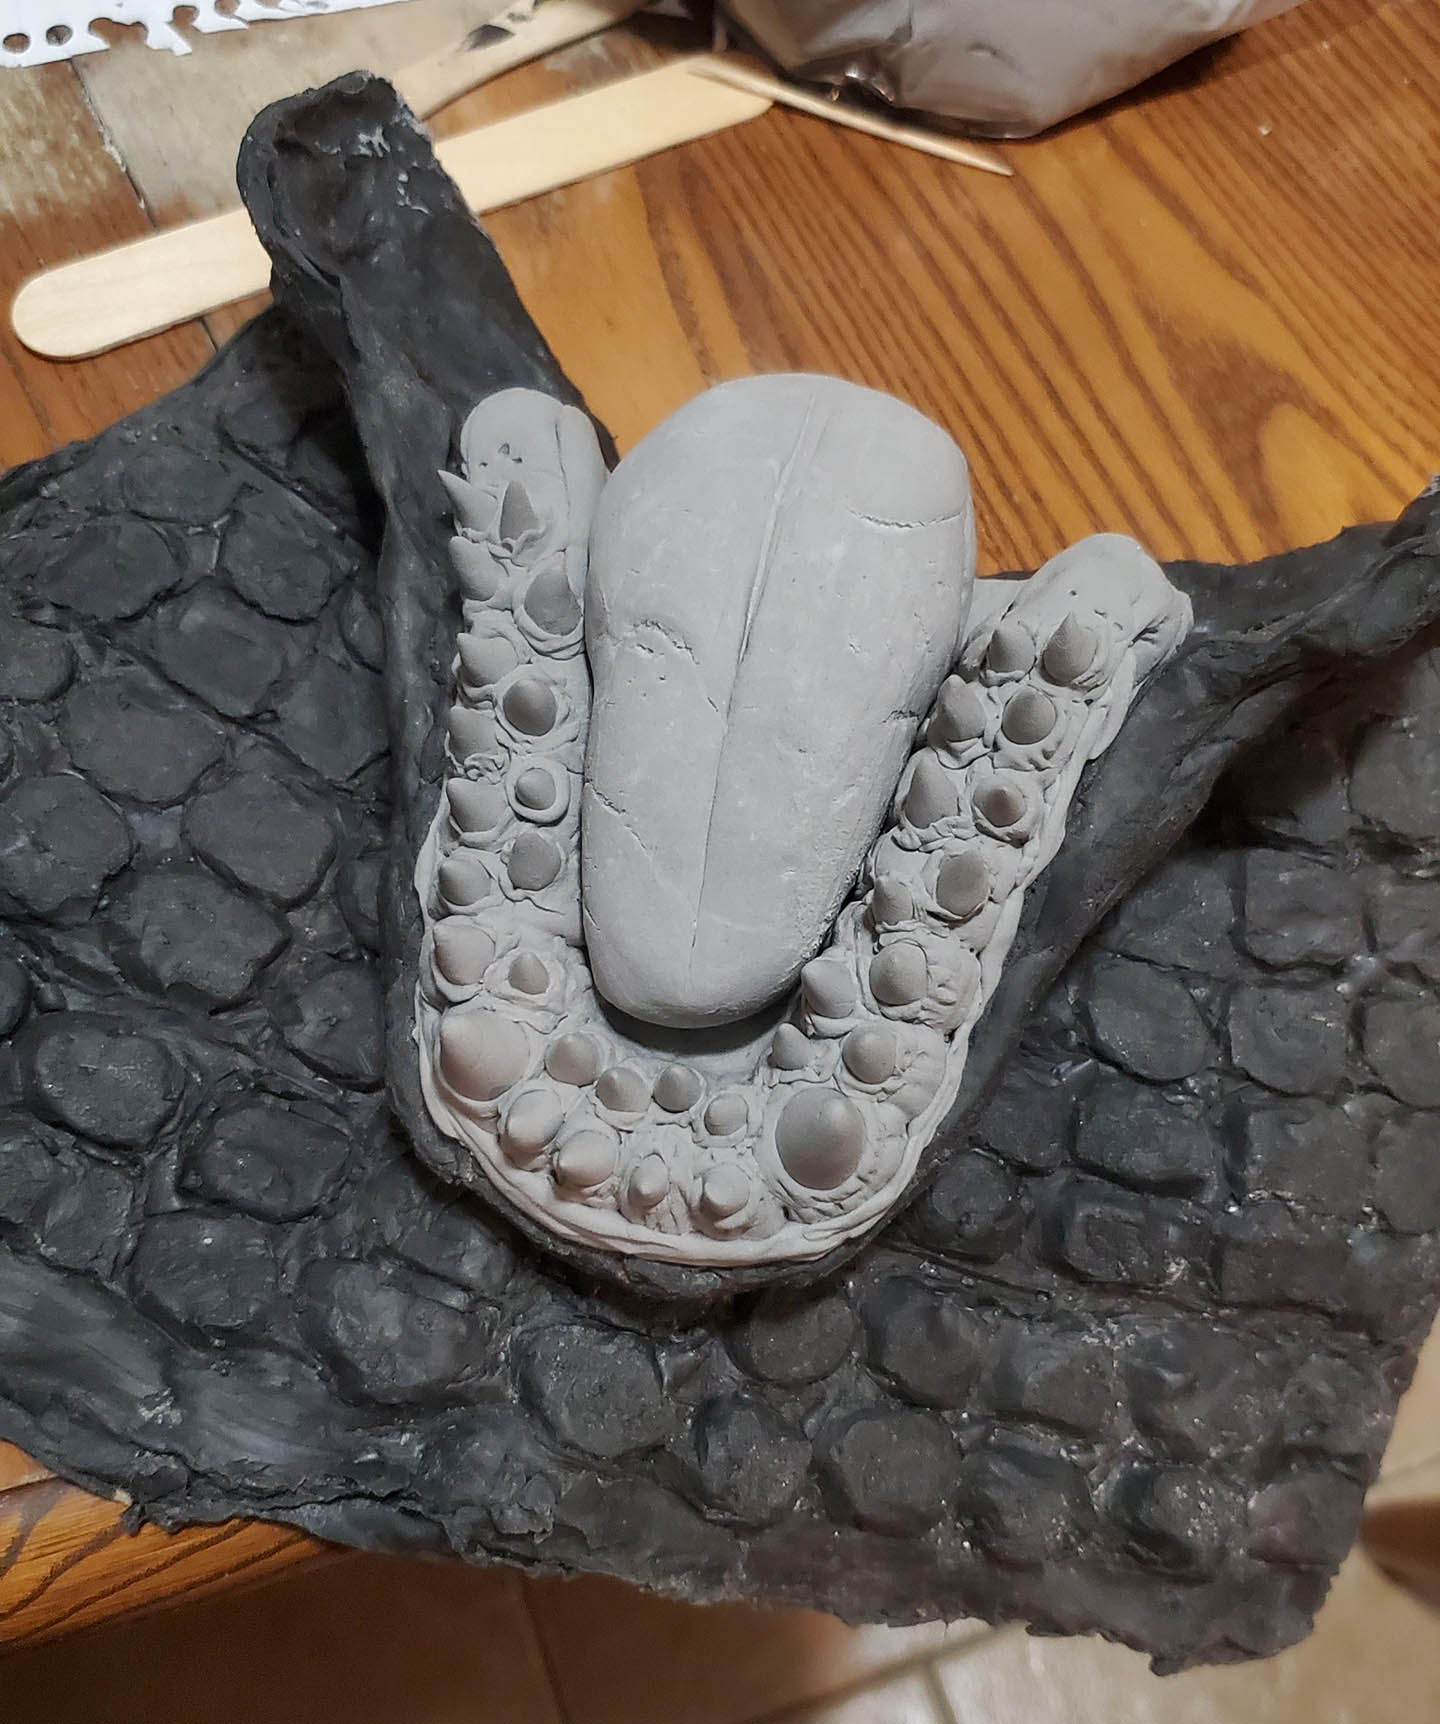
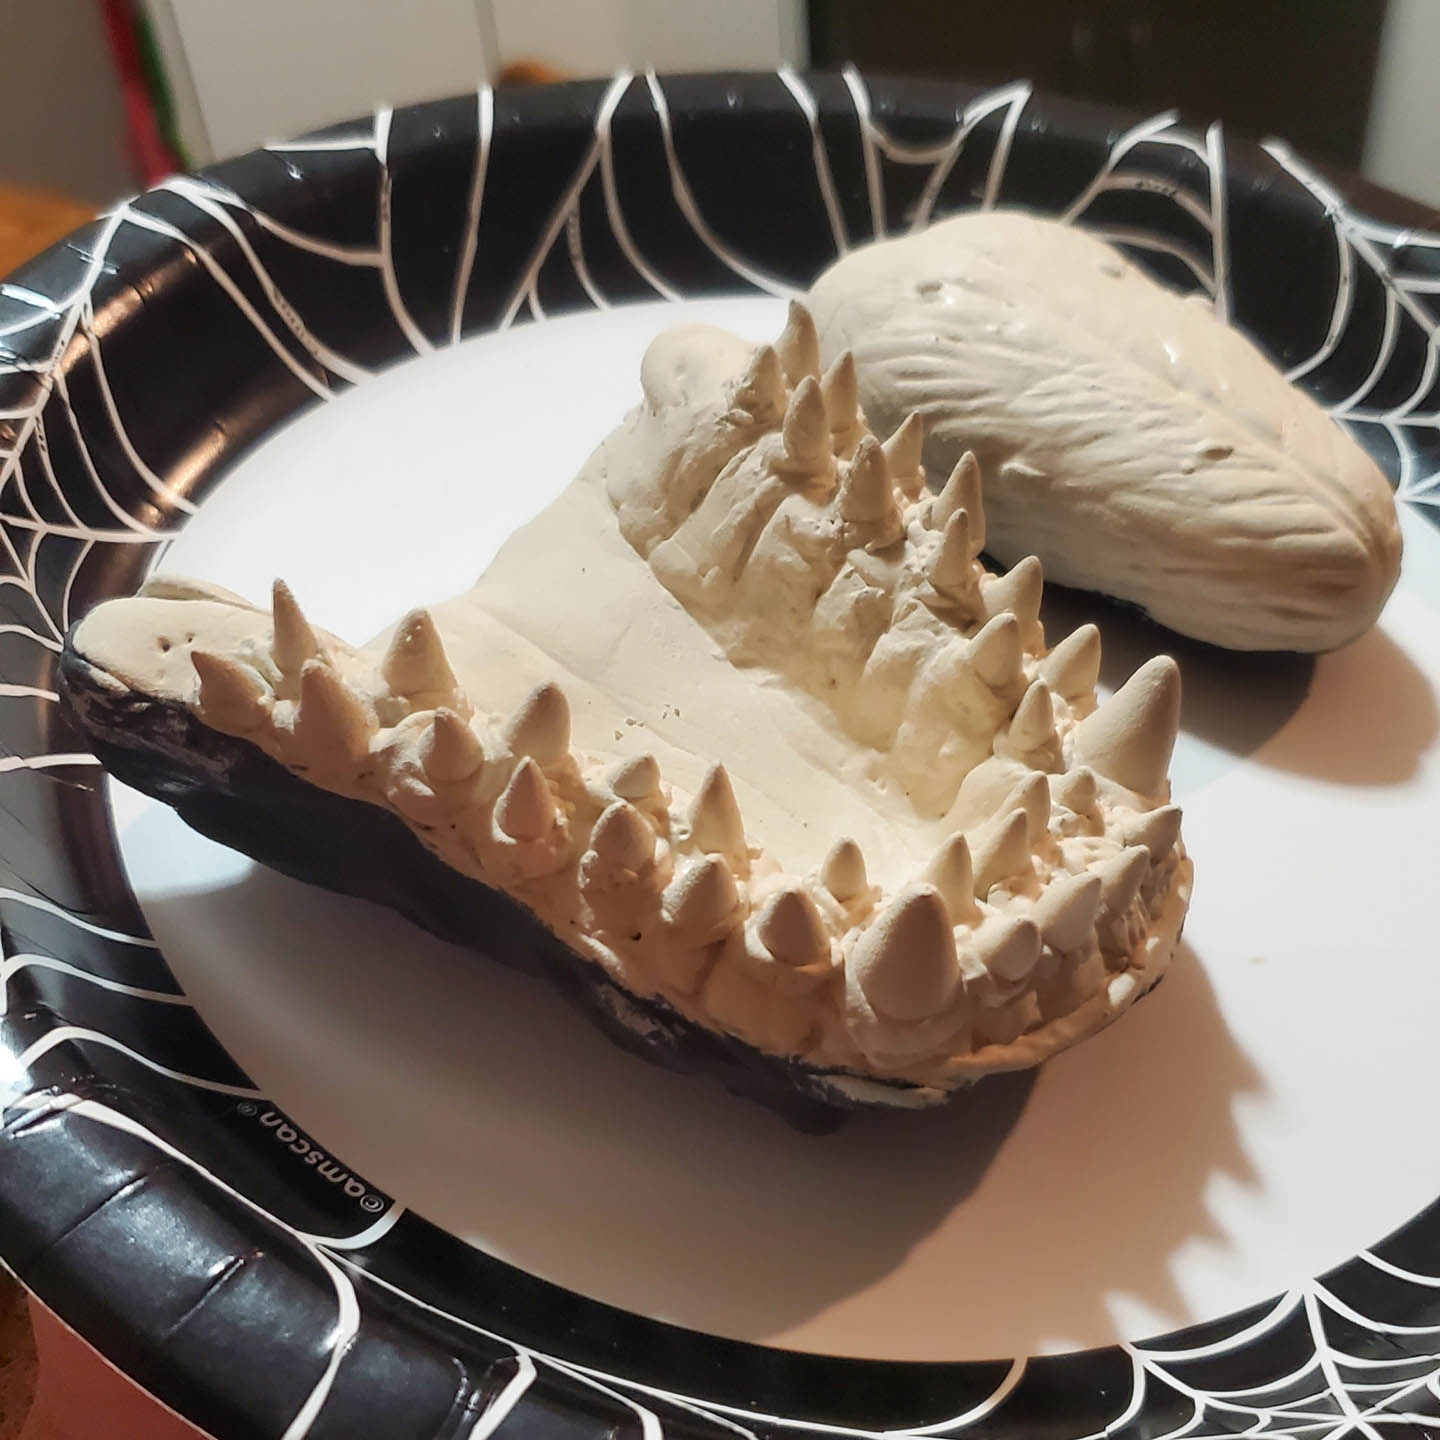
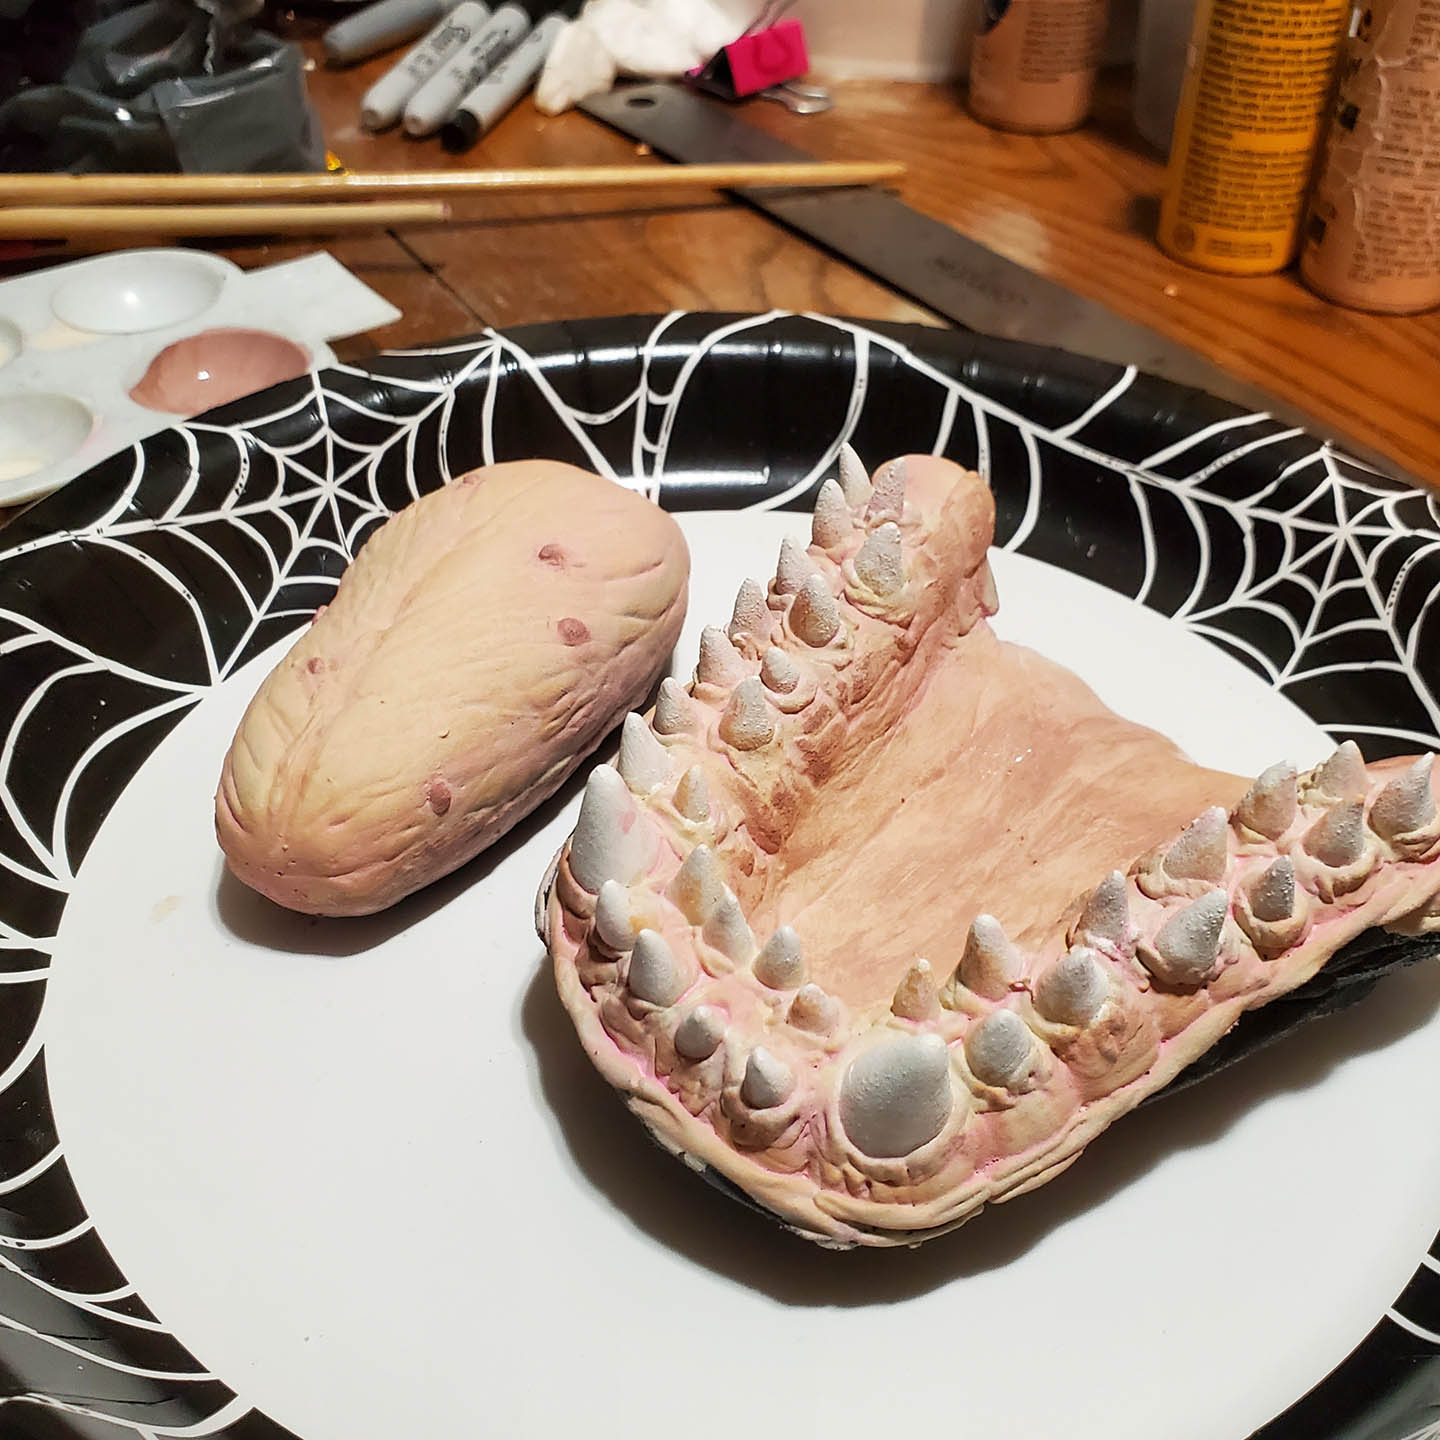
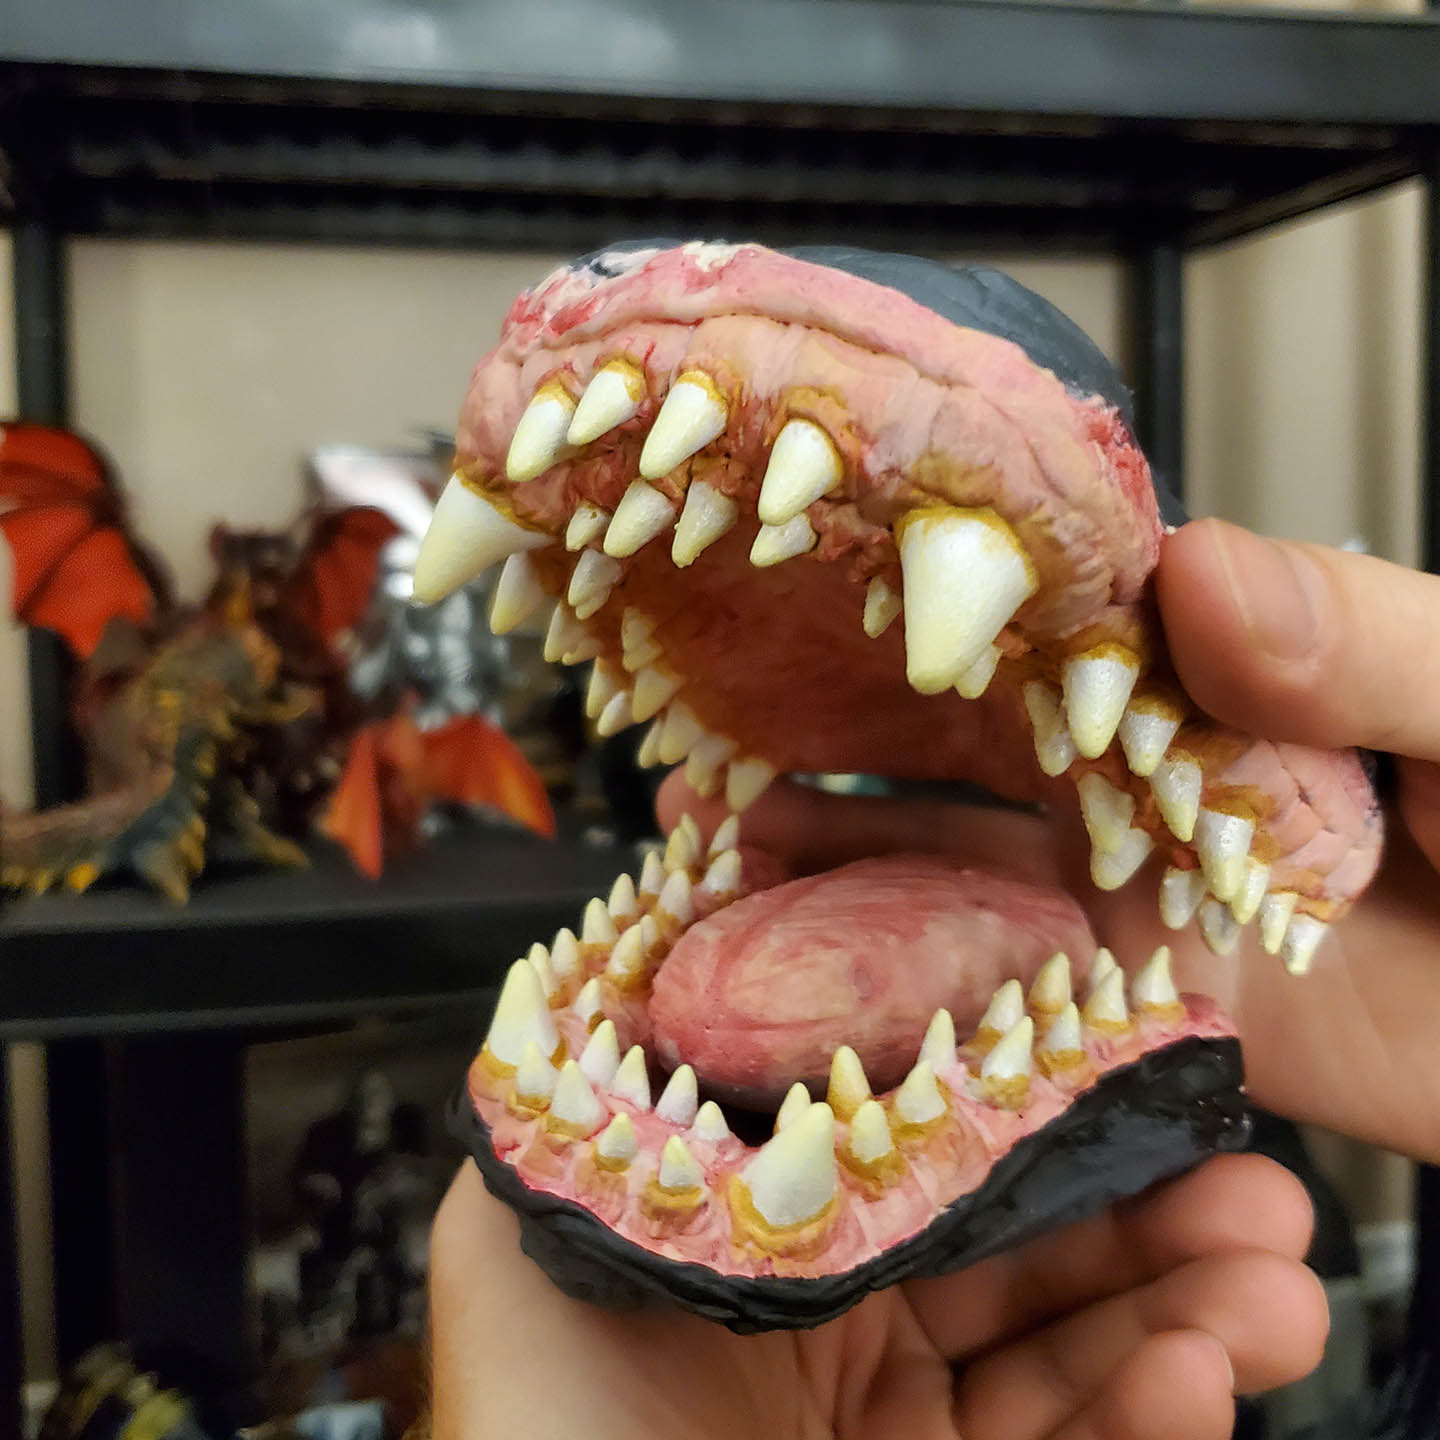
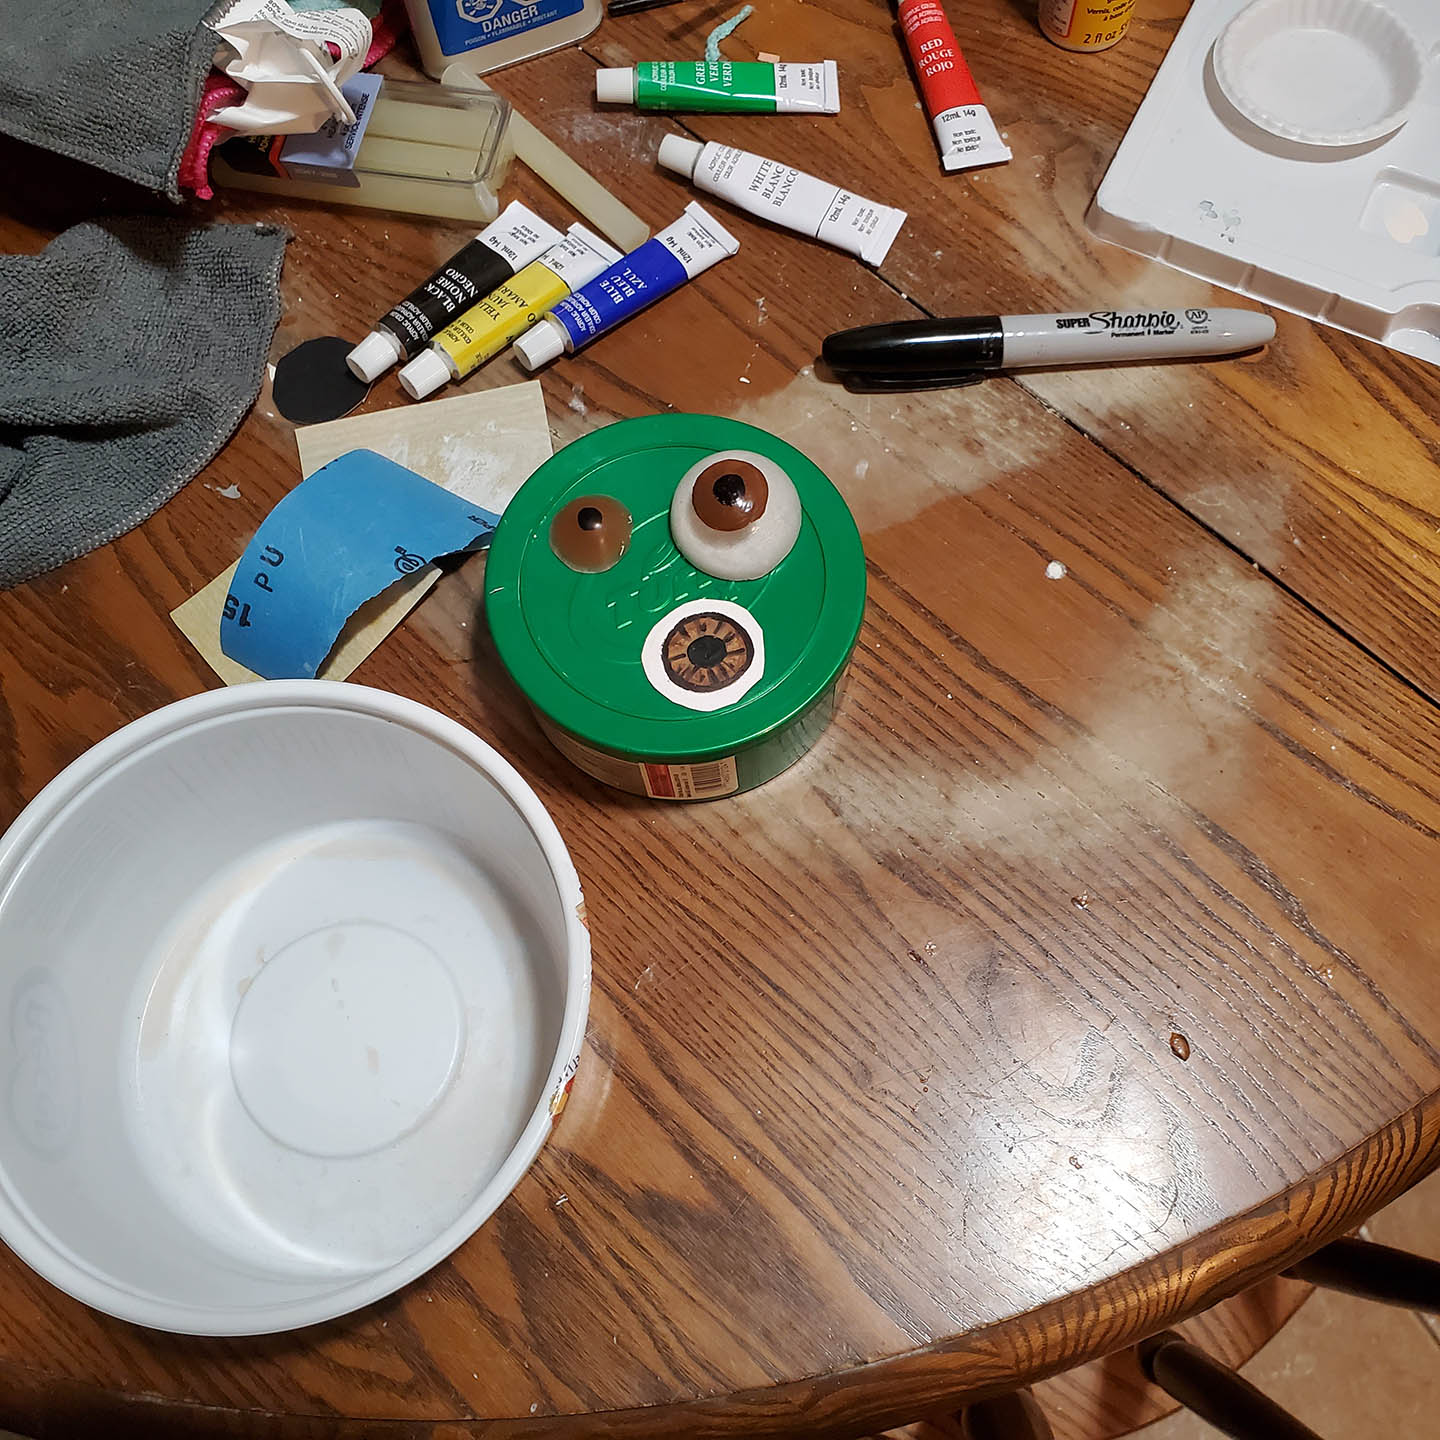
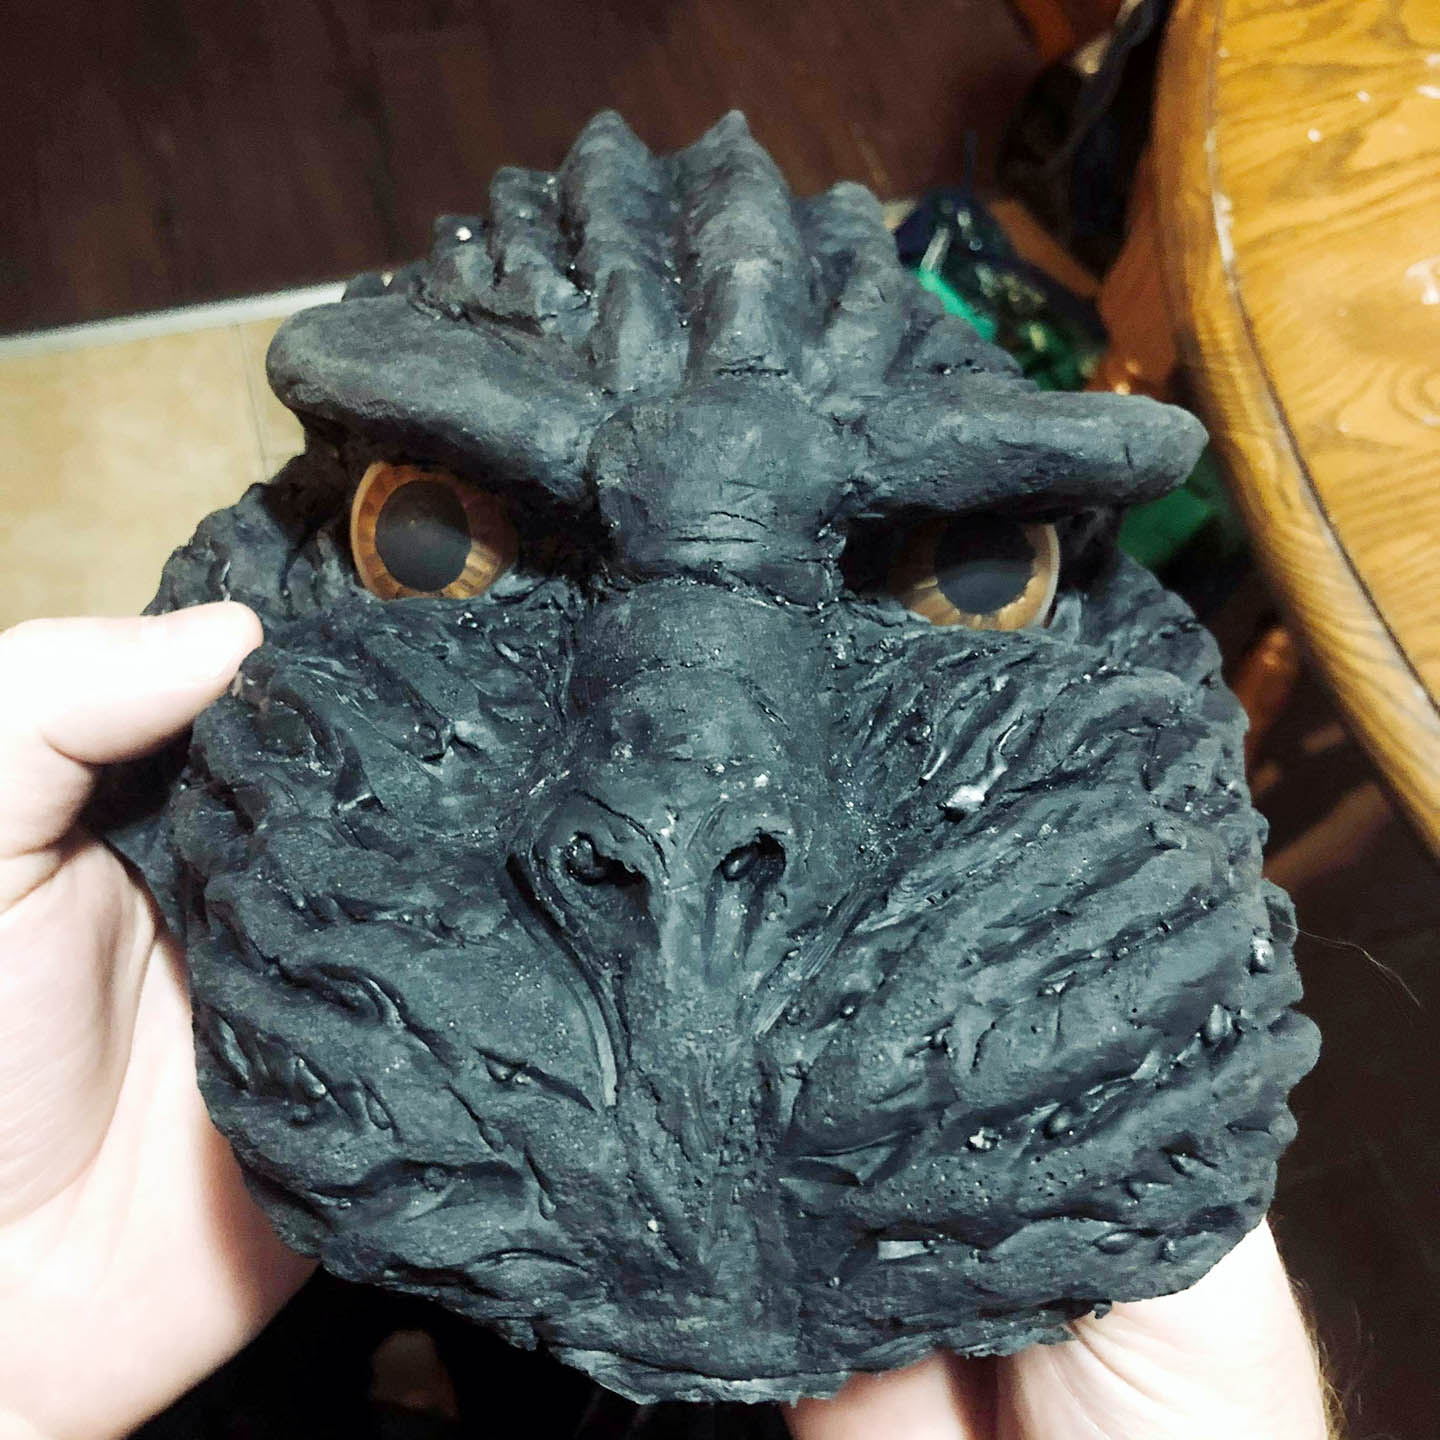
Teeth and Eyes
Godzilla’s teeth, gums and tongue were sculpted out of a material called foam clay and painted with basic acrylic craft paint. The eyes were half hemispheres of resin that I cast using the same ping pong balls that were used in the original sculpture. These were also painted with acrylics and given a shiny finish with mod podge. The gum palettes and eyes were glued into the head using hot glue before the upper and lower jaw pieces were latexed together. A thin sheet of black fabric was hot glued into the back of Godzilla’s throat to hide the top of my head while still providing ventilation. Between the scales on Godzilla’s neck, I added a series of small circular holes using a wood burning tool which melted straight through the latex. These are what allow me to see and breath, and were patterned as close as possible off those seen on the original Toho suits.
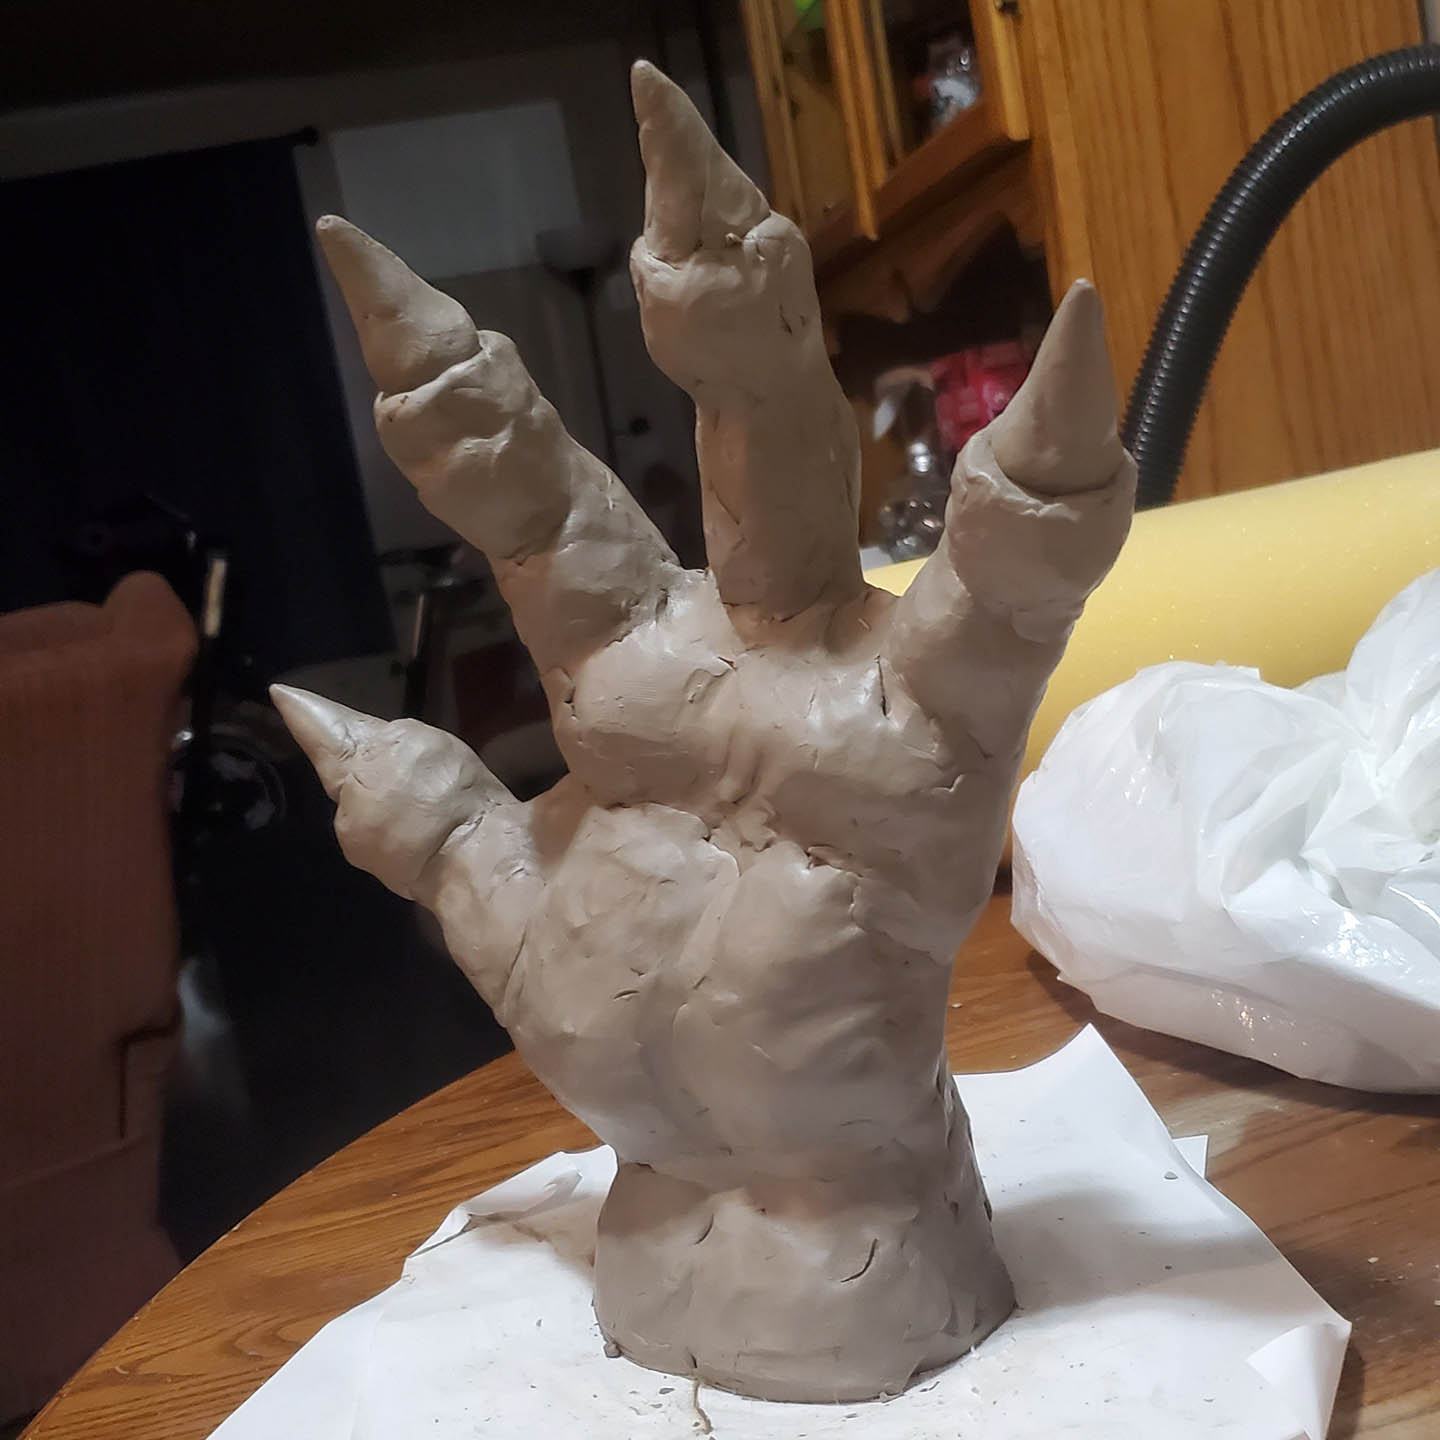
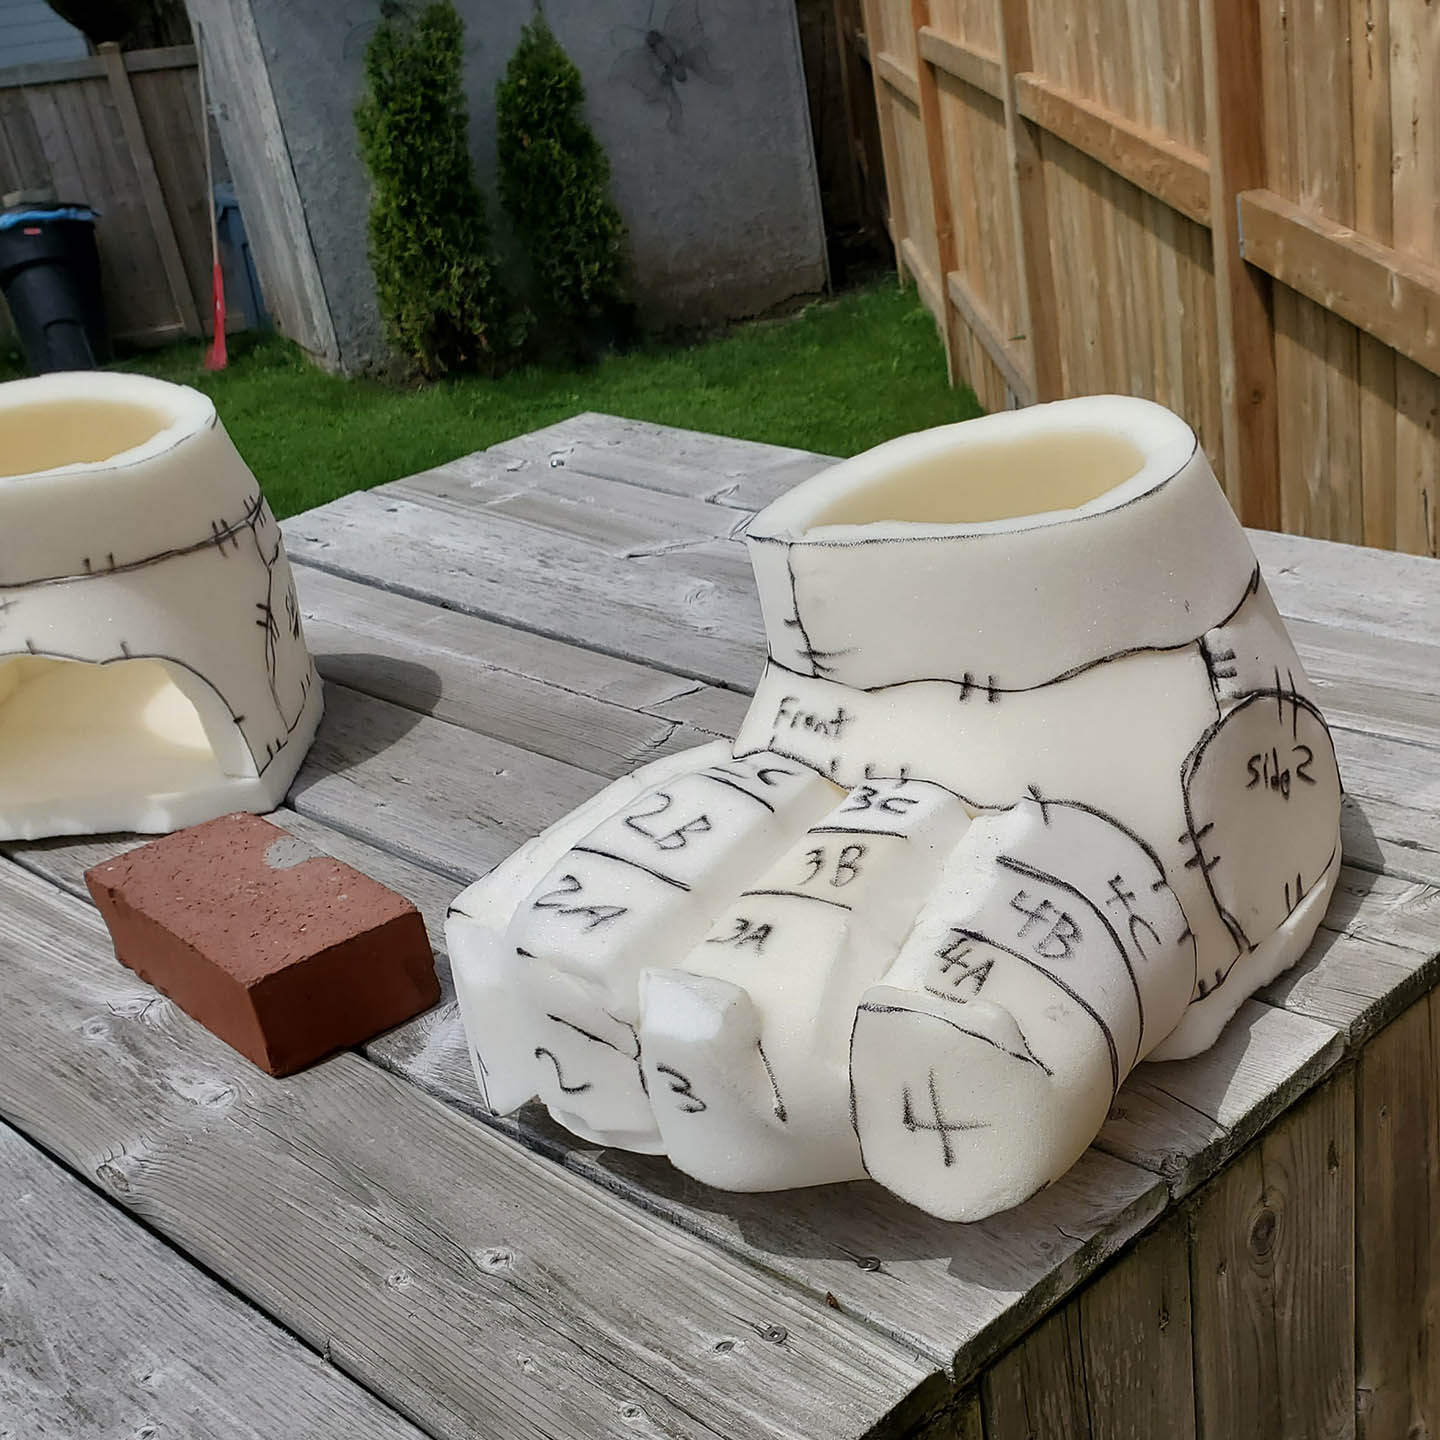
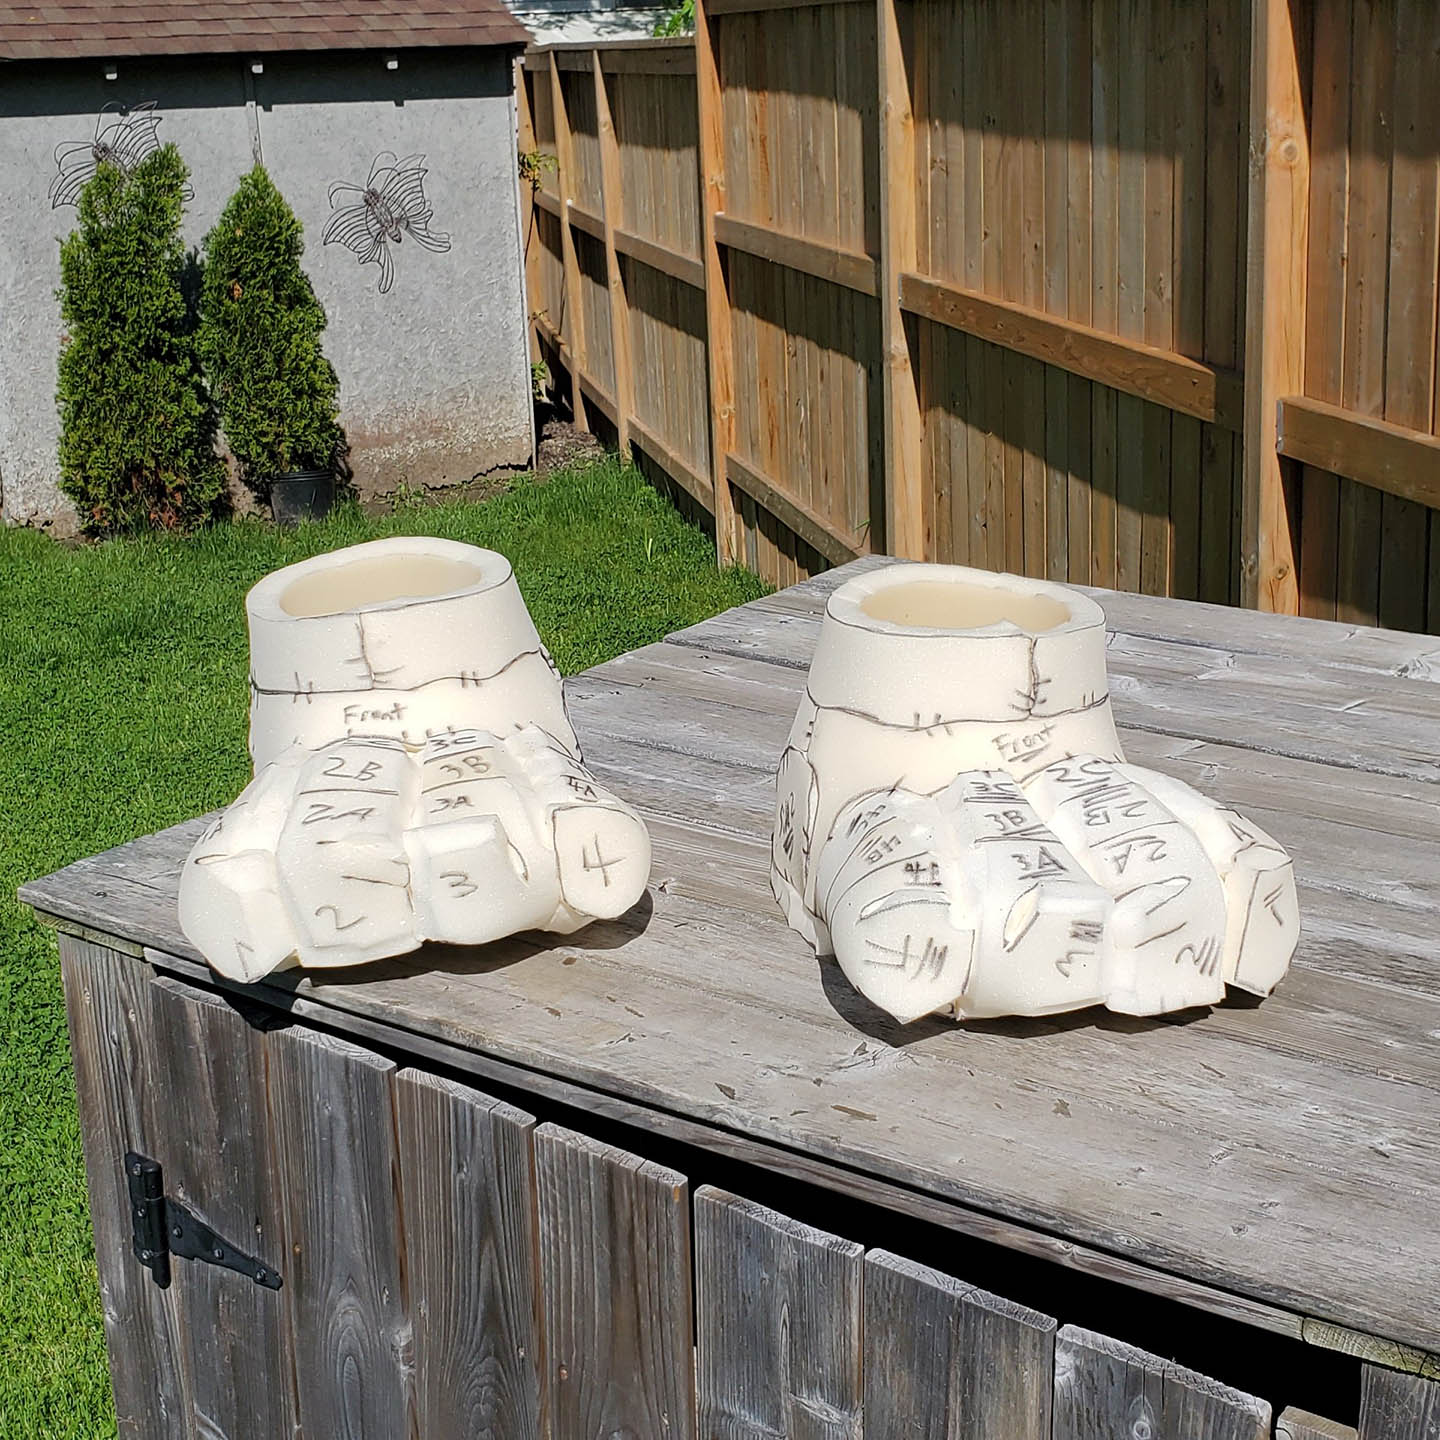
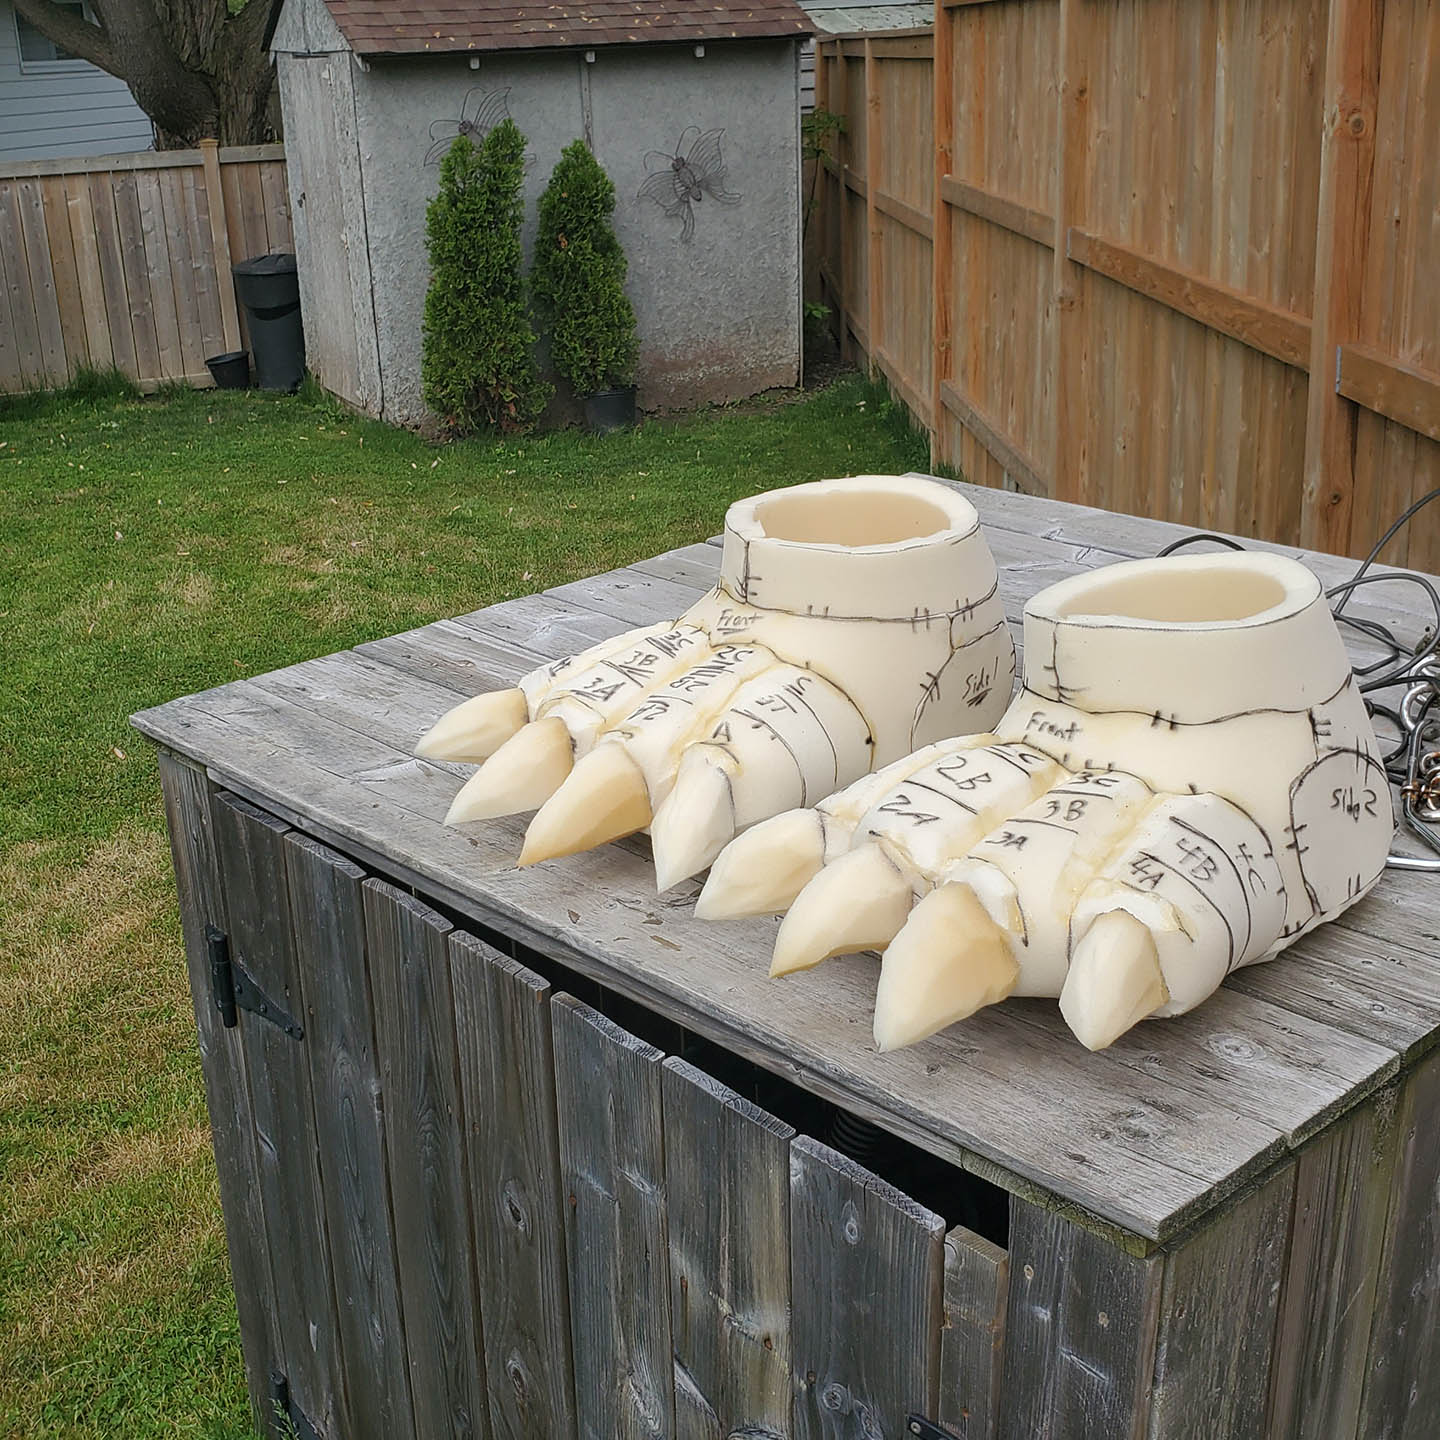
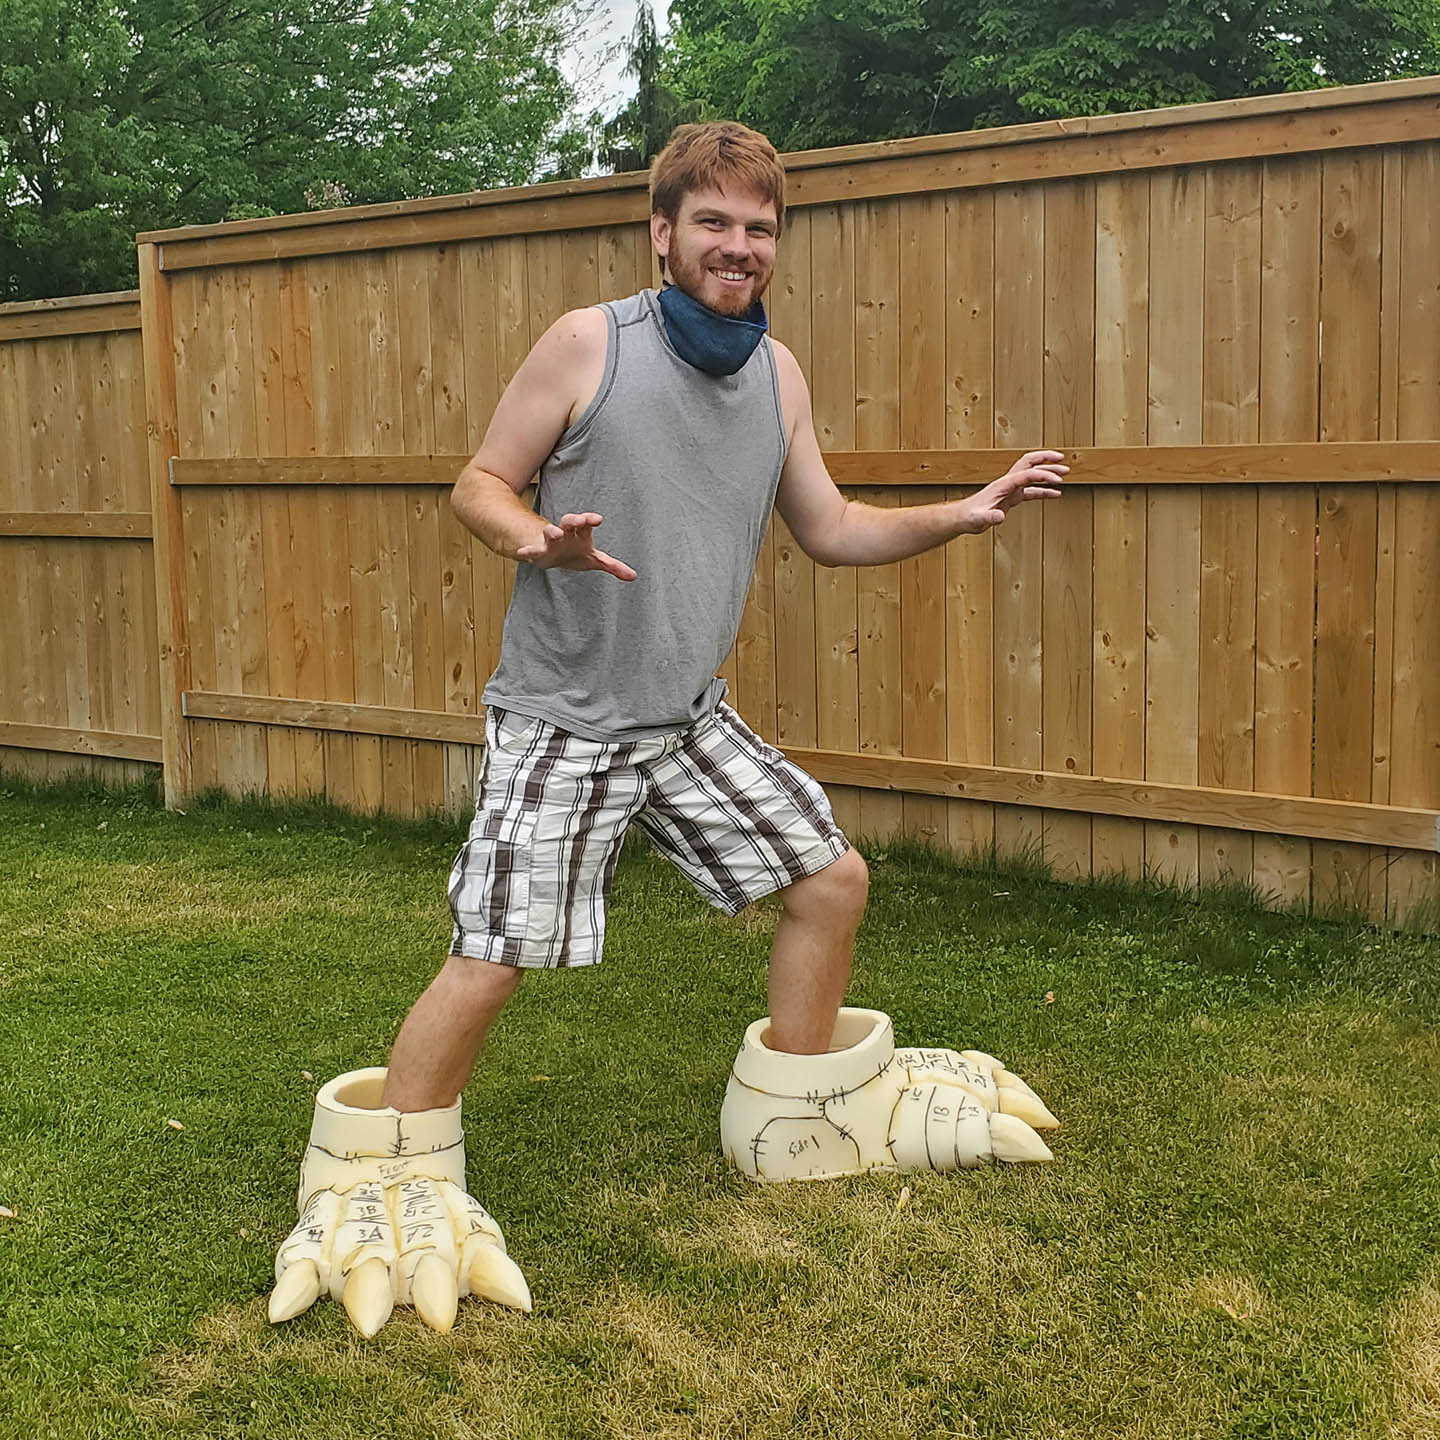
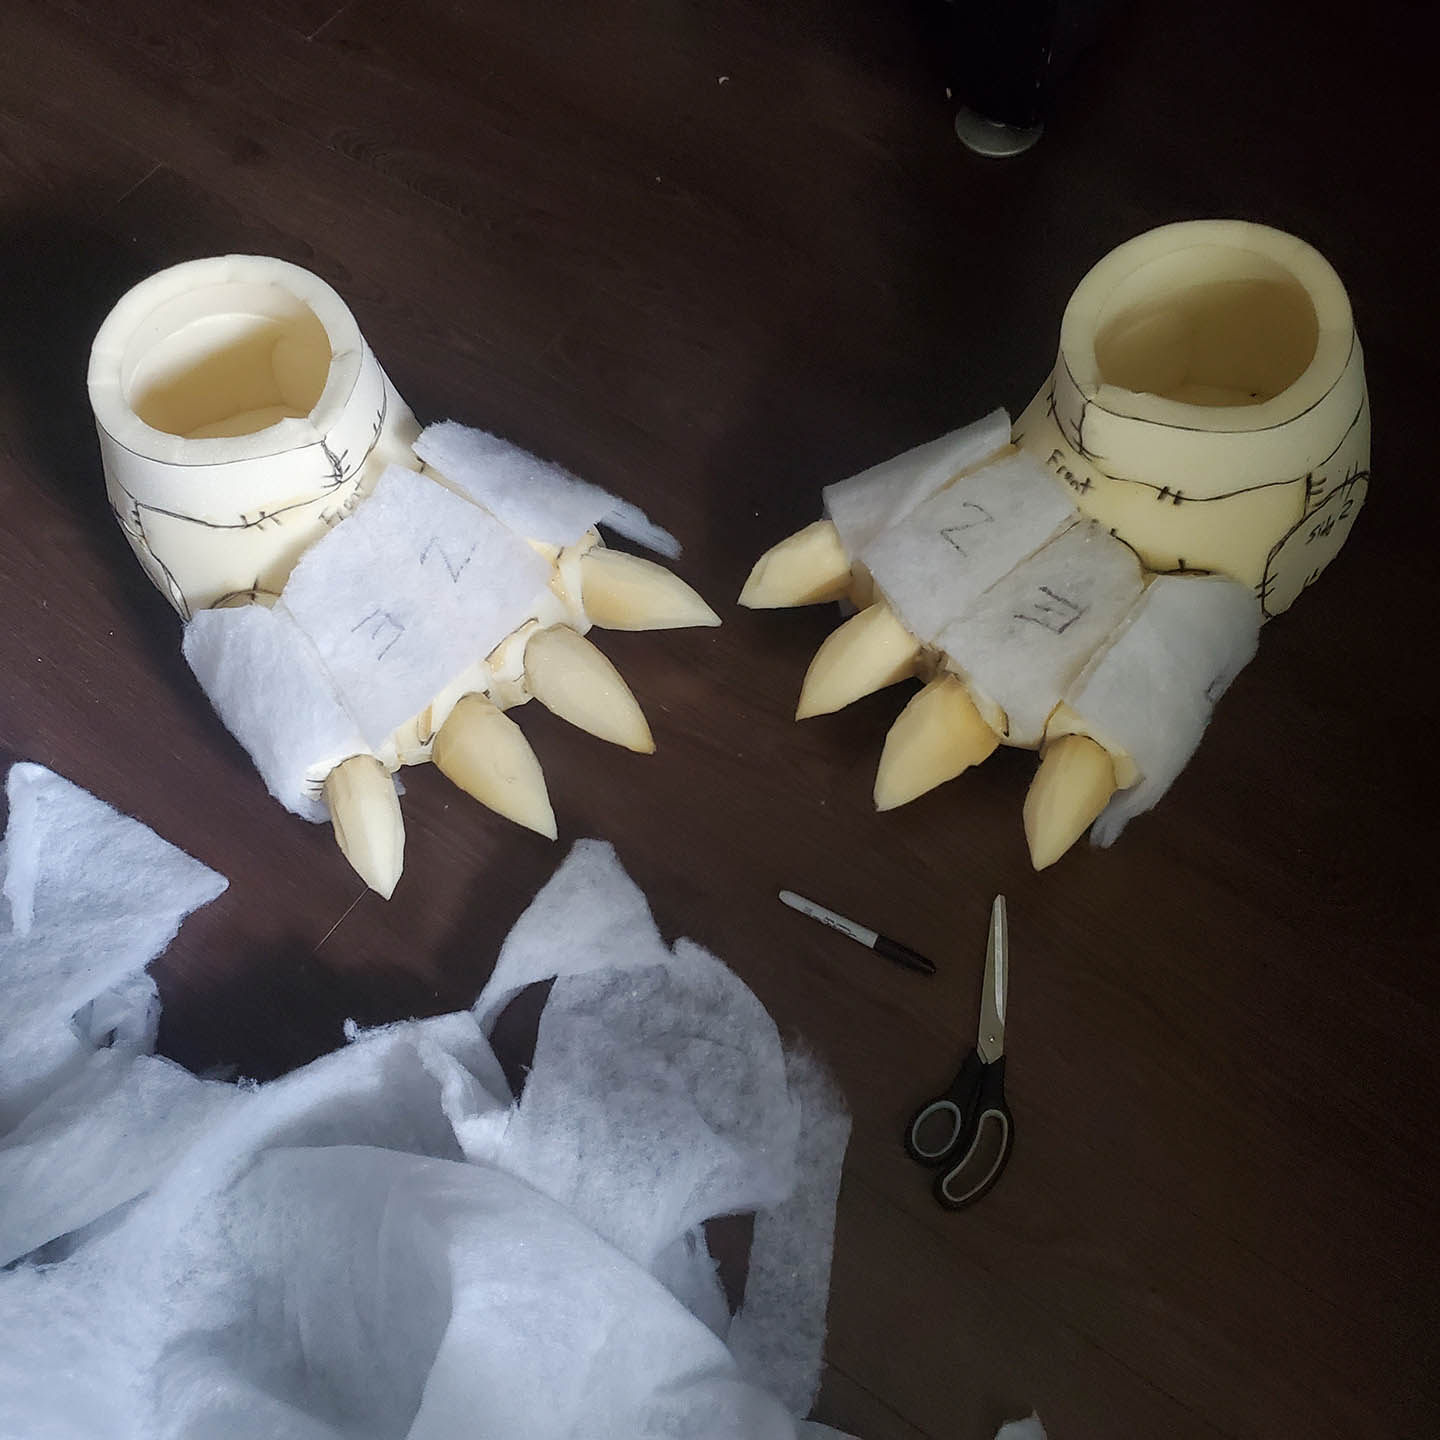
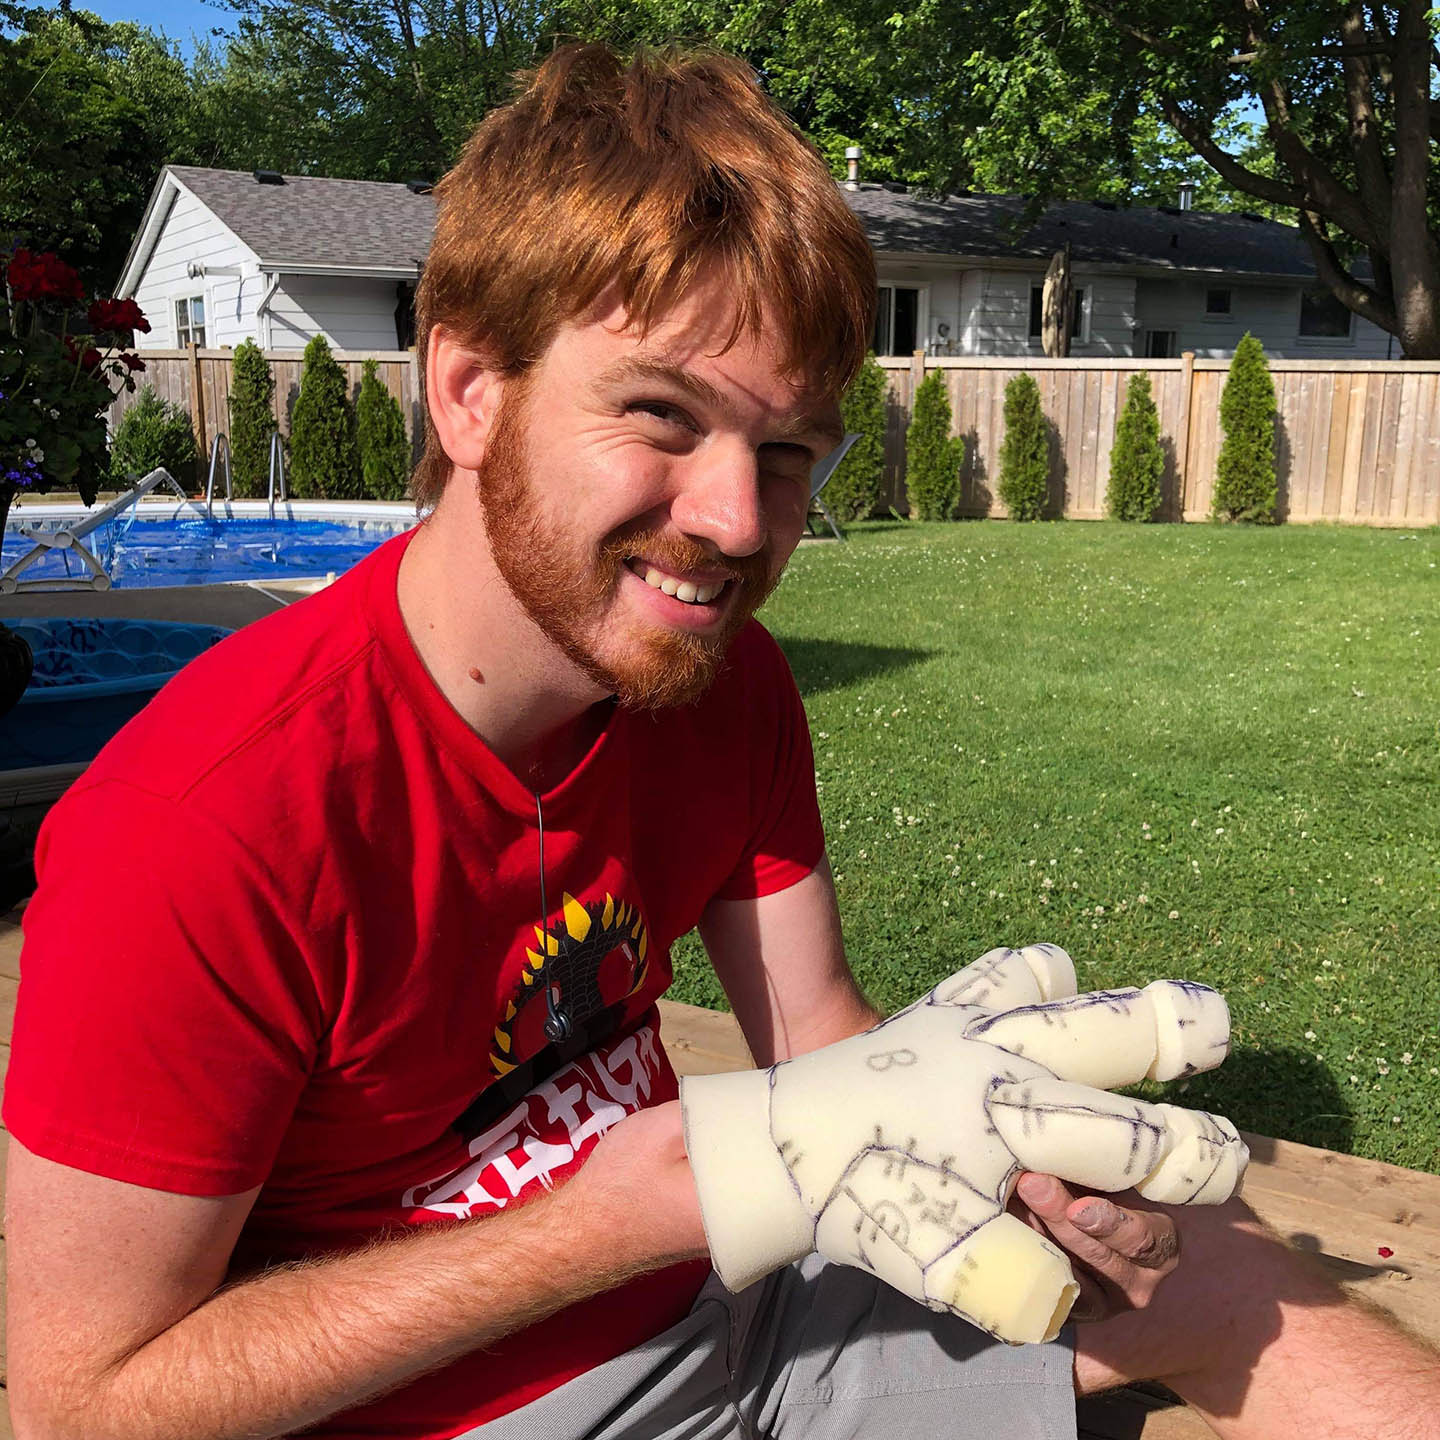
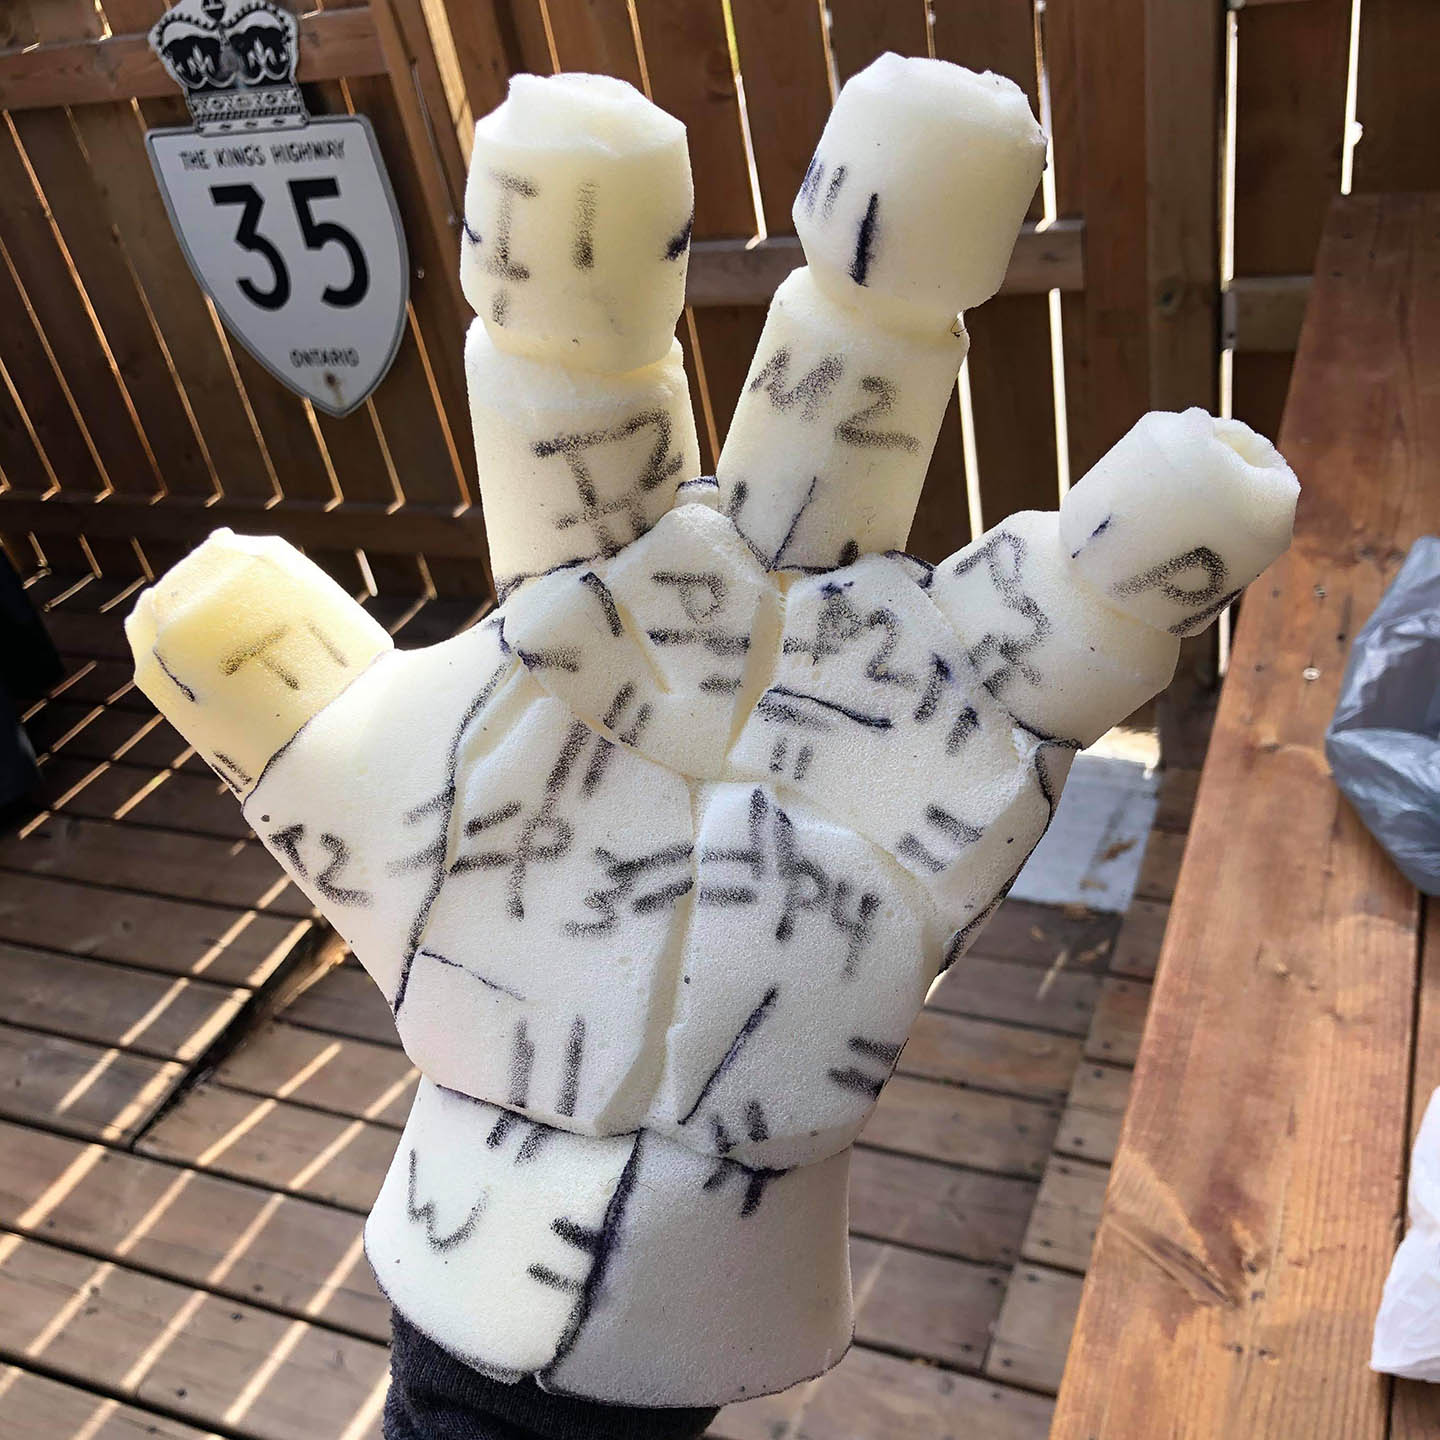
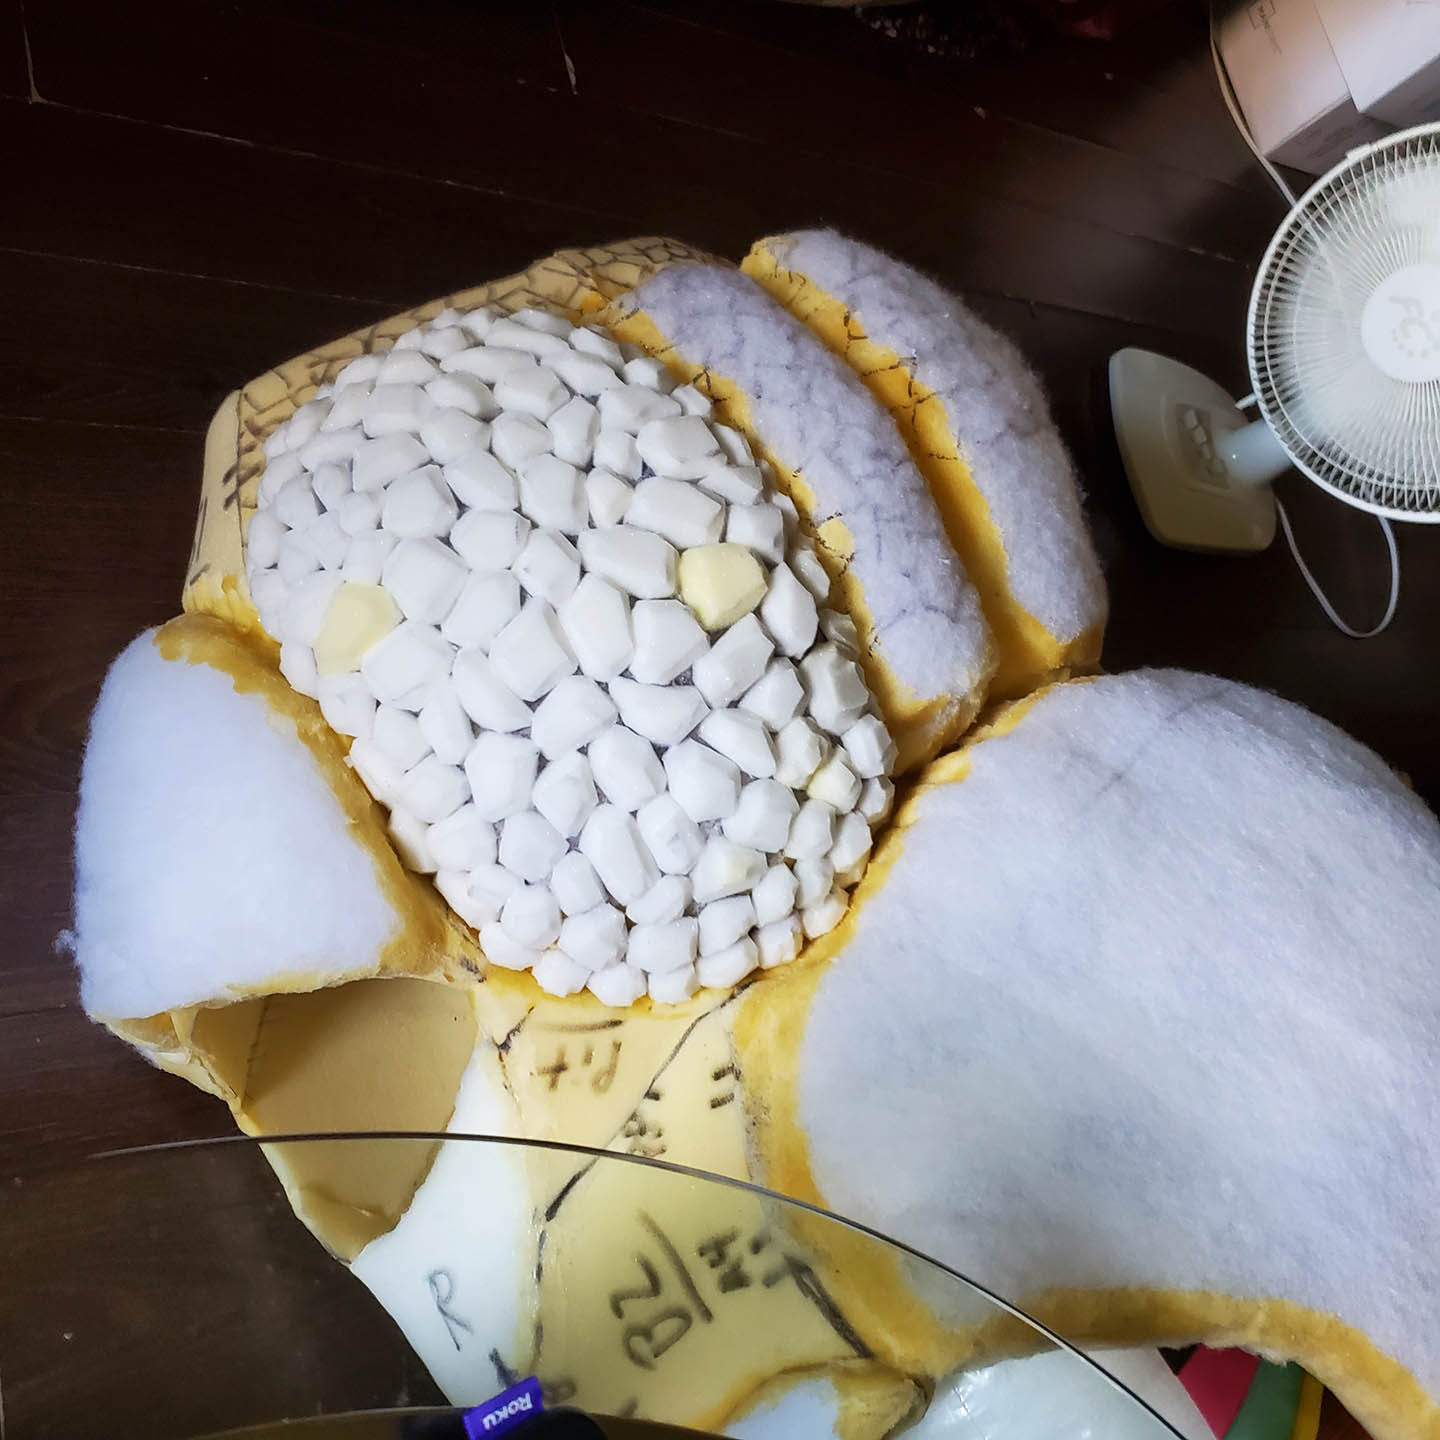
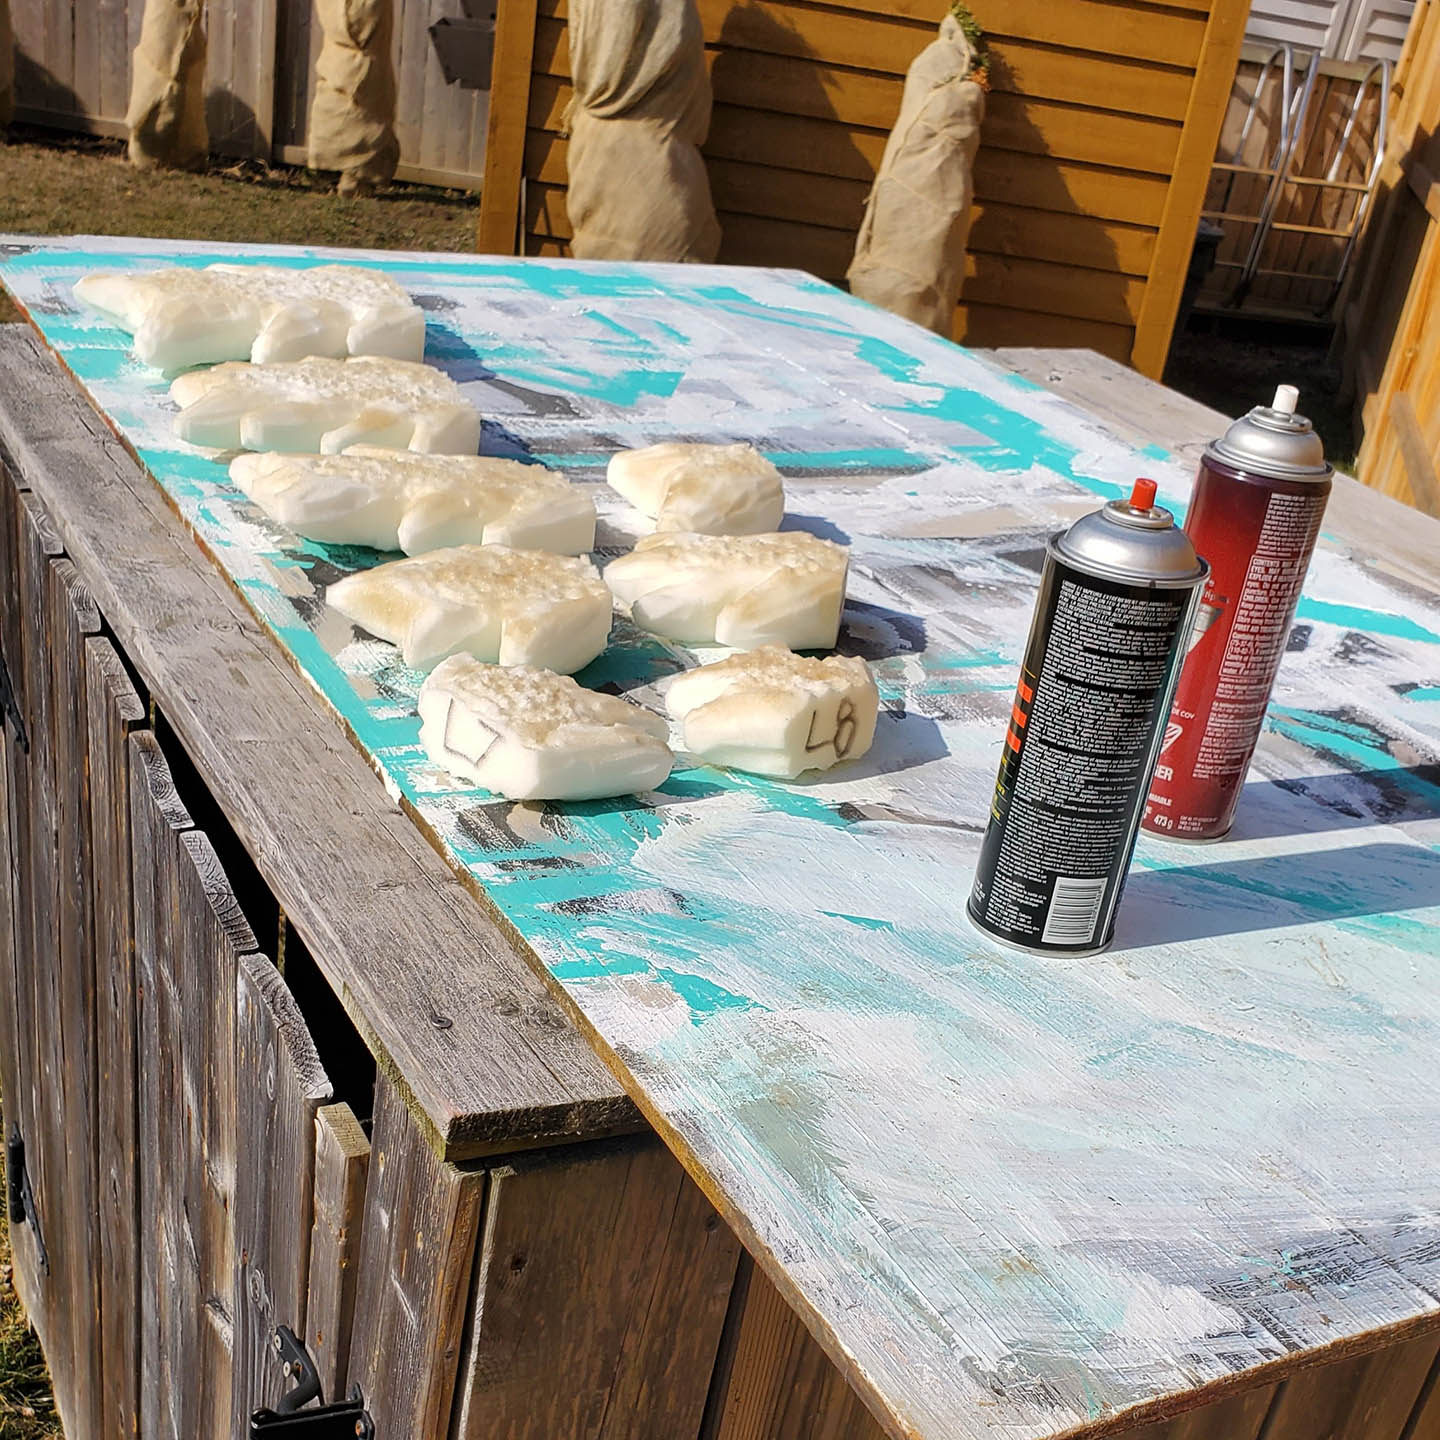
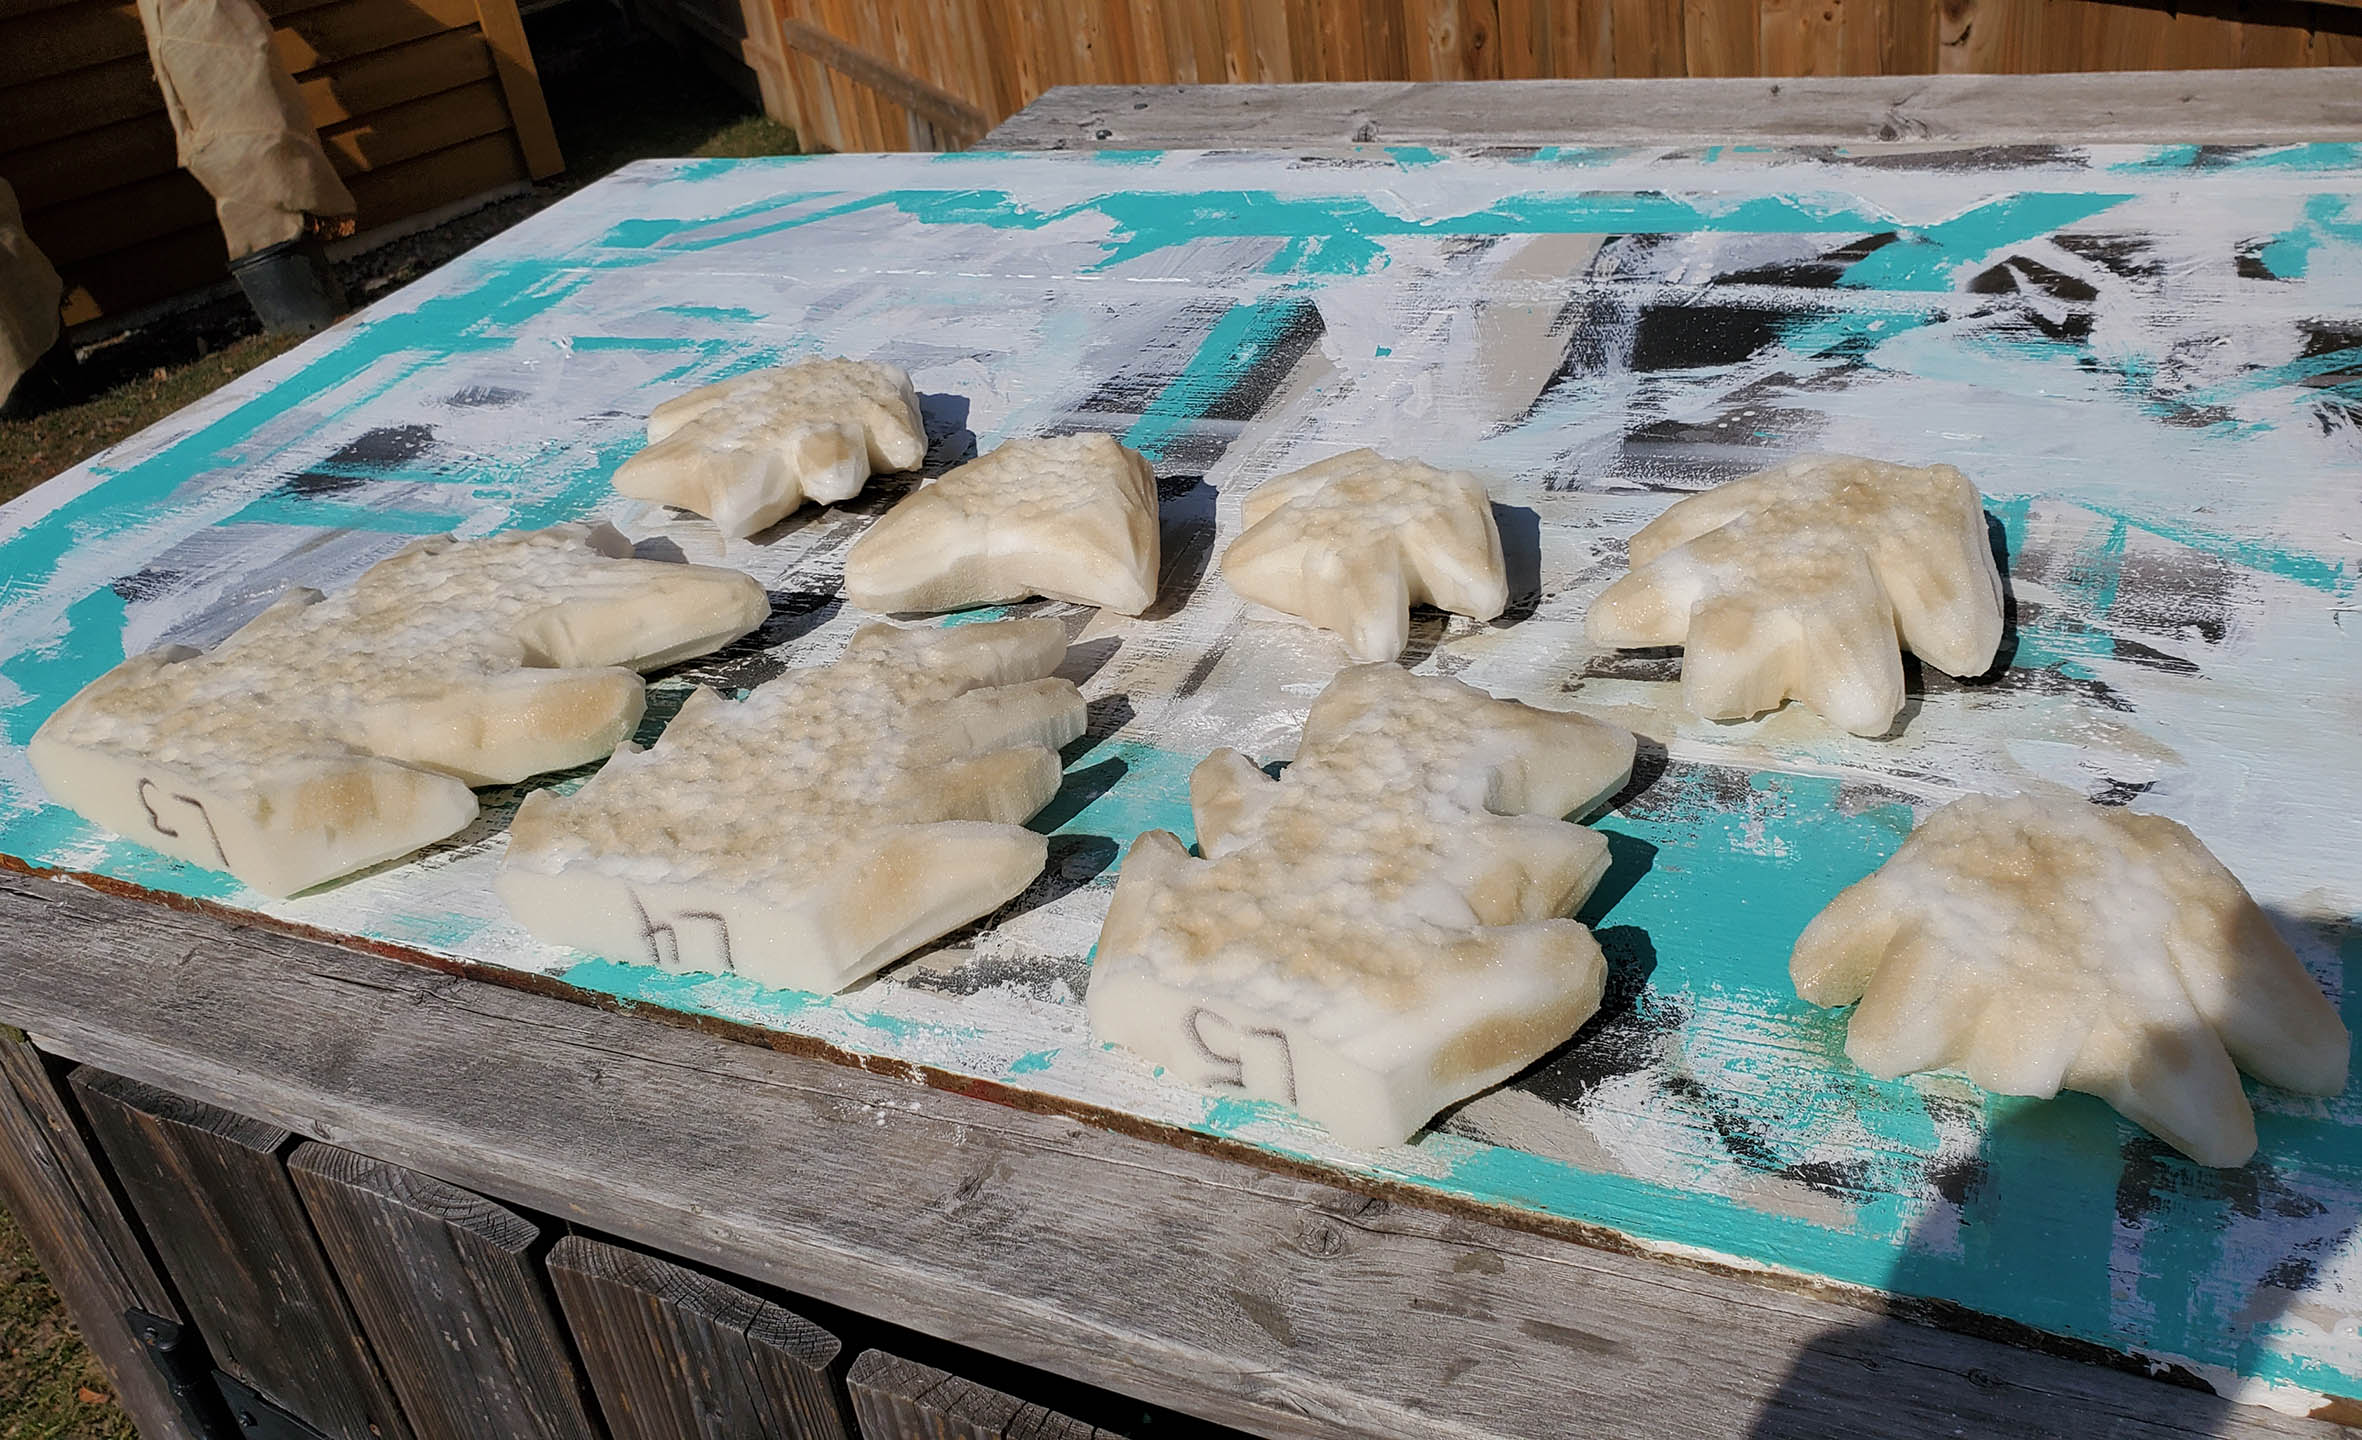
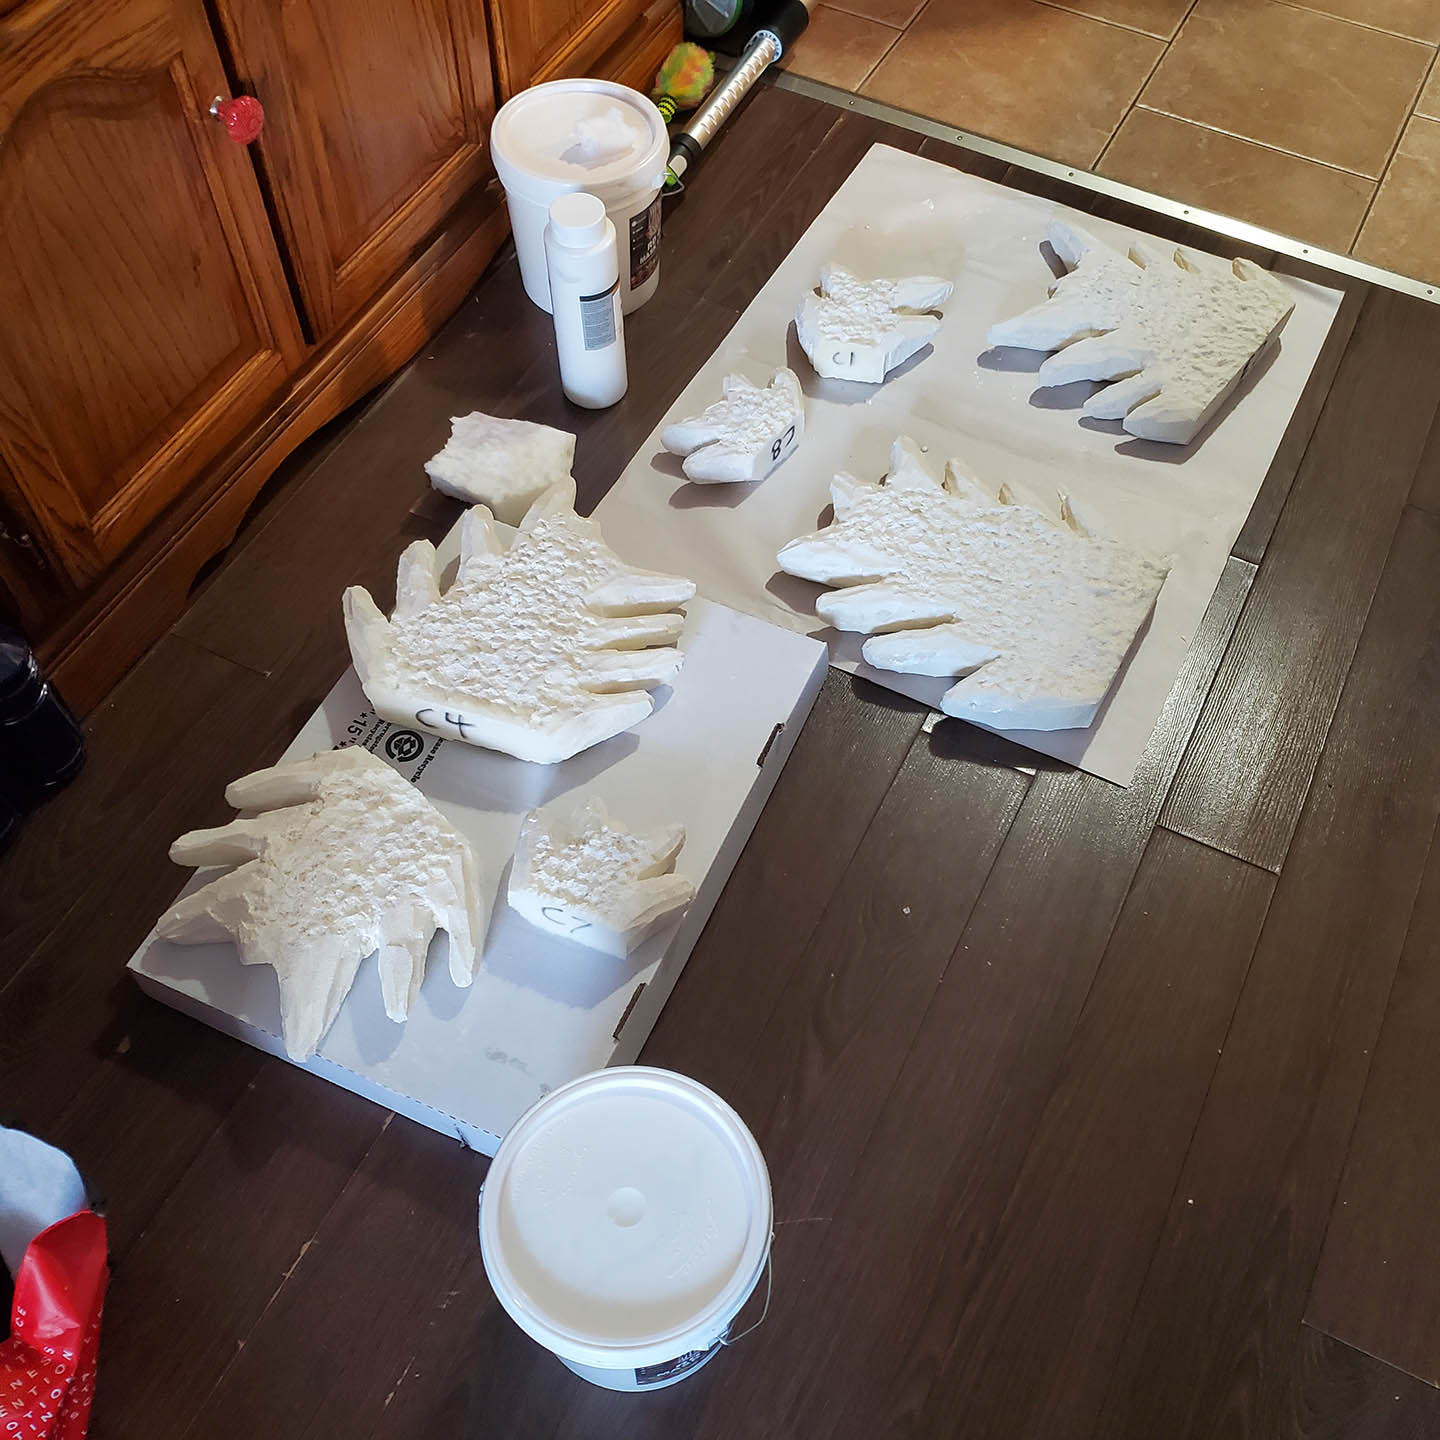
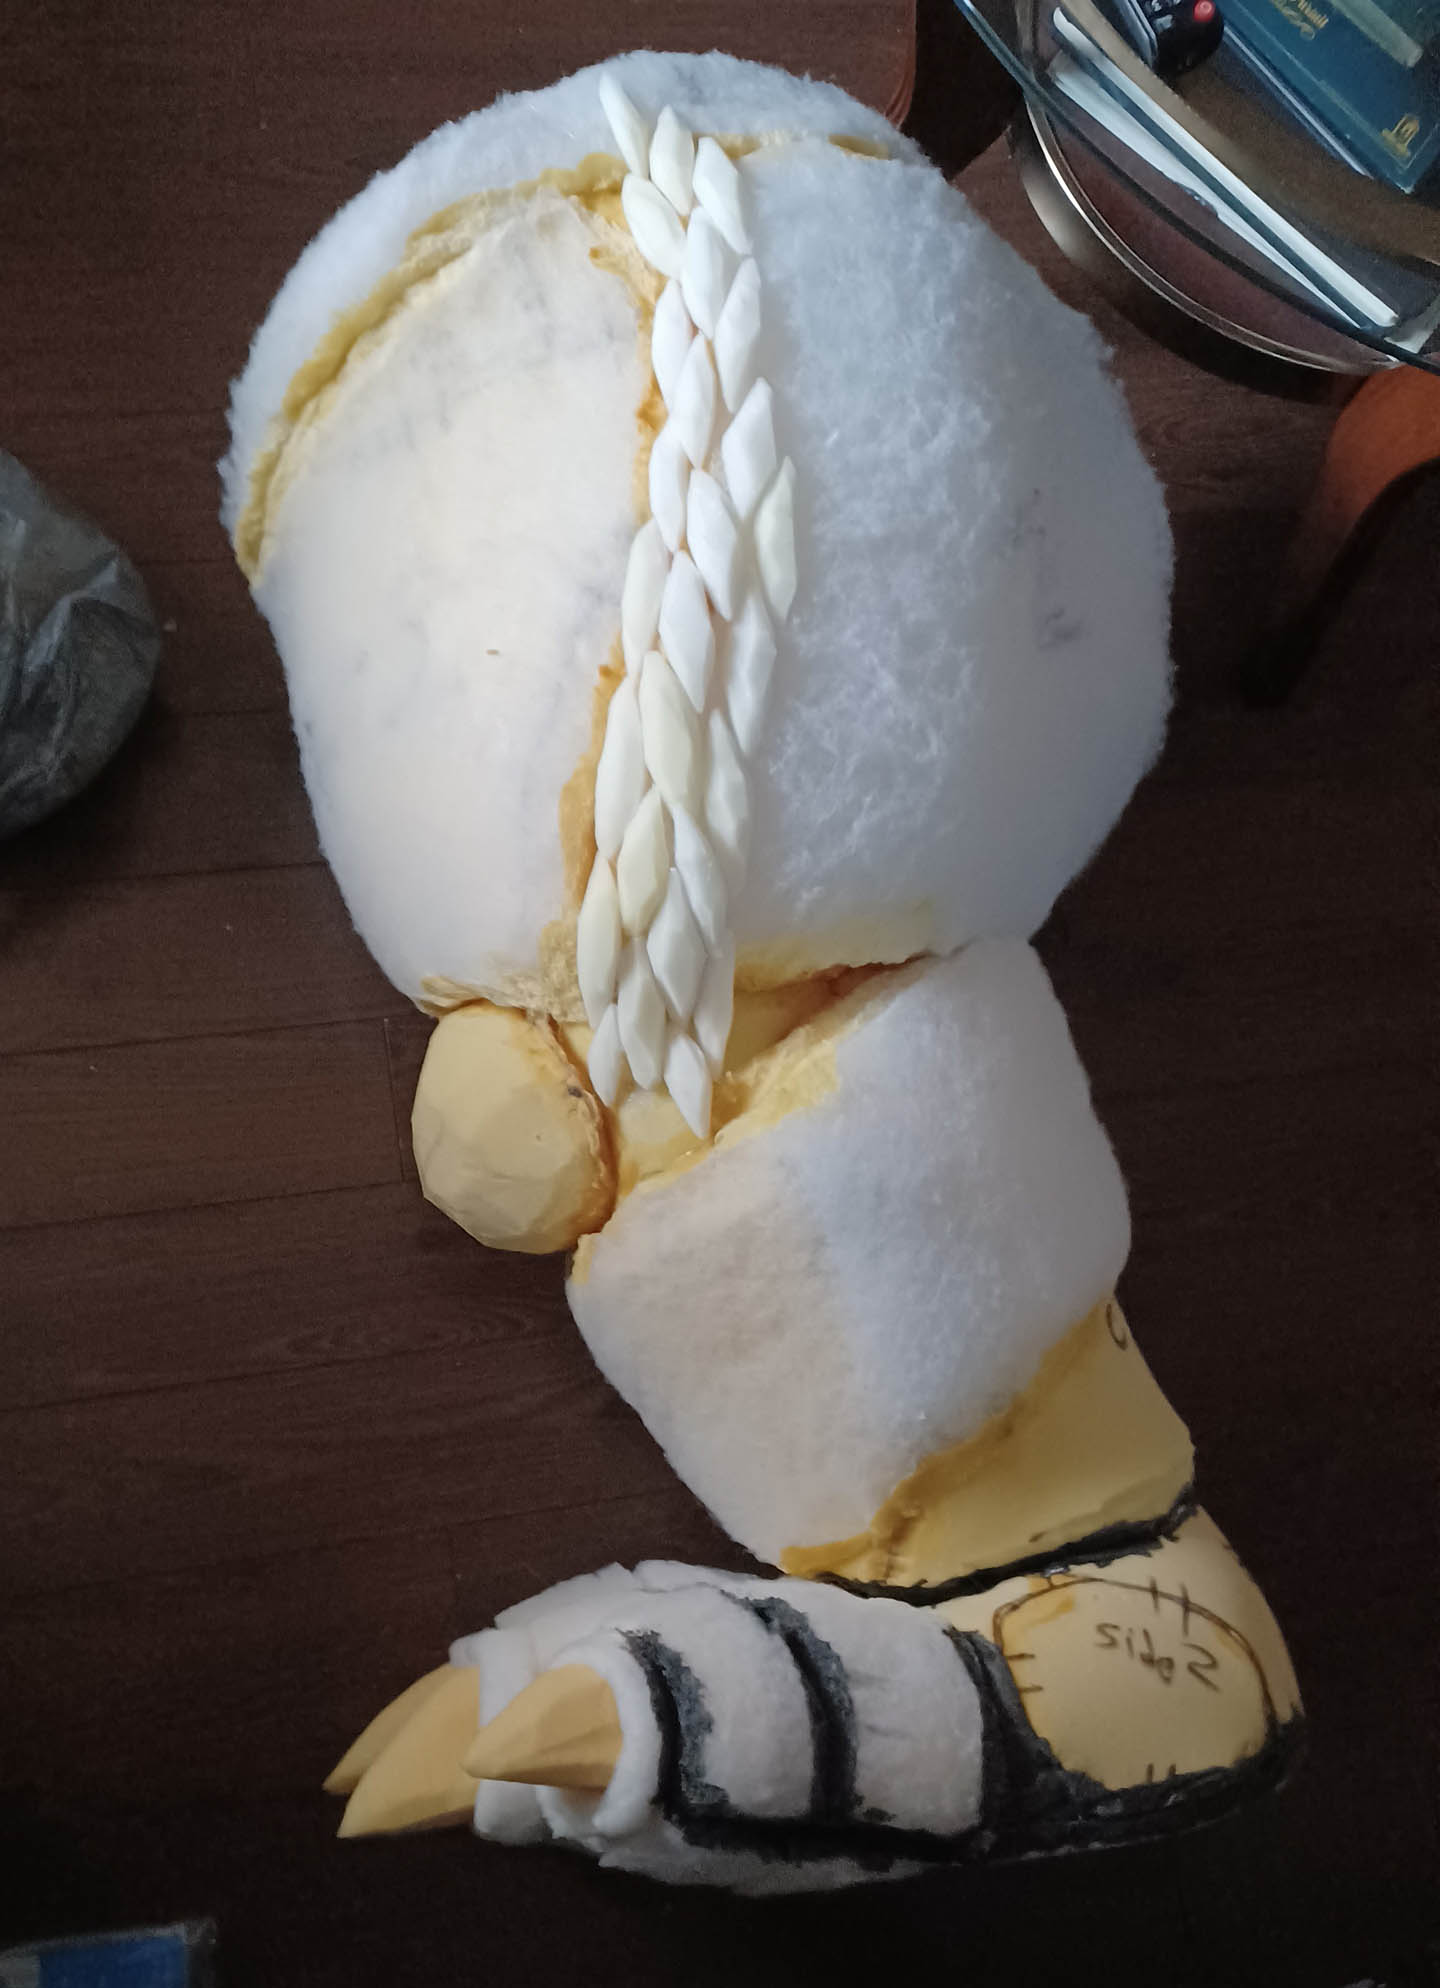
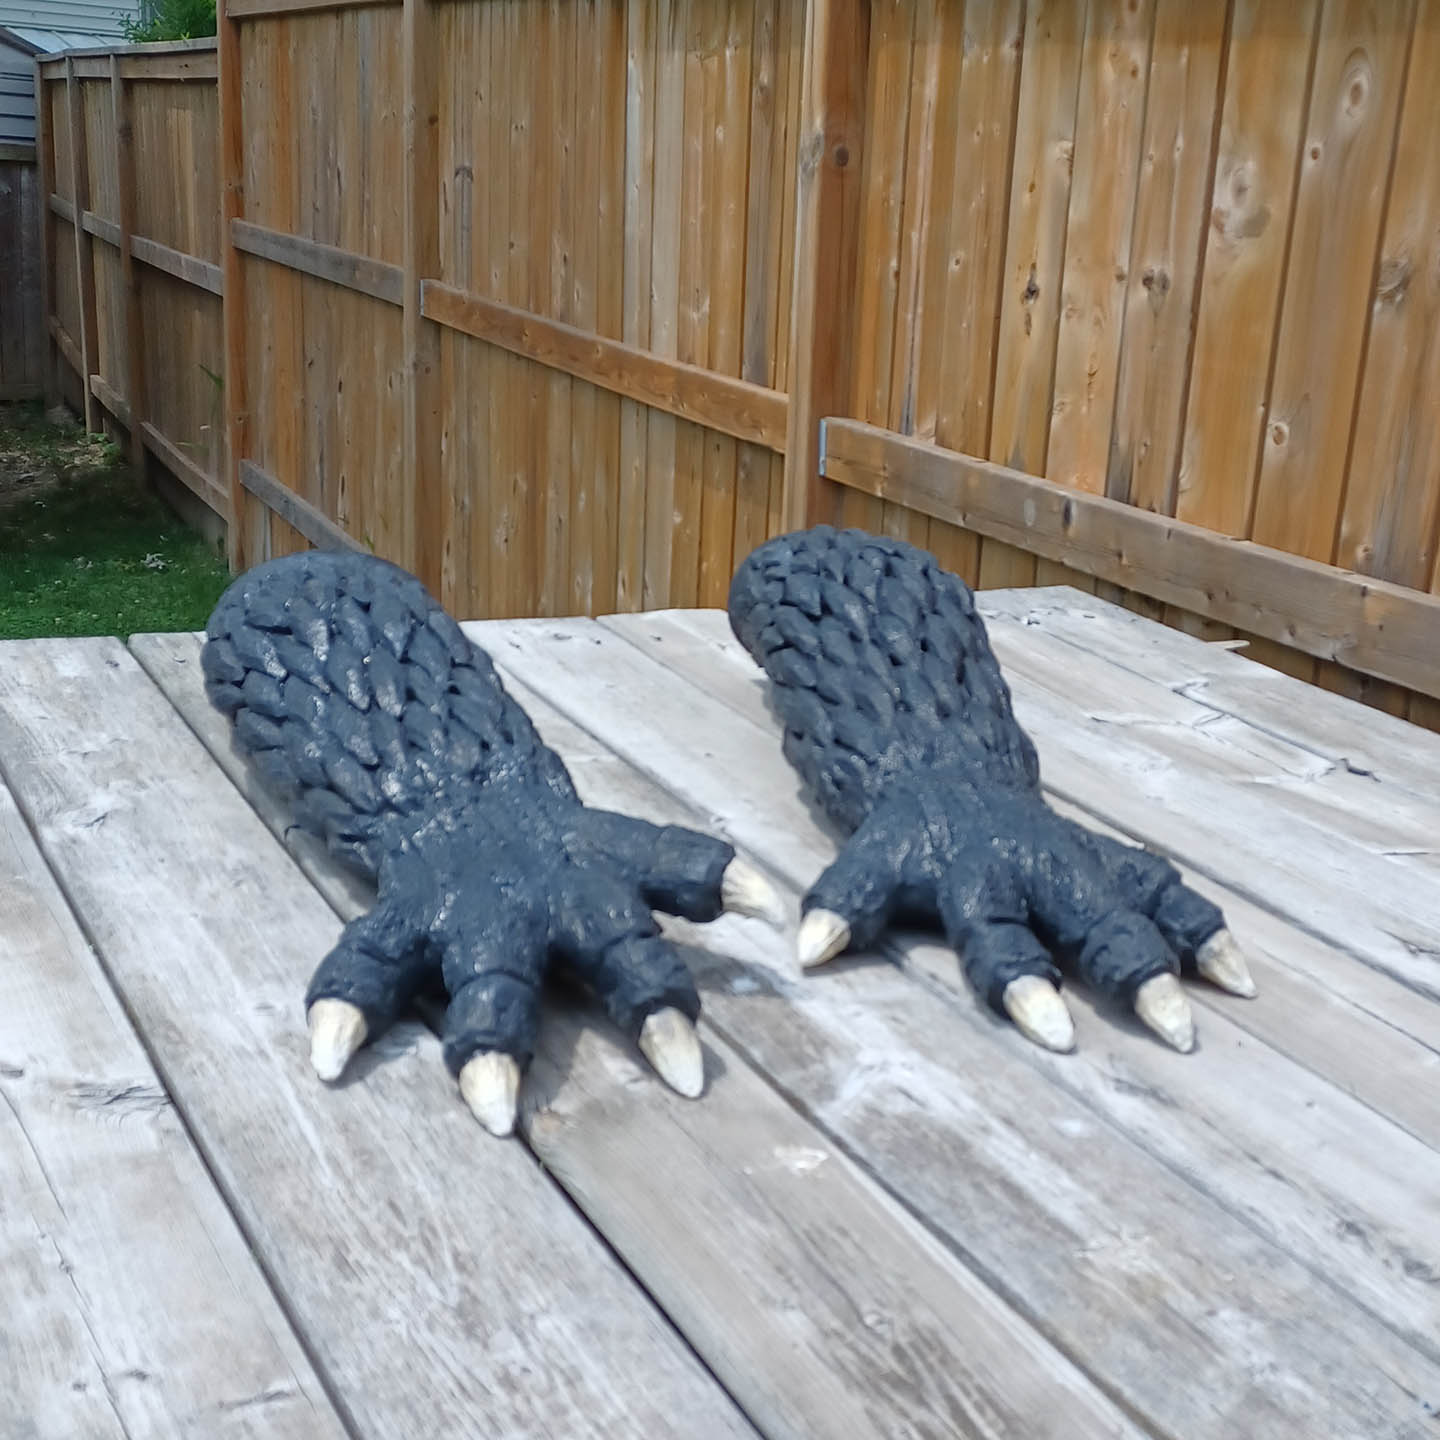
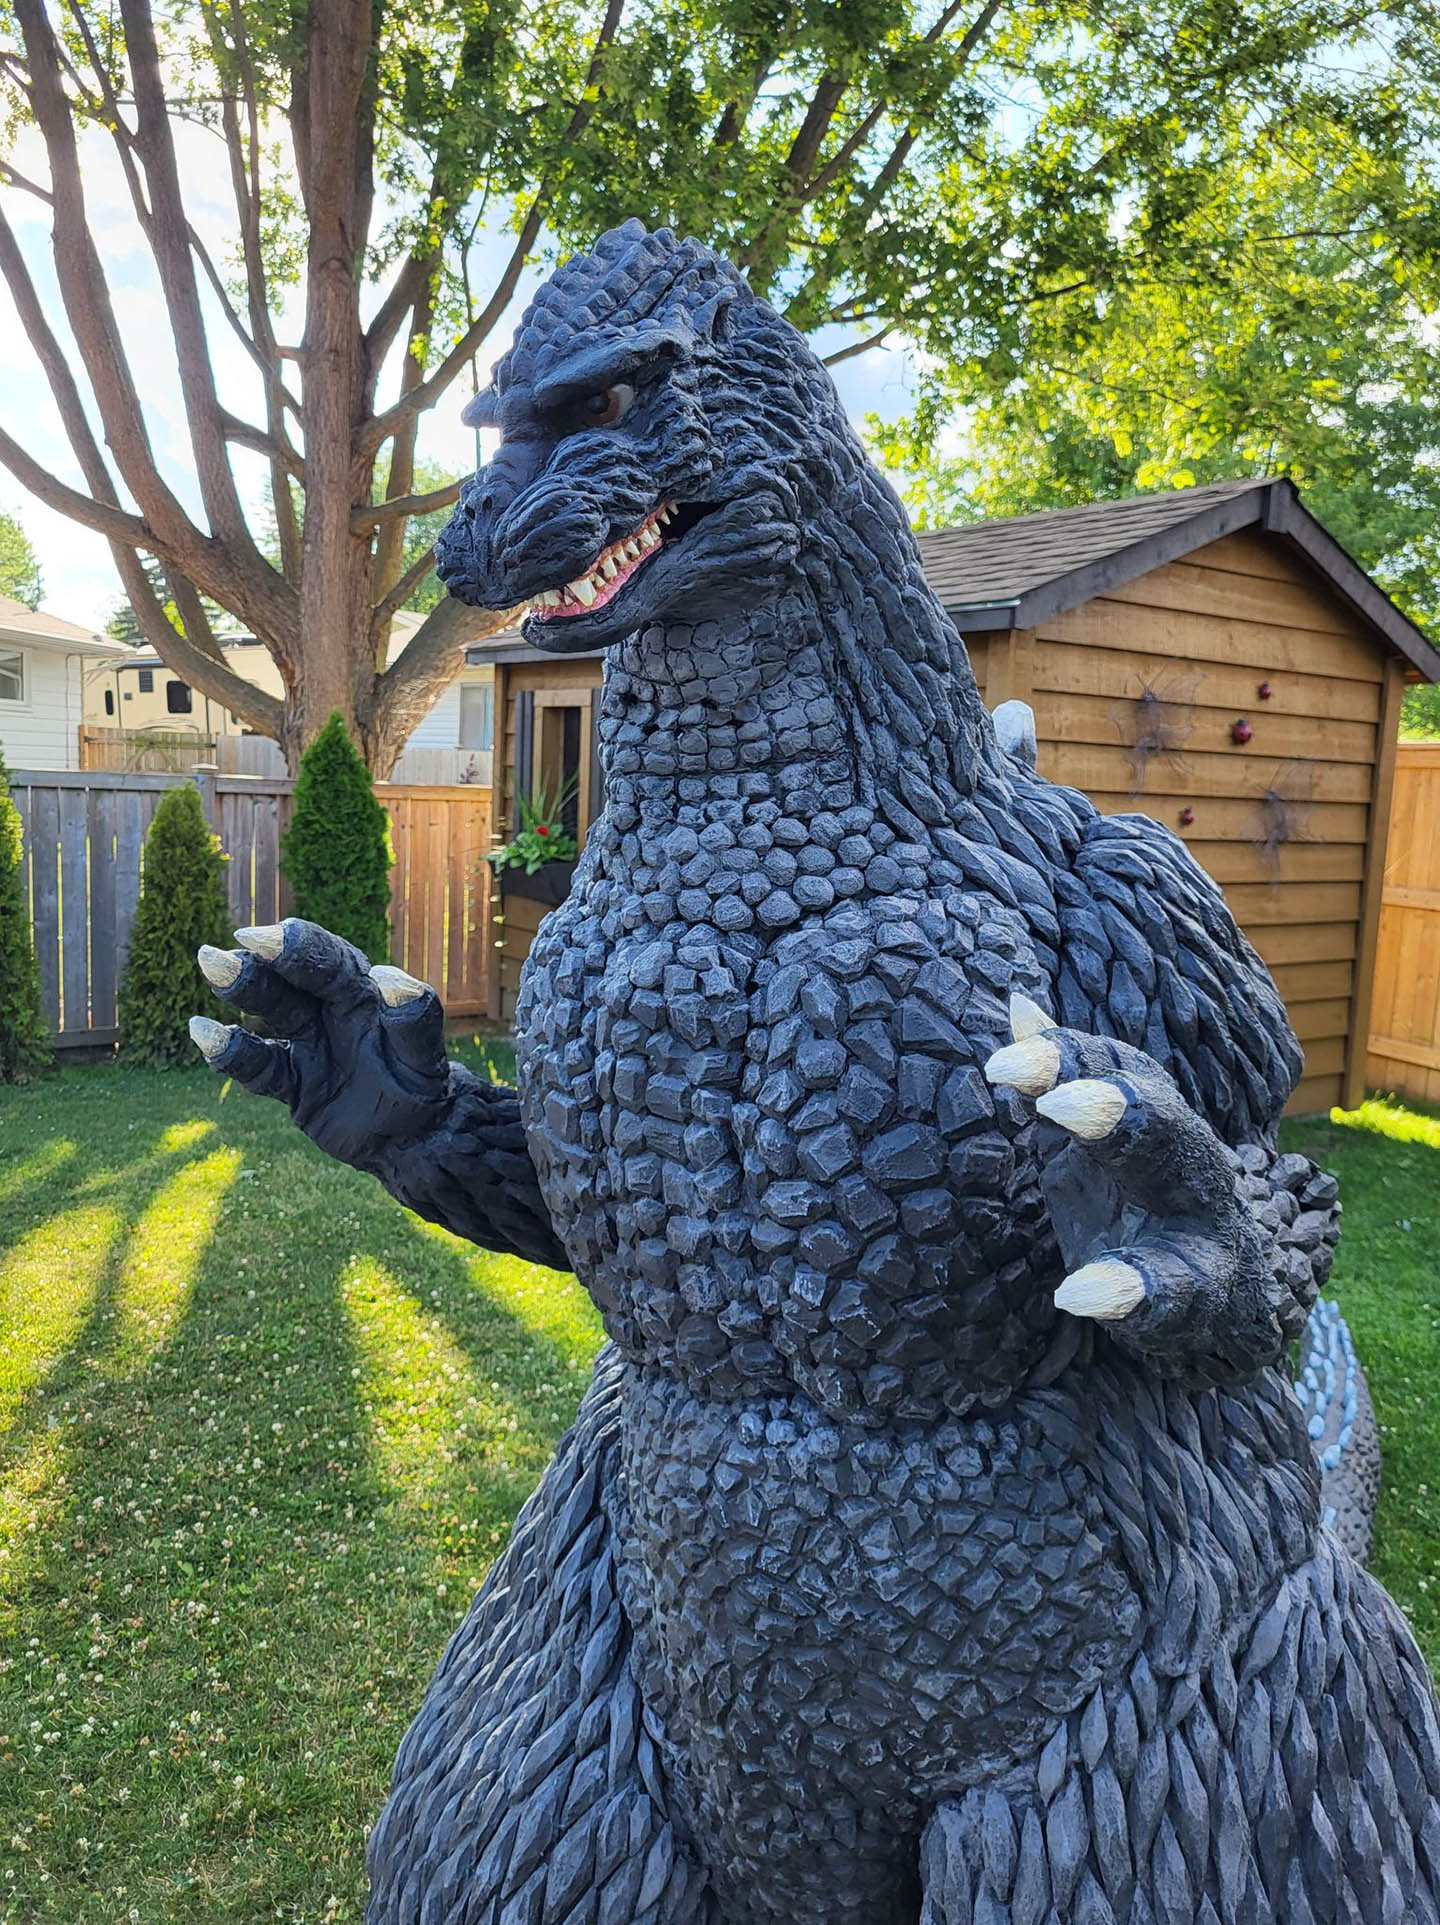
Hands and Feet
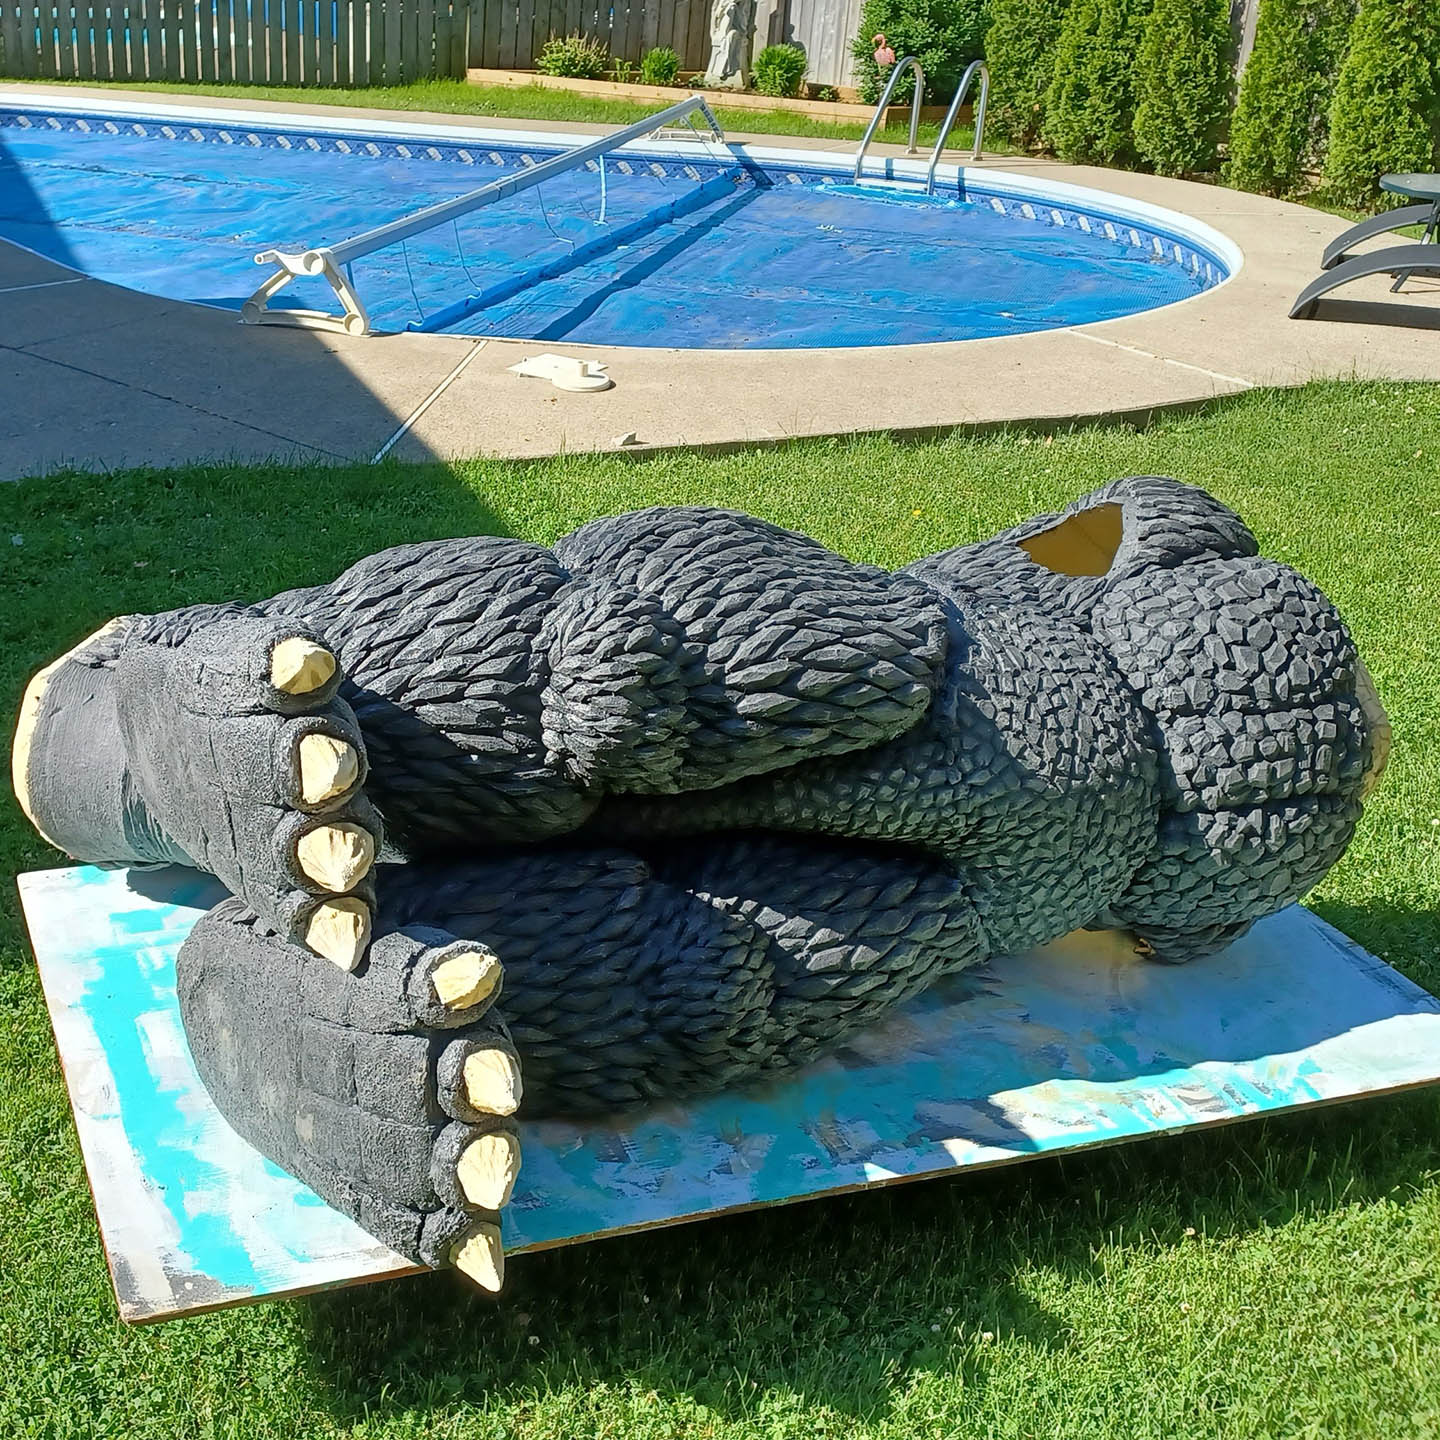
Learning from my experiences with the body, the hands and feet were sculpted in miniature using clay, and at a scale that was easier to enlarge for making the full sized pieces. From here, I simply repeated the patterning and enlargement process to turn the clay sculptures into the full sized foam hands and feet. The only difference is that this time they fit me and the suit on the first try. The claws on Godzilla’s fingers were carved from 1 inch foam using scissors. The claws on the toes were carved from 4 inch foam, aided by an electric carving knife. Texture was added by burning lines into the foam with a wood burning tool. These were the only foam elements on the suit that were created freehand.
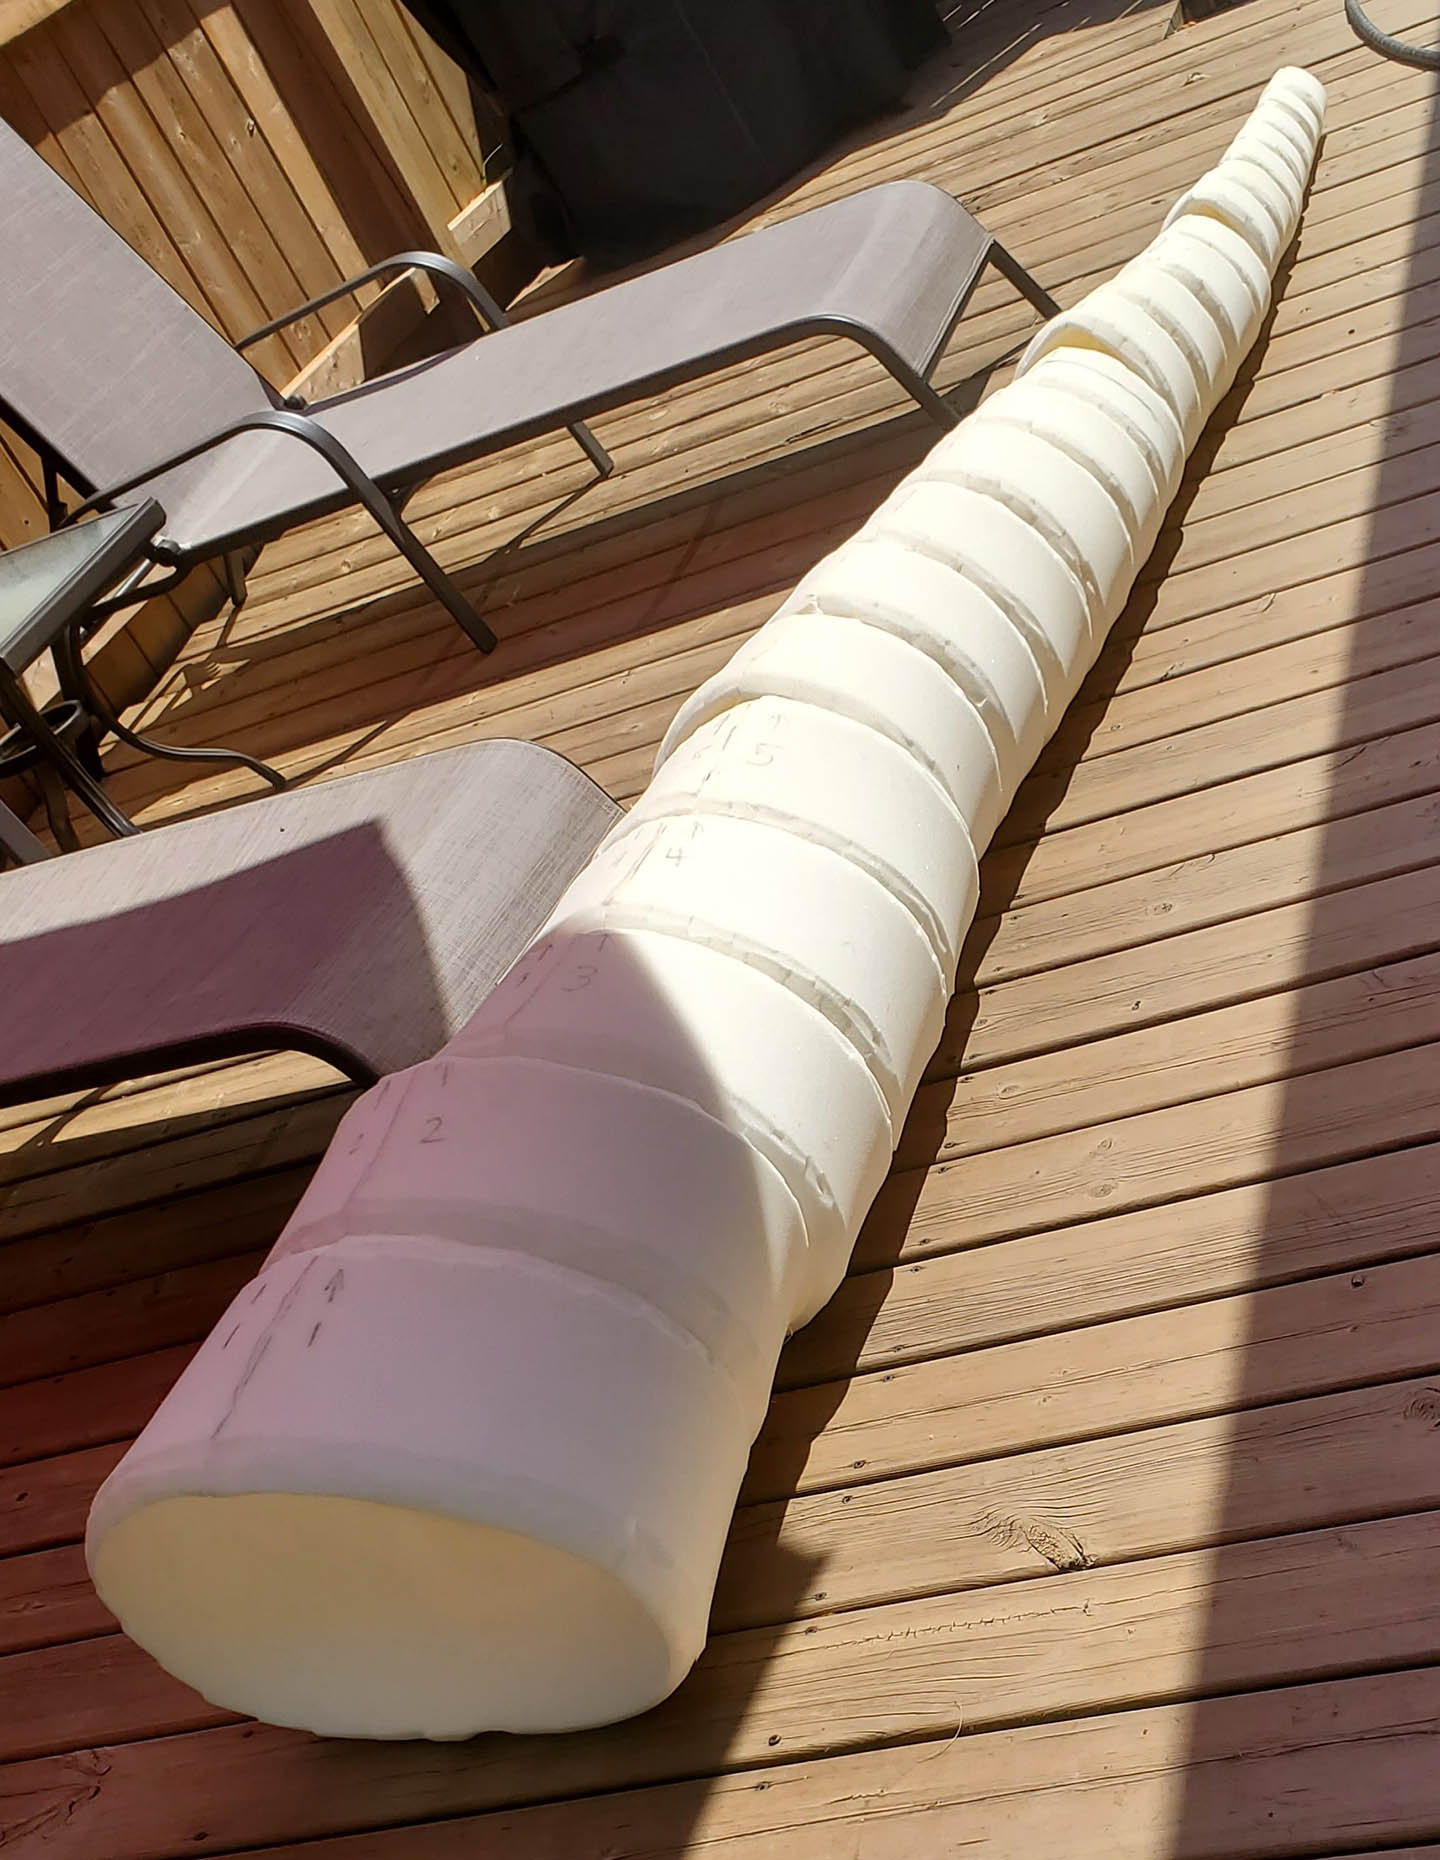
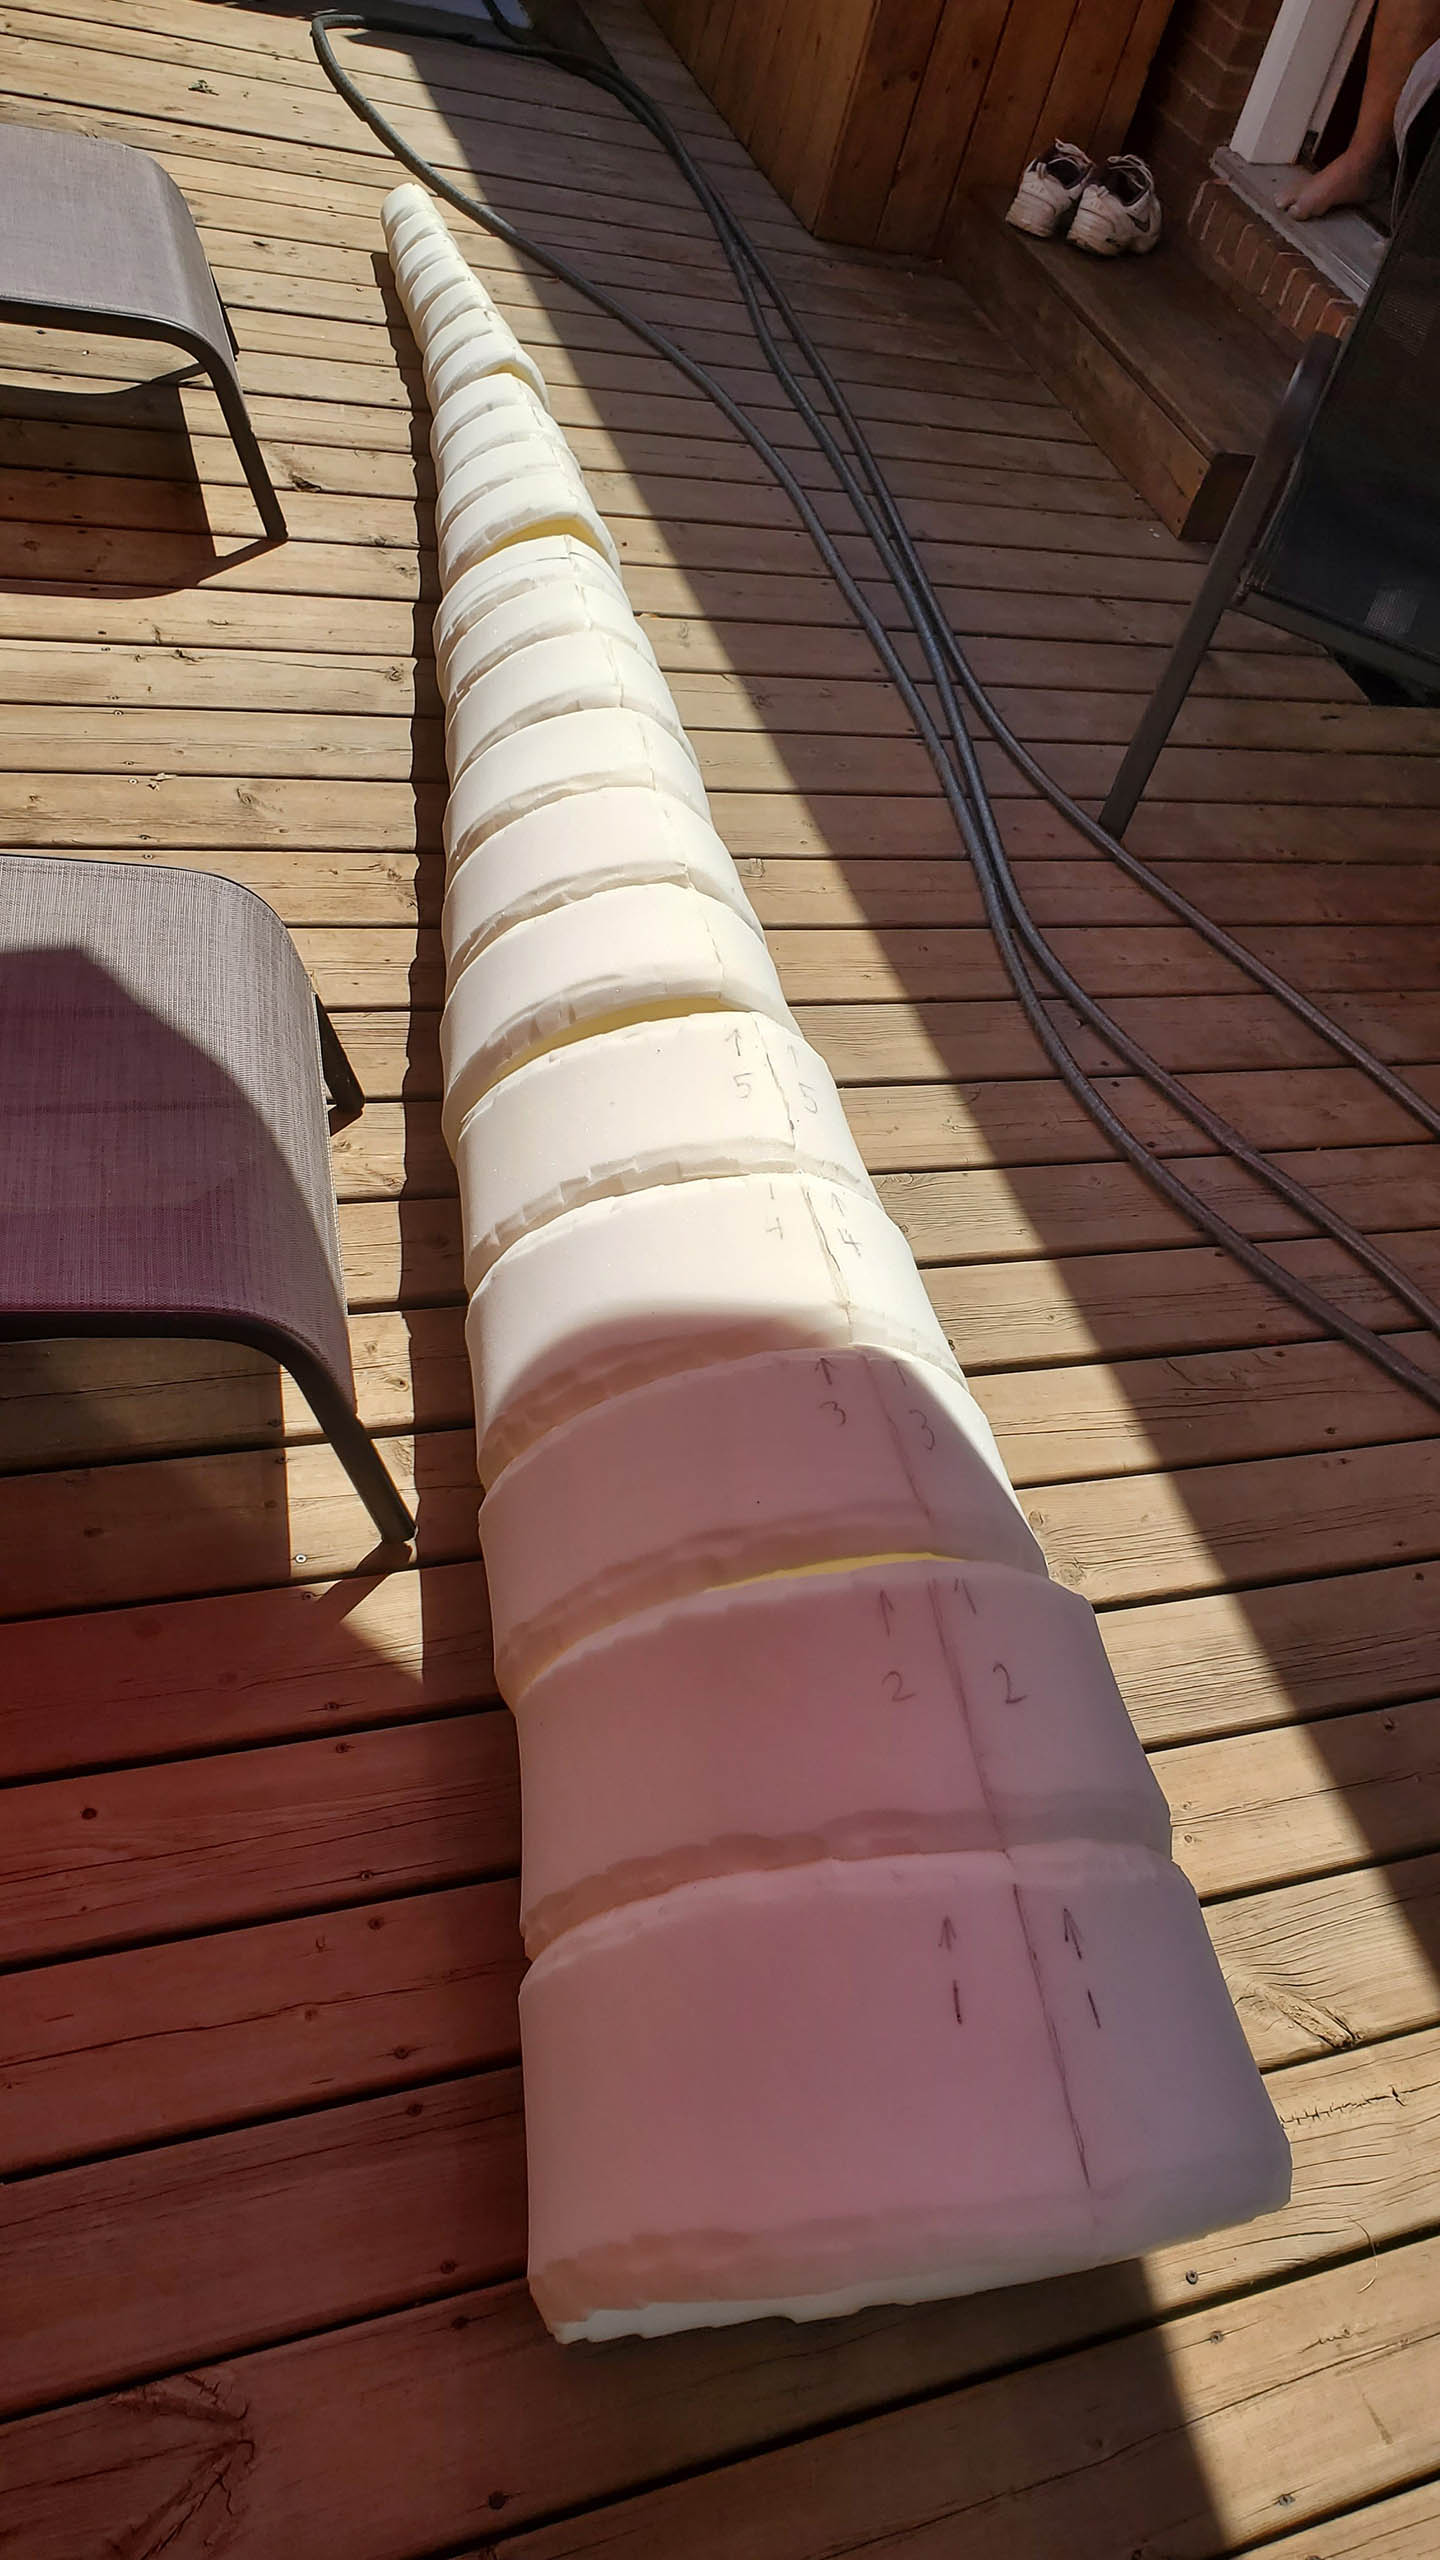
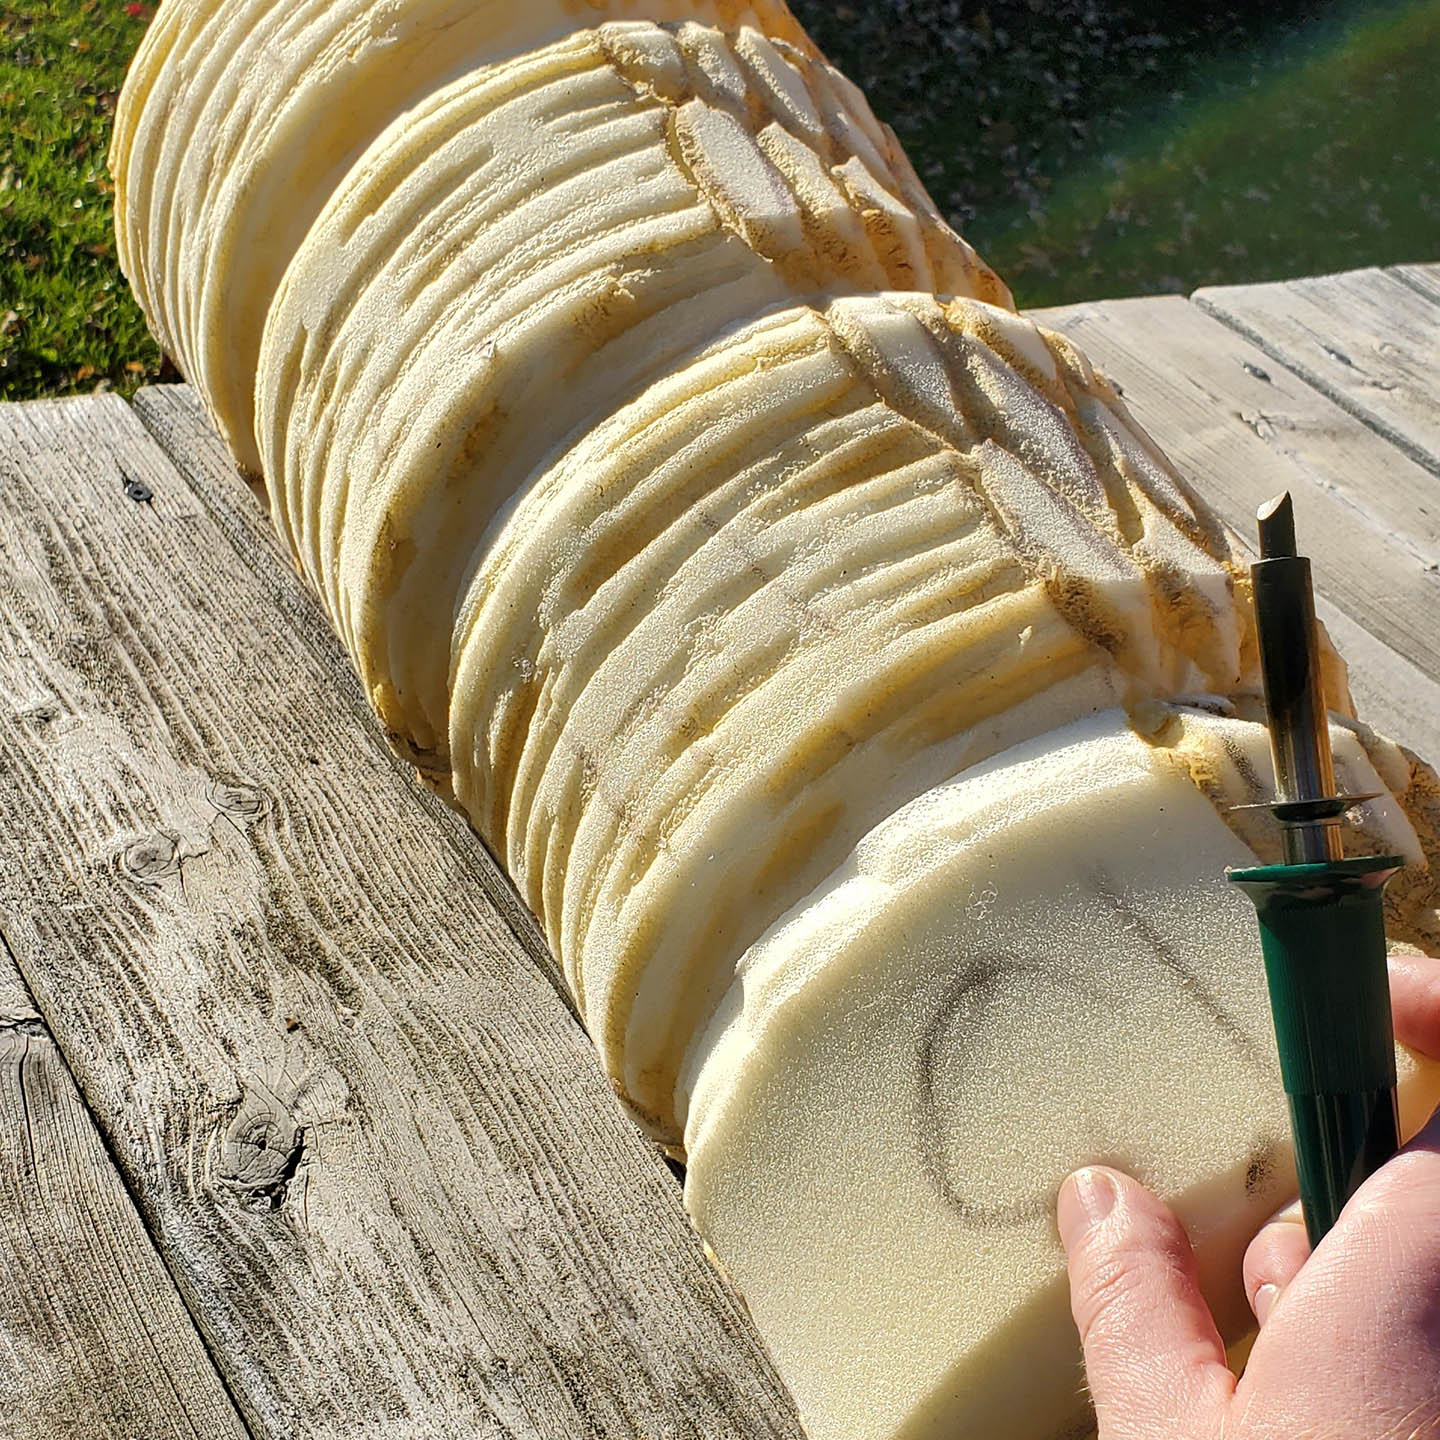
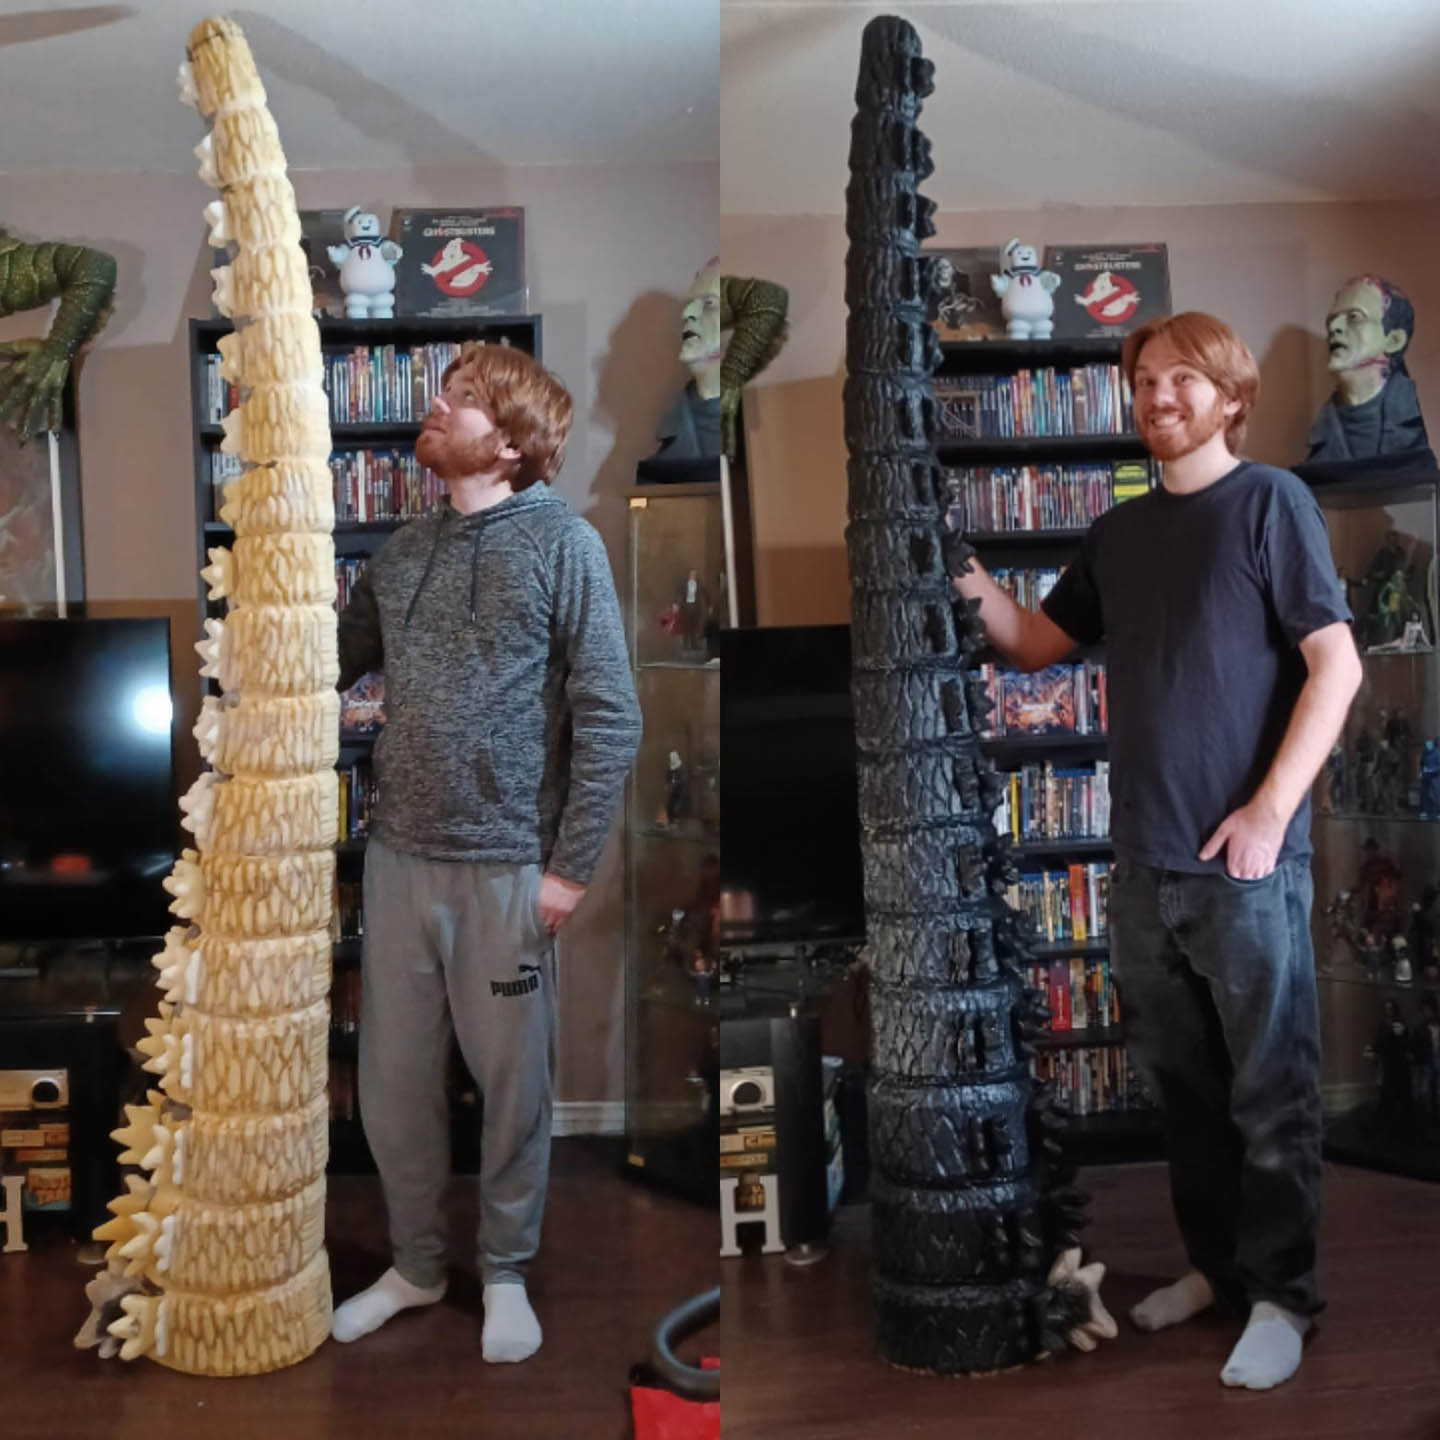
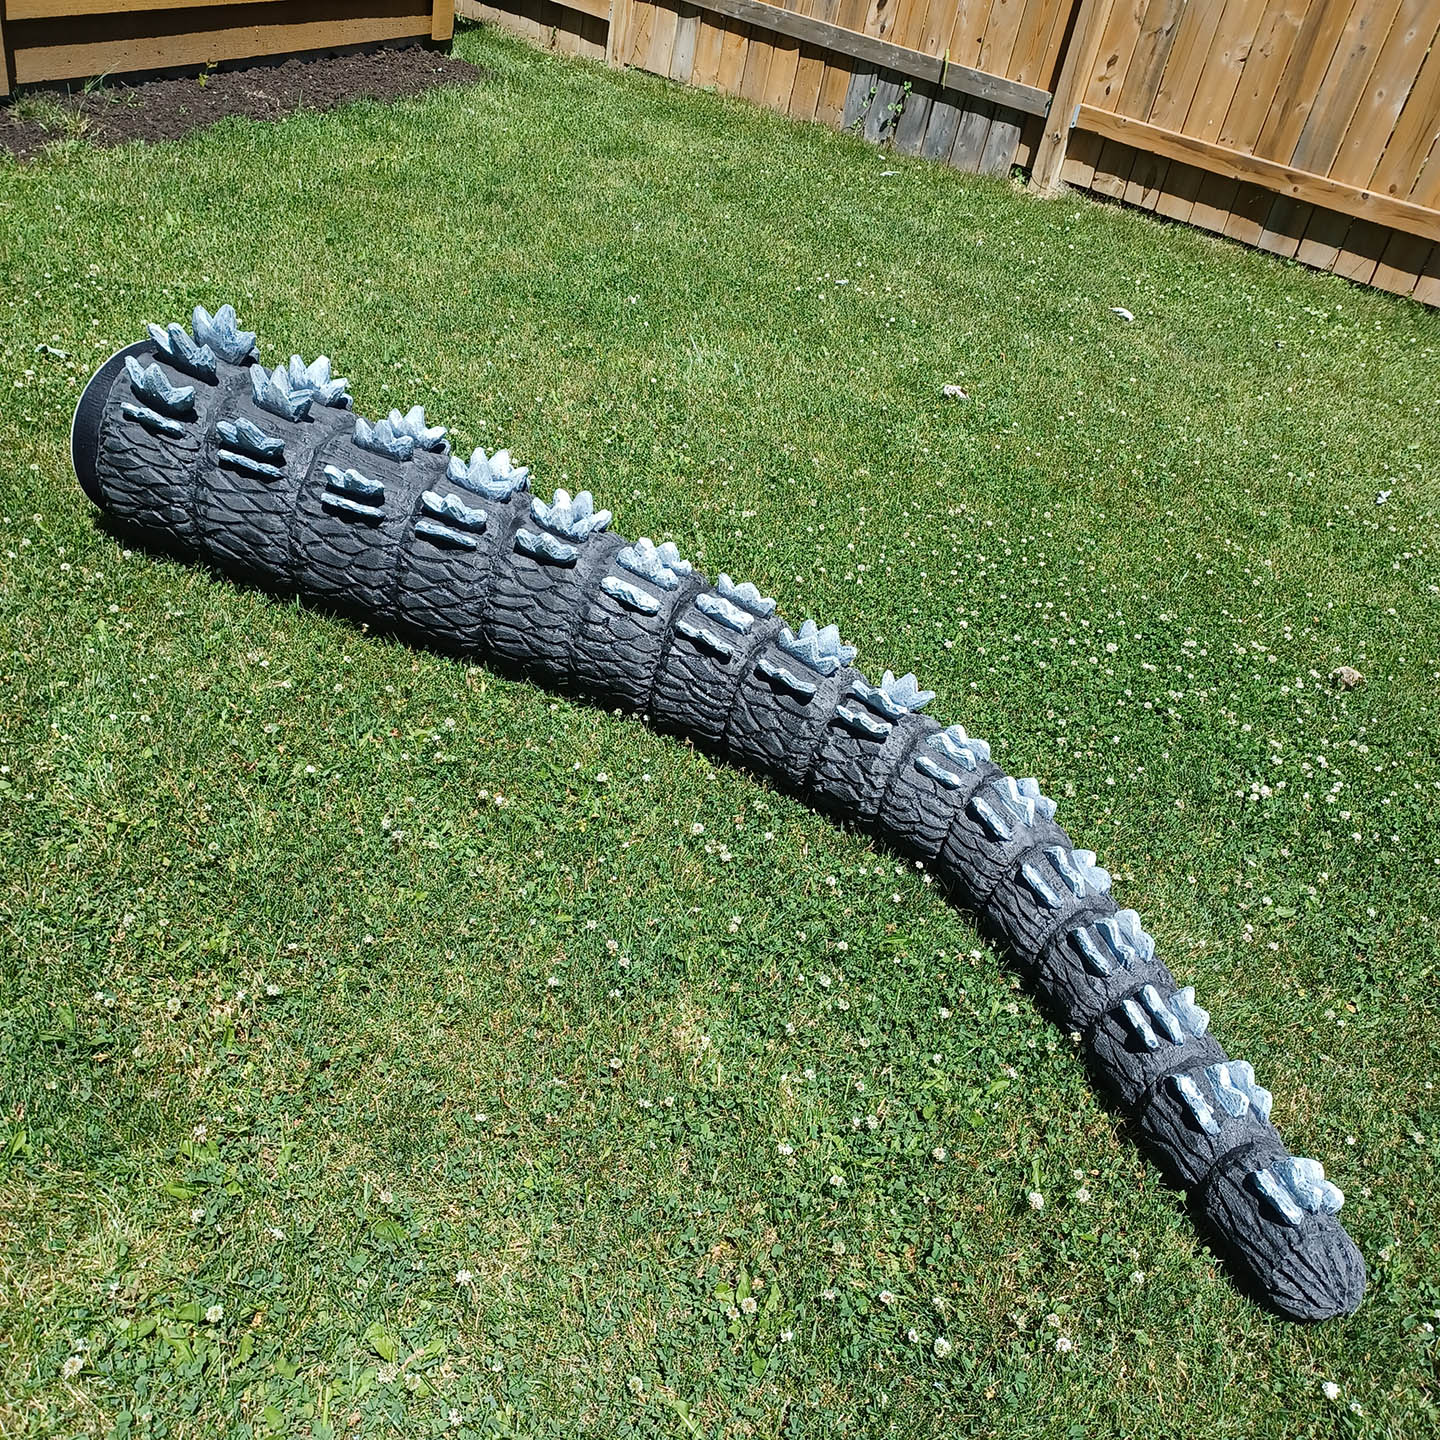
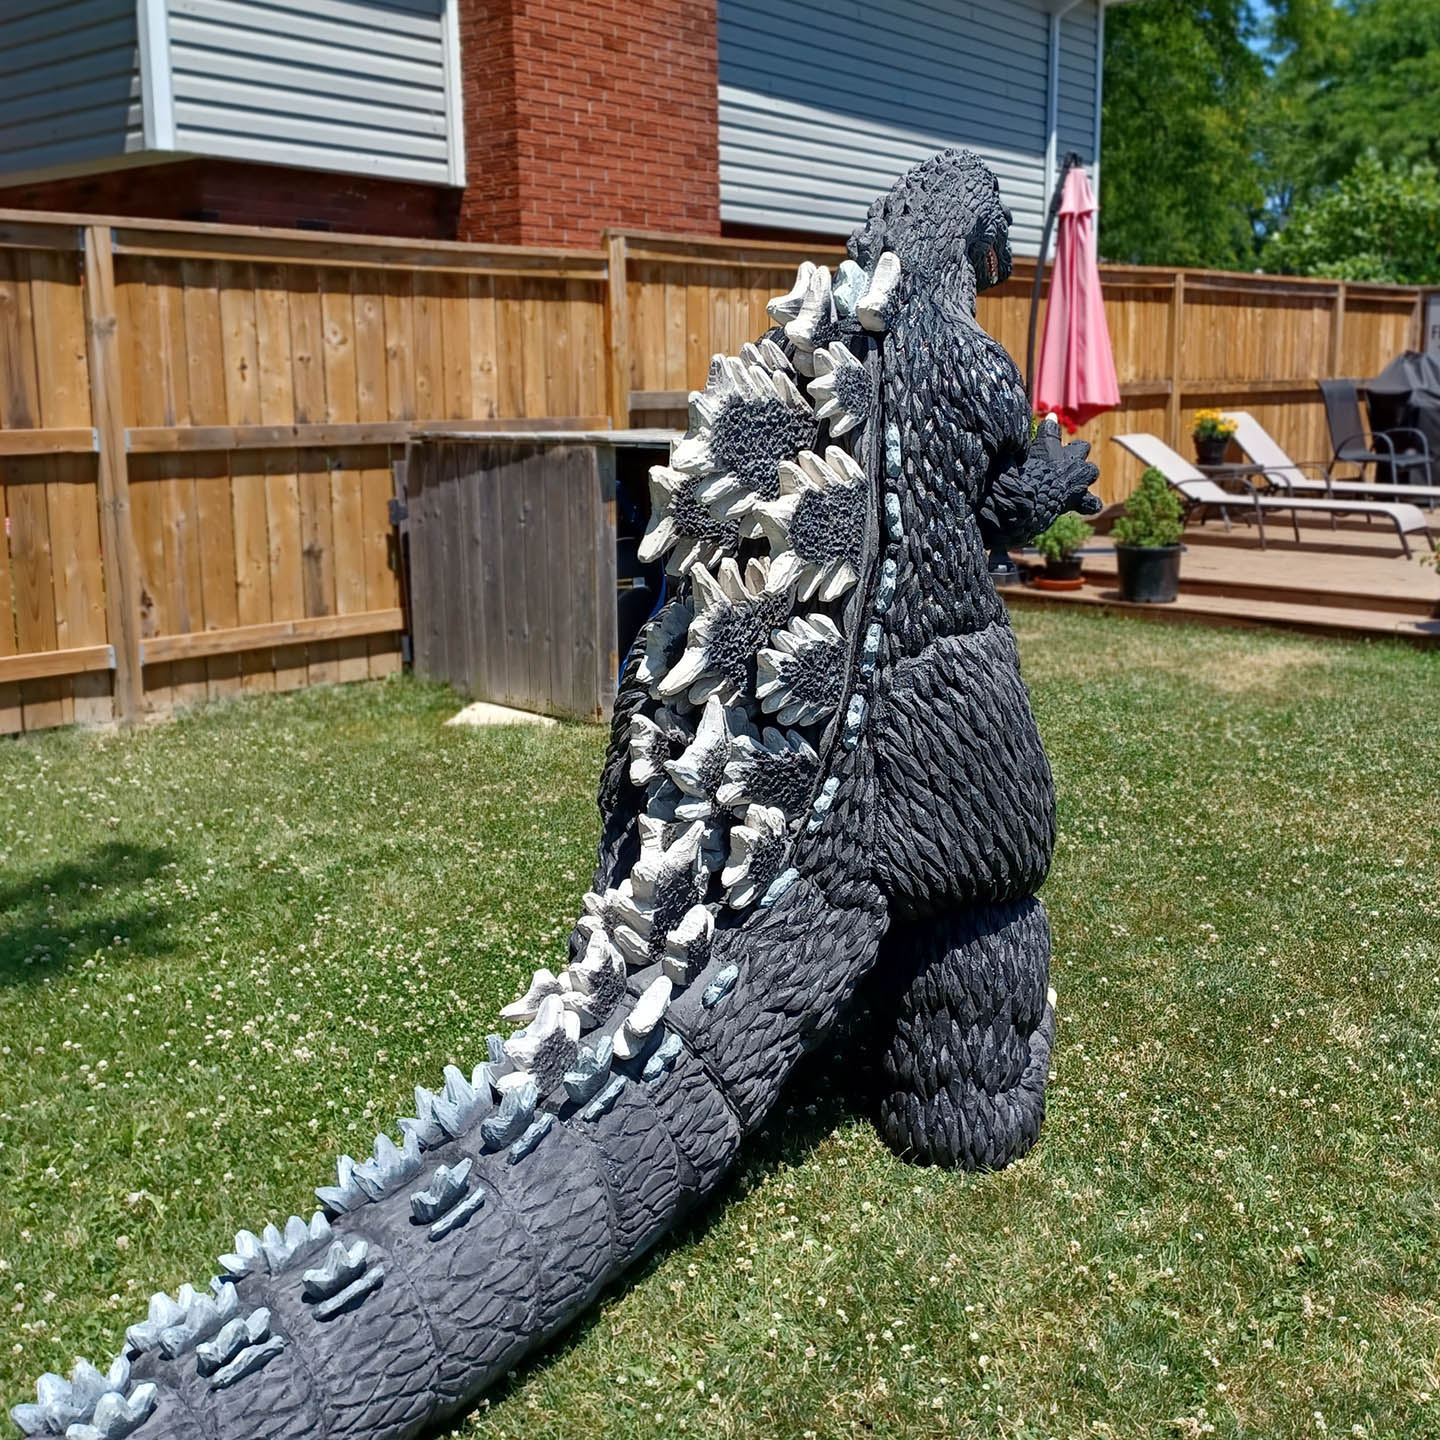
The Tail
The tail was essentially just a large tube of 1 inch foam cut at gradually shrinking intervals to create the impression of rings. The length was determined once again by rescaling the measurements of an action figure. Once fully glued and assembled, it was stuffed end to end with poly-fil. Until the final skin and dorsal fins were added, I kept the tail broken up into 3 segments so it would be easier to work on. Each segment was corked with a sheet of foam glued inside to help contain the stuffing.
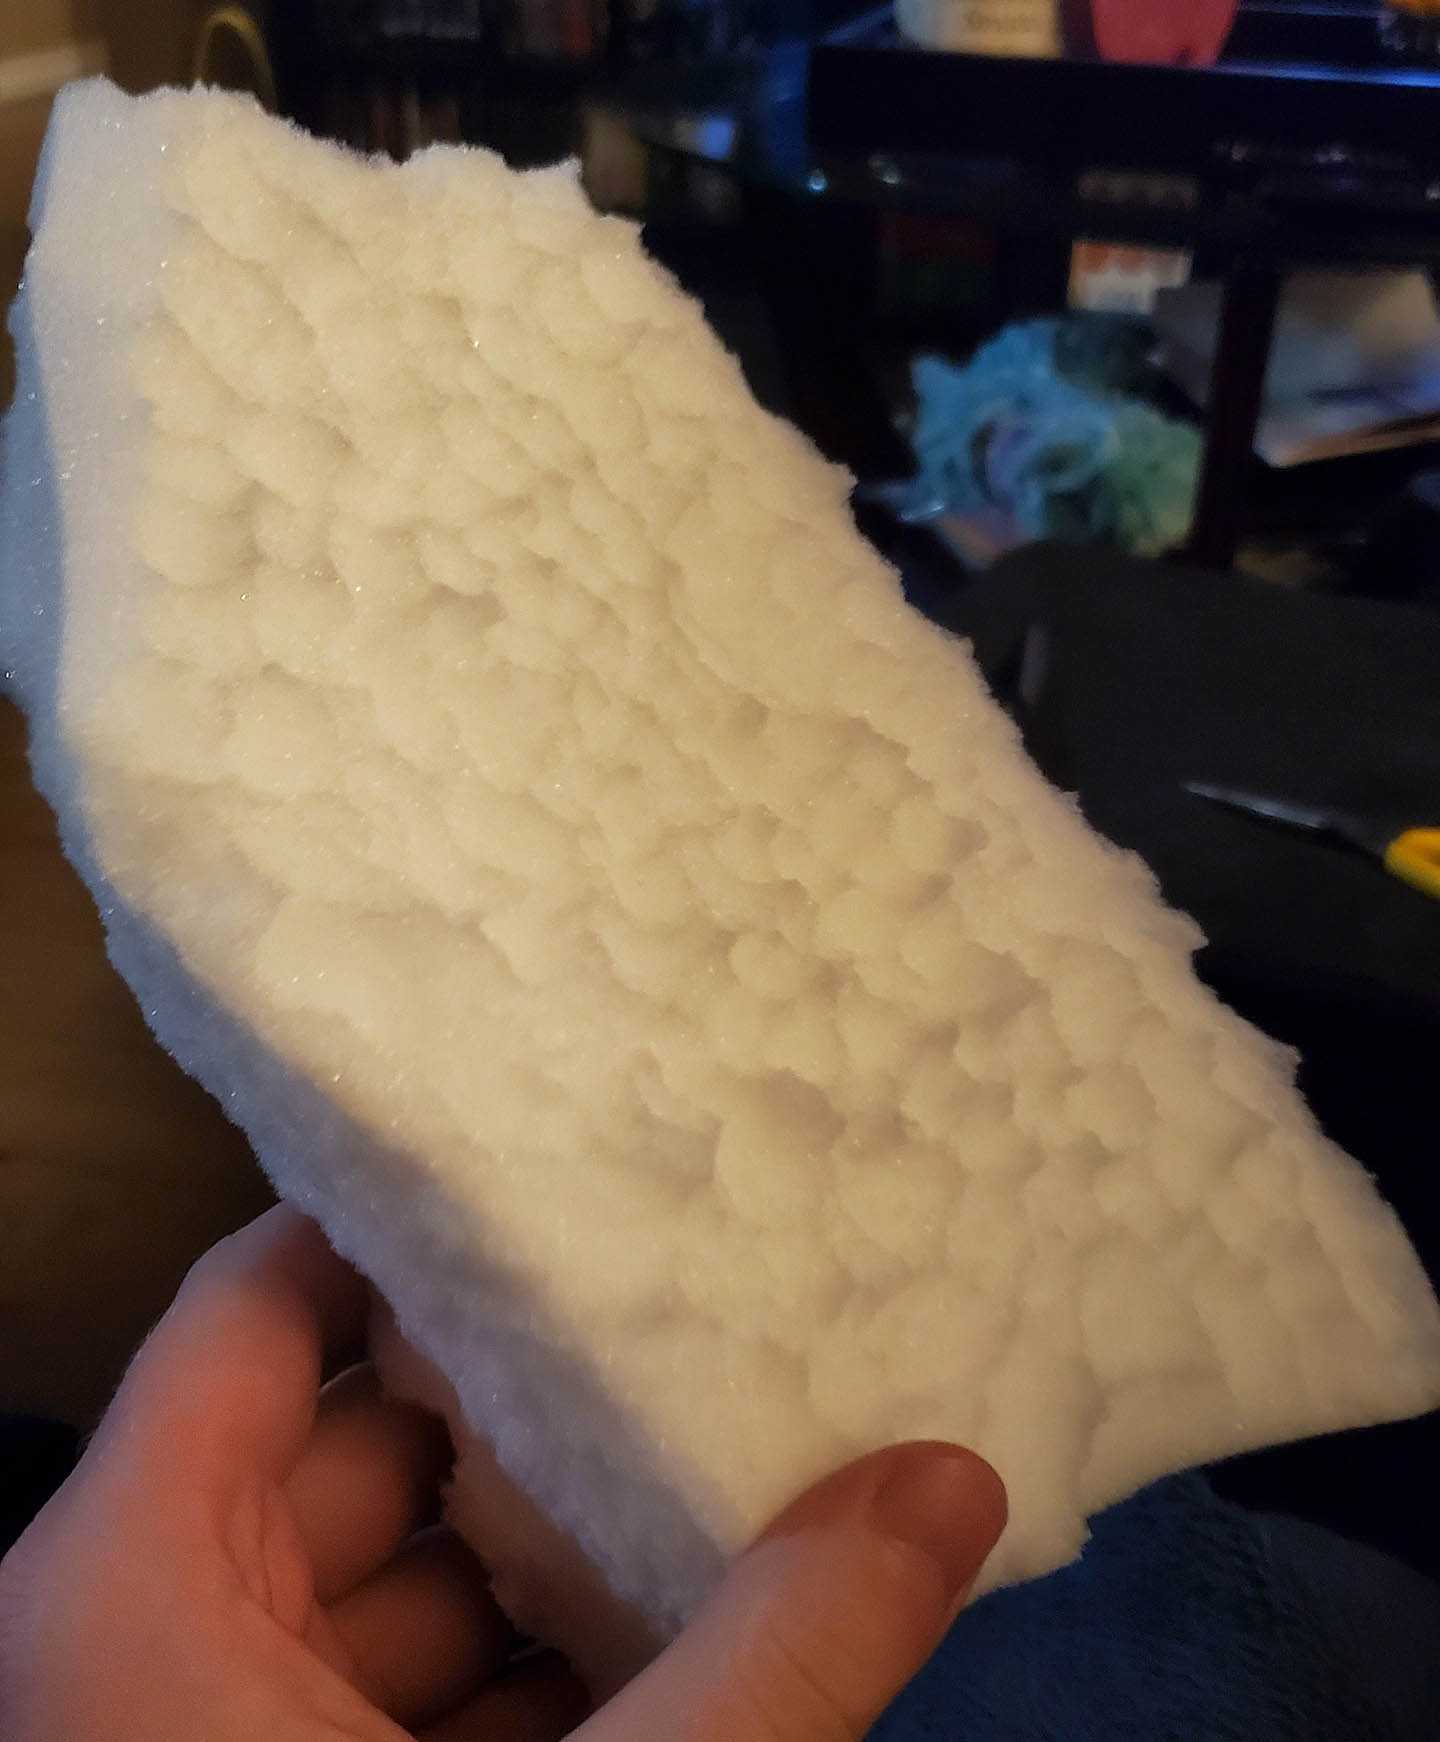
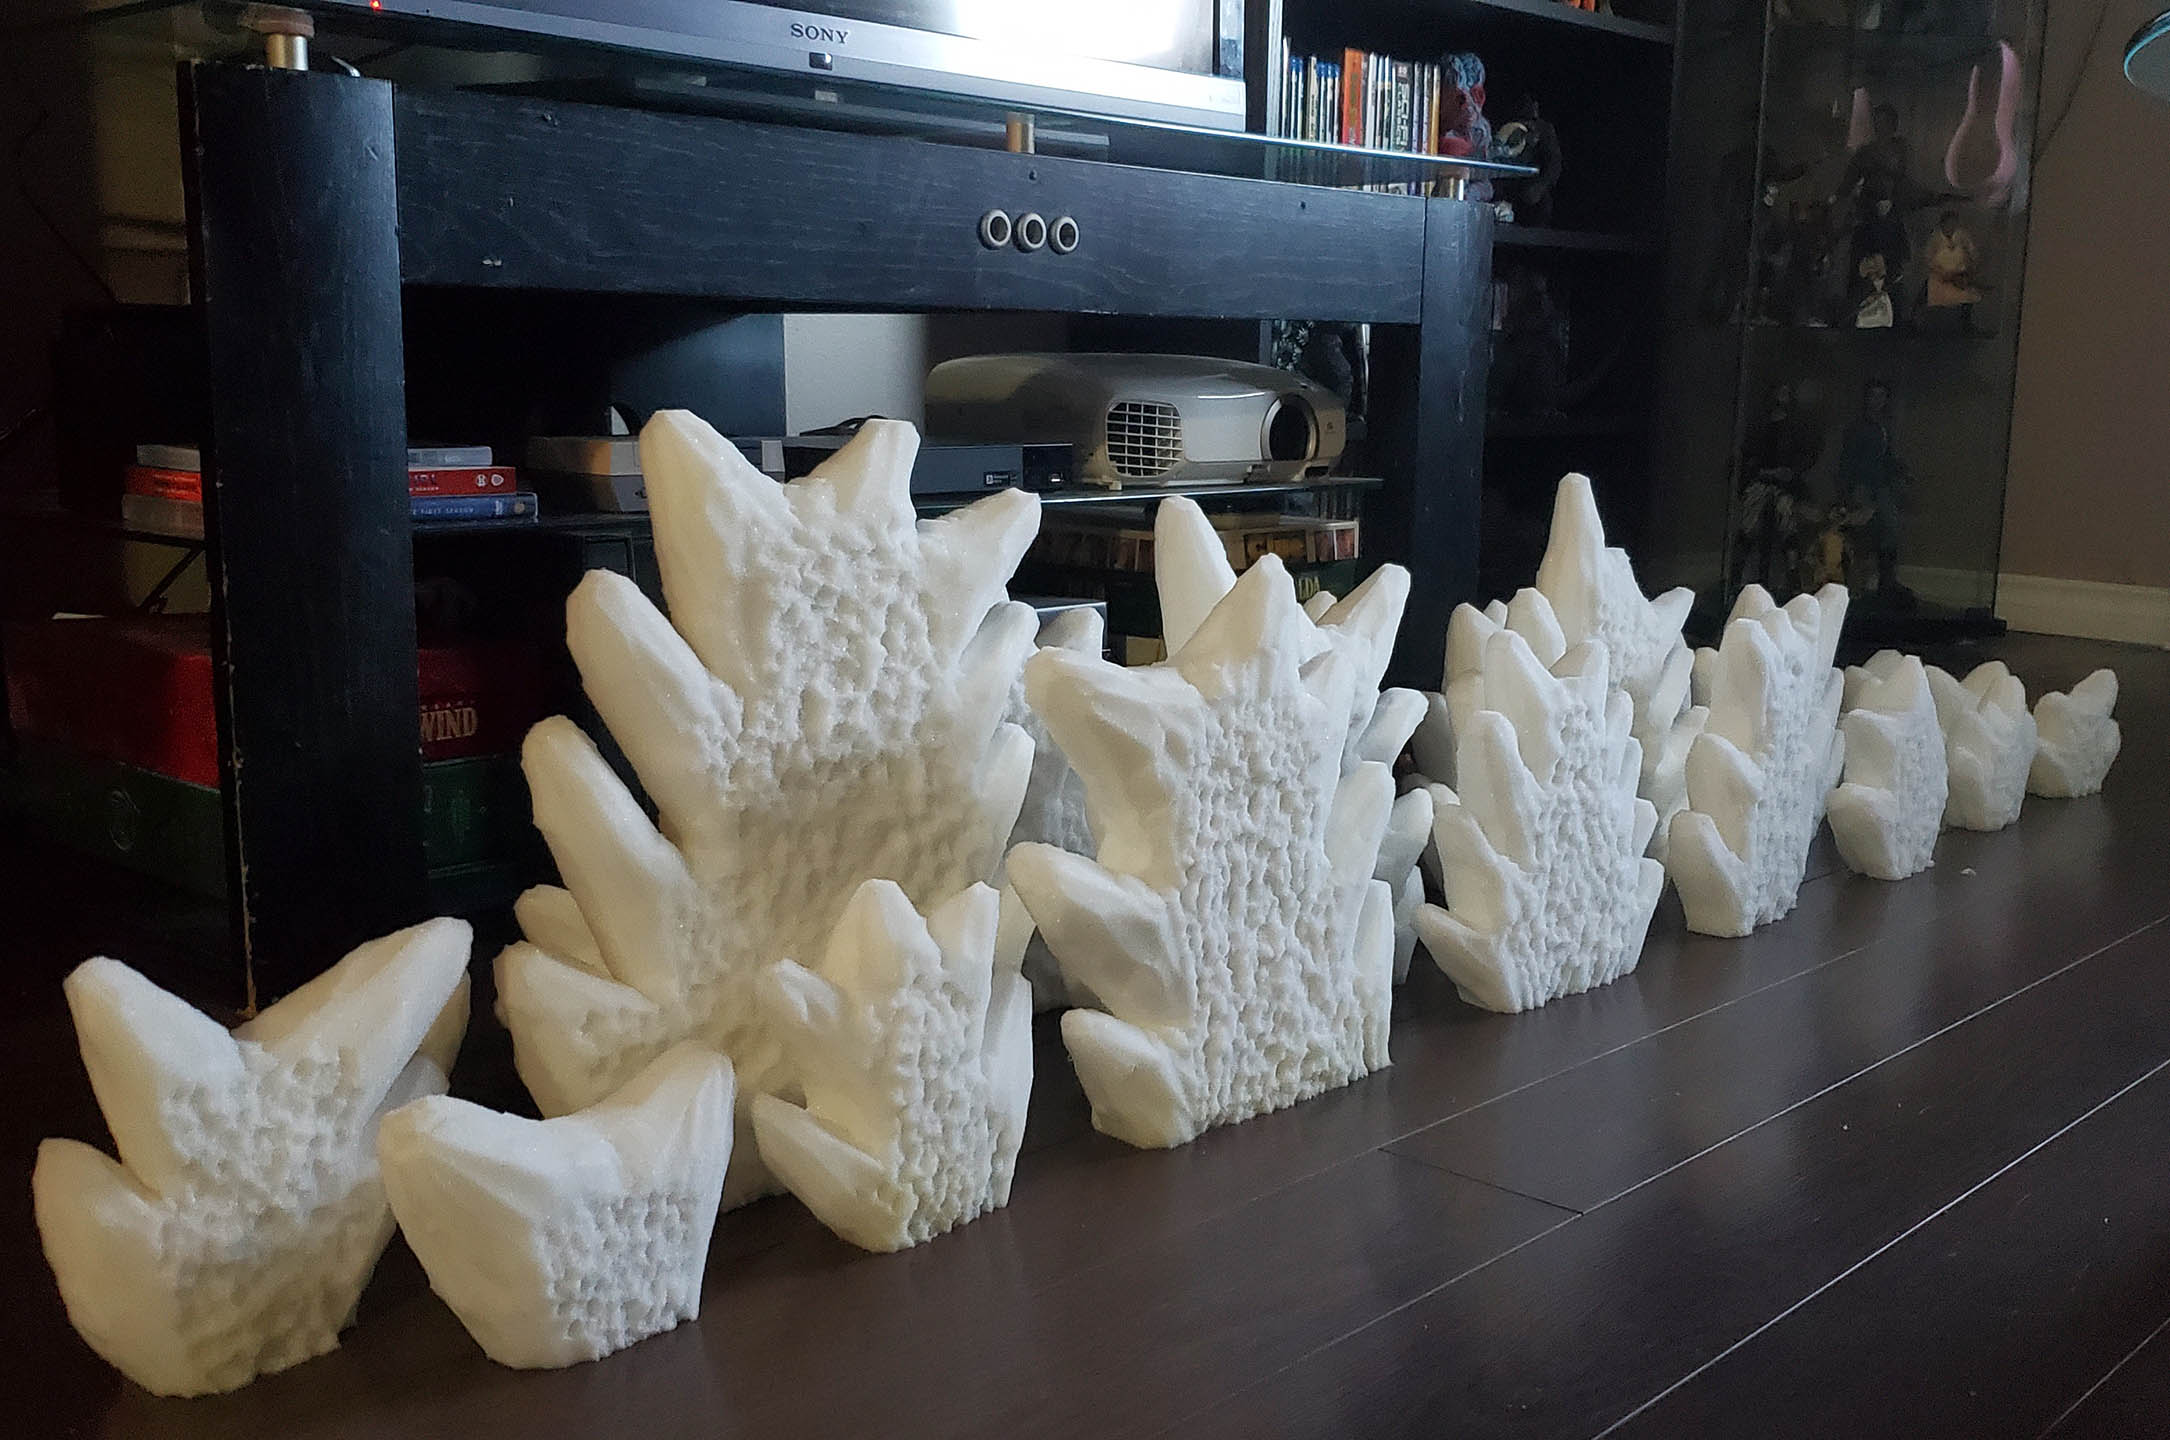
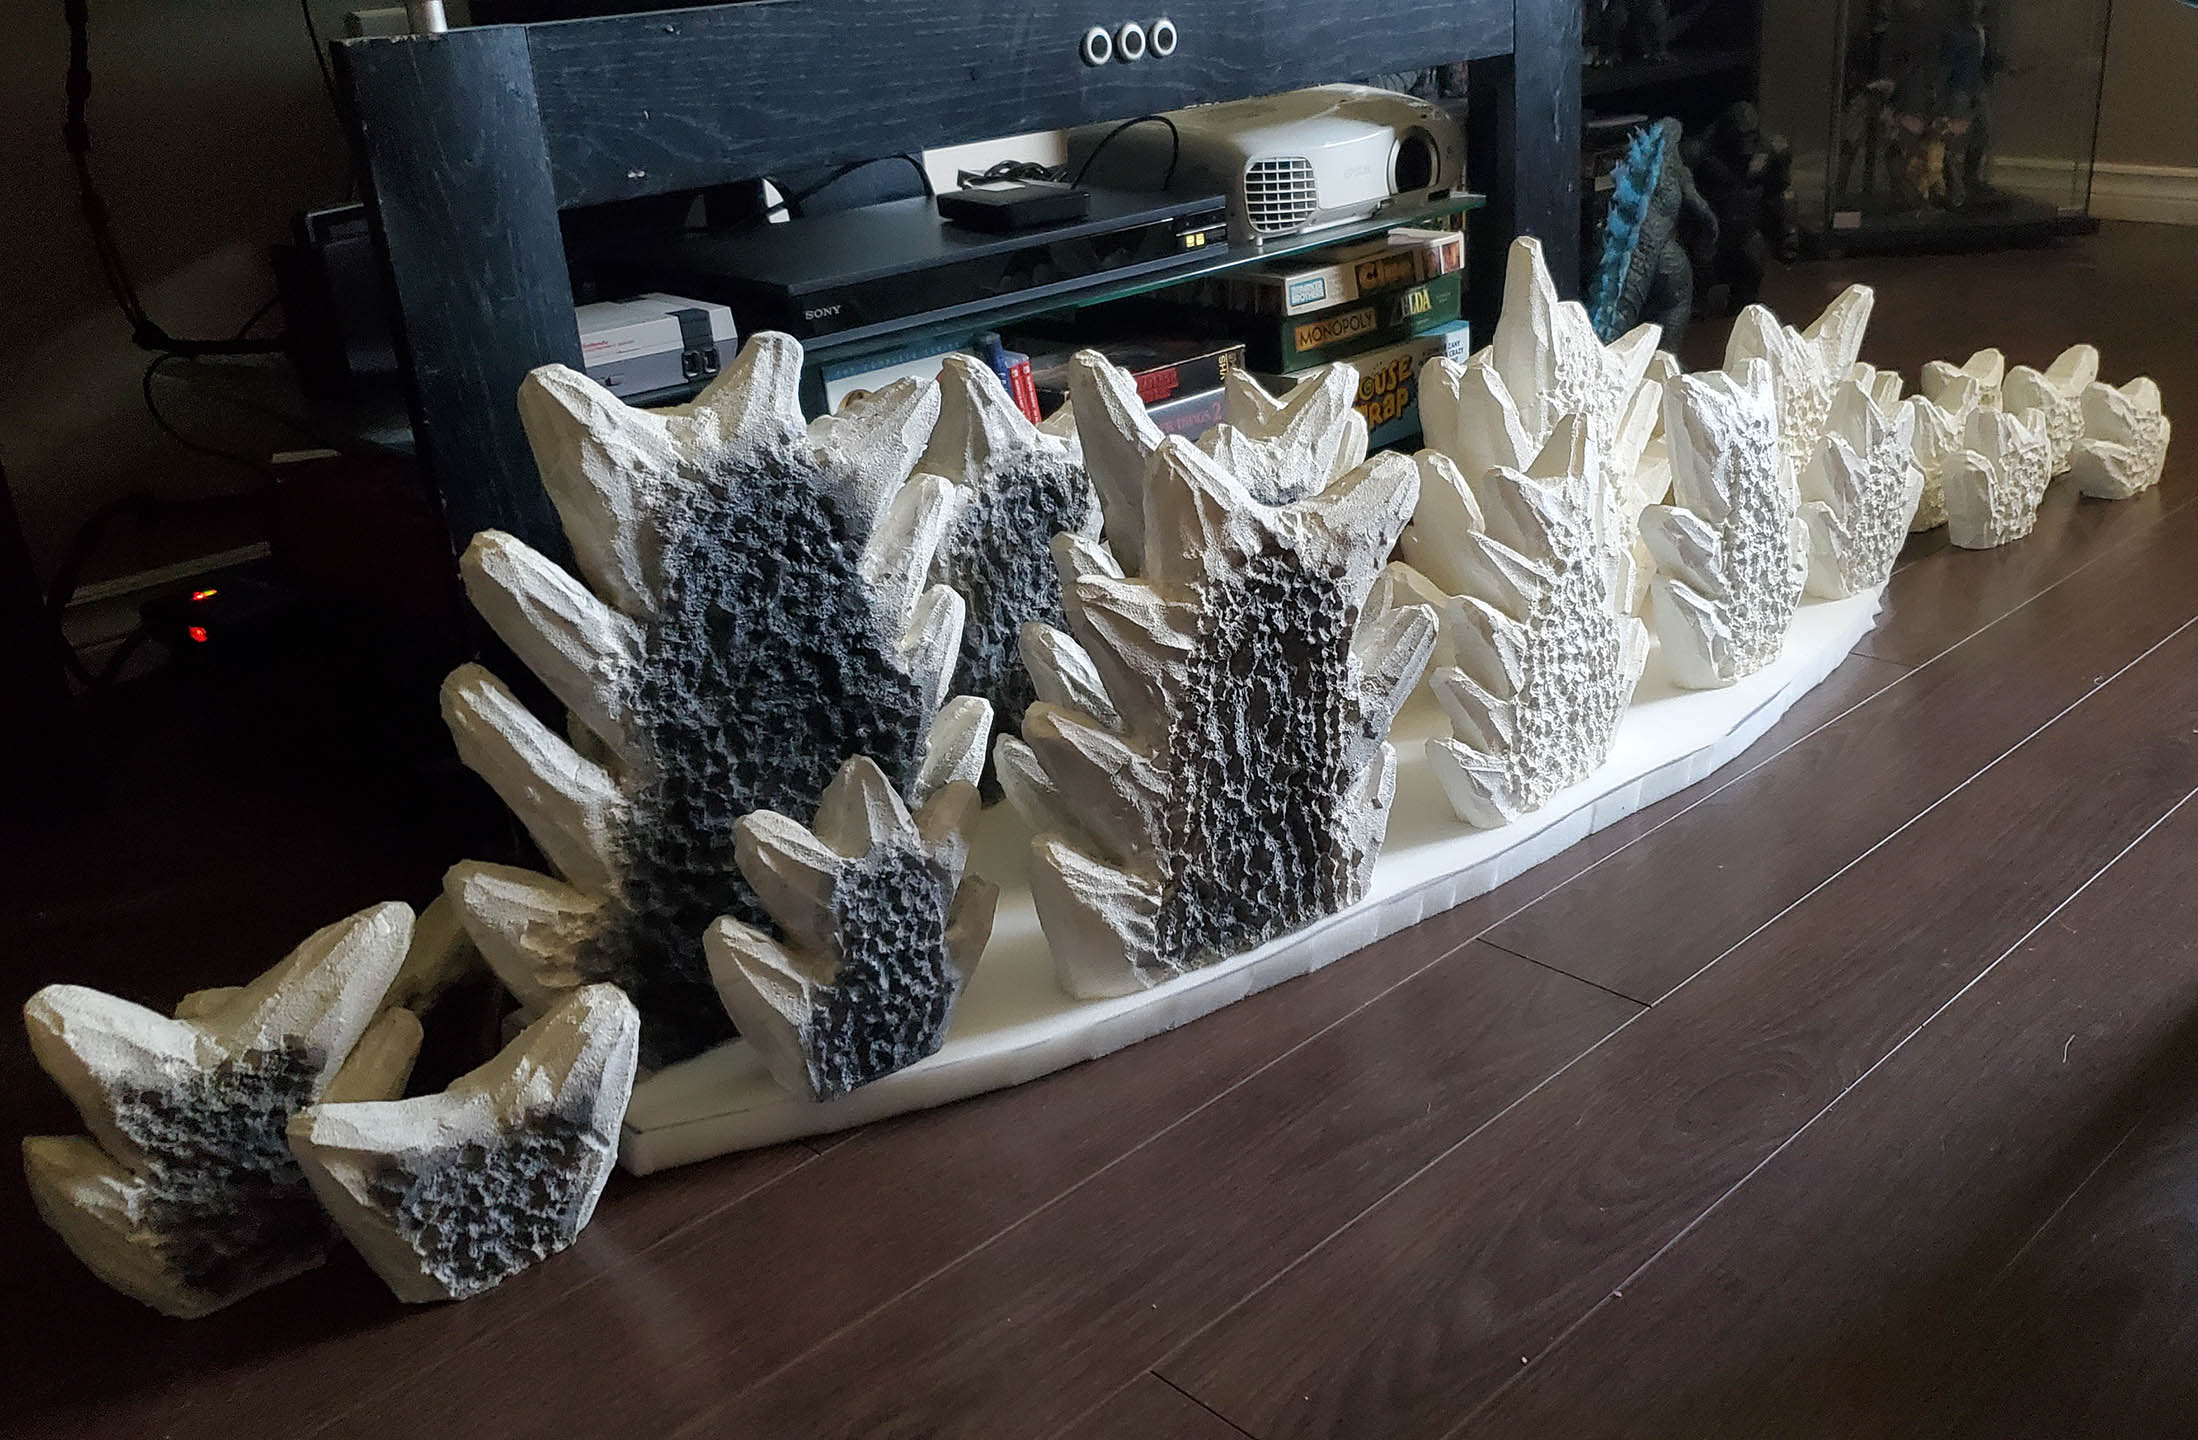
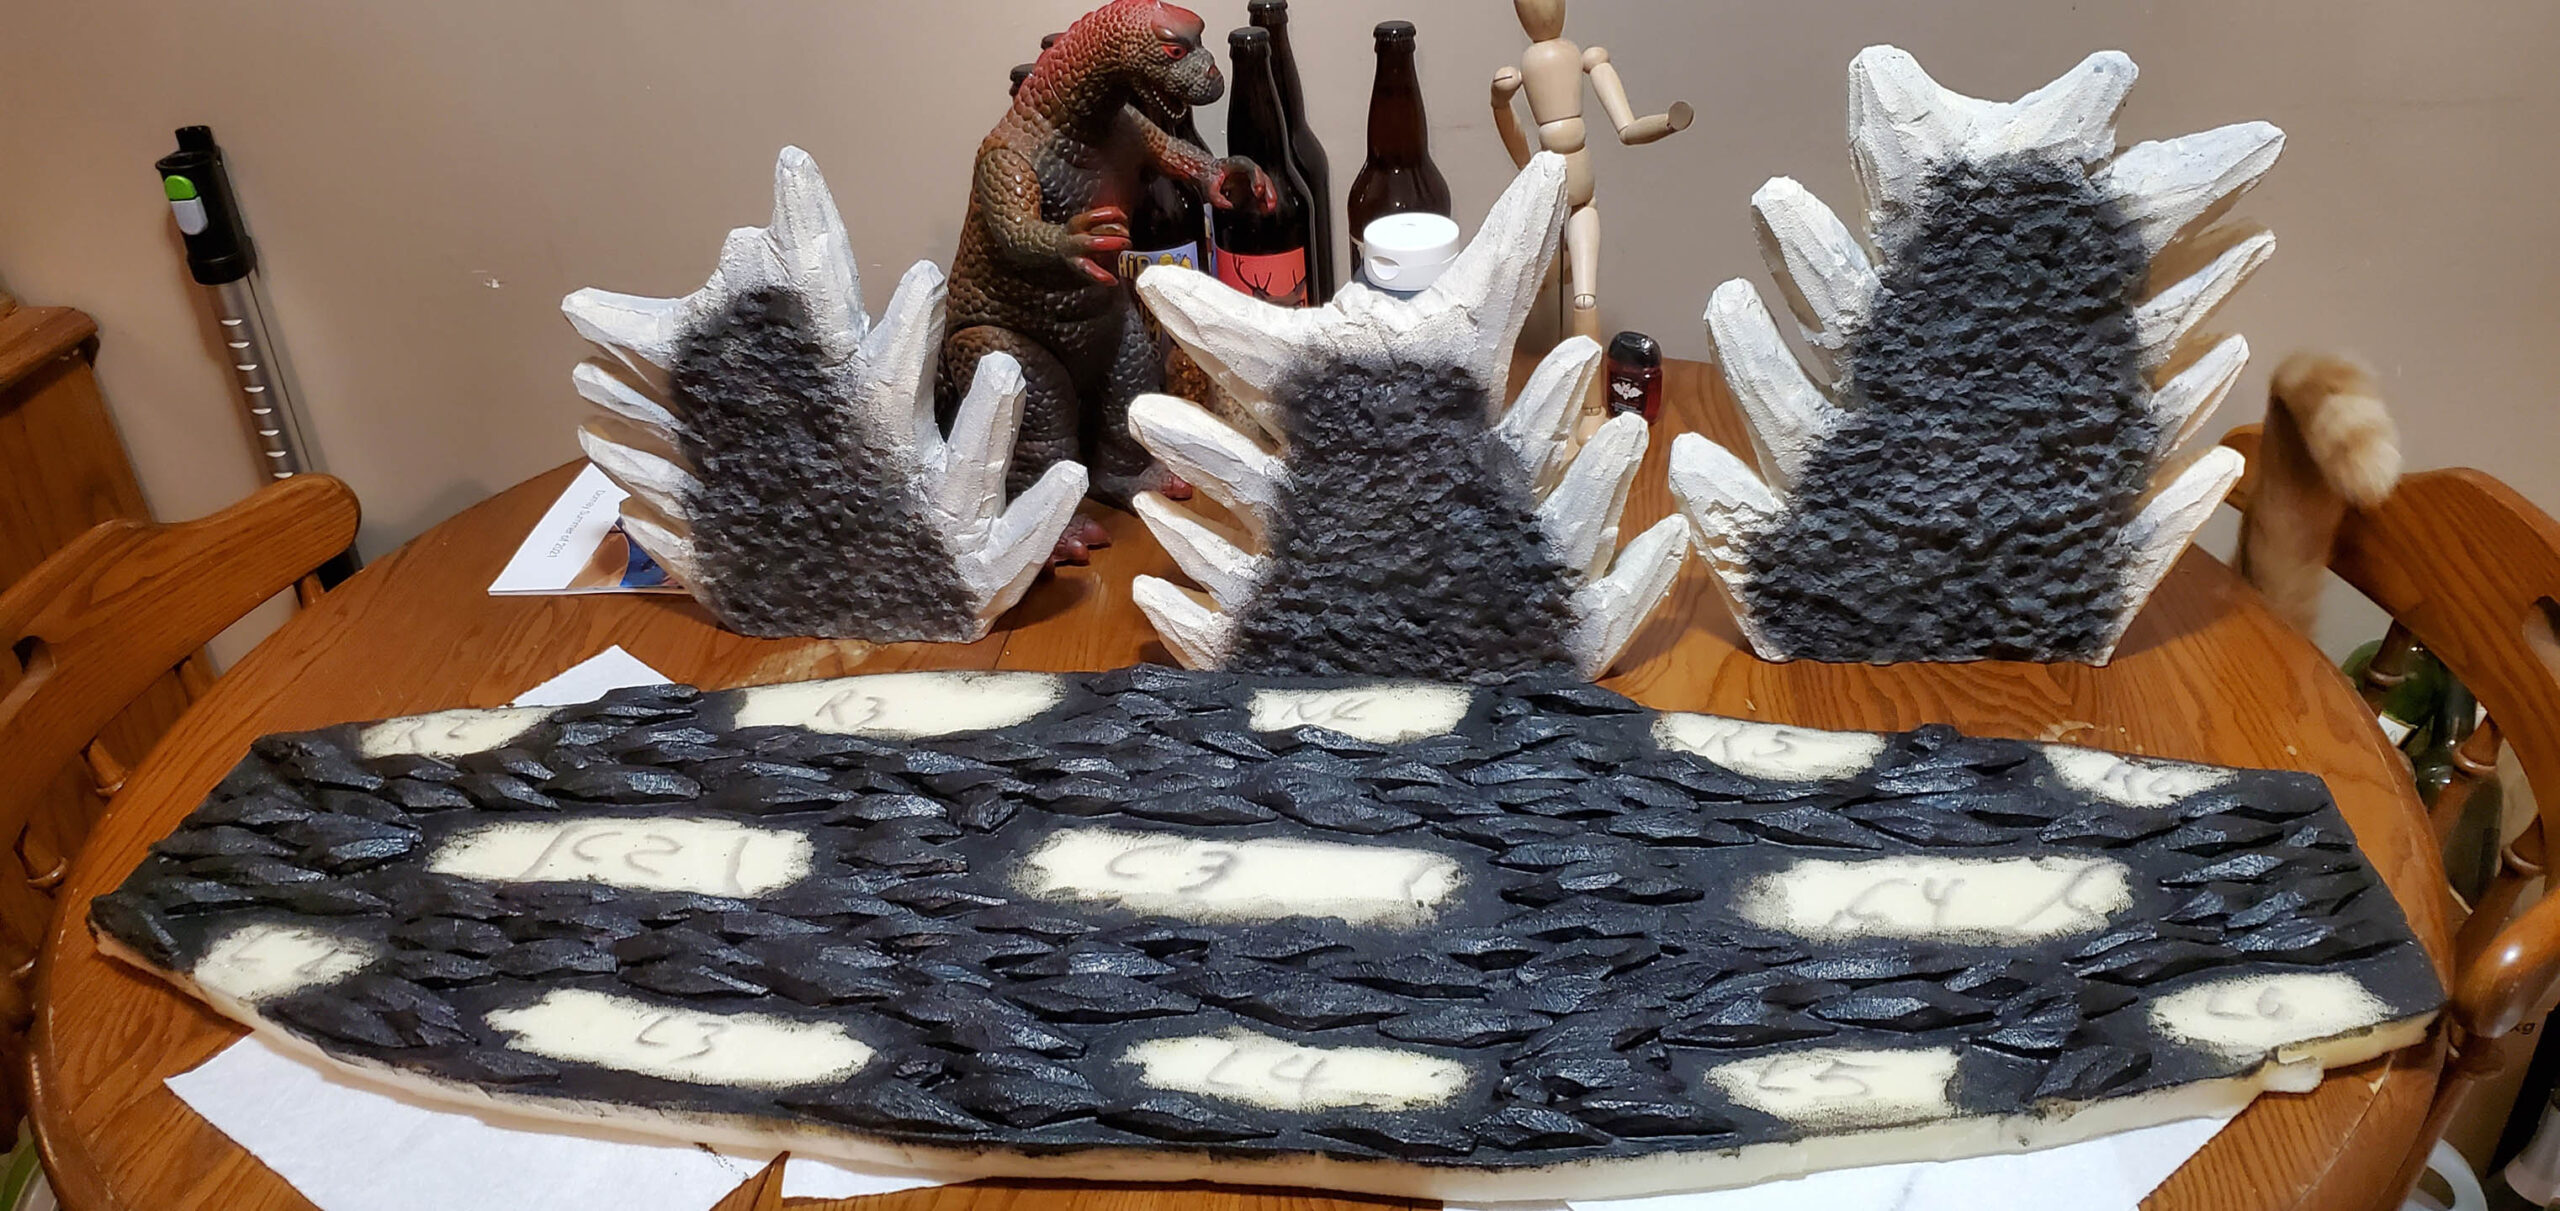
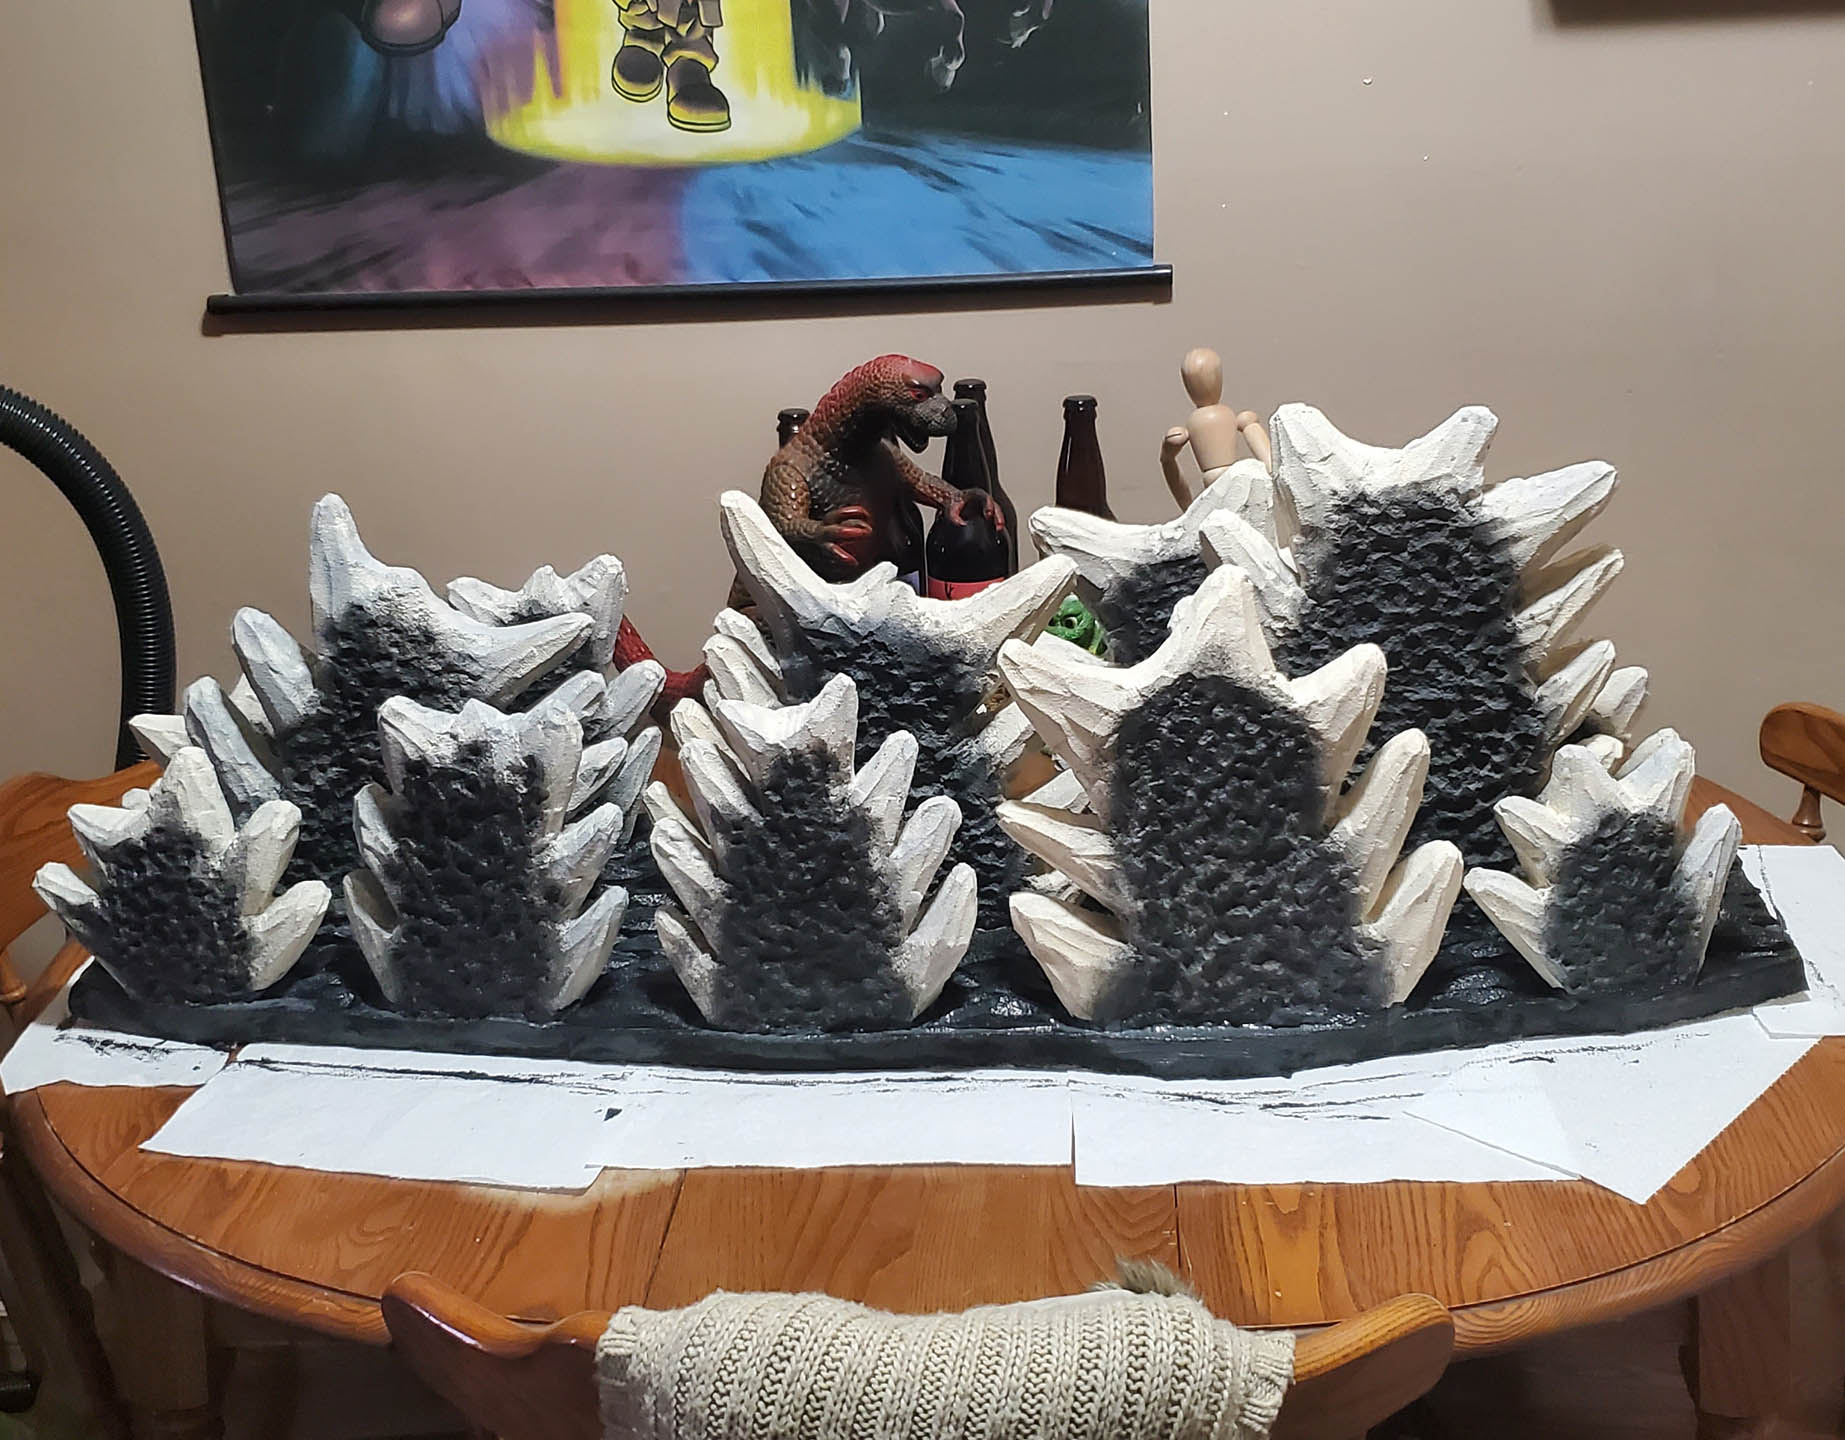
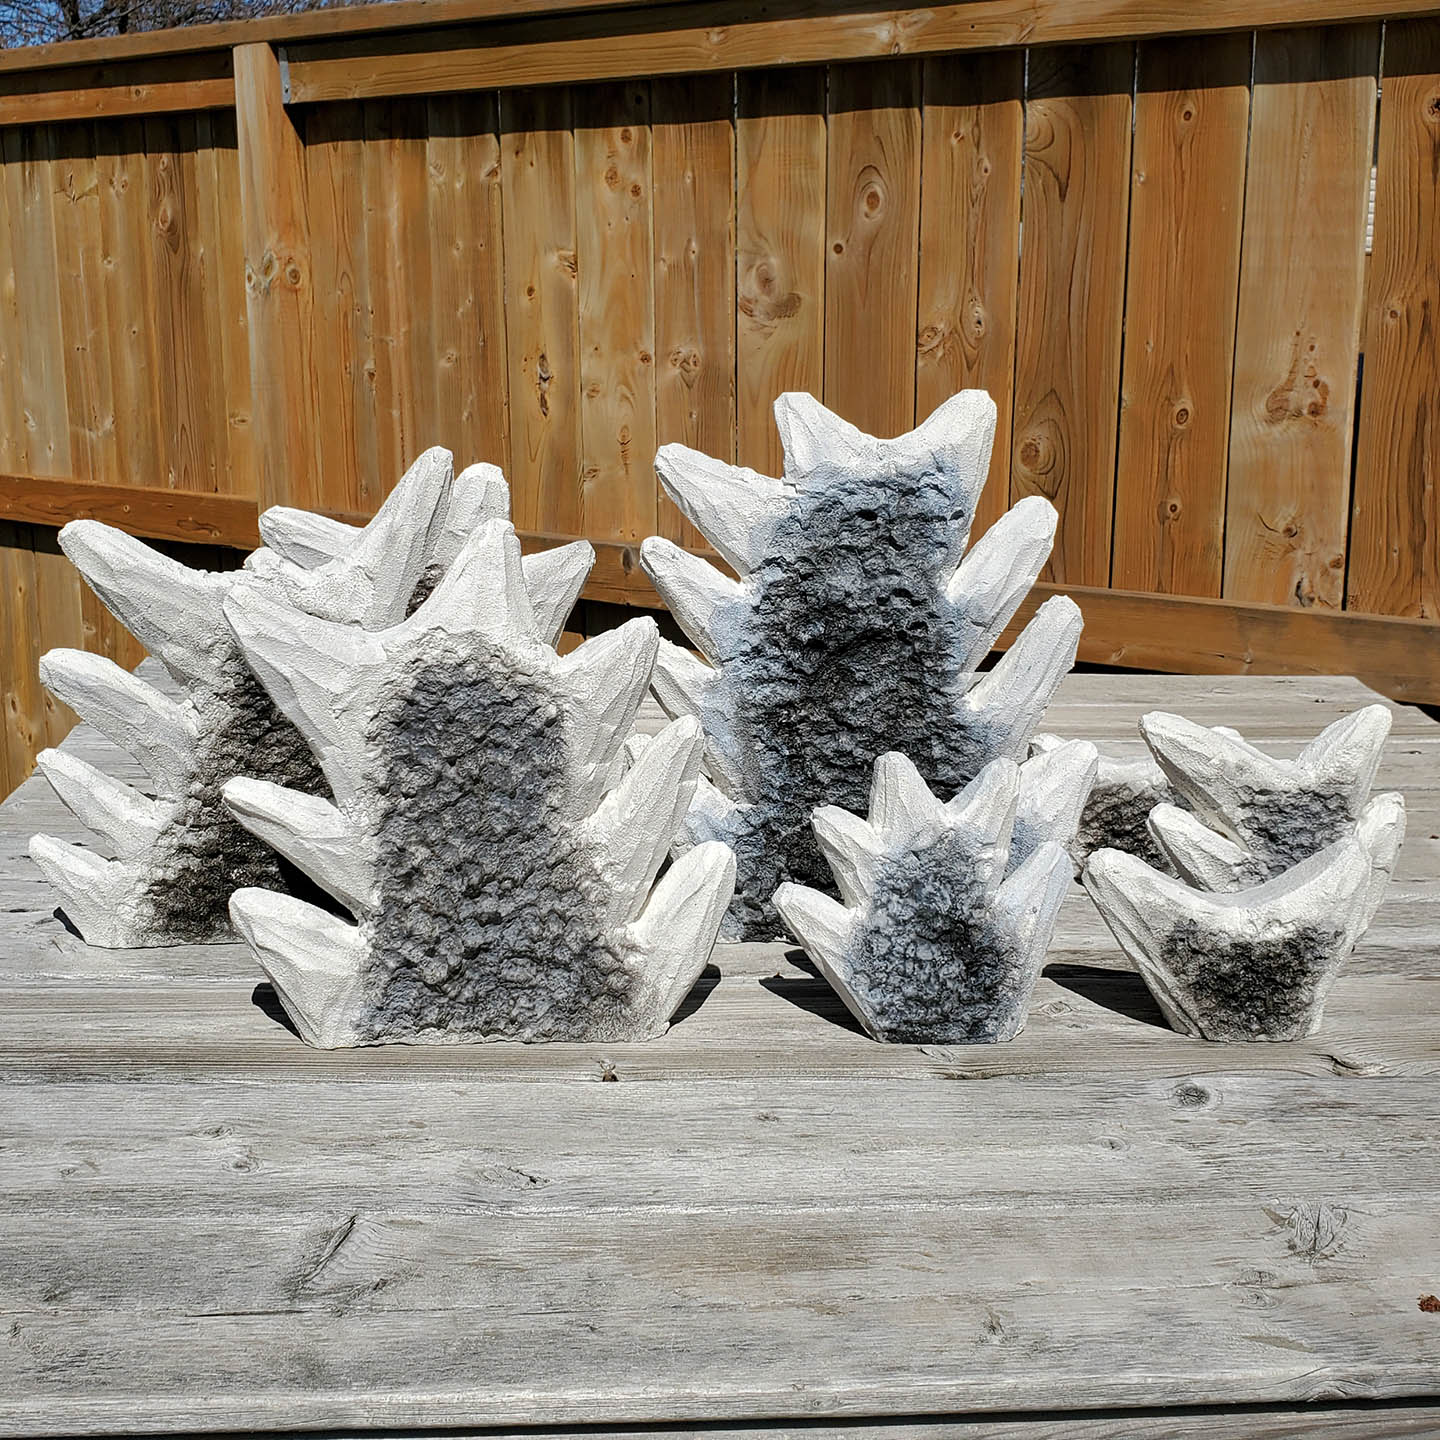
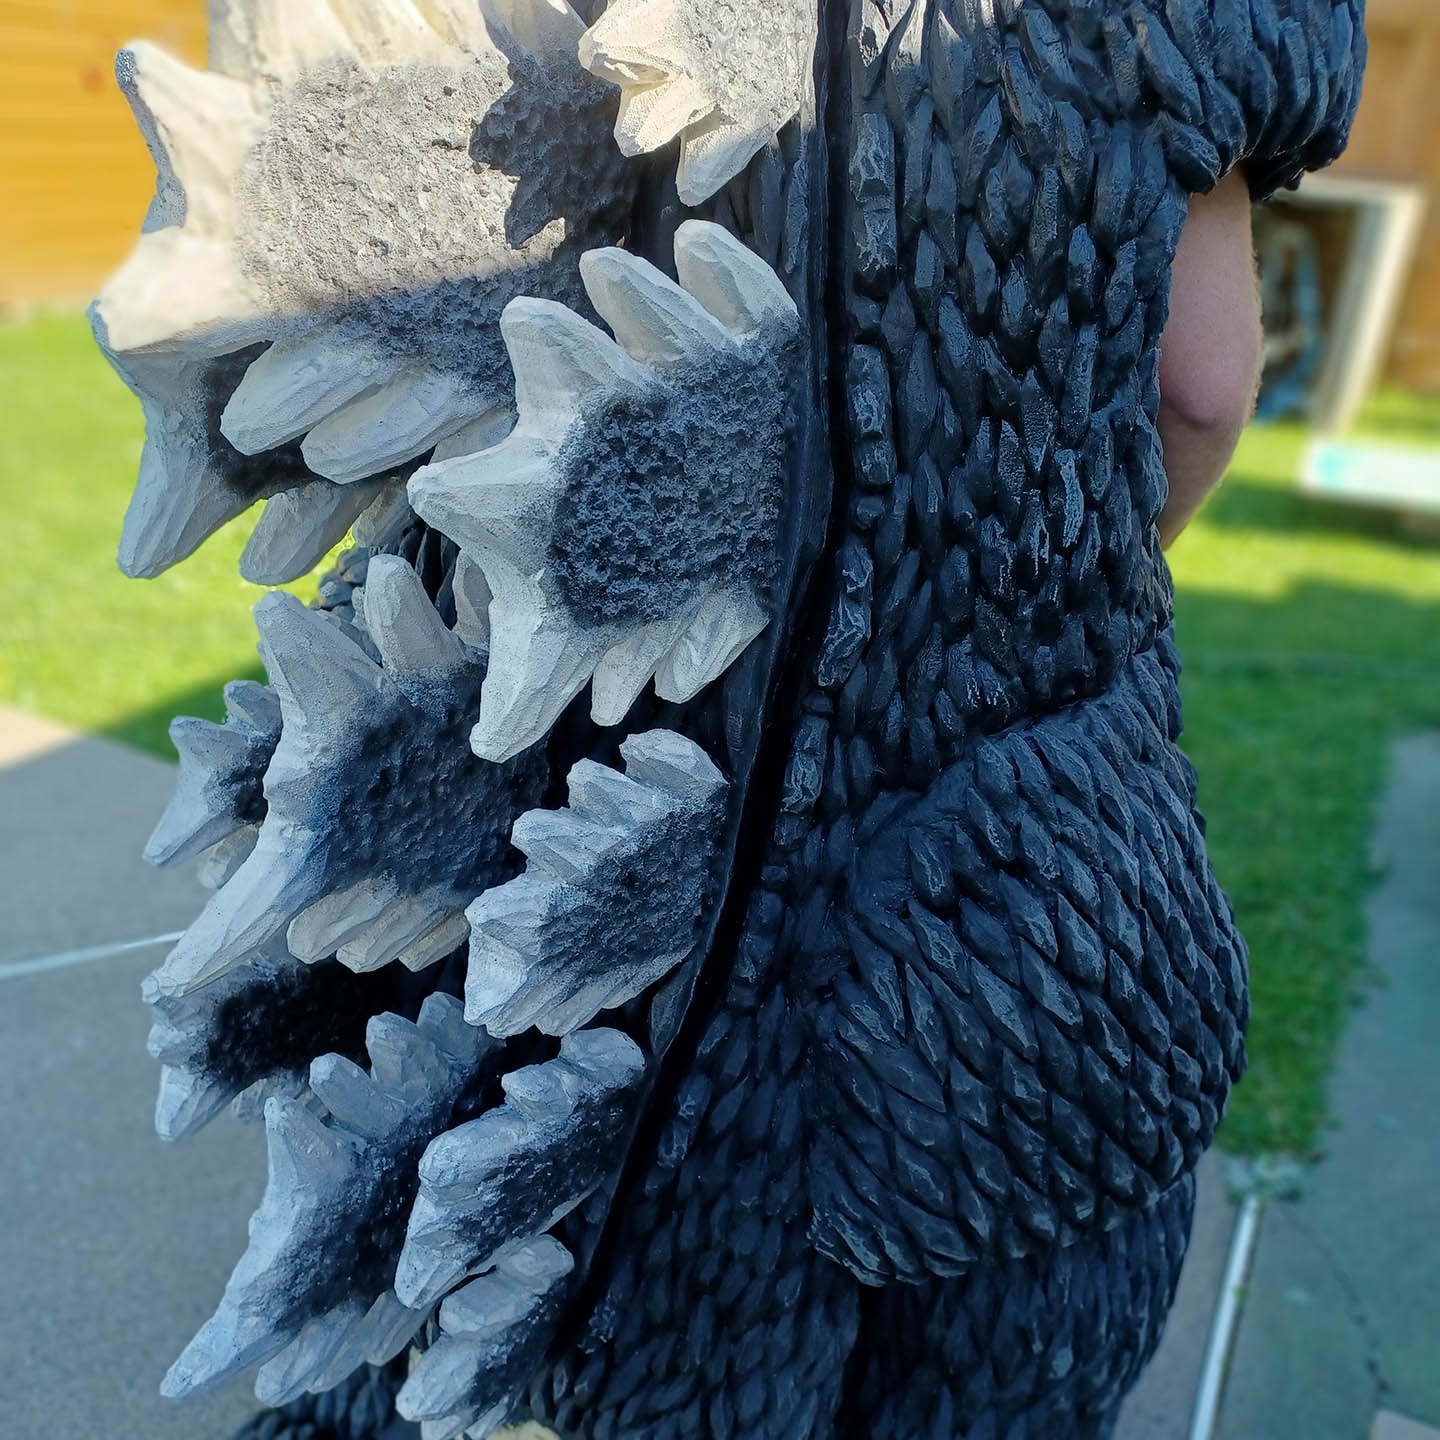
Dorsal Fins
The dorsal fins were patterned on paper; drawn by hand using a variety of screenshots from Godzilla vs. King Ghidorah (1991) as reference. In the case of the outermost row, I utilized a profile scan of Yuji Sakai’s Human-sized Godzilla 1991 statue, as it offered the clearest, cleanest view of any of the fins. Because most of the fins overlap, some guess work was involved in designing the center row. These patterns were then blown up on paper to match the scale of the suit, and translated to 2 inch thick upholstery foam. They were cut out and shaped using an electric carving knife and scissors. The final texture was achieved by simply plucking the surface with my fingers until the desired look was achieved. After being latexed and painted, the majority of the fins were glued to a 1 inch sheet of foam, a plate that velcroed over the opening in the back of the suit that I use for entry, just like many of the official Toho suits. The velcro was sewn by hand onto sheets of cheap black fabric which was then glued to the corresponding sides of the suit and back plate with Super 77. Attaching the velcro to fabric adds durability over putting it directly on the foam.
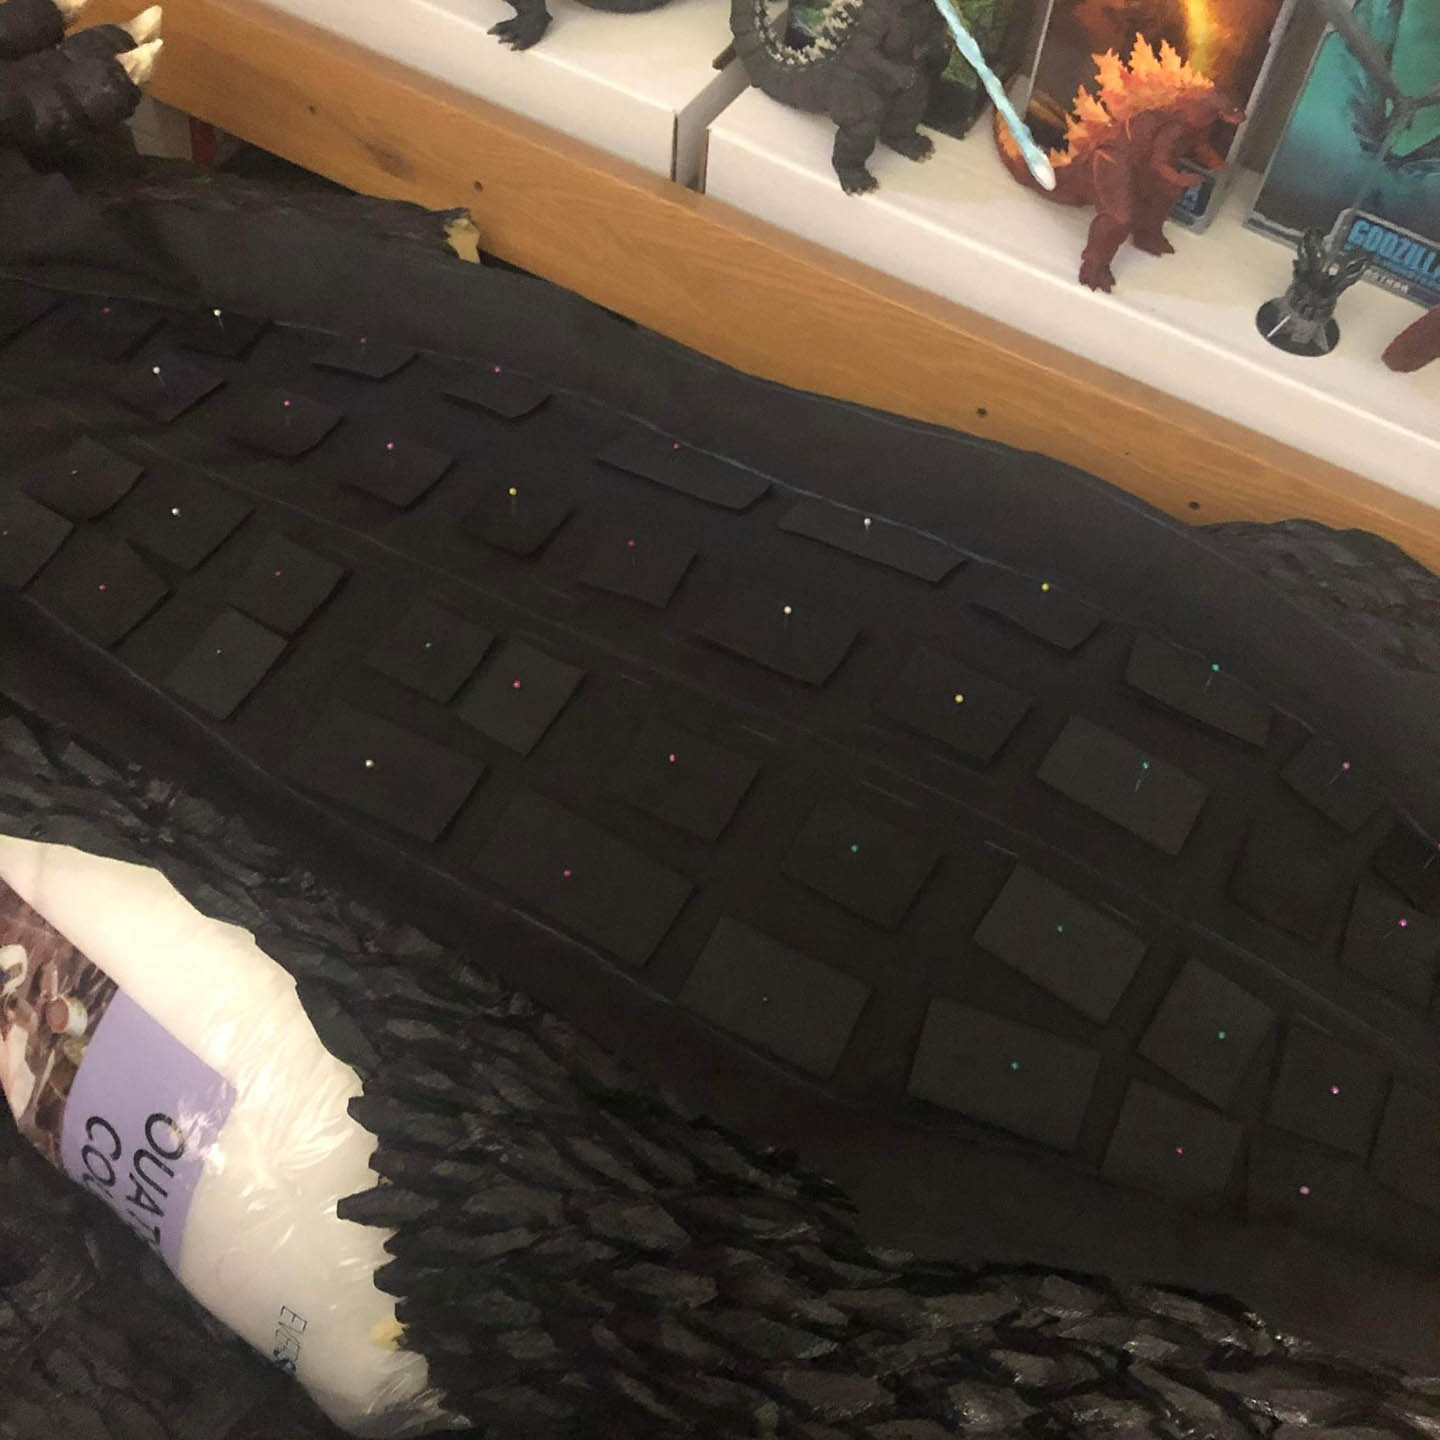
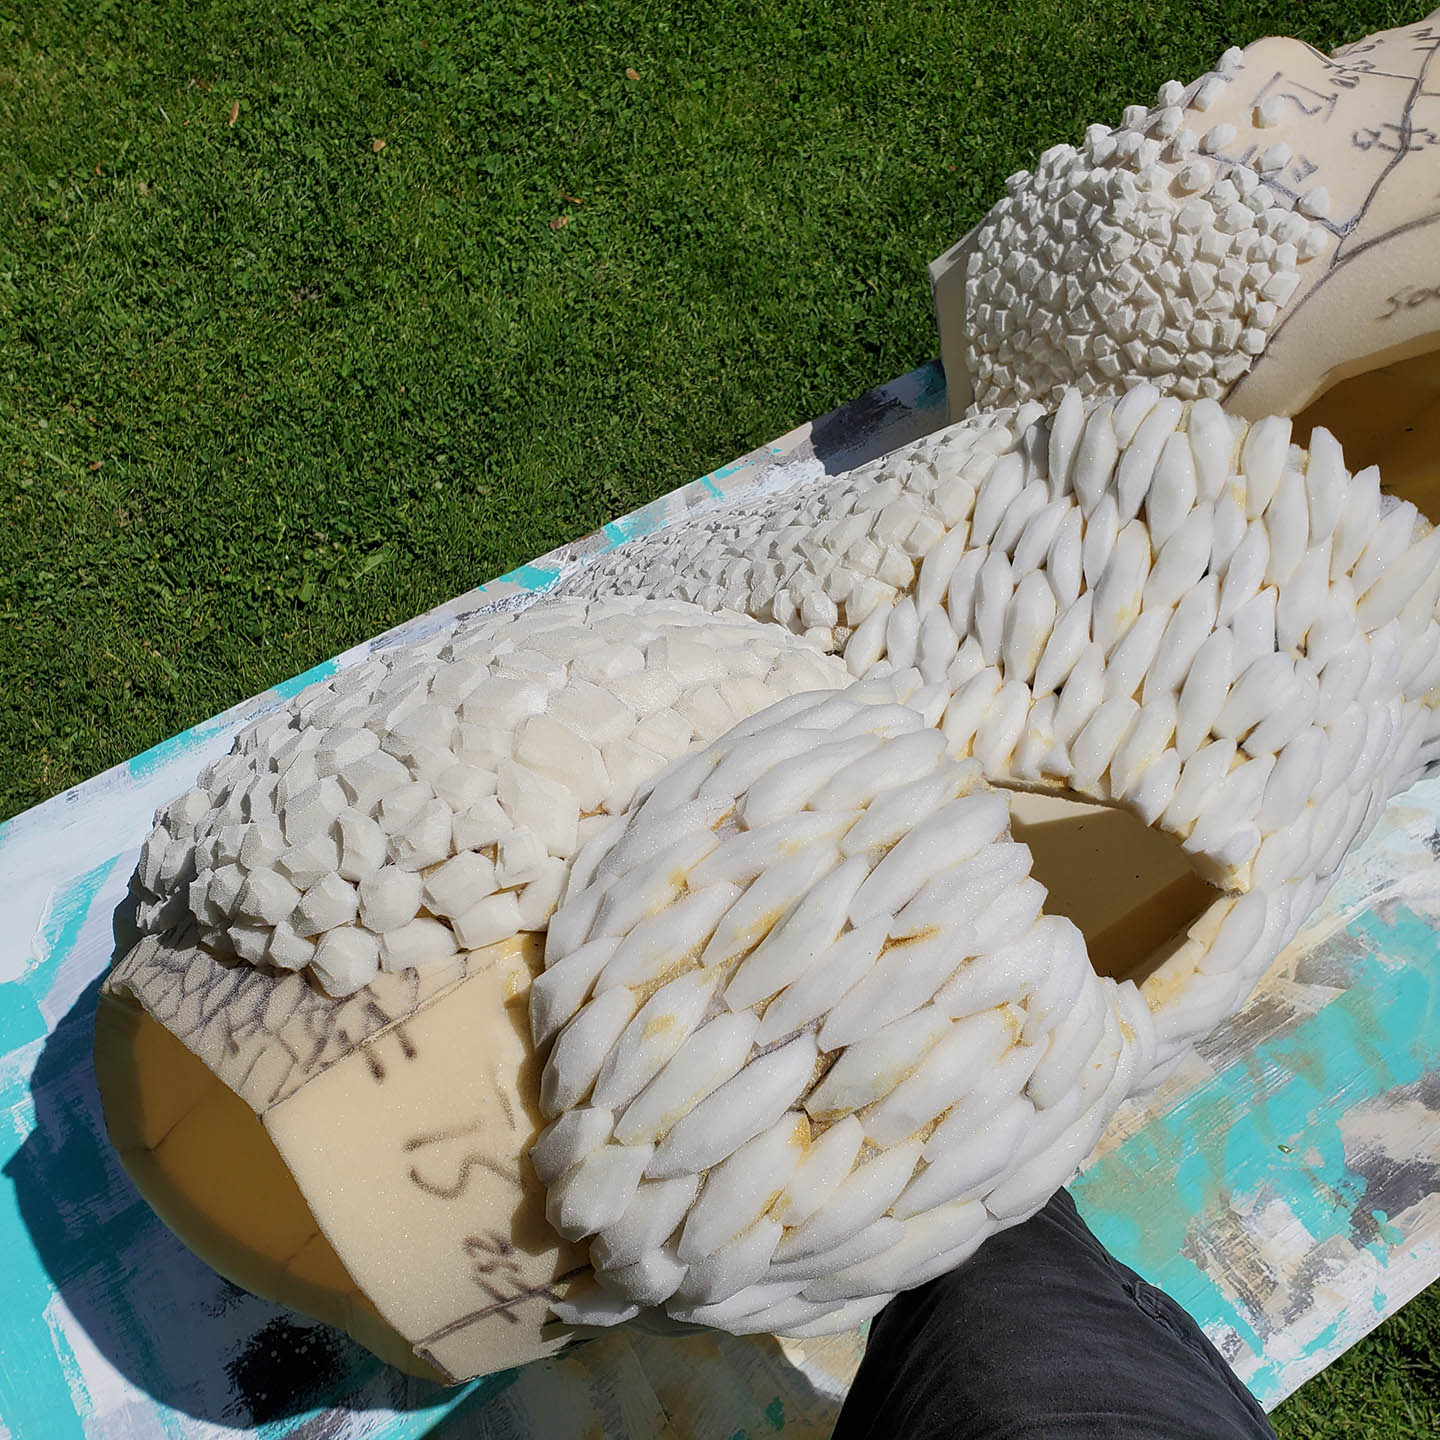
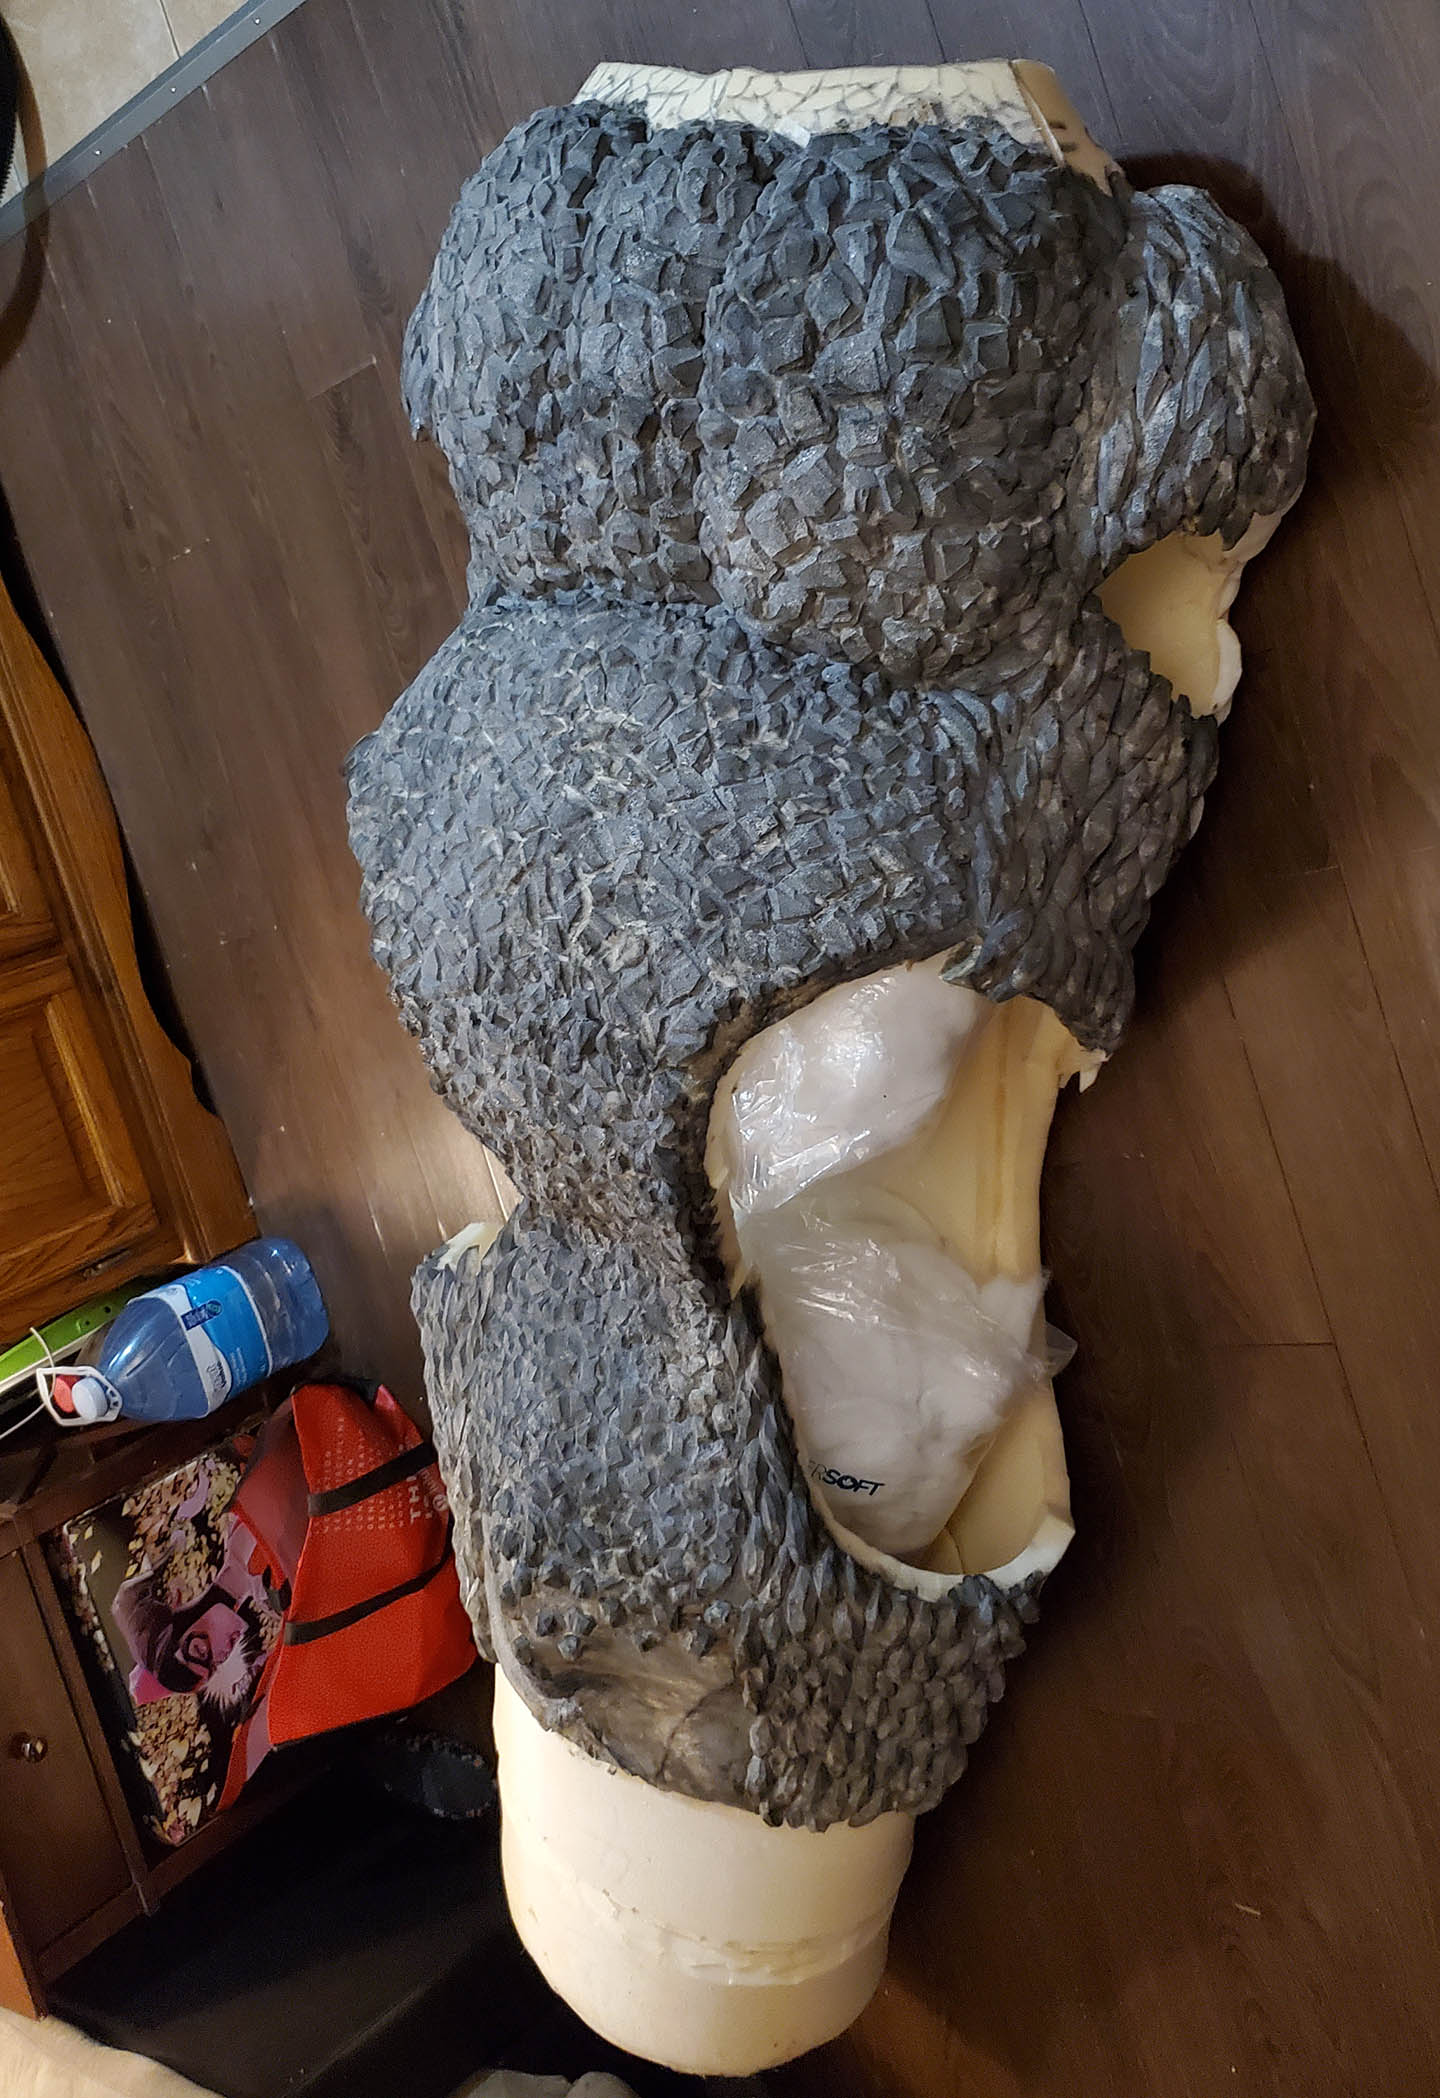
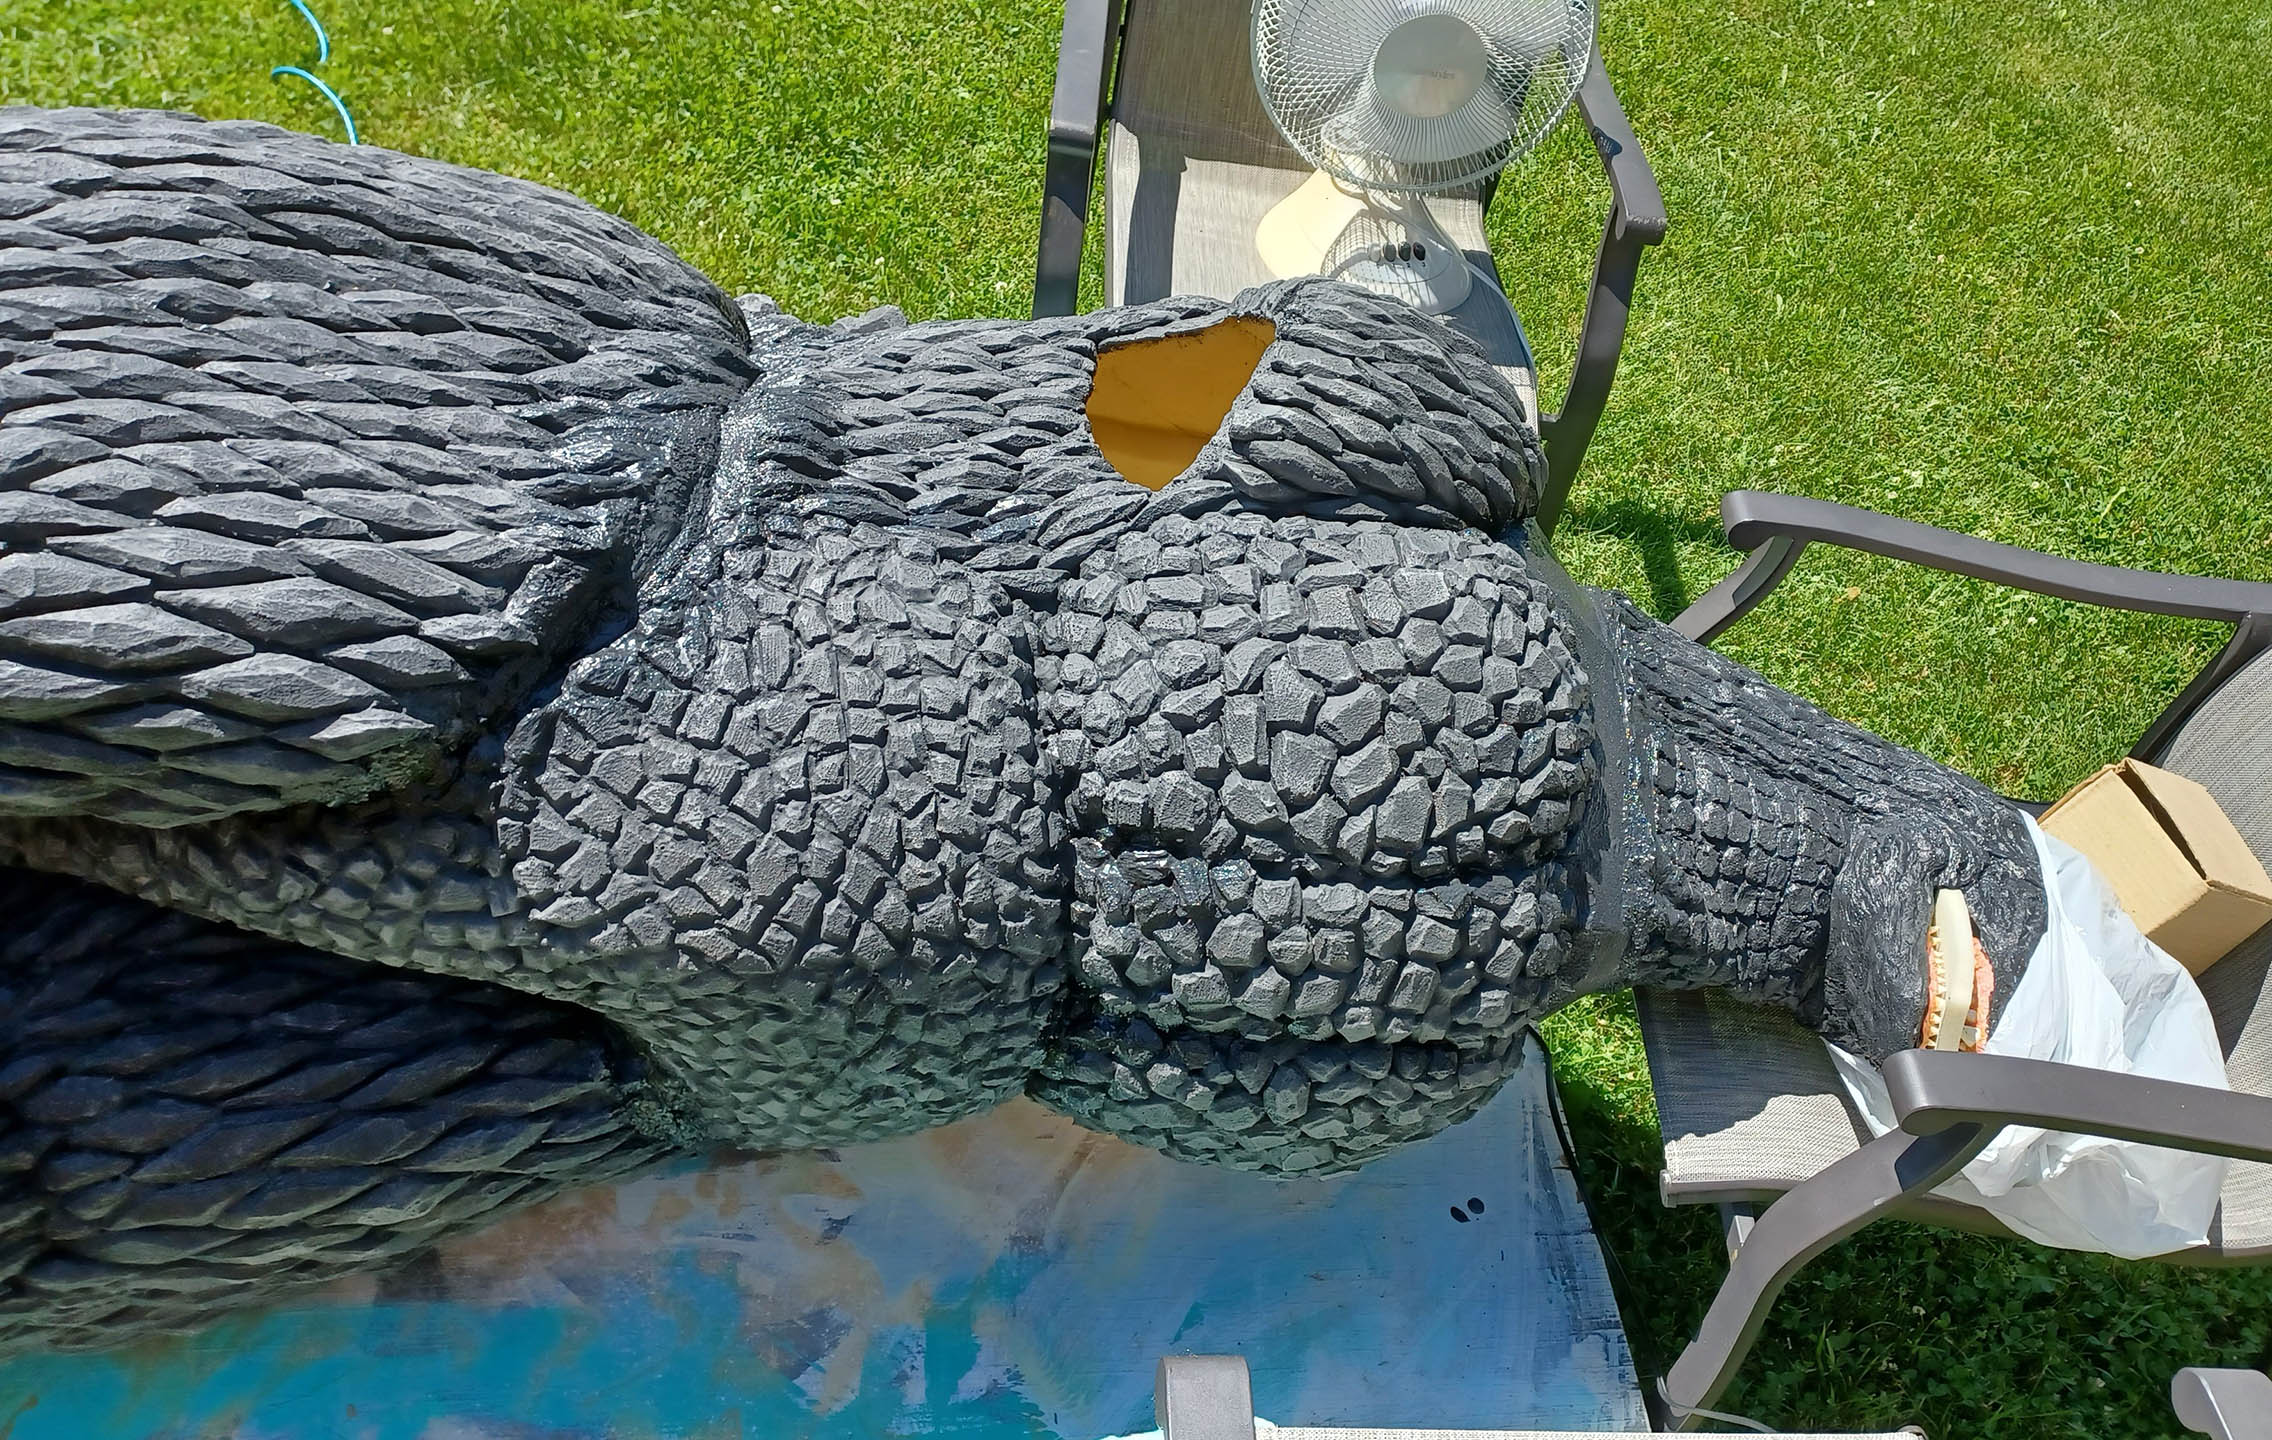
Skinning and Painting
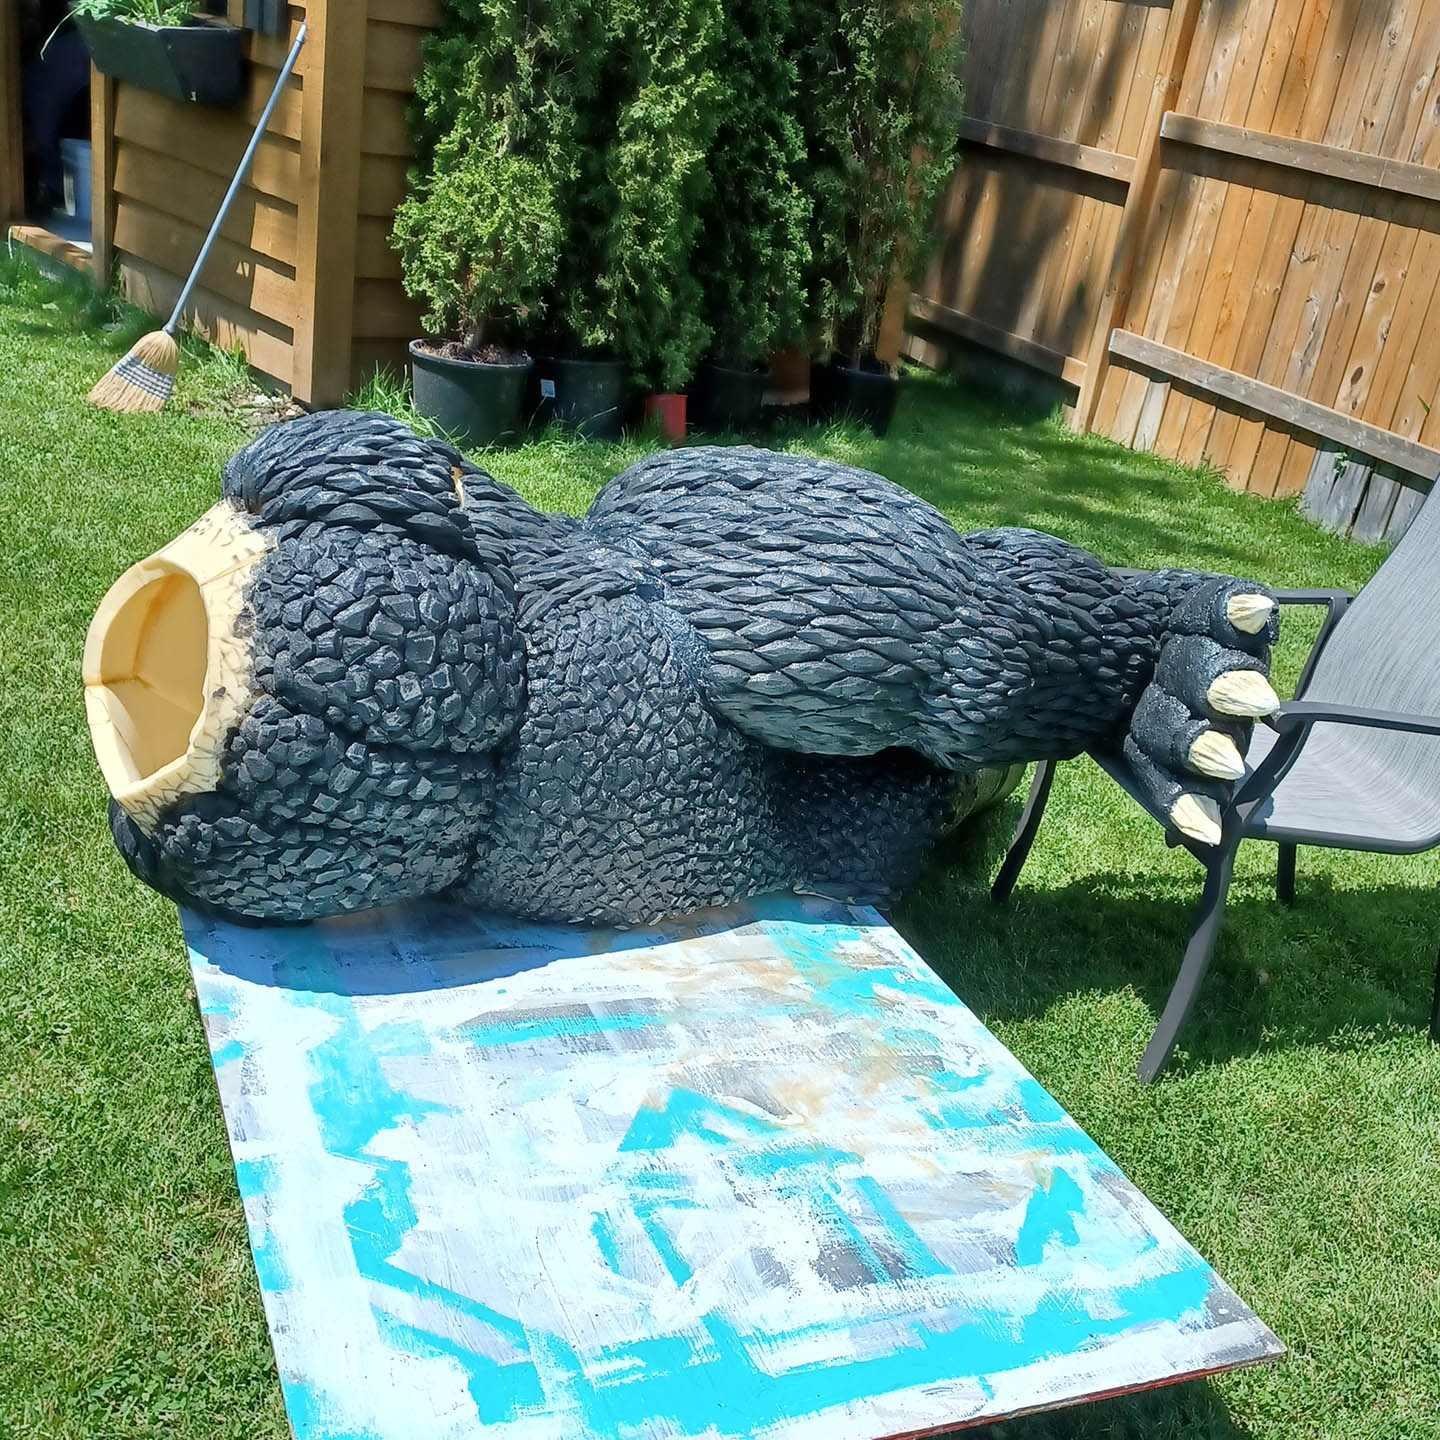
The majority of Godzilla’s scales were cut out individually from 1 inch and 1/2 inch upholstery foam. I stockpiled various sizes and shapes for the various sections of the body and then glued them on individually, sometimes using contact cement, but mostly with a hot glue gun. Some parts of the body utilized a different method. For the tail and belly I carved the scales directly into the foam of the suit using a wood burning tool. If I were to attempt a build like this again, I would probably model the suit so I could use the wood burning method across the entire body. Although the scales don’t have the same depth as when they are cut out and glued individually, the results are comparable and the process is far less time consuming and tedious.
Once the texture was complete, each piece of the suit was sprayed with a couple coats of Super 77 spray, which acts as a primer. The tackiness of of the glue was countered with baby powder, and from here the latexing began. Every part of the suit was coated in a minimum of 3 layers of liquid latex, with more being applied at the joints and stress points. The latex was tinted black by adding a small amount of acrylic paint to it. The fins had white mixed into their latex, as did the claws. Additional coloring for fine details was done by mixing a small amount of acrylic paint into some rubber cement I bought at the craft store. Acrylic paint on it’s own would have flaked or cracked on the rubber surface of the latex once it was dry, and while the tinted latex mixture is good for base colors, it doesn’t work well for details. To achieve the smokey transition from light to dark on Godzilla’s fins, I thinned the tinted rubber cement with naphtha and applied it with an air brush.
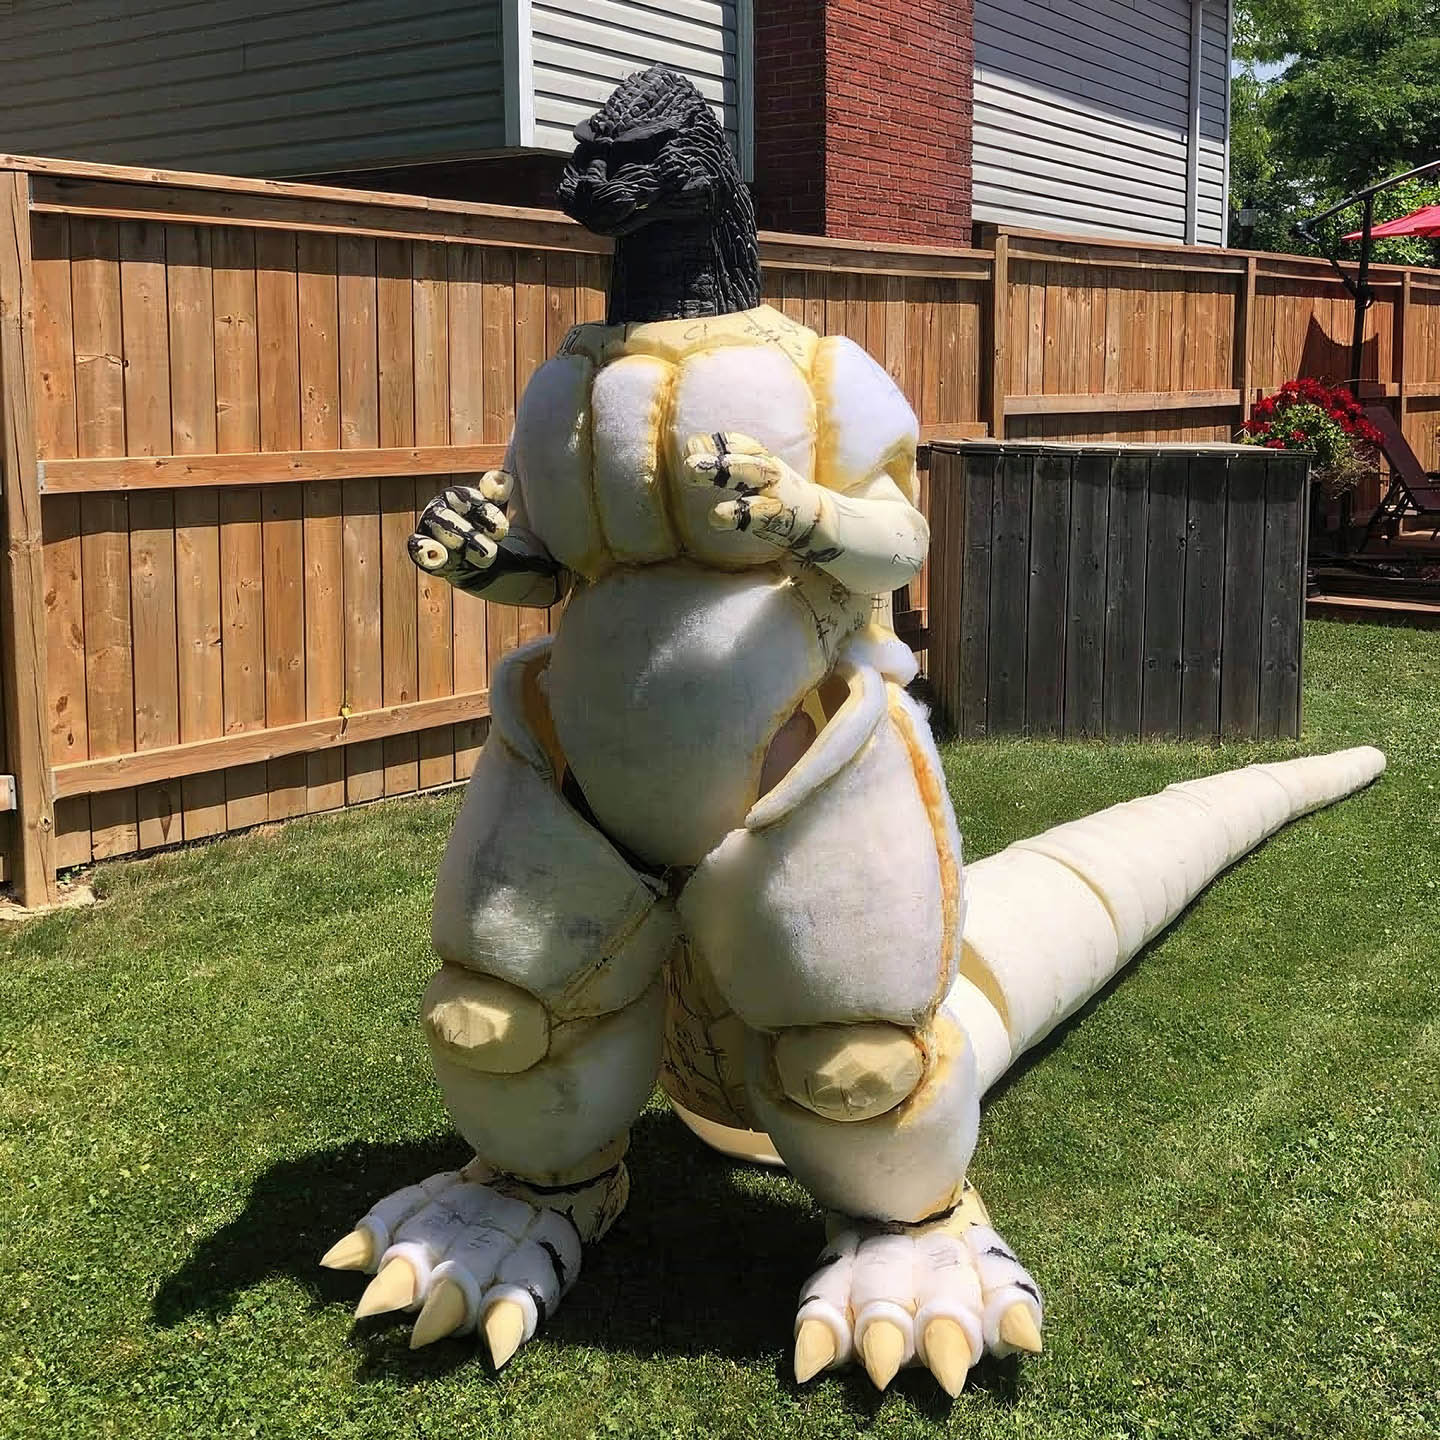
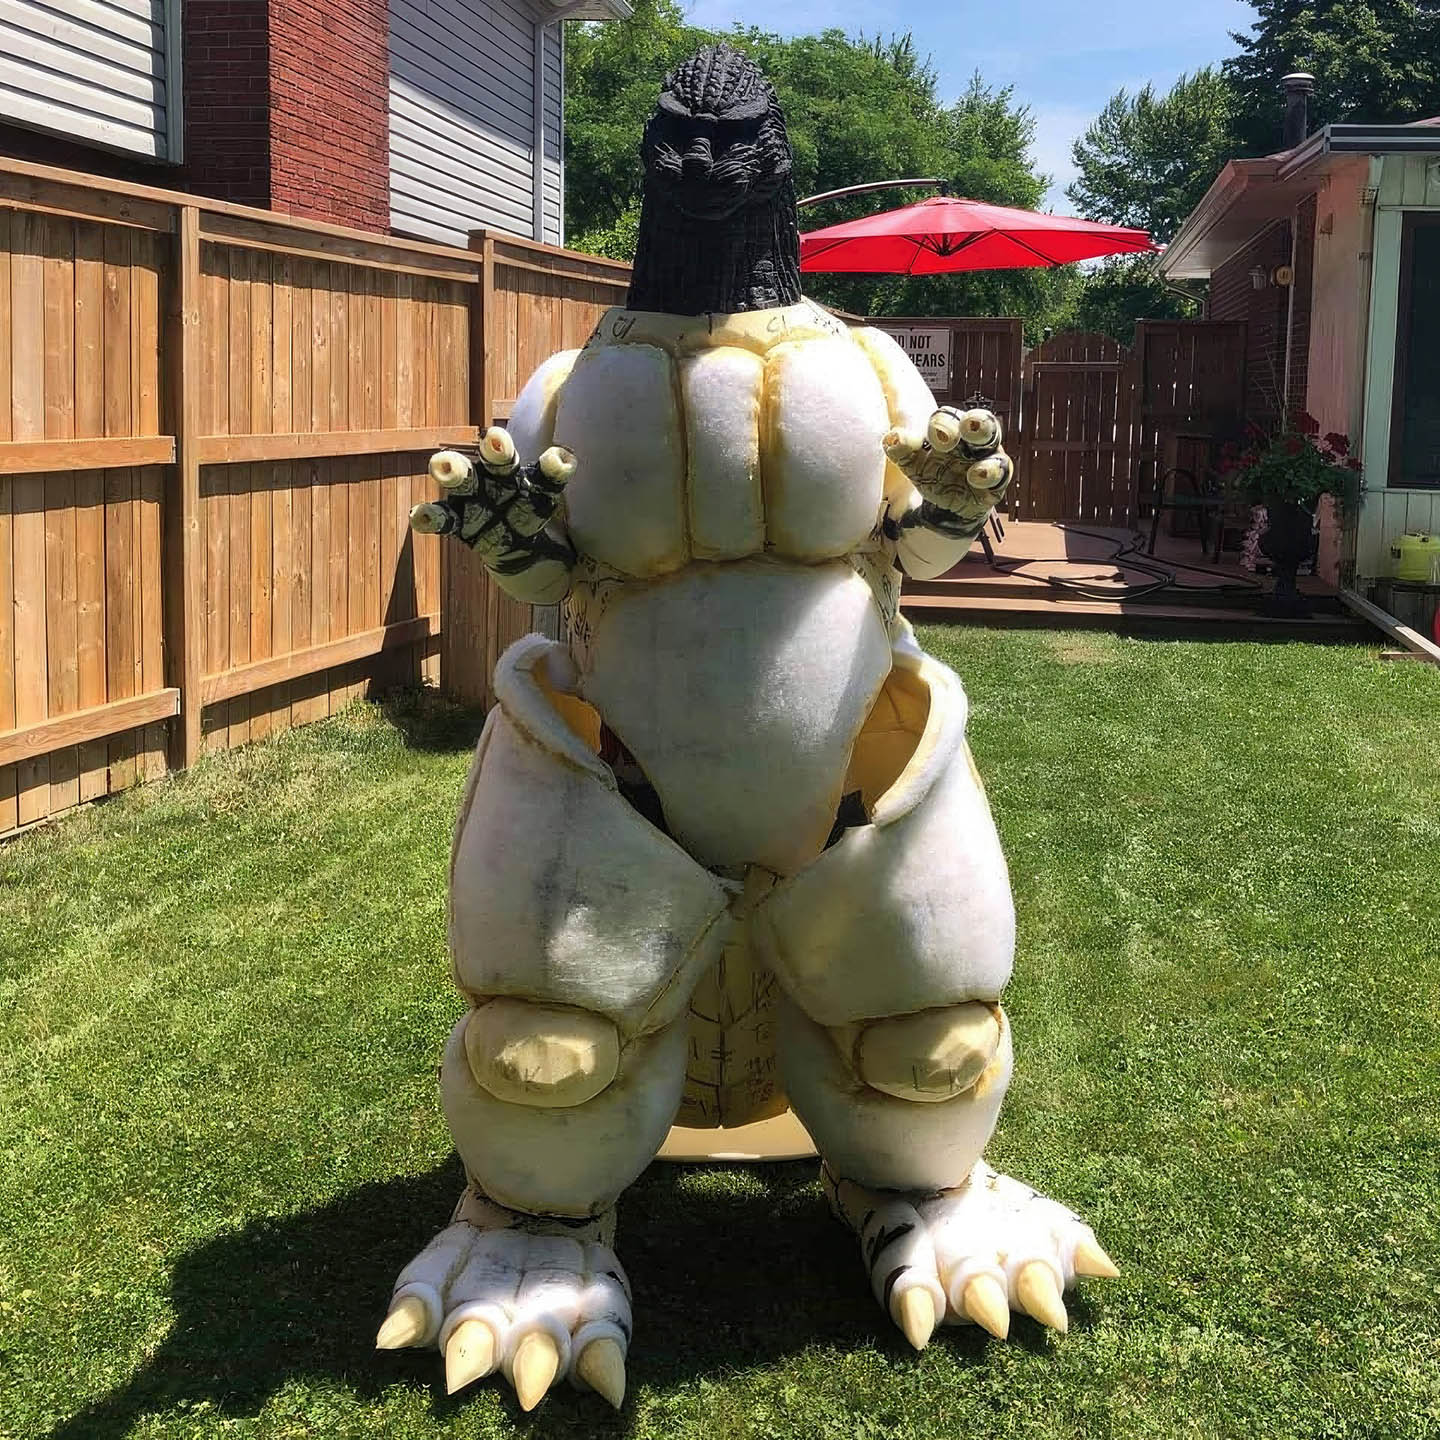
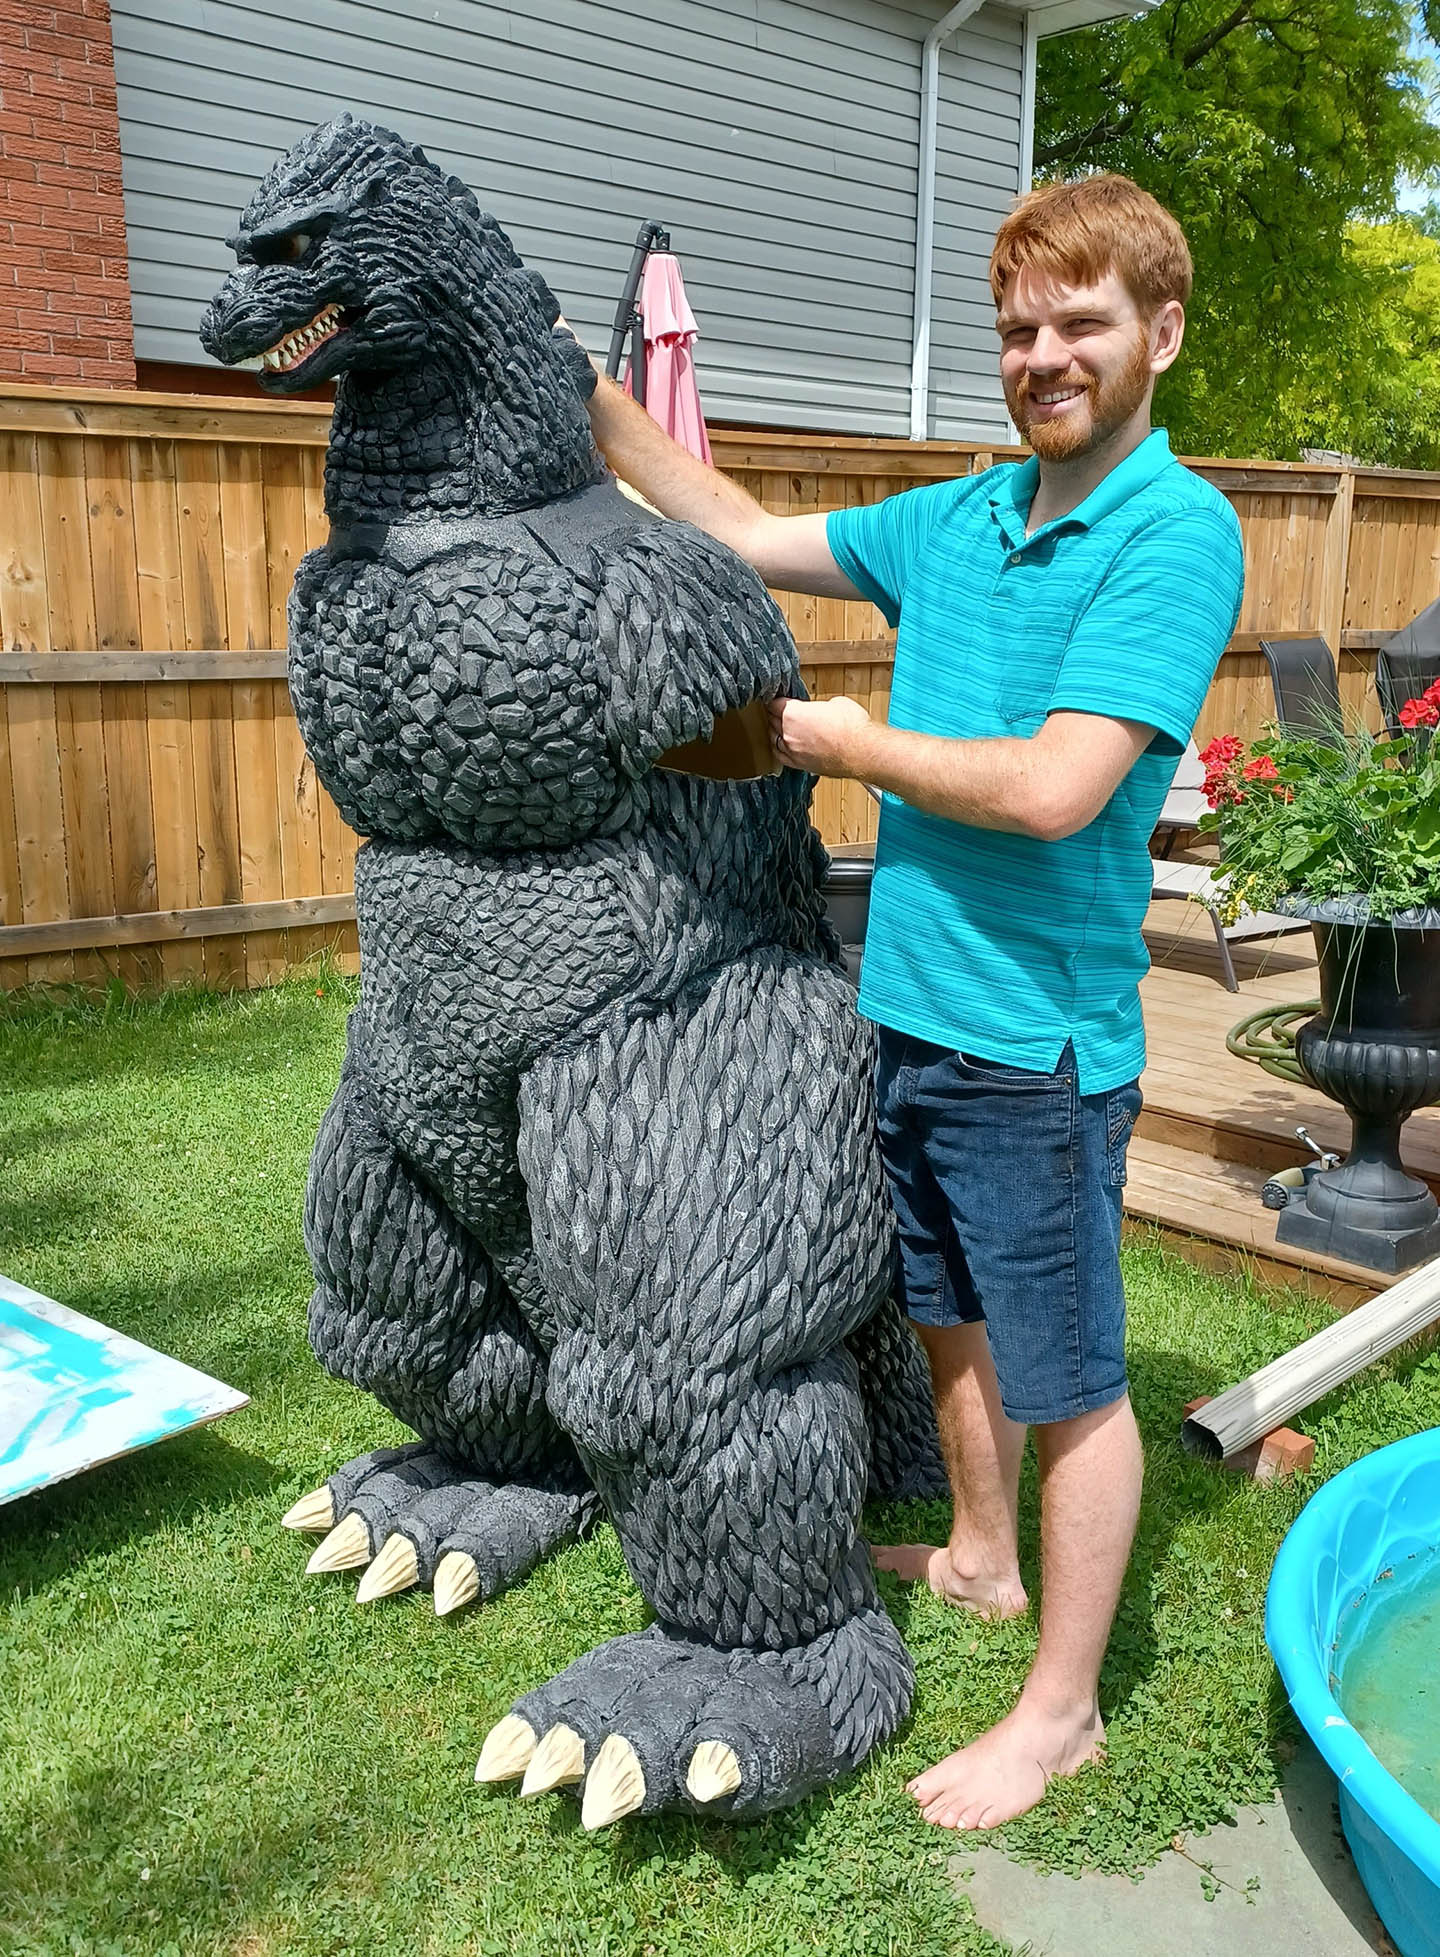
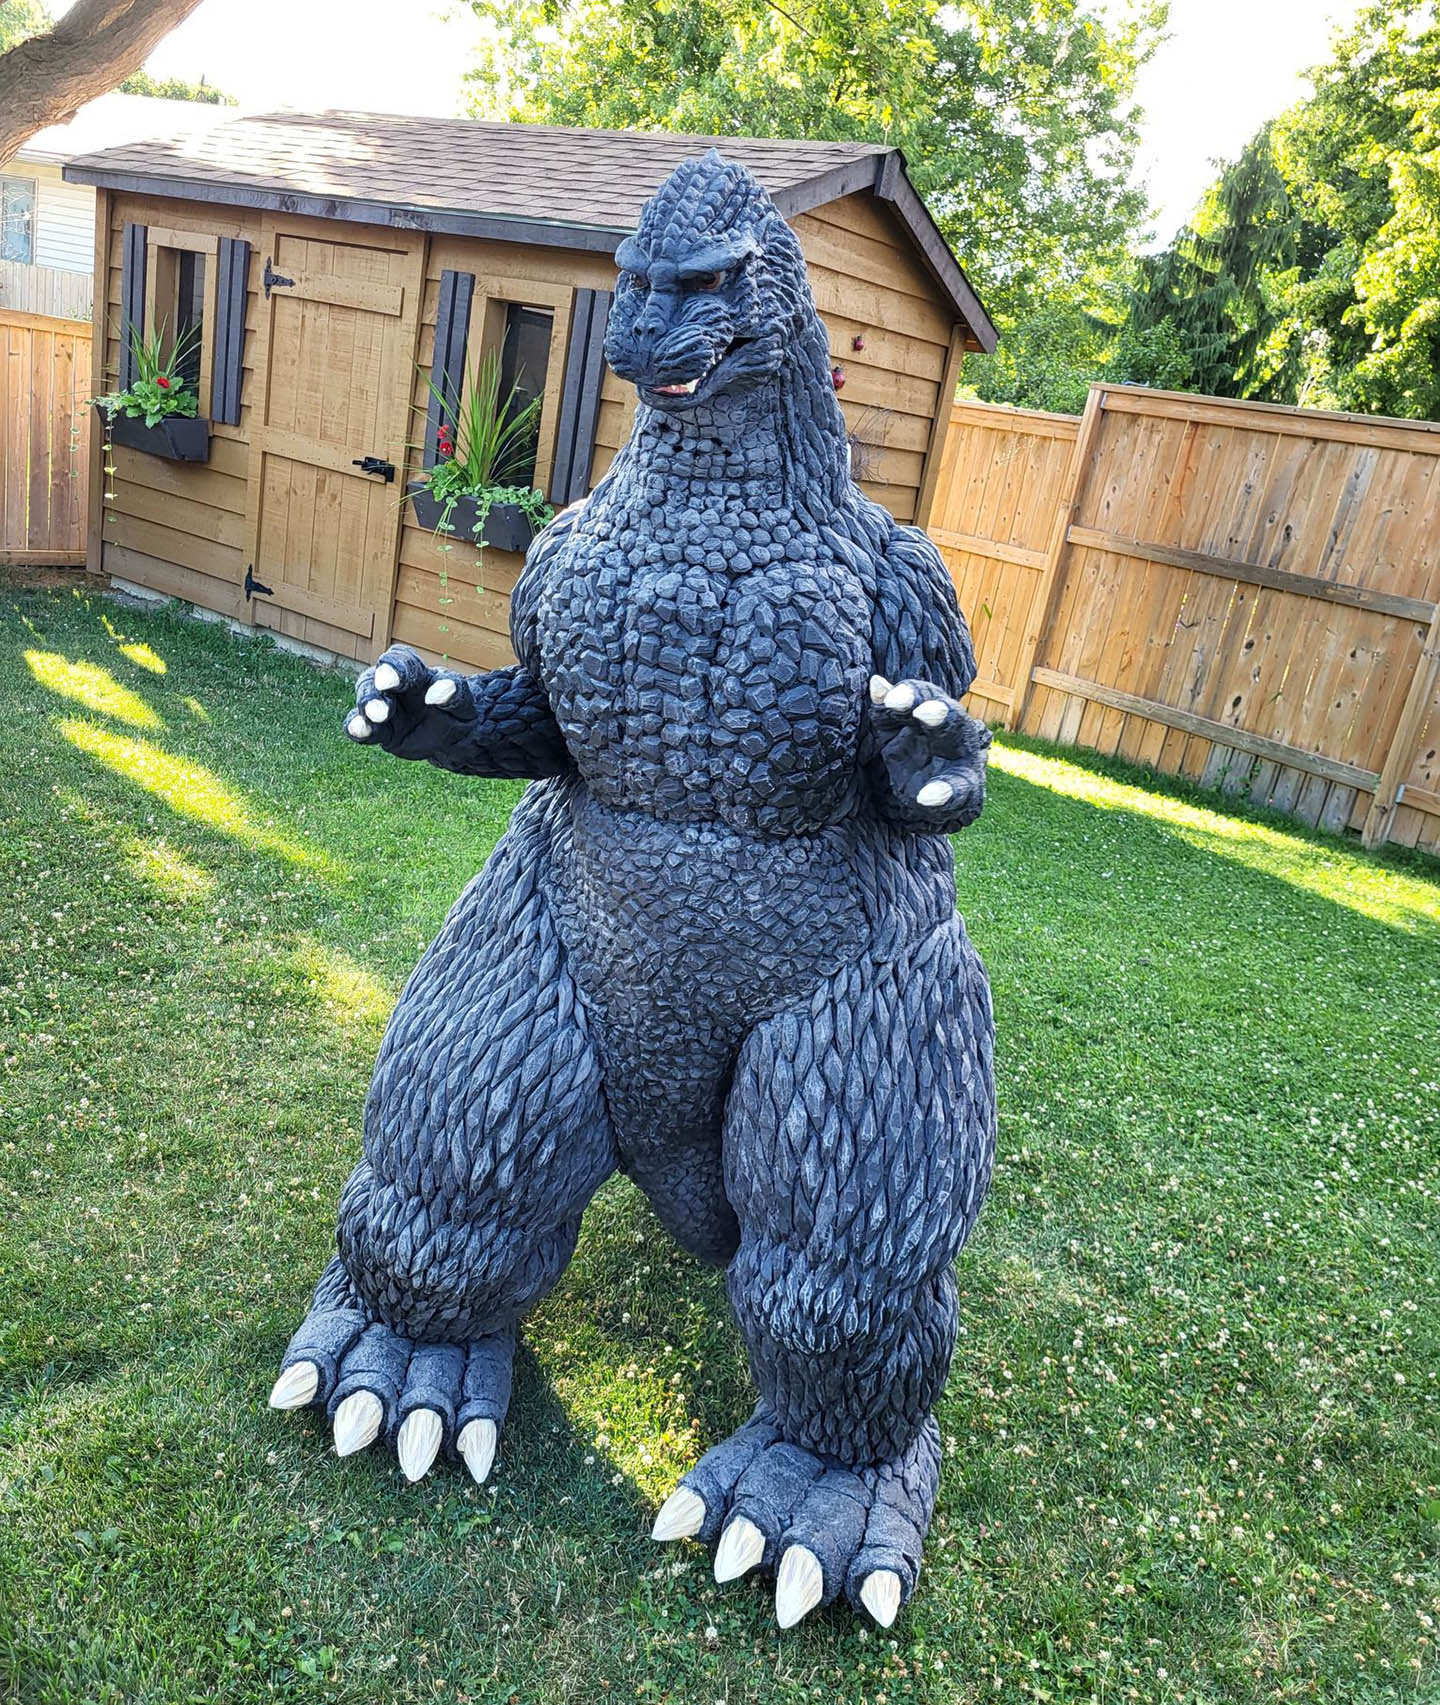
Final Assembly
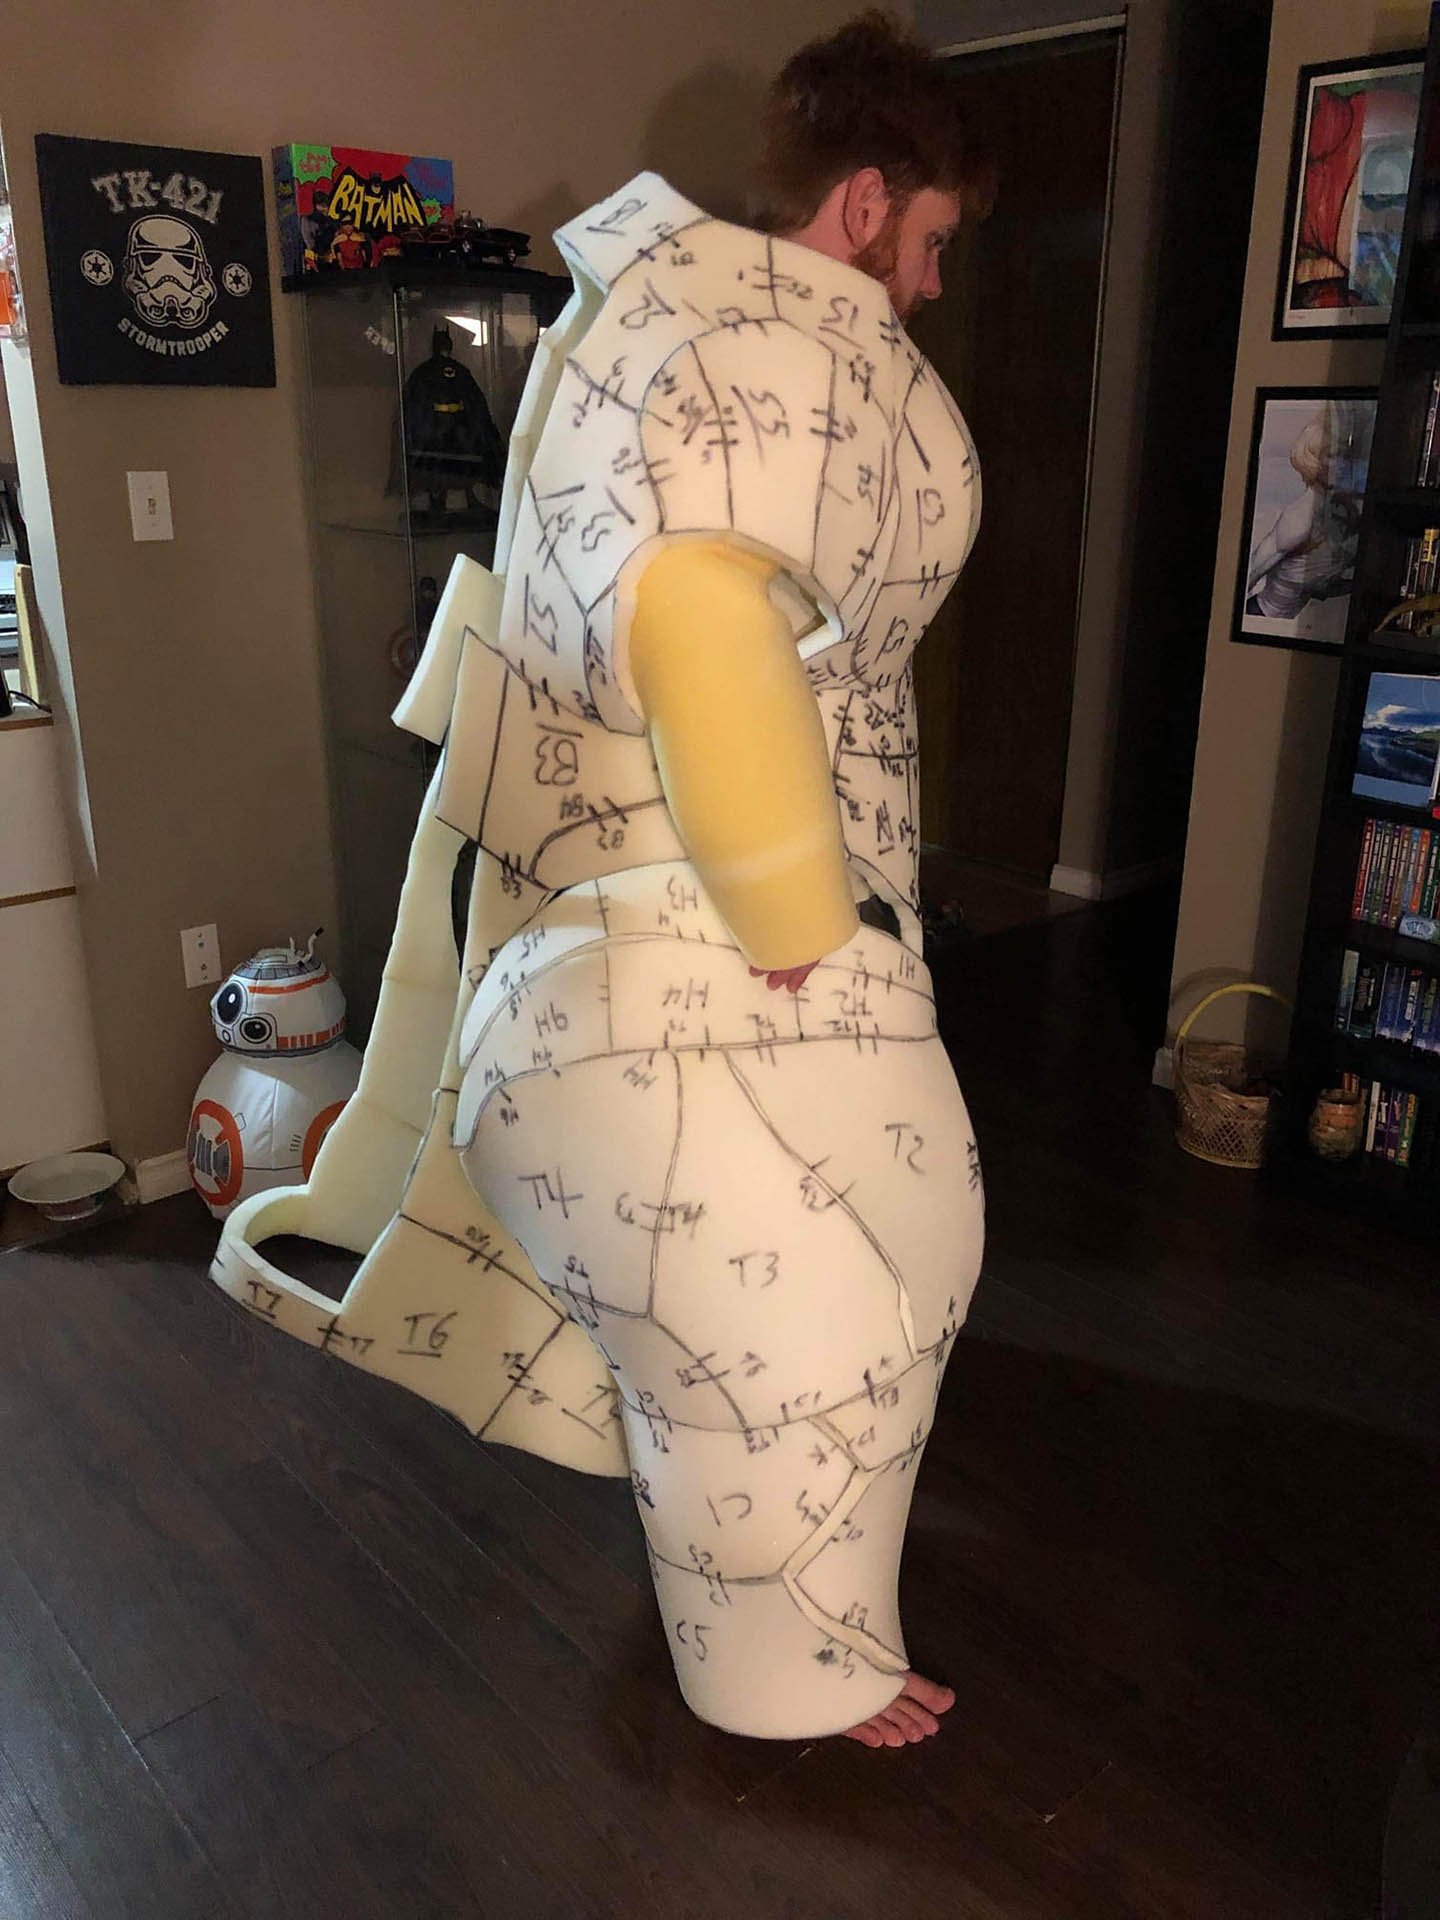
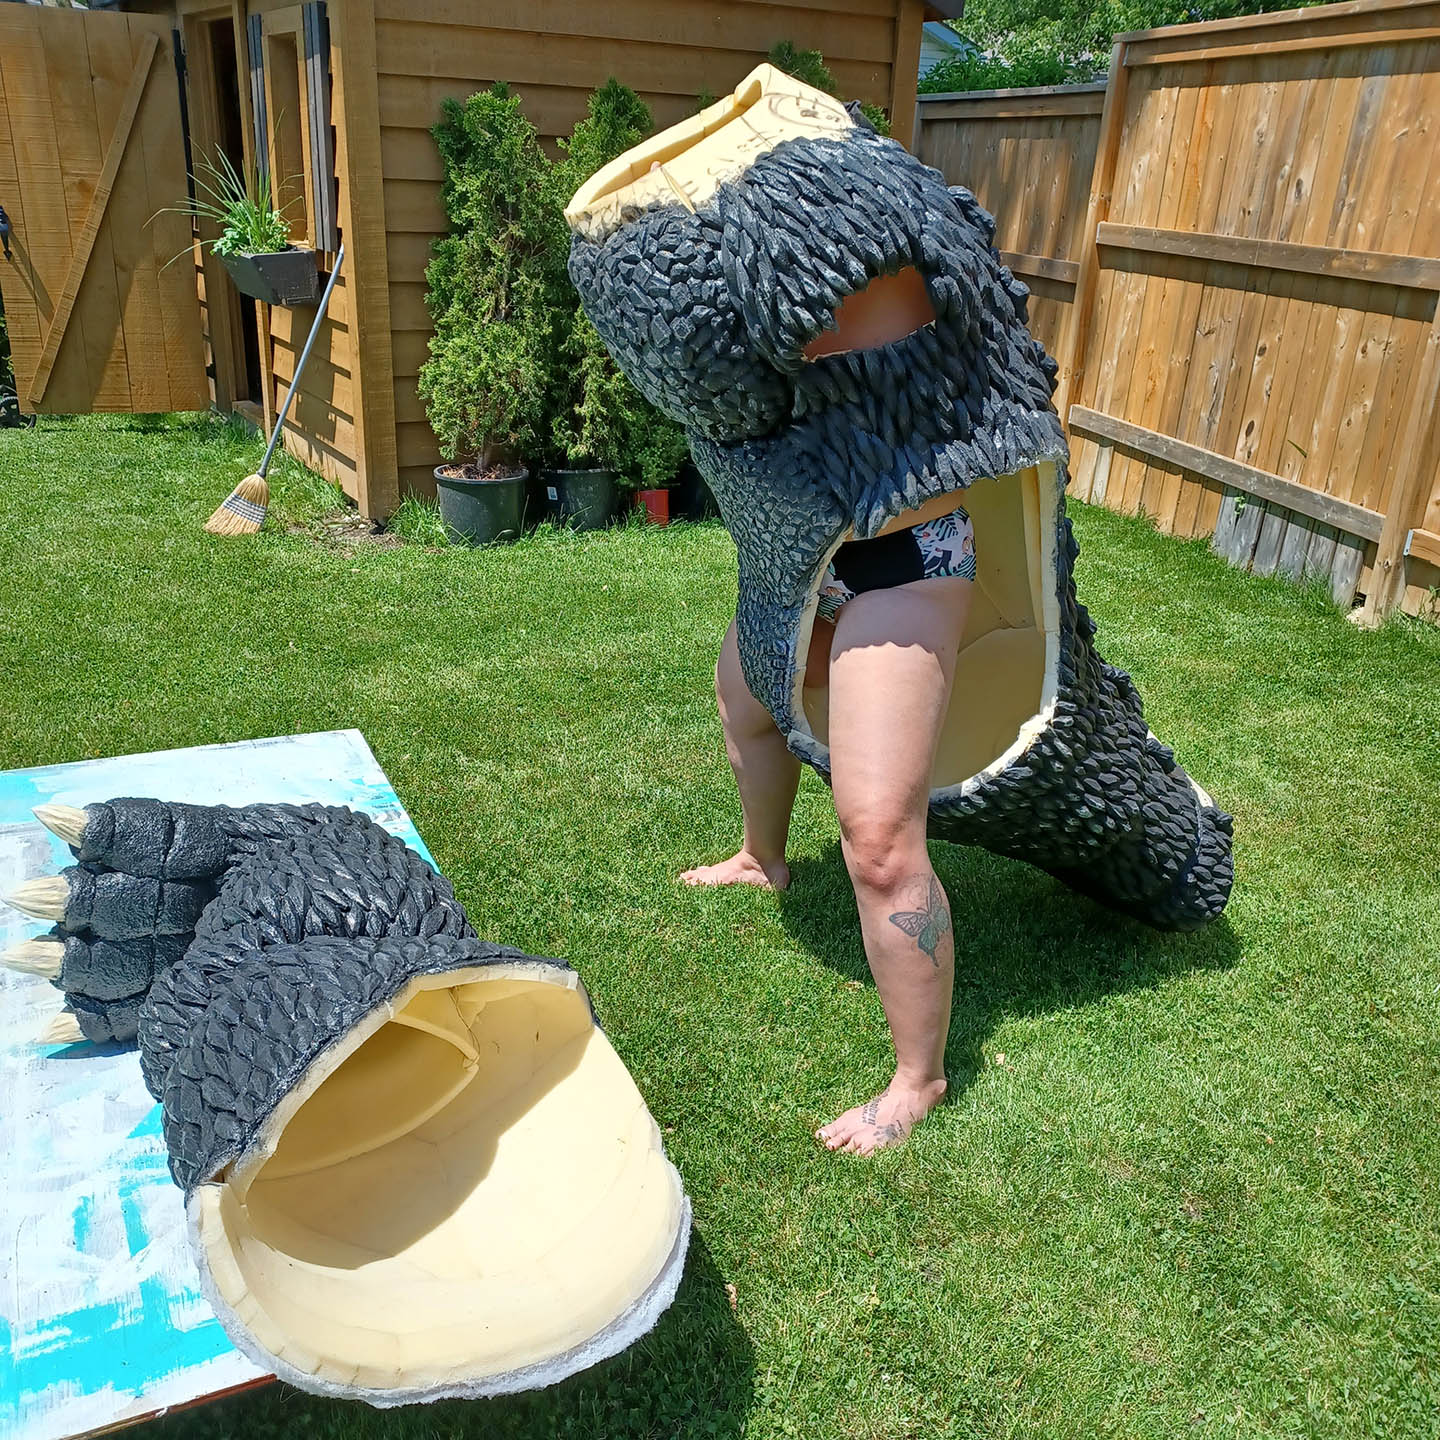
Over the course of the build I did countless fittings to ensure that the pieces fit me and scaled properly. Once they were all complete, I glued them together with Super 77 spray. The seams were covered in scales, cotton batting and sometimes fabric before finally being latexed. Apart from the tail and back fins, which both attach via velcro, and the arms which simply plug into the shoulders, the entire suit is one piece. Inside I wear a rechargeable neck fan purchased off Amazon which helps to keep me cool.
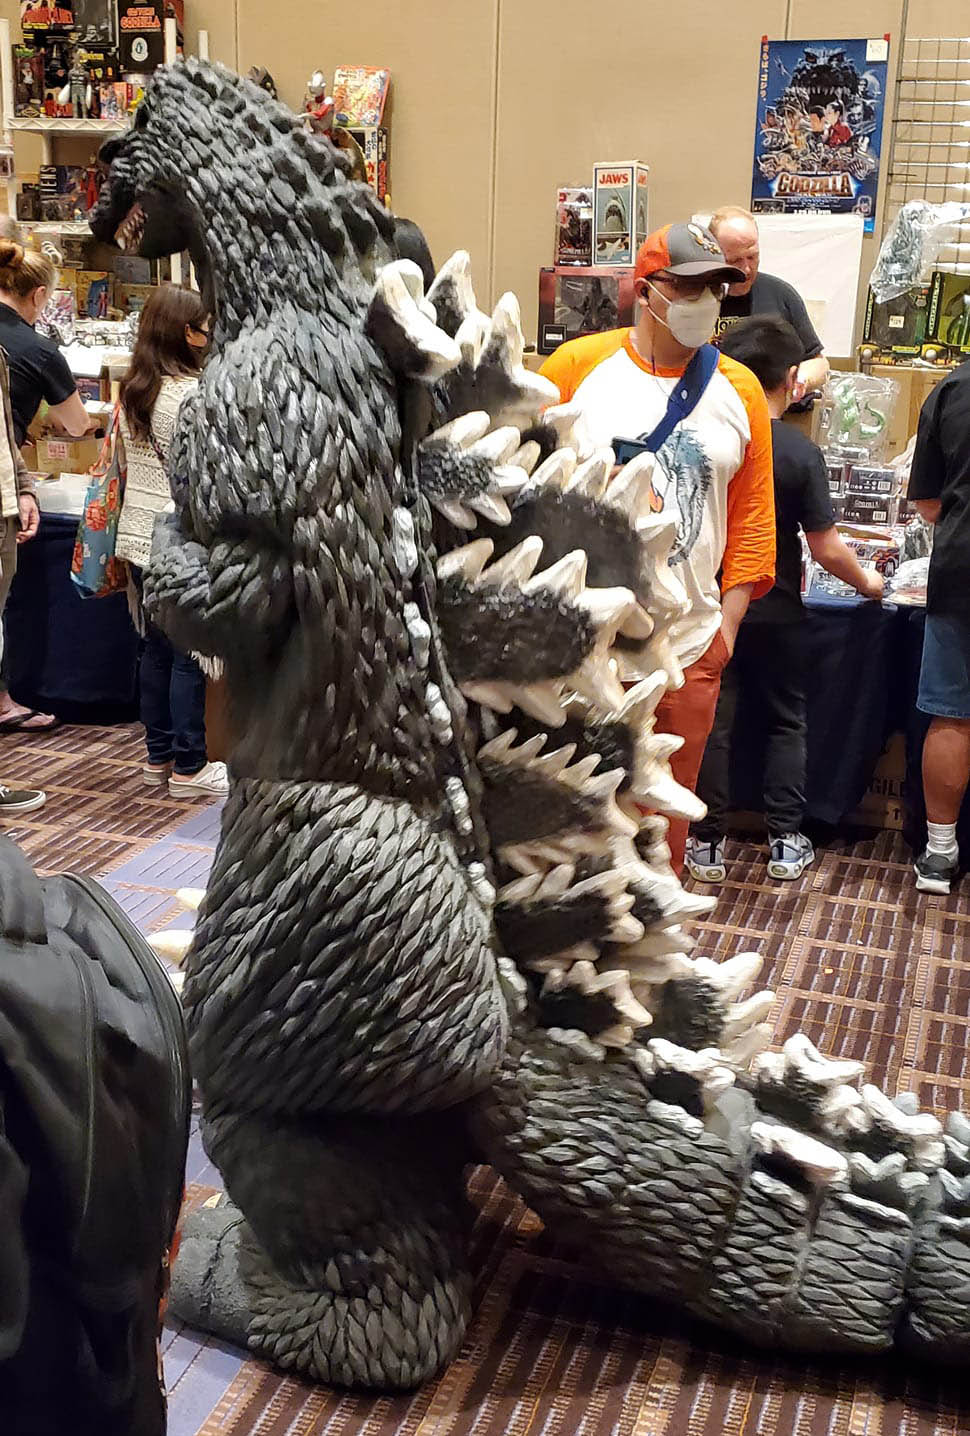
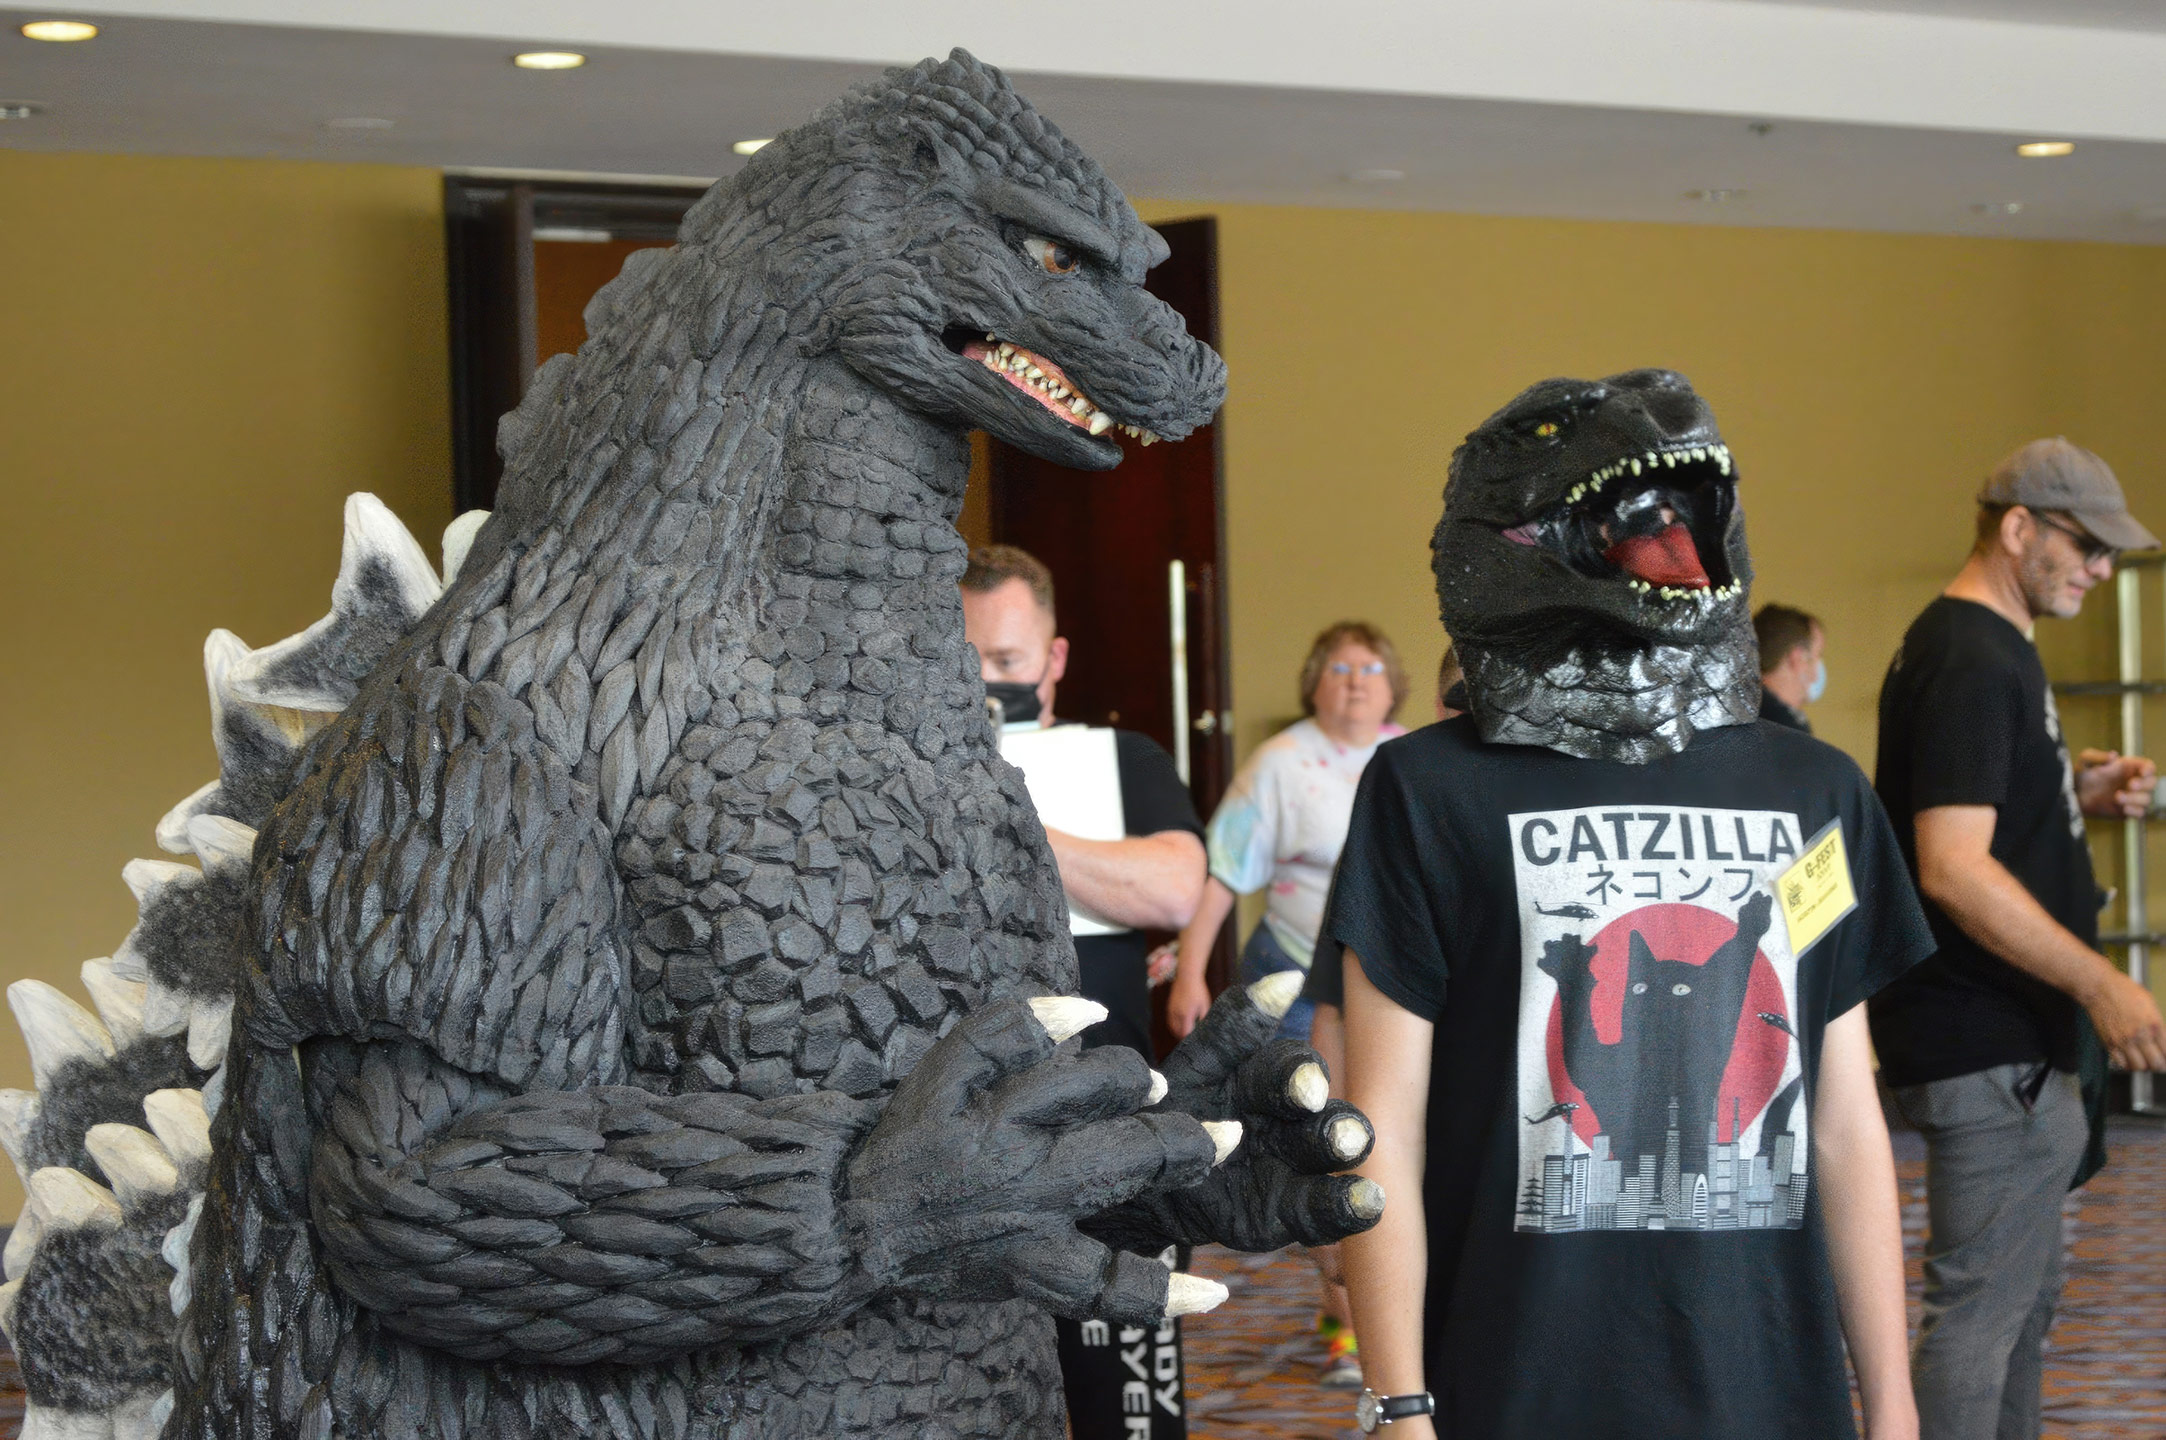
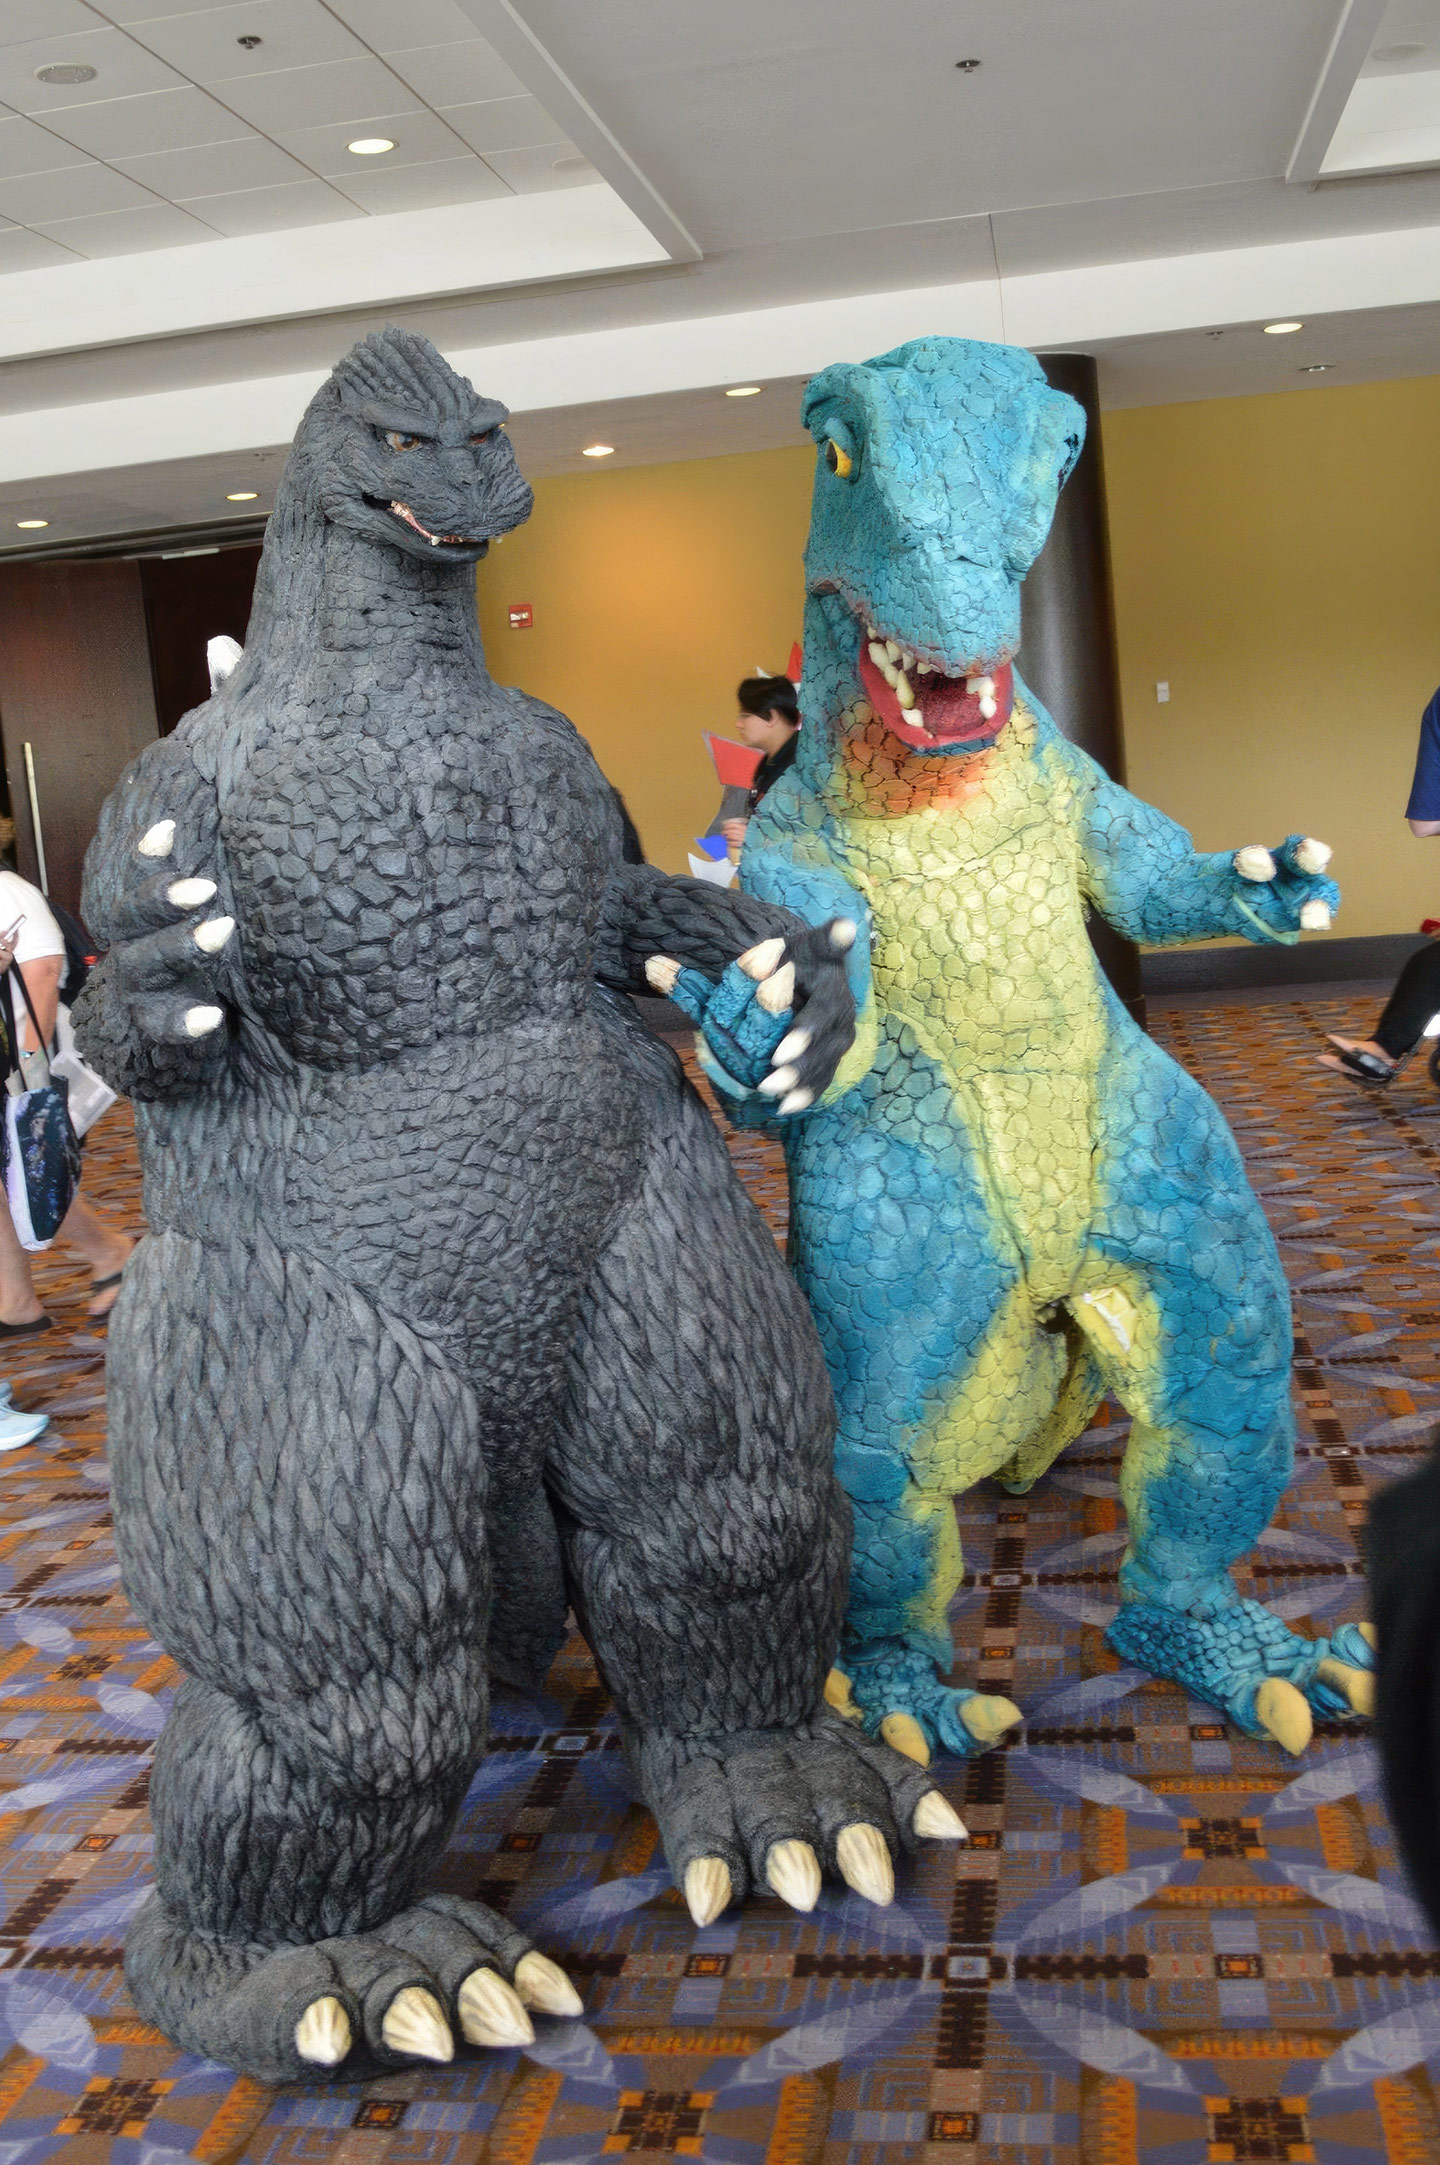
After nearly 3 years of on and off work, a global pandemic, and lots of trial and error, my Heisei Godzilla cosplay was completed on July 3rd, 2022. Just over a week later, he made his first public appearance at G-Fest in Rosemont, IL on July 16th, and it was all worth it.
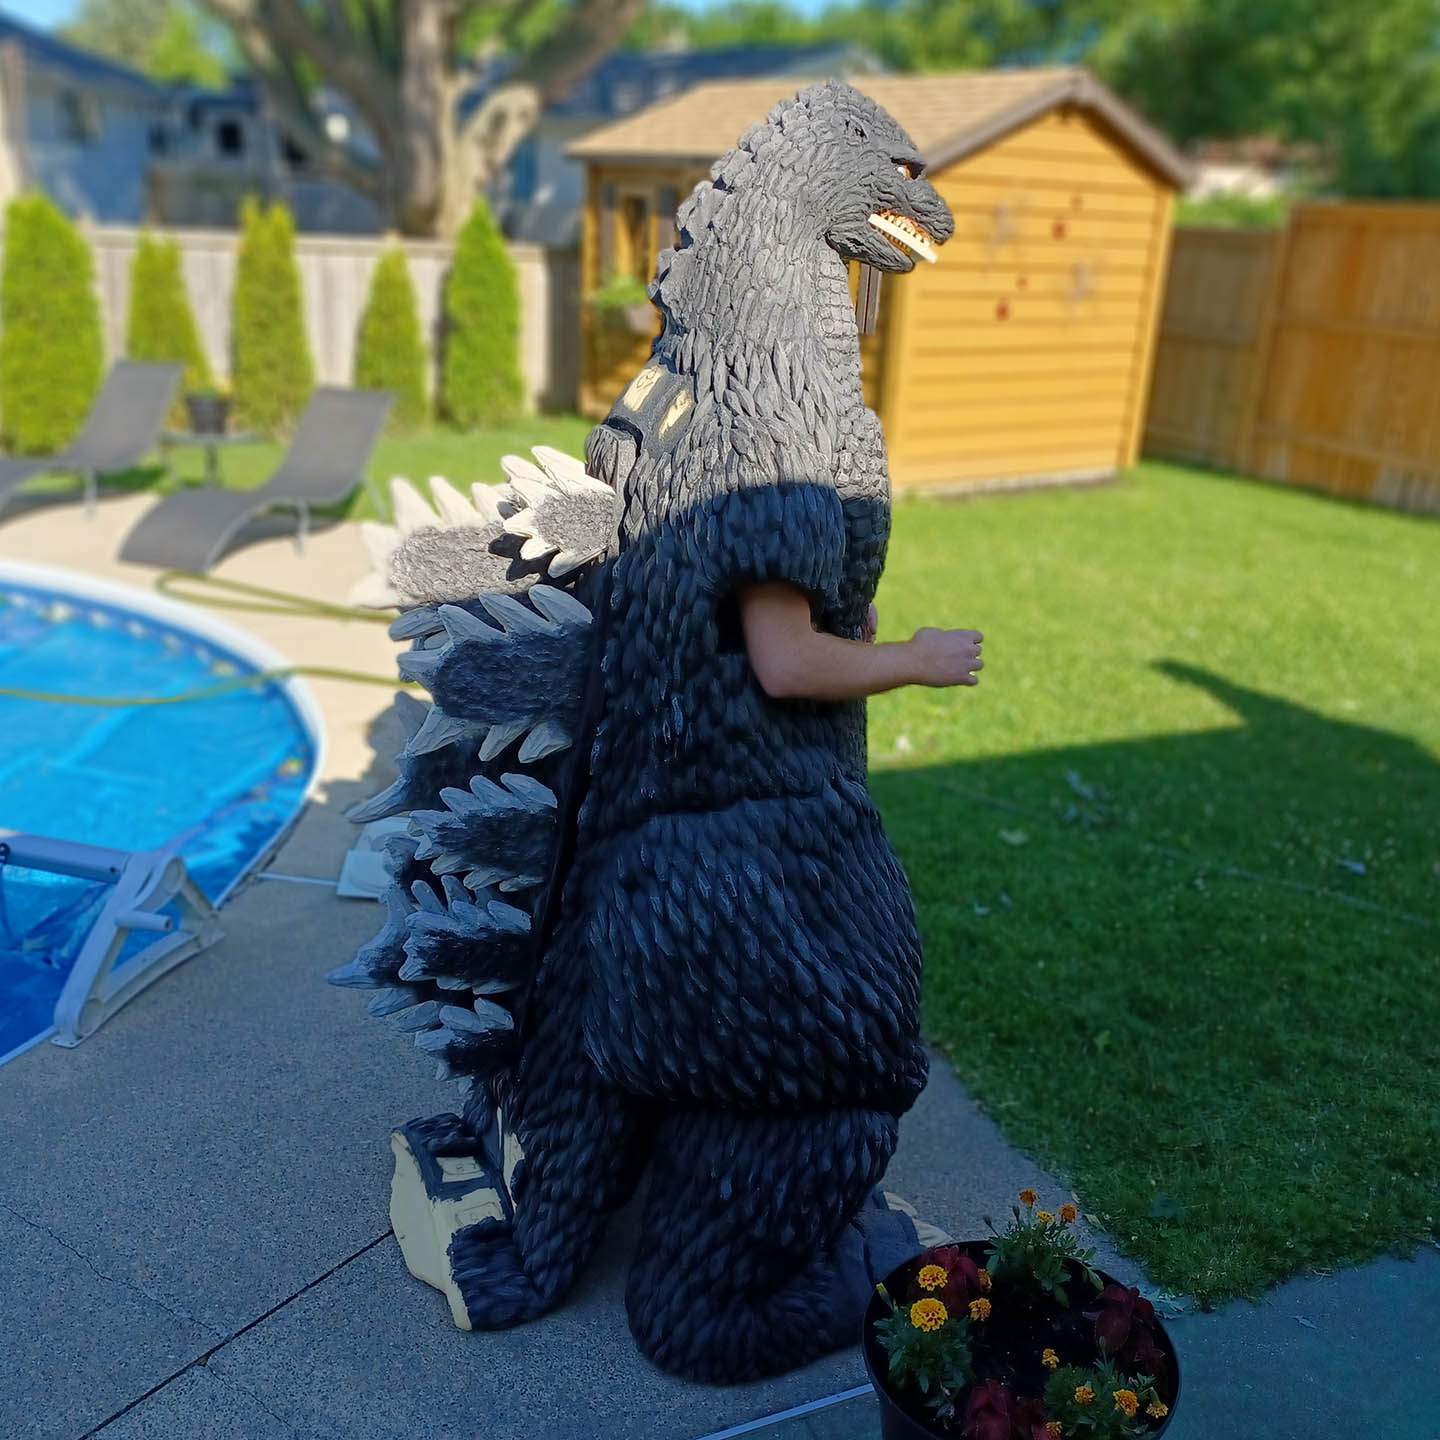
FINISHED COSTUME
Links
Contact
Have you already completed your own Godzilla costume and want to feature it here? Then by all means contact me and we’ll work together to add your costuming experience to this site.