Legs
Legs & Thighs
KRYS BAIOA FUSION GODZILLA
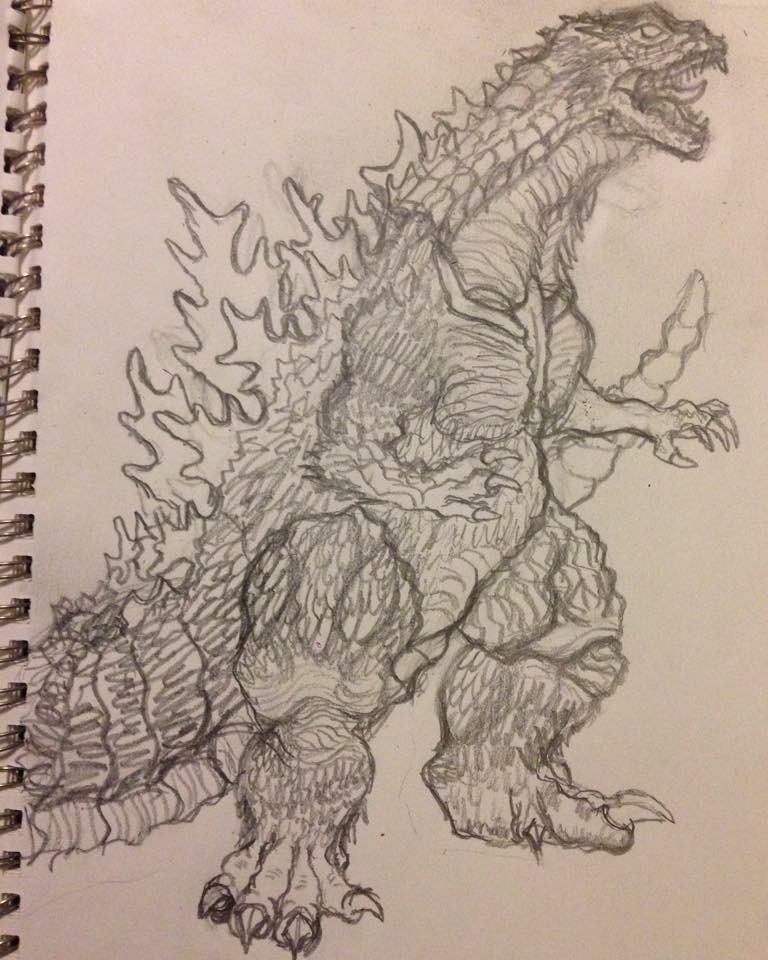
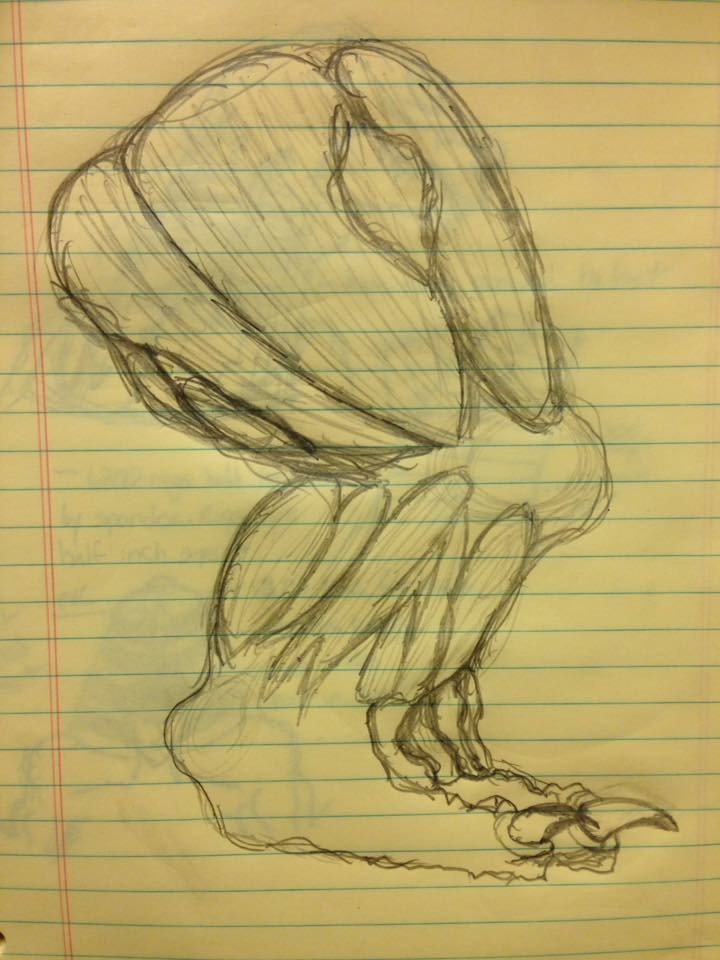
Leg Concept Art
Like any film project, a design always starts with concept art. These were just quick doodles of the look of Fusion Godzilla and a map of his leg muscles which will be made out of upholstery foam.
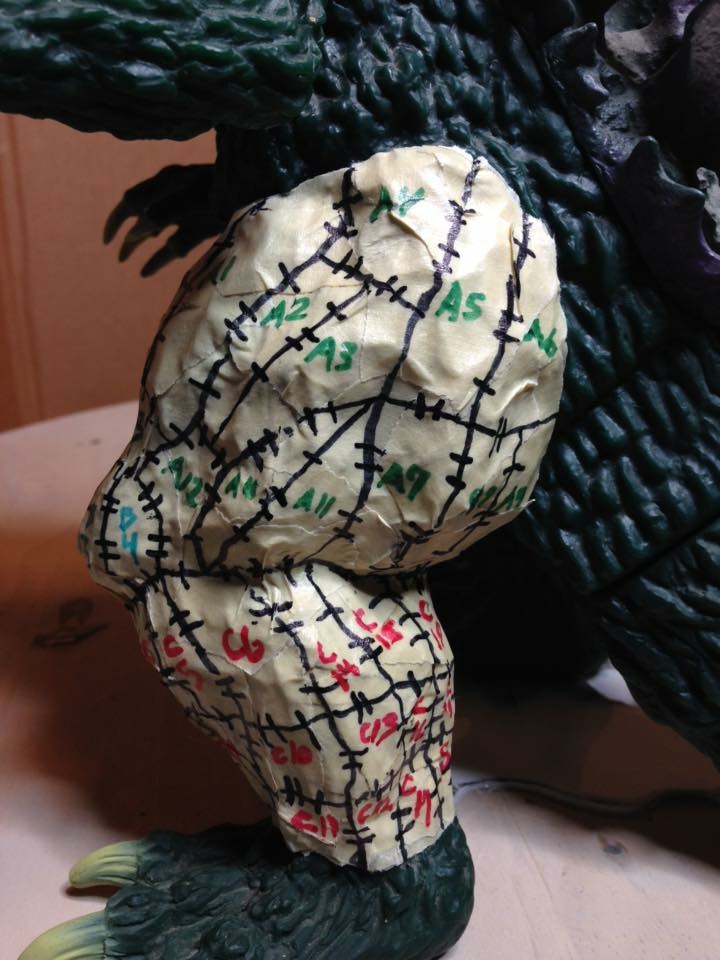
Leg Pattern
For the legs of my FusionGoji suit, I decided to try a new technique which involves patterning a form to later blow up to scale. In this instance, I patterned a Godzilla leg from one of my figures. I wrapped the leg in masking tape and drew lines on it to separate everything into pieces. The more pieces there are, the more flat you can make each individual shape which will make gluing everything together easier.
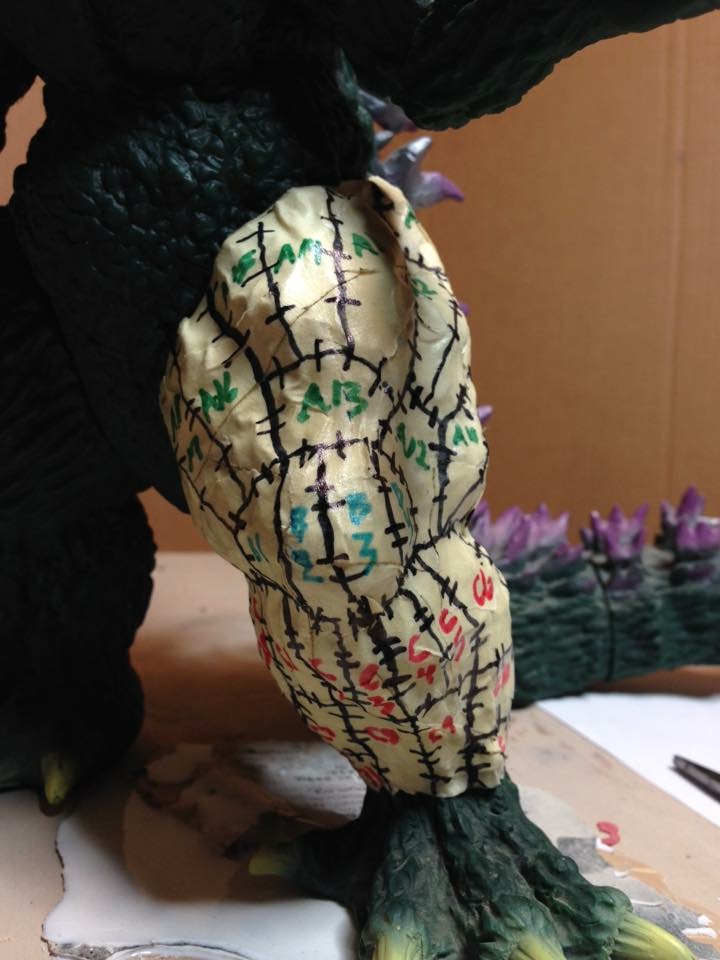

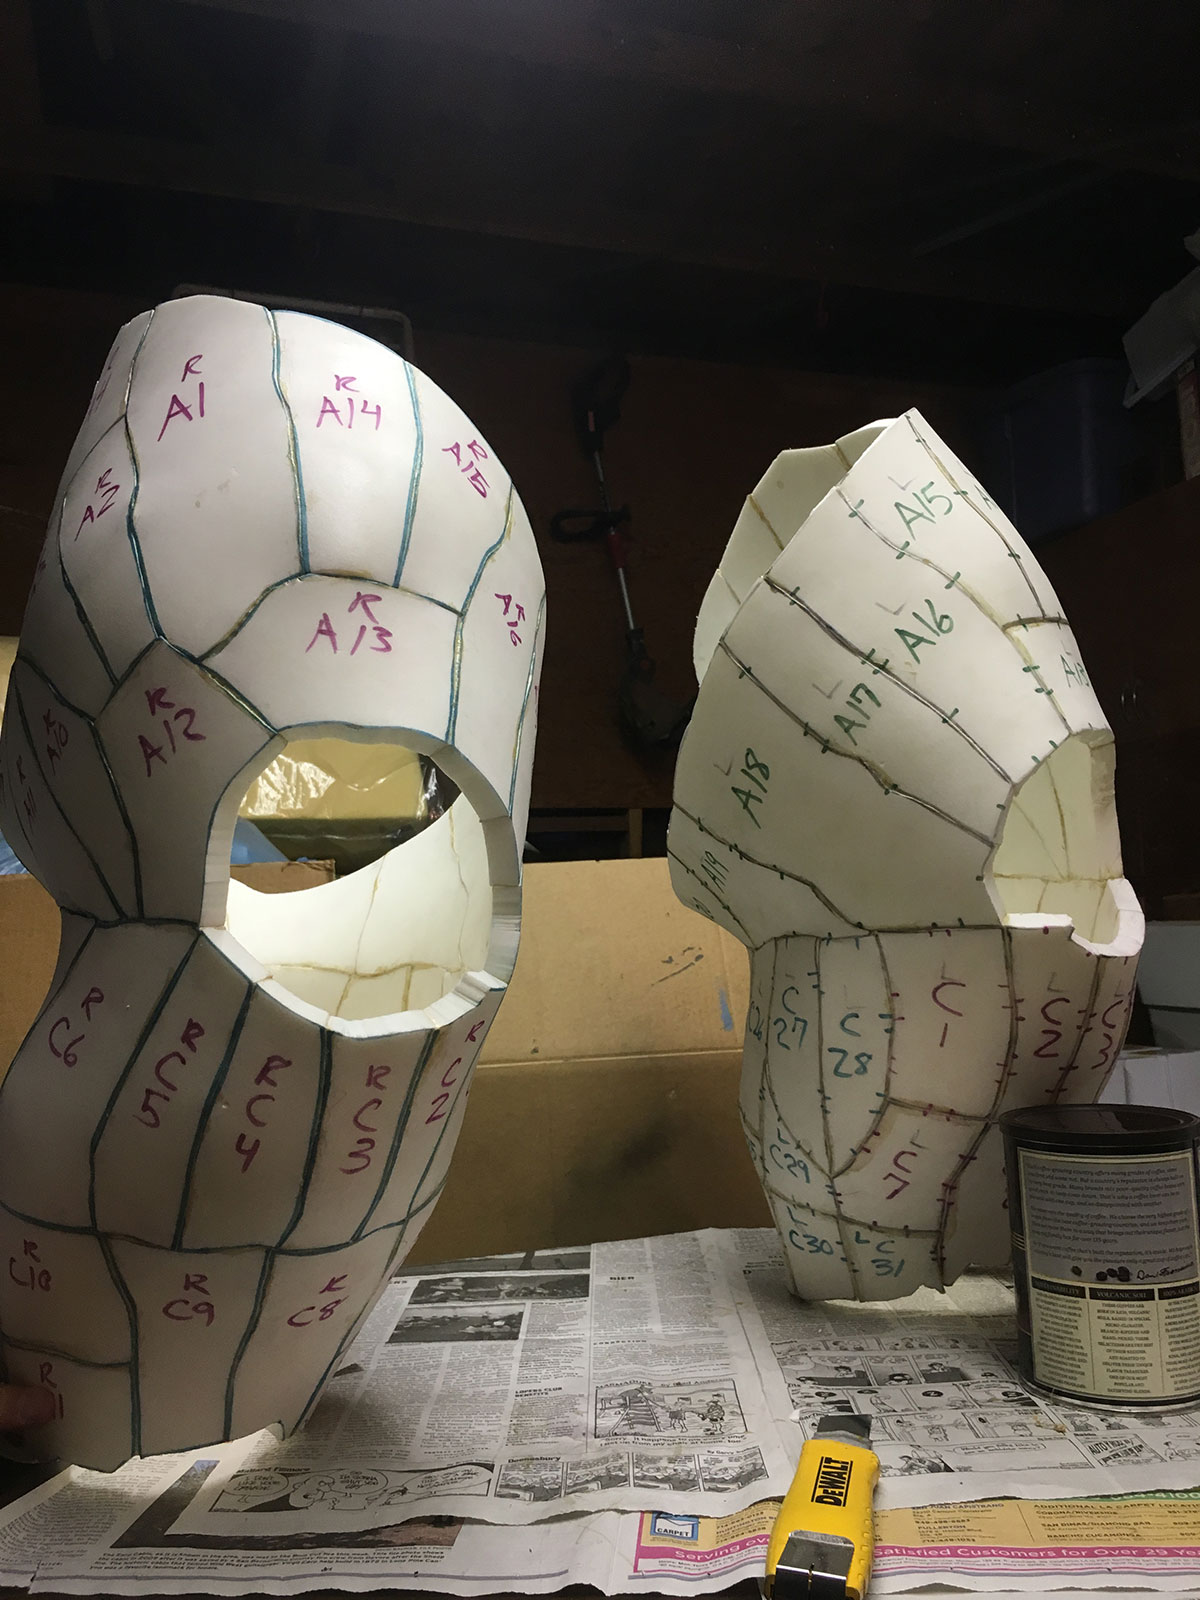
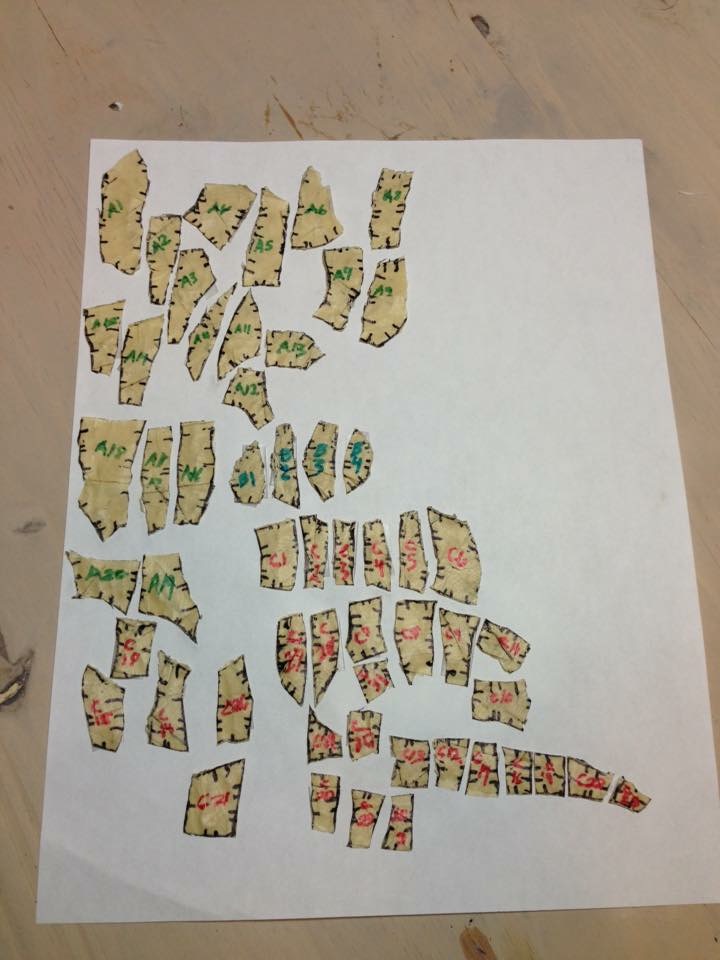
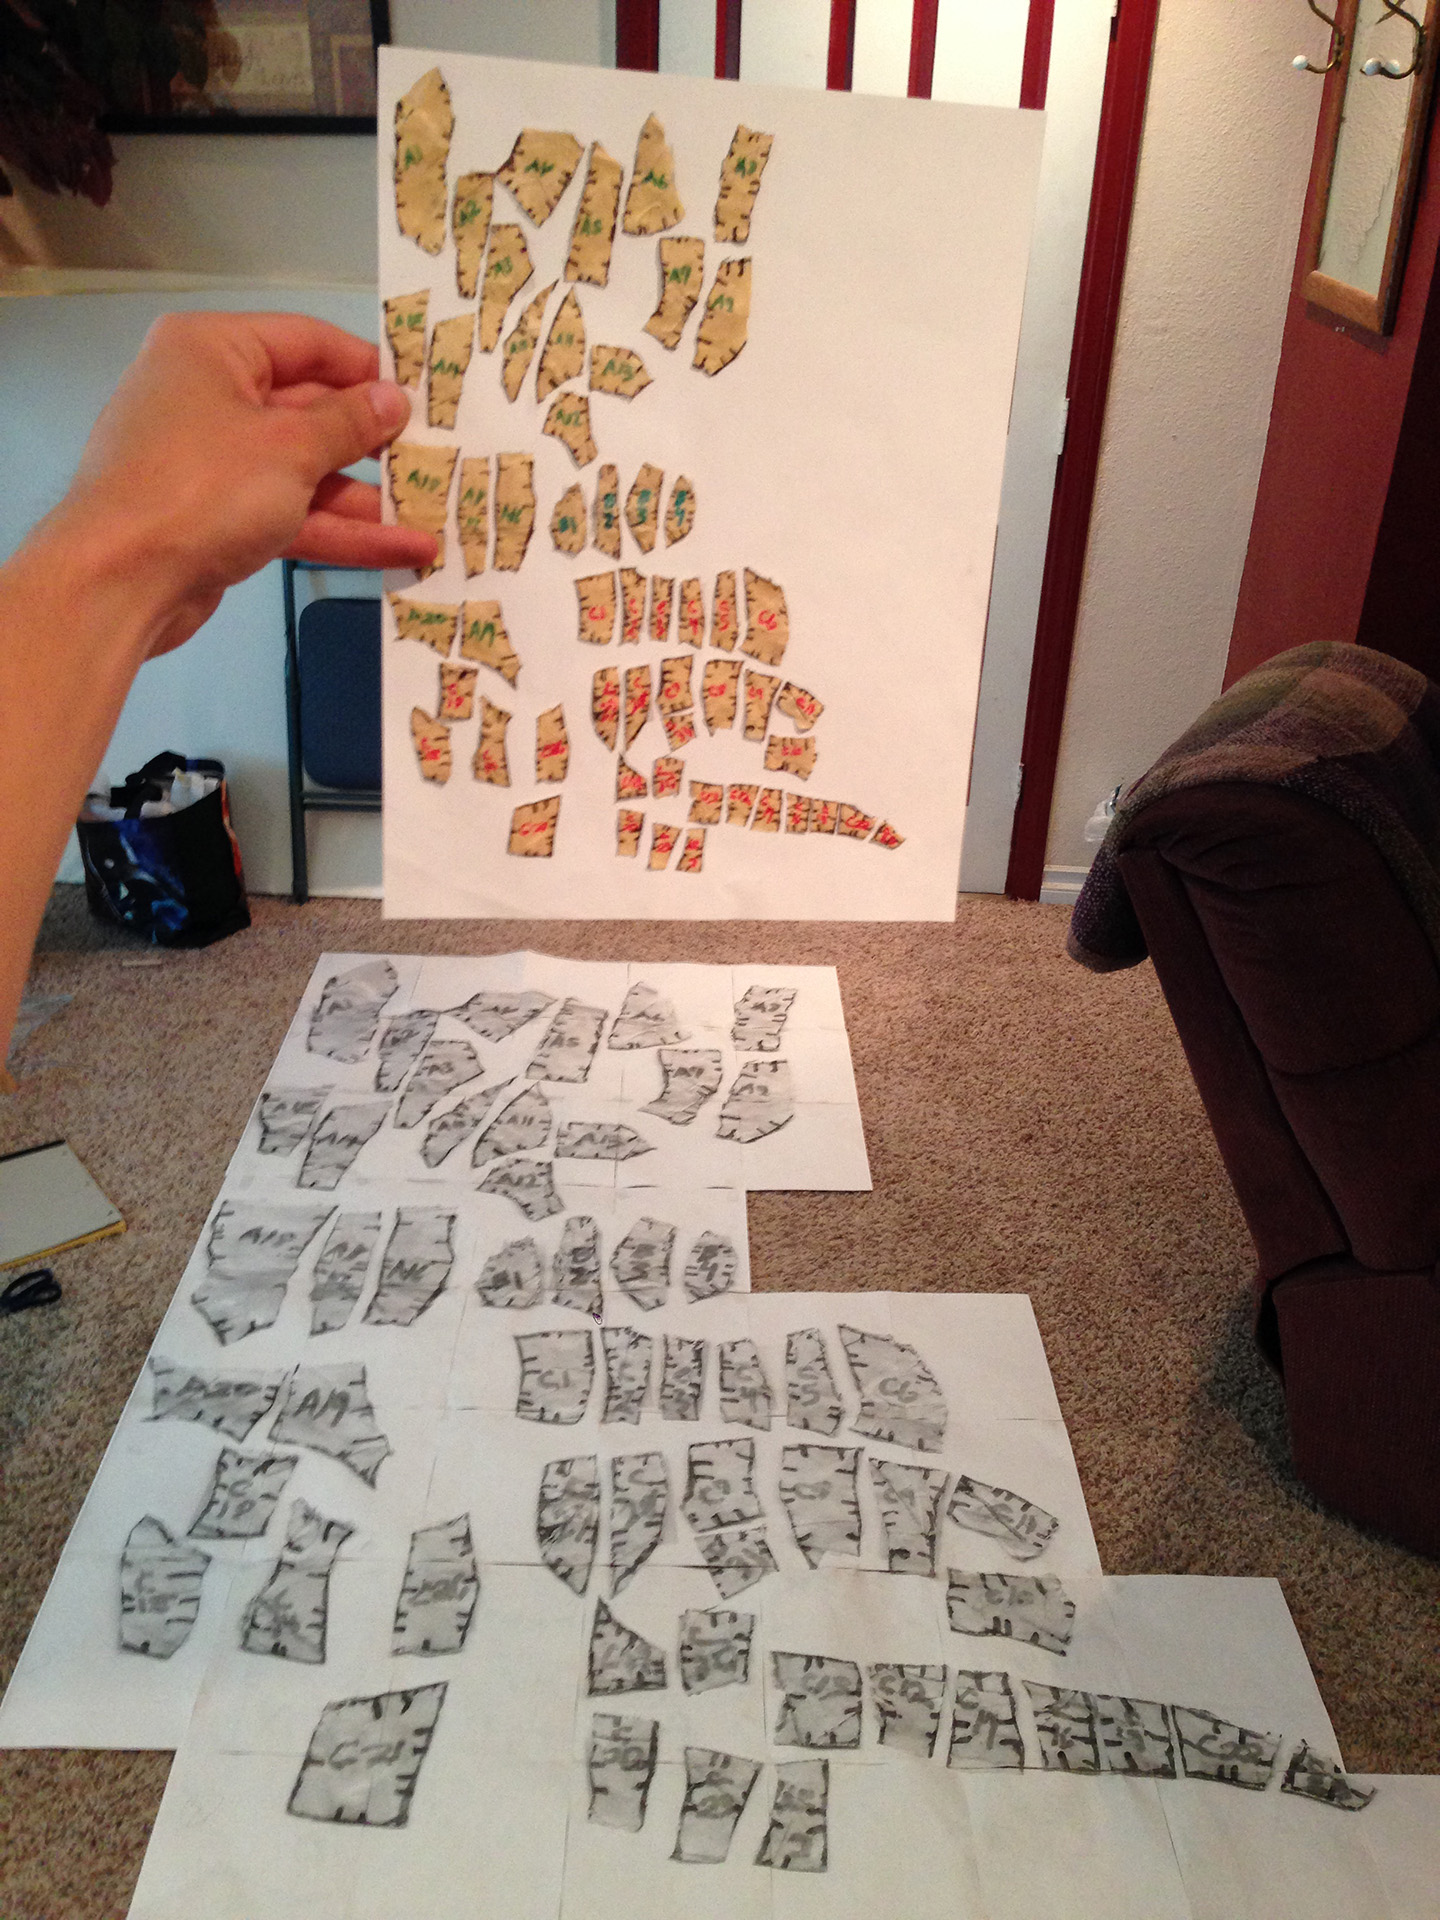
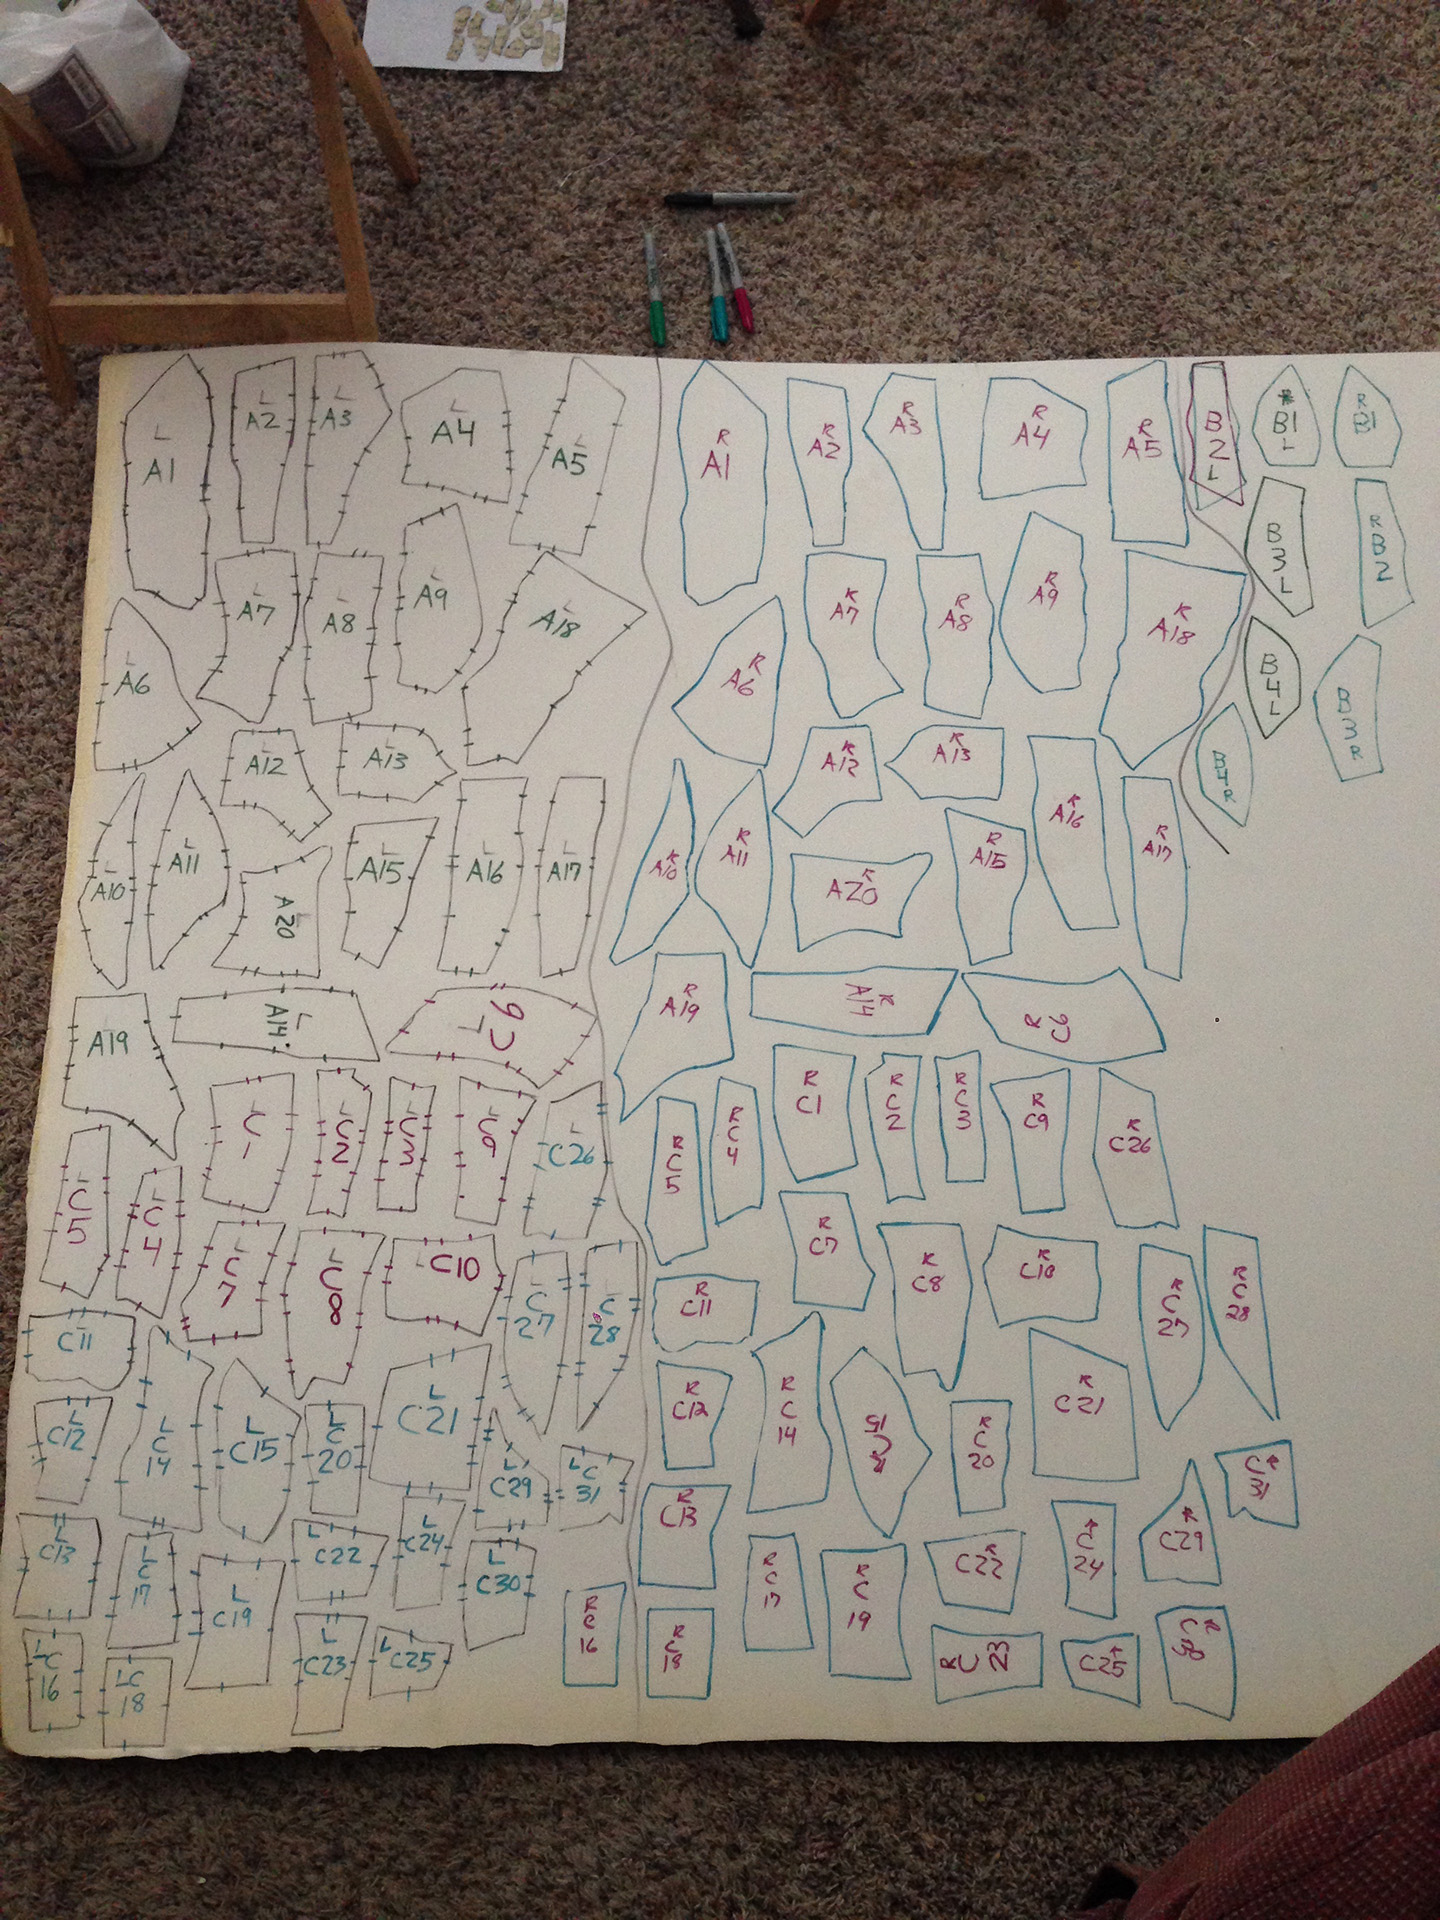
Leg Bluprints
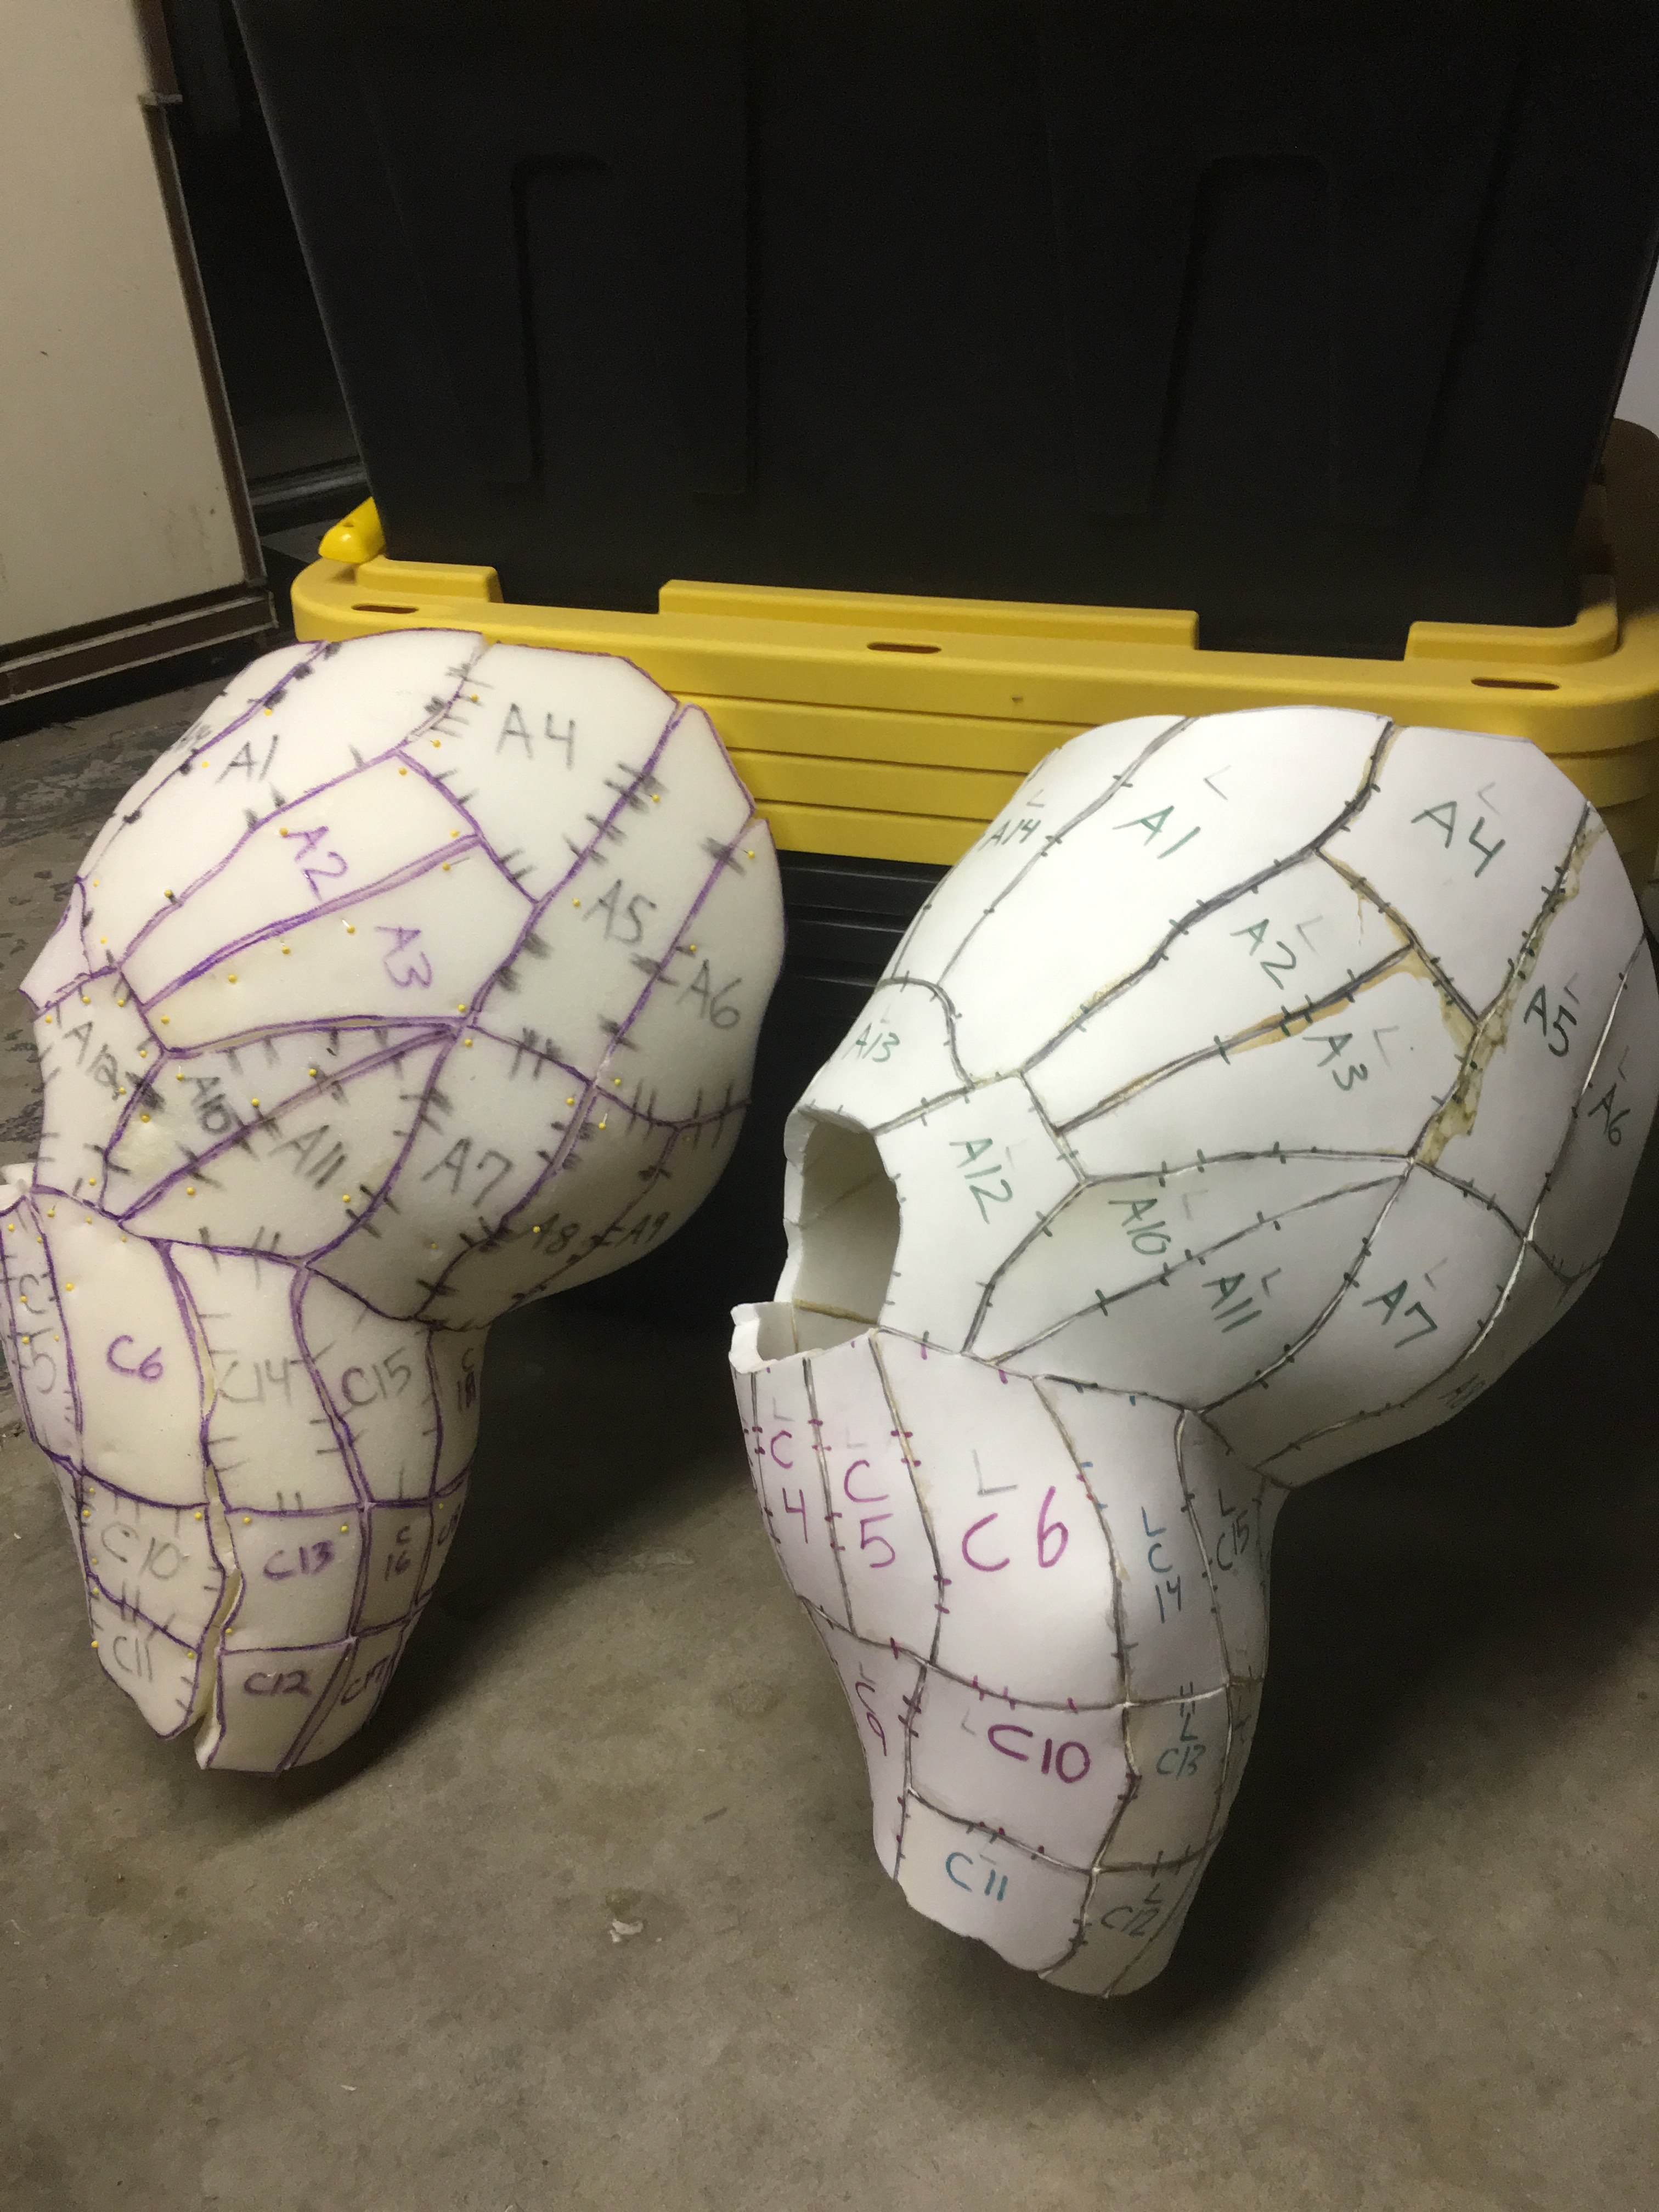
Once the pattern pieces were cut out I taped them onto a sheet of printing paper. Each one was labeled and color coded to make assembly easier. It’s VERY IMPORTANT to photograph the pattern extensively while still on the figure. I needed to reference the photos a lot to make sure I was assembling the pattern correctly. I scanned the sheet of paper with the pattern on it and sent it to a friend who had a computer program that blew the pattern up to the scale I needed. The blown up pattern was sent to me and I printed it right from the printer. It came out in sheets that I had to tape together. It was like a giant puzzle. Once together, I cut each individual piece out and traced them onto L200 foam. I flipped the pieces over to get a mirrored copy which would make both the left and right leg.
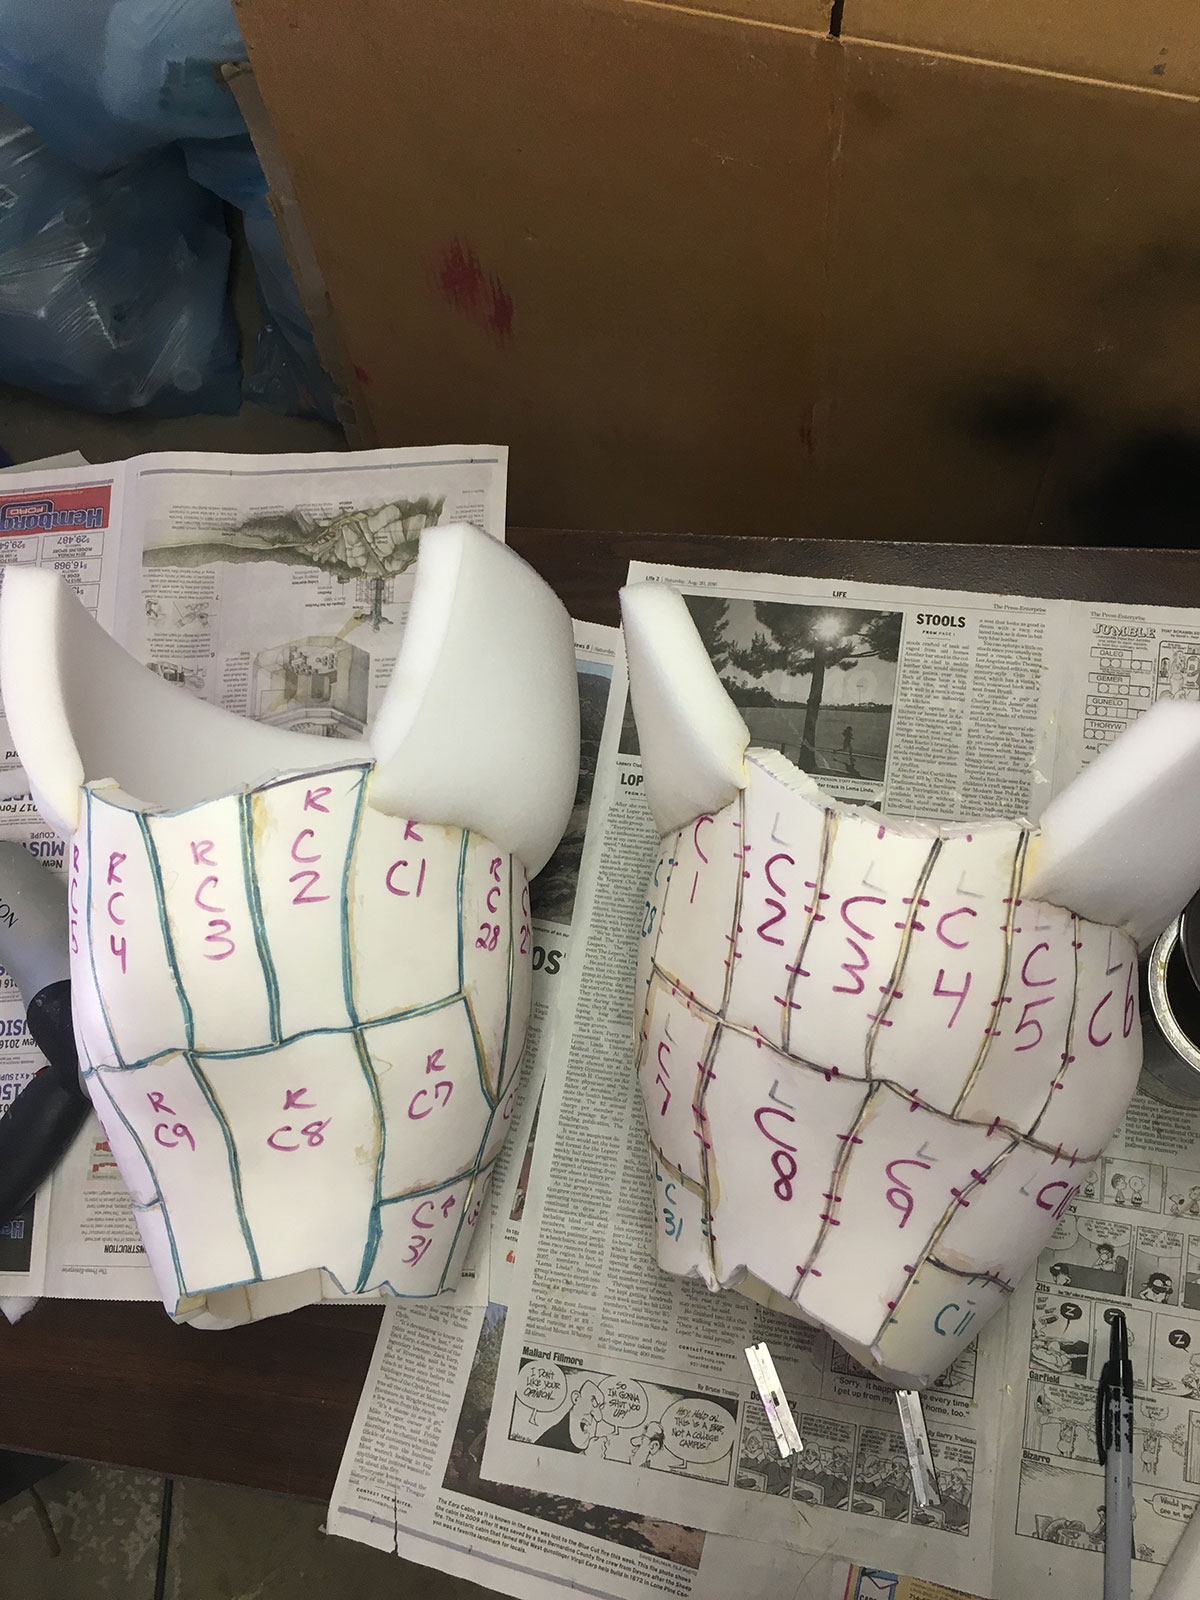
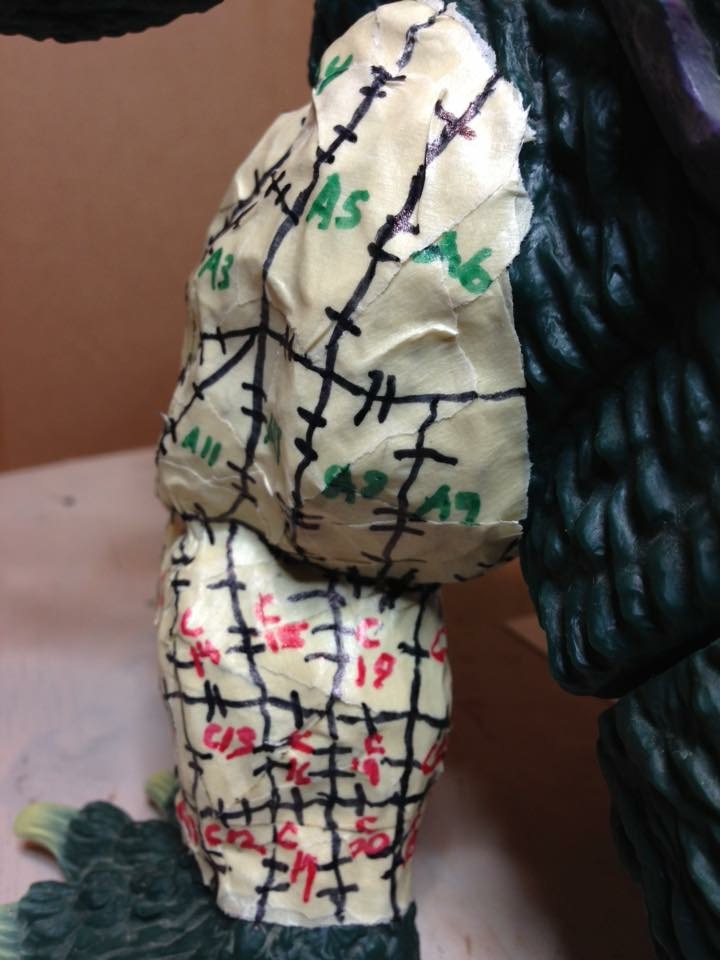
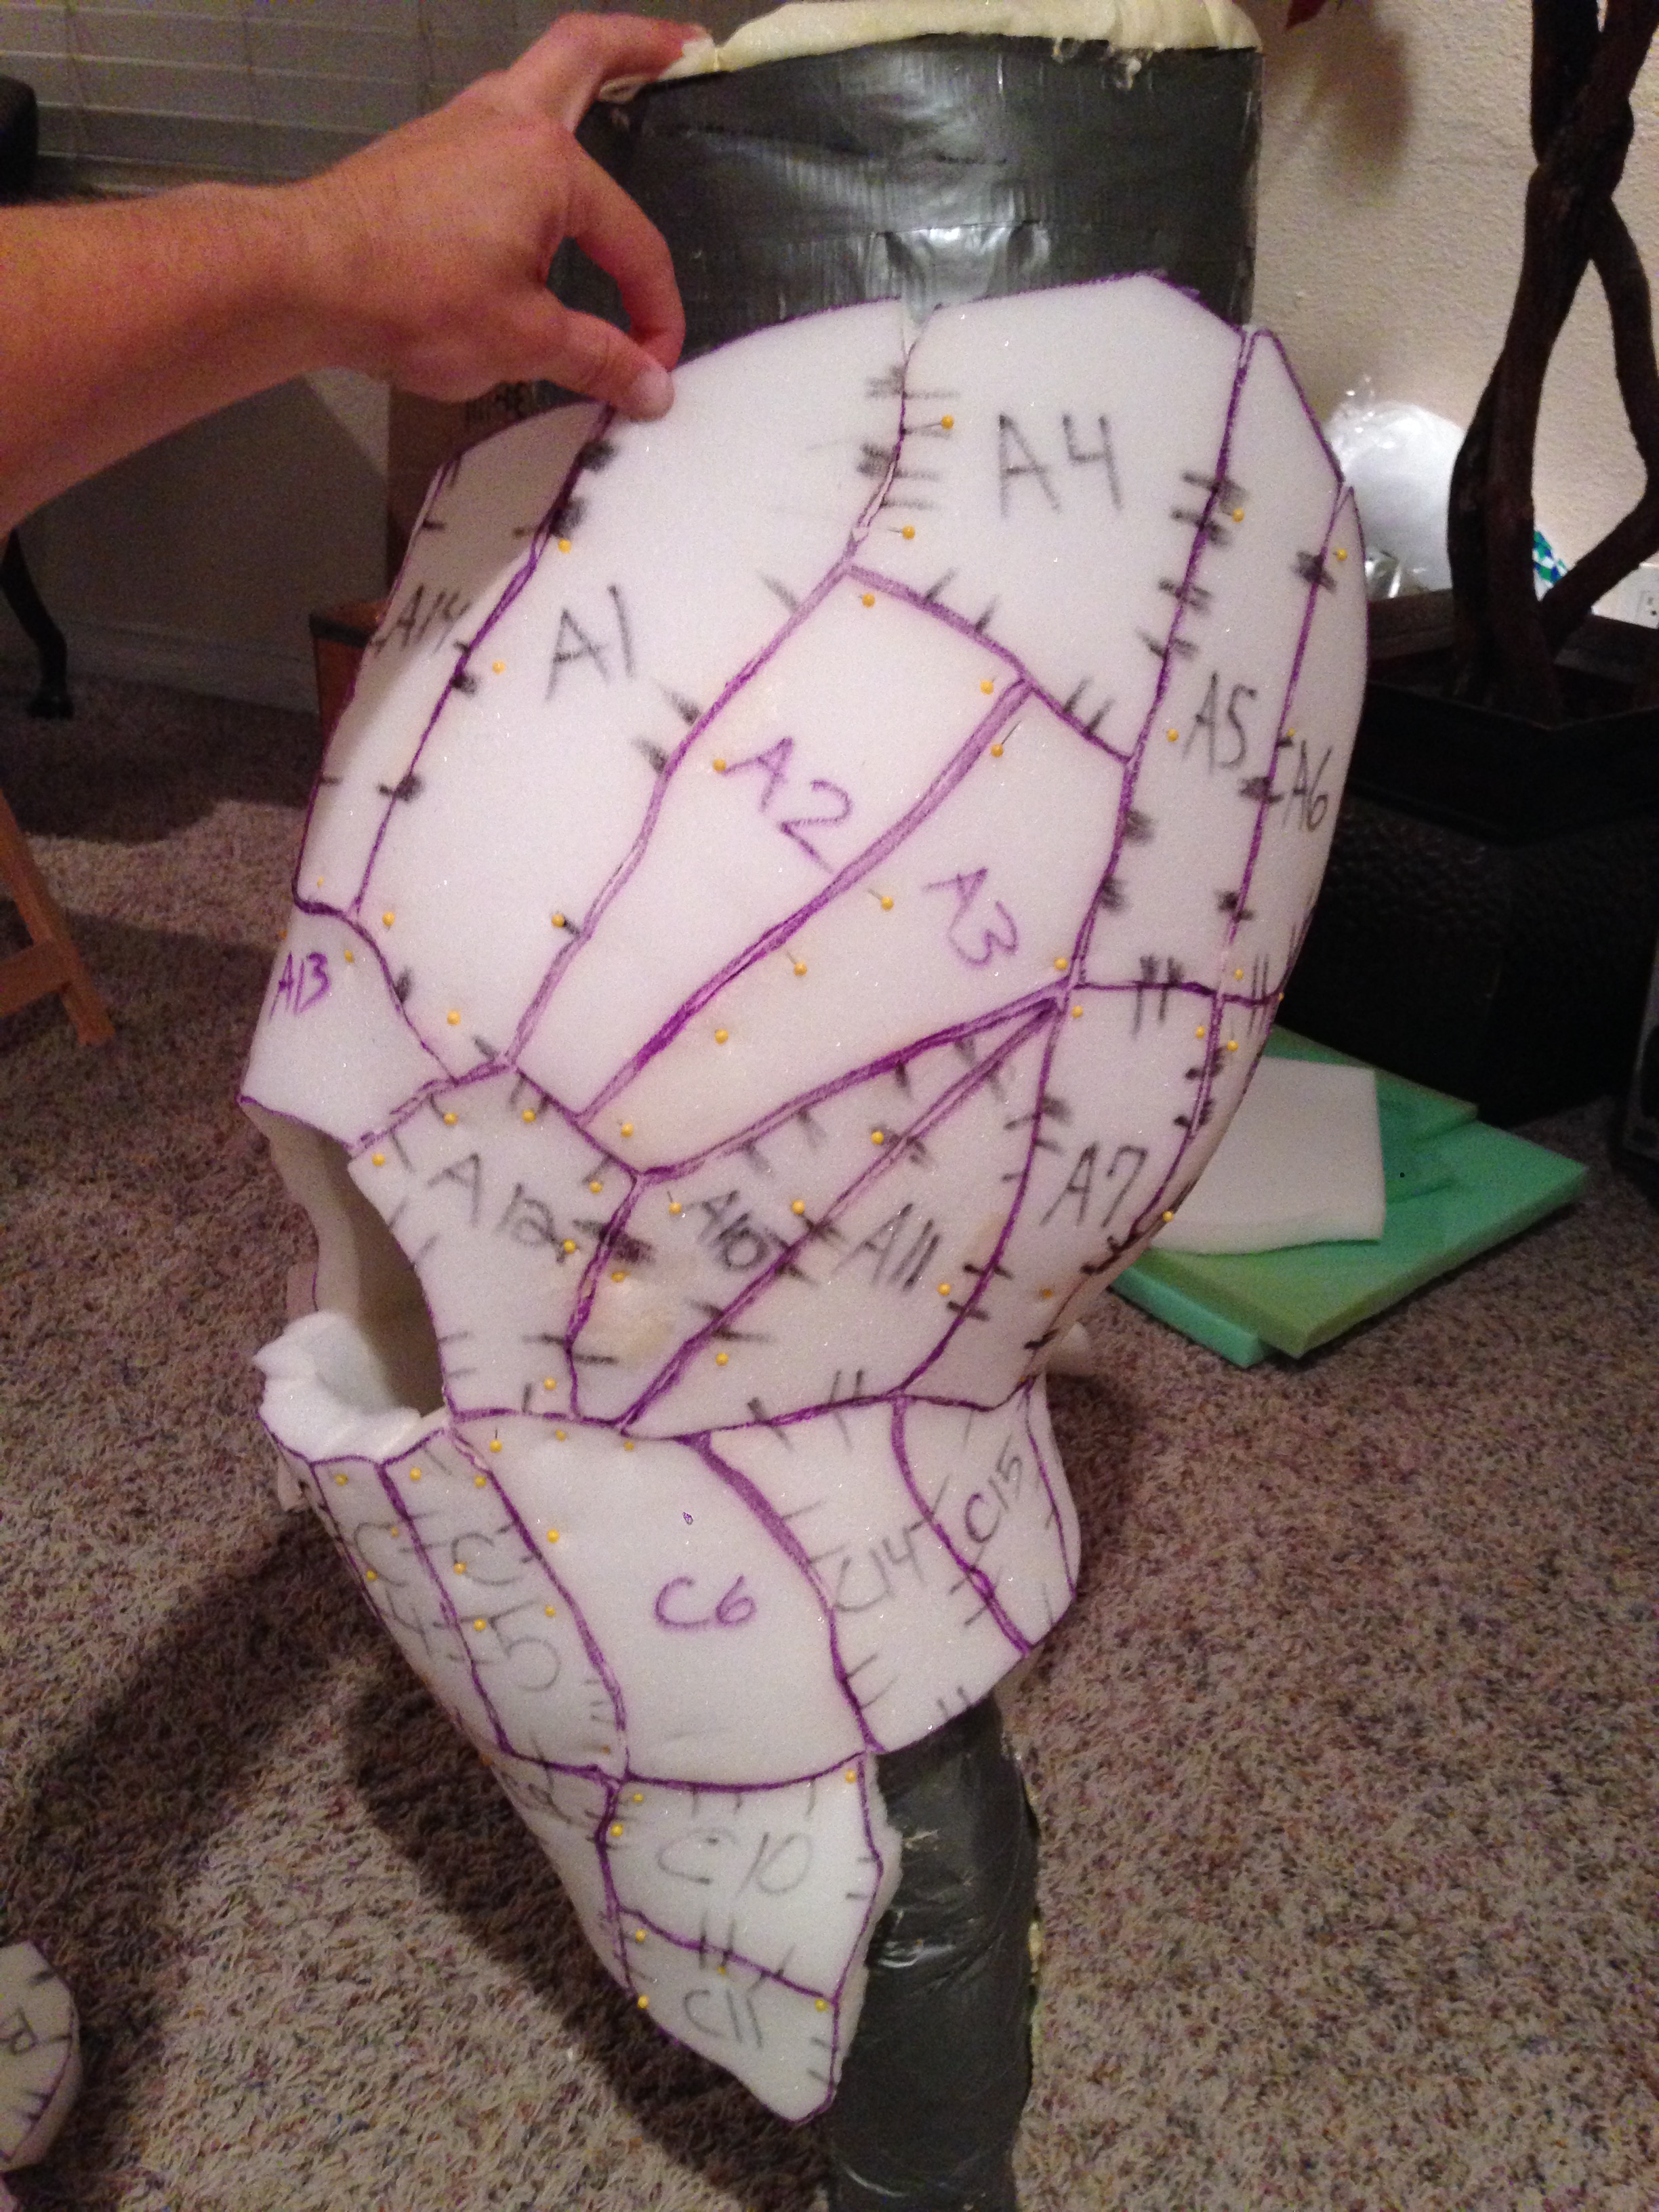
Leg Form
Once all the pieces were cut out with a persona blade, I then glued them together while referring to the images of the pattern on the Godzilla figure. I used barge glue to hold them together. You can use a blow dryer to speed up the drying time of the glue and make sure you are in a well ventilated area. I first traced the shapes onto upholstery foam to get a prototype. This is to ensure the pattern is the size and shape I need it to be without wasting L200 foam. Once satisfied with the form I created the leg form out of L200 foam.
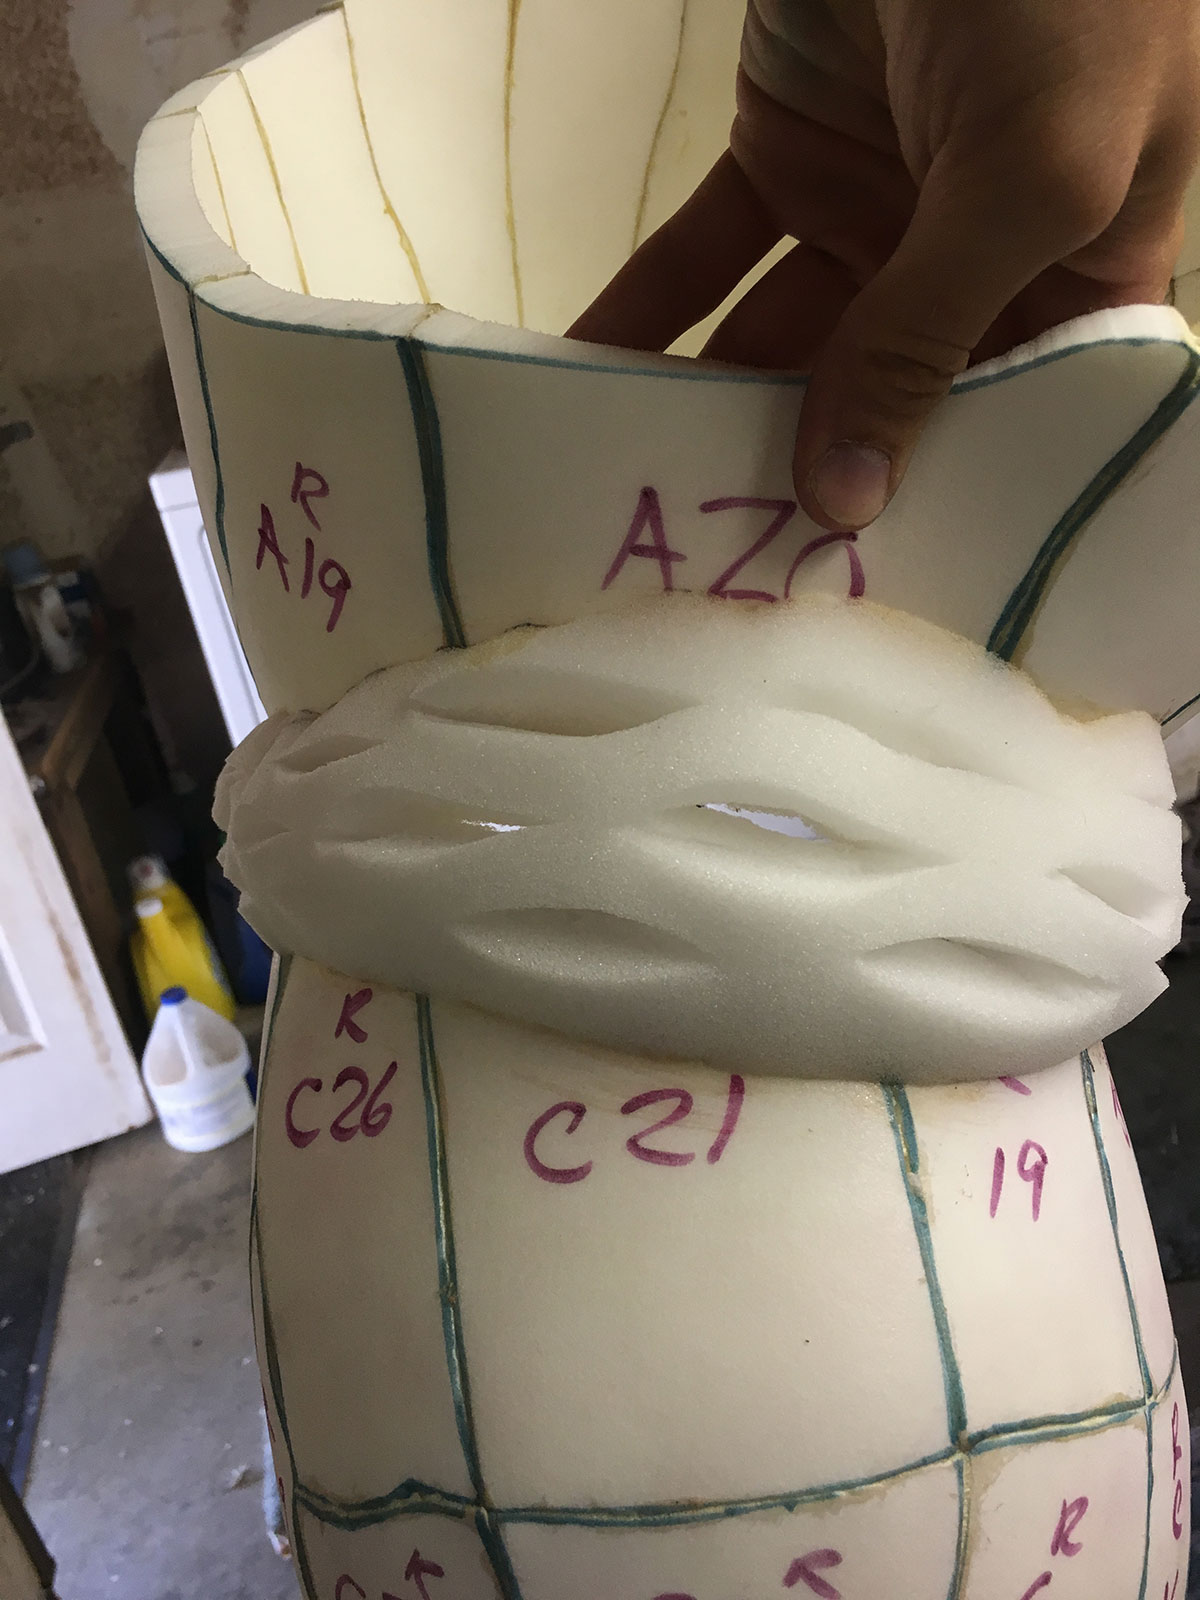
Legs
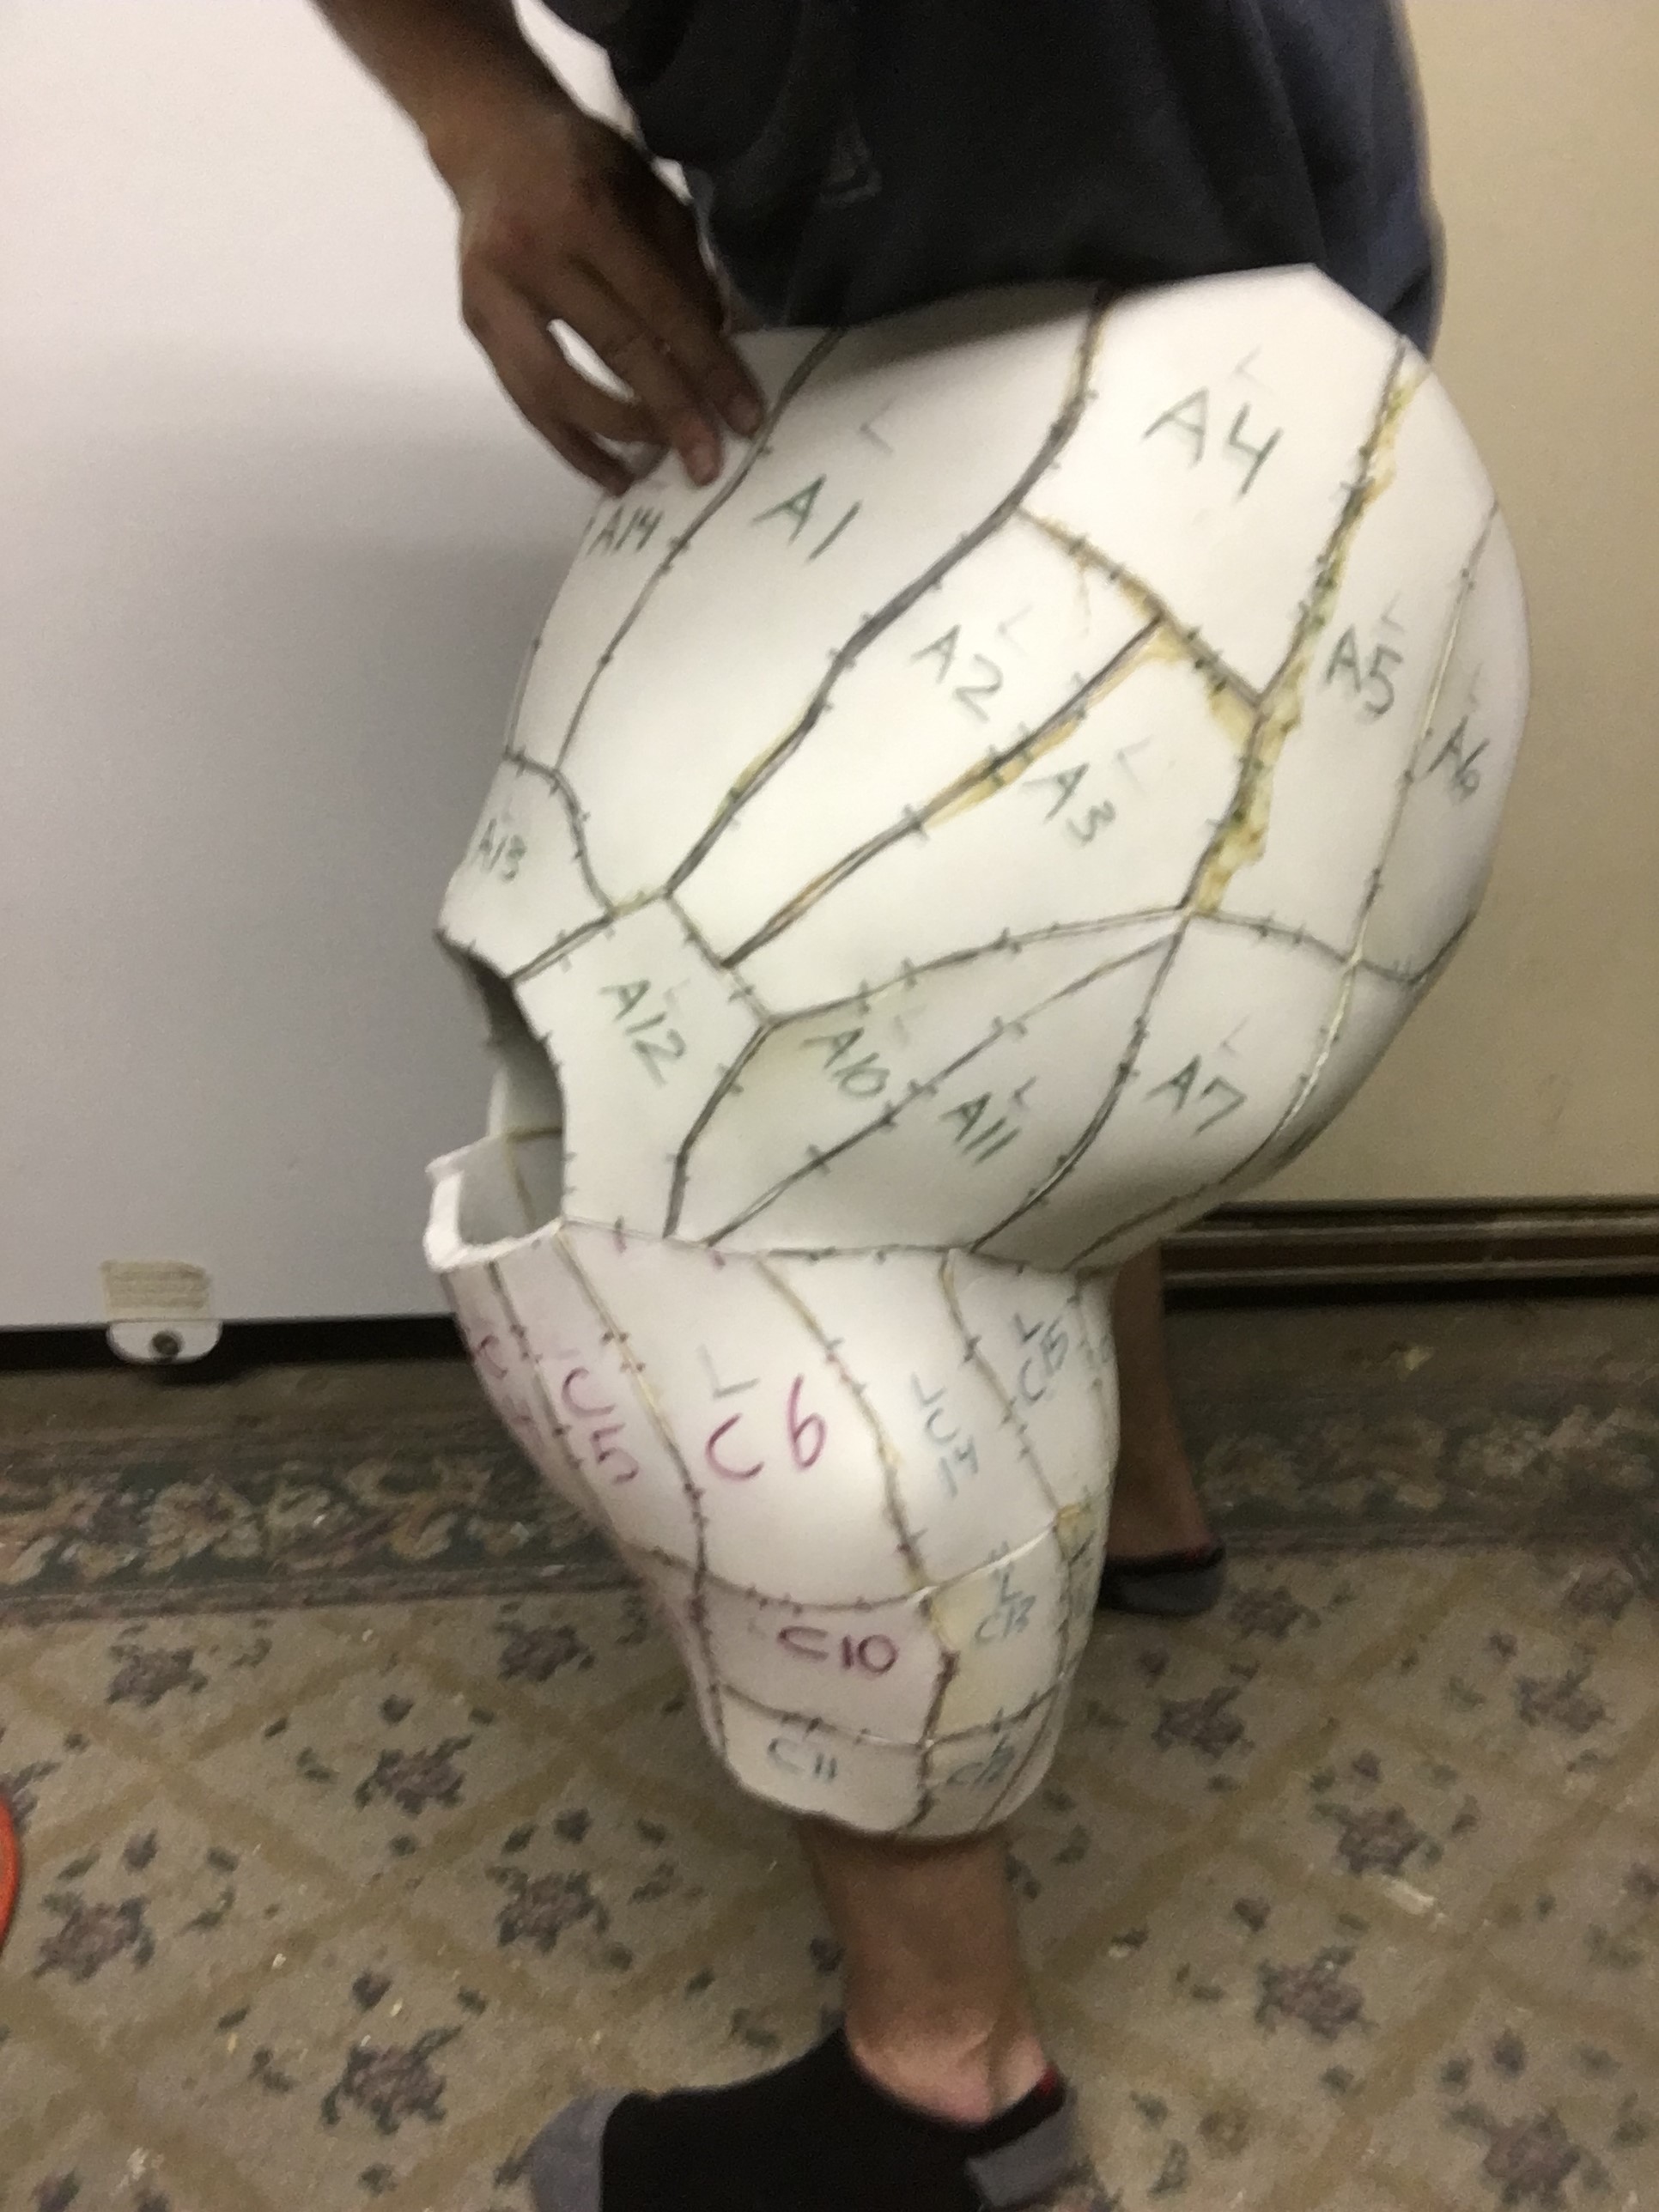
Once the two leg forms were completed, they were then cut in half at the natural bend. The two halves were then bridged together with upholstery foam. The upholstery foam was cut at a bevel on both sides to it glued flat and seamless with the L200. A bevel is a slanted cut that you make into your foam where the edge can either look like this / or like this depending on how you need the foam to attach to the suit. The slits that you see cut into the foam are in the pattern of a mesh. This is to allow me to bend the leg and walk without resistance. To make a mesh you just cut slits like layers of bricks, each cut being staggered to the other. This allows a lot of flexibility from the foam.
Sometimes opposite duplicates are required like a left and a right leg. To get another leg, I just flipped over the leg pattern pieces and traced them onto L200 foam to get a mirrored image. If you’ll notice, I left out the kneecaps from the pattern. This is because I’ll be using soft upholstery foam to fill in that space.